


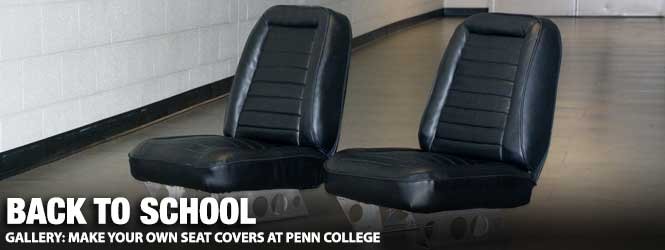
When it comes to vehicle restoration, many of us have enough talent to handle the vehicle’s mechanicals and maybe even the paintwork. Still, seat upholstery is often beyond the scope of many enthusiasts. Usually, but not always, a company reproduces seat covers for your Mopar. However, when no covers are available, a visit to a professional upholsterer may be the only option.
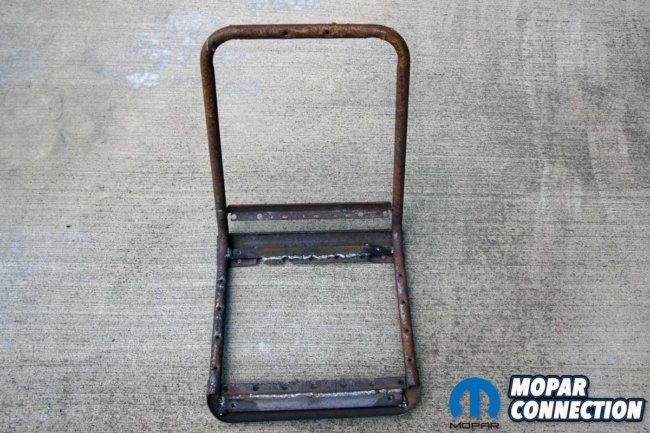
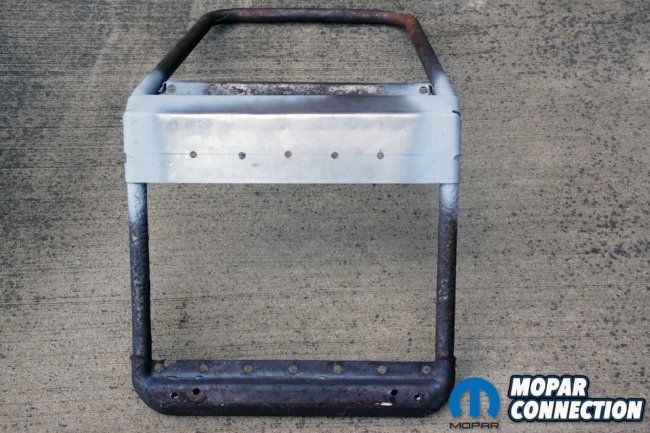
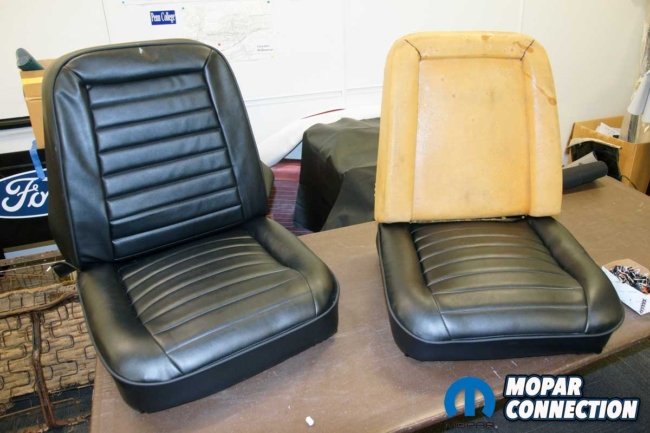
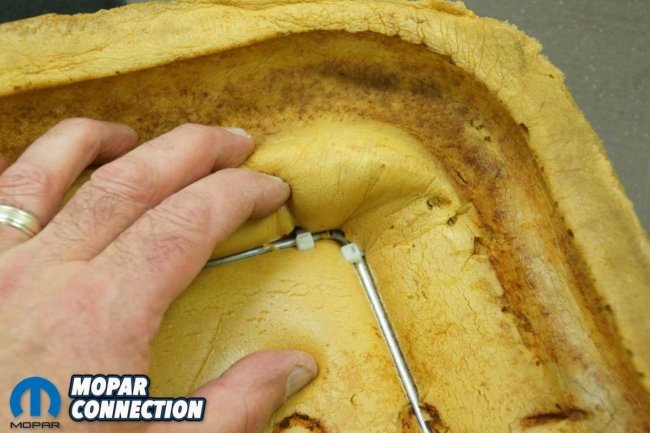
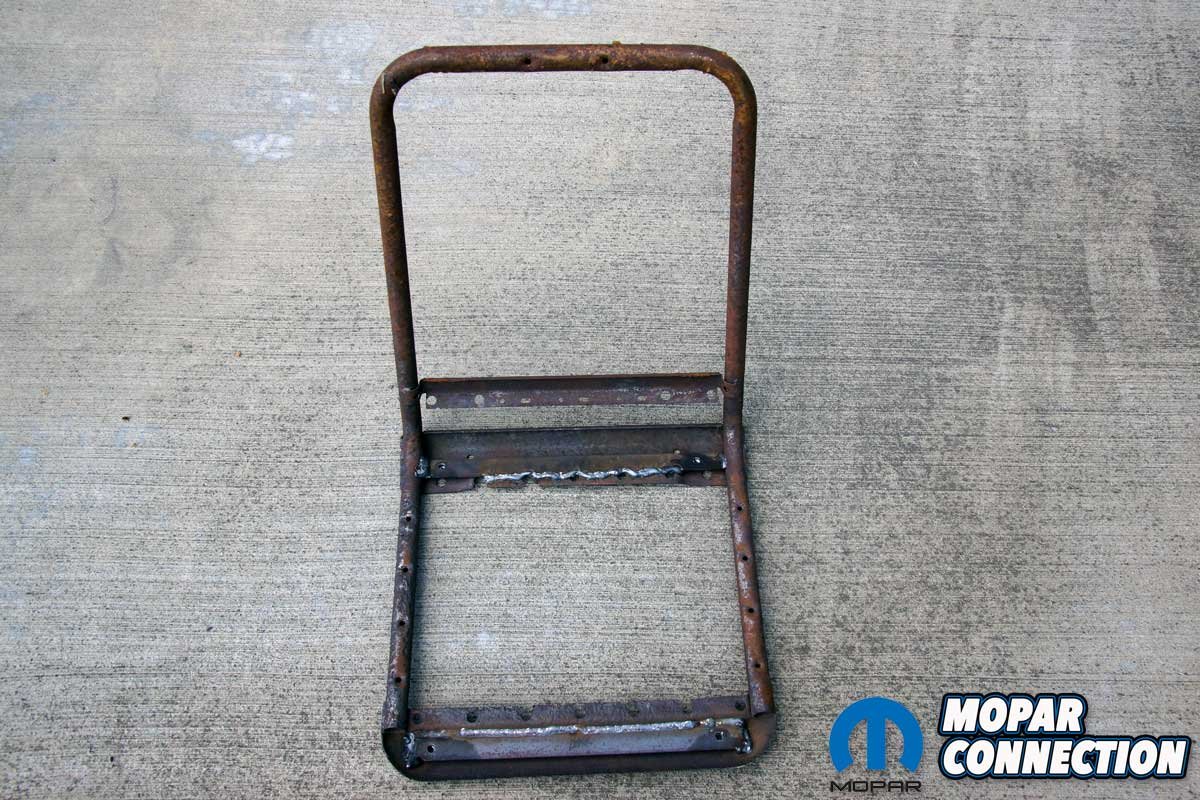
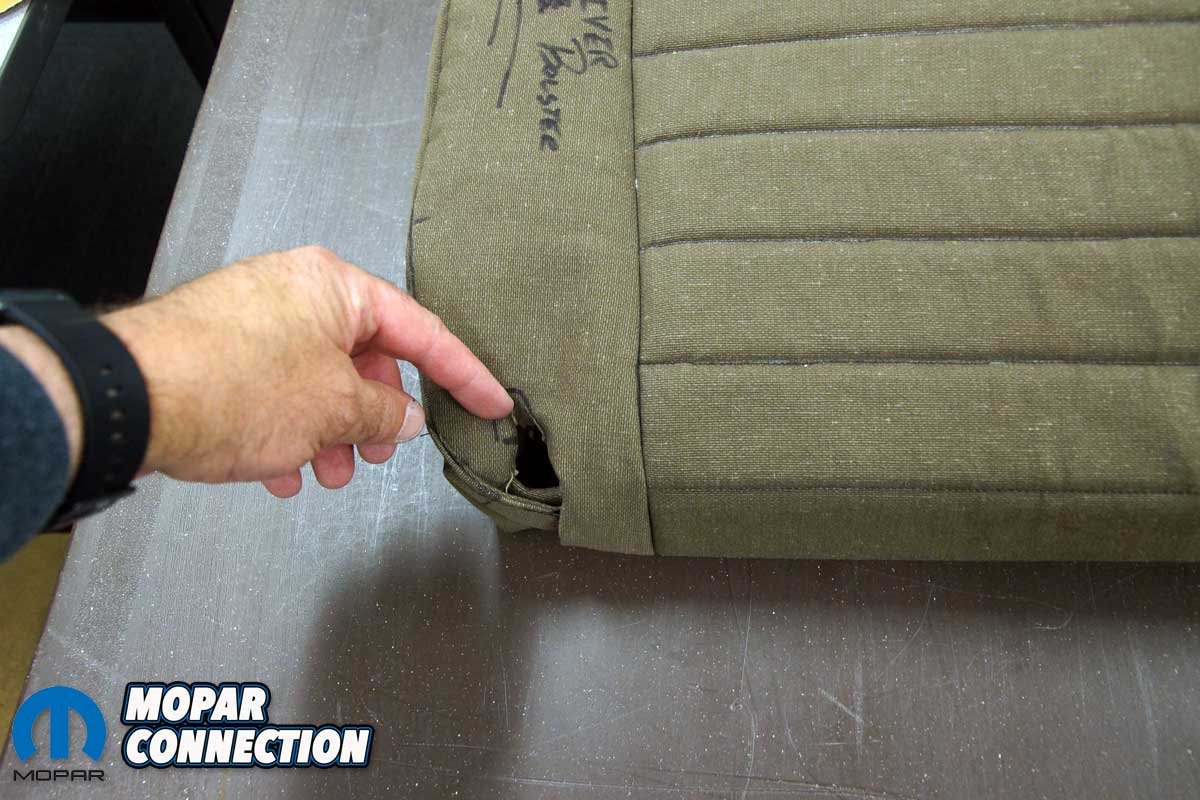
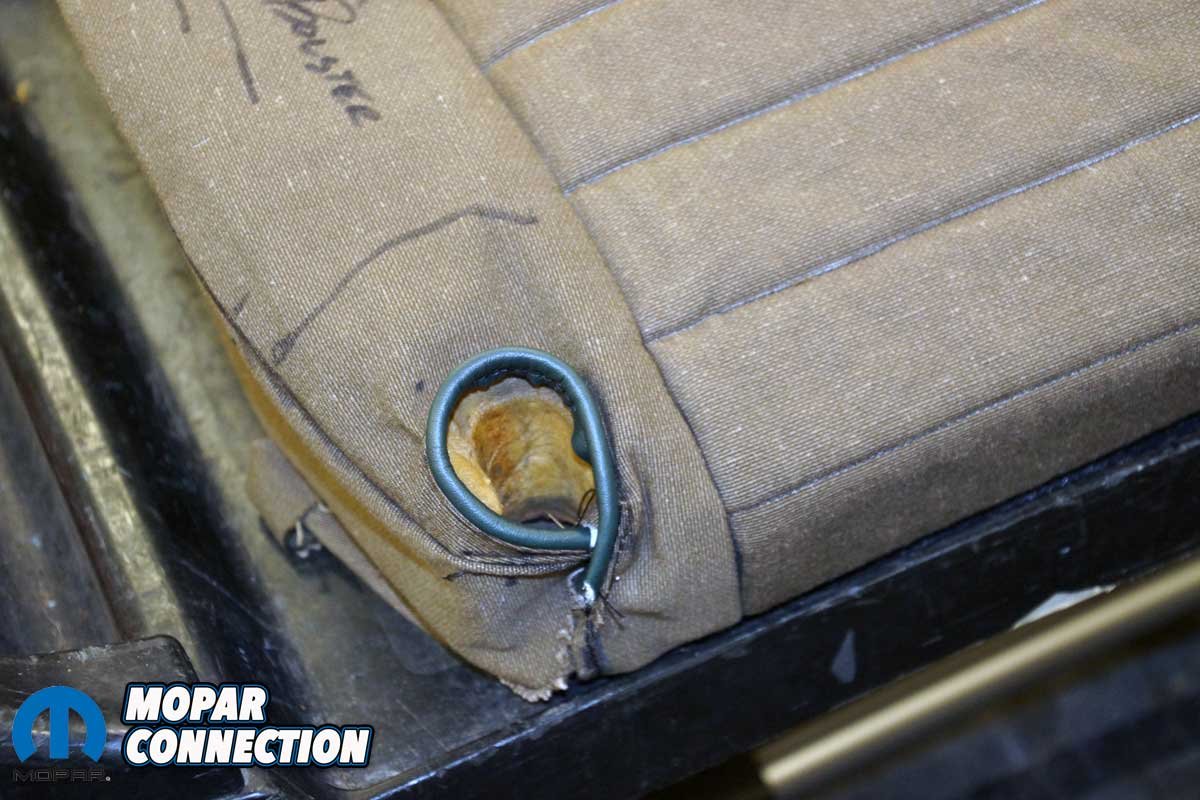
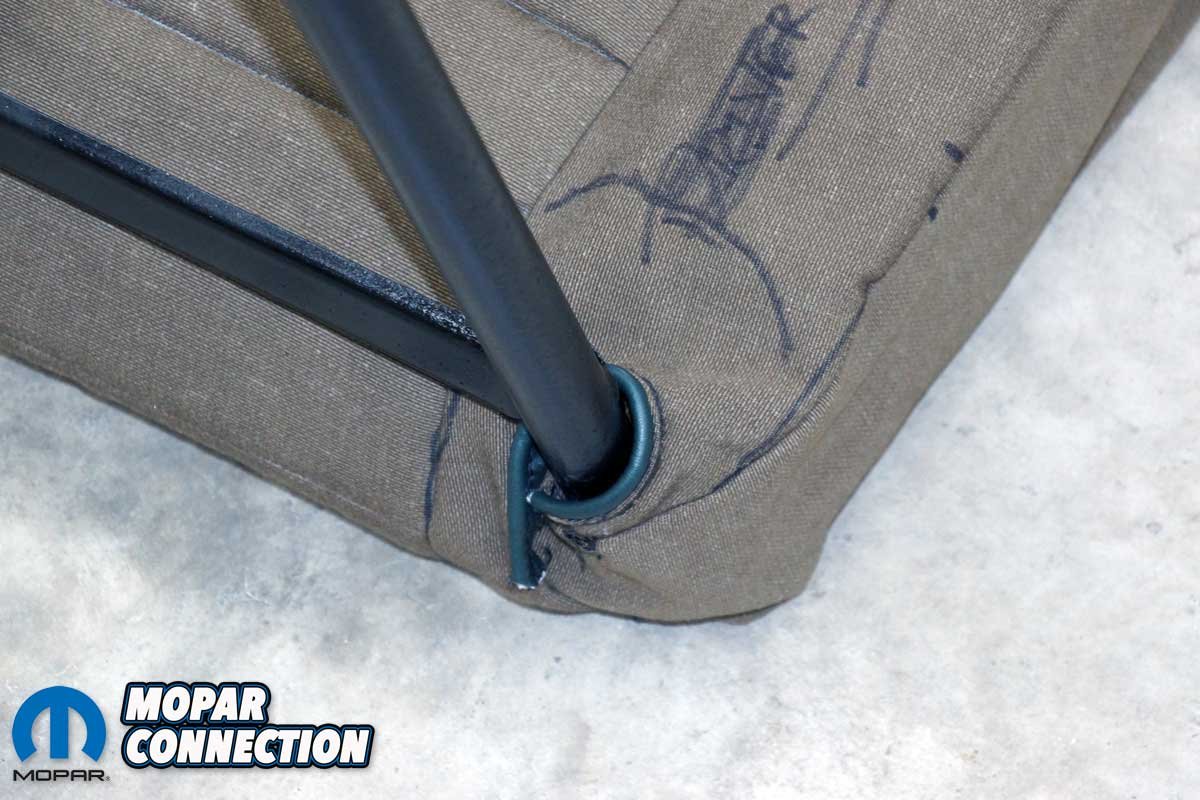
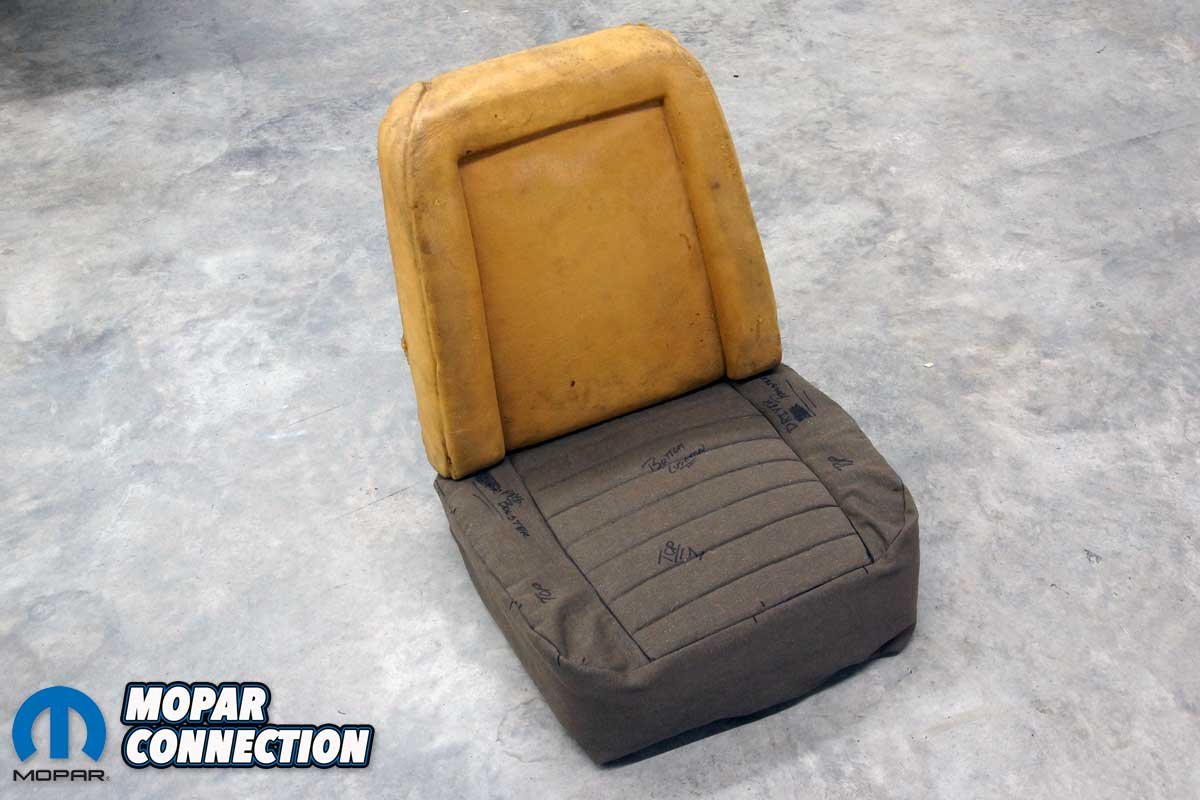
Left: The van seats have been sitting on a shelf for over three decades. When I decided to take an upholstery class, I pulled them off the shelf, and they were in rough shape. Right: The front cross member (on both seats) could be saved, but each rear cross member was replaced before the class started.
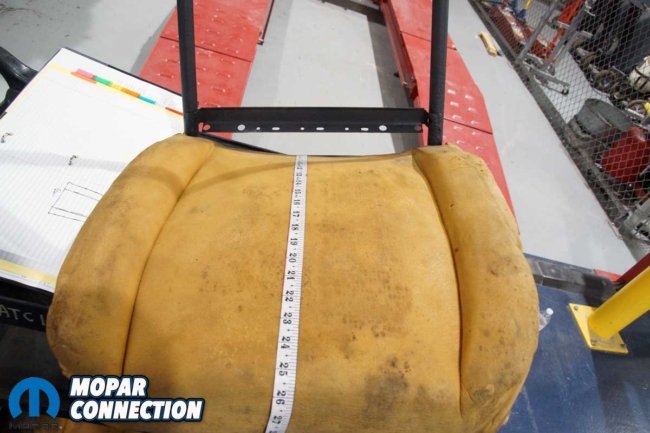
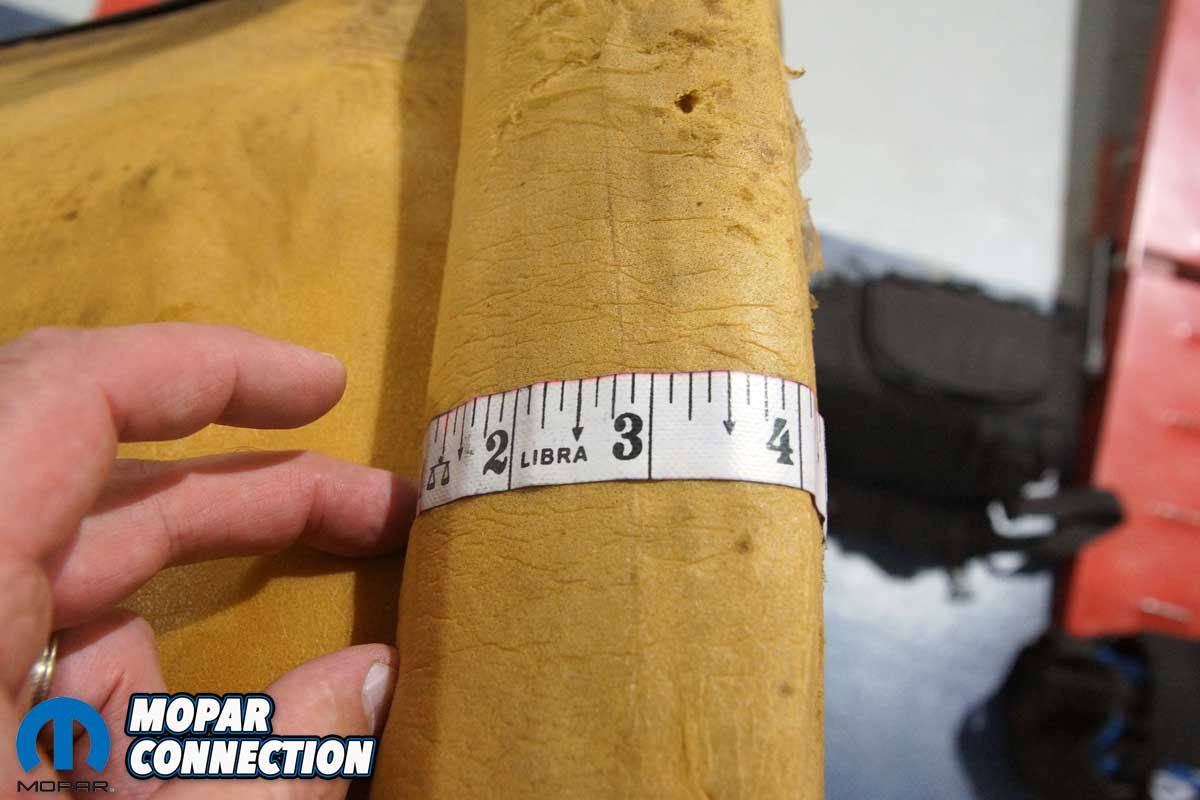
Over 32 years ago, I purchased a pair of A100 (or possibly A108) van seats from a salvage yard with the plans of installing them in my ’69 Dart. I had dreams of drag racing the Dart, and a pair of lightweight Super Stock-inspired seats seemed the way to go. The seats consisted of frames, springs, and foam cushions but no seat cover material.


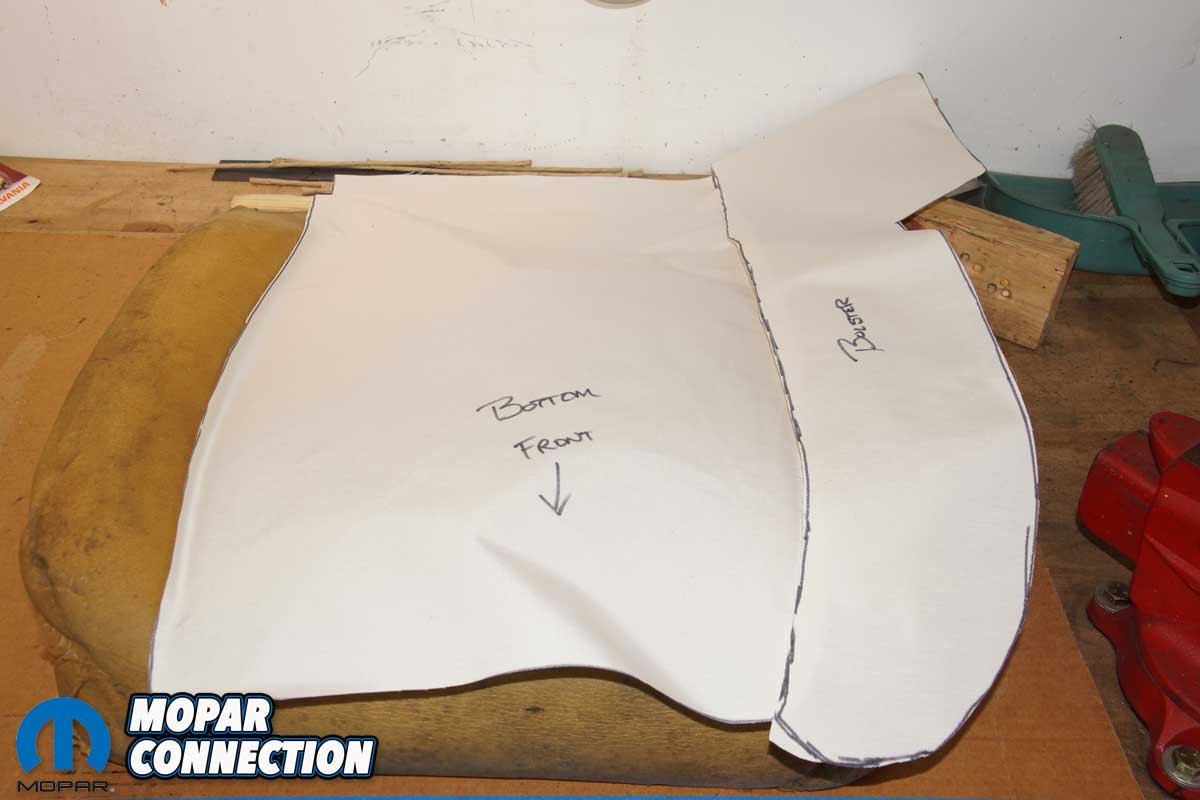
Left: Both seat frames and the cushions were ready when the class started. Center: The original seat covers were long ago removed (before my ownership), so plenty of measurements were taken. Right: All the dimensions were noted, and from those numbers, templates were developed.
Sadly, I set the seats aside due to limited funds to purchase new covers and even less capacity to complete the task. Time passed, and a pair of Jaz Products racing seats found their way into the Dart. After moving through three houses, the seats remained unused. That was until the fall of 2022.
Pennsylvania College of Technology offers a16-week automotive upholstery class as part of its Restoration Program. I spoke with Professor Roy Klinger about taking the class to reupholster the van seats. He felt it was a great project.

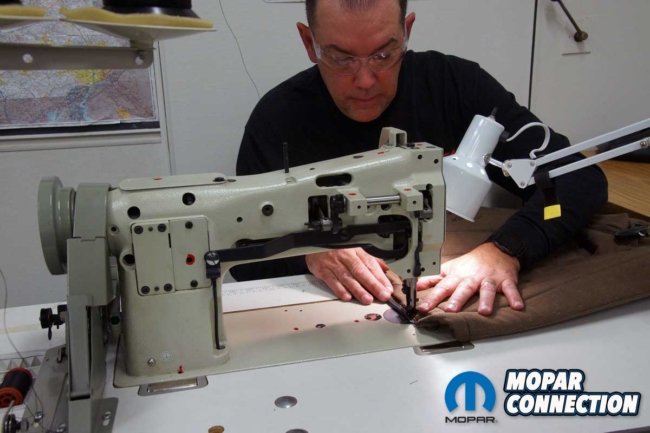
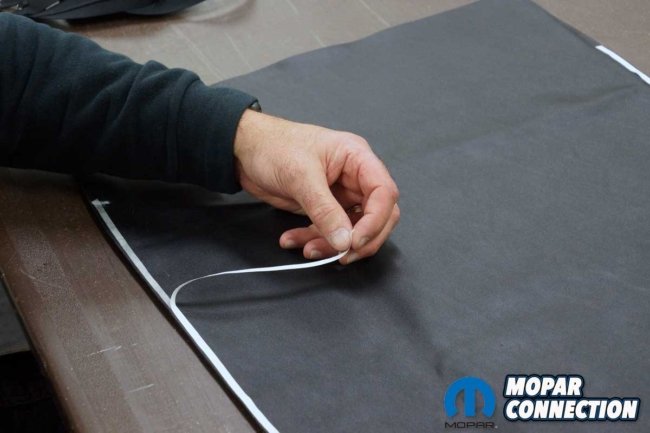
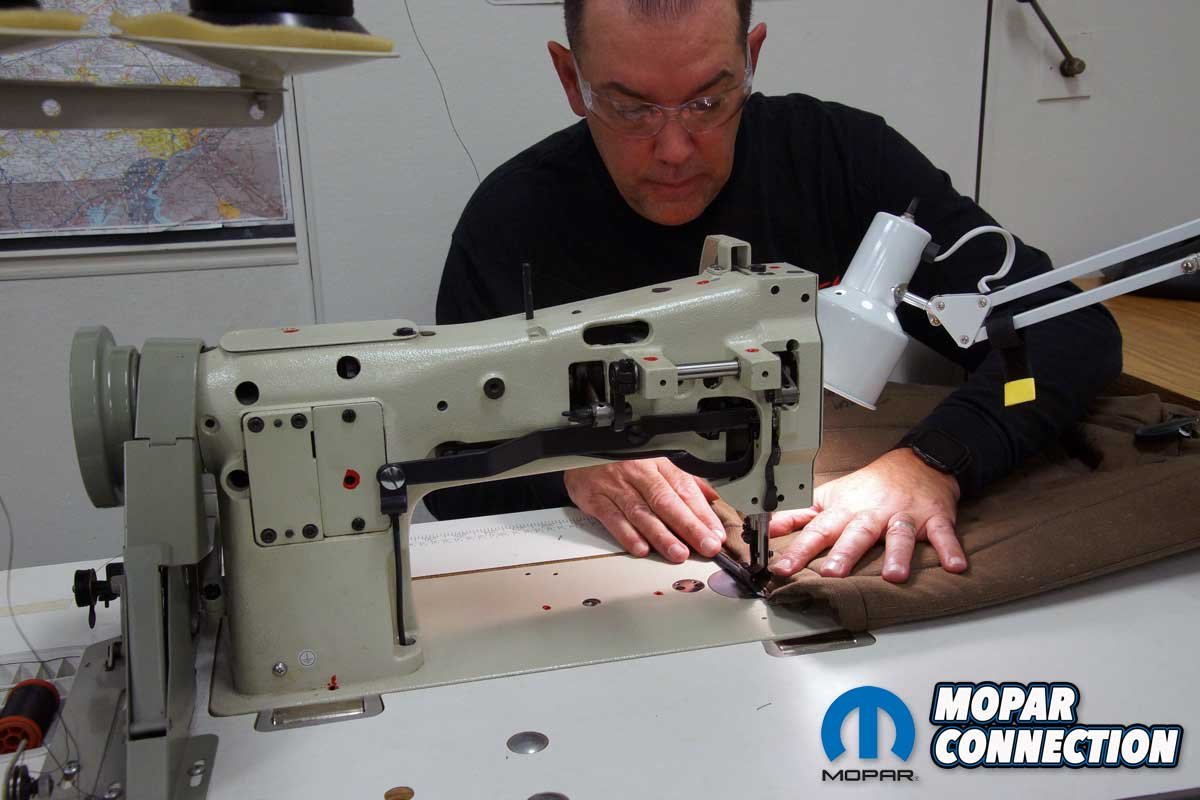
Left: The patterns were cut out of inexpensive material. The seat base cover required only four templates. Right: After the designs were transferred to burlap, it was time to practice the sewing techniques. The sewing machine was a Consew industrial unit. Pennsylvania College of Technology also has a Singer and a Pennsew sewing machine.
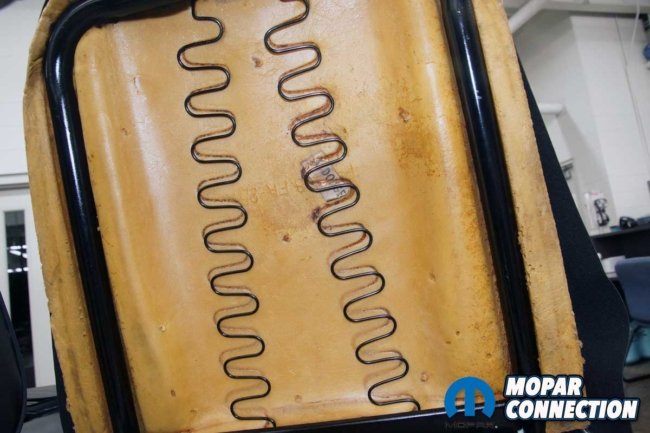
Before the class started, I pulled the frames from the shelf to find they were in worse condition than I remembered. The frame rails were ok, but the front and rear cross members on each seat were in rough shape. Both front cross members were cleaned of rust and repaired, but the rear cross members were so severely damaged the only repair was to remove them and make new ones.
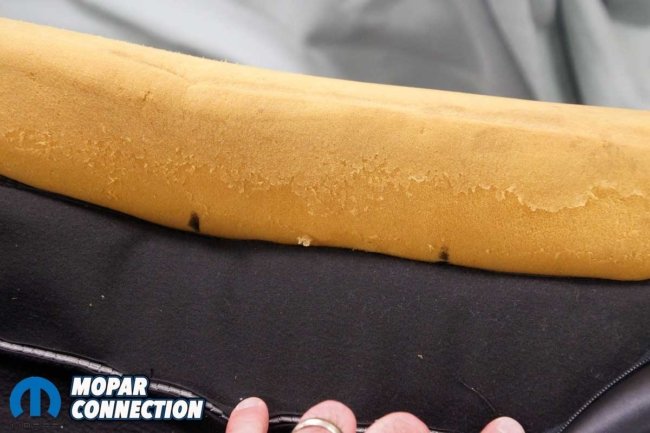
The rear cross members were bent into shape, and once completed, one was welded to each frame rail. Next, I evaluated the four-seat base (bottom) springs and the two-seat upright (back) springs on each frame and decided the springs would need to be replaced. Luckily, the seat foam for both seats was reusable. Finally, I painted each seat frame black.


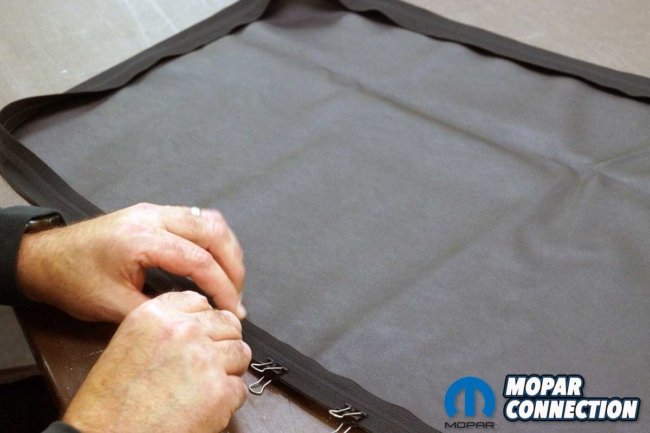
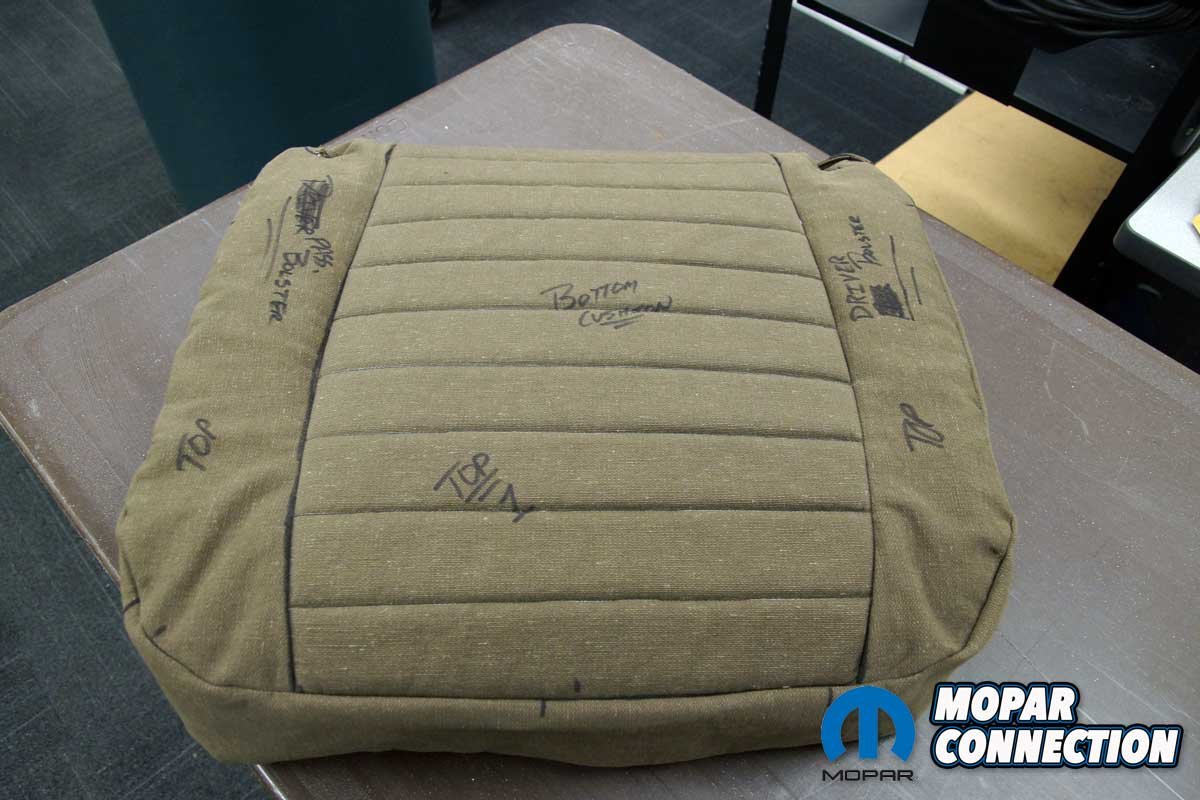
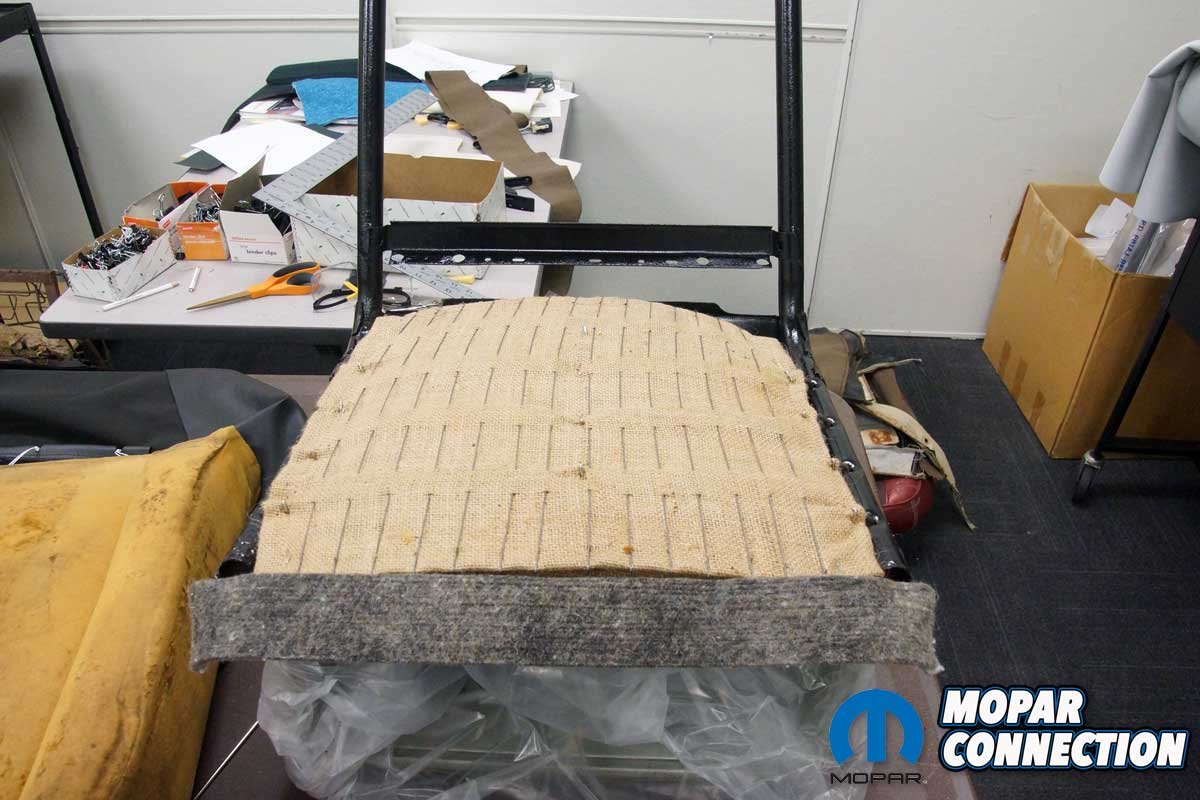
Left: The base cover insert was pleated, and both bolsters were sewn to the insert. Around the bottom, a wrapping material was sewn to the bolster and insert. Right: Each bolster required a clearance hole for the frame. The foam cushion provided a perfect template to locate each hole.
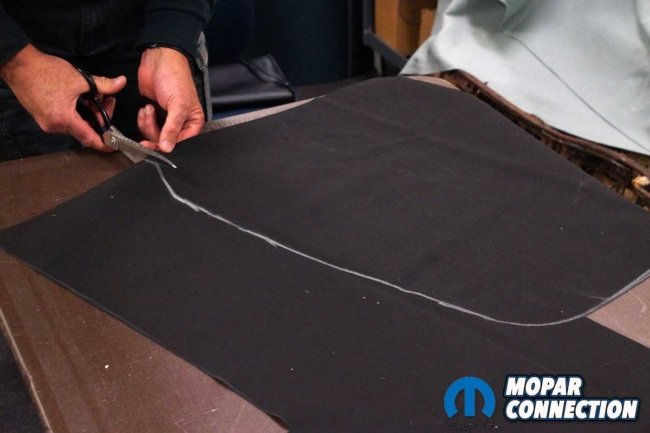
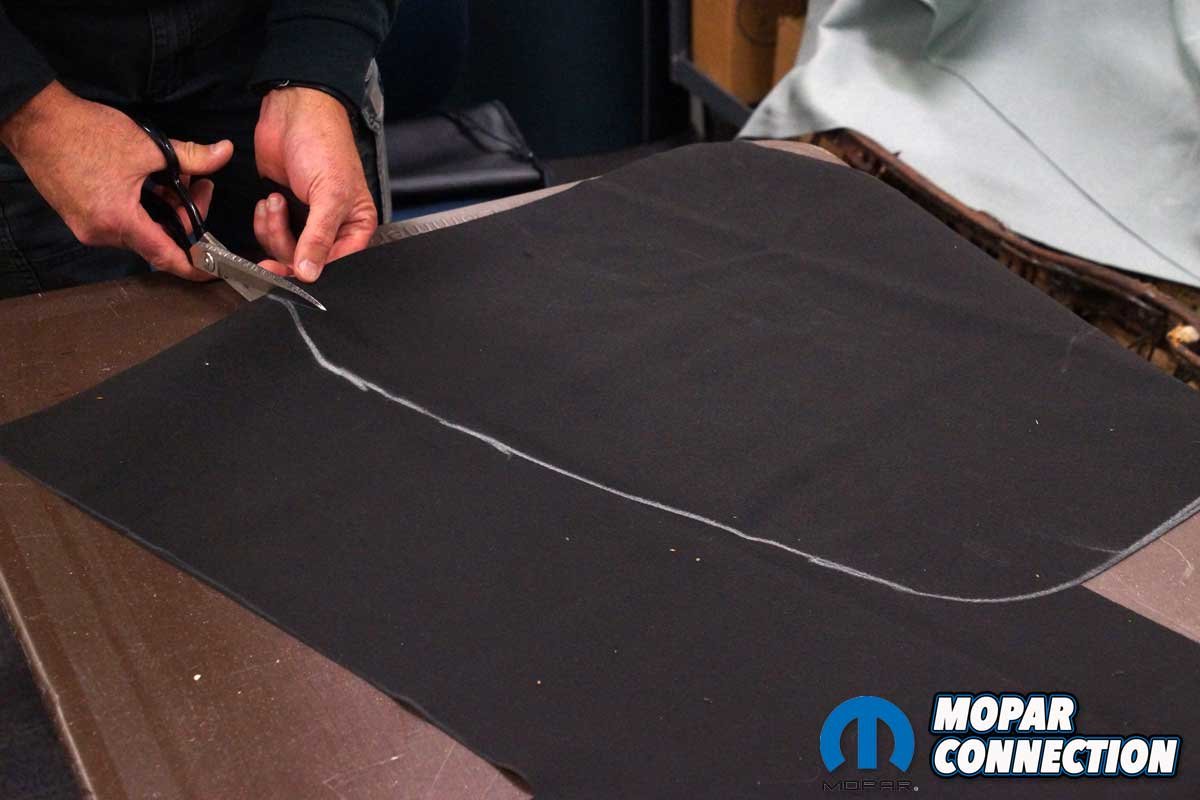
Because I did not have the original factory seat covers to dissect and use as templates, I had to make several measurements of each seat cushion and both frames to develop several patterns. From the dimensions, I made rough cut masters out of inexpensive material that I trimmed to size once they were laid on seat foam. Each master had a ½-inch seam allowance to accommodate stitching the pieces together.
Upon finalizing the templates, I transferred each pattern to a material suitable for sewing. Professor Klinger provided burlap, which was cheap and allowed me an opportunity to practice sewing. Until the upholstery class, I had never sewn, and after a day-long training session with two professionals, I knew just enough to be dangerous.
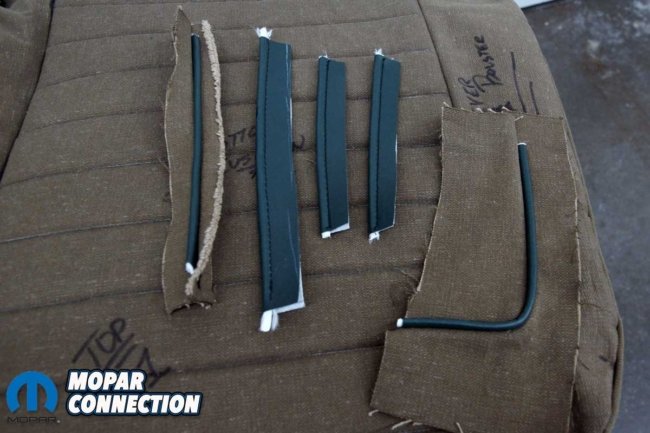


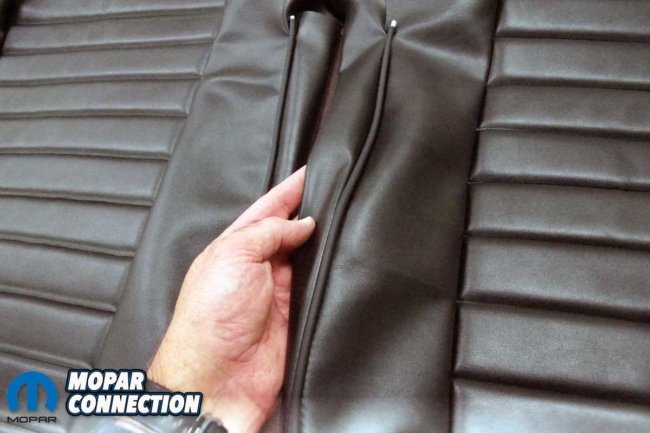
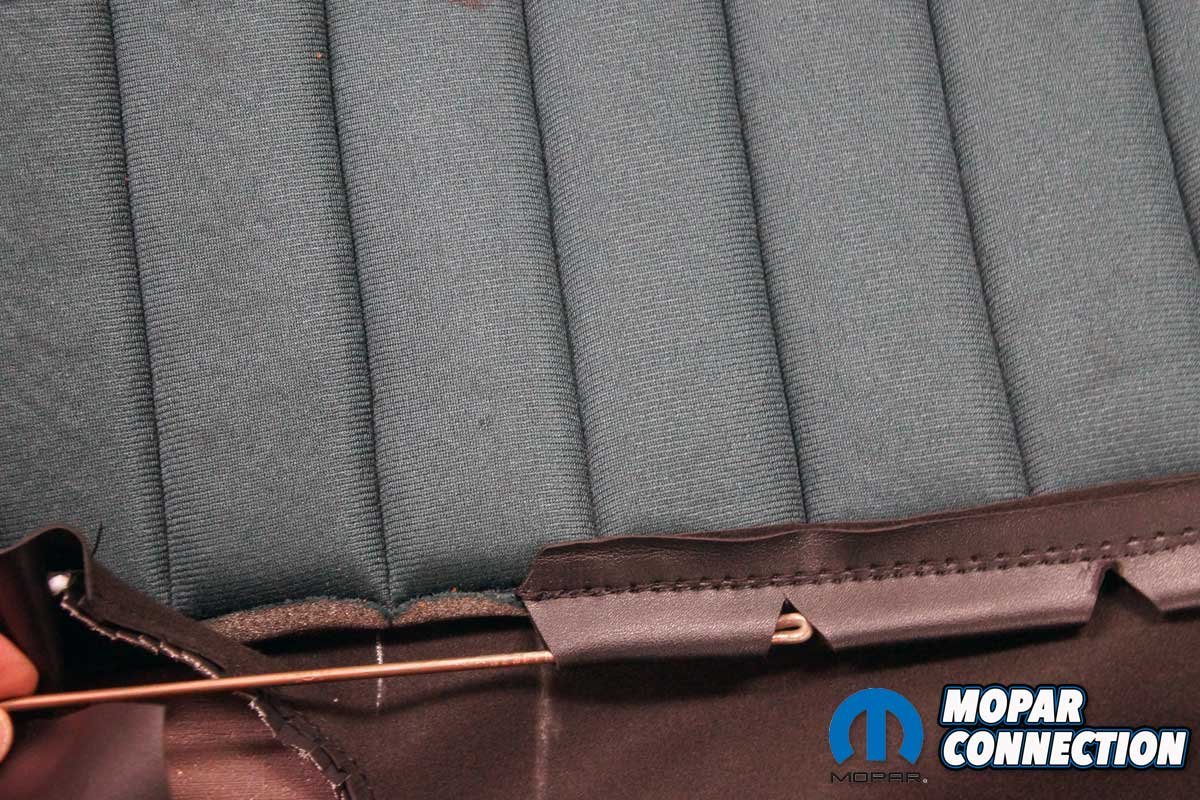
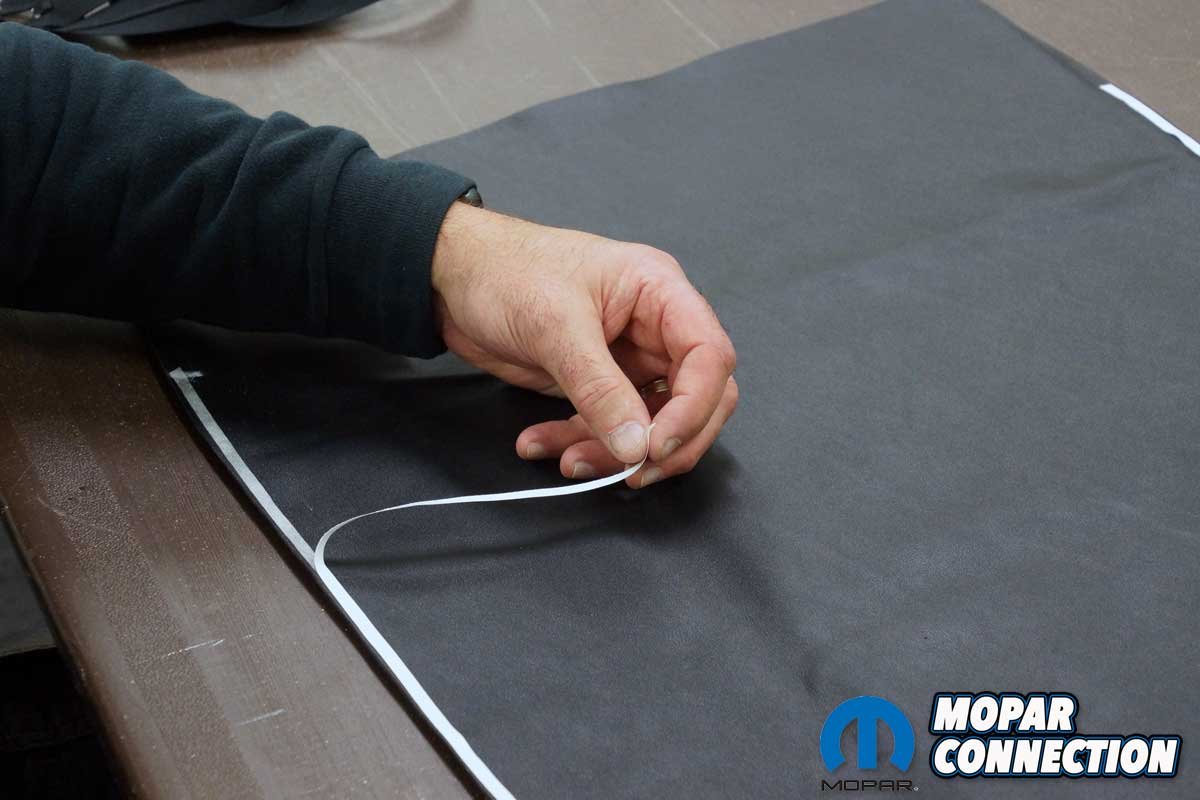
Top Left: The area around the frame would require piping to keep the cut material from fraying. A little practice was needed to get the technique. Top Right: The piping was made and then sewed to the cover. Bottom Left: The base cover wrapped perfectly around each frame rail upright. The arched line on the bolster showed where the upright bolster would rest. Bottom Right: The seat back bolsters covered the piping and holes in the cover.
Nevertheless, with some practice, I made pleated inserts for the seat base. I sewed ½-inch sew foam under each insert. I continued by sewing each bolster (two) to the insert and then wrapping the parameter of the assembly with material that would attach to the frame. At the rearmost area of each bolster, I cut the fabric to wrap around the seat frame. After several “V” cuts, I tucked the material under and sewed in piping to finish the opening.
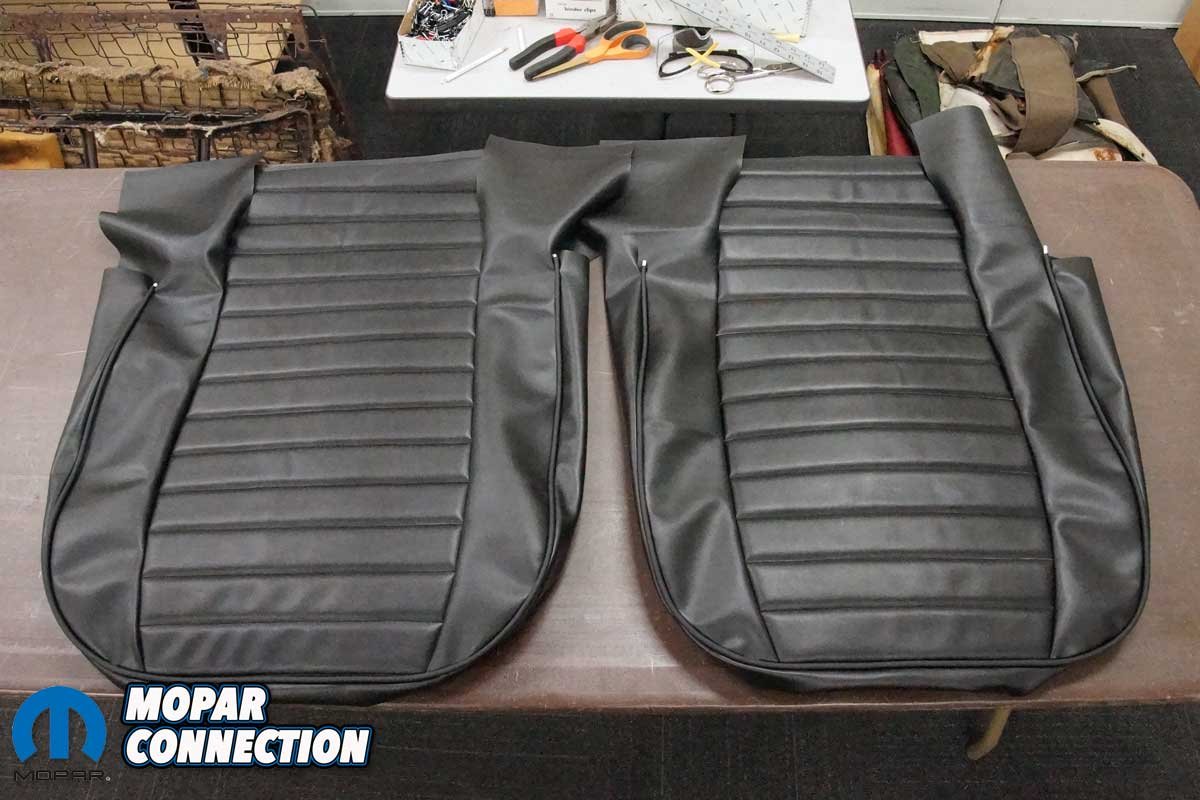
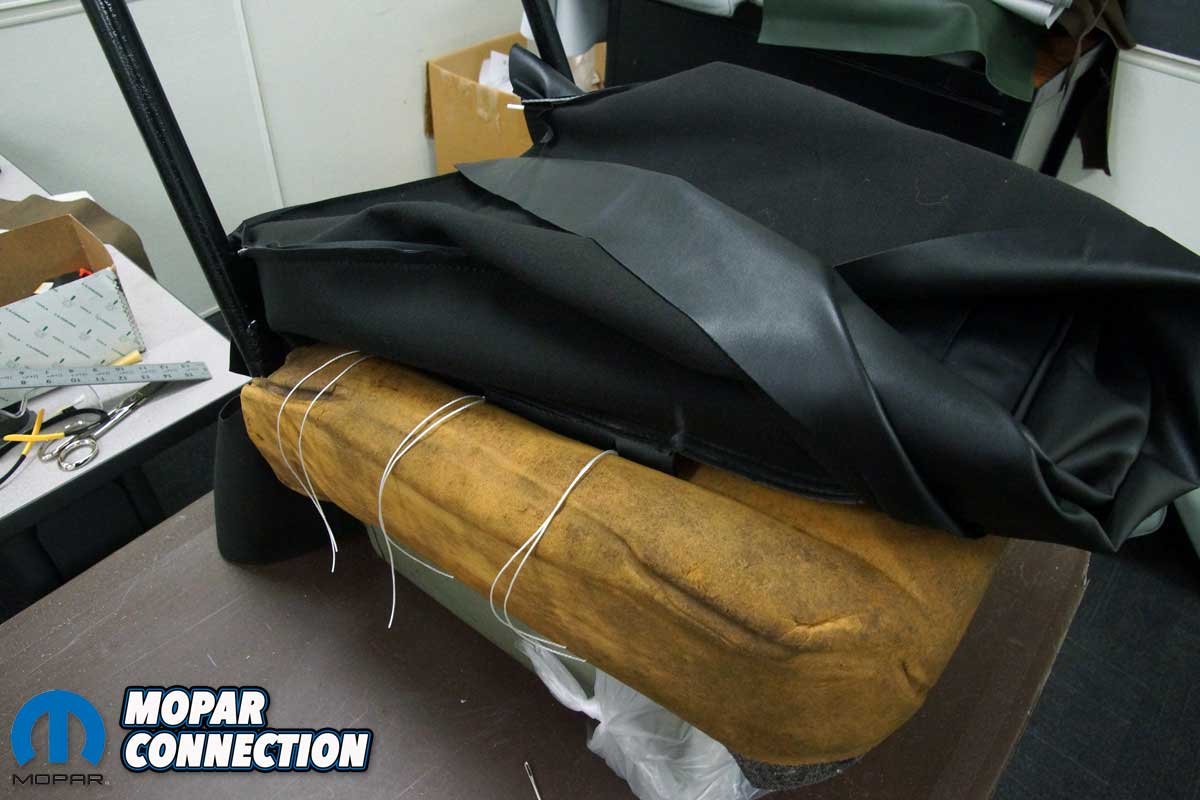
Left: The burlap seat covers fit well. Faux leather was used for the final covers. About four yards of material were used to cover both seats. Right: Exact measurements were transferred to the vinyl material.
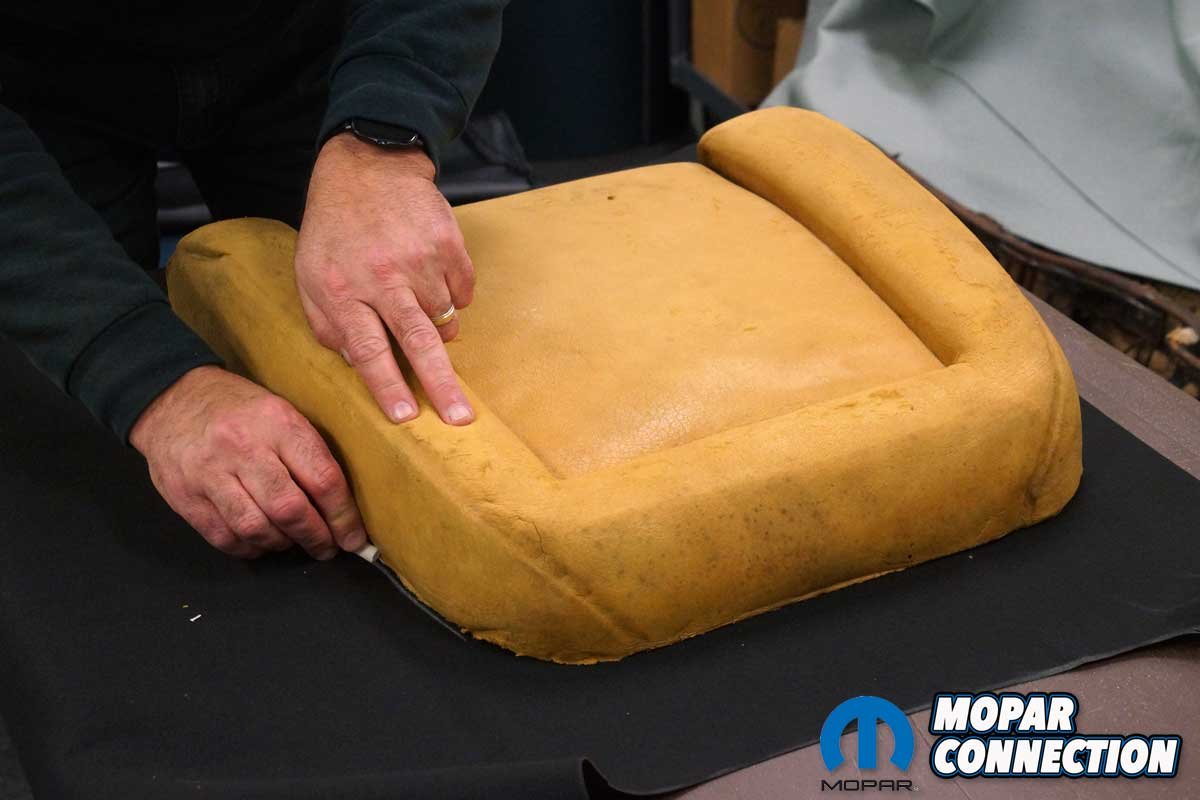
After multiple test fits of the seat base cover followed by minor adjustments, it conformed nicely over the cushion and the frame rails. Although both seat cushions appeared the same, Professor Klinger suggested I make a cover for the other seat. Therefore, I repeated the same process to construct another base cover.
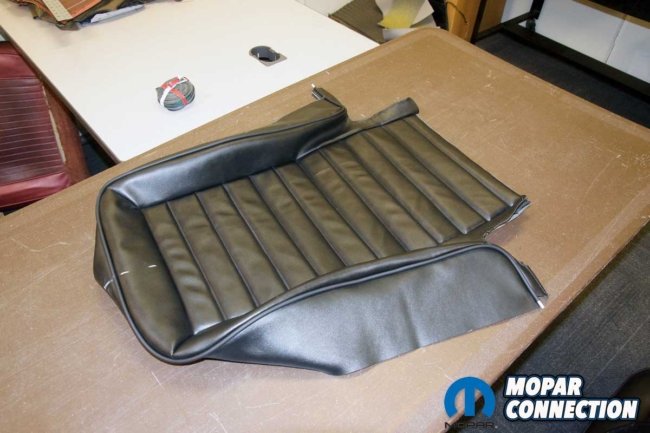
With both bottom covers completed, I disassembled them and used the four parts of each cover as templates to transfer to the finish material, a faux leather fabric I had purchased. It was a 1.2mm thick, soft vinyl with UV protection, making it suitable for seat upholstery.

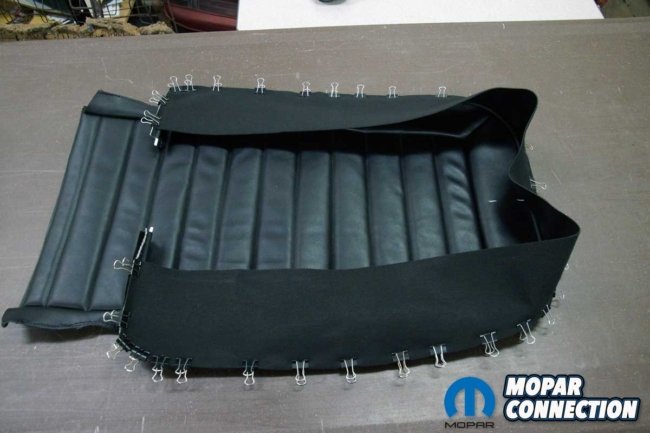
Left: Both base seat covers were sewn together. The two covers represent hours of work cutting, laying out, and sewing the patterns together. Right: Rather than making piping, a source with premade piping was located. It matched well, and it saved some time.
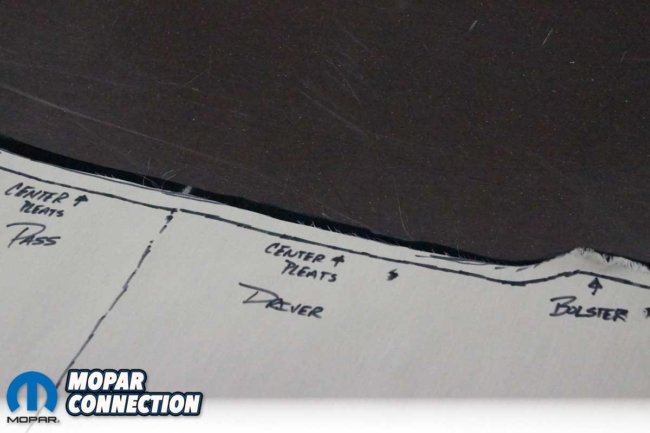
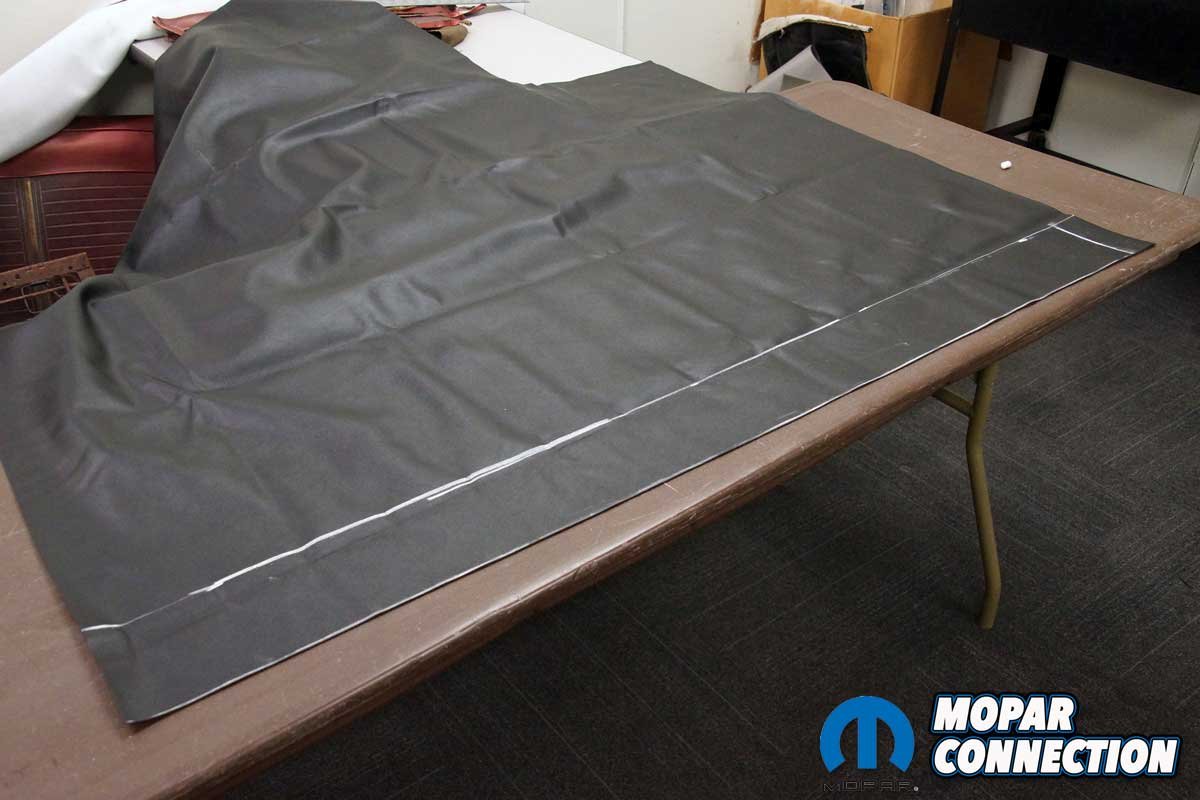
The vinyl was unrolled on the cutting table, and each pattern was placed onto the vinyl. I noticed the fabric would stretch when pulled in one direction (left-right) but would not in the other direction (top-bottom), so I positioned the bolsters to stretch from the insert to the lower wrap. I arranged the insert to pull from the front to the rear of the seat.
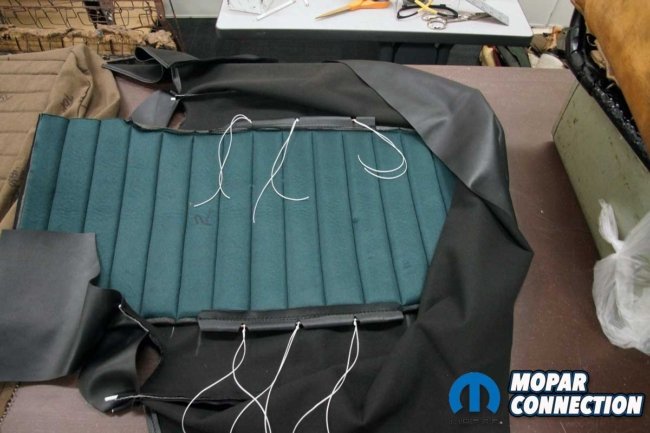
Left: A pair of pockets were sewed to the underside of the pleated inserts. Listing rods were slipped into the pockets. Right: Twine was tied to the listing rods in three locations (per rod).
I used a piece of sharpened chalk to trace each template. Then, I sewed each piece as I had with the burlap covers. The only variation was adding piping between the bolster and insert assembly (already sewn together) and the lower wrap piece of the cover. The last step was adding looped material for listing rods on the underside of the insert.


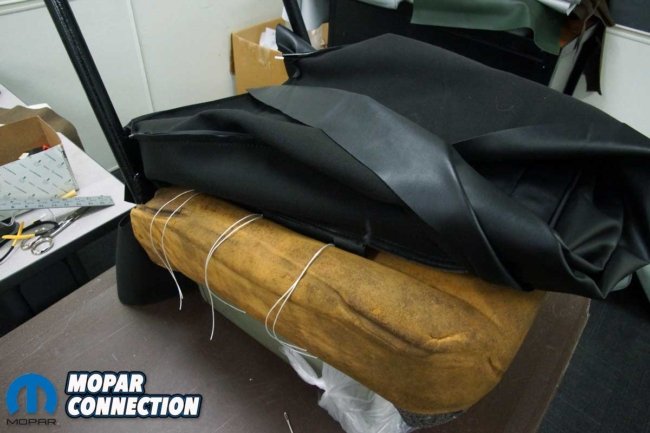
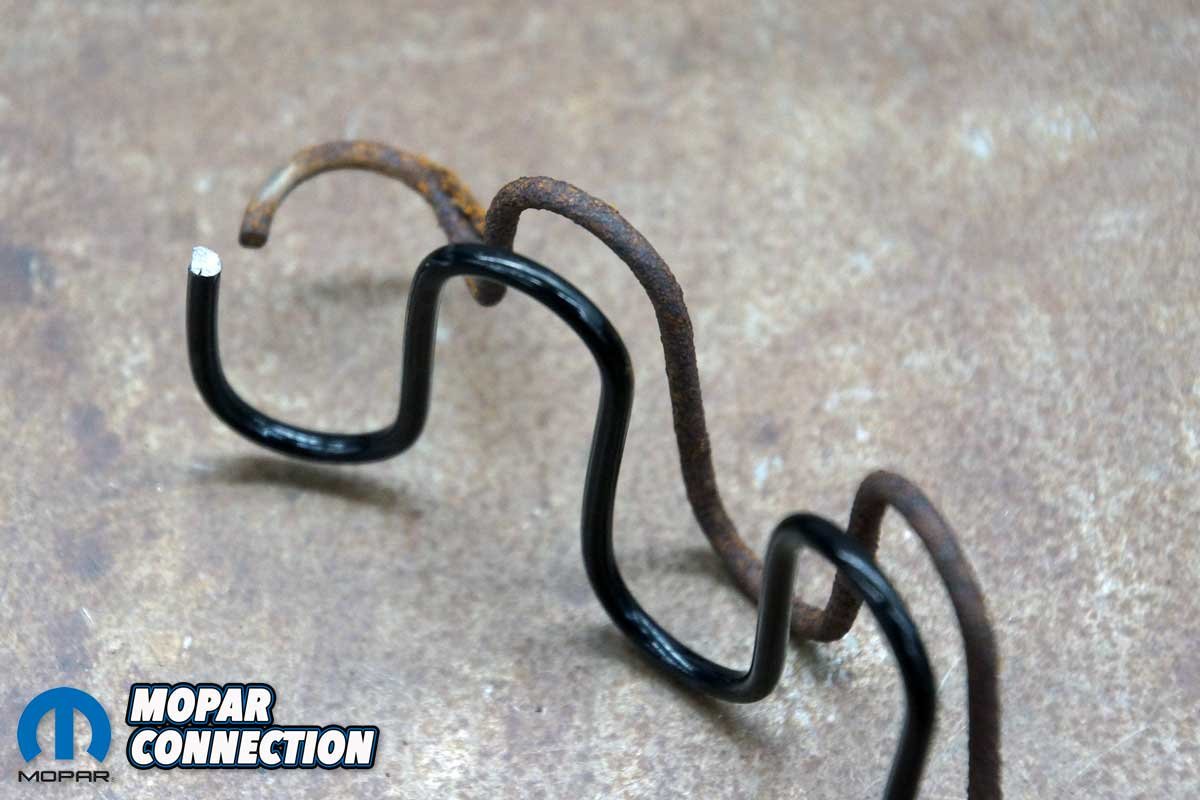
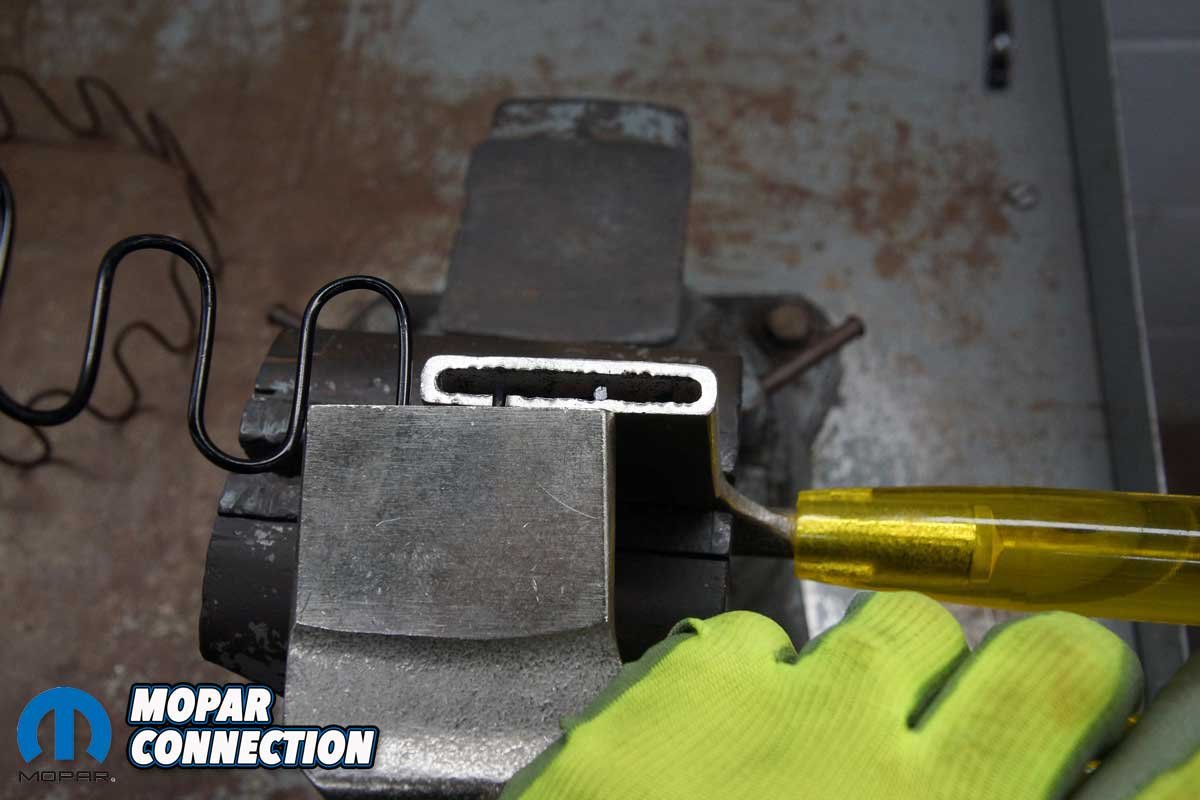
Left: The original springs were too damaged to reuse. A new zig-zag 9-gauge spring was found, but it had to be cut to length, and each end had to be modified with a 90° hook. Center: Special spring bending tools were used to bend the spring without damaging it. The tools can be purchased online or at an upholsterer’s business for less than $30. Left: Laced burlap was attached to the four springs to maintain the location of the springs and provide additional support for the cushion.
Once the seat base covers were complete, it was time to fit the zig-zag springs into the seat frame. For the bottom springs (four per seat), I chose a 9-gauge spring. Unfortunately, it came as a 20-foot spool, so I had to cut each spring section to fit. Even worse, the frames required the spring ends to be at a 90° angle. Therefore, I bent and formed each end to fit the frame.
To keep the springs parallel, I laid a wire-laced burlap section over the springs and secured the burlap with hog rings. The burlap provided additional support and maintained the spring alignment.
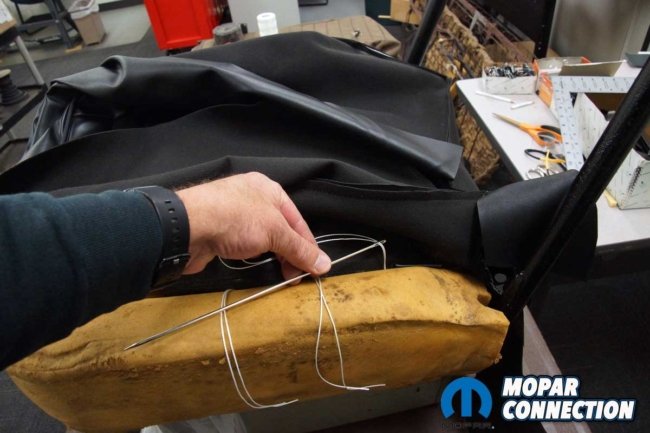
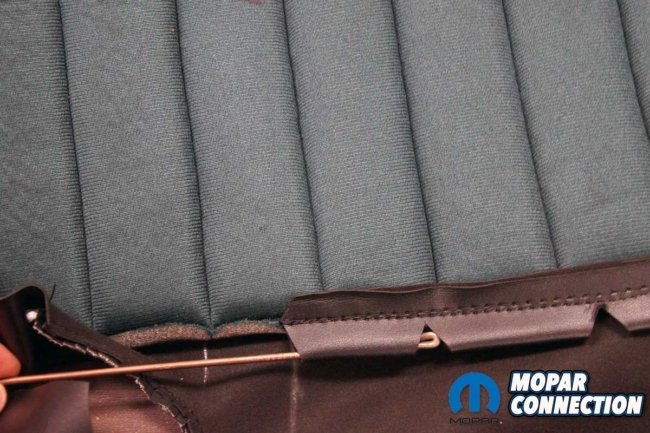
Left: The cover was placed over the cushion. Next, each strand of twine was laid out. Center: One at a time, a cord was attached to a 10-inch needle. The needle pierced the foam and pulled the string to the underside of the seat. Right: The twine was firmly secured to a spring.
I added two listing rods to the looped material sewn under the driver’s base cover and situated the cover over the foam and frame. At several points on each listing rod, I attached nylon twine. The other ends of the string were poked through the foam and secured tightly to a spring. After tightening the cords, the insert laid nicely on the foam.
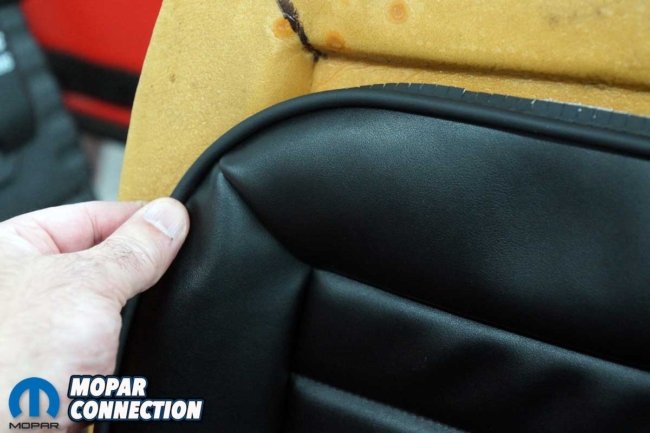
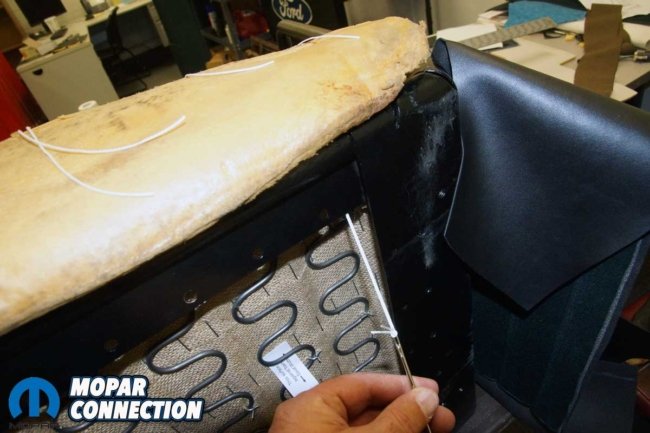
Left: The base cover was attached to the frame with hog rings. After properly stretching and securing it, the cover looked great. The other base cover also came out very nice. Right: For the uprights, templates were made, and the dimensions were transferred to the faux leather. The seat cover piping matched the base cover piping.
From this point, it was a succession of pulling and manipulating the material over added 2-inch bolster foam and securing it with hog rings to the frame. I worked from the front of the seat to the rear. The piping around each frame rail was oriented correctly, and any additional material was tucked or removed. I used the same assembly process for the passenger seat.


Left: The wrap over the seat bolsters required a long thin strip of material. Center: The material was contoured to fit the seat. Right: After a few additional modifications, the 2nd longest stitch was ready to be completed.
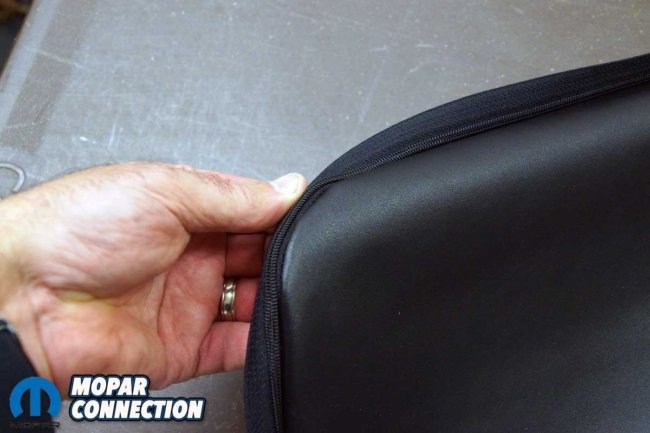
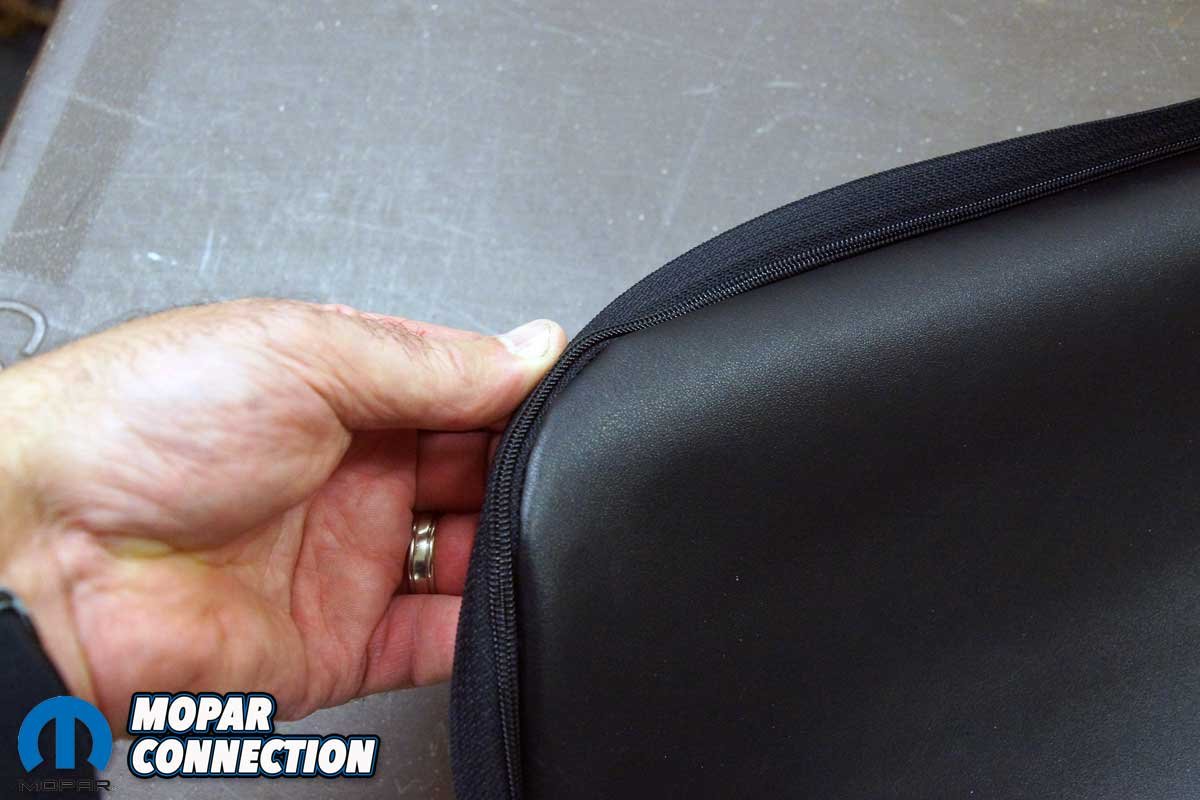
I followed the same development procedure as the base seat covers to construct the upright covers. I made templates, transferred the patterns to burlap, sewed the burlap together, test-fitted the cover, disassembled it, cut out the faux leather, and sewed it together. However, I sewed in a zipper for the back part of the seat cover to allow it to be installed or removed as necessary.
Left: With all the sewing processes, clips or pins were employed to keep the two (or more) pieces of material from walking away from each other. Right: The first upright cover was nearly complete. The piping lined up with the base cover piping.
As with the seat bottom springs, the uprights needed new springs. I selected 11-gauge springs. Again, I had to cut the springs to length and bend them to the correct 90° orientation to fit the frames. Conversely, this time, due to the thickness of the foam, I did not add a burlap layer for additional support.
Left: One upright cover was laid on the foam while the other cover was being completed. Center: Both covers were ready for the back section to be installed. Right: Before the covers could be installed, 11-gauge zig-zag springs were bent and installed on each seat.
The assembly of the upright cover was like the seat base, but this time instead of nylon twine, I used zip ties to secure the listing rods. Also, I added a metal support rod (bent into a “U” shape) on the backside of the foam to provide an anchor for the zip ties.
Once the listing rods were fastened, I pulled the insert around the lower upright cross member and affixed it to the frame. Next, the bolster flaps were stretched over the foam, and I used cotton wadding from a previous seat cover story to augment the booster padding. Lastly, I zipped the cover together and fastened two tether strips to the frame.

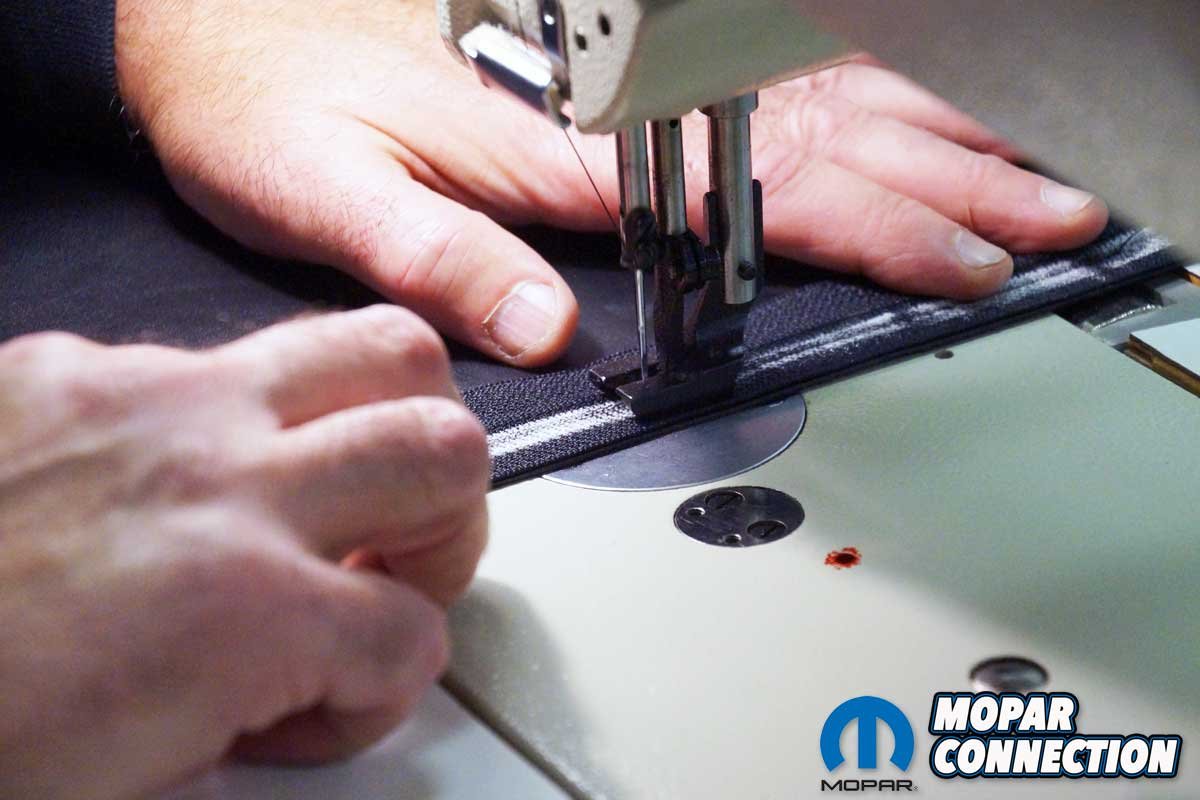
Top Left: The cushion was used as a template to make the final part of the upright seat cover. A sharpened piece of chalk provided a trace line. Top Right: The material was cut to shape. A second pattern was also cut. Bottom Left: A zipper was going to attach the back to the cover. Again, the two-sided tape was used to help hold the zipper to the material. Bottom Right: The zipper was oriented to allow each half of the zipper to attach to the seam allowance. Again, clips helped the tape hold the zipper during the sewing process.
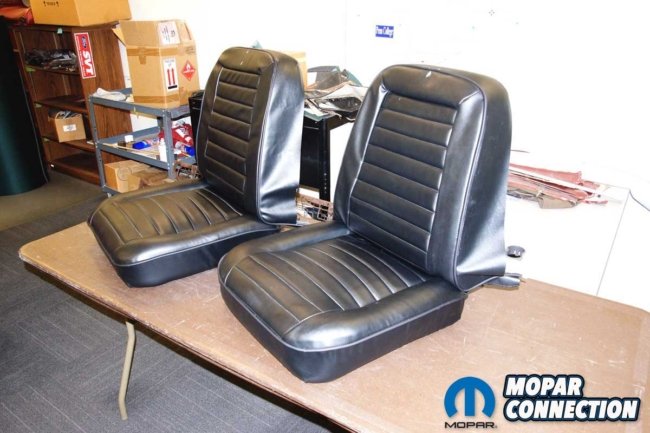
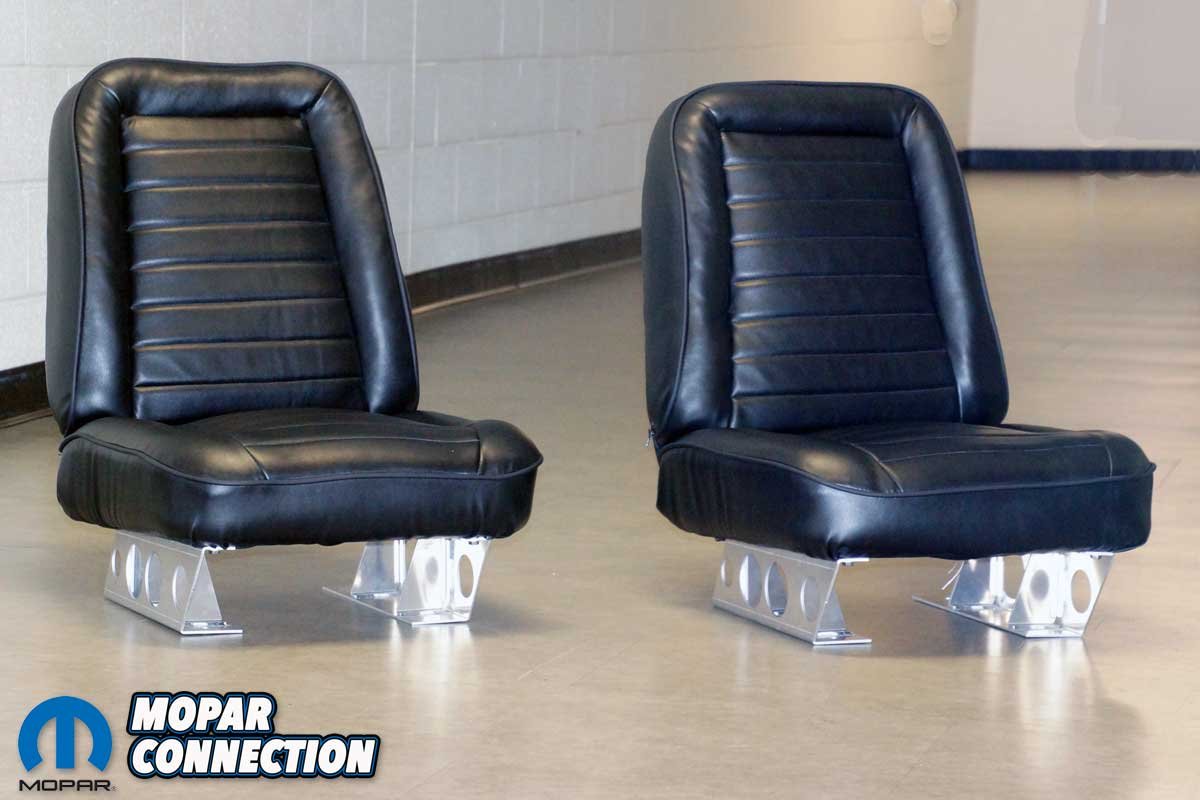
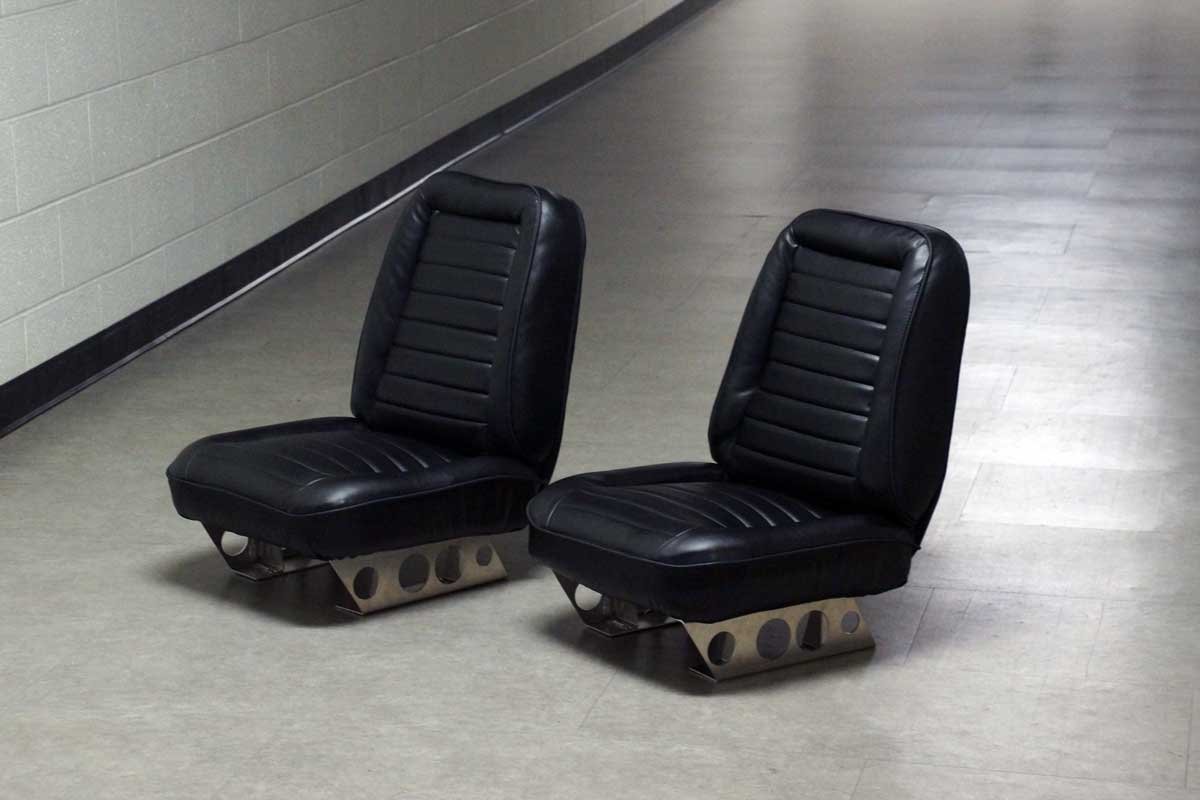
To finish the project, I added a pair of ’68 Super Stock seat braces to each seat. The braces came from Kramer Automotive Specialties. They added the final touches and provided the era-correct look for the seats.
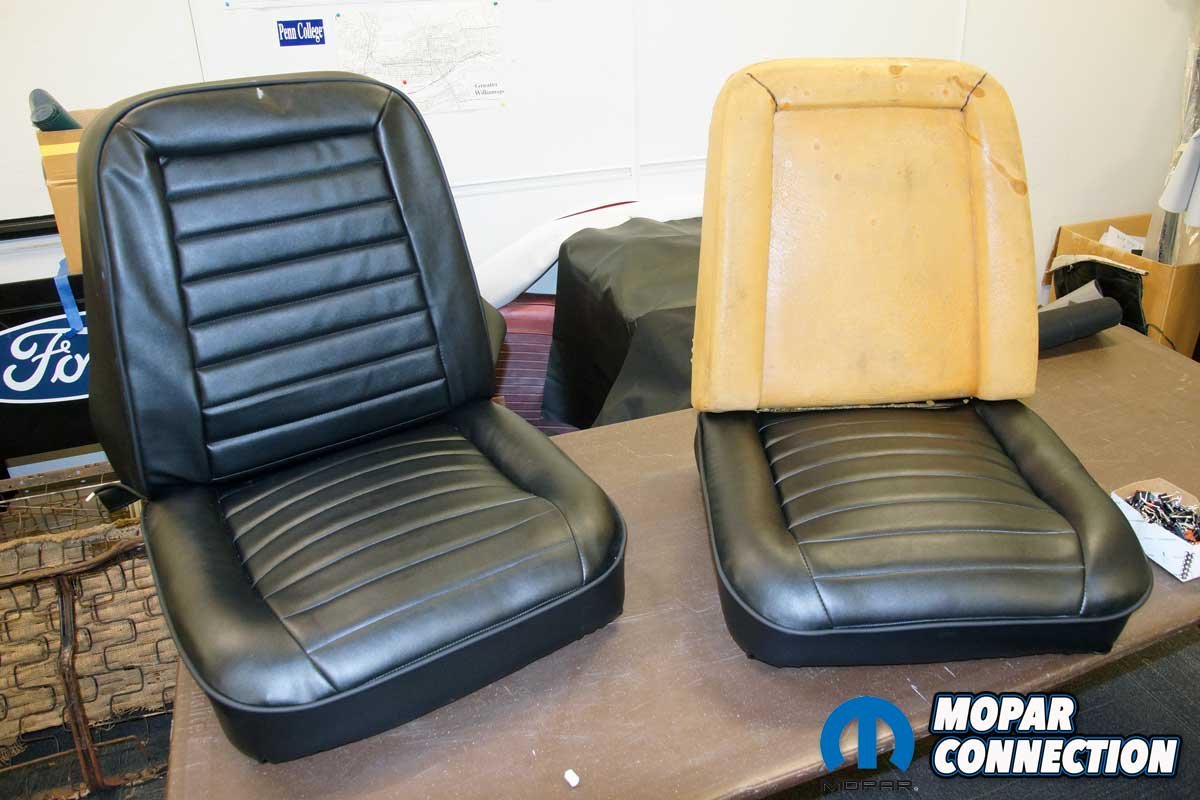
I was asked if I would do it again after completing the seats. Yes, it was a great learning experience in which I had plenty of opportunities to test ideas and techniques. Are the seats 100% factory correct? No, yet they are what I wanted. The seats aren’t perfect, but they are decent and will look good in a roadster or a Super Stock Dart.

Left: The zipper seam was the longest continuous stitch on the seats. The chalk was drawn onto the backside of the zipper as a guide. Right: The zipper stitching on the back cover looked good. The other half of the zipper was stitched to the upright cover.
Are there things I would do differently after gaining some experience? One thing I would do differently is make better templates, maybe out of construction paper, poster board, or laminated paper. Second, I would start by working on the upright first. The base was in the way the entire time I worked on the vertical.
Left: Several zip ties pulled the listing rods to a “U” shaped bar that was added to the seat. Right: The listing rods fit nicely in the gap between the insert and bolster areas of the foam.
The total cost for the springs, material, zippers, foam, piping, burlap, nylon, and needle was $332.07. A new pair of seat covers from Legendary Auto Interiors, LTD. for the ’64-’67 or ’68 A100 van will run $493.95 plus labor. The covers are available in black at Classic Industries.
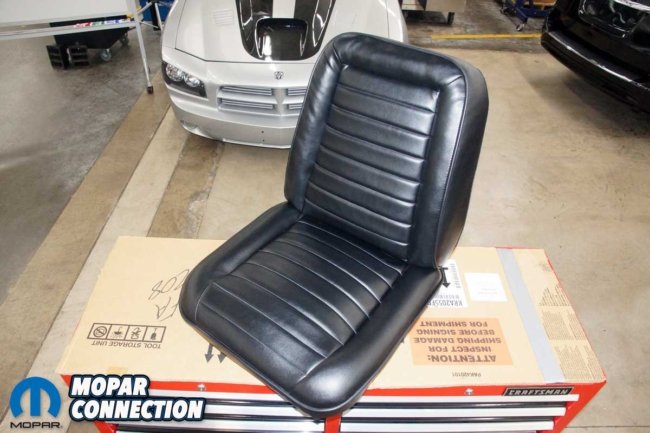

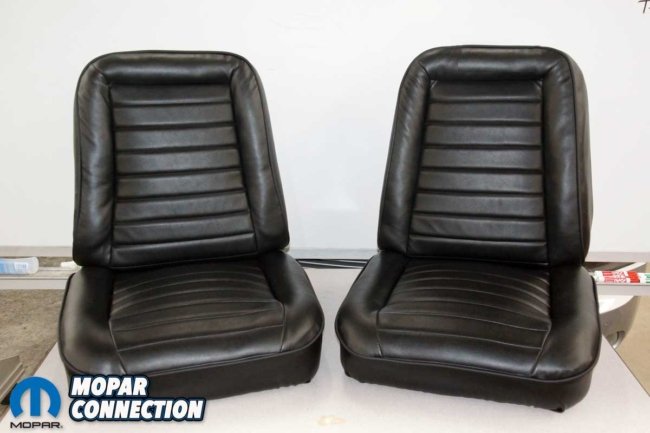
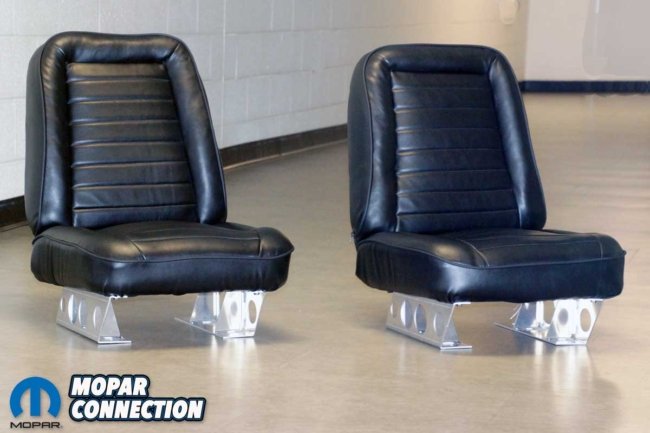
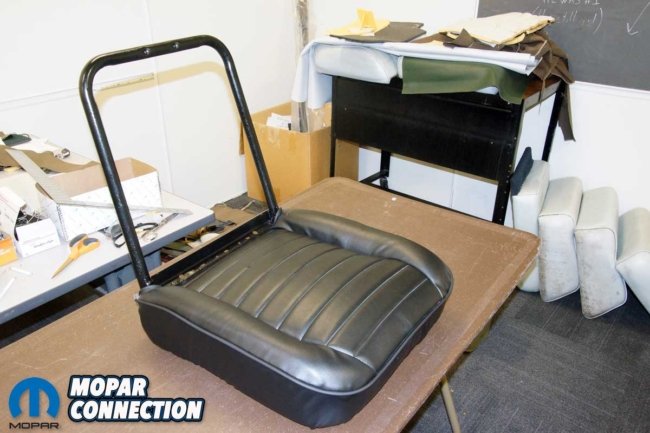
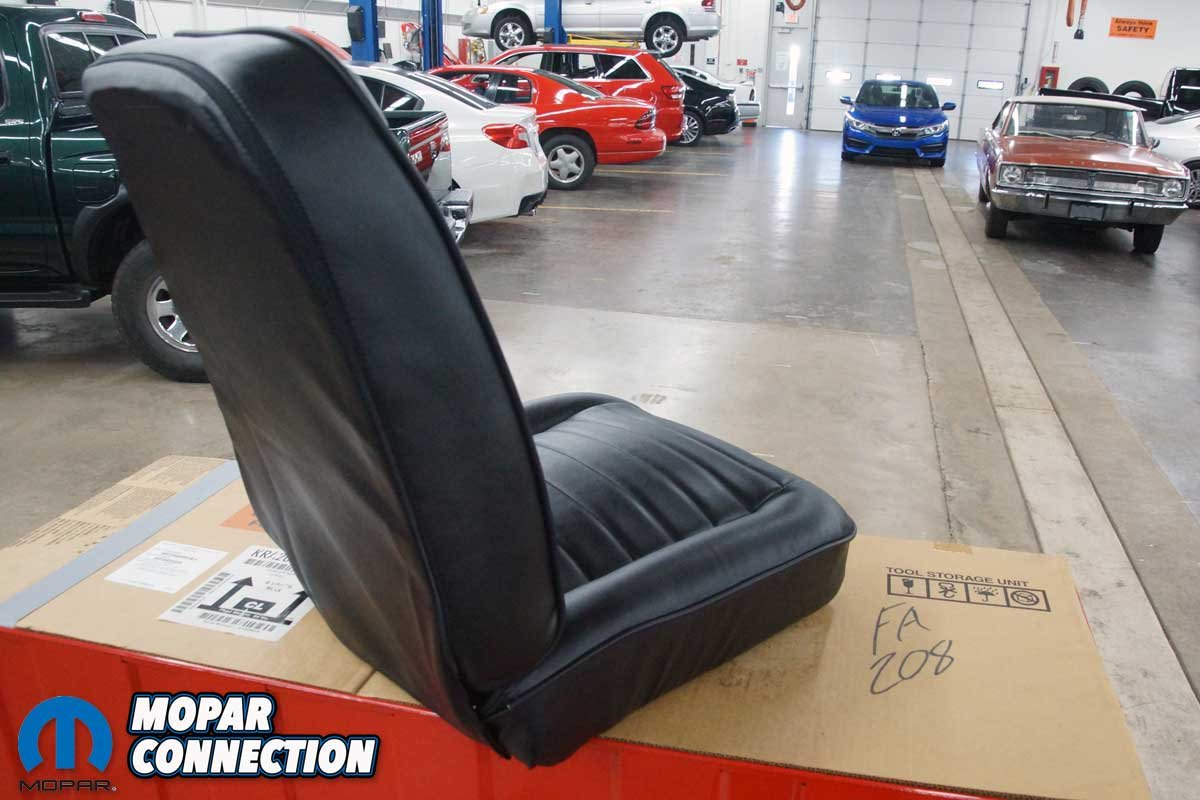
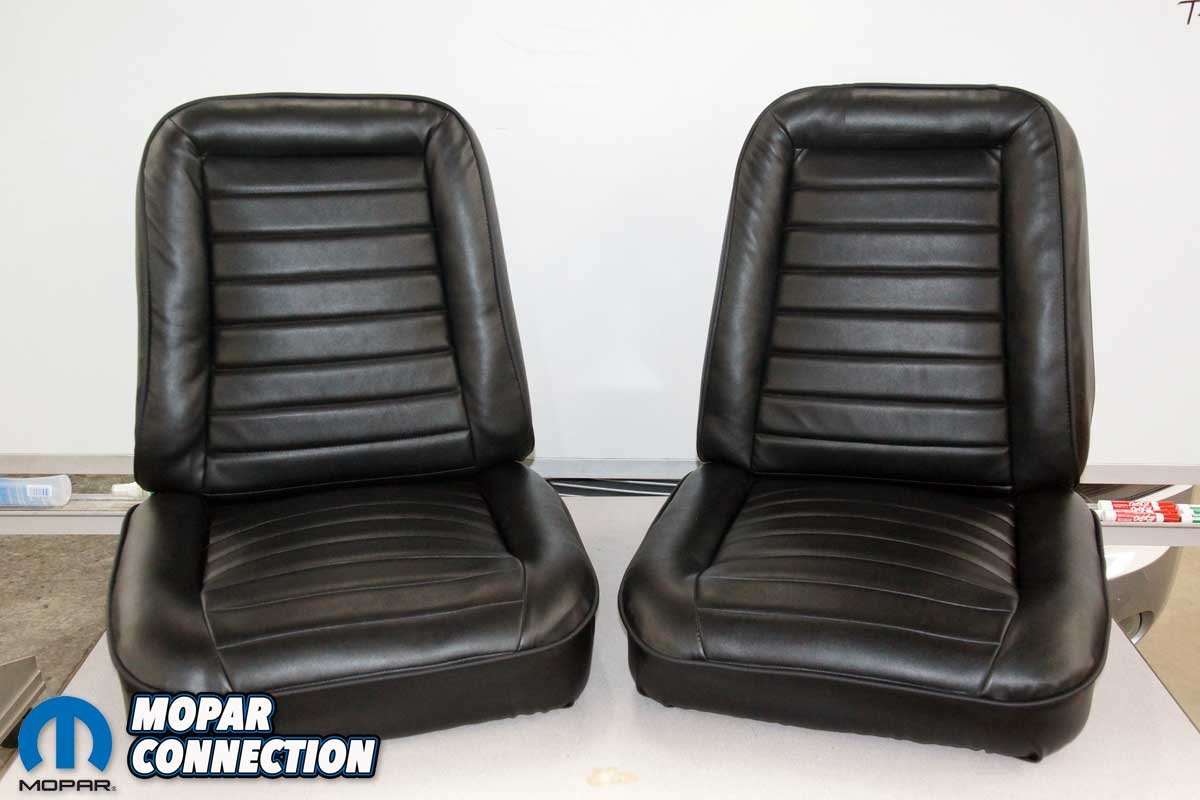
Top Left: The first seat was nearly finished. The base and upright lined up nicely. Top Right: The backside of the upright was zipped into place. A little steam was still necessary to remove a few slight wrinkles. Bottom Left: Both seats were complete. A little fine-tuning with cotton wadding on each upright bolster was still required. Bottom Right: The seats were mounted to a pair of Super Stock seat brackets. The seats came out better than expected, but there is always room for improvement in the future.
Without access to an industrial sewing machine, the Legendary products are a great option and will fit perfectly. However, if a sewing machine is available, I recommend making the covers for no reason other than the pride that will be felt when someone asks who did your seats.


