


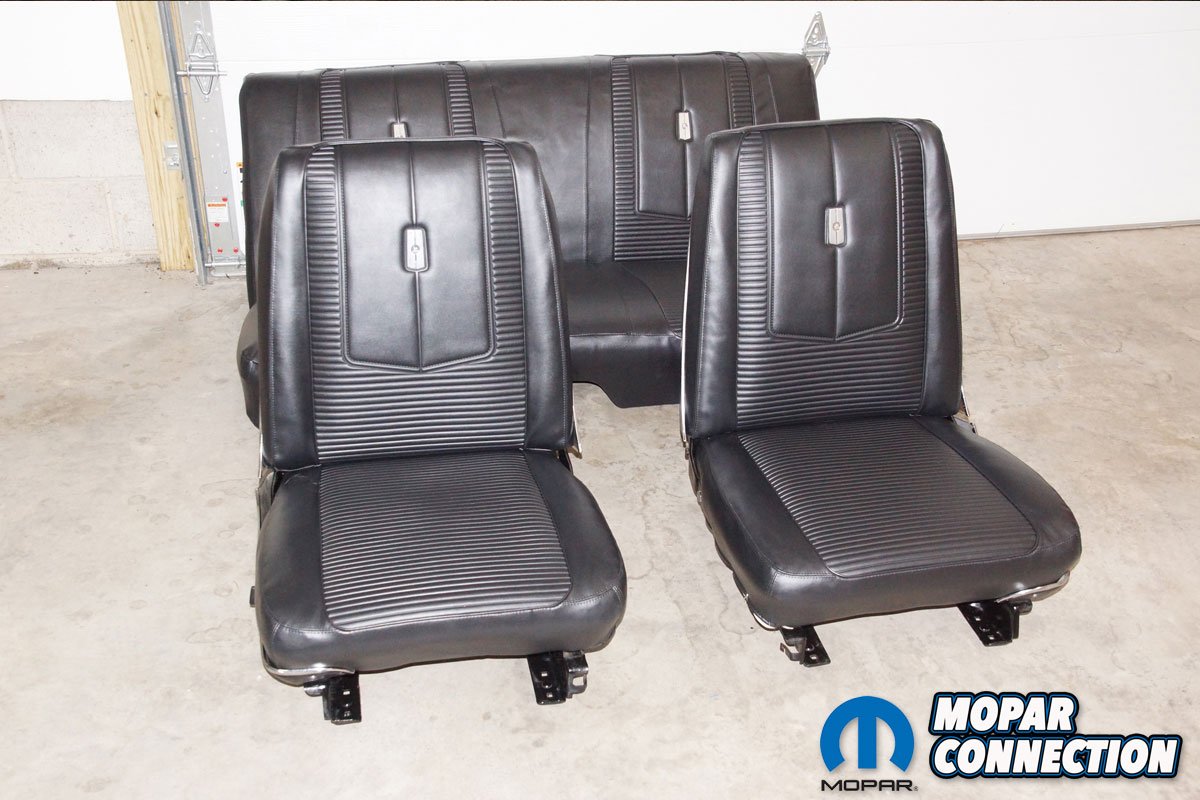
After completing a few interior updates on our 1967 Dart, the seats looked a little haggard next to the new parts. There were several split seams on the bucket seats, a spring was jutting through the driver seat cover, and the passenger seat lacked proper support. While your author’s petite wife experienced no problems with the passenger seat, other more significantly sized riders found themselves slipping through it.
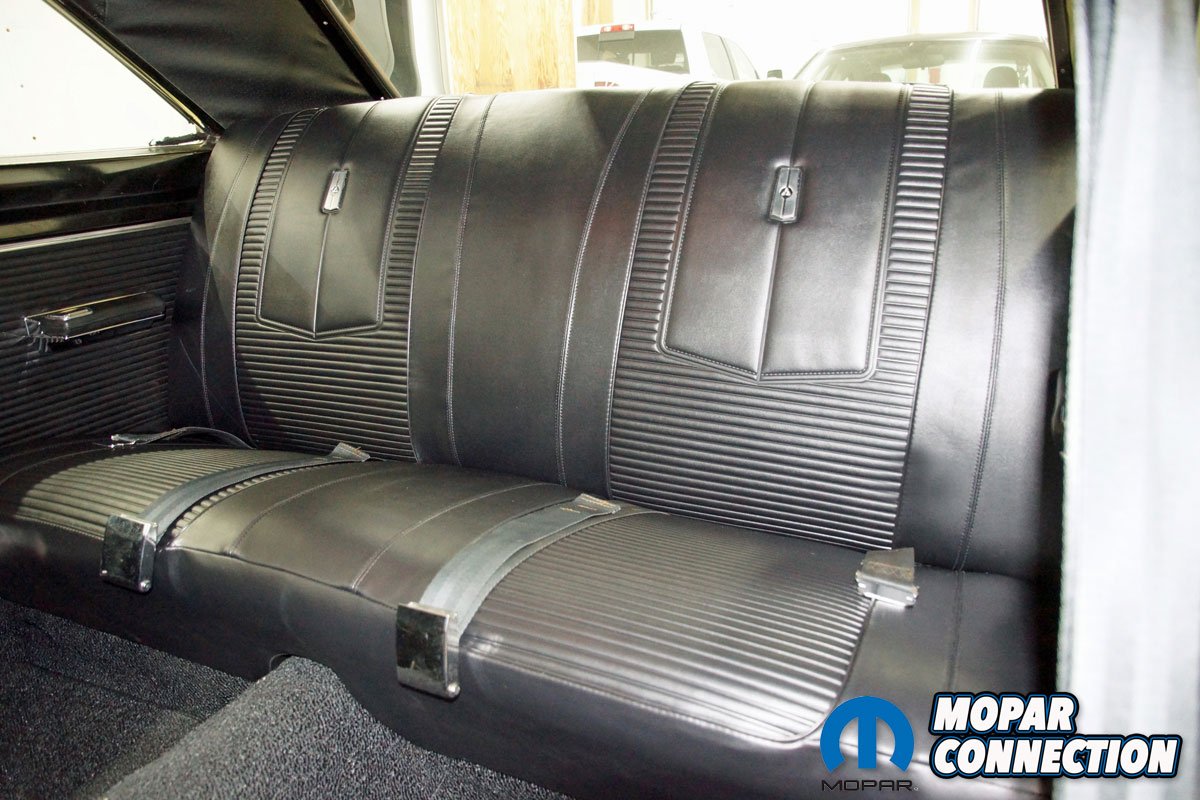
The rear bench seat was intact, with only a quarter-sized tear at the package tray. To return the seats to the factory appearance, Mopar Connection magazine contacted Classic Industries about what we needed to replace the front and rear seat covers, seat foam, and padding. A Classic Industries representative suggested Legendary black vinyl upholstery for the front bucket seats (part no. MA630100), matching rear seat upholstery (part no. MA631100), front bucket seat foam (part no. MD3003), and a padding kit (part no. AK50102).

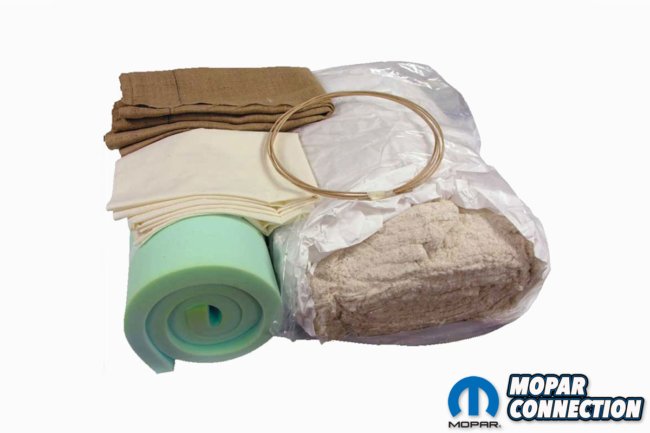

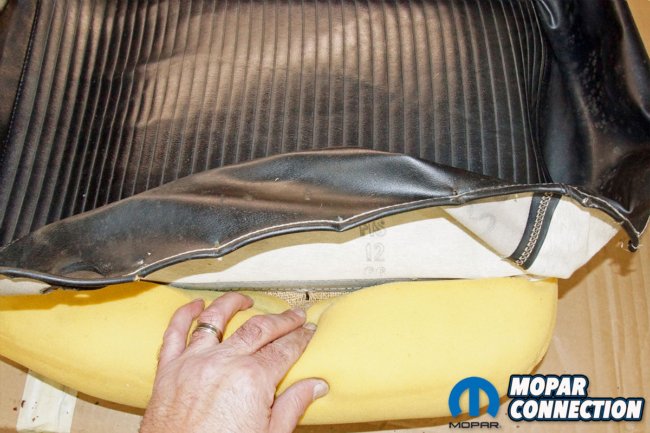
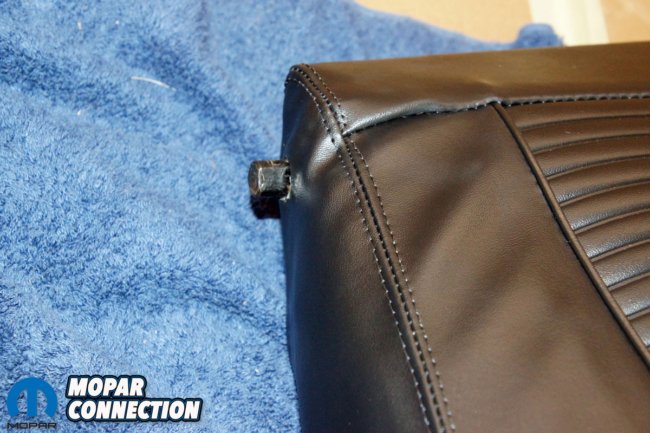
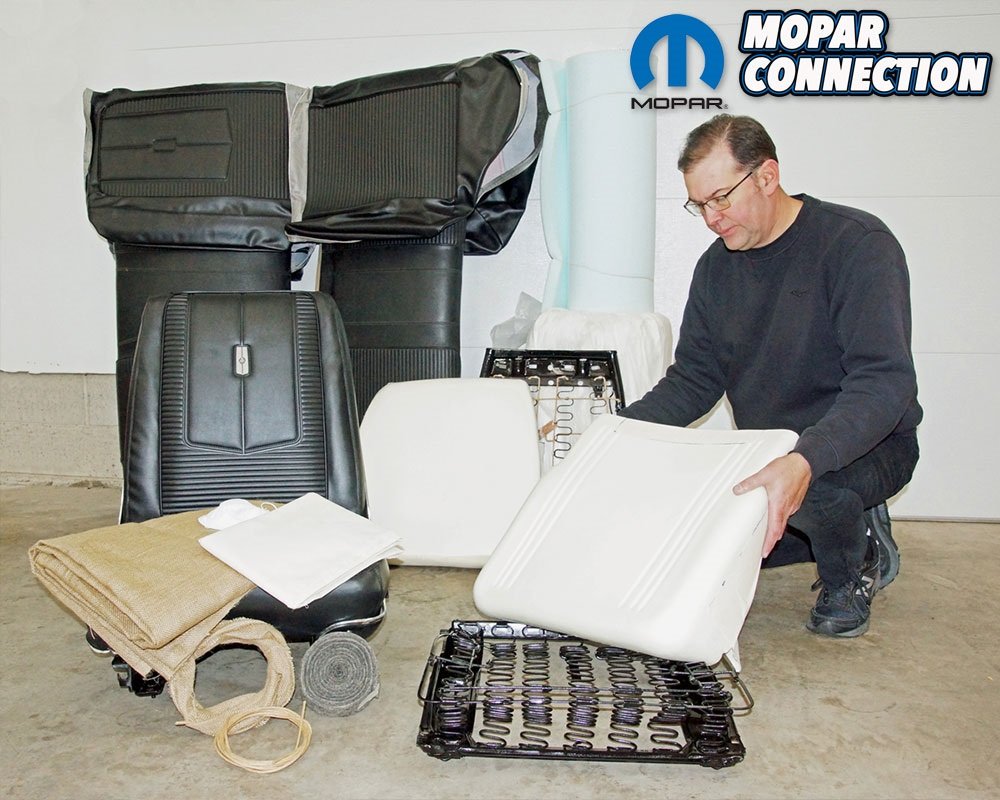
Above Left: Classic Industries provided foam for our 1967 Dart front bucket seats (part no. MD3003). This foam installs on several years of Mopar seats with minor modifications (discussed in later photos). The foam is soft to the touch, but it has a sturdy, firm shape. Above Center: The restoration re-upholstery kit (for rear seats) from Classic Industries included 10lbs of cotton, muslin, rolled foam, listing rods, burlap, and felt for the reassembly of the rear bench seat (part no. AK50102). The kit proved to be essential for the rebuilding of all the seats. Above Right: The 53-year-old original front seat was in decent shape. A few seams had separated, and there was a large rip in the seat bottom, but the worst problem was metal poking out of the seat cover.
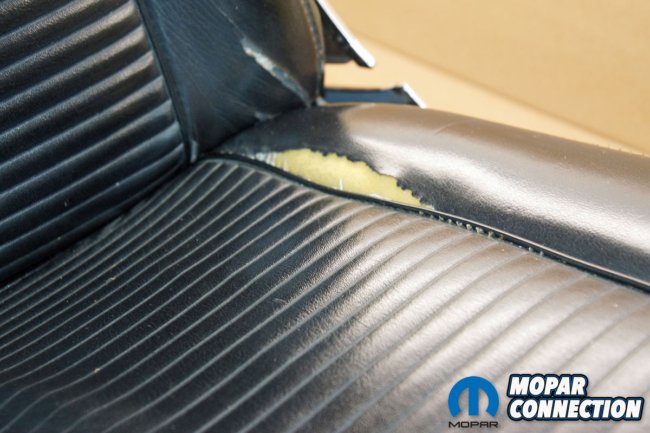
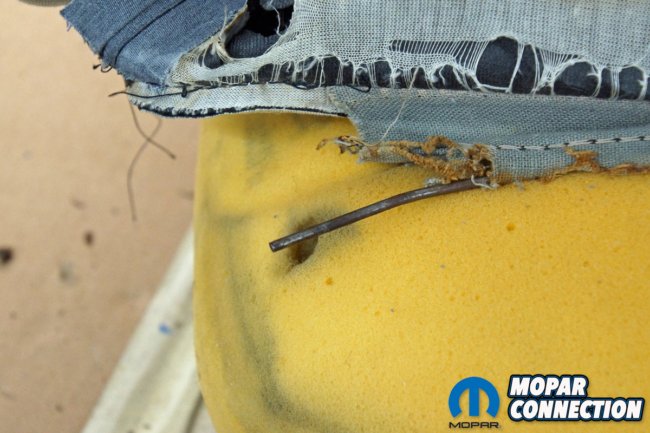
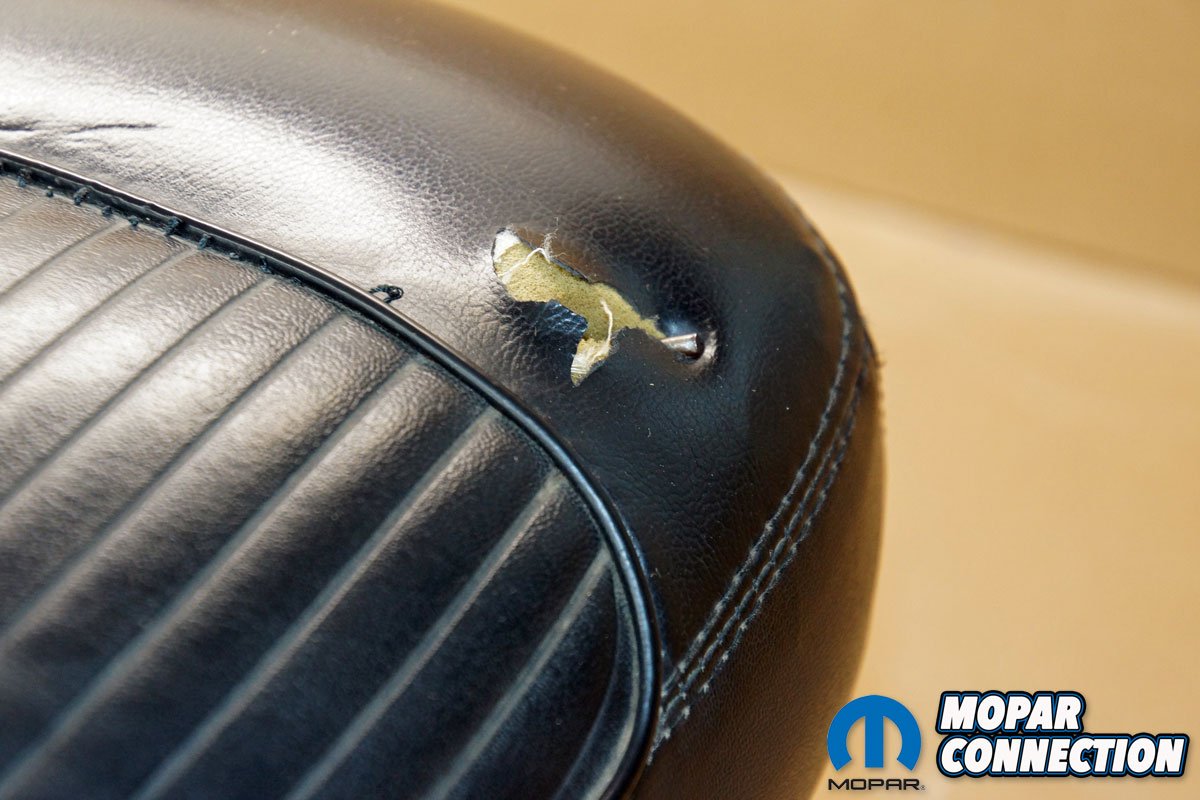
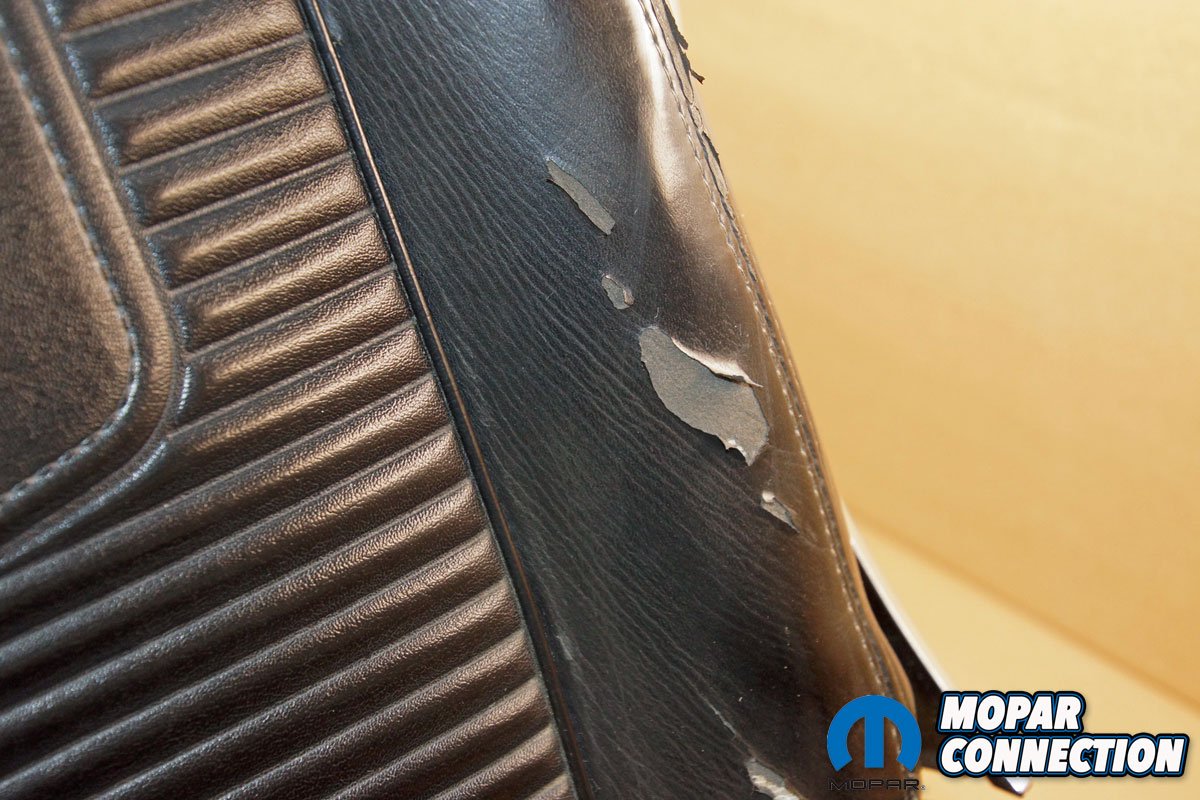
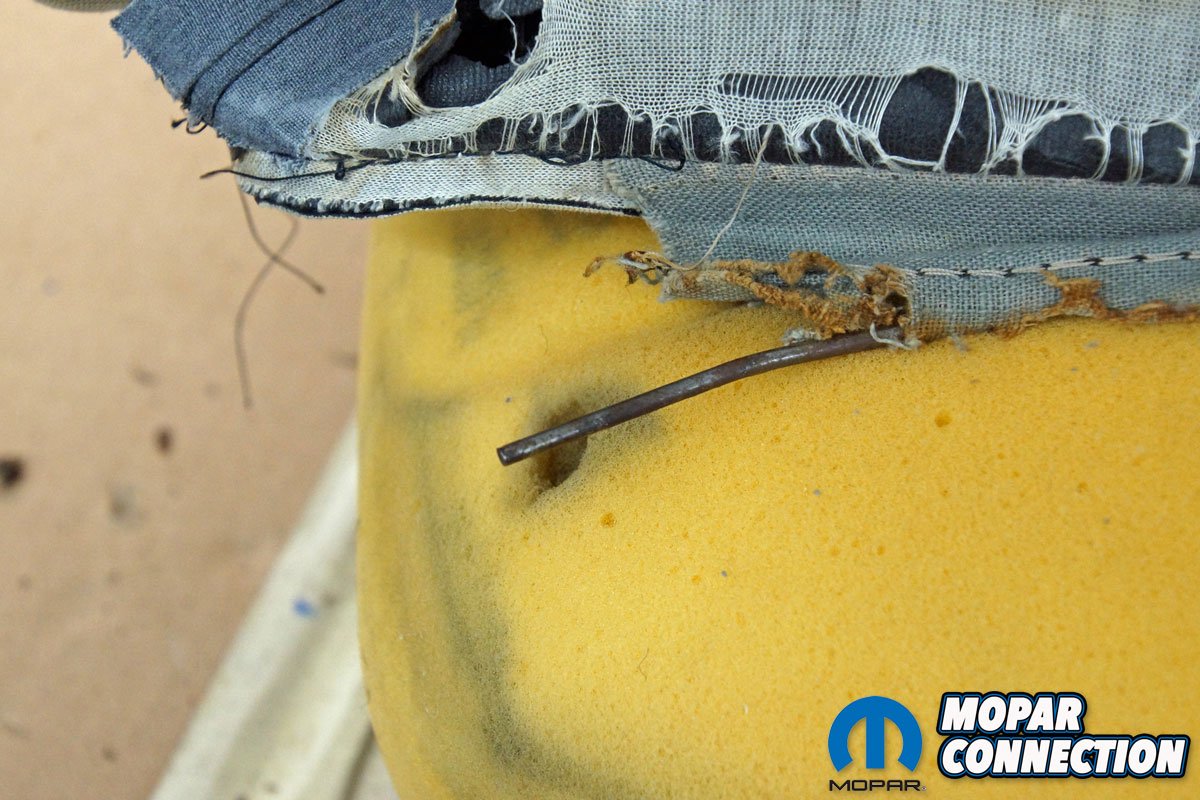
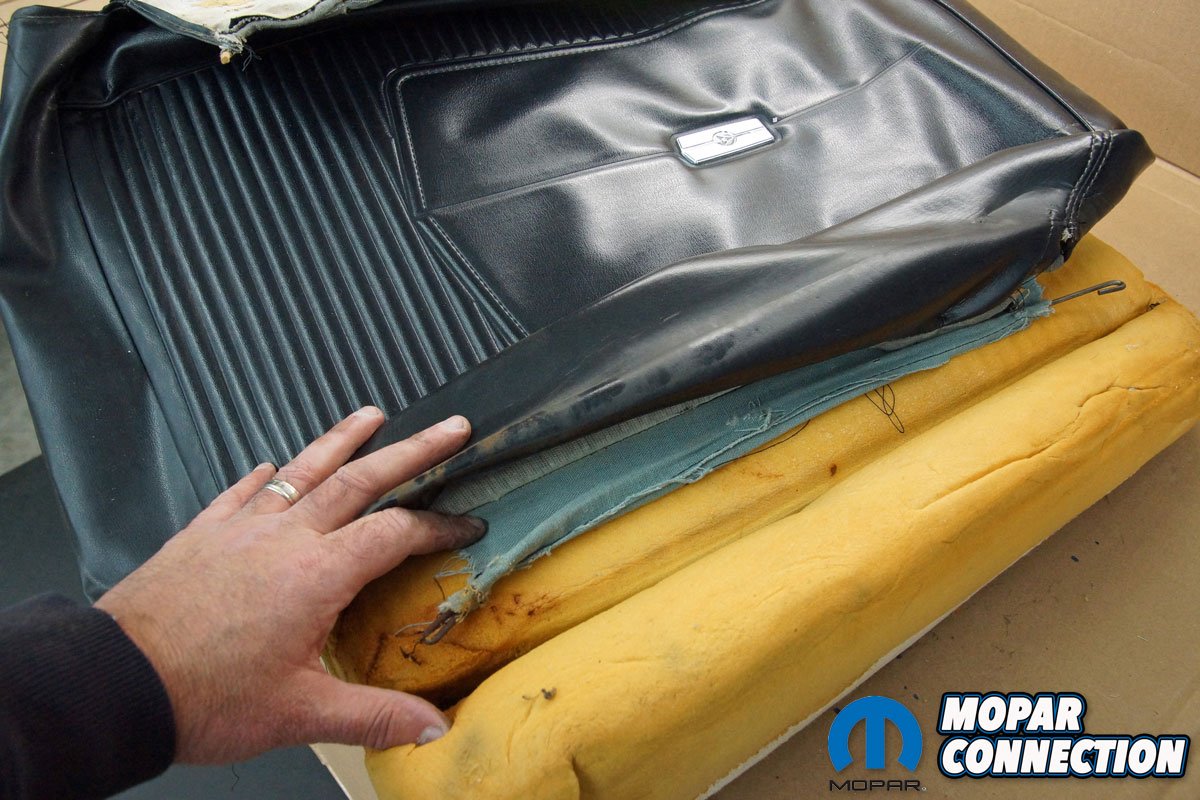
Below Left: Here is our hole in the seat. A piece of metal is protruding through the foam and the seat cover. If care was not taken, this metal rod could do some damage to a leg or a pair of pants. Below Center: The rip in the front seat bottom (FSB) was unsightly. It continued to open up with our frequent use of the seat, and eventually, it would have gotten to an unacceptable condition. Below Right: The front seat top (FST) cover was peeling, but there were not any rips through it. In other areas of the cover, the seams were starting to come apart. With the damage to the seats, it was an opportune time to update the interior.


With the driver seat removed and on the workbench, we unscrewed the knob from the seat track adjuster lever. The seat track was disconnected from the frame, and with the tracks out of the way, the bezel cover on the lower left side of the seat bottom was removed. Two 5/8-inch shouldered bolts joined the front seat top (FST) to the front seat bottom (FSB). After removing the bolts, we were able to separate the FSB from the FST.
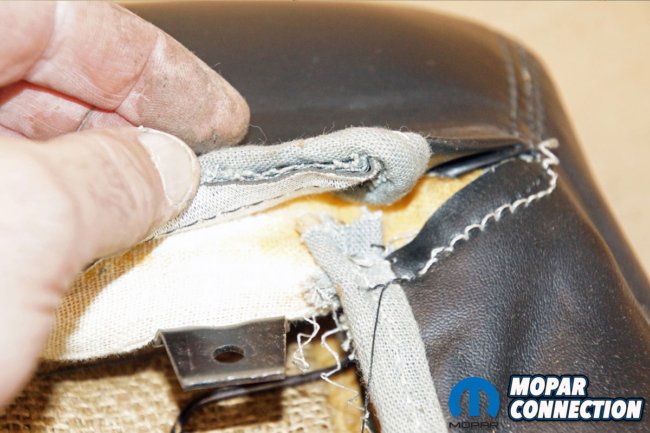
We detached the cover, held in place by about a dozen hog rings, from the parameter of the FSB frame. To gain access to additional hog rings, we folded the cover back over the foam. The hog rings were attached to a pair of listing rods inserted in the cover and fastened to a matching pair of listing rods on the seat frame springs. The metal protruding through the seat cover was not a spring, but rather, a listing rod separated from its pocket in the cover, slipped forward, and damaged the cover.

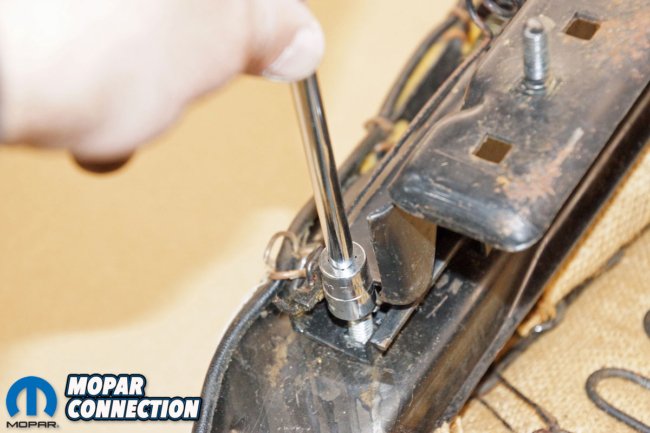
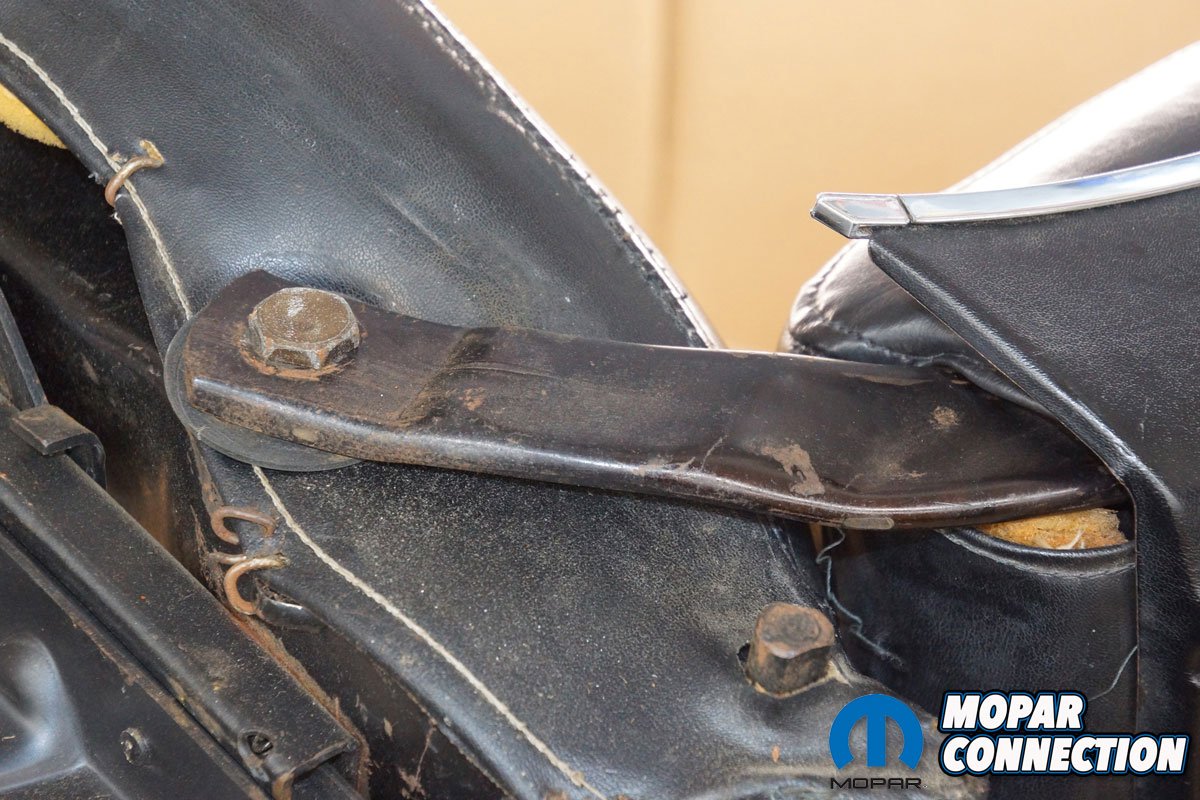
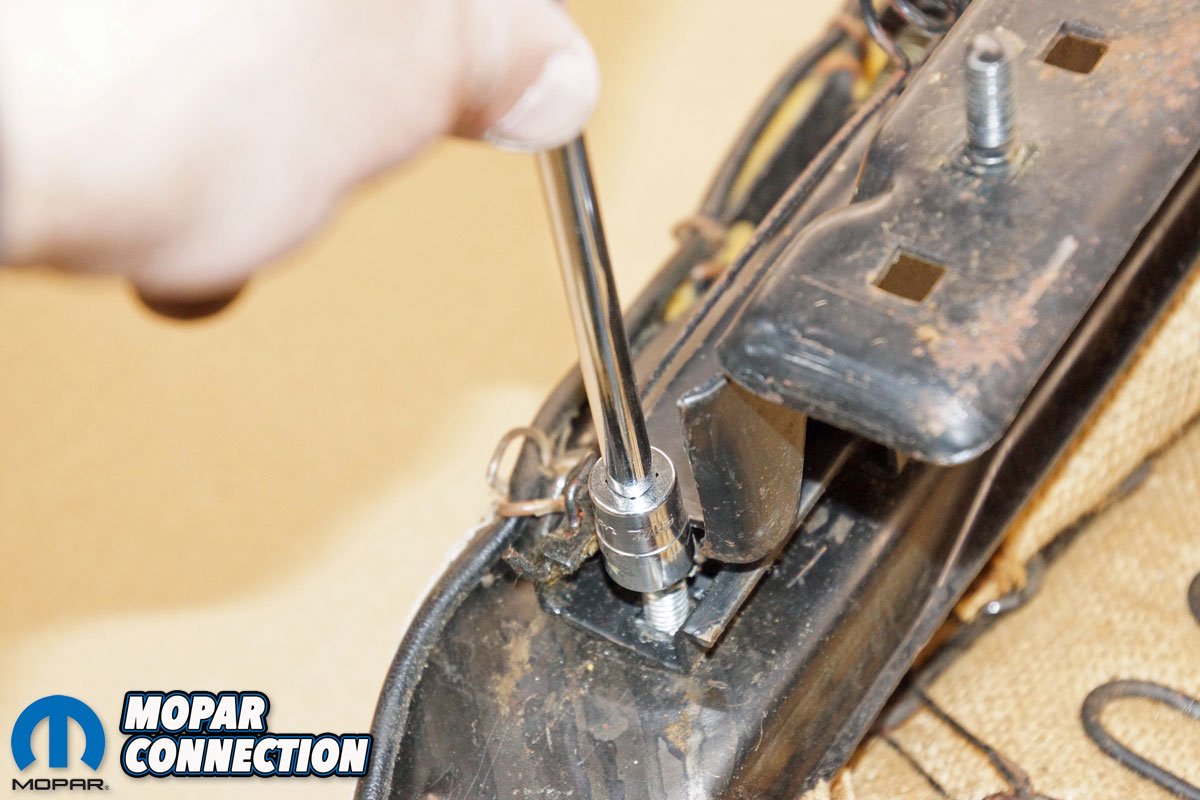
Above Left: The disassembly of the driver side bucket seat began with the removal of the seat track adjuster lever knob. After removing the knob, we gained access to the seat track bezel cover, which we removed, cleaned, and set aside for reassembly. Above Center: Continuing the disassembly, the seat frames needed to be separated from each other. The hinges were held in place by a single bolt on each side of the FST. After the removal of the bolts, the FST hinges (and plastic washers) were slipped away from the FSB. Above Right: The seat tracks were removed from the FSB. Two fasteners attached each track to the seat frame.
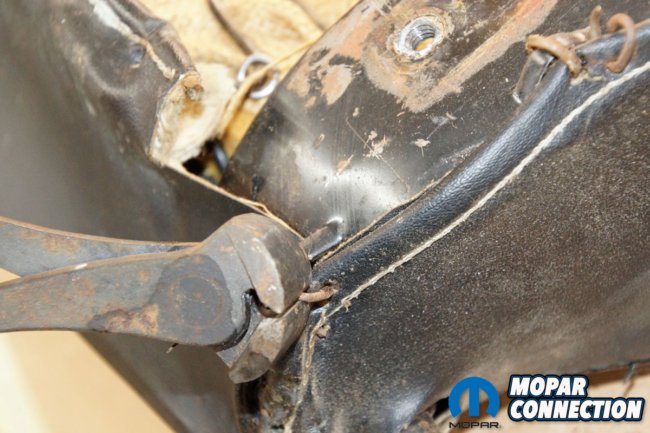
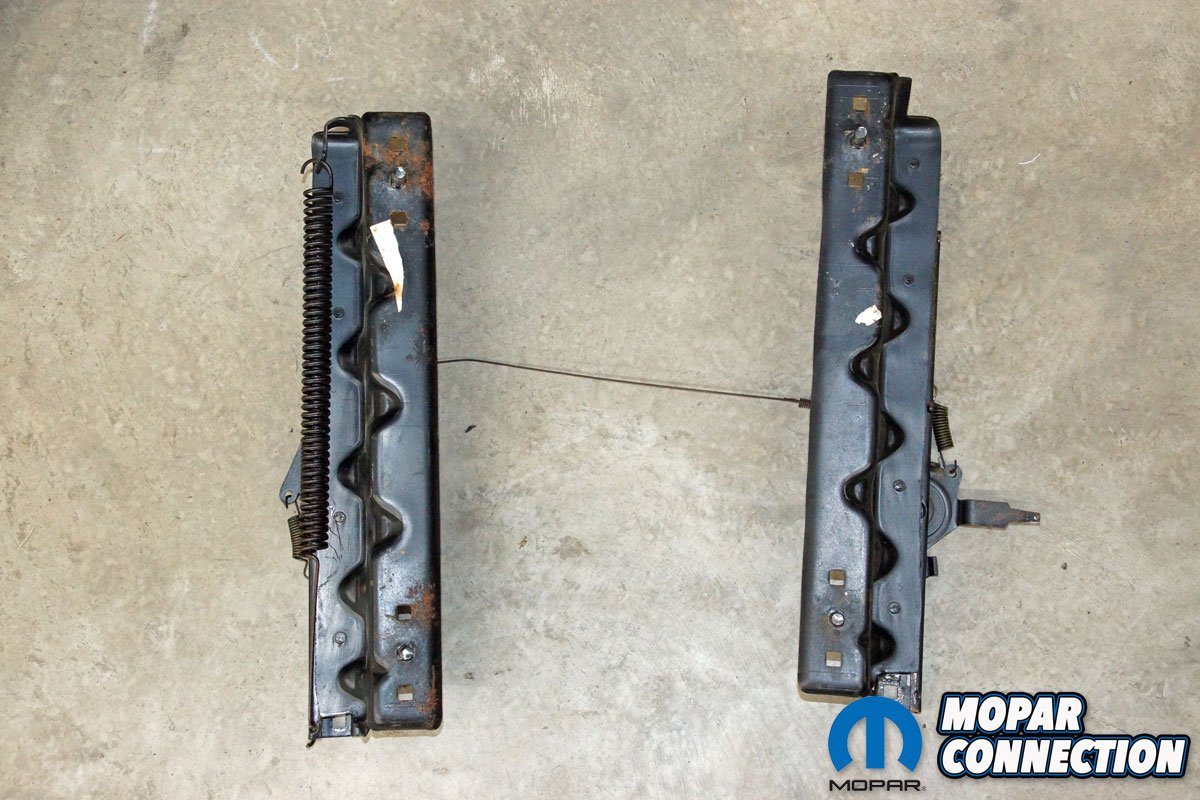
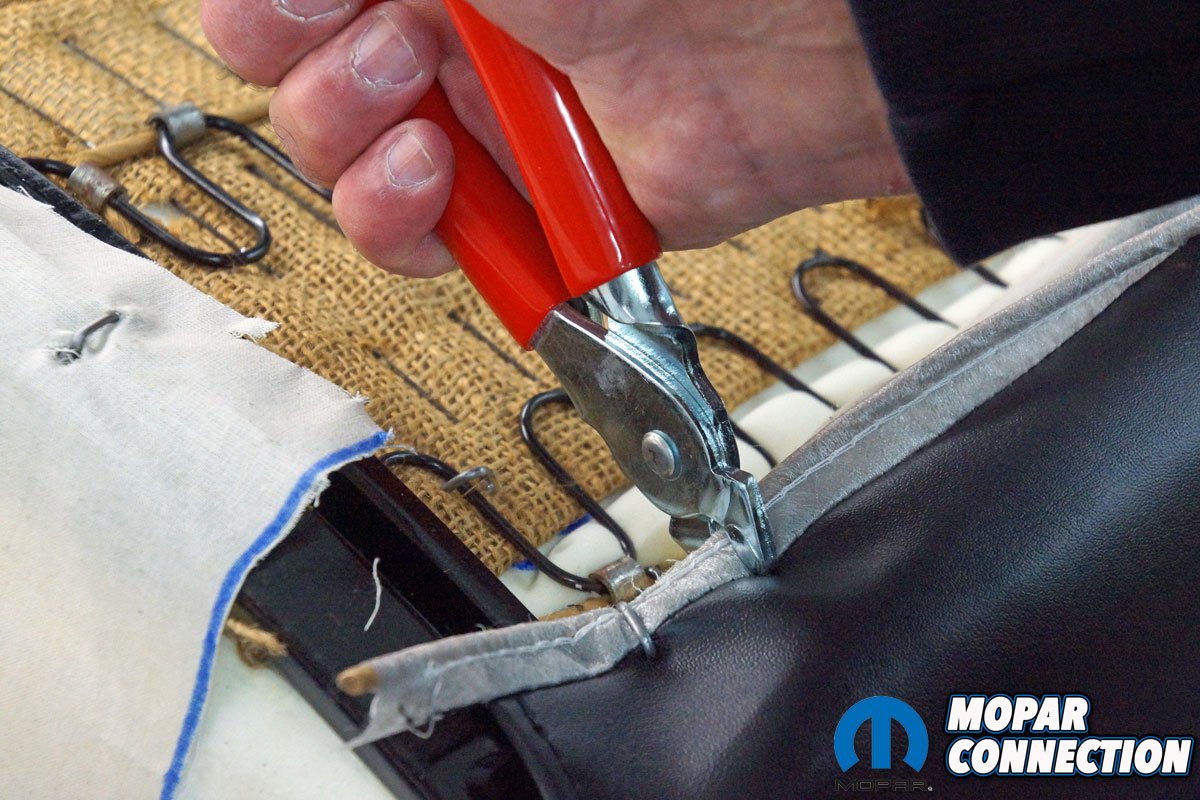
Below Left: The driver side seat tracks were in excellent shape with just a touch of surface rust. The return spring (right track) broke while removing the track from the frame. Luckily, we were not hurt. Fortunately, we had a pair of replacement new-old-stock (NOS) springs that were purchased years ago for a project but never installed. Below Center: A quality pair of end cutters allowed us to cut or twist the hog rings from the frame (or springs) and out of the cover. Before we began removing the hog rings, we took plenty of photos of the factory installation of the seat cover. The photos provided us an excellent resource for our installation. Below Right: We started cutting the hog rings from the frame. Working slowly, we moved around the parameter of the frame.


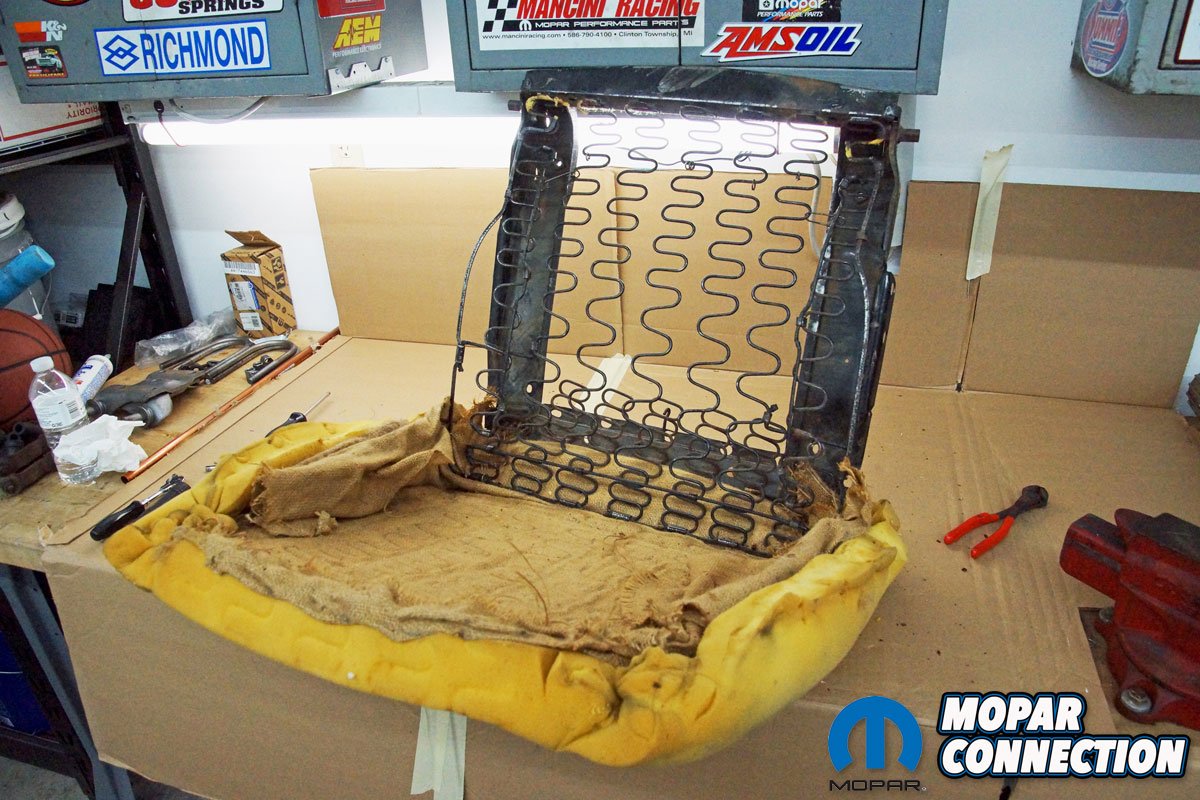
After removing the seat cover, the foam was peeled from the frame, exposing a layer of old burlap, which was fastened to the frame and springs with several hog rings. We removed the remaining hog rings and discarded the burlap. The frame was inspected, and no damage was found to the springs or the paper-wrapped listing rods, so we just cleaned the frame and prepped it for paint.
Moving to the FST, we slipped off the steel seat back cover after unthreading two screws from the frame. With the inside of the FST exposed, about a dozen hog rings fastened the cover to the frame, and just like the FSB, once the parameter hog rings were removed, we peeled back the cover to expose hog rings through the listing rods and frame. After releasing the listing rods, we removed the cover and foam from the frame. The burlap under the foam was in perfect shape; it still contained the small gauge metal rods evenly spaced about ¾-inches apart. As we had done with the FSB, we checked all the springs and the paper-wrapped listing rods and prepared the frame for paint.

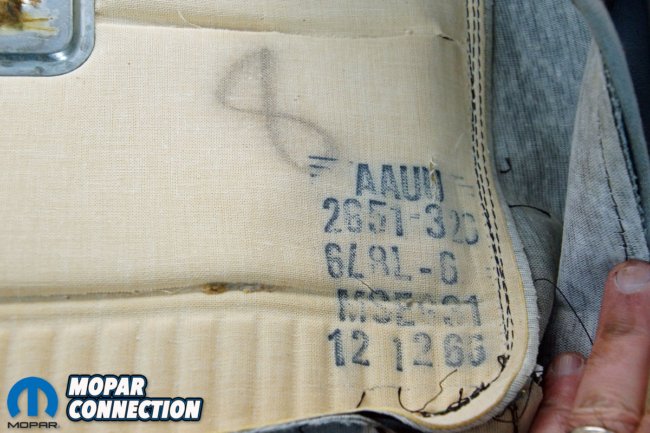
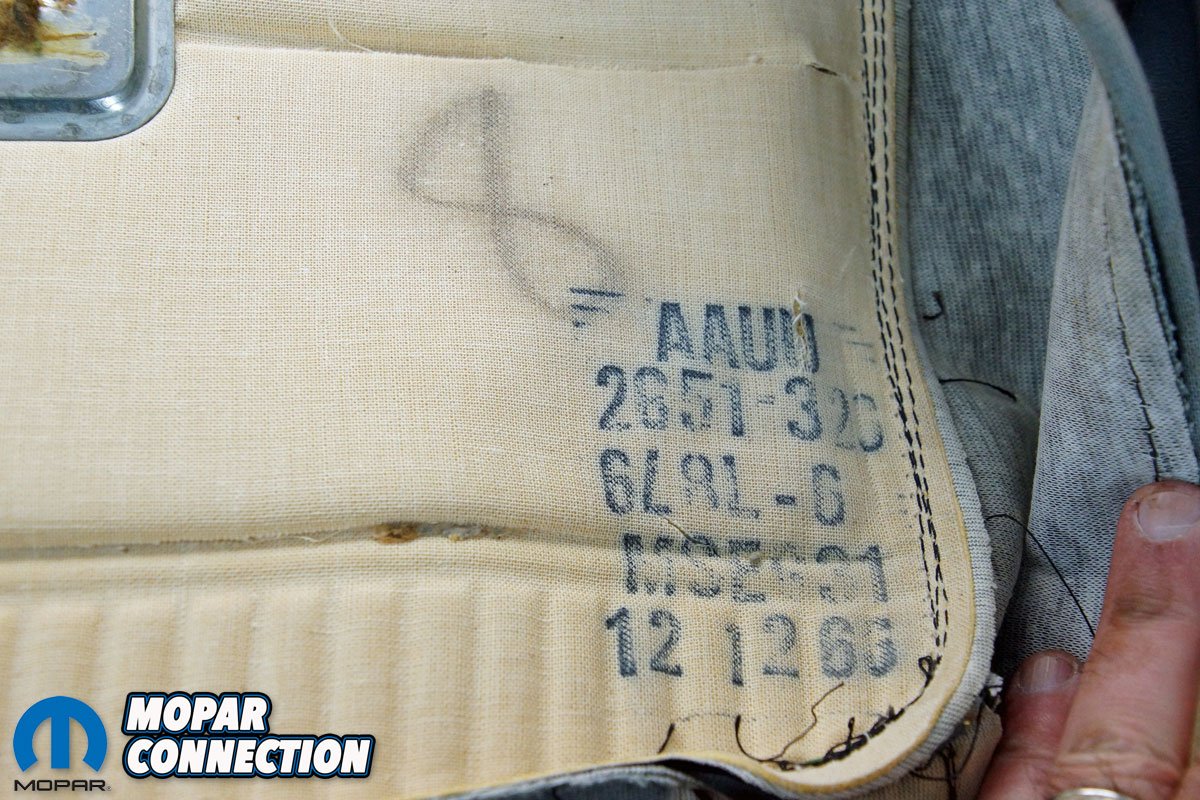
Above Left: The seat cover was pulled back to expose the listing pockets that housed the listing rods (two per cover). The seat cover listing rods are attached with hog rings to the seat spring listing rods. Above Center: We found one listing rod had broken free from the seat cover’s listing pocket. The floating rod moved forward, which resulted in it protruding through the seat foam and the seat cover. Above Right: The FSB’s factory stamped information remained legible over the last fifty-three years. The FSB was manufactured on 2/21/67. The Dart was manufactured 5/11/67, so the seat bottom was manufactured three months before the car.
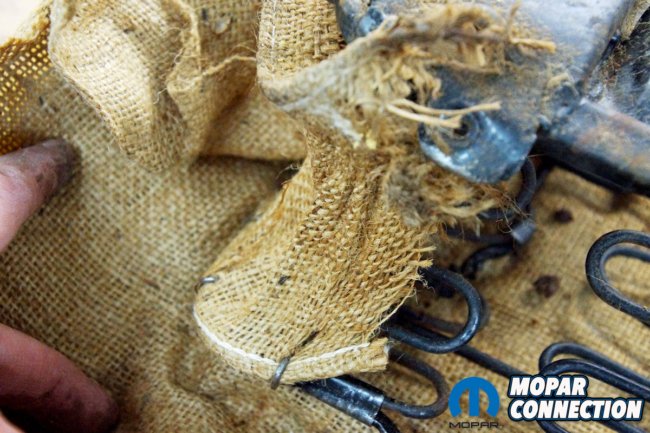
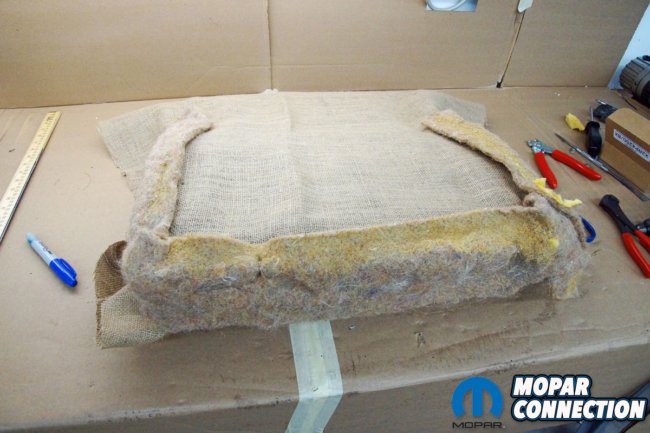
Below Left: We detached the remaining hog rings to free the FSB foam and the attached burlap from the frame and springs. The burlap was in poor shape, which resulted in the foam failing as it slowly began to push through the springs without the burlap support. Below Center: After the foam and burlap were removed, there was some additional burlap attached with hog rings on the frame corners and a layer of felt, which we pulled from the frame. Below Right: All the springs and the listing rods on the frame were in excellent condition. The frame needed nothing more than a good cleaning and a fresh coat of gloss black paint.


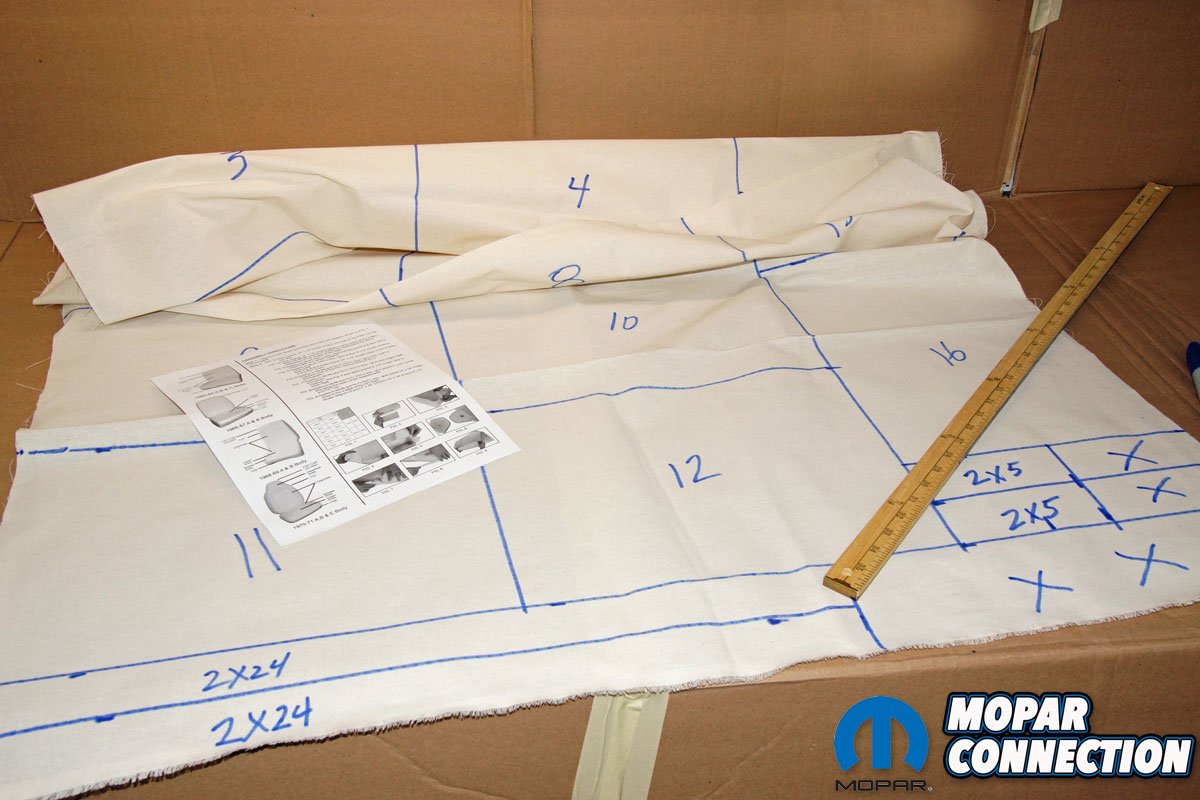
The FSB and FST were painted in gloss black enamel and set aside to dry. During this time, we prepared the new seat foam. The instructions specified a few modifications to the foam to work with the 1967 seat frames. First, we had to cut a large fabric sheet (muslin) into sixteen 10 x 14-inch rectangles, two 2 x 5-inch rectangles, and two 2 x 24-inch rectangles (these strips were not necessary for our installation).
We applied spray adhesive to four 10 x 14-inch muslin strips and each of the four sides of the FSB foam. The loose ends of the muslin strips would provide hog ring attaching points to the frame. The FST foam was prepared in the same fashion. On the FST, we had to fold the top edge of the foam back on itself, which provided a cap for the top of the seat frame. The adhesive was applied, and to reinforce the bond, we glued a 2 x 5-inch strip across each seam.


Above Left: We removed the seat back cover from the FST to expose the inside of the seat. We set the cover aside for cleaning. Again, we took several photos of the hog ring locations and orientation of the cover wrapped around the seat hinges. Above Center: We took note of how the fabric was trimmed on the FST. We wanted to mimic this factory fabric tuck, so the seat back cover would install correctly. Above Right: The cover was pulled back to reveal the cover listing pockets and listing rods (two per FST foam). The listing rods were in good condition, and the pockets had remained intact for the last 53 years.
Below Left: The FST also had the construction date stamped on it. Strangely, the FST cover was made on 12/12/66, which was two months before the FSB and five months before the Dart’s manufacture date. Below Center: We removed the remaining hog rings on the seat foam, but the burlap did not come off with the foam. The last hog rings were removed from the burlap. Based on the condition of the burlap, we decided it could be reused during the reassembly. Below Right: After removing the seat foam and the burlap, the bare frame was exposed, and it was in excellent shape. All that was required to bring the frame back to its factory look was cleaning and a coat of gloss black paint. The small tag (still secured with a hog ring to the seat spring) listed the build date of the seat as 2/27/67.


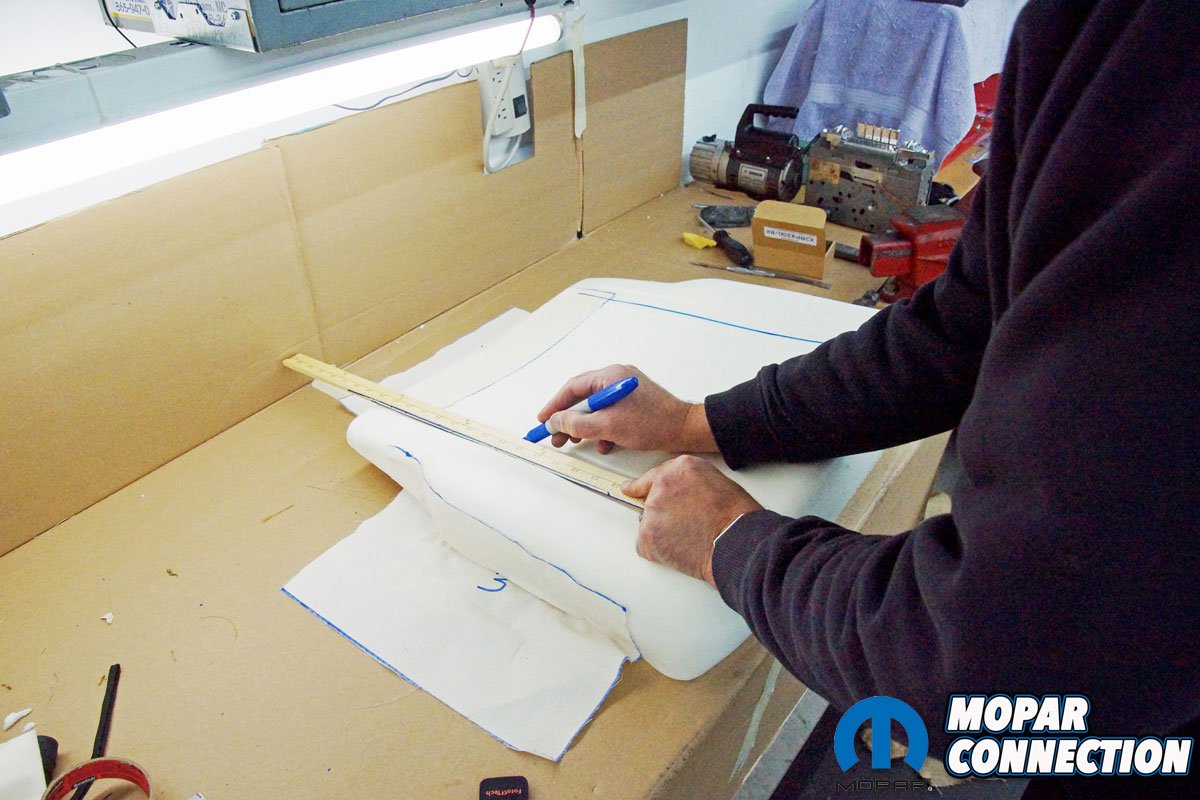
To prepare the FST seat cover for installation, we transferred the seat emblem to the new cover, and we slipped the original listing rods into the listing pockets of the seat cover. We located the centerline of the foam (top to bottom) and measured the distance between the listing pockets of the new cover. We transferred these measurements onto the foam and cut two listing channels about 2/3rds deep through the foam.
At three points on each channel, we cut two-inch slices through the foam (one at each end of the channel and one in the middle). With the foam modified, we fastened the original burlap onto the seat springs and placed the foam over the top of the frame. We clipped the muslin strips to the frame with hog rings and trimmed the excess muslin.
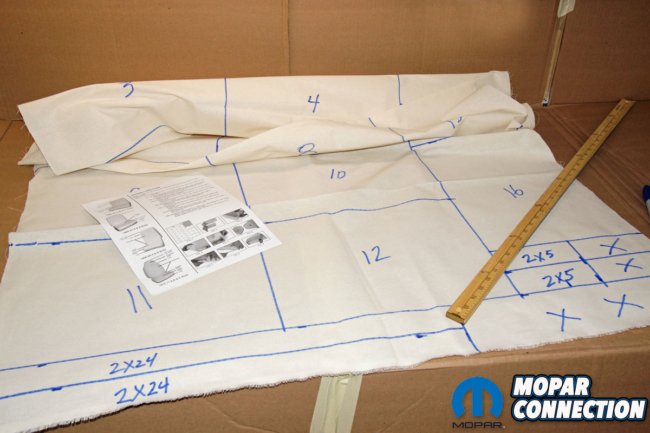


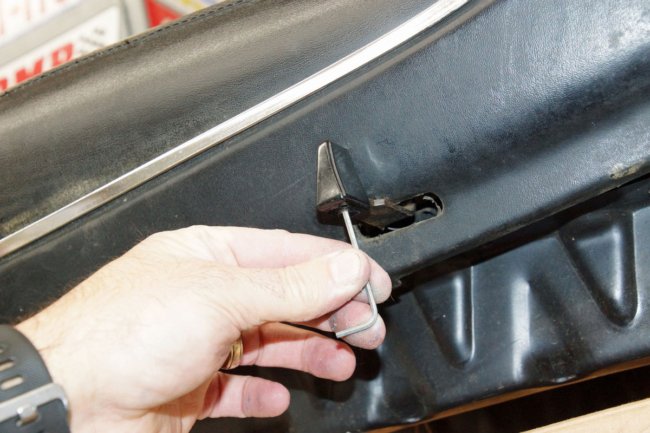
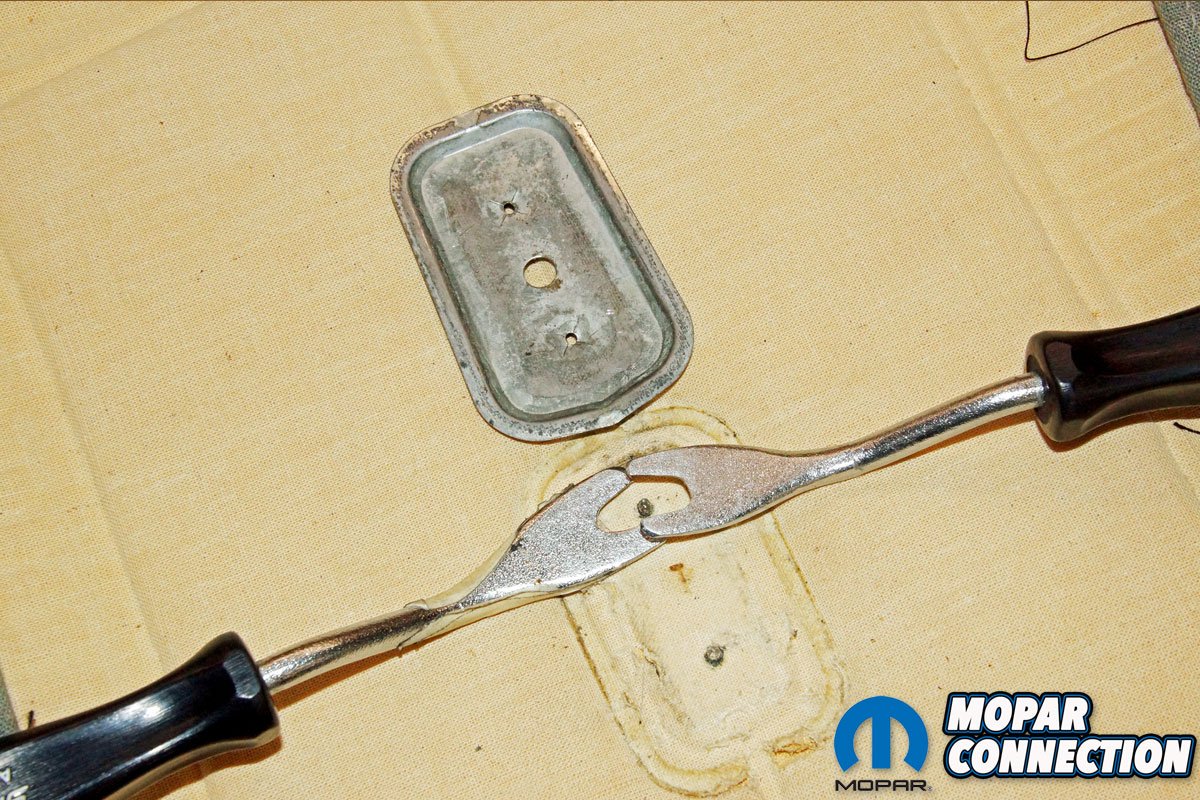
Above Left: The muslin for the front bucket seats was carefully plotted according to the instructions included with the front seat covers. We measured and marked for sixteen 10 x 14-inch rectangles, two 2 x 5-inch rectangles, and two 2 x 24-inch strips (not used with our Dart’s seats). After completing the marking on the muslin, we cut it into twenty rectangles. Above Center: We glued the 10 x 14-inch muslin rectangles strips on the FSB and FST foam (four each). The muslin will wrap over the frame and allow the foam to be secured to the seat frame via hog rings. Above Right: The seat emblem of the FST needed to be transferred to the new cover. It was held on to the factory cover with a retainer plate. With great care, we worked with door panel removal tools (two) to release each emblem pin (two pins) from the retainer plate. By gently applying pressure to one door panel tool while the other panel tool supported it, we developed enough force to remove the retainer.
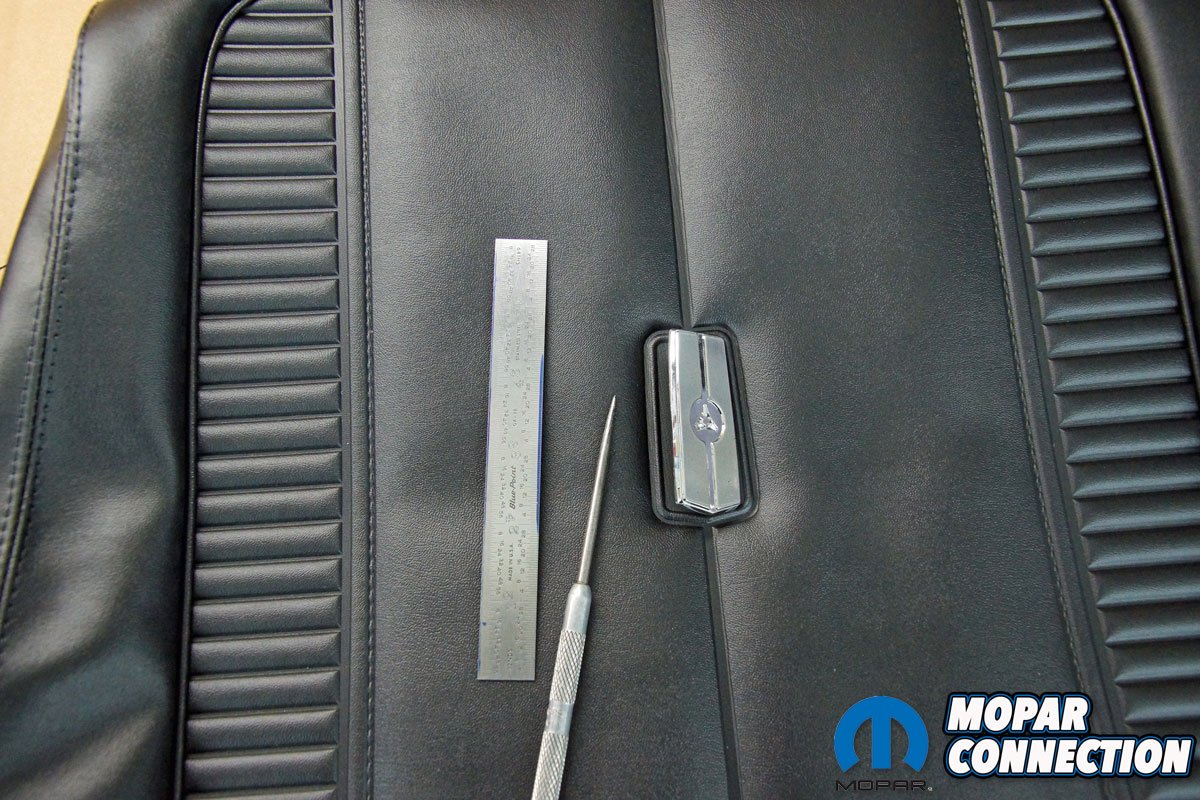
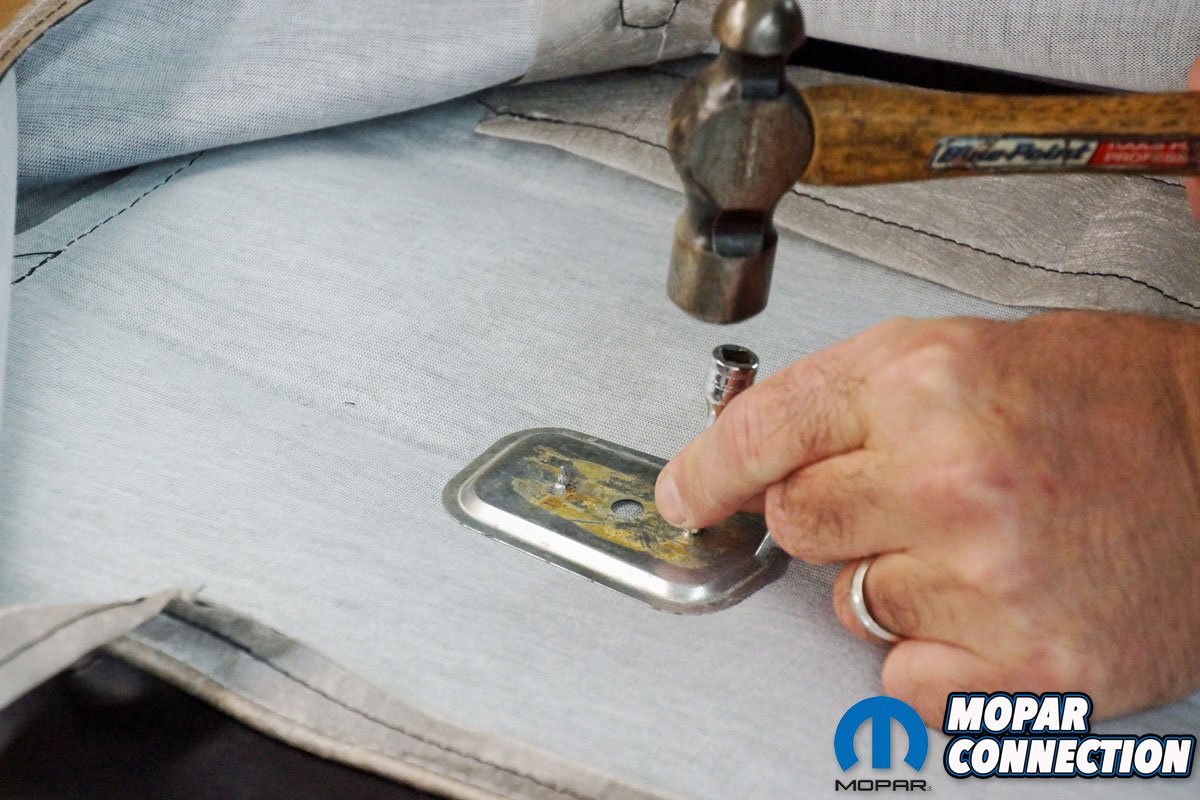
Below Left: We measured the location of the emblem pins on the old seat cover and transferred the pin locations to the new seat cover. After making the measurements, we laid the emblem onto the cover, and with light pressure applied to the emblem, the pins left small impressions in the material. We then used a pick tool to stab a pair of holes (through the impressions) in the seat cover. Below Center: With the emblem pins pushed through the seat cover, we placed the retainer over the pins. With the aid of a hammer and a 6mm deep-well socket, we tapped the retainer firmly over the emblem pins. Below Right: We found the centerline of the FST foam. Then we measured the distance between the seat cover listing pockets and transferred the measurements to the foam (an equal distance on each side of the centerline).


With the foam secured, we installed the seat cover listing rod to the seat frame listing rod through the three holes in the foam. We slipped the second listing rod in its channel, and again, it was secured at each hole in the foam. We stretched the cover over each top corner and around the sides of the FST. We began attaching the seat cover to the frame at the top, and we moved around to secure the parameter while continually checking the seat cover for wrinkles.
We secured the bottom flap of the cover last after pulling it taut around the lower frame and the seat hinges. Once we were satisfied with the seat cover’s appearance, we reinstalled the factory seat back cover with the factory hardware.


Above Left: With a utility knife, we cut two channels (about 2/3rds deep) into the foam. We used a listing rod to determine the length of each channel. Once we had the correct length, we plunged the knife through the channel at the top, bottom, and middle of each channel. Above Center: We straightened the factory listing rods and inserted them into the new seat cover listing pockets. We confirmed each end of the rod was bent over. Bending the ends of the rods would reduce the chances of the listing rod sliding through the listing pocket and eventually damaging the seat foam or cover. Above Right: Because the factory burlap for the FST was in great shape, we reused it. The burlap was fastened into place with hog rings, and we worked diligently to maintain the small reinforcing gauge wires were spaced correctly. The burlap is used to support the seat foam and block the foam from pushing through the seat springs.
Below Left: With the seat foam installed, we stretched the muslin over the seat frame. The muslin was fixed in several places to the frame with hog rings. The muslin provided an anchor point to hold the foam in place while installing the seat cover. The excess muslin was trimmed away. Below Center: To install the seat cover, we pushed a listing pocket into the channel we had cut into the foam. Once firmly inserted, we secured hog rings through the three incisions in the foam to attach the seat cover listing rod to the seat frame listing rod. The same procedure was performed with the seat cover’s second listing rod. Below Right: We did our best to copy the factory installation of the seat cover. Starting at the top of the FST cover, we moved around the parameter, finishing at the bottom of the cover.


Following the same procedures we had employed on the FST, we laid burlap over the FSB seat springs and fastened the burlap with hog rings. Then we measured, marked, and cut channels partially through the foam with three plunging cuts in each channel. The seat cover, with the listing rods installed, was secured to the listing rods on the seat springs.
We stretched the seat cover over the foam and secured it at the front, working around the sides, and finally tightening the rear of the cover. To complete the assembly, we had to cut relief holes in the cover for the FST hinge stop studs and the seat hinge bolts.


Above Left: We were able to stretch the seat cover over the foam and adequately anchor it to the frame. A couple of adjustments were required to attain the proper stretch of the cover. We repeatedly pulled, applied hog rings, and rechecked the cover’s appearance until all four sides of the cover were fastened. Above Center: The cleaned seat back cover was fitted onto two hooks that hold it to the top of the seat. Two small screws secure the cover at the base of the frame. For the passenger side FST, just like the driver side, the same procedure of disassembling, cleaning, painting, and reassembling was followed. Above Right: The FSB foam required two channels to be cut into it. We measured the seat cover listing pocket locations and transferred those measurements to the foam. Again, the channels were cut about 2/3rds deep through the foam with three two-inch cuts through each channel.
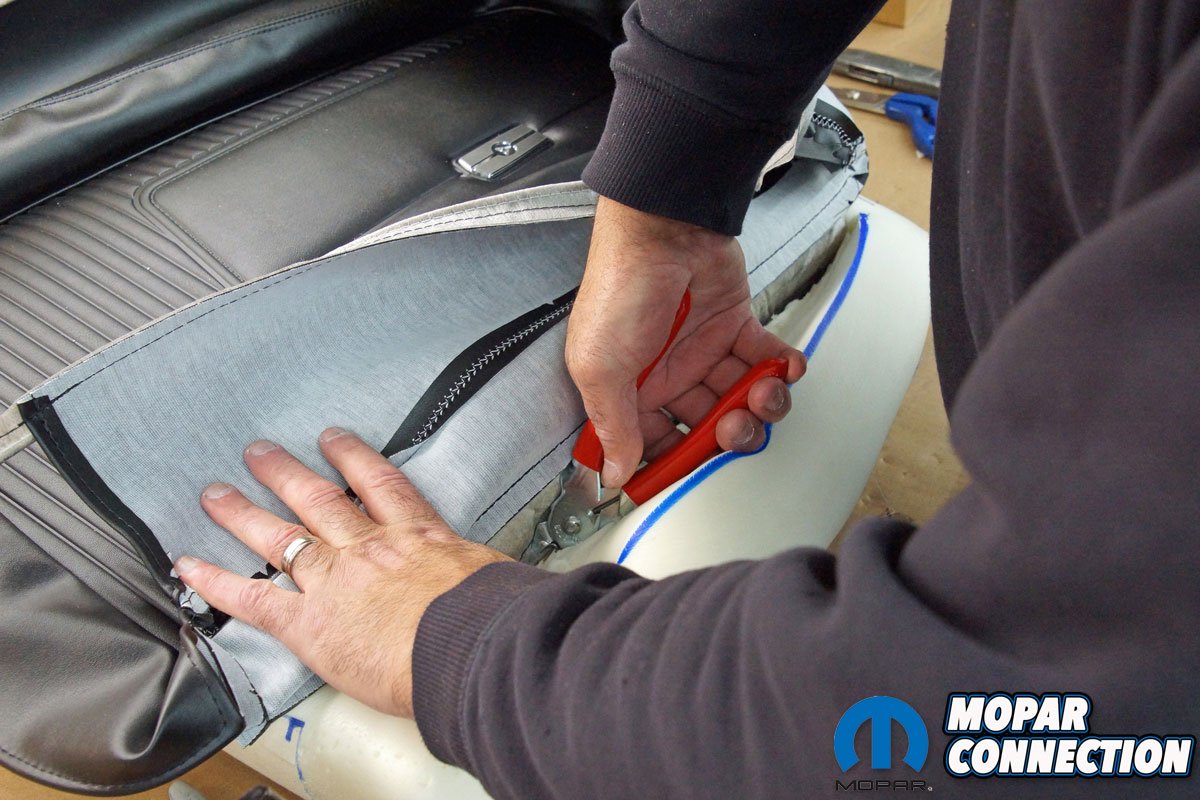
Below Left: Our cleaned frame was wrapped in new burlap while we reused the factory felt around the edge of the frame. The burlap and felt were positioned on the frame with several hog rings. Any excess burlap was cut away from the frame. Below Center: The FSB foam was secured to the frame with muslin, and the excess muslin was trimmed. A seat cover listing pocket was worked into the foam, and the seat cover listing rod was secured to the frame listing rod in three places. The same procedure was applied to the other listing pocket and rod. Below Right: Starting on the front corners of the FSB cover, the cover was stretched over the foam and frame. Once the desired stretch was attained, we secured the cover to the frame. We had to cut out provisions for the seat back stop studs and make small cuts for the seat hinge bolts.

We completed the reassembly of the driver seat by guiding the FST hinges over the FSB. The hinge holes were aligned with the FSB bolt holes, and the bolts were installed. On the underside of the FSB, we attached the cleaned track bezel cover, and the repainted seat track was fastened to the seat frame with the factory hardware.
The last step was to reinstall the knob on the seat adjuster lever. The seat hinge operation was tested, and the movement was effortless and smooth. We completed the passenger side seat in the same fashion.


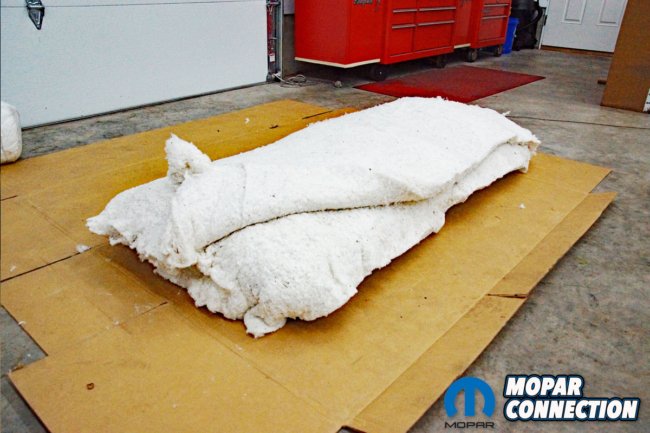
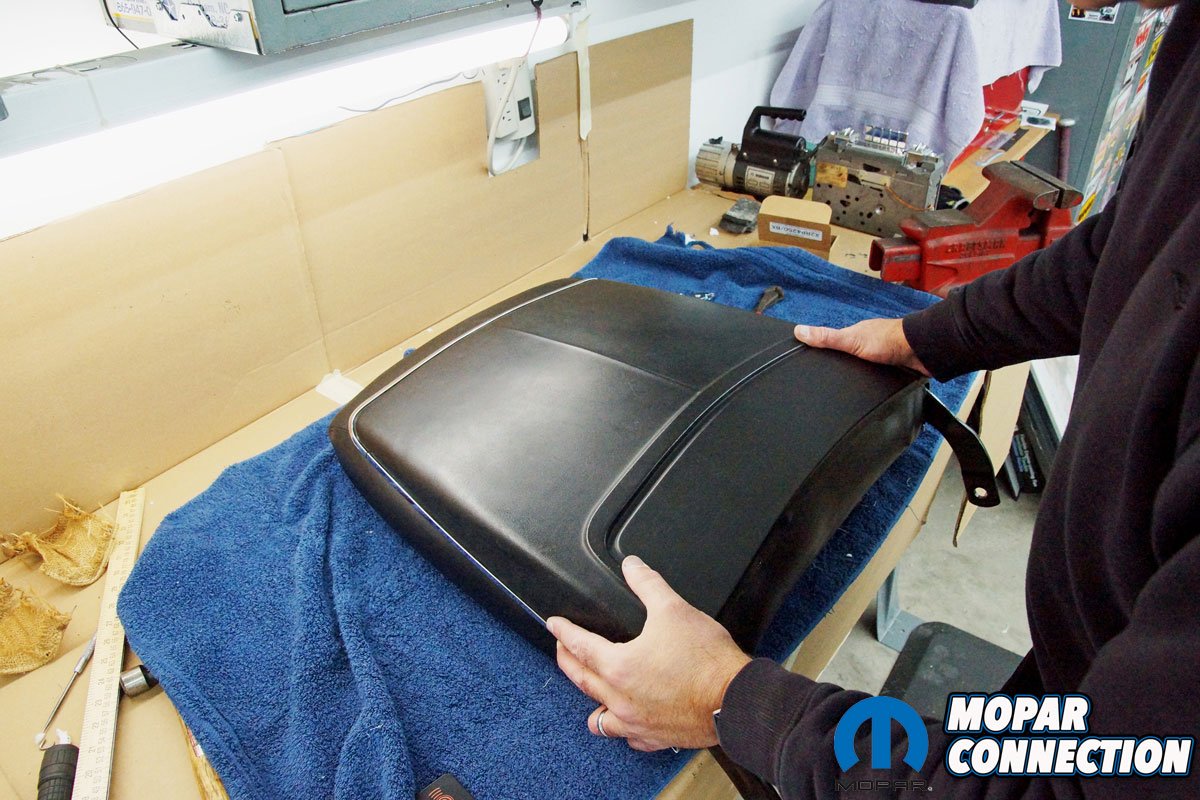
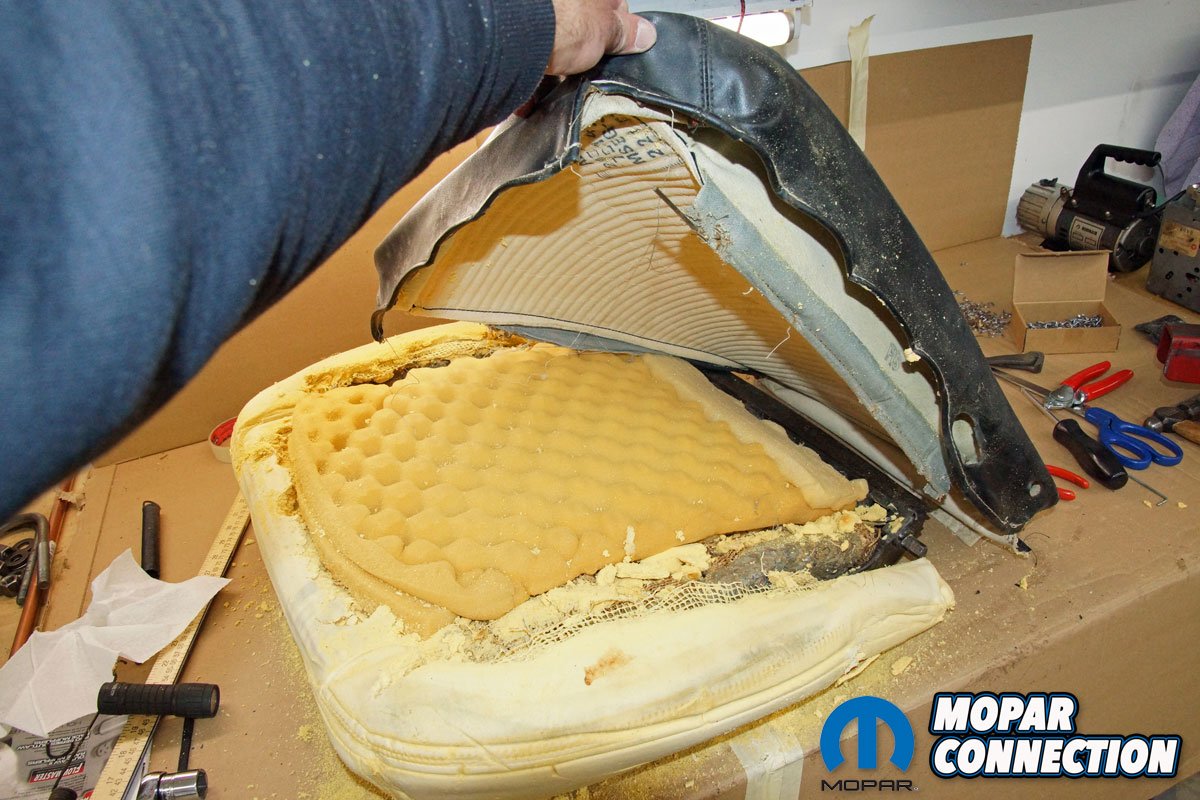
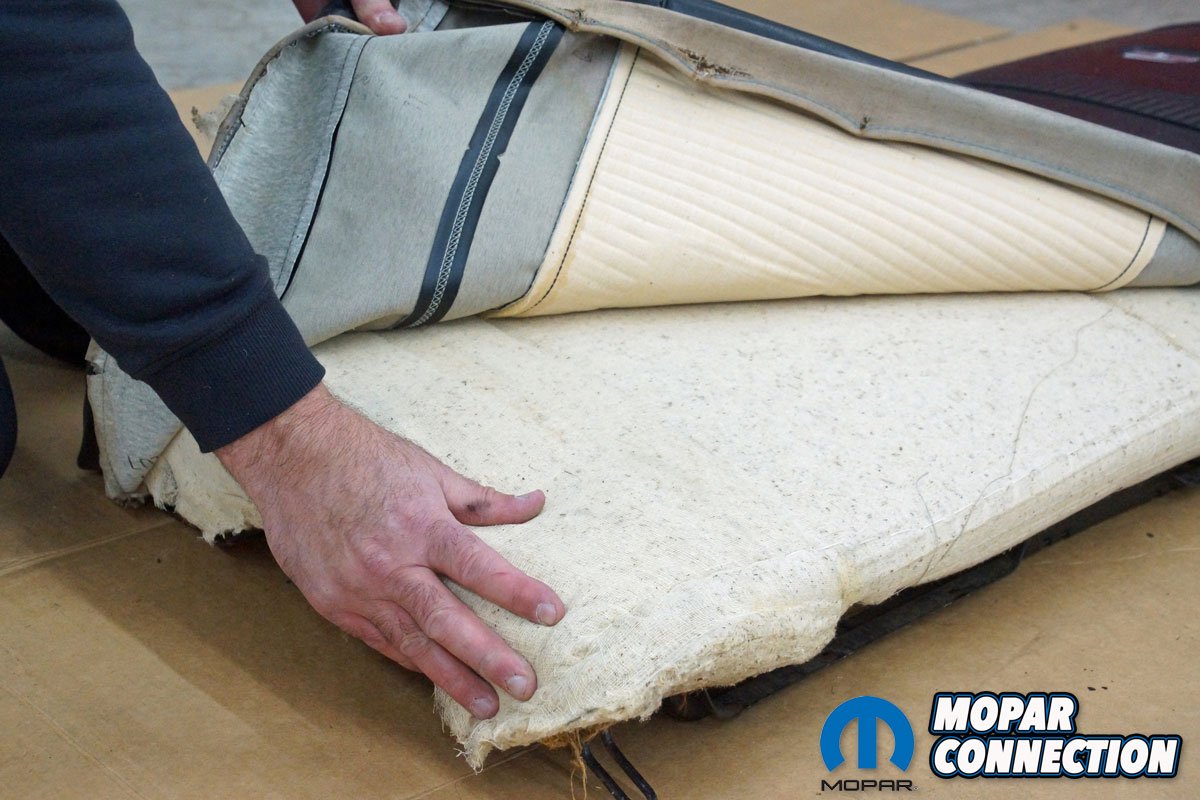
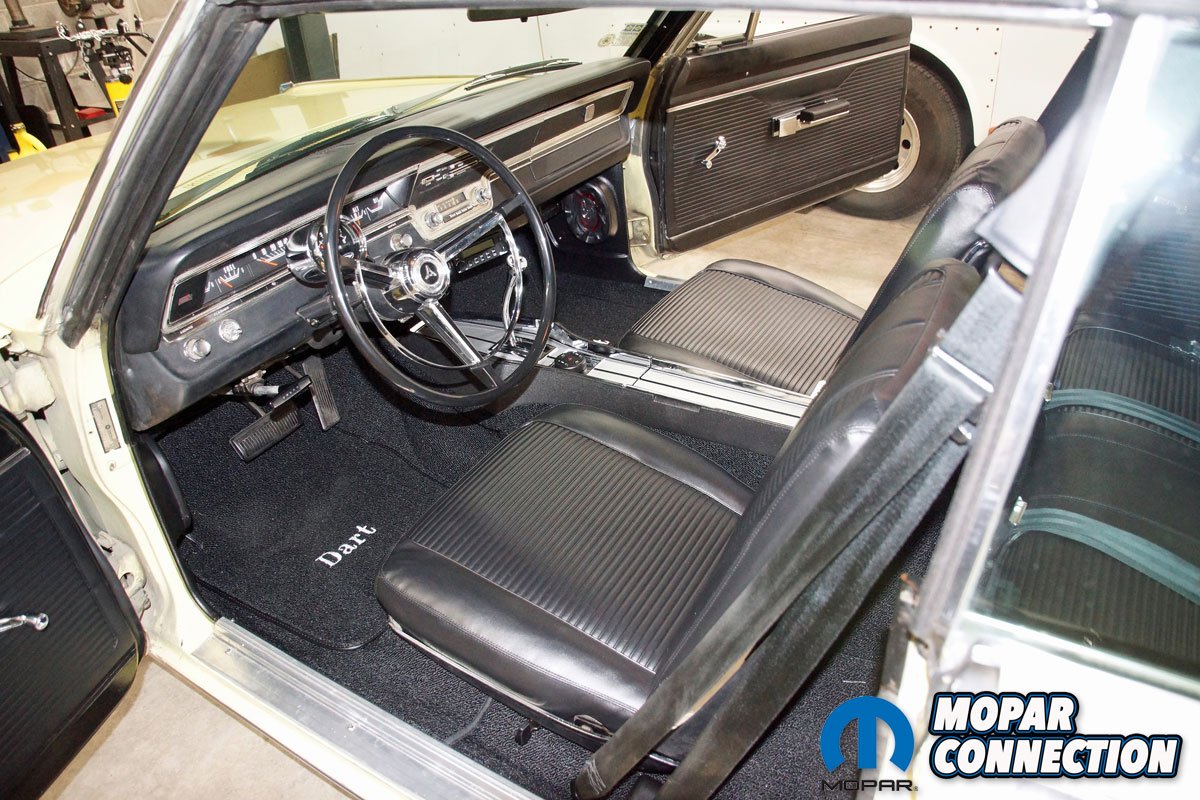
Above Left: The driver seat is complete. For our first attempt installing seat covers on a classic vehicle, we were impressed with the finished product. The passenger side seat was disassembled, cleaned, and reassembled with the Classic Industries components (part no. MA630100) without any difficulty. Above Center: We found the problem with the passenger side FSB. The foam started to fail, so someone ripped the burlap out from underneath, cut out the damaged foam, and stuffed egg crate foam into the seat bottom. There was zero support of the foam. Above Right: The rear seat top (RST) cover was removed to reveal the factory cotton. Although we were not reusing the slightly flattened cotton, it was in perfect condition. A layer of burlap was under the cotton. Both were discarded.
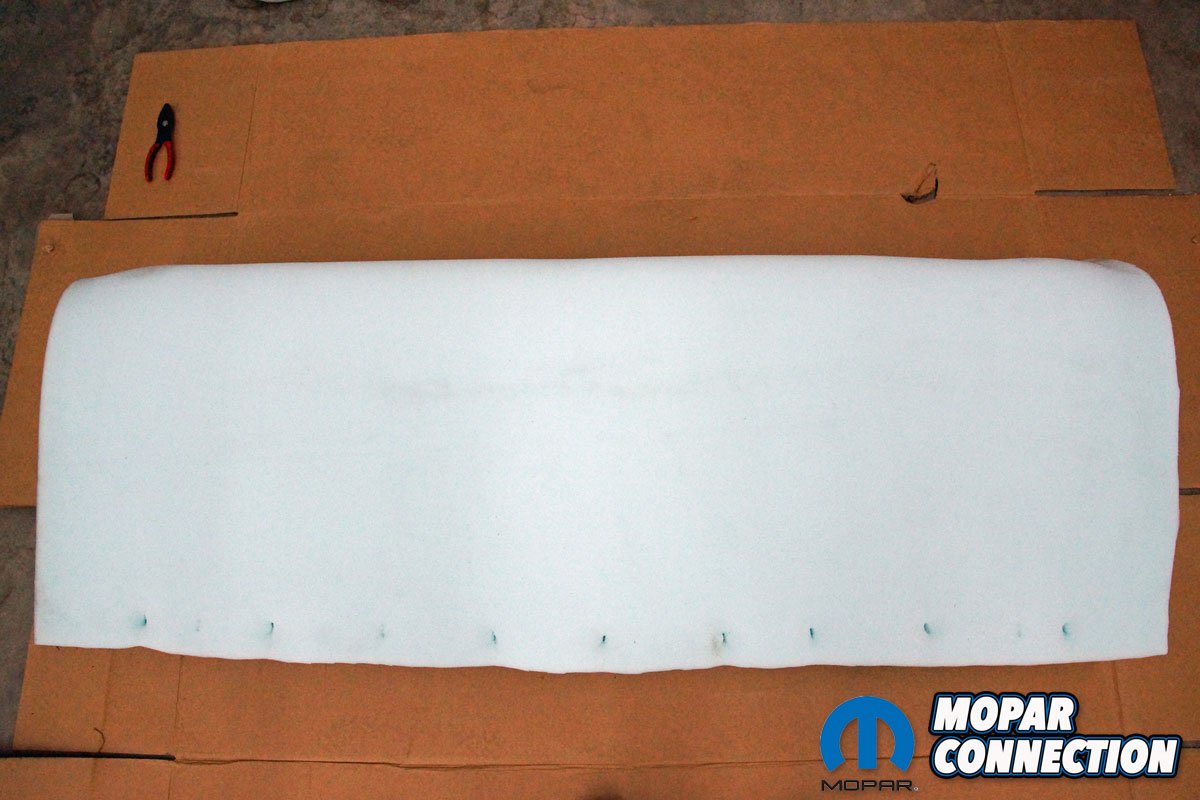
Below Left: The repainted seat frame was covered with burlap, which we positioned and attached to the frame. We then laid three layers of cotton onto the burlap. We took plenty of time to lay out the cotton as smoothly as possible to eliminate any bunching of the cotton. Below Center: We wrapped the RST frame in muslin to maintain the location of the cotton during the seat cover installation. Just like the front seats, we had to transfer the seat emblems from the old covers to the new covers. We used the same techniques we had performed on the front seats. Below Right: The rear seat bottom (RSB) required us to unroll and secure the foam to the frame. Before we installed the foam, we fixed a layer of burlap on the seat frame. To ensure no damage would occur to the new seat cover, we attached the foam on the underside of the frame at the front and the top on the rearmost area of the frame. We carefully stretched the new cover over the foam.


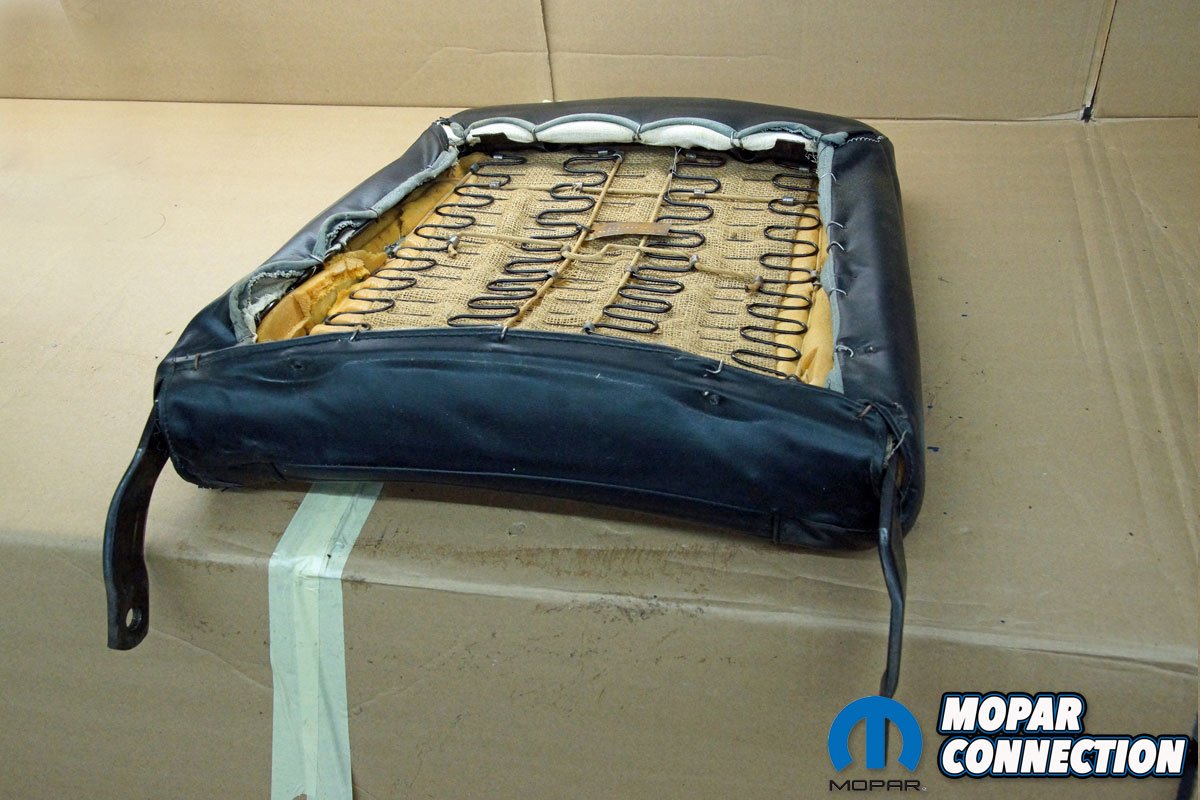
The rear seat bottom (RSB) disassembly was less complex than the front seats. The cover was slipped off the seat cushion after about two dozen hog rings were removed. The seat cushion was not a formed foam; instead, it was a 2-inch foam laid over the seat springs and had hog rings holding it in place. We were pleased to find the frame (and springs) in great shape, so it was cleaned and repainted.
The Classic Industries reupholstering padding kit included new burlap that we laid over the frame. The kit had new foam that was unrolled and secured onto the RSB with the hog rings that we tucked under the frame (so it would not damage the cover). We stretched the new seat cover over the foam and secured it to the frame.


Above: All three seats were completed. Each emblem was cleaned and transferred to the new covers. Although the restoration took a few days, the work was well worth the time. The quality of the Classic Industries products and our attention to detail restored the bucket seats to the 1967 just off-the-showroom floor appearance. The Classic Industries covers worked well with the factory seat hardware and frames. The seat covers are a much richer black than the faded covers that we replaced. The polished original emblems make the seat covers pop. We were surprised at the support and comfort of the seats. It is a night and day difference in the firmness between the old and new seats. There are very few things that make an impact on the interior of a car, like quality seat covers.
Pleased with the RSB, we disassembled the rear seat top (RST), starting with the removal of the cover. Under the cover, we found a layer of factory cotton wrapped with muslin. We released the muslin, cotton, and burlap from the frame, and just like all the other frames, the RST frame was in great shape. After cleaning and painting, a new layer of burlap was attached to the springs. We unrolled new cotton and laid three thick layers over the burlap. The cotton, wrapped with a layer of muslin, was secured to the frame. To finish the seat, we stretched the cover over the cotton and fastened it to the frame.
After completing the seats, we were impressed with how they turned out. The covers look great, and they restored the luster of the interior. Besides improving the appearance, the seats are supportive and comfortable, and there is no longer a concern of falling through the seats or being poked by a wayward rod. Expect the two bucket seats and bench seat to take about two to four days to complete. If your seats are showing some age, give Classic Industries a call about all the interior products they have for your Mopar. They will have you sitting pretty in no time.


