If you have owned a 1967-1976 Mopar A-Body, you have most likely experienced damage to a door jamb in the striker post area. The factory designed the post to pass through a 0.040-inch steel sheet metal door jamb and thread into a large nut on the back of the sheet metal. Unfortunately, after years of constant door usage, the circumference around the post would crack, leaving only the nut to support the post.
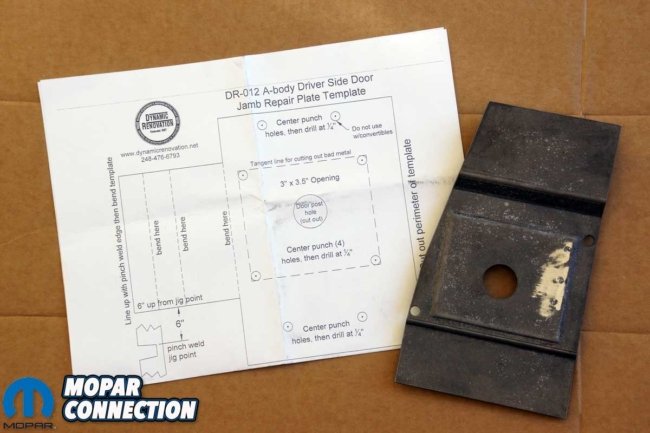
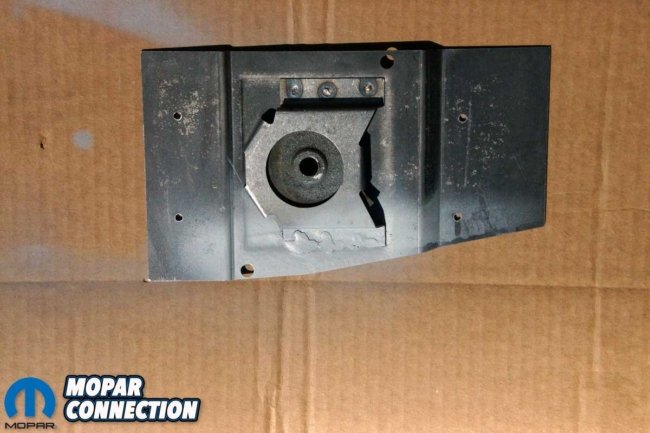
Above Left: Classic Industries offers driver- and passenger-side door jamb repair kits for ’67-’76 A-Bodies. The instructions and a template are included with each kit. Above Right: The 0.062-inch-thick repair plate has a provision for the support nut, which is transferred from the original door jamb.
Classic Industries has driver- and passenger-side repair plates for the two-door A-Bodies (part nos. MP41268 – driver or MP41269 – passenger) to fix the damage. Each 0.062-inch plate is designed to fit in the weakened area and restore the door jamb’s integrity while reinforcing the support area for the post.
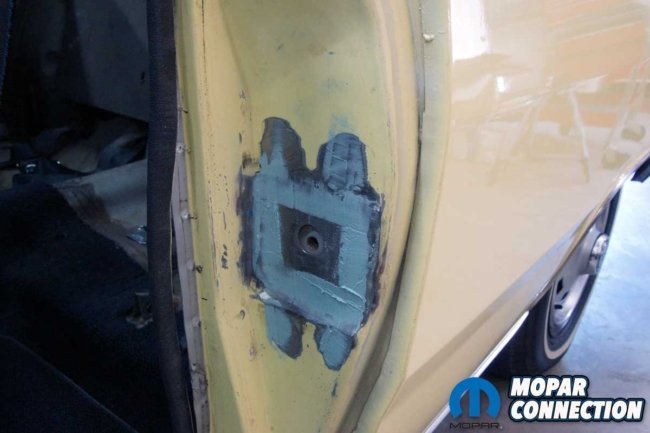
In 2018, we purchased our 1967 Dart. After owning several A-Bodies and being involved with numerous others, we were lucky as the ’67 was the first vehicle we encountered with door jamb damage. The thin door jamb steel had completely broken around the post’s contact with the jamb. As a result, the post moved freely, although the door opened and closed without difficulty.
Above Left: Our ’67 Dart experienced the failure of the door jamb support. The factory steel is only 0.040-inch thick. Above Right: Because we would need the driver door open and we would be welding, we disconnected the battery, so the battery would not be drawn down due to the dome light operation, and the electrical system would not be exposed to damage from the welding process.
We have driven the Dart with the loose post for the last four years. We heard the door rattling every time we took the Dart out for a spin, but the damaged area did not seem to get worse, and it was nothing a twist of the radio’s volume button couldn’t fix. However, with time, we noticed two spots on the door jamb where the paint had worn through from the constant movement of the door, so we decided it was time to make the overhaul.
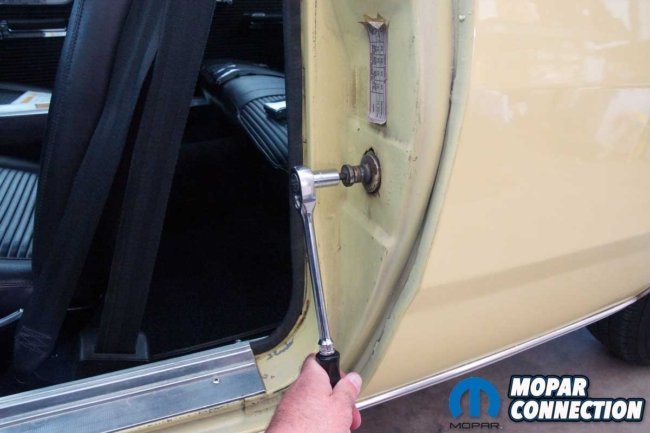
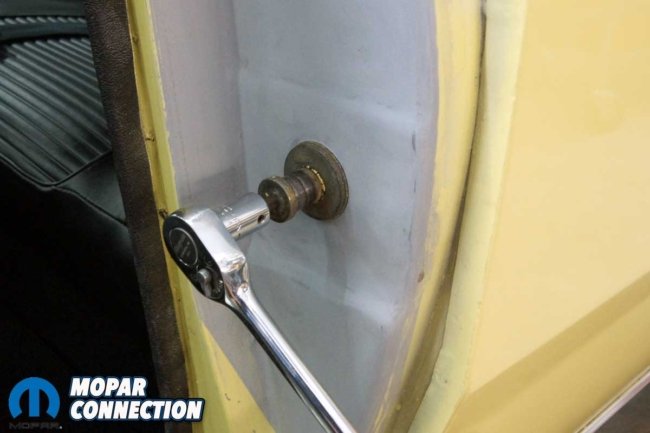
Above Left: The post wobbled around in the door jamb. However, the post’s threads were extremely tight in the caged nut on the other side of the sheet metal. Above Right: After the post broke free, we were able to remove the post and a washer. Unfortunately, the fractured sheet metal dropped into the inner panel. We fished it out later in the process.
With the door jamb repair plate, Classic Industries supplied an instruction sheet and a paper template to properly locate the areas of the door jamb that would be drilled or removed. The first step of the repair was to detach the existing door post. Unfortunately, our Dart’s post was extremely tight (into its nut), and just about the moment we felt the Allen socket was going to break, the post threads snapped free. Once loose, the post was unthreaded without any additional difficulty.
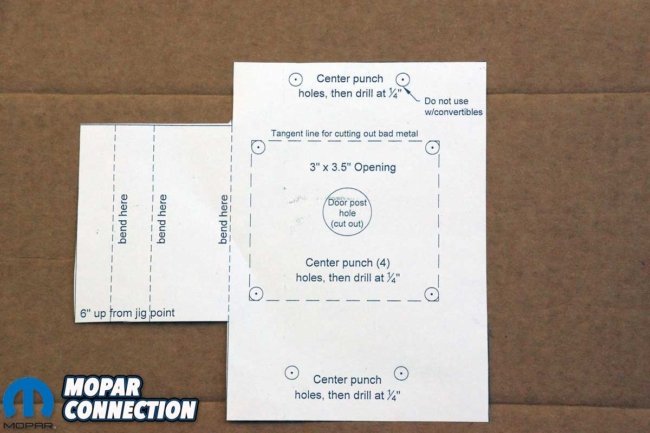
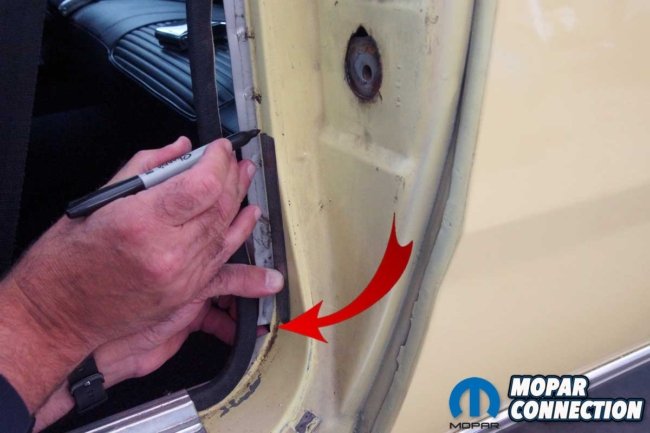
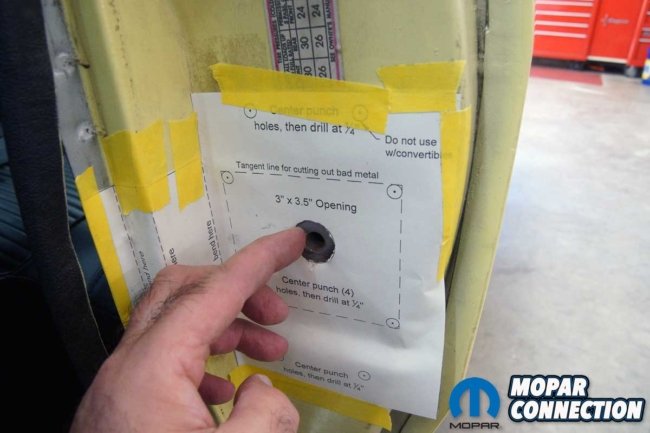
Above Left: We cut the template from the instruction sheet. Above Center: We measured 6-inches from the factory jig point on the pinch weld to mark the point to affix the template. Above Right: The template was formed to the contours of the door jamb and taped in place.
We cut out the template and folded it at each labeled fold line. Next, the door jamb windlace trim was pulled back to reveal the pinch weld jig point. We placed a Sharpie reference mark six inches from the jig point and began taping the template onto the door jamb. The template followed the contours of the door jamb, and once installed, we ensured the door post hole of the template was located over the existing hole in the door jamb.
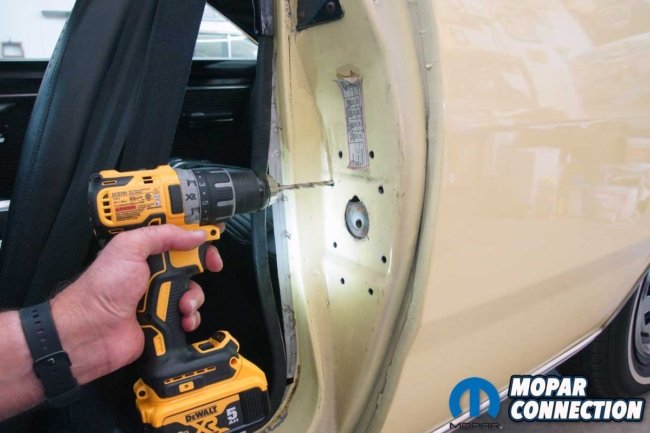
The template had eight points that we center punched. After removing the template, we drilled each mark with a ¼-inch drill bit. Then, with the Sharpie, we marked a tangent line between the outer edges of the four inner holes. The lines formed a 3- X 3.5-inch square that we would need to cut out of the door jamb.
Above Left: We cut out the center post locator from the template. It lined up perfectly with the caged nut. Above Right: The template had eight locator indicators that we center punched.
To protect the paint and interior from flying sparks from our cut-off wheel, we secured protective welding paper to the door opening and laid 8- X 8-foot welding blankets over the Dart. The cut-off wheel quickly cut through the thin factory sheet metal, and at each corner, we took our time not to cut past the drilled holes.
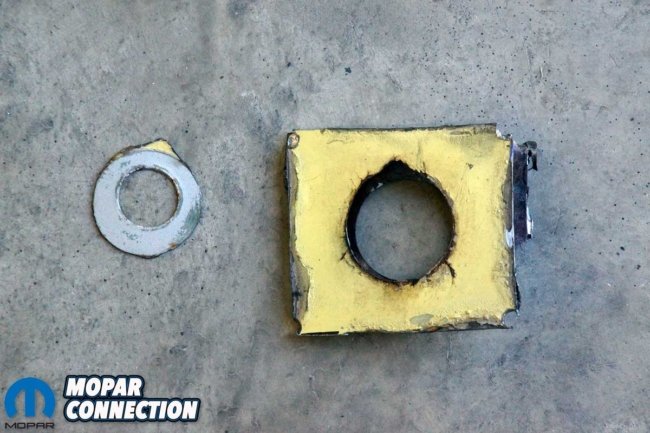
During the extraction of the square, the nut’s cage remained caught in the lower right corner of the cut area. As we twisted to break the remaining metal loose, the cage broke open, and the nut fell out. The nut had to be removed anyway, so this saved us the step of cutting open the cage. Upon removing the metal, we used a file to remove debris from the cut areas and square each corner of the opening.
Above Left: We drilled all eight holes at the center punch marks. Above Center: Between the four innermost holes, we drew lines to mark the area to be removed. Above Right: A cutoff wheel handled the metal cutting.
Before we could test fit the repair plate, we needed to remove the rear seat and the rear trim card (panel). Surprisingly, the fifty-five-year-old plastic vapor barrier under the panel was still intact, and the glue was still soft and sticky. We made a mess trying to cut through the adhesive, but eventually, we gained access to the backside of the door jamb.
The repair plate was pre-cut and contoured to fit inside the door jamb. It took a little finagling to slip the plate into place. The contours lined up nicely, and the raised 3- X 3.5-inch pad fit into the cutout hole of the door jamb. With one hand, we firmly held the plate in place, while with the other, we used a Sharpie to mark the plate through each of the four outer holes.
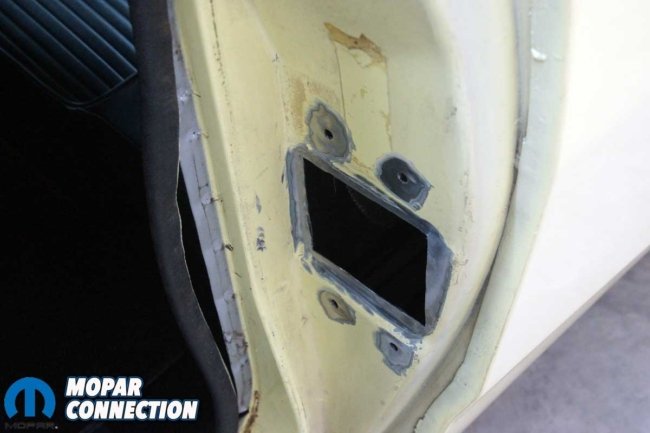
Above Left: The 3- by 3.5-inch area of sheet metal was cut cleanly from the door jamb. Above Center: The nut had to be removed from the cage on the back side of the door jamb sheet metal. Above Right: The broken segment (left) was retrieved from the quarter panel.
We removed the plate and center punched all four marks. The instruction sheet suggested using a #29 (0.136-inch) drill bit to make the holes, but we used a more common 5/64-inch (0.140-inch) bit. We utilized a drill press to make the holes. The repair plate had one edge of the nut cage welded to the plate, so after slipping the original nut into the cage and spraying the area with weld-through primer, we welded the other side of the cage to secure the nut.
We cleaned the plate and the inside of the door jamb with paint prep and then shot each area with a weld-through primer. Next, the plate was slipped into the back side of the door jamb, and with the outer holes lined up, we secured the plate to the jamb with four #8 sheet metal screws. The tightened screws drew the plate securely to the inside of the door jamb. The raised pad was flush with the cutout area of the remaining door jamb.
Above Left: The hole’s corners were squared off with a file. The paint was removed in all the areas we would be welding. Above Center: We needed access to the quarter panel’s inside. The rear seat, window crank handle, armrest, panel, and vapor barrier were removed. Above Right: While supporting the repair plate against the backside of the door jamb, each outer hole’s location was marked on the plate.
Before the welding started, we installed the door striker post. There was plenty of adjustment due to the free movement of the caged nut. However, after a few minutes, we had the post adequately located. The door closed without excessive effort, released cleanly, and matched the height of the quarter panel. Pleased knowing the door post could be correctly positioned, we removed the post and proceeded to the next step.
The instructions specified to tack weld each plate corner at the cutout opening, so we again installed the protective shielding and blankets on the Dart before welding. After spraying a small amount of weld-through primer onto the repair plate and door jamb, we tack welded the plate. With the welds in place, one sheet metal screw was removed, and the hole was chamfered with a 5/16-inch drill bit. We welded the hole closed and followed the same procedure for the remaining screws.
Above Left: The four Sharpie marks were drilled through with our drill press. Above Right: The door jamb nut was transferred to the repair plate. We inserted the nut and welded the cage closed.
The final step in the welding process was to weld the plate to the door jamb hole. We worked slowly and moved from section to section to keep the heat under control and reduce the chances of warpage. Our Lincoln 110V MIG welder delivered excellent weld penetration through the repair plate.
Above Left: We inserted four sheet metal screws in the outer holes to secure the plate to the door jamb. The 3- by 3.5-inch raised plate fit into the cut-out perfectly. Above Center: We taped off and covered every part of the Dart except the work area. Above Right: After welding the four corners of the cut-out square, we removed one sheet metal screw, chamfered the hole, and welded the hold closed. We performed the same steps for the other screw holes. Then, we welded the parameter of the square.
The most time-consuming process of the entire project was grinding the welds smoothly. There are many air-powered tools with different sanding attachments to access all the welded areas. We used a 90° die grinder and interchanged two diameter sanding discs. After the grinding was complete, the area looked good, but there were a few low spots in the welds and there were sanding scratches.
Above Left: We ground the welds smoothly. The grinding left a mirror finish. Above Center: There were a few little voids in the weld areas. We added a thin layer of body filler to cover the minor imperfections. Above Right: Most of the filler was sanded away. The filler cleaned up the door jamb.
We touched up the welds with a thin layer of body filler. While waiting for the filler to harden, we reinstalled the vapor barrier, trim panel, rear seat, armrest, and window crank handle. The filler was rough sanded with 80-grit and then finished sanded with 320-grit.
After completing the sanding process, we taped off the area and applied several thin layers of primer. Our original plan was to repaint the site in the factory yellow color, but the more we looked at the rest of the door jamb, we felt it would be better to wait until we addressed all the areas in need of repair.
Above Left: After priming the area around the repair, we installed and adjusted the door pin. Above Center: We had planned to shoot the factory color over the primer, but after looking at the door jamb, we found additional components that needed repair before the final paint. Above Right: We used 320-grit sandpaper to smooth over the edges of the primer paint lines.
The last step of the procedure was to reinstall the door jamb post. As we had performed earlier, we adjusted the post to secure the door correctly and reestablished the door’s height to the quarter panel.
With the repair panel installed, we were pleased with how easily the door opened and closed and that there was no rattle during the process. Driving provided the same results, no more rattle, at least not from the door. However, we will still need to turn up the radio to cover other clatters.
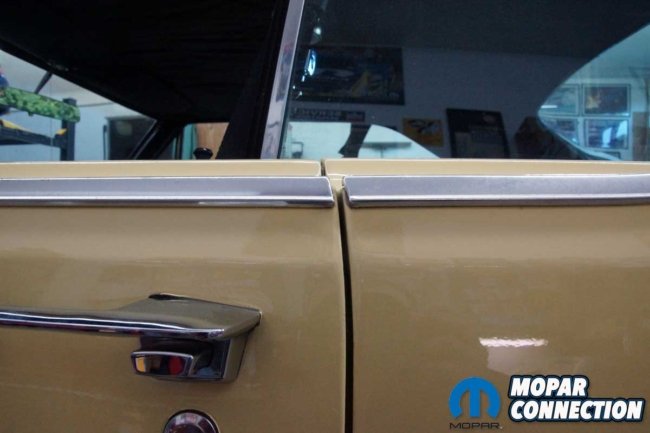
Above Left: After some final adjustments, the door lined up nicely with the top of the quarter panel. Above Right: The door was flush with the quarter panel, and the door closed and opened without difficulty. Also, the door no longer rattled.
While we performed our repair on an A-Body, B-Body Mopars have similar problems with the door jambs, and Classic Industries has the components needed to make those repairs. Contact the reps at Classic Industries about all its repair plates and the complete line of door jambs for classic Mopars.


