


Who would ever guess that one of the biggest issues we face with an install of a T56 or TR6060 is shifting into reverse? Well, fret no longer! American Powertrain now has a solution; they recently introduced a Reverse Lock Out Module that takes care of this common issue. Their reverse lockout module allows actuation of the solenoid in the same fashion a new Mopar equipped with a T56 or TR6060 would.
For those of you that don’t know, 5th gear and reverse are very close together in the T56/TR6060 transmissions. Not only are they close together, but to make the transmission work, Tremec had to design the transmission with both gears synchronized. That means that when shifting from 4th to 5th it can easily slip into reverse, which you can guess is not good. The only way Tremec was able to solve this issue was to design a reverse lockout solenoid that acts like a gate.
On factory vehicles like a 2017 Dodge Challenger, this solenoid is wired into the car and only allows the driver to shift into reverse at speeds under 5 mph. This works out great as the solenoid opens and closes by itself. Installing these transmissions into our classic vehicles with less wires and sensors causes a problem.


Above left: Here is Project Orange Crush safely lifted into the air with our wooden block stands and ready for us to crawl underneath! Above right: The solenoid unboxed and ready to install, with American Powertrain’s detailed instructions.
Many of you might not know, but we have a T56 Magnum in our project Orange Crush which has this issue. We have had the solenoid wired 2 different ways and both were problematic. First, we ran the solenoid to a toggle switch. This worked, but if you forget to flip the switch off then you’re susceptible to shifting into reverse at highway speeds. One can only imagine what horrific carnage would be inside our transmission if you fully shifted into reverse at 60mph.
After leaving the toggle switch on a couple of times and scaring the daylights out of us, we read some forums and decided to wire the solenoid into the brake pedal switch. Normally when you shift into reverse you press the brake right? Well, not always… We found it to be a pain in the butt. Multiple times we weren’t pressing on the brake or pressing hard enough to power the solenoid so we could shift into reverse. Let’s just say it’s a little embarrassing stalling your car at a car show because you shifted into 5th and not reverse like you thought. All of these issues are now cured thanks to American Powertrain!
American Powertrain has been installing 6-speeds for quite some time now and they have come across this issue time and time again. Now, with a simple black box and a couple wires, all your headaches can be relieved. We recently installed their Reverse Lock Out Module on Orange Crush and here’s how it went:


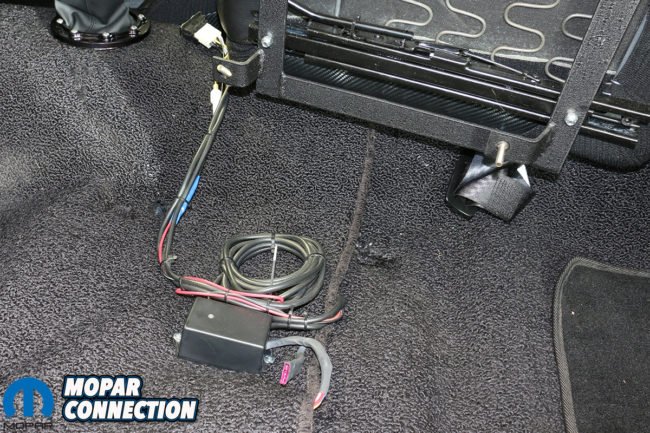
Above: We removed the driver’s seat to install the module in the same spot we have our electric exhaust cut-out switch. The module and cut out switch will be relocated eventually.
Out of the box, the module was packaged very nicely. The module came with a few zip ties, a couple stainless mounting screws and instructions for the installation. The module has 6 wires that need to be tied into the car and transmission wiring. APT knew that the module would be installed into many different vehicles and would be a lot easier if they kept it as a universal setup.
There were a couple convenient warning tags that came banded to the box that said to not hook anything up until the black ground wire is hooked up first. If any of the other wires are hooked up before the ground it could short out the module. Additionally, it was convenient that each wire was color coated and labeled so you know which wire is which and you don’t have to go back and fourth trying to remember what each wire is. There was also a built in harness with a 3amp fuse that helps protect the module.
Next, we dove into the instructions. Just like we would expect from American Powertrain, the instructions were very clear and easy to understand. We did notice multiple times throughout the instructions not to connect any wires until the ground wire was connected and to make sure battery was disconnected. The reason behind this is due to the possibility of shorting out the module before it is ever installed. Unfortunately, electronics are vulnerable to shorting out when they are not installed exactly like the manufacturer requires and this would not be covered under any type of warranty.
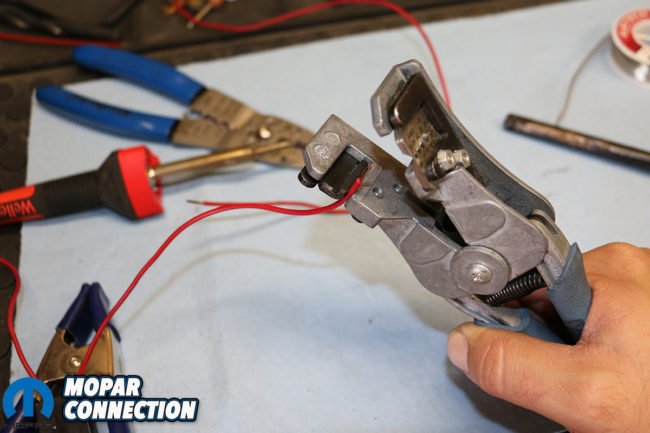


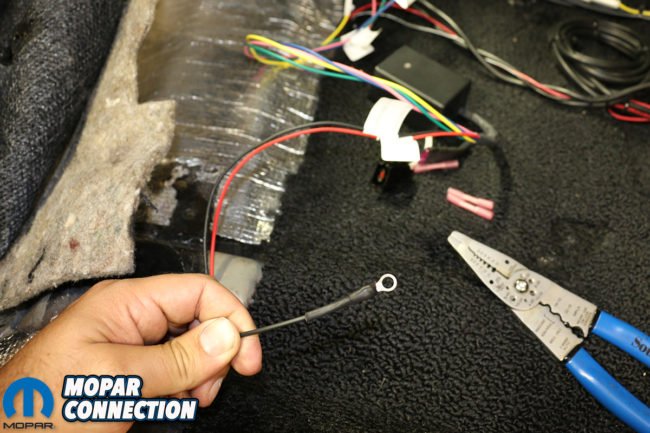
Top: After rummaging through our electrical supplies we came up with a 10 amp fuse that was already hooked to a red wire. Bottom left: A little trick we have found when soldering is using a couple clamps for each side of the wire to hold it in place while you solder it together. Bottom right: Here is the finished product of our ring connected soldered onto the ground wire for easier installation under the dash.
Another issue that can be problematic is installing the lockout module with the transmission in gear, it needs to be in neutral. The rest was fairly straightforward; connect wires labeled VSS to the VSS plug, the wires labeled lockout solenoid to the solenoid, black wire to a ground and lastly connect the red wire labeled power to the ignition switch and a 10 amp fuse. Note: if you do not have any of the plugs for your T56 , be sure to mention this to American Powertrain when ordering, as they have the different plugs you need in stock.
For easier access of the transmission and the underside of the car, we jacked it up and used our wood blocks under each tire. The wood blocks you see are easy to make yourself and are a great way to securely get your vehicle up off the ground.
Since the module is universal, each wire is 6ft long, so your options for installation are wide open. You can easily mount the box under the dash, in the glove box, behind the kick panel or in many other places. American Powertrain does not recommend installing the module anywhere that it might come into contact with the elements though. The module is not weather proof; water, high heat, etc. could cause issues. Inside Orange Crush the dash is a little cramped; we use our glove box and our kick panels have no room. The most convenient place for us was placing the module was under the drives seat. This was not necessarily ideal since Orange Crush should get a rewire in a couple months, but we can move the module under the dash at that time.
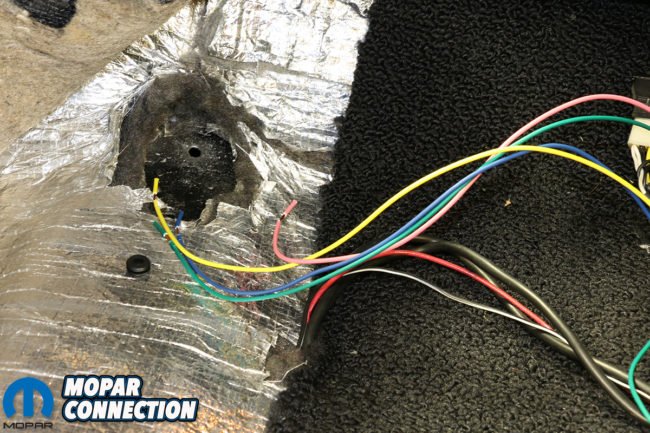
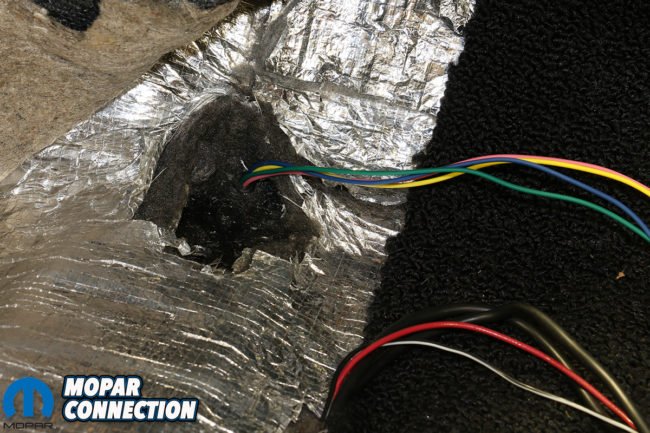
Above left: Top left Here you can see the hole that we drilled and the grommet ready to be installed to protect the wires from chafing. Above right: You can see all the wires have been ran through the grommet and ready to hook up to the sensors on the transmission.
Now that we had a location picked out, it was time to start tearing stuff apart. Like most installs that we do, removing stuff that is in your way saves a lot of time and headache. We started by removing the driver’s seat, the sill plate, kick panel and the pulling up a small section of carpet. We were ready to start running wires.
After reading the instructions we wanted to splice in our 10 amp fuse into the power wire and solder our ring connector to the ground wire outside the vehicle. It is a lot easier to solder and heat shrink the wires on a workbench then inside or underneath the car. However we did not solder any of the plugs for the sensors because the plugs would need such a big hole in the floor, we decided to worry about them later. After splicing the 10amp fuse and our ring connector onto the modules wires we were ready to run the wire inside the Dart.
Then we disconnected the battery cables from the battery. Whenever you are working with the electrical system you want to make sure the battery is completely disconnected, as this prevents any shorts and in this case protected our module. Once the battery was disconnected we found a good spot under the dash to install our black ground wire before we started with anything else. Again, we double-checked to ensure that the battery was disconnected, and began with the ground wire set-up.
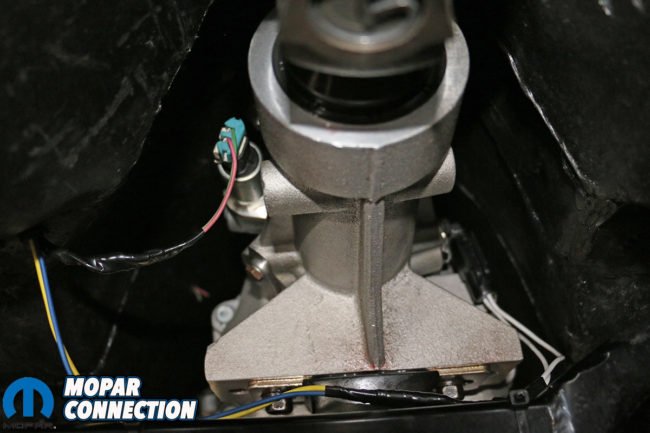
Above left: You can see the Lockout switch on the left with the green and pink wires. The Blue and Yellow wires were routed across the transmission crossmember to the VSS on the right. Above right: Here is a final look of the lockout module installed and the wires tucked away before the seat is reinstalled.
We drilled a small hole into the transmission tunnel for the wires going to the VSS and lockout solenoid. After drilling the hole we found the proper size rubber grommet to protect our wires from rubbing bare and shorting out. After running the wires through the grommet we needed to figure out what wires went to what sensor. The Orange Crush had no pre-existing wires running to the VSS, which made for a simple hook up because the VSS is non-polar and it didn’t matter what side of the sensor the wires went to. If your car has existing wires running to the VSS, you need to test the plug for which side is the signal.
We had our old wires from the brake switch running to our lockout solenoid, which we removed. The lockout solenoid is also non-polar and you can install the wires to either side of the solenoid. We happened to get lucky and the lockout wires we had were green and pink just like the ones for the module. For simplicity we kept it color coated.
After we spent time trying to solder the connections together under the car, which we will avoid in the future, we needed to figure out how we were going to route the wires to the lockout solenoid and the VSS. The best way we found to route the wires were to zip tie them to the transmission cross member so they wouldn’t lay on the exhaust or get wrapped up in the driveshaft.
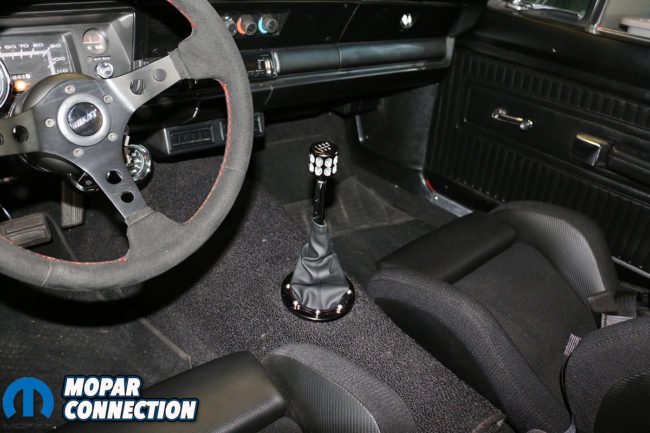
Above: The final installation reveals that nothing can be seen from the outside. In all, the installation took half a day (including stopping to take pictures).
With the plugs connected and wires secured it was time to hook up the power wire. Running the power wire was simple; we were able to run the wire under the carpet to the rocker panel, down the side of the car and to the ignition switch. With all of the wires installed it was time to test the reverse lockout module.
We hooked up the ground cable first and then the positive, dropped the car back down off the blocks, and fired it up. For the moment of truth: we shoved clutch in, shifted into reverse, slowly let out the clutch and we starting moving backwards! Now, I understand this isn’t as exciting as it might sound but we were pumped. We backed the car out of the garage and took it around the block.
After we starting moving over 5mph, reverse was locked out like it was supposed to be. When we came to a halt, I was able to get it back in reverse. What a relief! We were stoked that our T56 Magnum now works like it was designed to. We don’t have to worry about accidentally shifting into reverse or looking like an idiot when it doesn’t go into reverse when we need it to. American Powertrain has done it again! Making 6-speed swaps easier and easier.


The Vss for modern cars with existing wires to the Vss are polarized and you can not switch them. The yellow wire is the signal wire and the blue wire is the reference wire which is nothing more than a ground wire. The blue wire is not even needed with any modern car with a digital dash and not recommended to even hook up at all. Hooking up the blue wire can cause problems with the computer on some cars—-I found out the hard way.