


For the muscle car guy or gal that grew up in the land of carburetors and distributors, the stigma of any modern engine is always going to be the dreaded computer. Popping a performance hood used to be followed by a swift flick of the air cleaner wing nut and a treasure hunt through the tool case to find metering rods, jets, or power valves. Nowadays, there’s usually only one tool that’s needed and that’s a laptop.
What’s made computer-controlled tuning just as manageable as adjusting idle screws on a Holley four-barrel is easy-to-use, intuitive software like HPtuners’ VCM Suite. Consisting of a scanning module (VCM Scanner) and a tuning module (VCM Editor), the Suite is a Swiss army knife. The Suite’s point-and-click versatility to maximize modern engine and transmission performance is the same relative ease of dialing in a double pumper.

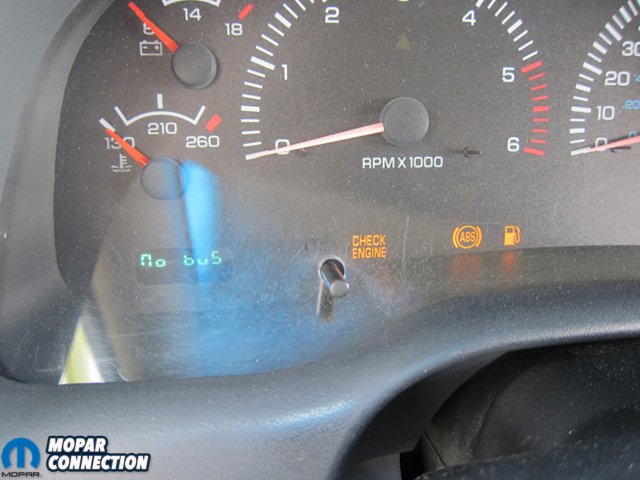
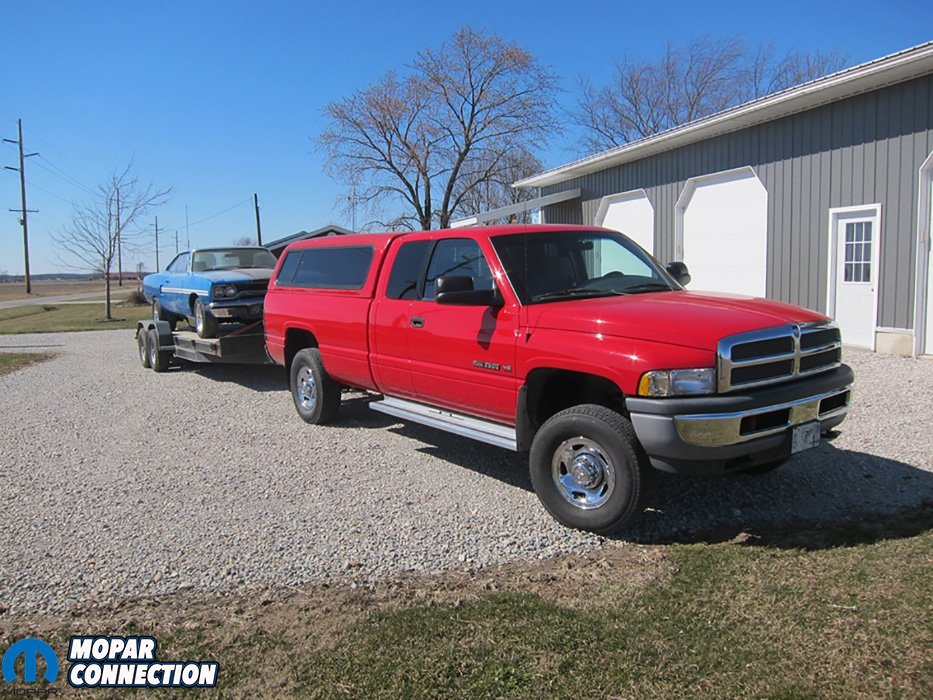
Above: Our 1999 Dodge Ram 2500 powered by a 5.9 Magnum engine.
There are always two downloadable versions of the Suite: one is stable and one is a working Beta that includes the latest programming but might have a few bugs to work out. Either version will come equipped with VCM Scanner, which is basically a comprehensive scan tool. It can help diagnose malfunction indicator lamps (MIL), check engine lights (CEL), or diagnostic trouble codes (DTC). Data can be logged with a variety of charts, graphs, and dashboards for analyzation in real-time or after the fact.
VCM Editor, on the other hand, is the programming side of the Suite that allows users to modify vehicle parameters such as fueling, ignition, and transmission control. After modifications are made, the Editor can reflash the powertrain controller to set any changes. It’s an incredibly powerful tool that is useful for engine swaps, transmission conversions, and tuning. Even the smallest of bolt-ons can benefit from some refinement in fuel or spark strategy and the Editor makes those adjustments easily.


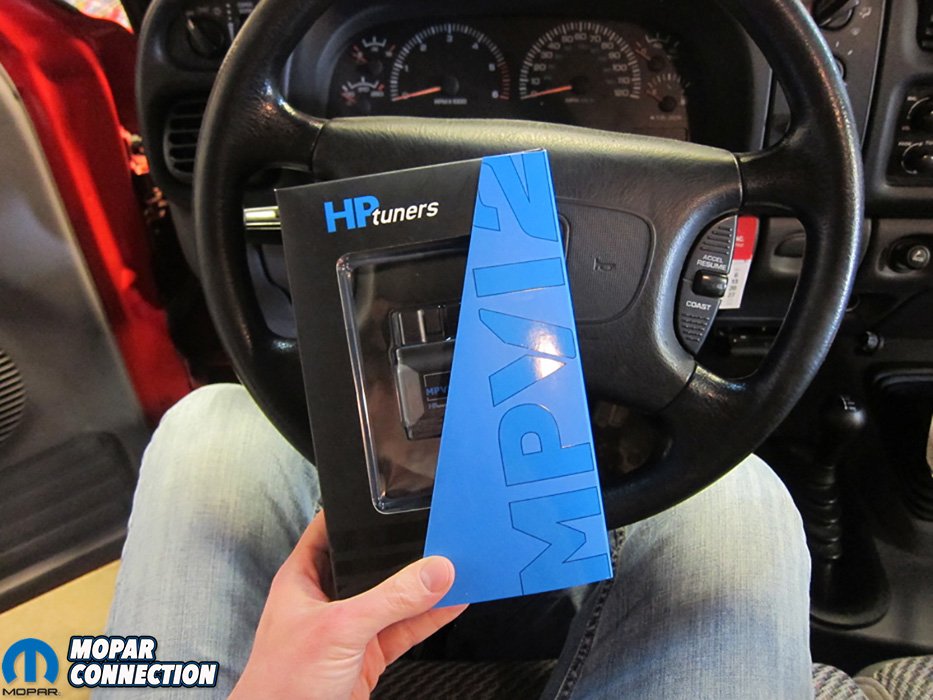
Above Left: Our 1999 Ram 2500 was primed for more power via the HPtuners MPVI2. Above Center: Plugging in put us in the driver’s seat in more ways than one. Above Right: With our laptop plugged in, we were ready to get to work.
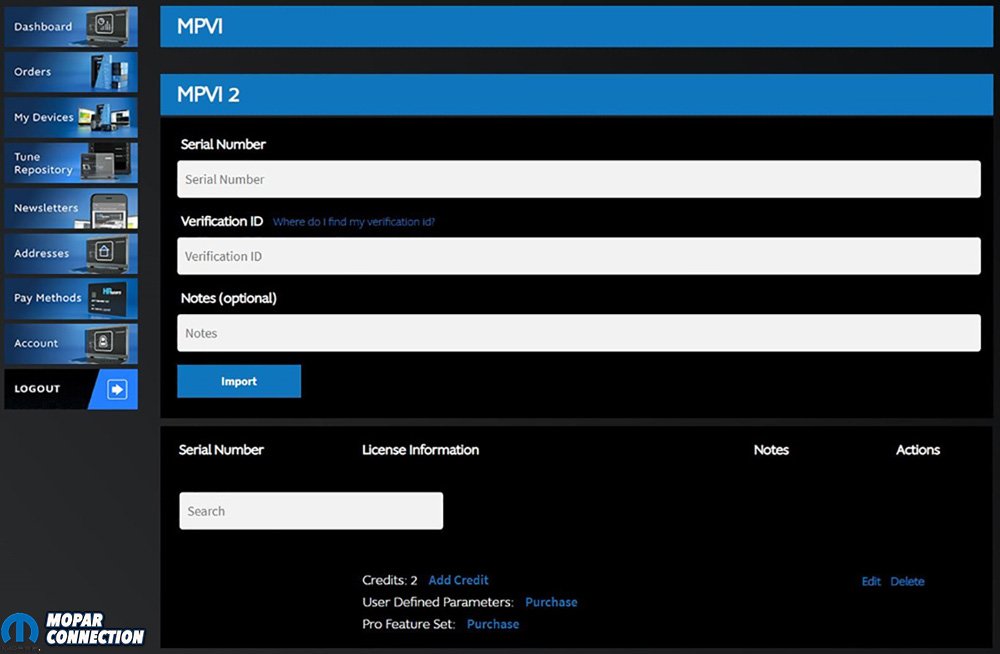
The hardware part of the equation is the MPVI2, a device that acts as a translator between the vehicle’s controller and HPtuners’ software. It’s a little pod that plugs right in to any OBDII (on-board diagnostics) port. As long as that make and model is supported by the VCM Suite, connectivity is that simple. Many vehicles made after 1996 are able to be tuned and continual updates are being made to keep up with new models. At the time of this writing, tuning capabilities have just been added for the 2021 Dodge Durango SRT Hellcat; that’s a pretty quick turnaround for a car that’s been on the open market for less than a year.
Even though HPtuners is most well-known for being on that cutting edge of engine control customization, they do their history homework as well in order to support legacy controllers like Chrysler’s retired JTEC system. Ma Mopar debuted the Jeep/Truck Engine Controller (JTEC) in 1996 to comply with the United States’ widespread mandate of OBDII on all cars and light duty trucks built thereafter. This all-new powertrain control module (PCM) featured three 32-pin connectors to manage both engine and transmission function. Revolutionary at the time, the JTEC PCM was programmed to rely on simple pulse-width tables for fuel management along with vacuum-based ignition control.


Above Left: With the laptop linked in, we dove into initial setup and downloads with a dead-steady internet connection. Above Right: It took a little bit for the initial reading.
Our JTEC-equipped test subject happened to be the shop’s tow rig, a 1999 Dodge Ram 2500. Featuring a 5.9 Magnum and nearly 200,000 miles on the clock, the mission was in motion for more motor-vation. With hitch duties including both a 7,600 lbs. camper and a 10,000 lbs. trailer, the modest Magnum has been reliable but lacking in the power department. Before budgeting any bolt-ons, we wanted to see if we could squeeze any more seat-of-the-pants oomph out of the as-built assembly.
Once our MPVI2 was registered online and loaded with credits, it was time to plug in and play. The device found its way to the OBDII port which, on this truck, was to the right of the gas pedal and aft of the transfer case shifter. We mated the MPVI2 to our laptop with the included USB cable.
Above: Reading the controller took about four minutes with a host of warning lights temporarily blinking across the dash. The original file was saved as soon as the read was complete.
With VCM Editor open and the ignition on, we found the “Read Vehicle” button which is a chip icon with a green arrow pointing up on the toolbar. A single click brought on the “Vehicle Reader” pop-up that was empty until clicking “Gather Info.” This populated the vehicle information, VIN, hardware, and operating system fields while confirming connectivity. All looked correct, just like a doctor picking up a scalpel, we tapped the “Read” button to begin the operation.
As expected, the read took about four minutes to complete. A battery tender kept an eye on vehicle voltage so we didn’t lose connection midway through. The sudden death of a battery is usually just a nuisance in the middle of a file read, but has a high likelihood of turning a PCM into the proverbial “brick” when writing any data. Maintaining a solid twelve volts is a must.

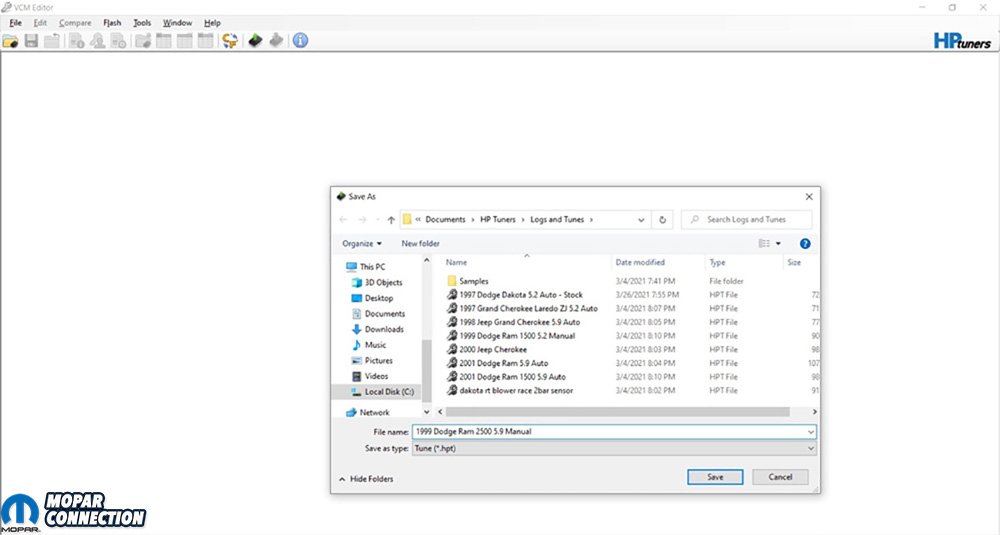
Above Left: We saved our base tune incase anything ever happened in the future we could return back to where we started. Above Right: The most important data was within the base fuel, main spark, and power enrichment tables.
Once the read was done, the tune file was saved before any changes were made. This practice can provide a good baseline if a tuner gets too far down the rabbit hole and wants to reset back to stock. It basically offers a big undo button in the event of a fat-fingered file.
After a tune is read and saved from the PCM, changes can be made unplugged and offline. Where those alterations occur will obviously have a positive or negative impact on performance. Unfortunately, manufacturers weren’t too keen on standardizing engine management nomenclature and as older controllers continue to be superseded by the next generation, tuning language has gotten a little perplexing.

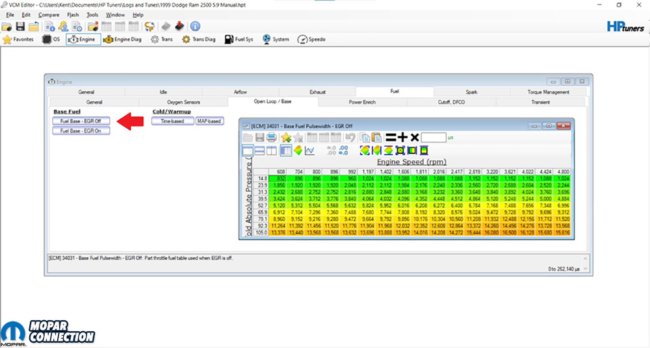
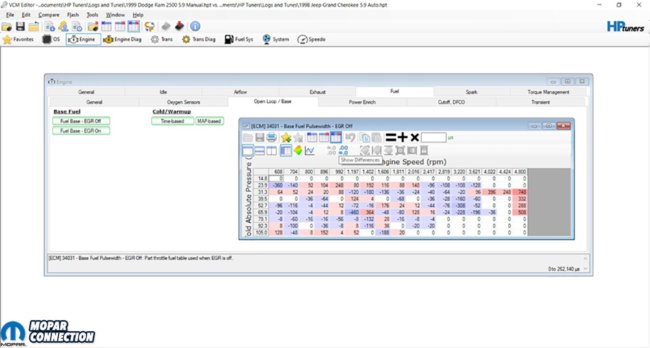
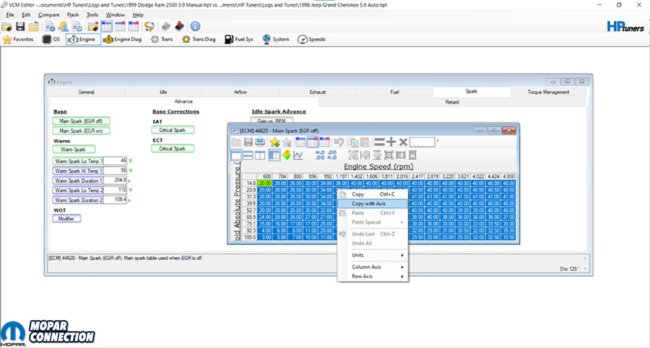
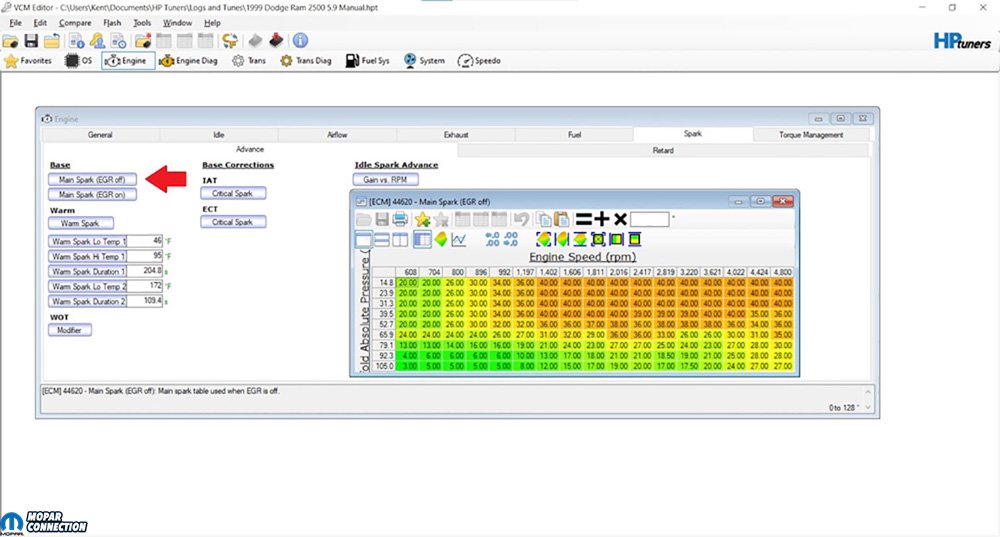
Above Left:The ignition index is called “Main Spark – EGR Off.” Above Right: Clicking on the fuel tab brings up different parameters for adjusting fuel tables.
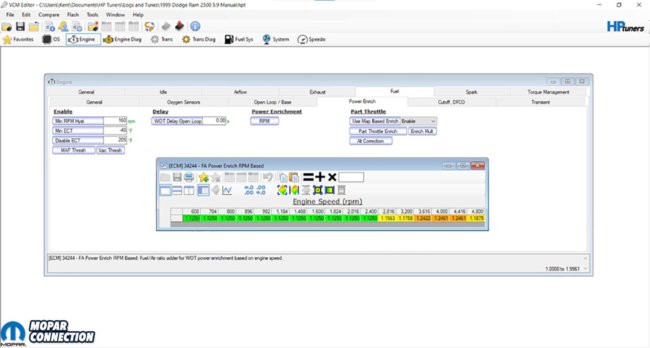
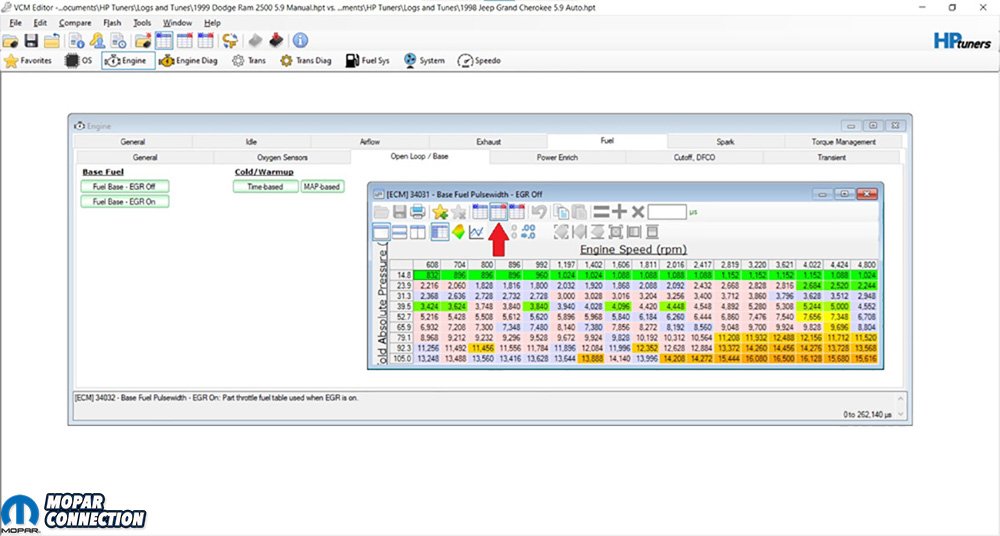
To keep it simple, the two most important parts of a tune file are generally going to be the fuel and ignition tables. For a JTEC PCM the base fuel table is titled “Fuel Base – EGR Off,” while the ignition index is called “Main Spark – EGR Off.” Power enrichment is also important as those tables act like a power valve (PV) would in a carburetor. Just like a PV adds fuel based on vacuum or manifold absolute pressure (MAP), power enrichment tables add fuel based on MAP and RPM.
MAP versus RPM graphs are common throughout the tuning world, so it’s important to understand them. Graphs for naturally-aspirated tunes typically range from 0 to atmospheric pressure at roughly 100 kPa. At wide open throttle (WOT) or 100% load, an engine is letting the full brunt of the atmosphere (100 kPA) into the engine. Any MAP reading under than that means it’s pulling a vacuum at something less than atmospheric pressure.

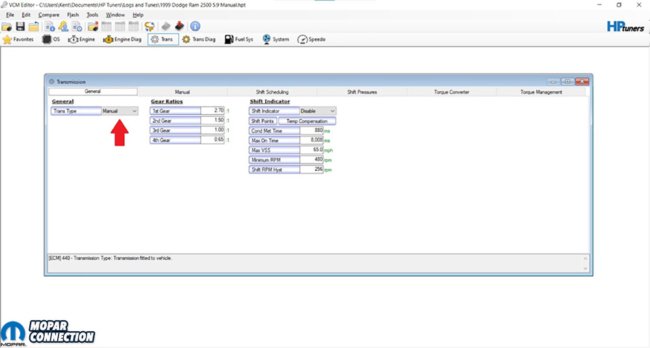
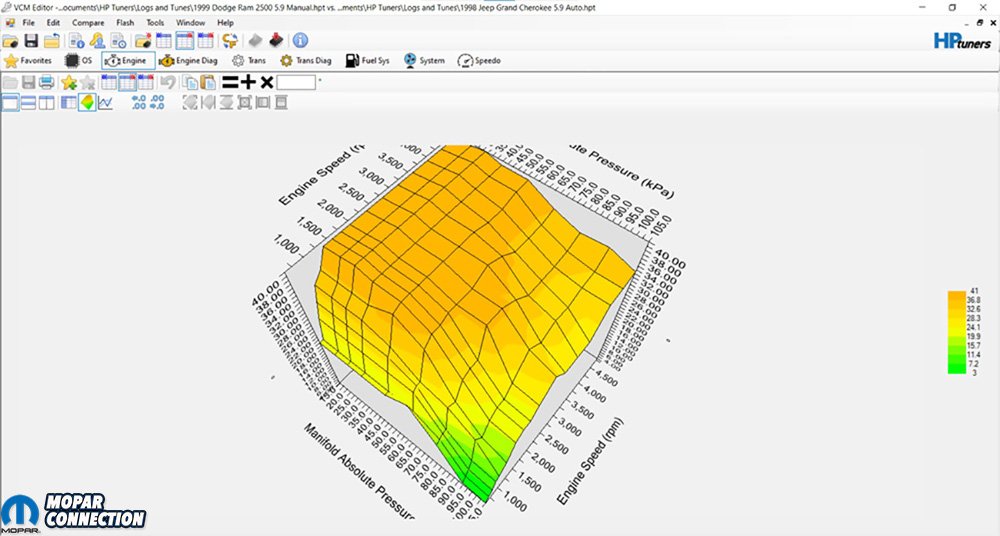
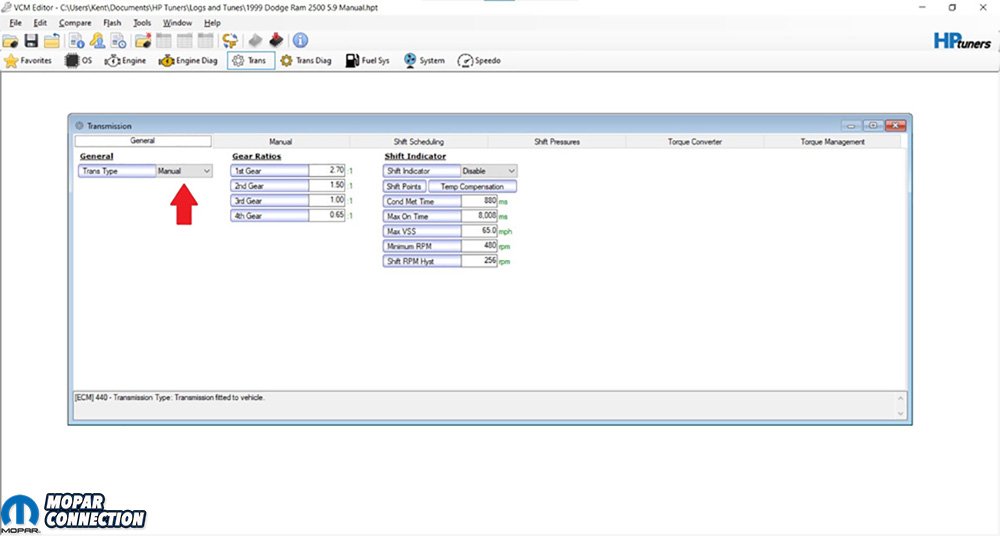
Above Left: If tables don’t tickle your fancy, 3D graphs are available as well to plot information such as MAP, RPM, and ignition advance. Above Right: Clicking on Transmission tab, we selected manual.
Spark tables are based on similar principals. When engine load is low (vacuum is high and MAP is low), timing is added to boost efficiency just like a vintage vacuum advance canister. When engine load is high, timing is reduced to minimize the risk of detonation.
Now, if you’ve ever toyed with tuning a G3 Hemi, you’ve probably seen its volumetric efficiency (VE) tables. If you’re looking for a VE table in a JTEC, you won’t find it. Fuel control is much more straightforward than that; as load and RPM increase, more fuel is commanded by way of increased injector pulse-width. There are no fancy calculations, just stick in how many microseconds the injector needs to stay open to achieve the desired fueling rate.
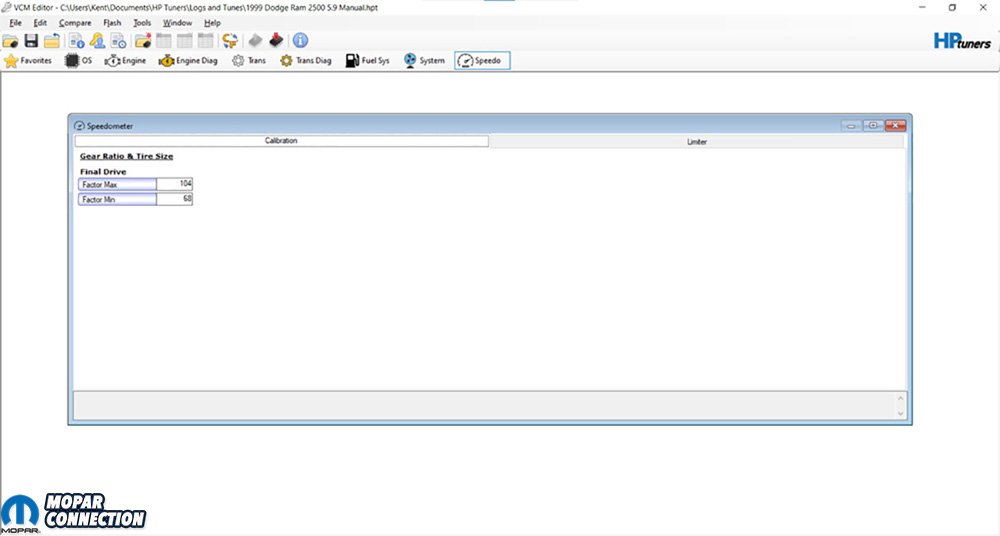
Transmission tuning is another beast entirely, but our Dodge didn’t require it with the trusty NV4500 5-speed manual box. An electronically-controlled automatic like the 47RE would have more options here such as shift points, pressures, torque converter apply/release, and torque management. Unfortunately, speedometer correction does not seem to be available at this time.


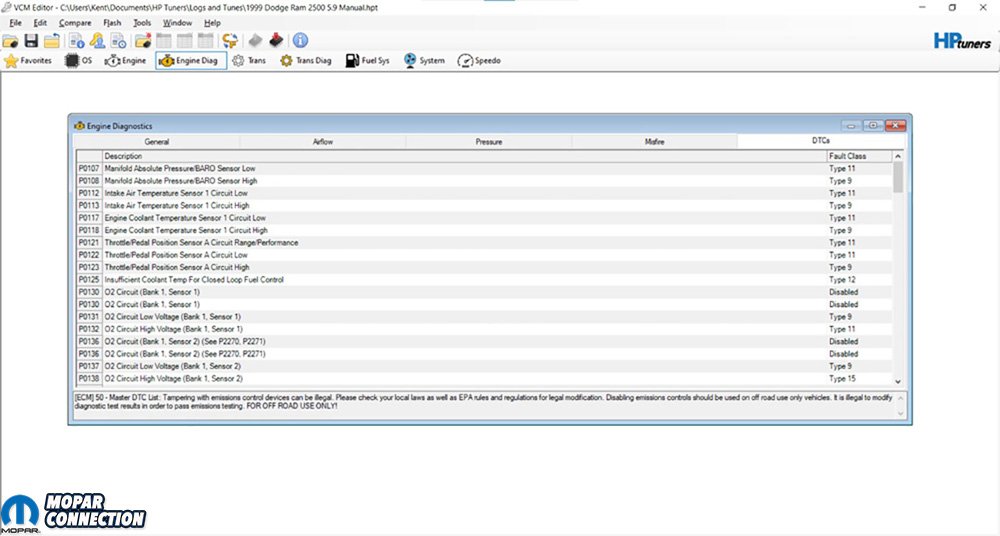
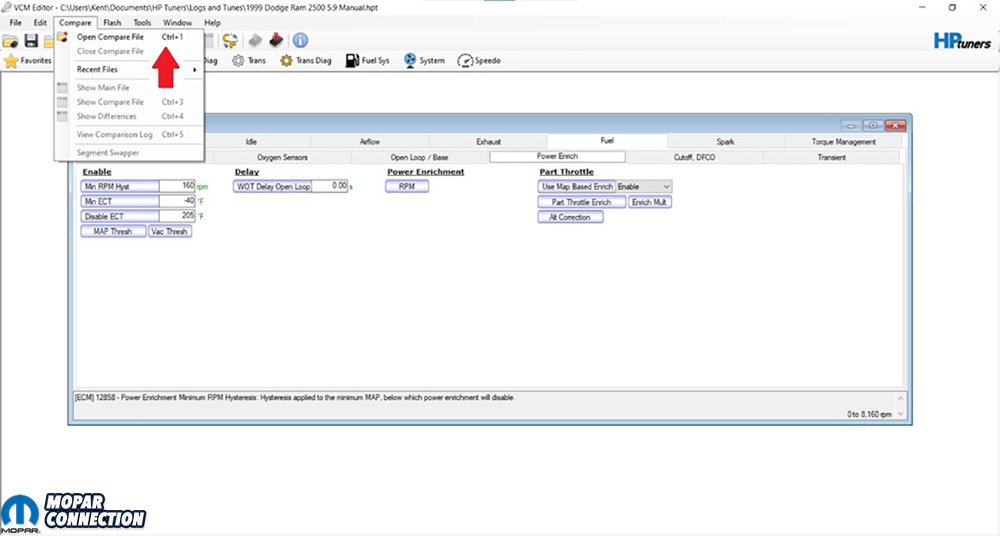
Above Left: The transmission, speedometer, and diagnostics tabs were pretty tame with our stick-shift box. Above Center: Our diagnostics tab was also tame do to our lack of check engine lights. Above Right: Opening a comparison file allowed for easy reference to other tunes.
Engine and transmission diagnostics are another part of the equation with a master list of DTC codes available for reference when needed. Basic diagnostic tests can be ran from VCM Editor as well. The same goes for transmission testing although the tab would be more useful with a slushbox instead of a stick-shift. Our Ram was without a check engine light. Thankfully none of that added functionality was necessary and we were able to get down to business.
Unfortunately, JTEC tuning information is nearly nonexistent. Rather than start from scratch, we decided to take a small step forward by referencing a premium fuel tune that was factory-supplied in 1998 Jeep Grand Cherokee Limited models with the 5.9 Magnum. Using that file as a comparison would make it simple enough to see what parameters needed adjusted to make a jump in power when going from 87 to 93-octane pump gas. HPtuners’ comparison feature made it easy to open the two files at once and quickly spot the differences. Toggling between files was as simple as clicking the table button with a red asterisk (original file), blue asterisk (comparison file), or both asterisks for the delta between them.


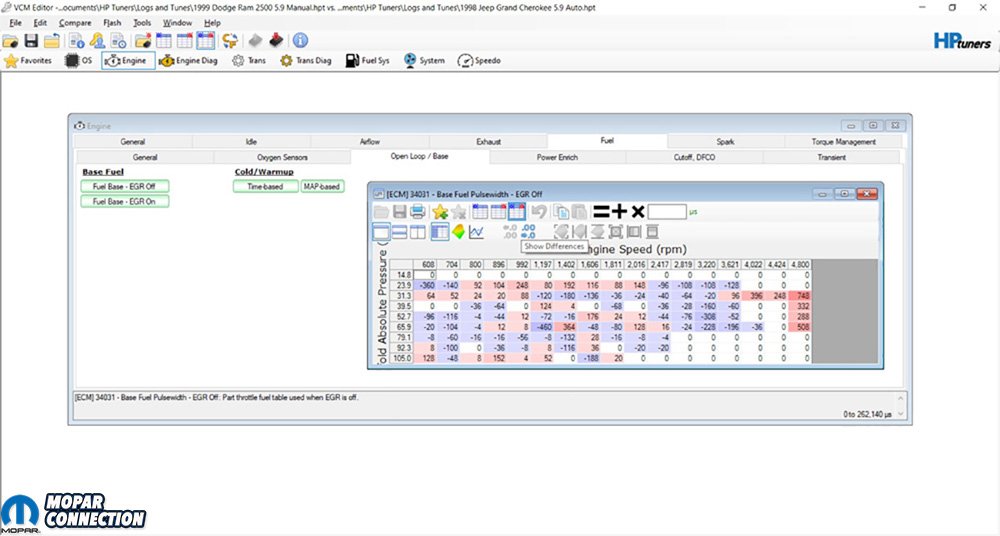
Above Left: Differences were highlighted in red or blue. Above Center: Files could be looked at separately or together with differences automatically calculated between the two. Above Right: There were big disparities in the spark table we pulled from a 1998 Jeep Grand Cherokee.
Any dissimilar tables were highlighted in green and showed the amount of change when opened. The base fuel tables, for example, were green so we opened them to find that the Jeep tune supplied more fuel in the midrange as evidenced by the large negative values from 2,417 to 3,621 RPM. Positive values would have indicated that the truck’s original tune held a larger value in that index when compared to the Jeep file.
Unsurprisingly, most of the variance was in the spark tables. Higher octane levels equate to less propensity for detonation and therefore more tolerance for additional spark advance. When added safely, that additional advance can tack on a considerable amount of power. However, increasing advance without increasing the fuel’s octane would create a high likelihood of severe engine damage via preignition or detonation.

Above Left: Copying those values over to the truck gave us a great starting position. Above Right: Next on the docket is a shakedown run with the VCM Scanner manning data-logging duties.
The disparity in spark was stark with the Jeep’s table putting in a bunch of timing at 52.7 kPa and above. In some areas with heavier load, the truck was set at 27 degrees of advance while the Jeep came in at a whopping 38. Clearly, testing in the development of the JTEC PCM had proven that big octane could handle big spark and vice versa.
Since the Jeep tune featured an automatic transmission calibration, we decided to make a copy of the truck’s manual tune, then modify from there. Copied values from the Jeep included base fuel, cold/warmup, power enrichment disable temperature, deceleration fuel cutoff (DFCO) enable temperature, transient multipliers, and spark advance. Tables were copied using the “Copy with Axis” feature that allows both values and axis labels to be copied and pasted from one tune to another.

Above: We will be soon with updates on how the tuning turns out.
From here on out, it’s all about the VCM Scanner. Data-logging long and short-term fuel trims and air/fuel ratio (AFR) will tell the true tale of our tuning. A wide-band O2 sensor will also be key to dial in injector pulse-width for proper AFR across the board. The fun has just begun but, with the HPtuners VCM Suite’s nearly unlimited abilities striking the match, we’re sure to have our Magnum mauling in no time at all.


where can you obtain the file for the performance tables on the R/T dakota or 1998 jeep R/T? can that be sent to me?
Contact HP Tuners. They’re not going to give that stuff away for free. Nobody will.
i did, it all worked out, i want to thank your office for publishing this article, i have the VPVI2 module and i am working on my truck. I have the same truck with the exception of the 46RE transmission. i understand these tables and will start tuning when the weather get warmer. thank you