


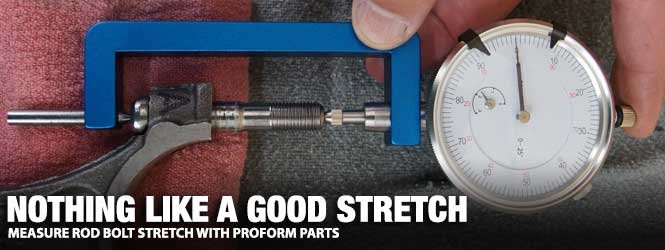
When building an engine, is torquing the connecting rod bolts the ultimate practice for success? Ask that question to any quality engine builder, and the response would likely be “no.” Instead, it is necessary to measure the bolt stretch to ensure the proper clamping force of the fastener.
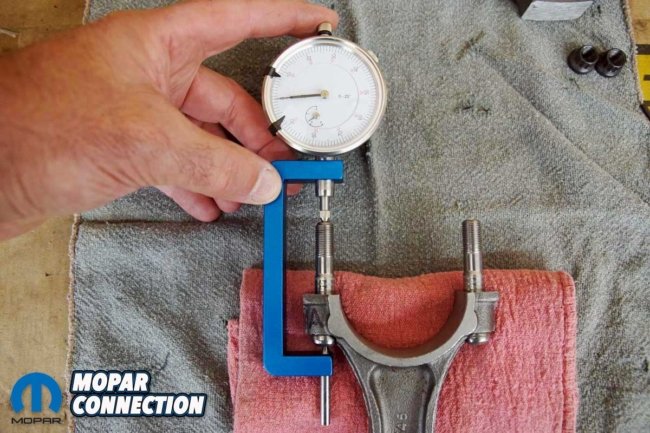
Determining the stretch of a bolt requires a quality bolt stretch gauge. To illustrate how bolt stretch occurs, we contacted Proform Parts about a bolt stretch gauge (part no. 66788) and to tighten each rod cap to the rod, a rod vice (part no. 66769).

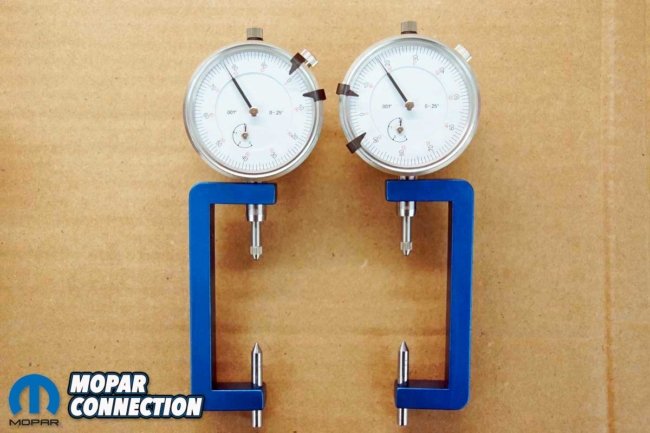

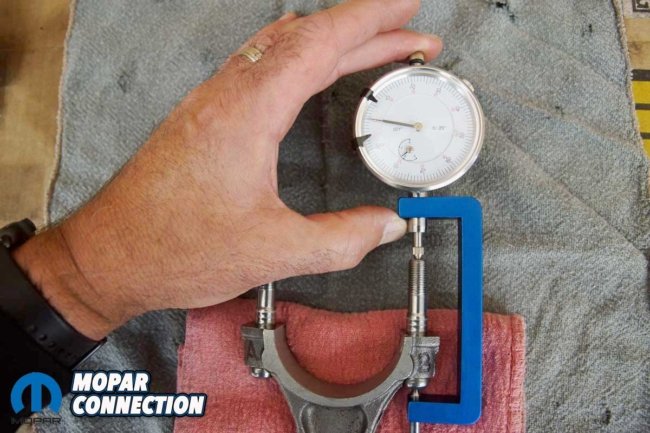
Above Left: To measure connecting rod bolt stretch, we picked up a pair of Proform Parts’ bolt stretch gauges and a connecting rod vice. Above Center: We prefer a stretch gauge for each bolt. It makes it easier to zero and measure each bolt separately from the other without requiring us to constantly reset the gauge. Above Right: The connecting rod vice has a provision on its lower end that can be clamped into a bench vice.
The rod bolt tests would be conducted on a small-block connecting rod fitted with ARP rod bolts (part no. 144-6001). After installing the bolts, we resized the big end of the connecting rods. The ARP rod bolts had a slight indentation on each end to accommodate the rod bolt stretch gauge.
If you have never heard of bolt stretch, it is an extremely important procedure when building an engine. The rod and cap could separate slightly with every rod and piston assembly cycle without the proper bolt stretch. Depending upon the rod’s direction of movement, the bolt will stretch in one direction and return to its previous state in the other direction. With the stretch and return happening between 30 and 100+ occurrences per second, it is only a matter of time until the under-stretched rod bolt fails, and nobody wants to cut loose a rod running through the traps at the track.

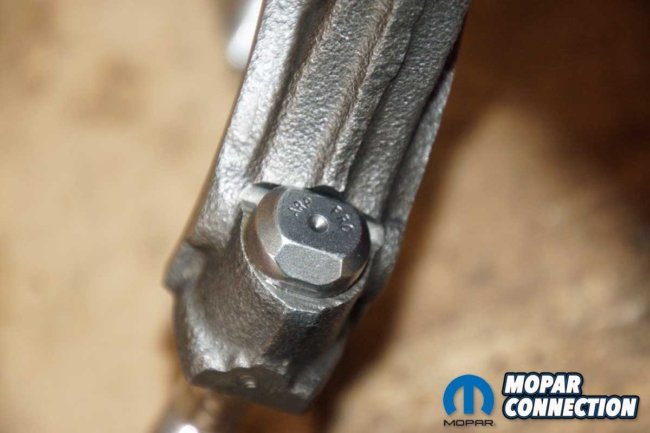
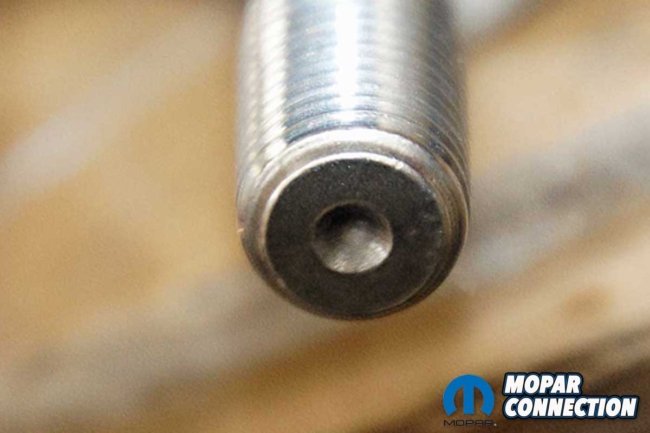
Above Left: Our test rod was a factory small-block unit fitted with ARP rod bolts and adequately resized. Above Center: The ARP rod bolts have a provision for the stretch gauge at the bolt head. Above Right: On the opposite end of each rod bolt is another indentation for the stretch gauge.
We planned to measure the length of the bolts before the tests. Then install the rod cap and torque the nuts onto the nuts to 50 ft-lbs (in three steps 20/35/50 ft-lbs). First, we would install the fasteners dry. The second test would be completed with 30-weight engine oil, and the last test would be with ARP Ultra Torque Fastener Assembly Lubricant.
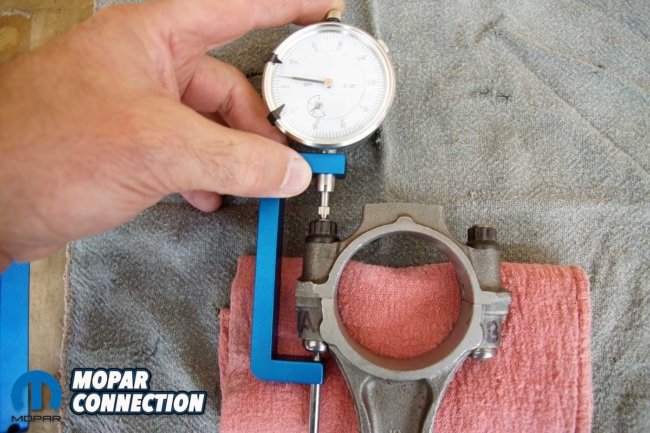
To start, we labeled each bolt by marking an “A” or “B” in the rod bolt area of the connecting rod. Then, with a pair of vernier calipers, we measured the length of each rod bolt. Our bolt “A” was 2.281-inches, and bolt “B” was 2.288-inches. Because the measurements are different, we prefer to use two bolt stretch gauges for increased accuracy. Therefore, one gauge was zeroed to the “A” bolt, and the other was zeroed for the “B” bolt.
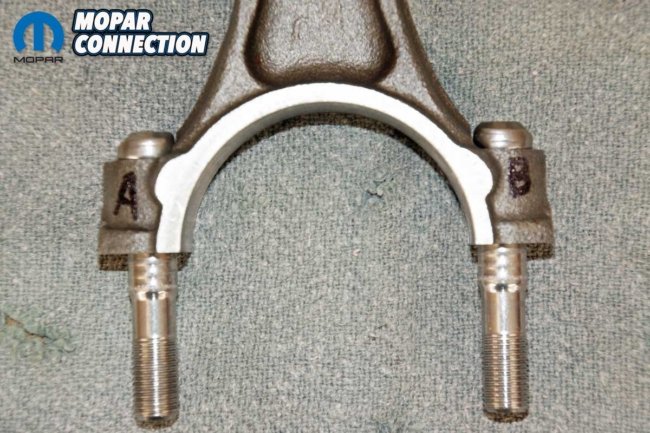

Above Left: On the connecting rod, we labeled the connecting rod bolts “A” and “B,” and a stretch gauge would be dedicated to each bolt. Above Right: Before we started the tests, we measured each bolt. Bolt “A” was 2.281-inches and bolt “B” was 2.288-inches.
With the bolt length noted and the two stretch gauges zeroed, we installed the rod cap and threaded the dry nuts onto the connecting rod bolts. The Proform rod vice had a provision on the bottom of the tool to allow it to be secured, which fit nicely into our bench vice.
Our test rod was slipped into the rod vice. We clamped on the break point between the rod and the cap. To eliminate any torque wrench inaccuracy, we had it tested before torquing the fasteners. The nuts were torqued in three steps to a final torque of 50 ft-lbs. We removed the rod from the vice and measured the length of bolt “A” and “B.”
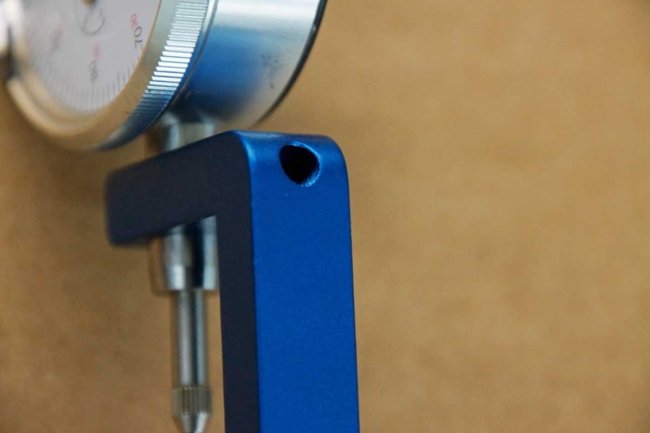
Above Left: At the top and the bottom of the stretch gauge frame, there is a provision for a 2.5mm Allen wrench. Rough adjustments can be set at each screw. Above Center: We zeroed the first stretch gauge to bolt “A” by fine-tuning the dial indicator. Above Right: The “B” bolt was zeroed as well. Next, we twisted the dial indicator locks tightly on both gauges so that the gauges would remain zeroed.
Each Proform rod stretch gauge read in increments of 0.001-inches. The “A” bolt was measured with its zeroed gauge, and it displayed the bolt had stretched 0.004-inches. Bolt “B” stretched a little over 0.004-inches (it measured about 0.0045-inches). The ARP stretch specification for the rod bolt was a range between 0.006 – 0.0065-inches. The unlubricated bolts were not sufficiently stretched at 50 ft-lbs.
We increased the torque to 55 ft-lbs and then measured each bolt. Again, the bolts did not stretch to the specification. We continued to increase the torque in increments of five ft-lbs and check the rod stretch. Finally, at 70 ft-lbs, we achieved a stretch on each bolt of 0.006-inches. Suppose an engine had been assembled with the connecting rod fasteners dry and without a stretch gauge, the torque measurement of 50 ft-lbs would have provided woefully insufficient clamping force.

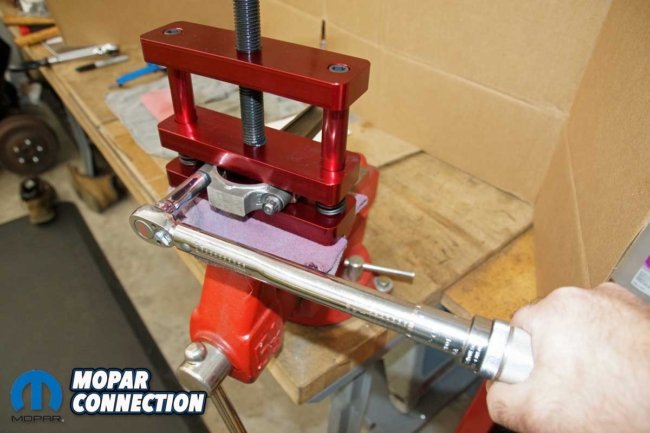
Above Left: We clamped the rod into the vice at the point where the rod cap contacts the connecting rod at the break point. Above Right: For all the tests, we torqued the connecting rod bolts to 50 ft-lbs.
Our next test was a standard method for torquing the rod bolts for years. We used a liberal volume of non-synthetic 30-weight engine oil on the bolt threads, nuts, and cap. Before the test was started, we remeasured the rod bolts (with the zeroed stretch gauge), and they were the same length as before the first test. The rod was reassembled, and the rod bolts were torqued in three steps to 50 ft-lbs.
Bolt “A” stretched to 0.0055-inches, and bolt “B” extended to 0.005-inches. Both were under specification. We increased the torque by five ft-lbs, and at 55 ft-lbs, the stretch was still not in spec. So, the torque was increased an additional five ft-lbs, and the bolt stretch was sufficient. The torque readings with engine oil were ten ft-lbs less than the dry fasteners, but the readings were still ten ft-lbs above the ARP specifications.

Above Left: With dry fasteners, the torque of 50 ft-lbs resulted in less than the required 0.006-inch stretch. It took another 20 ft-lbs to achieve the proper stretch. Above Right: For the second test, we oiled the fasteners. Again, it took more than 50 ft-lbs to complete the stretch. Finally, at 60 ft-lbs, the ARP bolts stretched sufficiently.
Our last test was to use ARP’s Ultra Torque Fastener Assembly Lubricant. Before wiping the lubricant onto the fasteners, we measured the bolt lengths with the stretch gauges, and the bolts’ free length had not changed. Next, we installed the paste lubricant on the cleaned bolts, nuts, and cap. Finally, the rod was clamped in the rod vice, and we torqued the rod bolts to 50 ft-lbs in three steps. On our first measurement, the bolts had stretched to 0.006-inches.
The tests proved that proper torque without the correct lubricant will lead to a rod bolt that is under-stretched, which does not provide the clamping force necessary to reduce the bolt failure. Even with a proper lubricant, without a bolt stretch gauge, there is no verification that the rod bolt will achieve the appropriate clamping force. However, the Proform bolt stretch gauges were accurate and will provide us peace of mind when we build our next engine.


Above Left: For the last test, we used ARP Ultra Torque lubricant paste. Above Center: We applied the lube to the bolts, cap, and nuts with the supplied brush. Above Right: At 50 ft-lbs, both bolts stretched sufficiently without requiring additional torque application.
Besides the stretch gauge and the rod vice, Proform has an extensive catalog of performance parts and tools, shop equipment, and garage gear. We have enjoyed using other products from Proform, and we are sure you will benefit from its products as well.


