


Whenever a new project car is purchased, there are plenty of opportunities to undo the patch-ups of previous owners. While some former repairs may have been competently performed, we have been slowly working through the poorly executed mends to our 1967 Dodge Dart GT. Our initial focus has been diligently working on the console, steering wheel, and an ignition and door key problem of the Dart. We repaired the damaged console, the cracked steering wheel has been filled, sanded, and painted, and the ignition and door lock tumblers have been replaced, and now we focused our attention on a drivability problem.
The Dart’s throttle pedal required a tremendous amount of pressure to open the carburetor butterflies. A few minutes of driving resulted in a cramped right calf muscle. It was obvious the throttle spring was not a factory part and the spring rate was not even close to what should have been on the Dart. To make matters worse, the kickdown spring was completely missing, which allowed the kickdown linkage to drift into various positions.

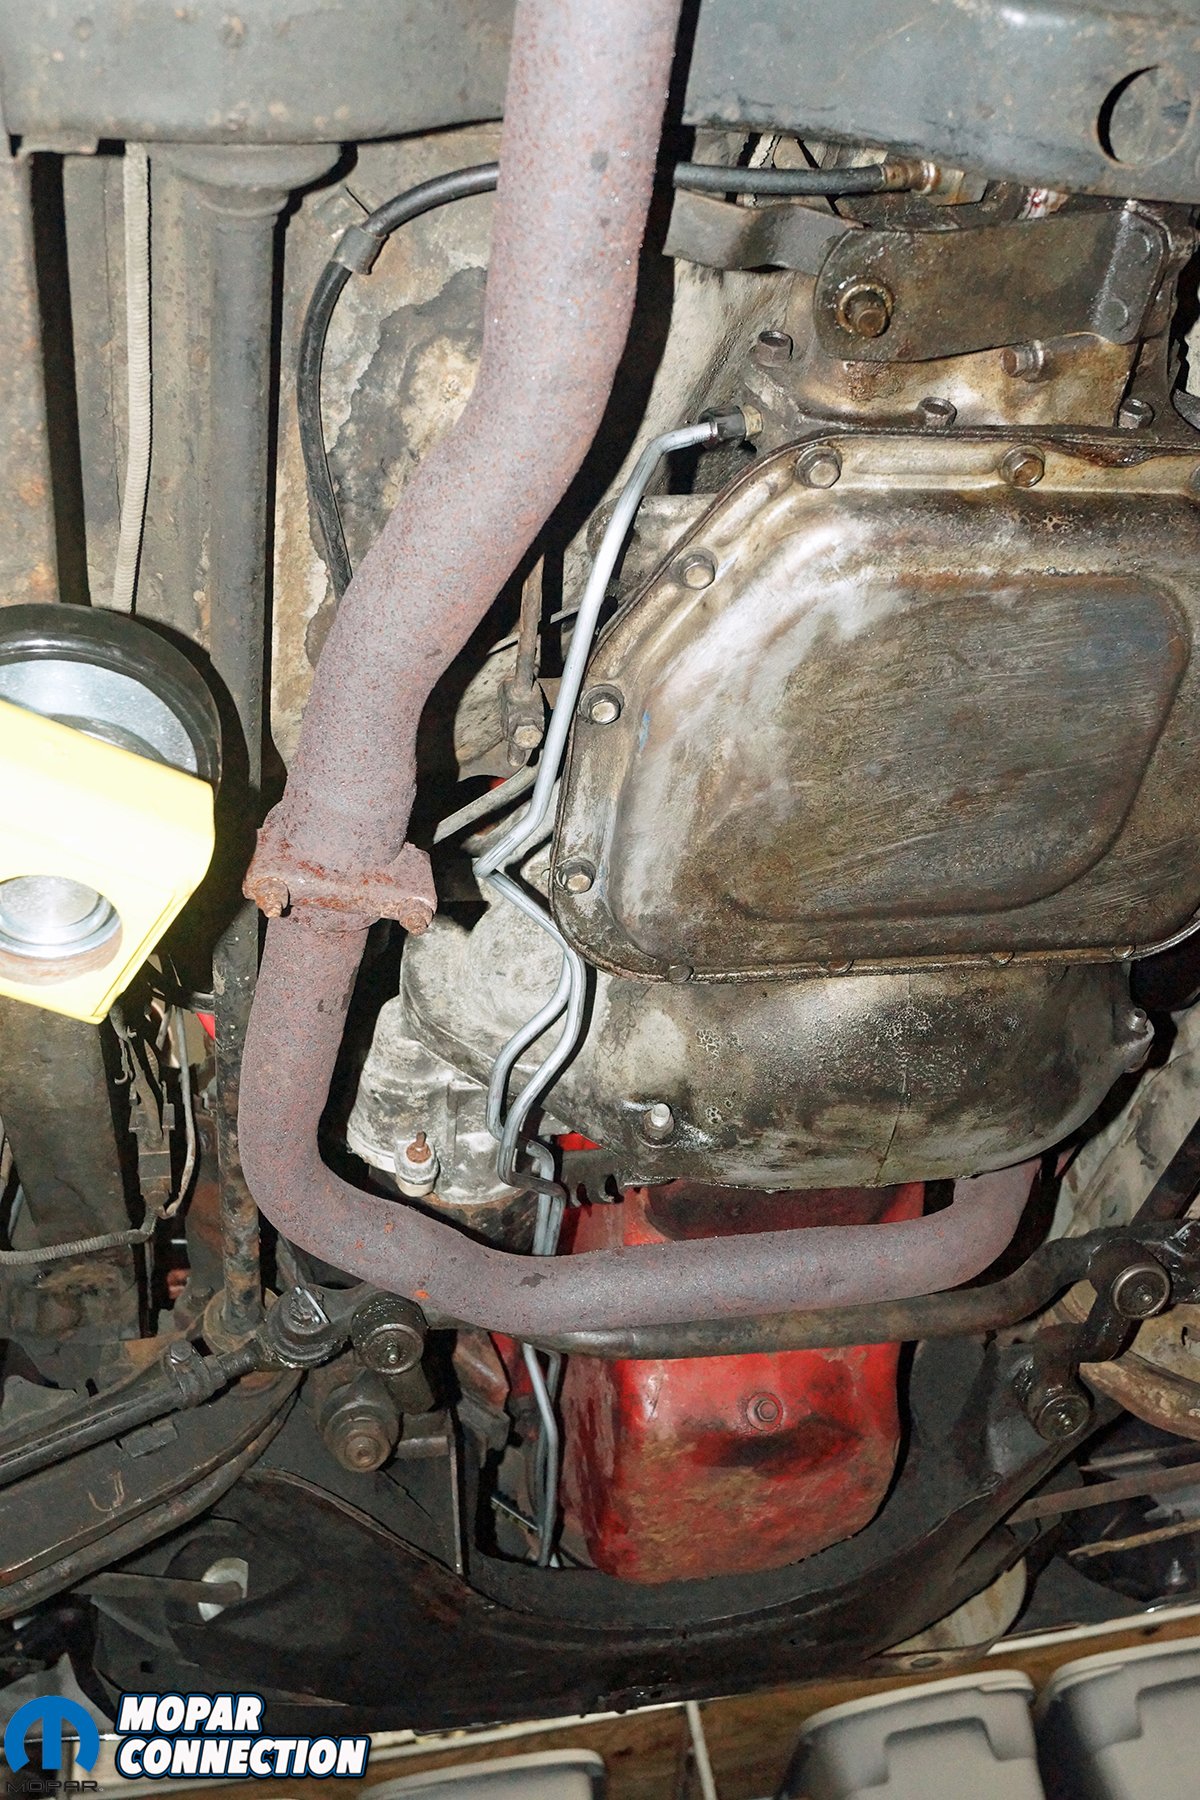
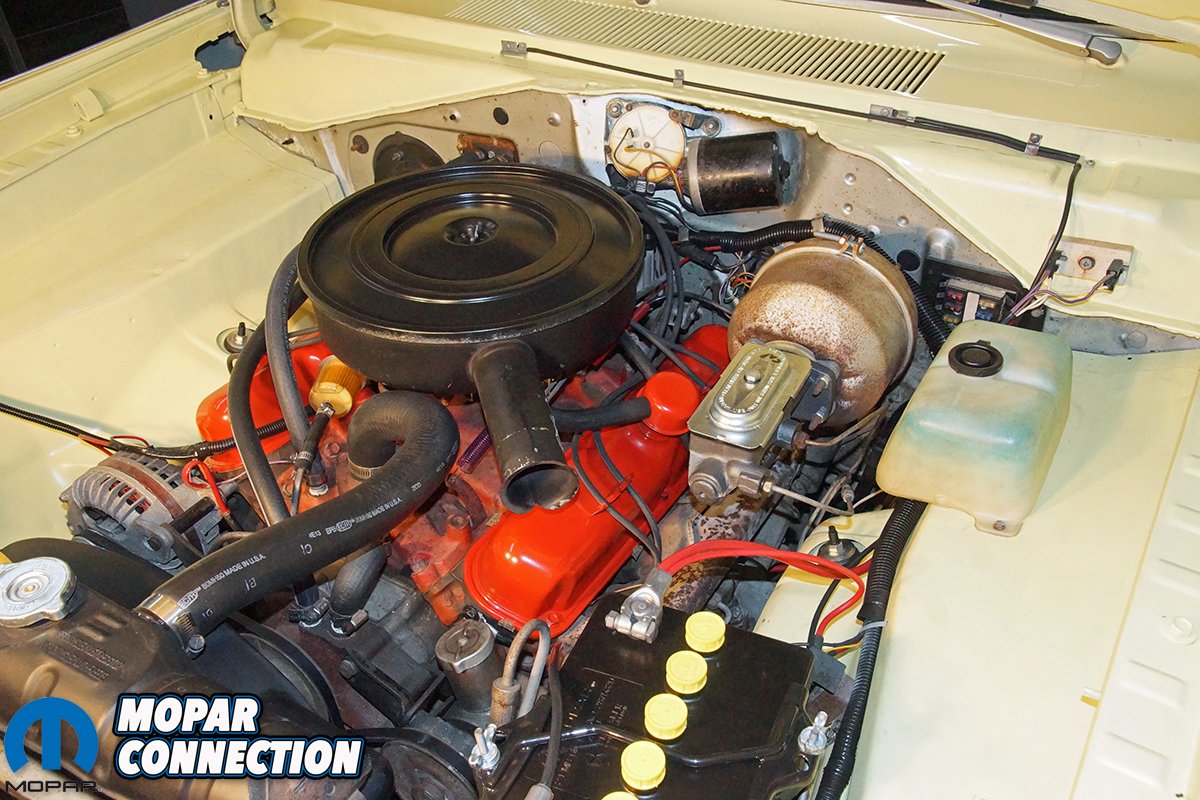
Above: Our Dart’s 1971 273
The linkage did not follow the carburetor lever pin when the throttle cable was actuated via the throttle pedal. Lastly, the steel transmission cooler lines had been cut about 8-inches before the radiator and flexible rubber hoses replaced the ends of the steel lines. To fix our problems, we contacted the representatives at Year One, and they recommended the pieces we needed to restore our transmission back to its proper operation.
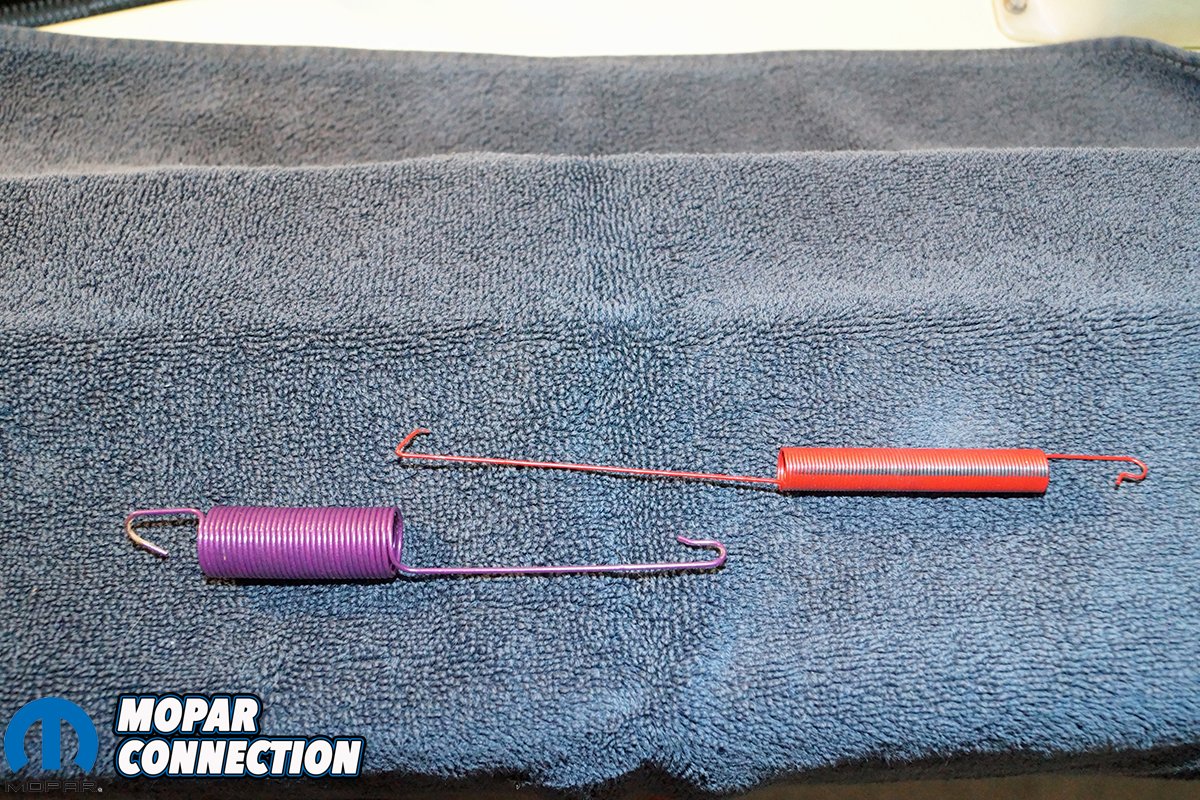
We selected a reproduction throttle kickdown spring (part no. BF340) that fit all 1966-1971 automatic transmission models except the Hemi. The spring had the correct dark red color with a black stripe, measured 7 ½-inches in length, and mounted from the carb to the kickdown bellcrank. While a throttle return spring for our 2bbl carburetor was not offered, we found a reproduction throttle return spring for a 1971 340 engine (part no. TRS9) that would work for our Dart.


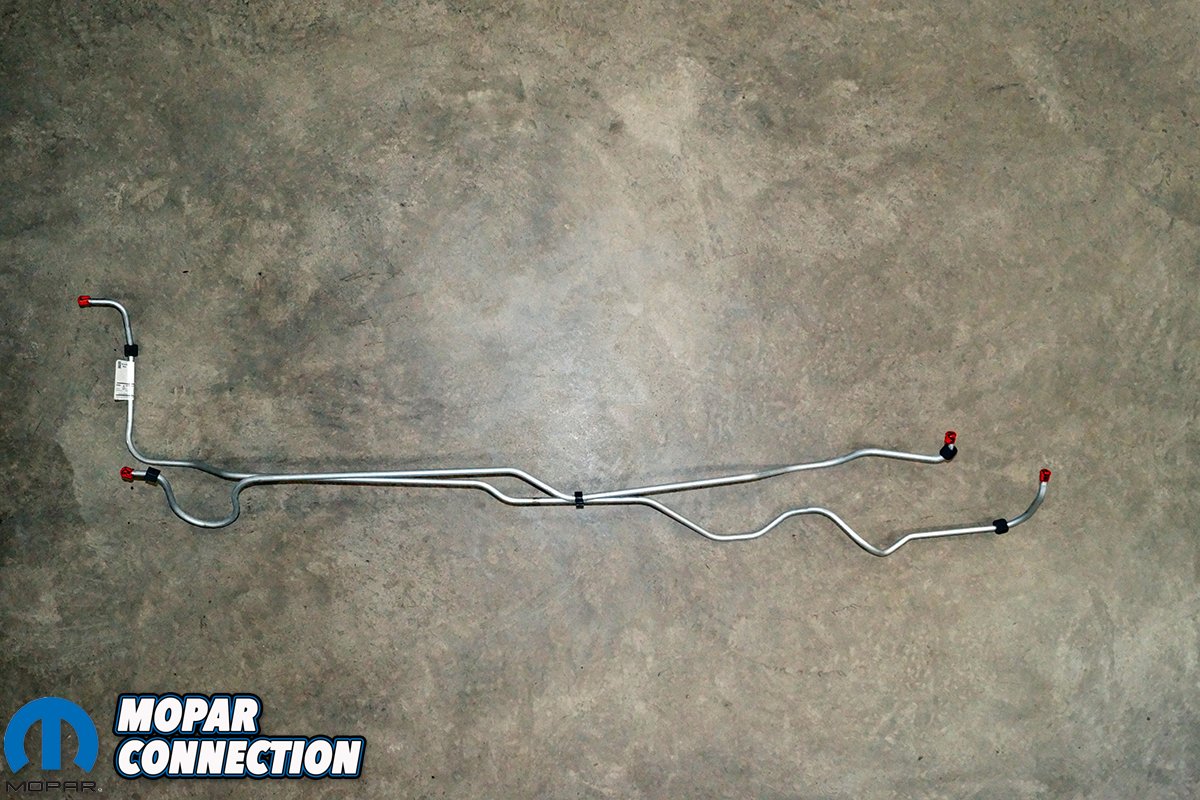
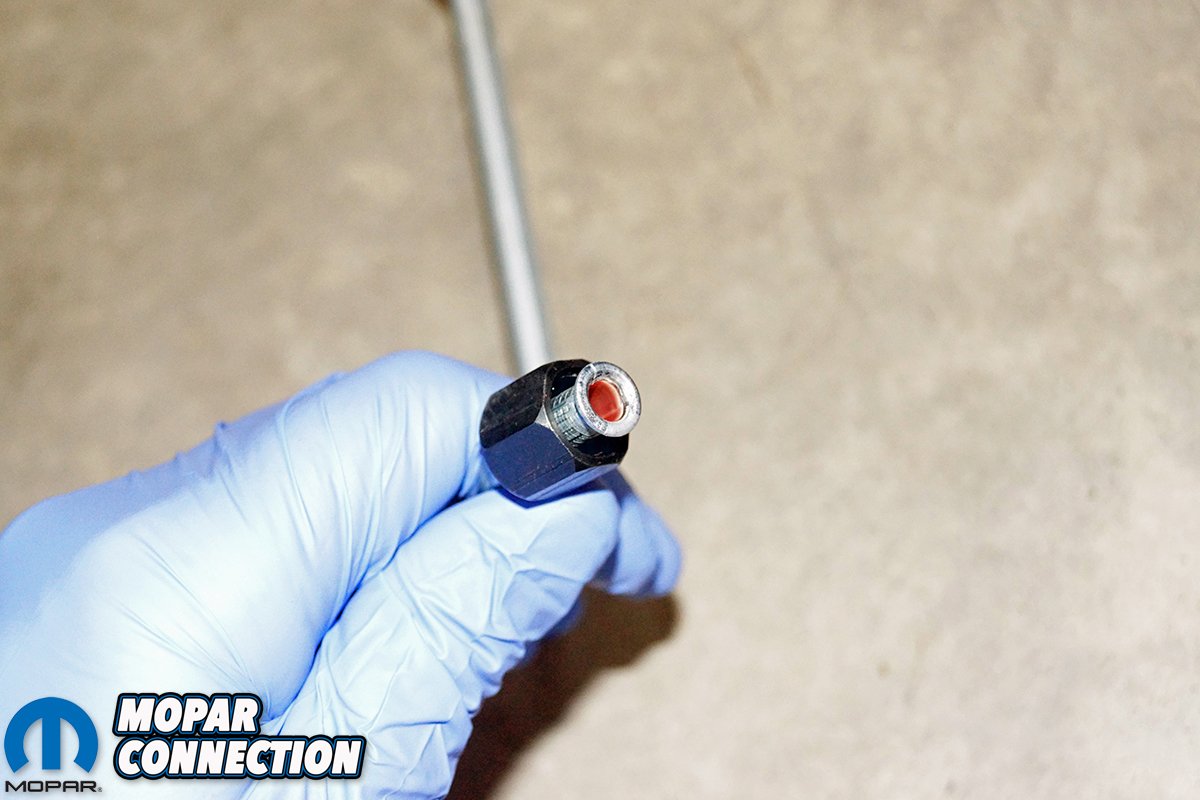
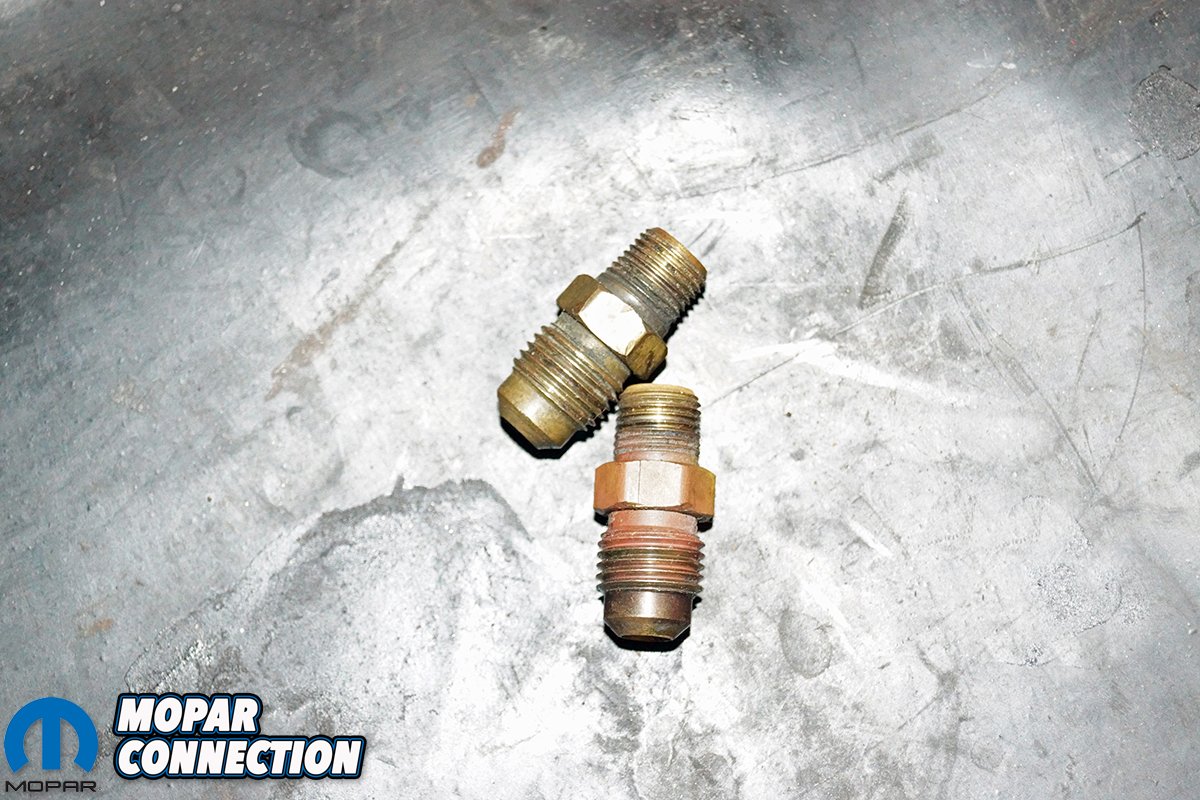
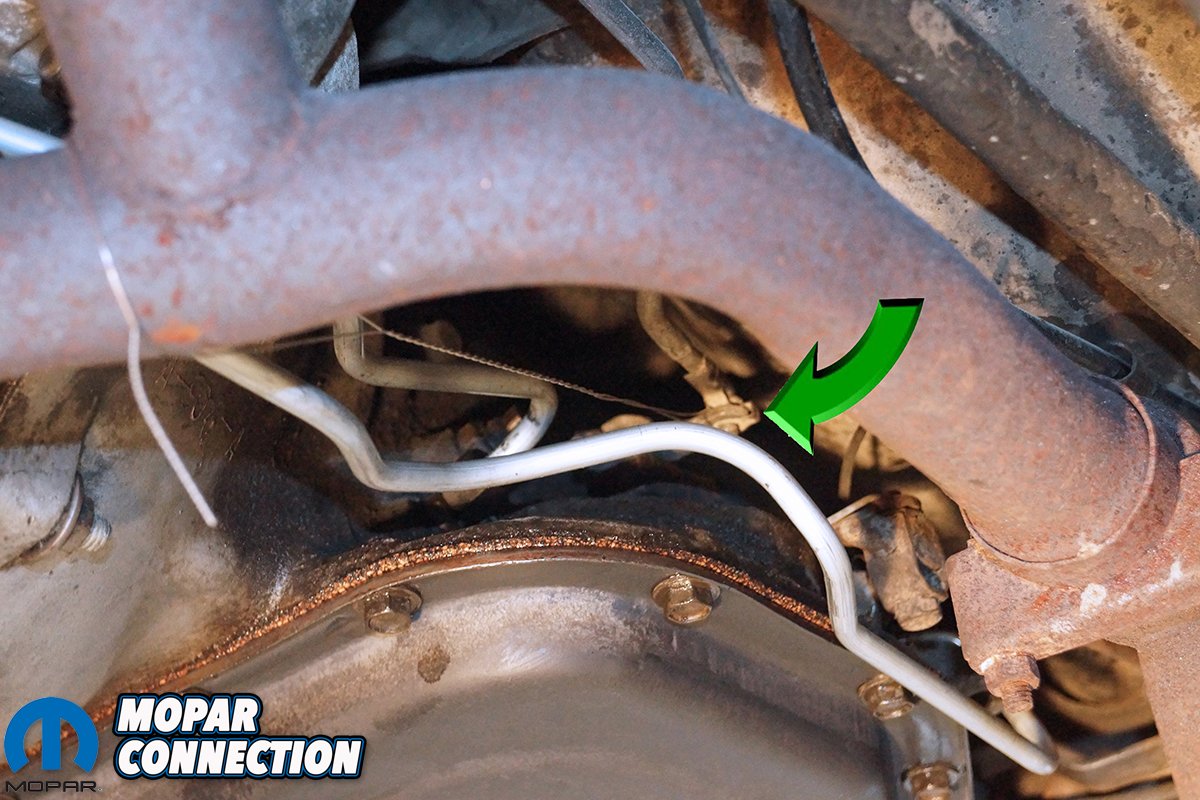
Top Left: Each cooler line was fitted with the proper double flare end and a -05 AN female connector. The lines and ends were perfect reproduction copies of the original cooler lines. Top Right: To fix the damaged factory cooler lines, we ordered a Year One transmission cooler line set for the 1967-1972 A-body small block with a 904 transmission, part no. QRB97TS.
The spring came in a violet color, and had the correct 33 coils similar to the original, which would reduce the pressure required to operate the throttle pedal. To address the cooler lines, we selected a transmission cooler line set for the 1967-1972 A-body small block with a 904 transmission (part no. QRB97TS). These cooler lines were the original-type steel material and had the properly-placed factory bends.
With the parts on hand, we started the mending of the Torqueflite by replacing the cooler lines. The rubber lines at the cooler were removed, and a small amount of transmission fluid leaked from each line as well as the cooler. We were taken aback to find barbed fittings in place of the factory 1/8-inch male NPT x 5/16-inch (-05 AN) flare (SAE) brass adapters.
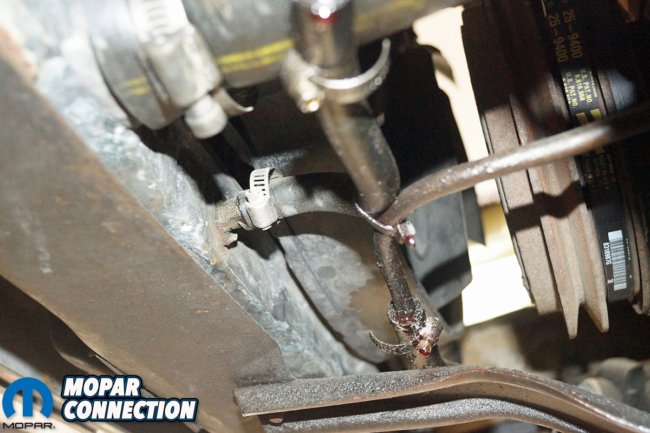


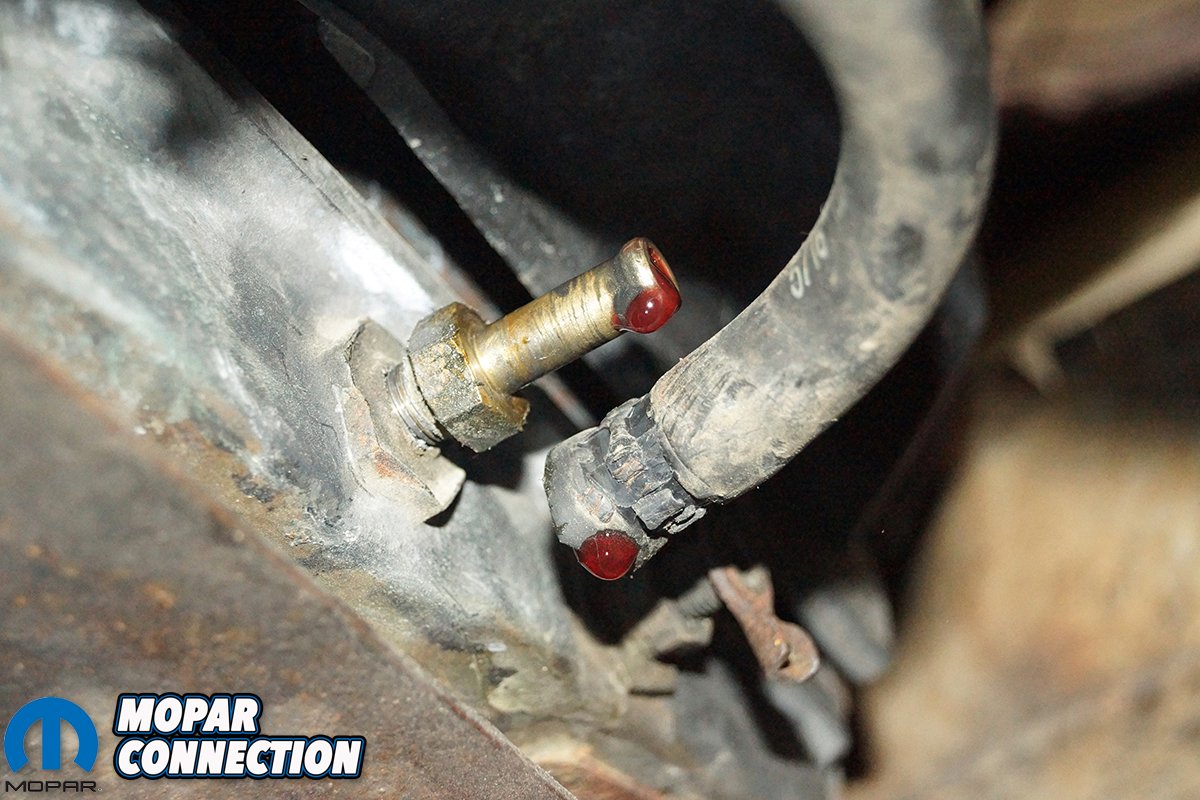
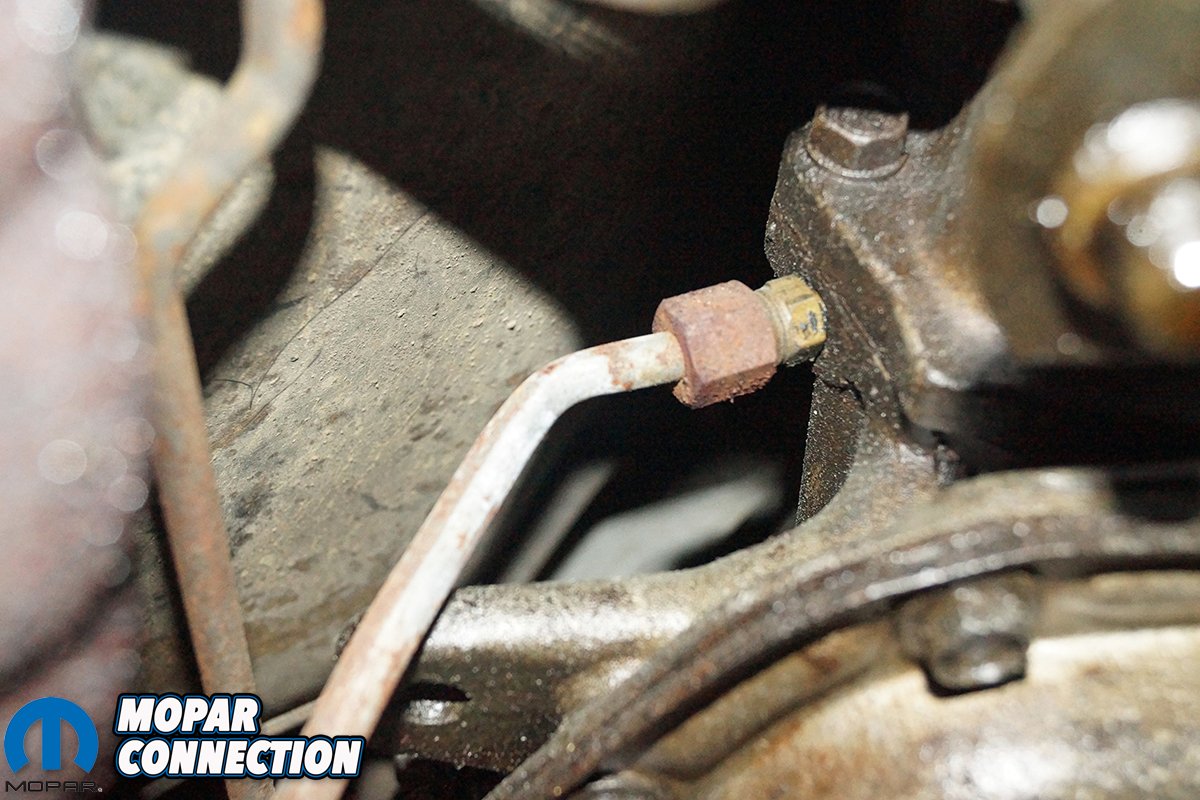
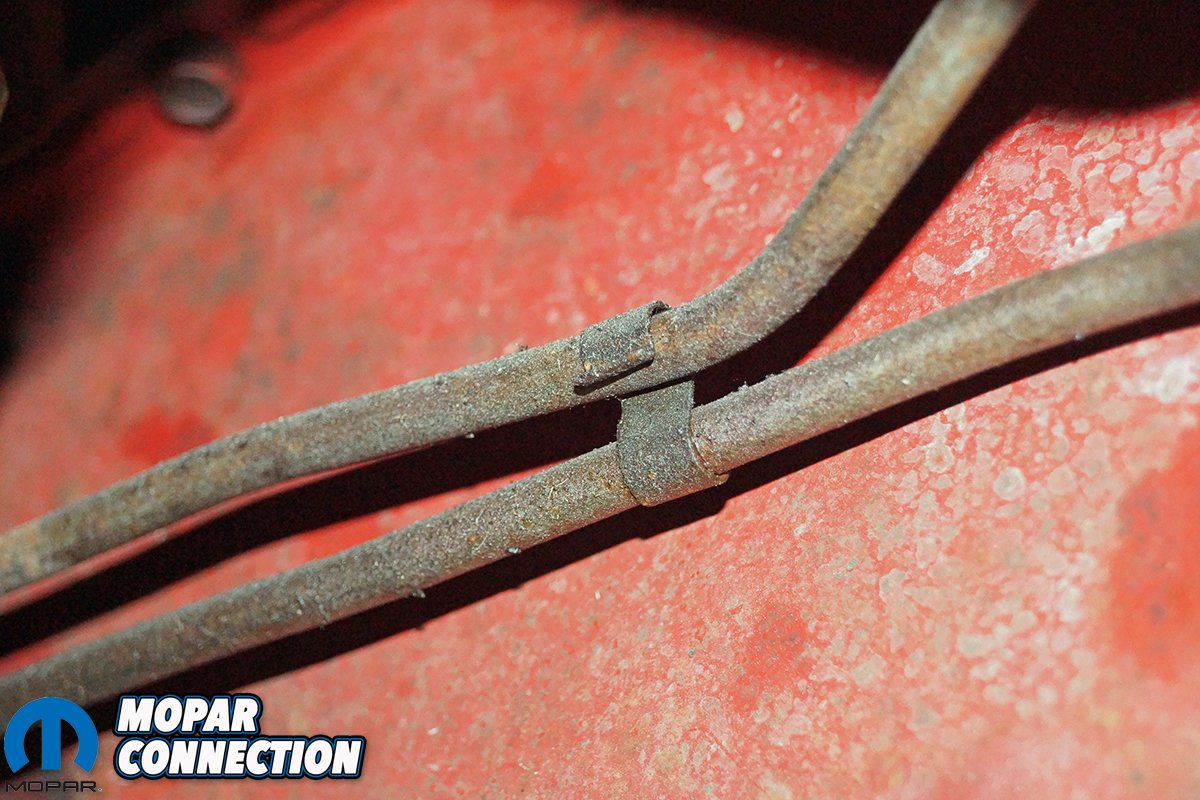
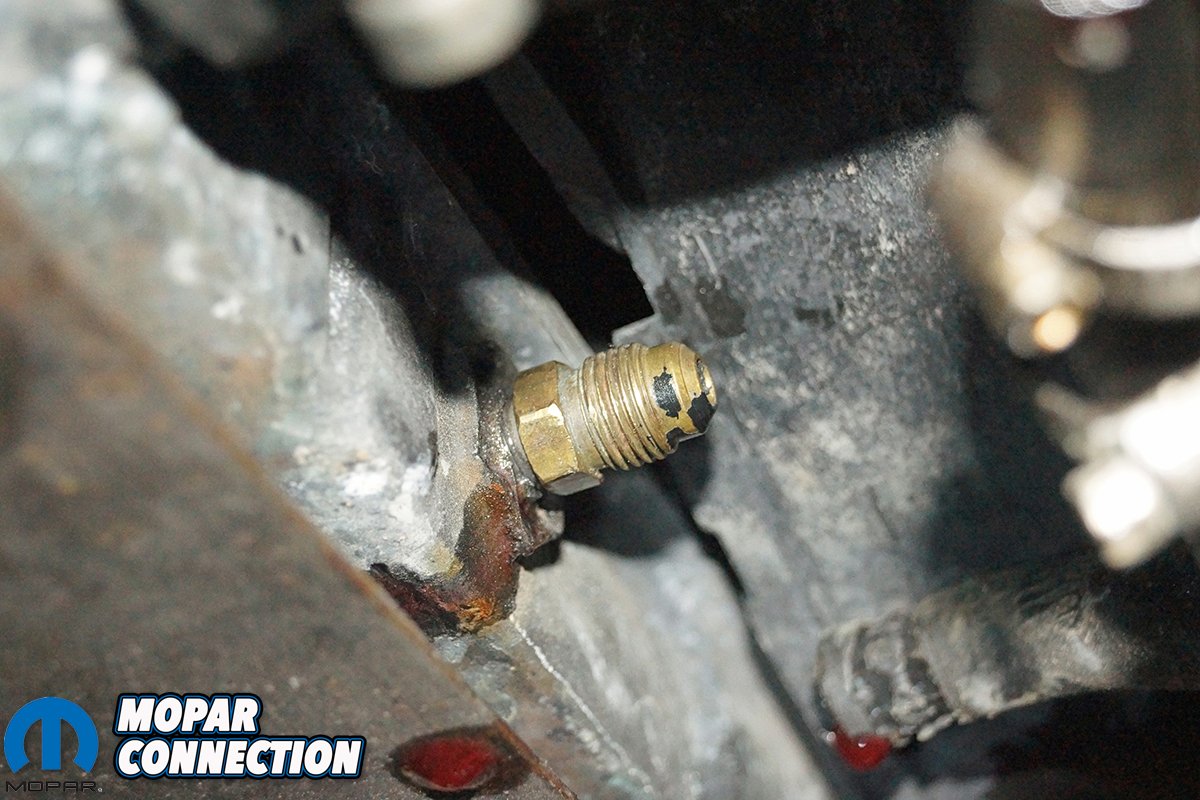
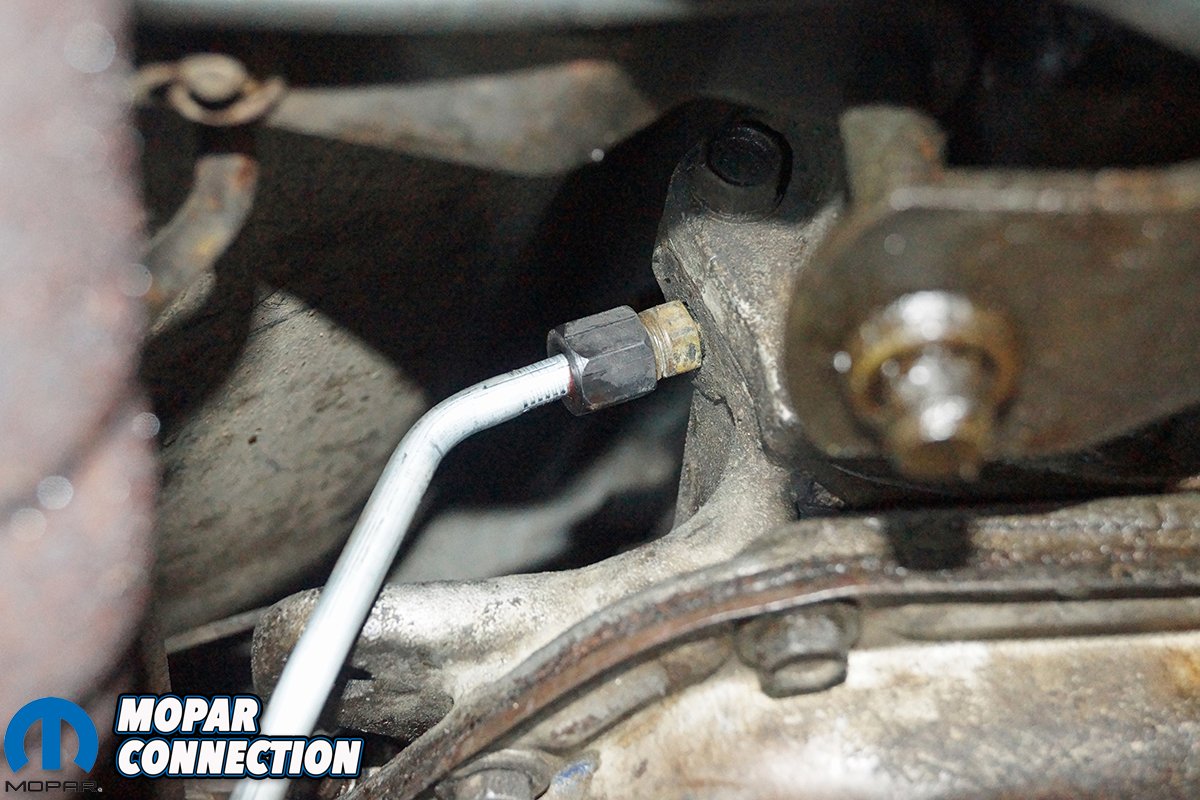
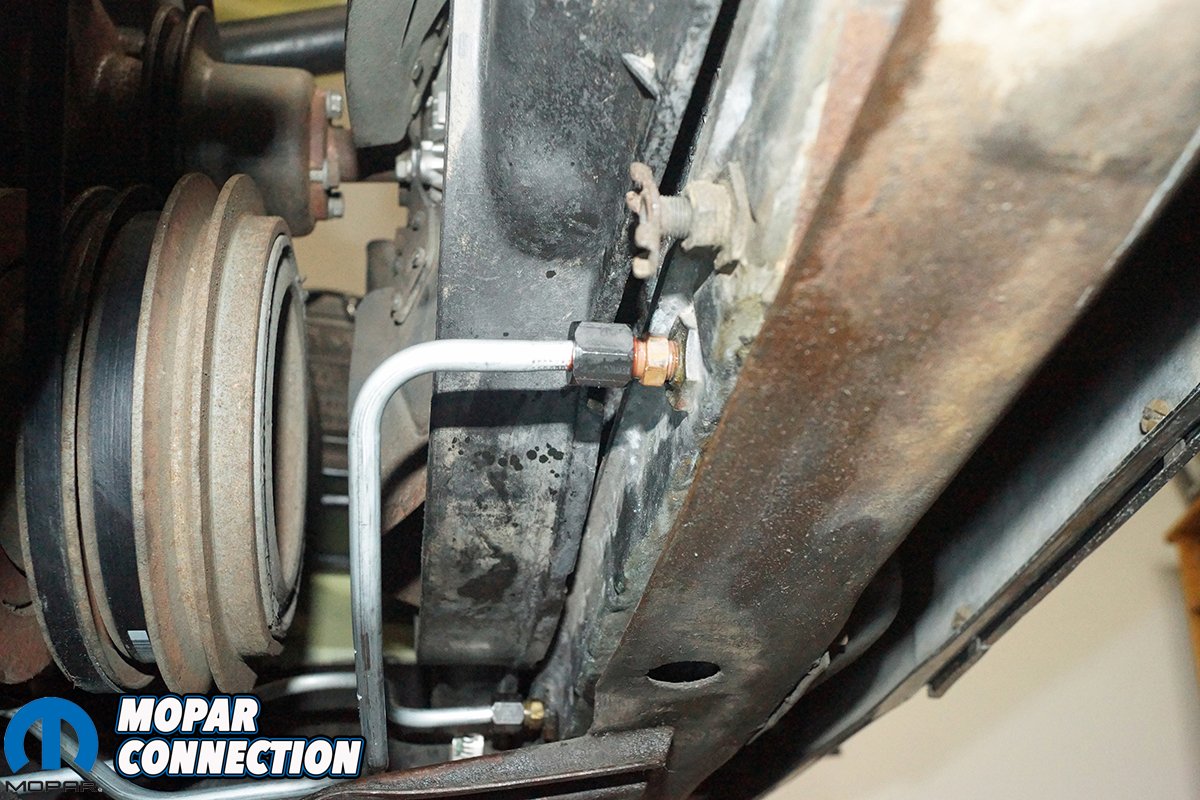
Top Left: The ends of each cooler line had been cut off just before the transmission cooler and connected with rubber hose. The hoses leaked and provided little support for the steel cooler lines, which allowed the cooler lines to rest on the k-frame. Top Right: We were surprised to find barbed fittings in place of the factory 1/8-inch male NPT x -05 AN flare brass adapters. Bottom Left: At the transmission, the cooler lines were connected to the factory brass adapters. Bottom Right: With the two cooler lines disconnected at the cooler and the transmission, we had to remove this clip that held the two lines together.
Luckily for us, a pair of these brass adapters had been removed from the radiator of our 1969 Dart in the summer of 1991 and stored in our tool box for the last twenty-eight years. A 5/8-inch wrench loosened the cooler lines from the transmission, and before the lines could be removed, they had to be separated from each other by removing a clip holding the two lines together. This clip was found about midway between the radiator cooler and the transmission inlet and outlet adapters.
The cooler lines were pulled from the transmission to the front of the Dart under the radiator support by manipulating each steel line around the transmission linkage, bellhousing, oil pan, and the k-frame. We removed the barbed fittings from the radiator, and the brass adapters were threaded into the cooler. If we had not kept the adapters, a pair could have been purchased at most auto parts retailers or home improvement centers.

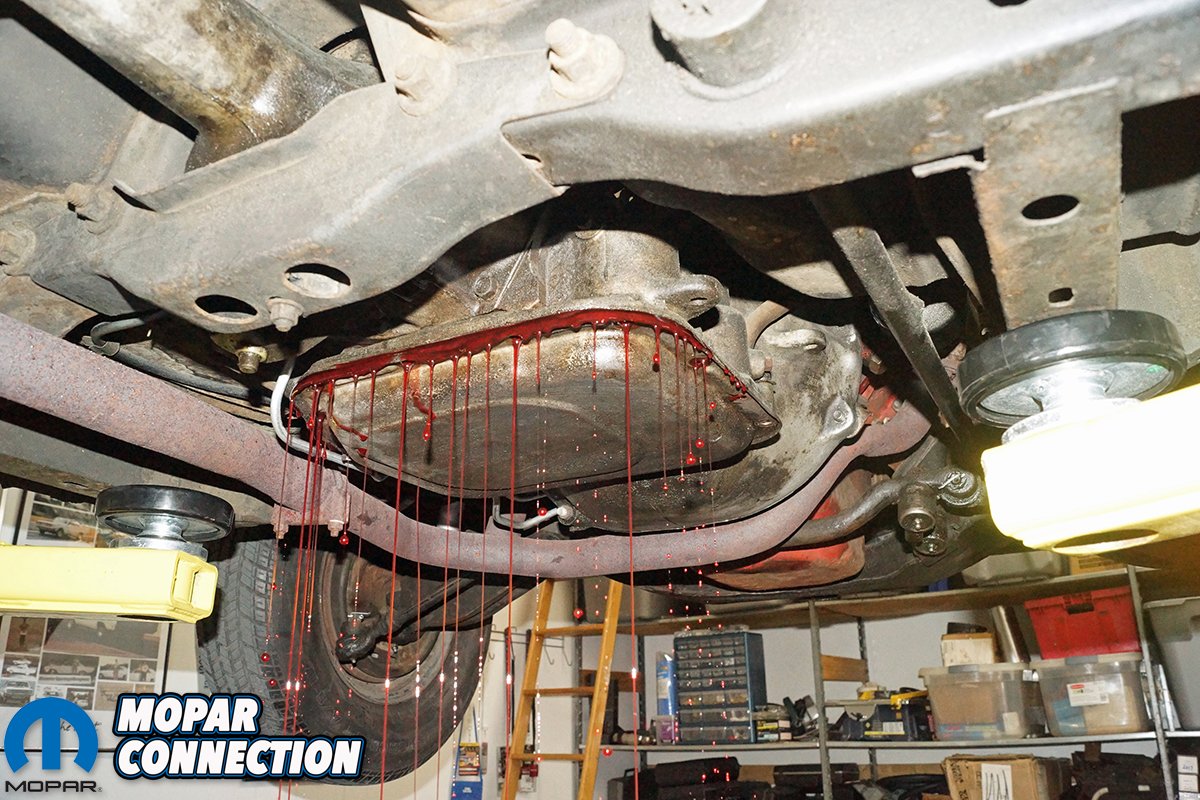
Above: Not knowing when the transmission was last serviced, we dropped the pan on the Torqueflite 904. We were pleased to see clean red transmission fluid spill out of the pan. The fluid looked great, so we cleaned the pan and prepared it for reinstallation.
The new cooler lines had a clip tying the two together just like the factory lines, so just like the factory lines, we removed this clip to aid in the installation. The rear most line was twisted into place first. The line was worked from the radiator support area to the transmission followed by the second cooler line being installed in the same fashion. Each cooler line was threaded onto the transmission adapters, and once snugged, we lightly manipulated the lines to align them with the brass adapters in the radiator. After we had the cooler lines tightened onto all four adapters, we worked each line to clear the oil pan and bell housing. The clip was installed onto the cooler lines, so each line supported the other and held the lines in place and out of contact of any other components.
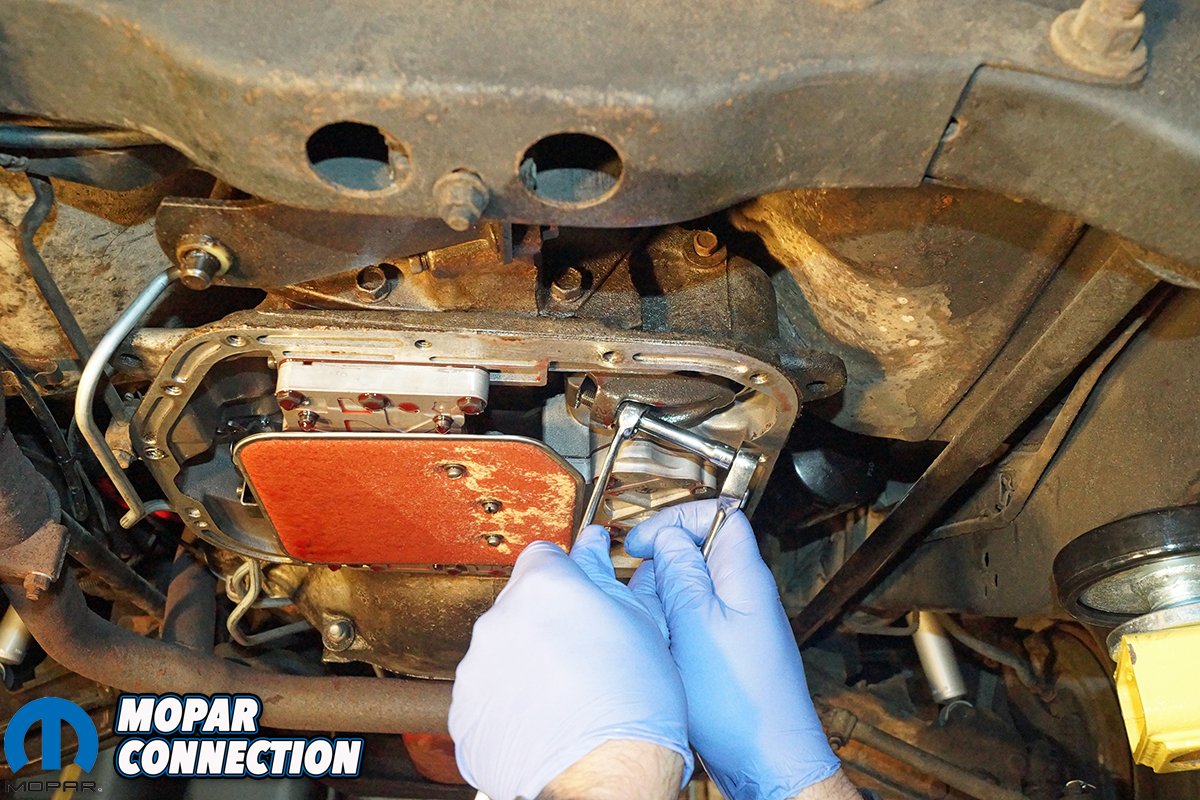
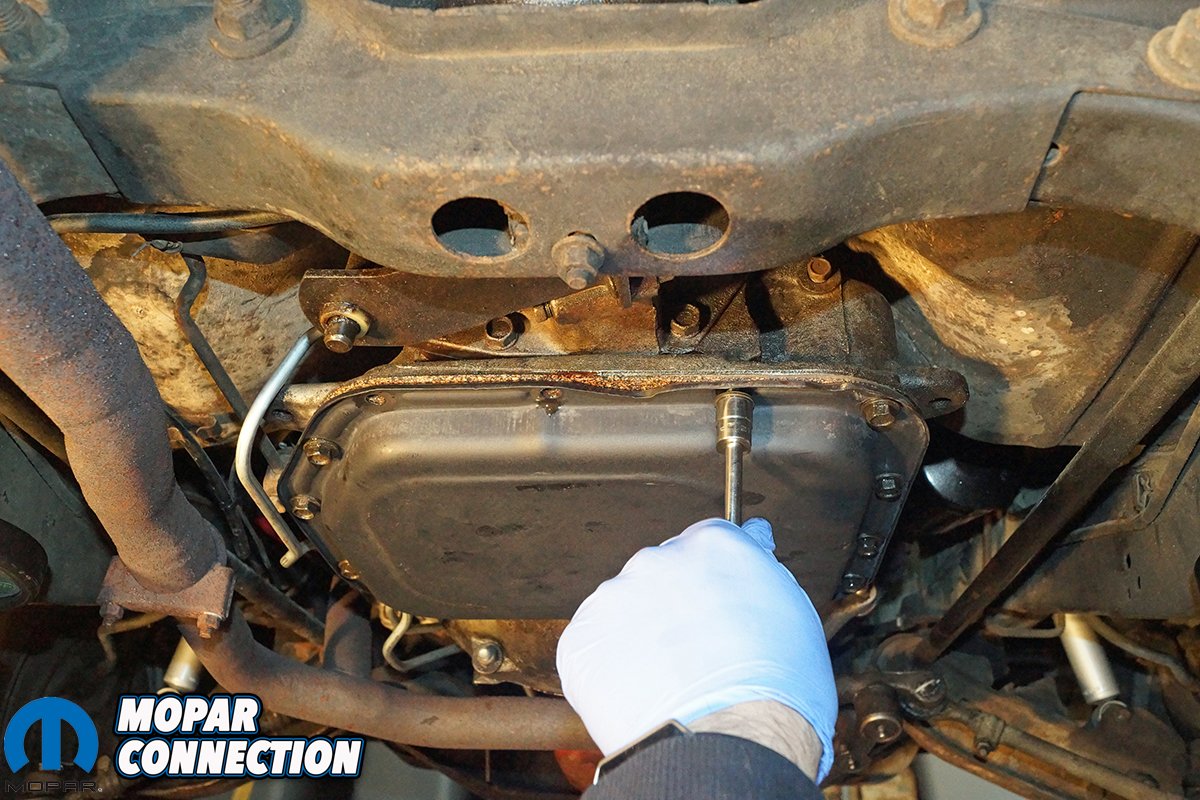
While under the Dart, we dropped the Torqueflite’s pan, and we were pleased to find the oil was a clean red color, and the inside of the pan had nothing but a coating of light gray film, which is common to find at normal service intervals. The pan was thoroughly cleaned in a parts washer, and once cleaned, the outside of the pan was shot with a fresh coat of semi-black paint. Before the pan was reinstalled, the low/reverse band was checked for proper adjustment.
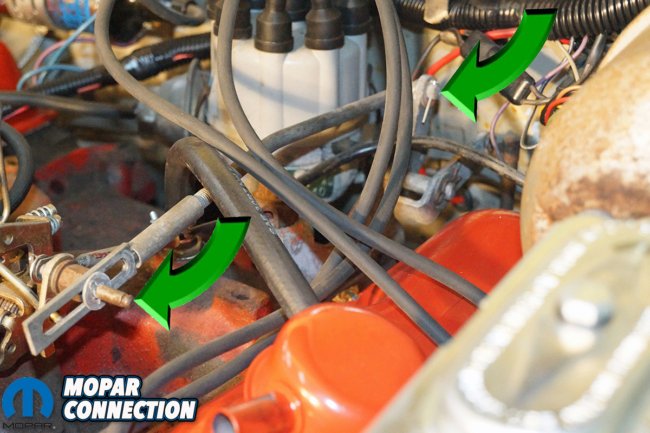


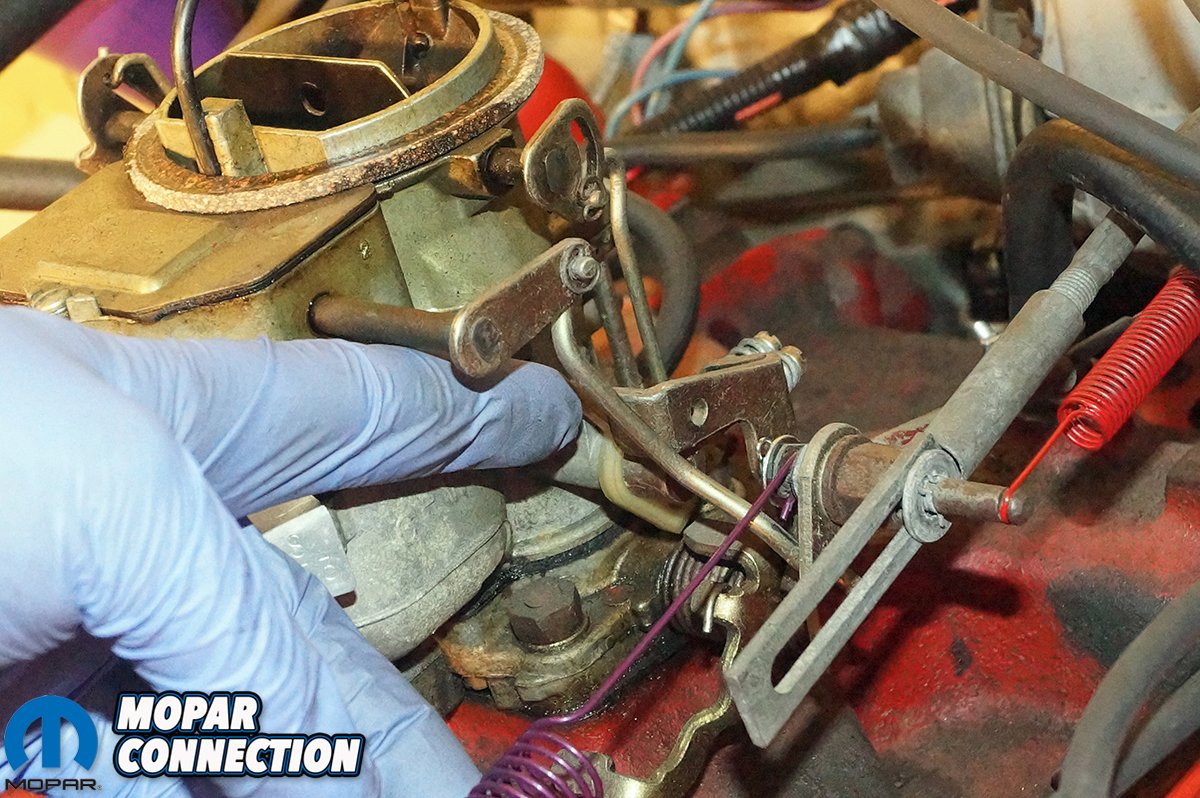
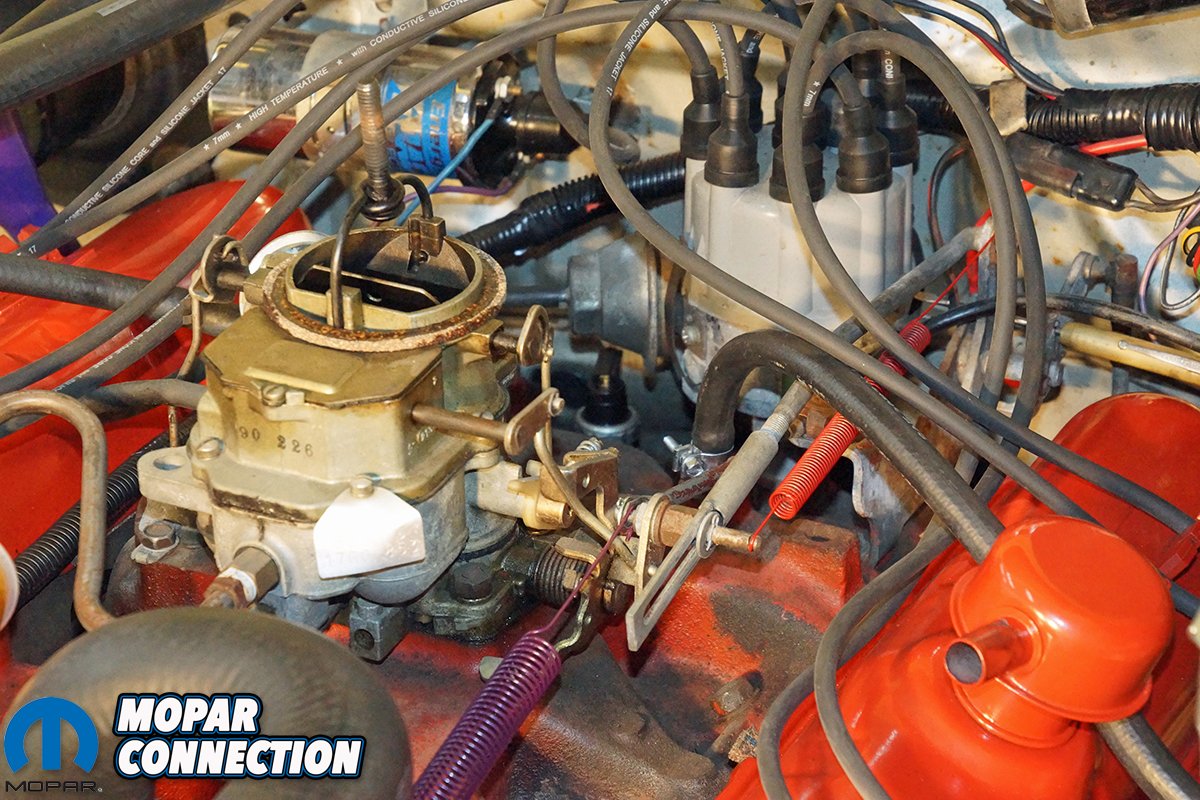
Top Left: The kickdown linkage was allowed to move to any position it desired because the kickdown spring was not installed. The green arrows show where the spring should have been installed with one end at the carburetor lever pin and the other at the kickdown bellcrank. Top Right: A Year One reproduction throttle kickdown spring (part no. BF340) fit our Dart’s Torqueflite kickdown linkage. The spring was a dark red color with a black stripe and mounted from the carb to the kickdown bellcrank. For the return spring, we found a reproduction for a 1971 340 engine (part no. TR29) that would work with our 2bbl carburetor. The spring came in a violet color. Bottom Left: To adjust the kickdown linkage, we installed the throttle return spring and the kickdown spring. We adjusted the carburetor choke to the off (open) position, so the throttle stop would be set to hot idle and not be resting on the fast-idle cam. Bottom Right: To adjust the linkage, we pushed the transmission kickdown lever (green arrow) to the full stop (toward the front of the Dart) and tied it into place with safety wire. The kickdown lever must be at the full stop. If it is not, the misadjusted kickdown linkage can lead to shifting problems or worse a damaged transmission.
We broke the jamb nut loose and torqued the threaded screw to 72-inch pounds. For our 904 Torqueflite, the factory service manual required the threaded screw to be backed off 3 ½ turns, and after the screw was backed out, the jamb nut was re-tightened. We installed and torqued a new transmission filter into the valve body (28-inch pounds) followed by a new gasket and the pan. Each transmission pan bolt was torqued to 150-inch pounds. We adjusted the kickdown band from the outside of the case. Again, a jamb nut was loosened, and the adjuster screw was torqued to 72-inch pounds, but in the case of the kickdown band, the screw was backed out only 2 5/8 turns followed by the jamb nut being retorqued. A 3/8-inch square drive socket was required for the kickdown band adjustment.
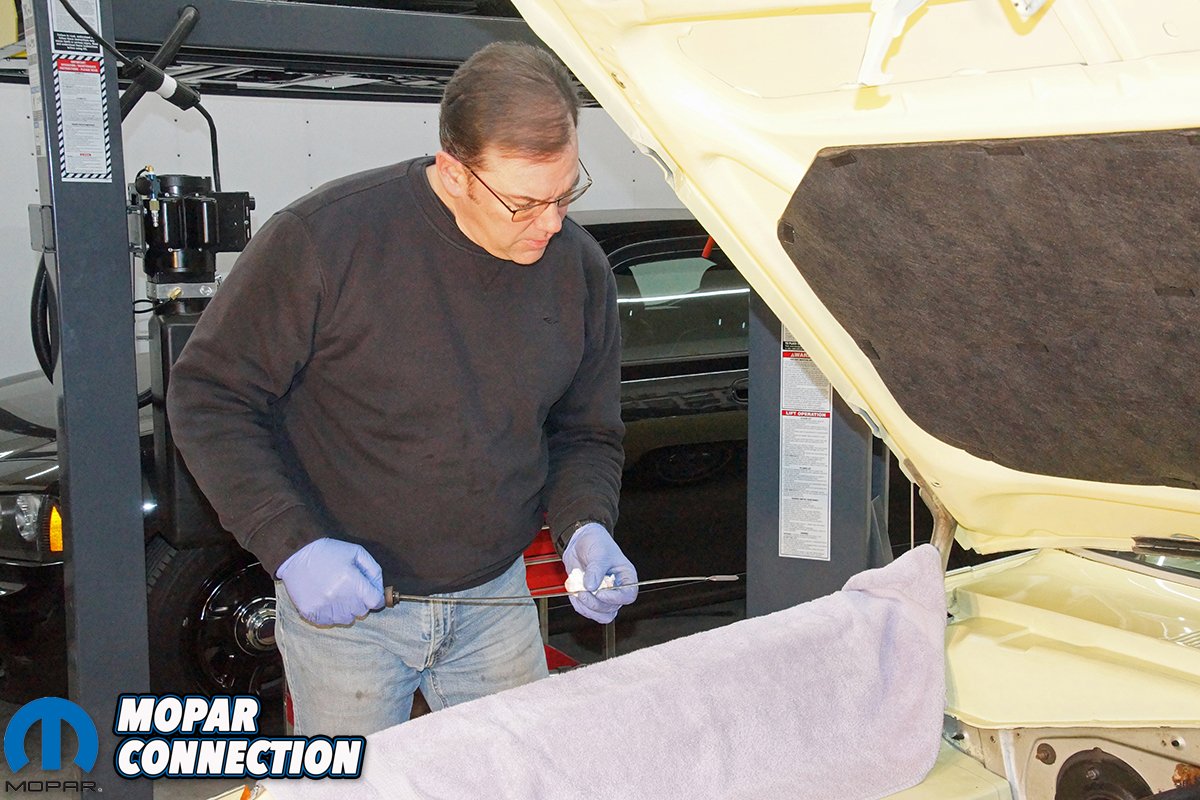
In the engine bay, we removed the non-stock throttle return spring and installed the new Year One violet colored spring. It fit perfectly, and required much less foot pressure on the throttle pedal to open the carburetor butterflies. The red kickdown spring was positioned on the carburetor lever pin, which was attached to the carburetor linkage and the upper bellcrank on the kickdown linkage. To adjust the linkage, we slipped under the Dart and pushed the transmission kickdown lever to the full stop (toward the front of the Dart) and tied it into place with safety wire.


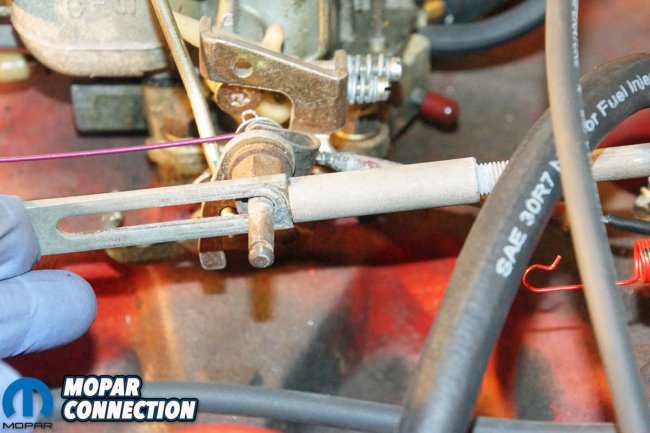
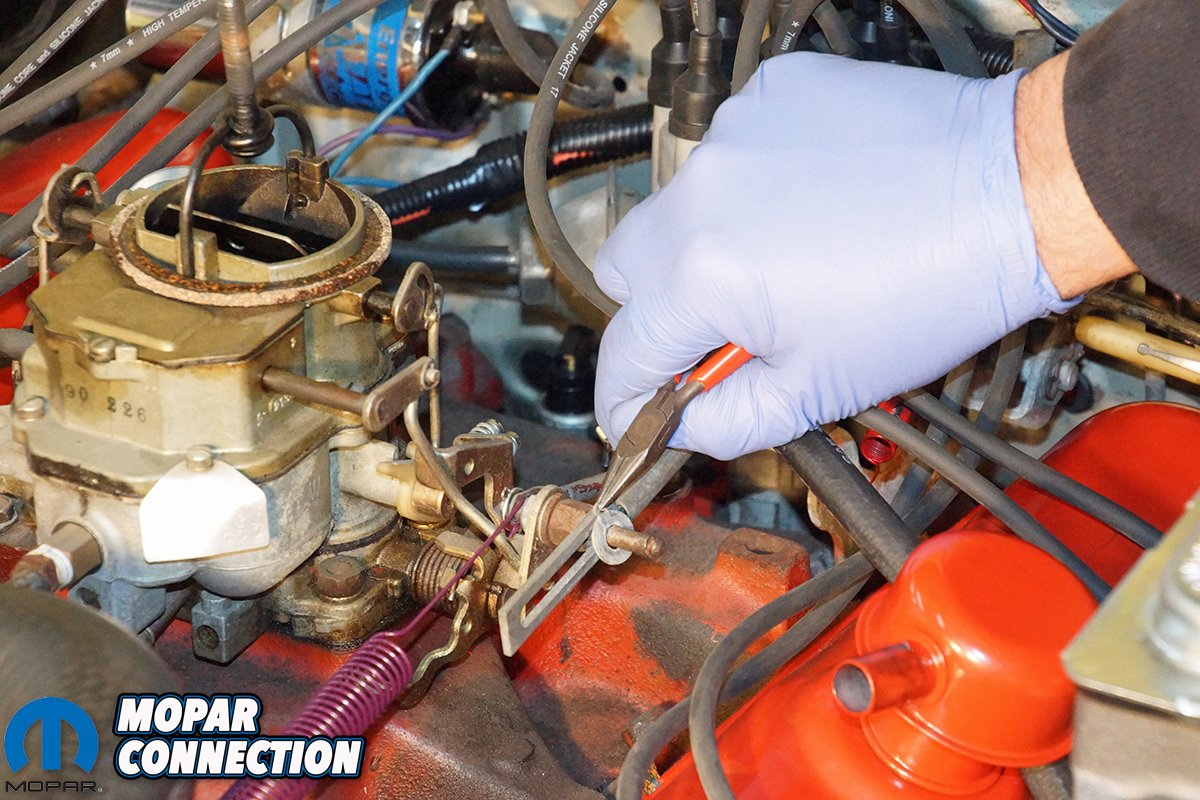
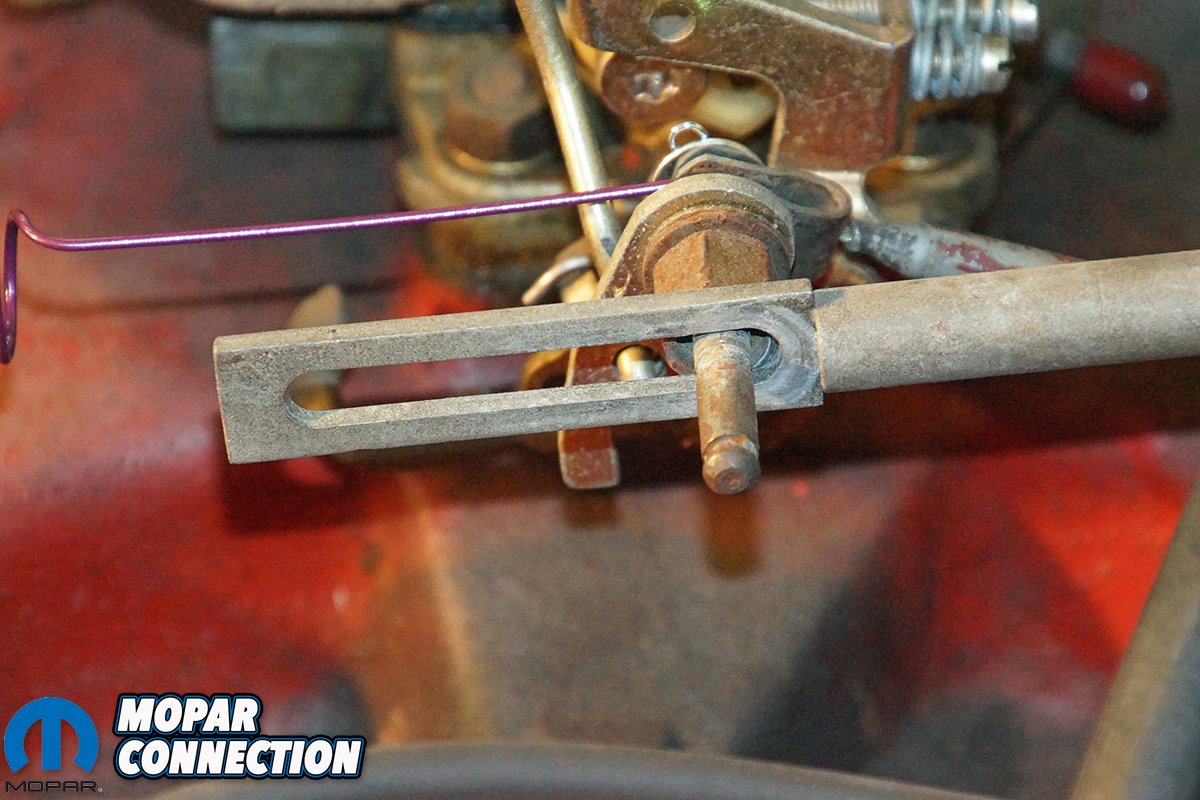
Top Left: A small 3/16-inch screwdriver was slipped between the holes in the bellcrank and the hole in the lever to secure the linkage from moving, and the intermediate transmission rod’s length was adjusted to line up the ball socket with the ball on the lever. Top Right: With the intermediate transmission rod length correct, the carburetor rod was too short. To make the adjustment, we removed the kickdown spring, the clip, and the washer from the carburetor lever pin. Bottom Left: There was a ¼-inch gap between the slot on the carburetor rod and the carburetor lever pin. The slotted end of the carburetor rod was slipped off of the pin and adjusted (lengthened) until the slot made contact with the carburetor lever pin with no gap between the slot and the pin. Bottom Right: The rod was not lengthened to the point where it interfered with the pin and apply pressure on it. Once the carburetor rod was the correct length, the washer, clip, and the kickdown spring were reinstalled.
Back in the engine bay, the choke was placed in the off position, and the intermediate transmission rod was removed from the bellcrank by popping the ball socket loose on the upper end of the rod. A small 3/16-inch screwdriver was slipped between the bellcrank and lever to secure the linkage from moving, and the intermediate transmission rod’s length was adjusted to line up the ball socket with the ball on the lever. The new kickdown spring was removed, and the carburetor rod was pushed rearward to take up the slack.
There was a ¼-inch gap between the slot on the carburetor rod and the carburetor lever pin, so the clip was pulled, the washer removed, and the slotted end of the carburetor rod was adjusted (lengthened) until the slot made contact with the carburetor lever pin with no gap between the slot and the pin. The rod was not lengthened to the point where it interfered with the pin and apply pressure on it. Once the carburetor rod was the correct length, the washer, clip, and the kickdown spring were reinstalled. The throttle cable was readjusted to provide wide-open-throttle (WOT) when the throttle pedal was depressed. With the kickdown properly adjusted, the screw driver was removed from the bellcrank.


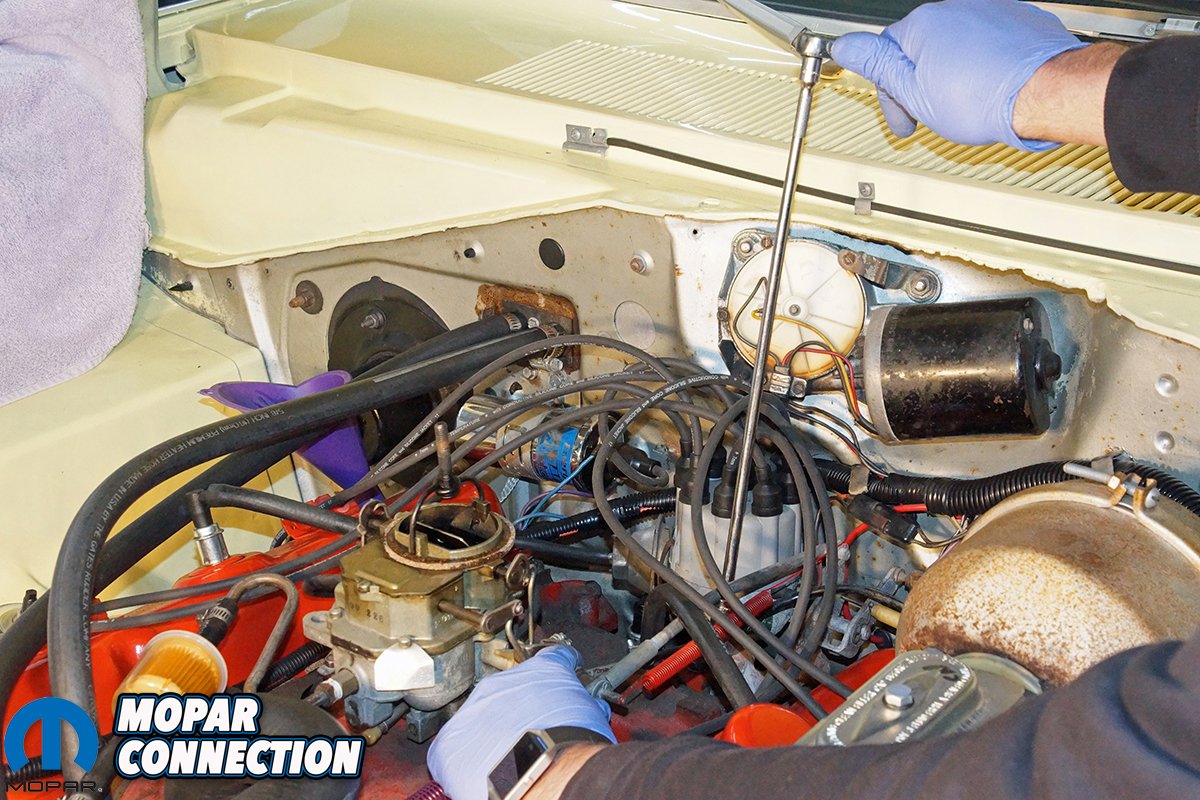
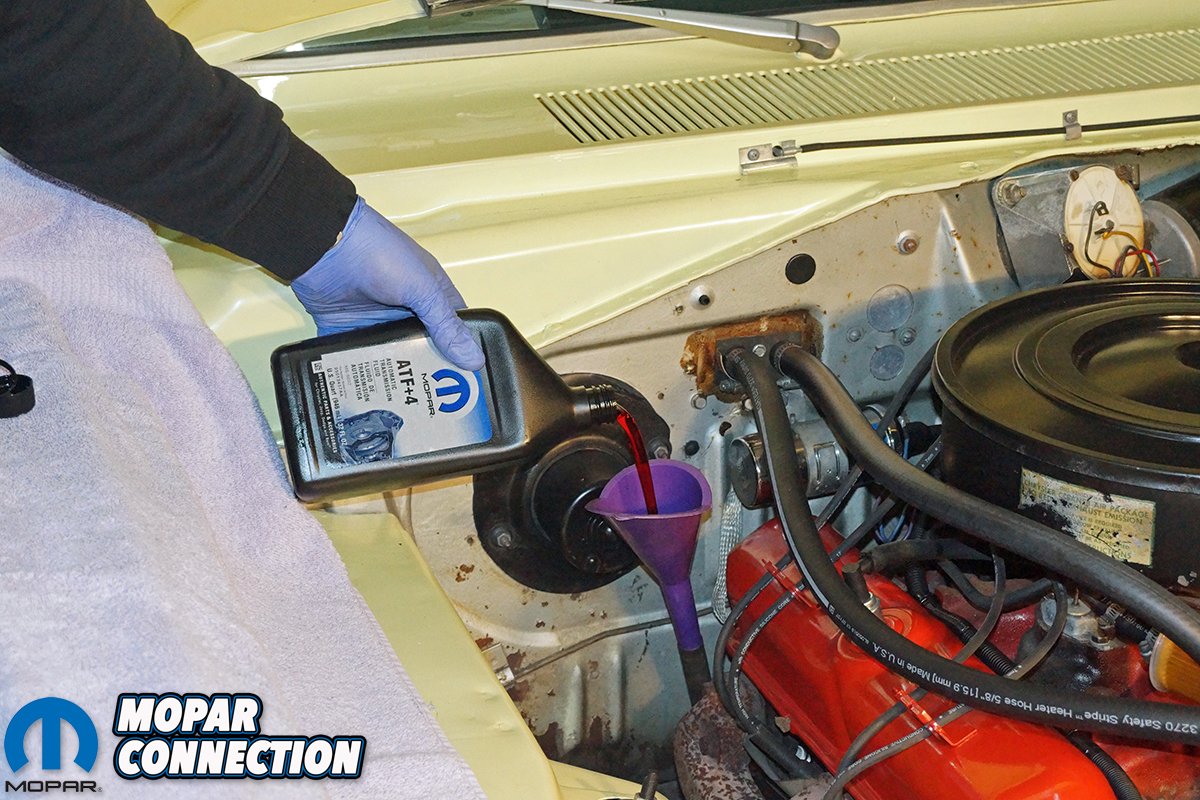
Above Left: With the new throttle spring in place and the kickdown linkage adjusted with the new kickdown spring, we pulled the screw driver from the bellcrank and lever. Above Right: We added five quarts of AFT+4 transmission fluid to the Torqueflite. We took it out for a test drive and rechecked the fluid while in neutral to verify correct amount was added.
With the new parts installed, we added five quarts of AFT+4 transmission fluid, and the engine was started and brought to operating temperature. The transmission was worked through the gears, and the selector was left in neutral, so the transmission fluid level could be checked. Once the fluid level was adjusted to specifications, the Dart was taken on a test drive, and the Torqueflite operated flawlessly. The transmission shifted without error, the kickdown operated properly, and there were no leaks or drips from the new transmission lines. Best of all, the throttle pedal was easy to push, yet it would snap back when released.
It is always a challenge to find and fix the errors of previous owners, but in this case, the blunders that occurred on our transmission were small, and we were able to make the repairs with little difficulty. The quality parts from Year One fit properly, looked fantastic, and took care of our problems. If you are in a similar situation where you are fixing the work of others, give the representatives of Year One a call, so you can acquire the proper parts for the restoration of your Mopar and return it to the just rolled off the showroom floor operation.


