


While a CB radio might have been the height of electrically-driven accessories in the 1970s, the 21st century has birthed a host of power-sucking products that have become very common in the muscle car world. Electronic fuel injection, electric fuel pumps, electric fans, high performance ignition, and aftermarket gauging can quickly overcome the factory Chrysler alternator’s meager capabilities. Unfortunately, a one-for-one swap to something with more output isn’t really the right answer. Amperage in excess of what the factory intended can easily melt a bulkhead terminal, cook the charge wire, or smoke out an ammeter.
Without a doubt, the stock charging system in a restored car with all new stock-style components is as reliable as they come. Hundreds of thousands of Mopars have gone millions of miles on those OEM setups. Through 1969, it consisted of a mechanical regulator with a “round-back” alternator. Output on these early units is throttled by controlling the power going to the field circuit.


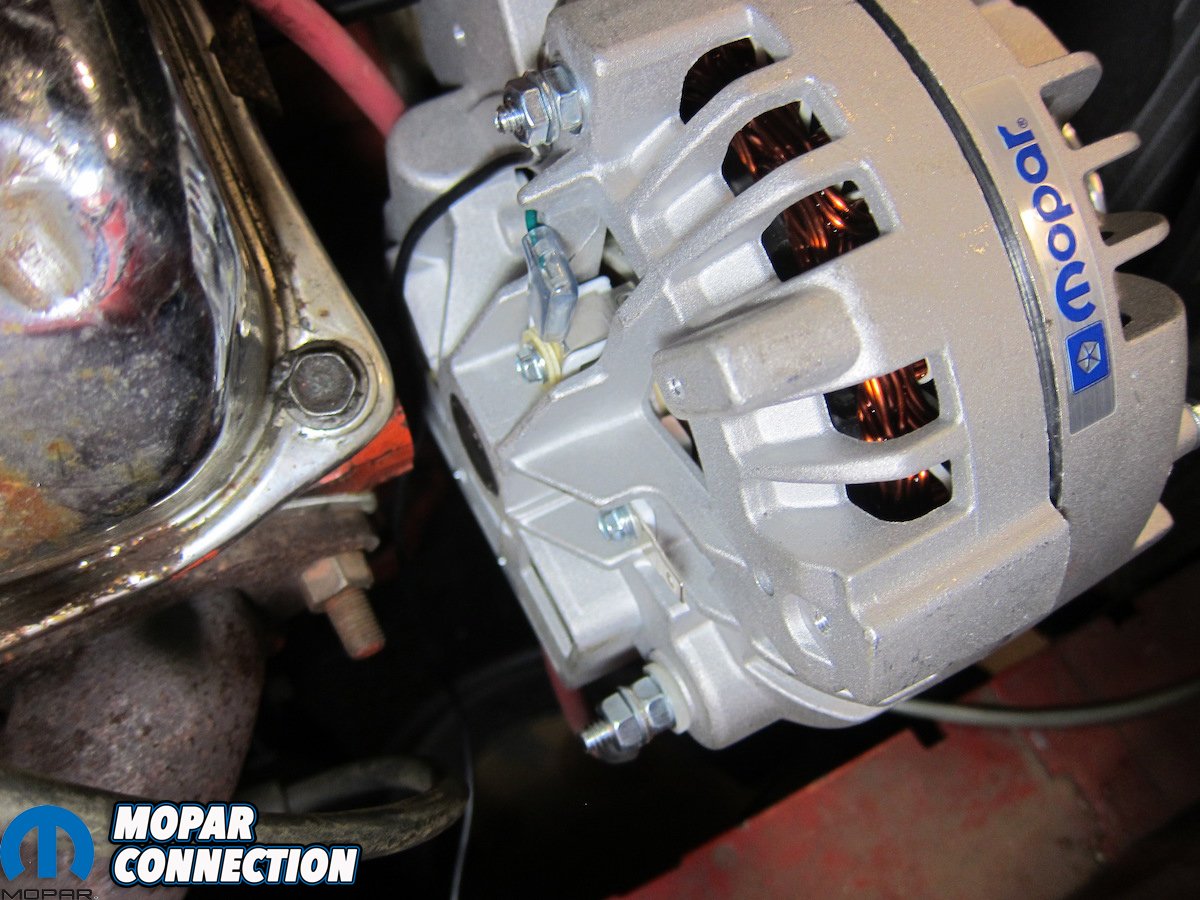
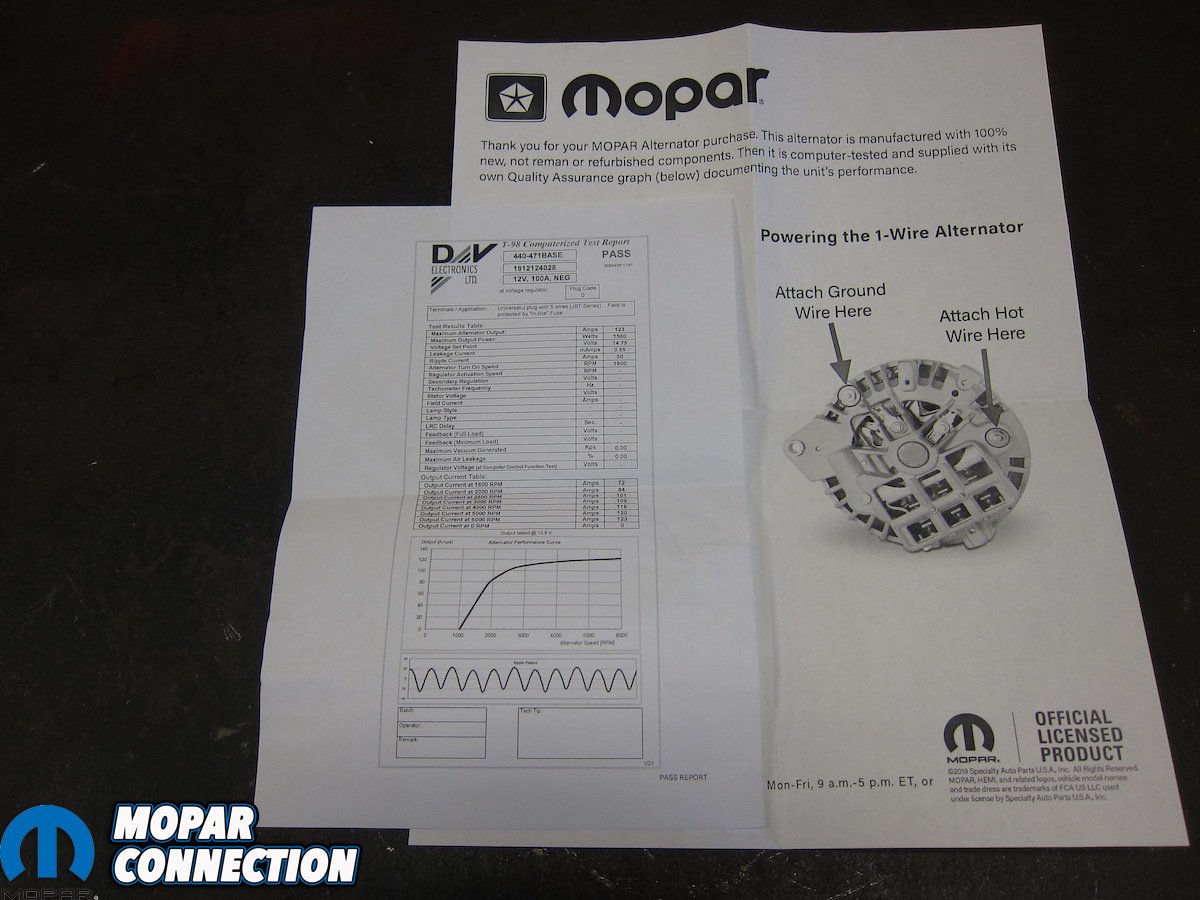
Above: Fresh out of the box, the Mopar alternator was an eye-catcher. Even more eye-popping were the numbers on the test report with 110+ amps on tap.
1970 brought a new transistorized electronic regulator that amazingly stuck around through the early 1990s. This is often known as the “square-back” alternator system, although early units did still use a round-back case. The main difference is that output on electronically-regulated systems is throttled by controlling the ground side of the field circuit. The combination of control method and improved electronics made it a huge improvement over the older version.
Though never offered by Chrysler, aftermarket one-wire systems made their way into the mix sometime in the 1970s. As the name suggests, the allure was streamlined wiring and, in most cases, more output. Basic theory of operation closely resembles that of an externally-regulated system, but with a special internal regulator that doesn’t need an ignition wire to “excite” it. Only a charge wire is needed as the alternator’s circuitry inside will do the rest.


Above: The outgoing alternator and voltage regulator weren’t original and were showing their age.
On all but the most faithful of restorations, most Mopars have been the recipient of the simple upgrade from round to square-back. Our 1969 Dodge Super Bee was changed over long ago with a conversion harness from YearOne. However, years of added accessories and slowly-decaying wiring recently brought it to its knees.
An unsteady charge that didn’t respond to standard troubleshooting procedure led us to the realization that it might be better to start from scratch. After all, a custom high-performance ignition system, electric fuel pump, aftermarket radio, O2 sensor, and some data-logging equipment were all way too taxing on the factory setup anyway.
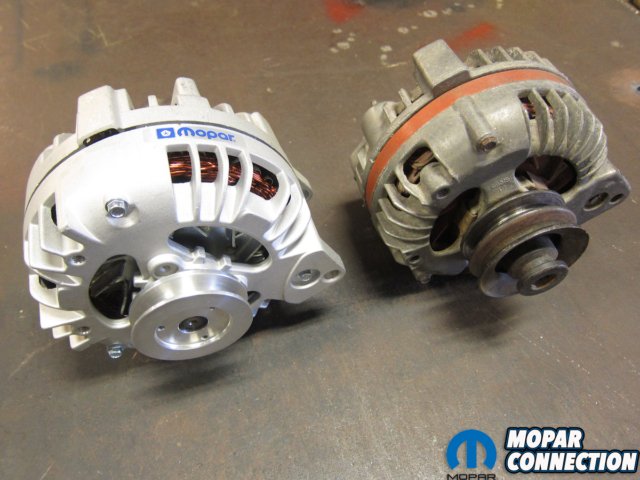

Above: Comparing the two, there were very few discernible external differences between them. All the excitement was on the inside of the Mopar one-wire.
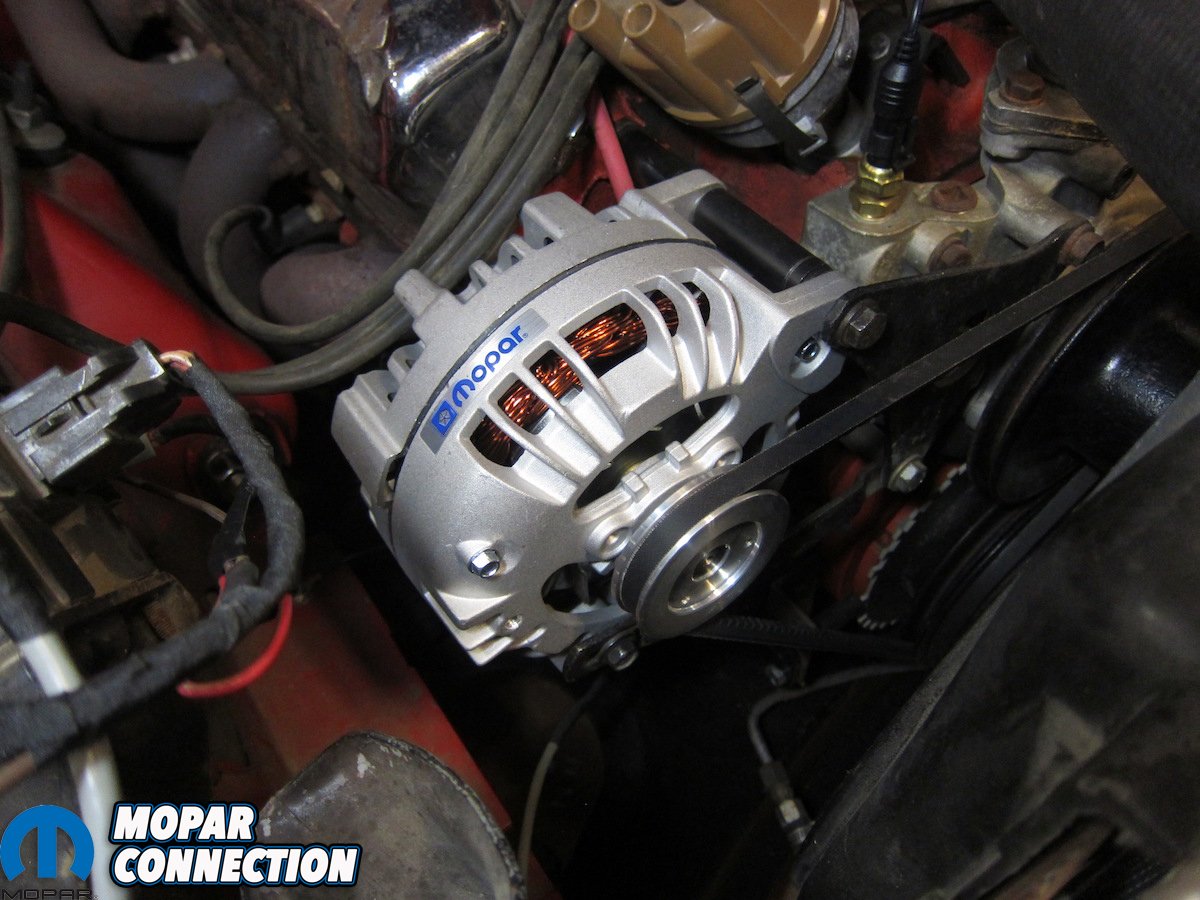
A Mopar officially-licensed 110-amp one-wire alternator (P/N 440-471) was tasked with putting our power problems out to pasture. Right out of the box, its natural finish aluminum case and vintage Mopar emblem were a step in the right direction. A visual comparison between it and the original alternator netted few discernible differences. The case is cast in almost the exact same shape with stock mounting locations and the signature square-back design all intact.
Of course, the big difference is inside. That unsuspecting case hides a regulator and enough guts to merit its massive 110-amp rating. The benefit of the internal regulator is the one-wire hookup. Without a remote regulator like factory, all wiring except the charge wire is contained onboard the alternator itself. This both simplifies installation and cleans up the engine bay as two less wires are necessary.

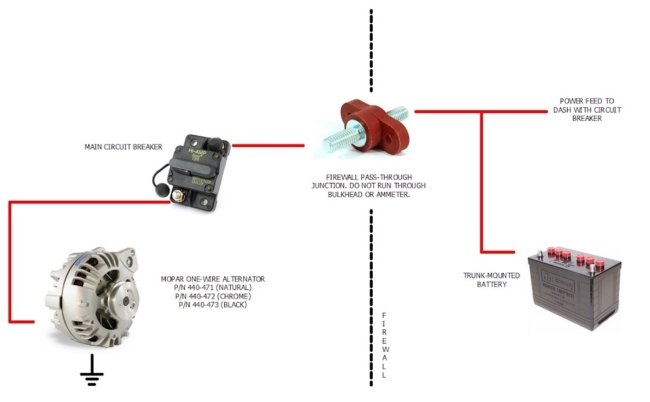
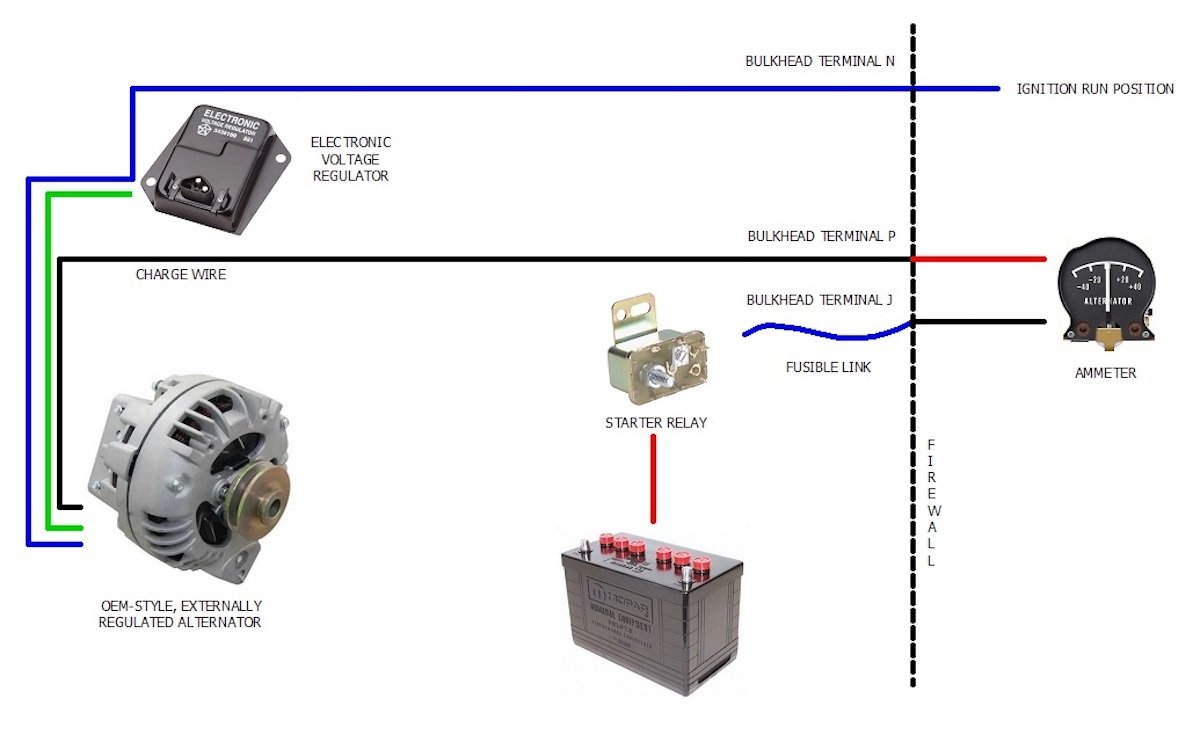
Above: The factory charging system ran all amperage through the bulkhead and ammeter. Both were weak points after upgrading to higher output. Simplified wiring replaced the factory stuff with something much more robust.
One-wires used to have a bad reputation for low output at idle, but that really isn’t the case with modern variants. In fact, the test sheet that came with ours showed an available 72 amps at idle alone; that’s more than the factory alternator could have produced at maximum output.
To start with, the ammeter had to go. In no scenario would it be burly enough to handle that kind of amperage in the event that it was needed. For this application, removing the ammeter from the circuit involved much more than just bypassing the gauge; the undersized bulkhead terminals that were set to melt at any time also needed to be eliminated. To do so, we decided to route power through a heavy-duty pass-through junction stud. Rated for 250 amps, it would have no problem handling anything the high-output alternator could throw at it.

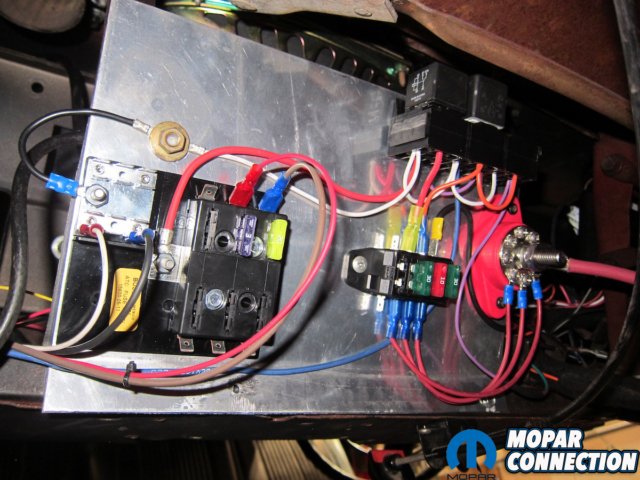
Above: Custom cables were made to ensure proper charge wire sizing. A custom fuse panel was mounted under the dash for our various add-on accessories.
We also needed a means of protection in the event of something like a dead short, so a circuit breaker was selected to match the maximum amperage output on the test report. Since the outgoing voltage regulator’s spot on the firewall was vacant, that’s where the breaker was slotted.
From there, it was just a matter of connecting the dots. As with all of our custom wiring jobs, Flex-A-Prene® cable was used for the high-amperage runs. From the alternator stud to the pass-through junction, our reference chart showed that 6 gauge wire would do the trick. For the long run back to the trunk-mounted battery, 2/0 has proved able to throw enough voltage up front to start a high-compression big block with a heat-soaked starter. Each cable received crimped terminals and heat shrink protection.
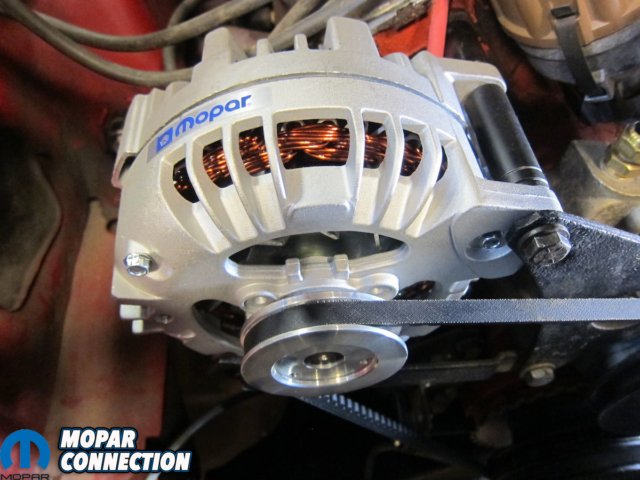

Above: Wiring at the alternator was really simple with only a power stud (bottom) and a ground stud (top) needing to be connected. The stock V-belt was retained.
Proper grounding is vitally important in any electrical system and while the alternator should theoretically ground itself through the brackets and engine, we added a dedicated ground to the frame per instruction. The internal regulator throttles output through the ground circuit just like an external one would, so grounding is important in both cases. In general, too many is just enough when it comes to ground wires.
Since we were this deep into the wiring and adding a new gauge cluster at the same time, two auxiliary fuse panels were added under the dash: one for switched power and one for constant. With the ammeter circuit no longer powered, it was necessary to provide a power feed to the dash. The extra fuse panels offered quick hookup for that as well as other accessories like the electric fuel pump and ignition.

Connections made, it was time for a test. First checks were for blown fuses or non-functioning accessories, of which there were none. Multimeter in hand, the second stop was the trunk to measure voltage at the battery. As expected, the Mopar alternator had it right on the money at 14.4 volts.
Under hood, we were glad to be rid of the oozing old regulator and unnecessary wiring. The alternator’s natural case finish fit right in with the Bee’s subtle day-two styling while cleaning up the overall look considerably. Above all, rock-steady charging regardless of RPM finally gave us some peace of mind at a stoplight. Rather than revving the engine to keep the headlights from flickering, we were able to focus on more important matters: mashing the gas on green to beat any challenging minivans to the next light.

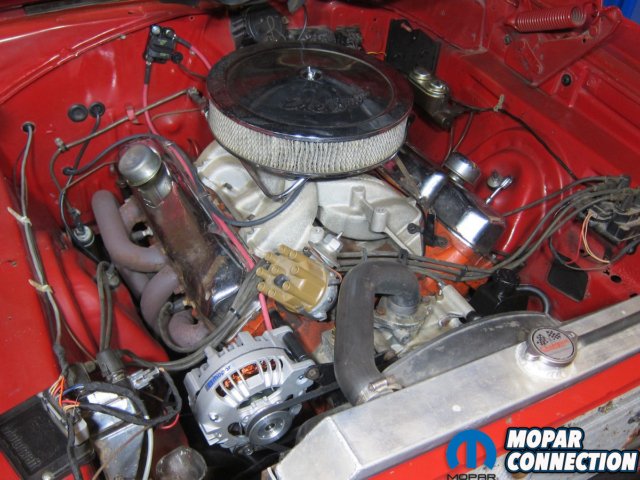
Above: The one-wire Mopar alternator really cleaned up engine bay wiring while also adding a bit of elegant flash to our 440.


