


 Proper fitment of an intake manifolds involves a bit more than just tossing a chunk of aluminum atop a set of heads and torquing it down. As previously mentioned, Hughes Engines has a method and, while tedious, it’s a textbook lesson on how to do this correctly.
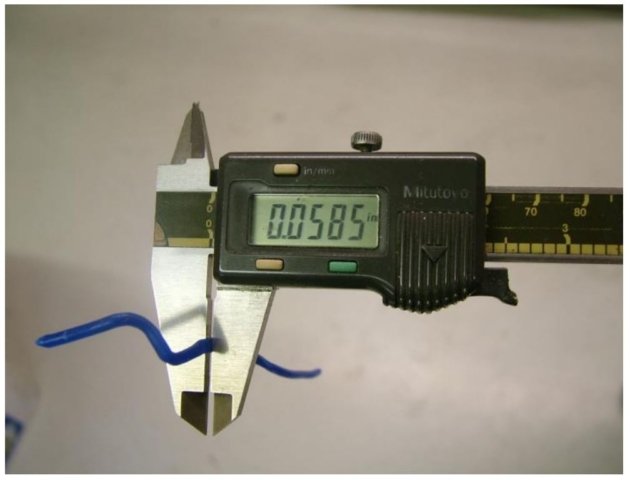
It all starts with some 10-gauge (0.100”) wax wire laid on the outsides of the end ports on each fully-installed cylinder head. Next, four identical washers are “glued” with grease to the underside of the outer bolt holes on the intake manifold. Then, the manifold is carefully placed onto the heads without disturbing the washers or the wax wire.

The four outer bolts get snugged enough to bottom out the intake on the washers, compressing the wax wire in the process. After that, the bolts and intake can be removed, leaving the flattened wax that can be measured gingerly at its top and bottom with a pair of calipers.
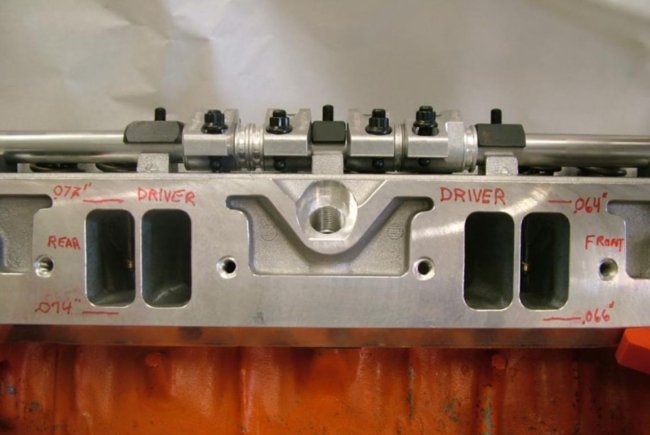
On Hughes’ example setup, the measurements (pictured) indicated an 0.008” combined larger gap at the bottom in the front and a 0.006” larger gap at the bottom in the rear. Both were actually the opposite of ideal which is an 0.006” to 0.008” larger gap at the tops.
Machining the manifold is the best option for correction and any competent machine shop can handle the job if give the proper method for measurement. The details are all available online, so there’s no excuse for your intake to be ill-fitted.


