


“And one day, it just stopped working,” I concluded. There was a pause from the other end of the phone call as the customer service technician was double checking his answer. “It sounds like either the cancelling cam or the turn signal switch went bad. I can get those out to you today.” Amazing, I thought to myself. I had been on the phone with Flaming River Industries‘ tech line for less than 7 minutes (according to the clock on my iPhone) and within that time I had presented my problem, relayed the symptoms and received a prognosis and solution. Considering it would’ve taken me 7 minutes to write a single email, today’s chore was resolved lightning quick.
As described, the turn signal switch in Mopar Connection’s long term “Brazen” ’69 Dodge Charger R/T‘s tilt-steering Flaming River column suddenly ceased its cancellation function. The turn signals worked fine, and the indicator arm clicked accordingly, but whenever I turned the wheel, the turn signal would fail to cancel out. And because the faint clicking of the turn signal could rarely be heard over the din of our 535ci “Wicked Wedge of The South”, I often would forget and continue driving with a blinking signal like a senile octogenarian. Because the Flaming River column uses mainly GM internals, I was left turning to their service line for assistance.

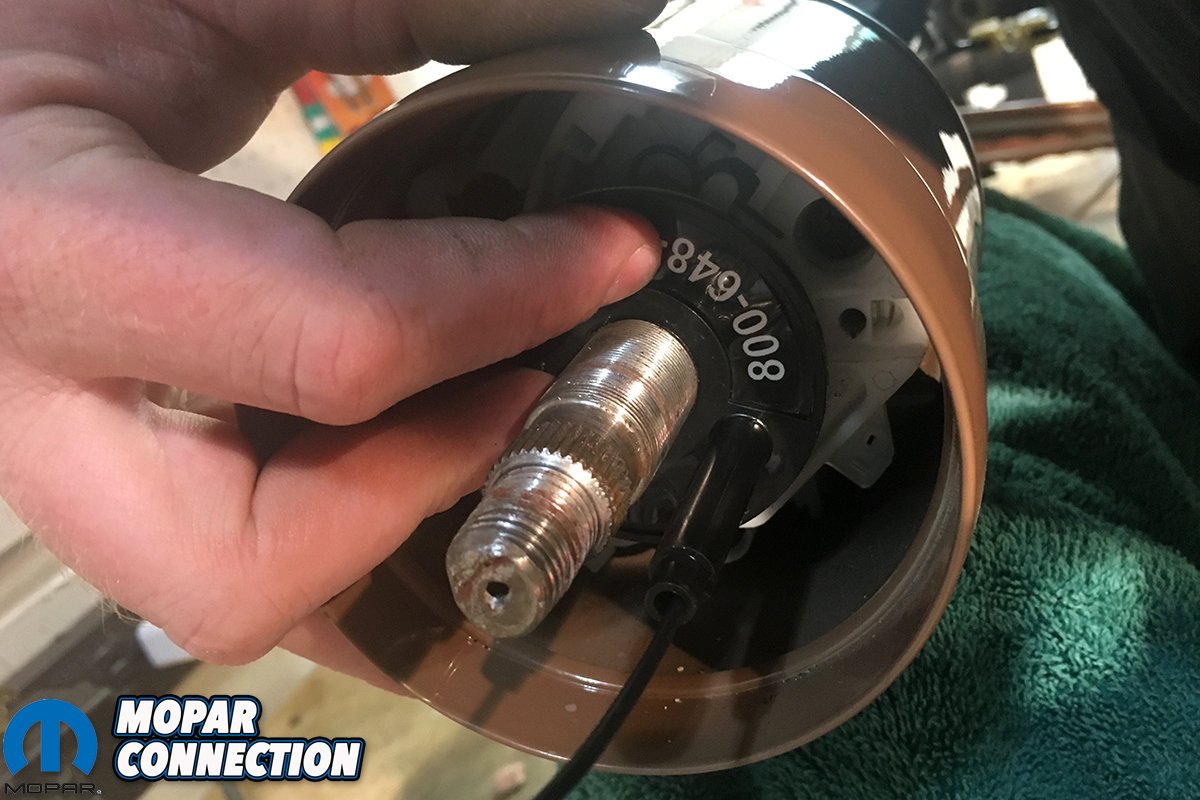
Above: We had hoped that our misbehaving steering column were going to be an easy fix, but Flaming River’s very helpful tech service line, suggested that the turn signal switch and cancellation cam would require replacement.

Above: Flaming River’s tech blog provided this helpful exploded view to better understand our tilt-steering column’s assembly.
Gratefully, Flaming River not only maintains the service tech line, but keeps it well staffed and operating beyond regular working hours. This allowed me to call in over the weekend and give me a head start. Replacing the turn signal switch is no easy task, and requires the entire column to be removed, and frankly, gutted. The turn signal switch is a three-piece cam that encompasses the column’s shaft and who’s loom is wired directly to. To feed the new loom into the column, all of the tongs will have to be popped from the harness and snaked down the column to the grommeted relief in the side. “This is going to take forever,” I groaned to myself.
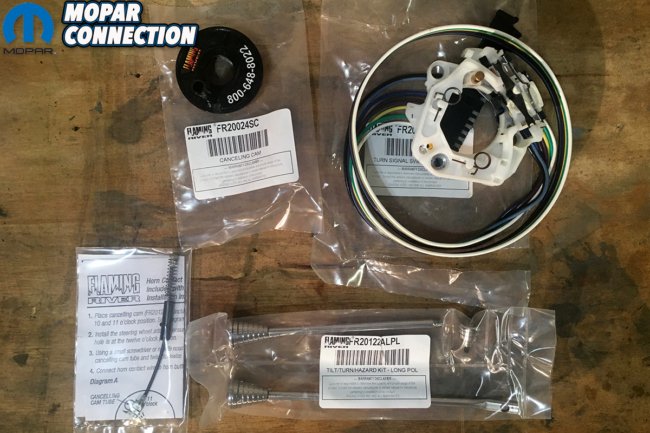
One small addition to my list of symptoms was the inexplicable failure of my horn button. Seeing that the switch was pinned as the culprit, I estimated that as the cancellation mechanism failed, so would other features. So off came the horn button, and the steering wheel with the help of a budget puller kit I picked up at Harbor Freight a decade earlier. Loosening the billet universal joint from our Flaming River manual steering box, the column came out effortlessly. By this time, the replacement Turn Signal Switch Kit (pt# 100841), Cancelling Cam (pt# FR20024SC) and Horn Contact Kit (pt# FR20120HN-R) had all arrived.

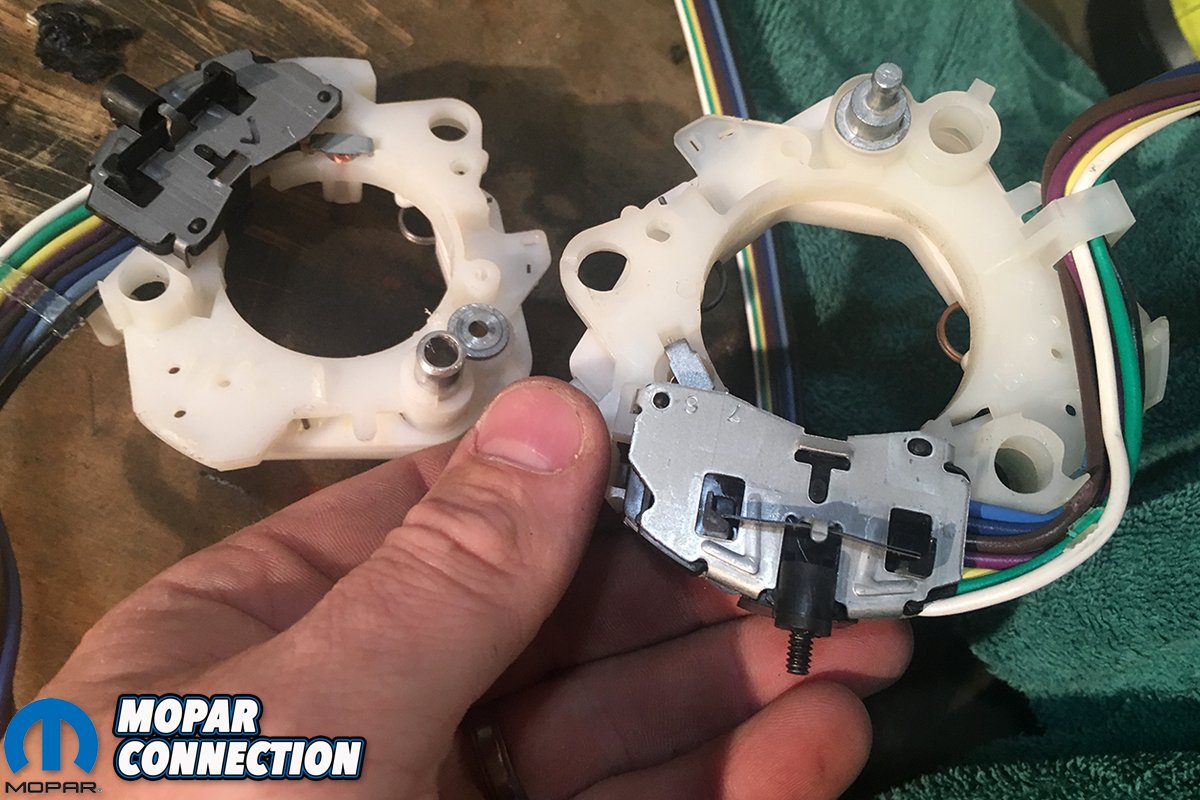
Above: The turn signal switch provided by Flaming River showed slight differences between it and what was already in our column, but nothing that would prove detrimental. Rather, we observed that our switch appeared to be in complete working order, allowing us to ship the unused switch back.


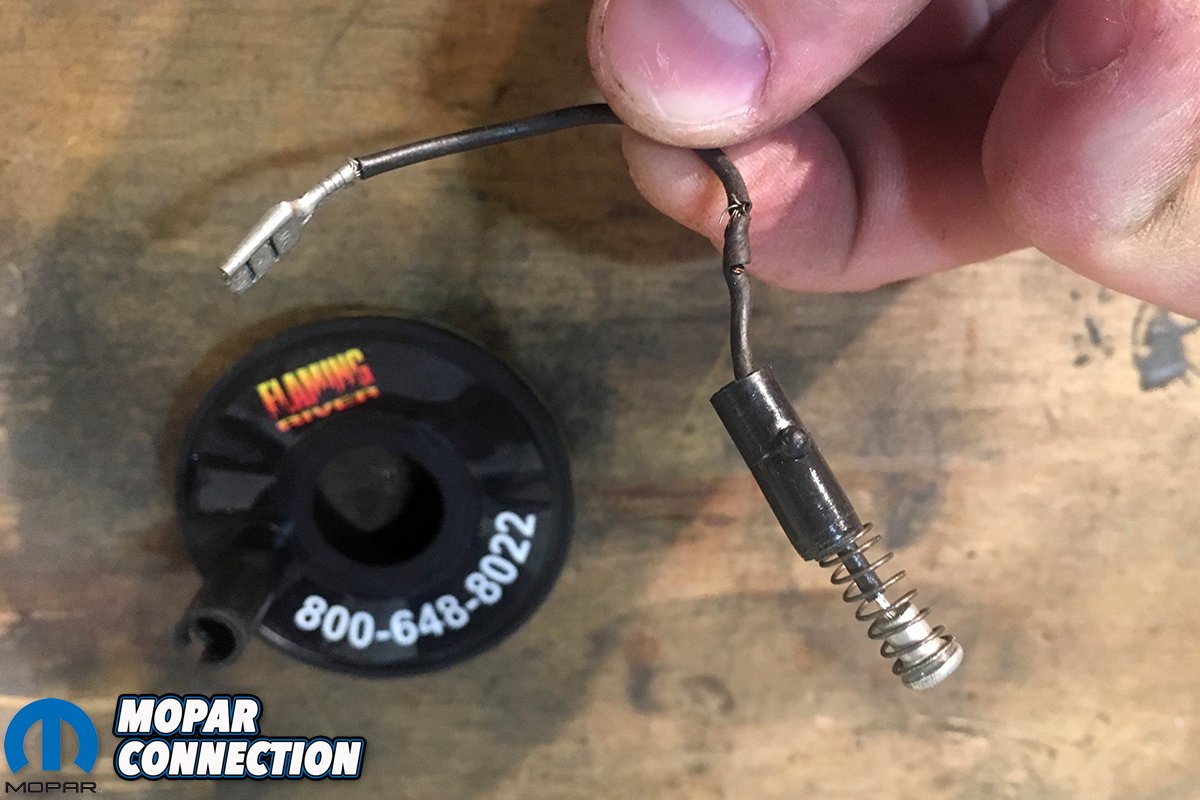
Above: Whew! Thankfully, all that was wrong was a broken horn contact switch and a misaligned cancellation cam switch. These are far easier fixes and don’t require the labor of replacing the turn signal switch.
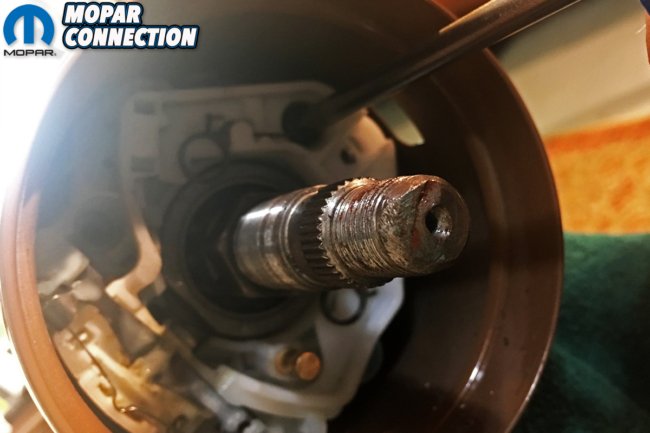
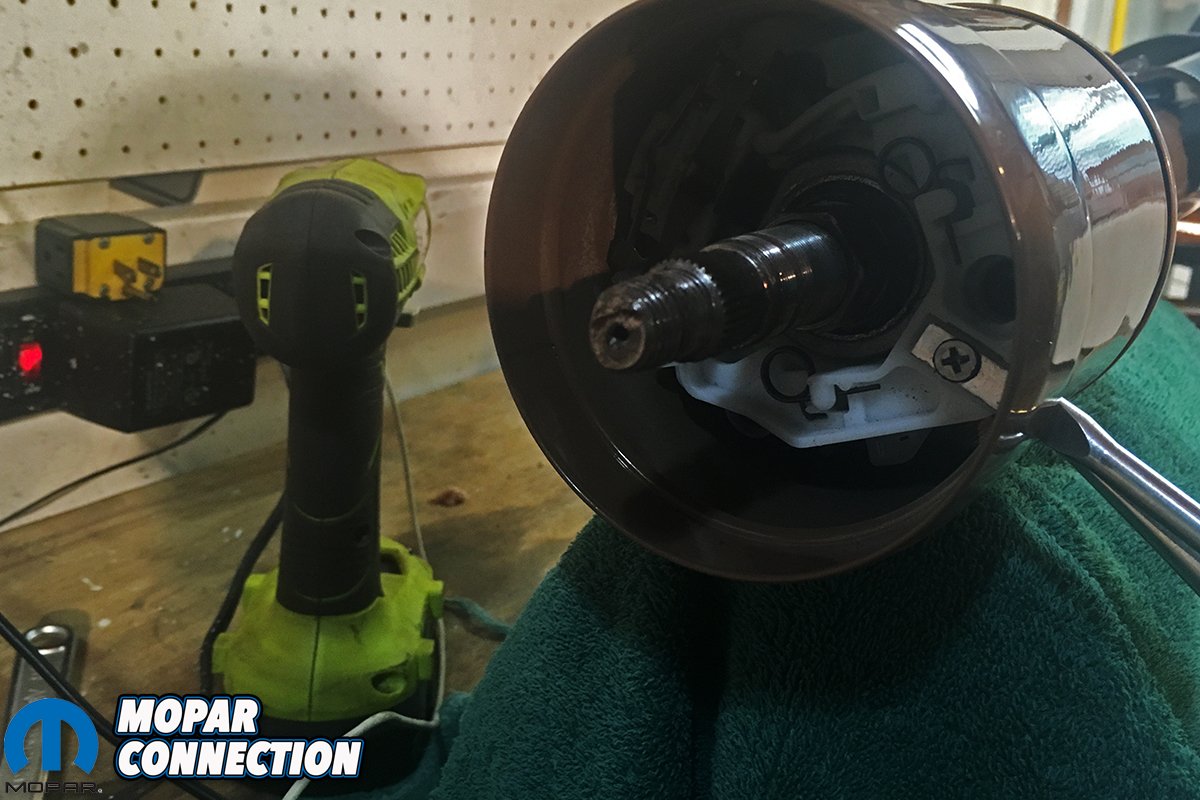
With the steering wheel off, the retaining nut and compression spring came off easily. Then came the original cancelling cam and horn contact switch, showing the original turn signal switch. Before going so far as to disassemble the wire loom, I pulled the signal switch further out to take a closer look. Small inconsistencies between the original switch and replacement gave me pause. I also began to study how the switches worked. There appeared to be nothing wrong with my existing switch, so I started backtracking to see where the failure may have occurred. It didn’t take me long to find out.
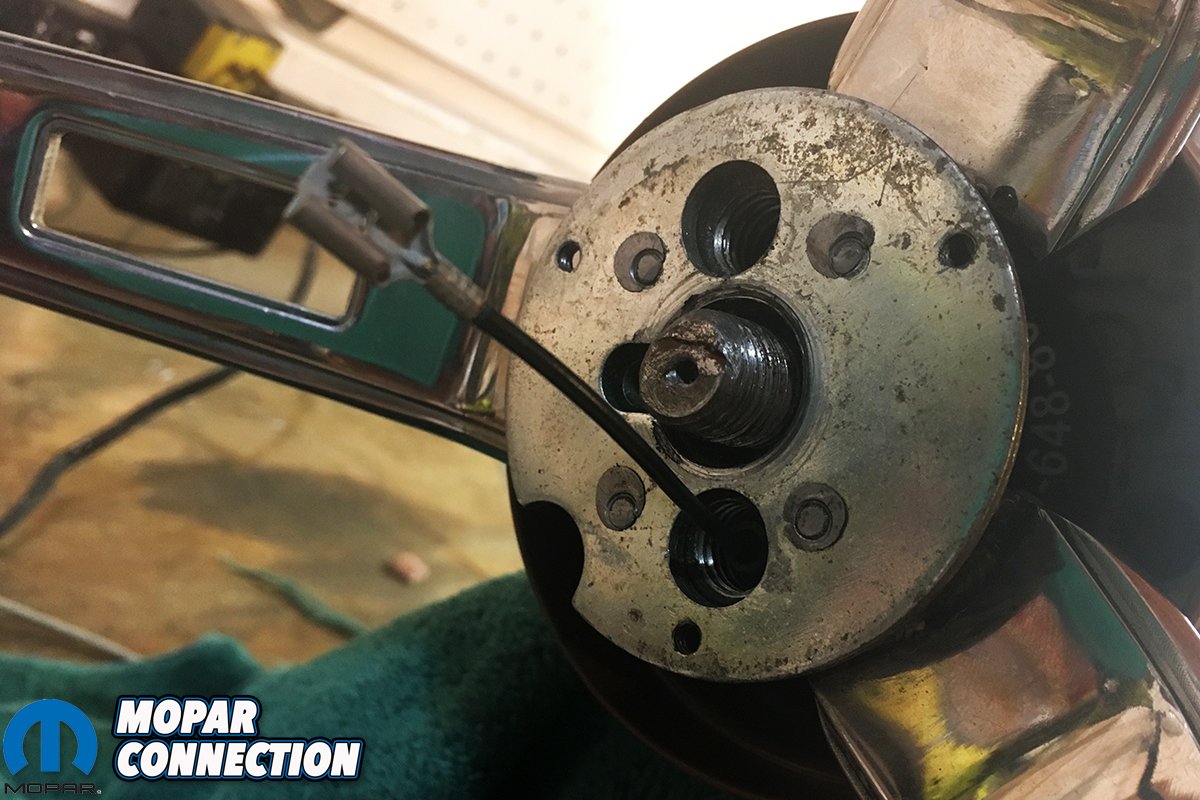
In my haste, likely during my initial installation, I had indexed the canceling cam incorrectly. This, in turn, bind the horn contact switch, eventually breaking the wire in two places. The horn failure was a direct response, and the cam’s incorrect alignment explained why turning right would cancel the turn signal, but turning left wouldn’t. Thankfully, properly installing a canceling cam is surprisingly easy. “When installed properly,” writes Mike from Flaming River’s tech blog, “the canceling cam will allow the turn signals to self-cancel and also allow you to connect the horn wire to the horn contact on your steering wheel.”

Above left: With our original switch in good shape, we reinstalled it back into the column making sure not to have the wire loom bunch up inside. Above right: Installing the new cancellation cam required following Flaming River’s instructions fully, by aligning the cam at between 10 and 11 o’clock, where the lobes of the cam (on the underside) aligned with the turn signal switch.

Above: BAM! That’s all it took. Because we didn’t want the horn contact switch to bind and break the wire again, we wove it through the steering column. Following Flaming River’s instructions, we reinstalled the compression spring and retainer nut prior to reinstalling the steering wheel. And now we’re back up and running!
Below the contact pad of the cancelling cam are two ridges. These ridges serve as the lobes of the cam, and when properly aligned between the 10 and 11 o’clock positions, will correctly indicate to the turn signal switch when to cancel the signal as the wheel spins left or right. The cancelling cam also has a molded-in pedestal where the horn contact switch slide-and-locks in. With our pre-assembled cam held in place, we slipped the compression spring back over the shaft and atop the cam before threading on the retaining nut. Flaming River recommends tightening down but careful not to over torque. This is meant to apply pressure on the cam but not keep it from moving.
Prior to installing back in the car, I remounted the steering wheel and mechanically tested the turn signal switch and cancelling cam. With a twist of the wheel, the cancelling cam did its job, clicking affirmatively as the indicator arm ratcheted back into the neutral position. Pleased with the result, I reinstalled the column, reattached the battery, fired up the big block Charger (any reason to fire it up is a good one!) and tested the turn signals once again. Without fail, they blinked on, and correctly clicked off as I twisted the wheel backwards. Oh yeah, and the horn happily blared again, leaving my neighbors to wonder why I was honking from inside of my garage.


