


We are sorry for leaving you guys hang for so long. We have found some of the lengthier articles get a bit tiring to read and wanted to divide it up into a couple. If you are reading this for the first time, please revert back to our Ultimate Hemi Swap Guide With Project Orange Crush Part I. Now, back to our 6.4 Hemi swap in Project Orange Crush.
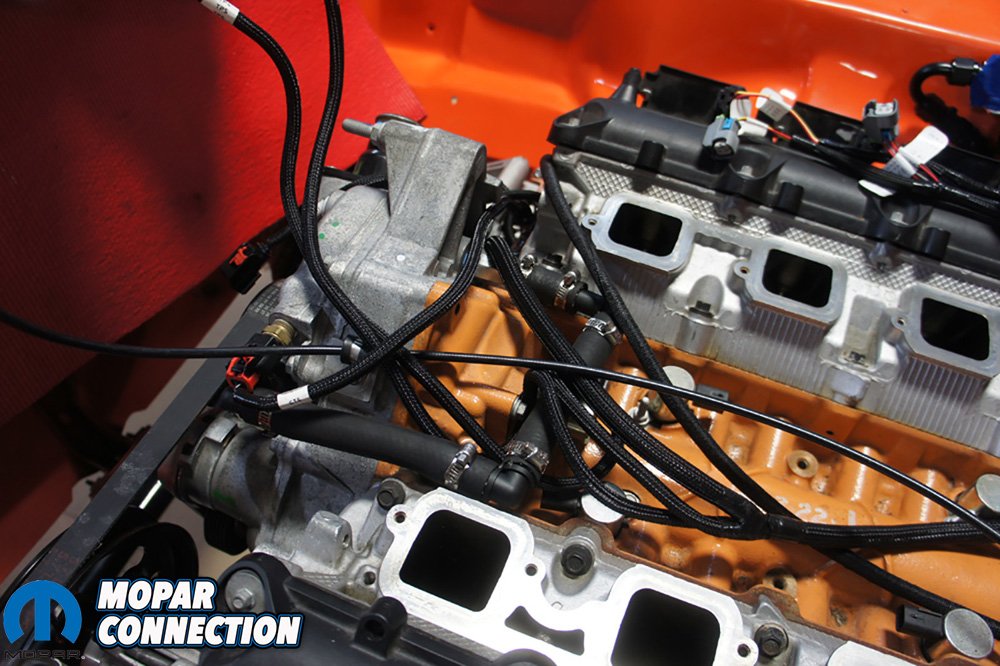
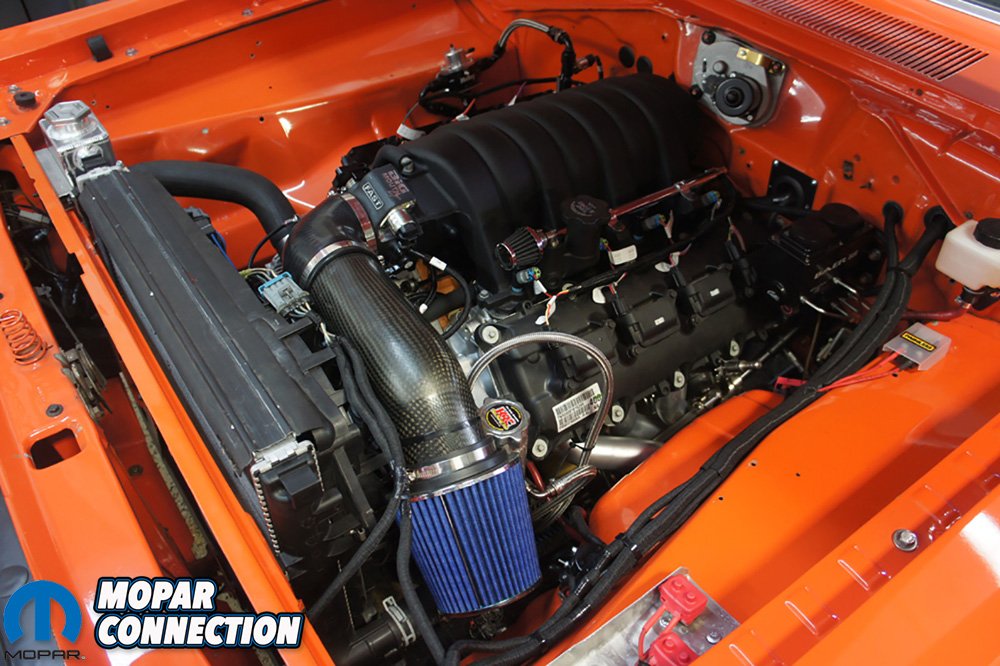
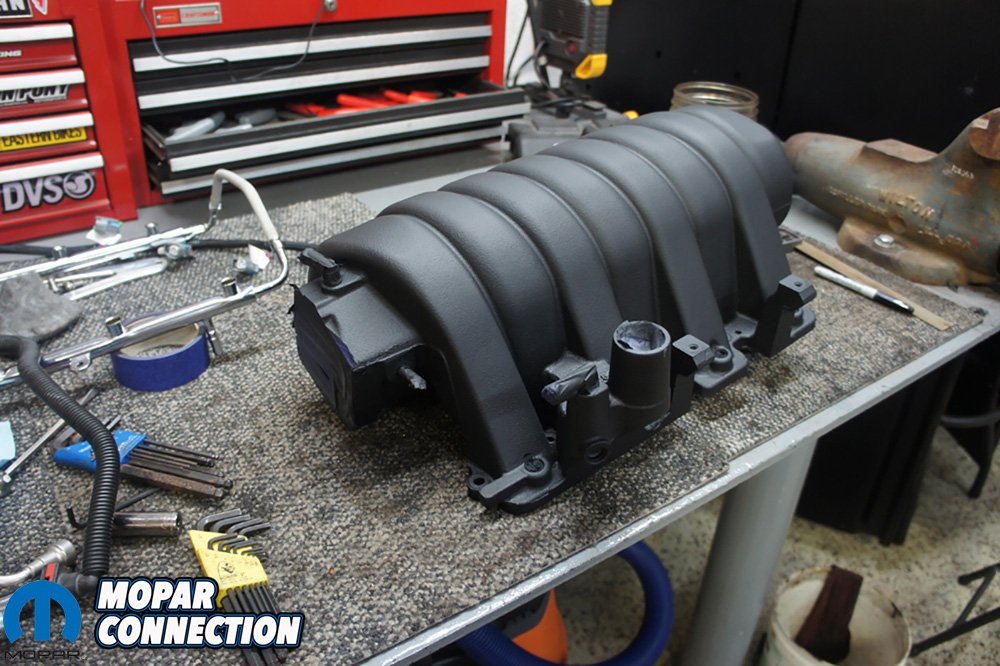
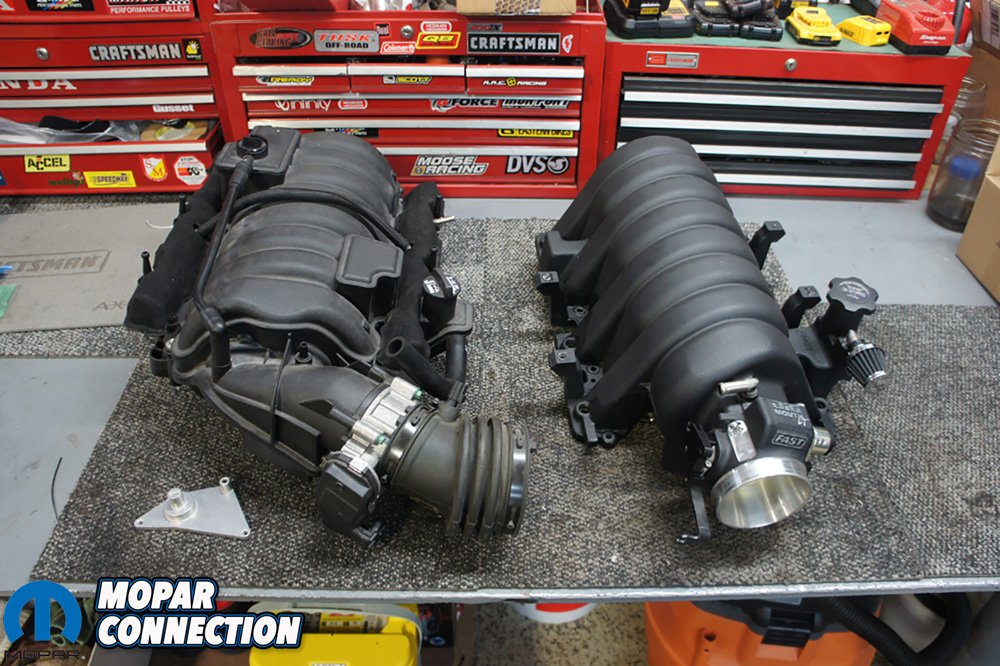
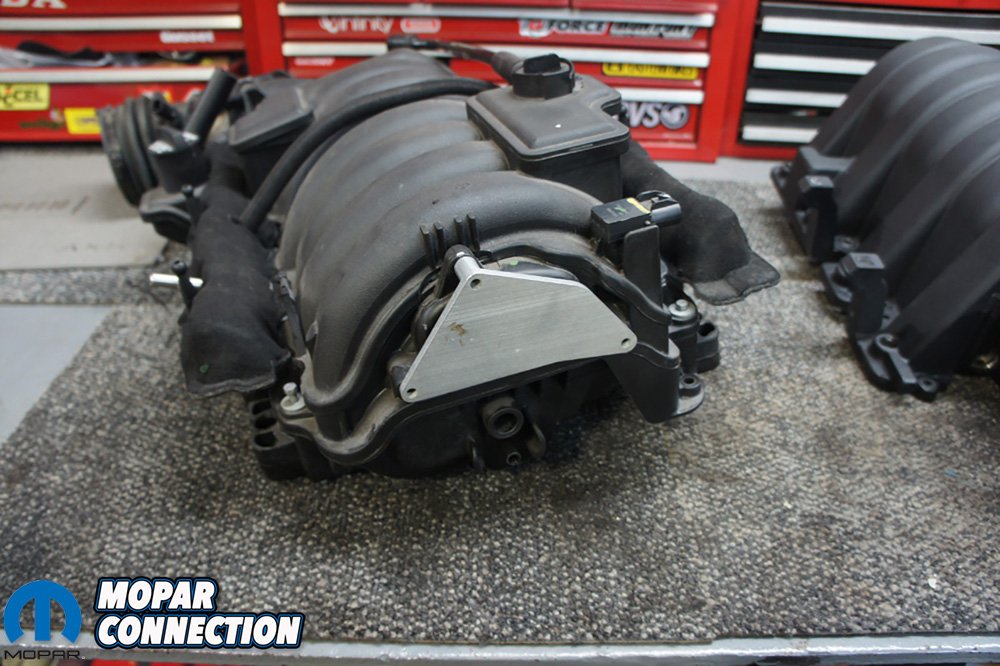
We ended up swapping out intake manifolds for a stock 6.1 manifold. We had the 6.4 manifold sitting on the motor for a while but once the motor was fully installed and went to bolt it in place, it was very close to the firewall. With the Short Runner sensor left on, it did not fit with out some trimming. If we used our MMX Short Runner Lockout from Mancini Racing it did. The 6.1 intake had better clearance and we preferred the look of the 6.1 intake. Also at the time we did our swap, Holley had not released their SRV (short runner valve) control harness and software for the Terminator X.


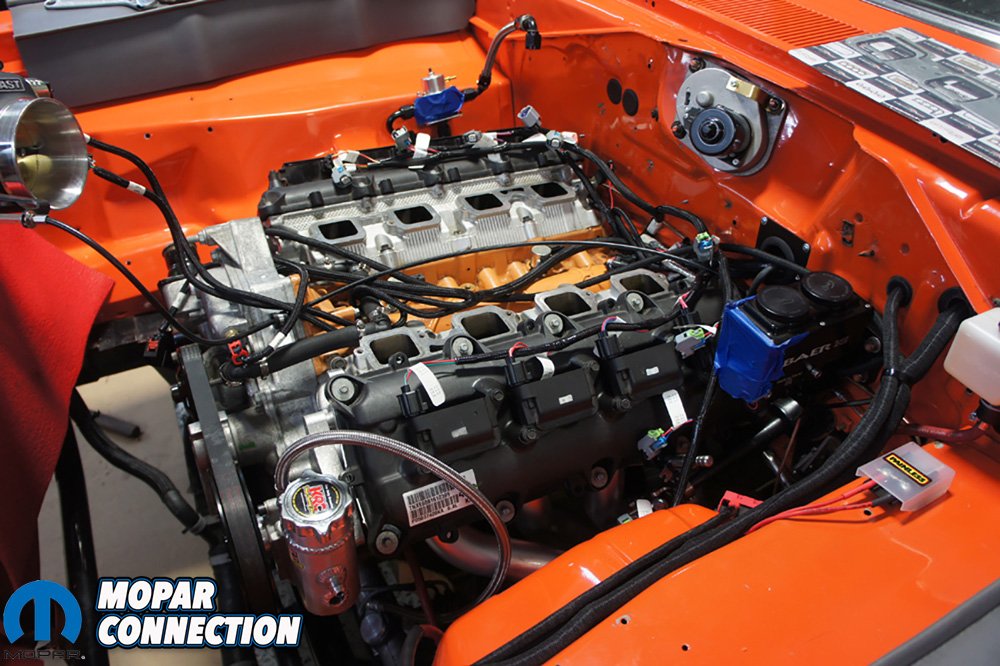
Above Left: Here you can see the difference in the 6.4 and the 6.1 intake manifolds. We painted the 6.1 intake black. Above Right: We could have used the MMX SRV valve lockout from Mancini Racing for more clearance but we liked the simpler design of the 6.1.
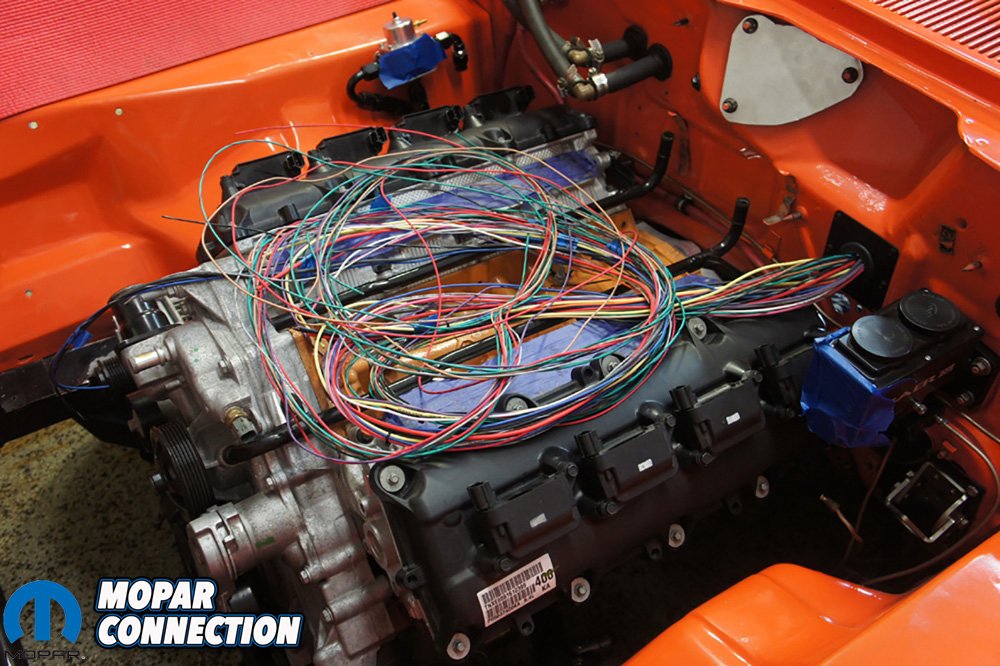
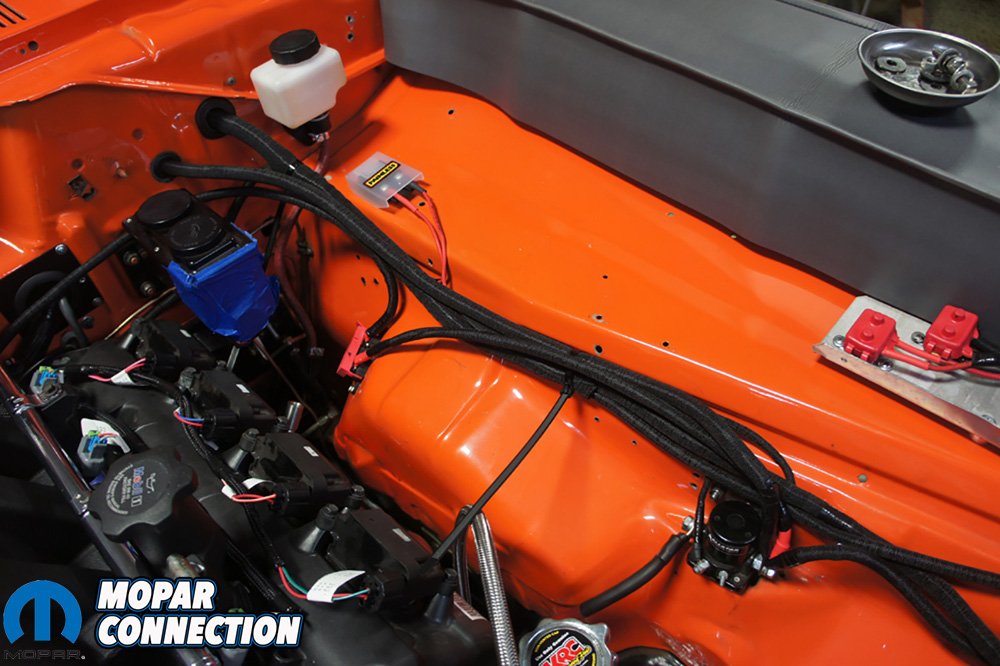
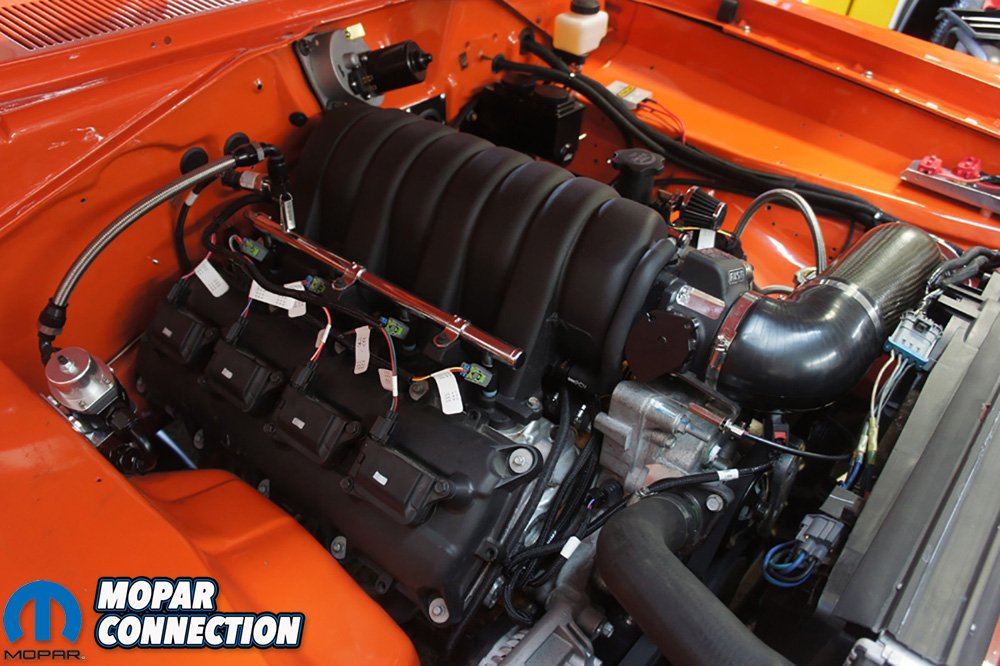
On the Gen III Hemis you can run most of the wires under the intake for cleaner look and less clutter. Holley designed the their Hemi harness to route this way. If any of your sensor wires seem too short, look at rerouting the wire. While under the intake, we removed our MDS and VVT harnesses but left the sensors in place for now.
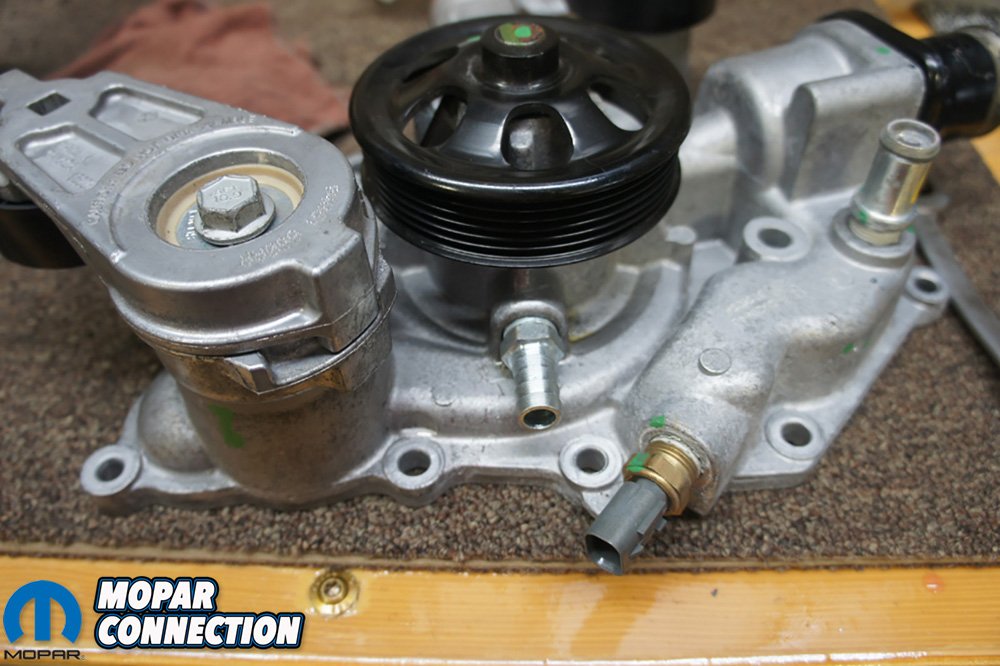
Another issue we concurred with the manifold off was our heater hose line. You can cut down the factory tubes and route to your heater box but we removed the factory heater box a while back. Removing the heater tubes were just a couple 10mm bolts and then a firm pull. There are just o-rings sealing them in the water pump.


Above Left: We ran a 1/4″ tap through both of the water outlets that our heater tubes came out of. Above Center: Be sure to not run the tap too far down or your hose fitting will not tighten. Above Right: Looking closely you can see our 90 degree fittings and heater hose connecting both ports. Once the intake was on you barely notice the crude fittings and hose clamps.
There have been conflicting thoughts on the best way to bypass or plug the holes. A few people have had issues with engines overheating if the holes are simply plugged. We decided to take the rerouting path and tapped the holes out with a 1/4” NPT tap. We then installed a couple heater hose fittings and connected both the ports together with heater hose and couple 90 degree fittings. It was all hid under the intake and can safely say we had no issues with overheating once the car was running.
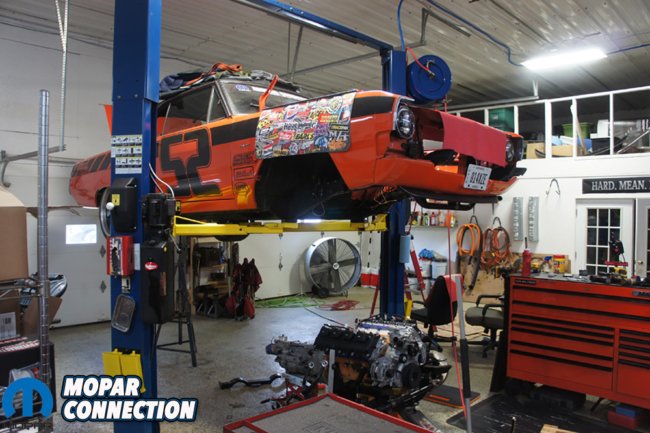
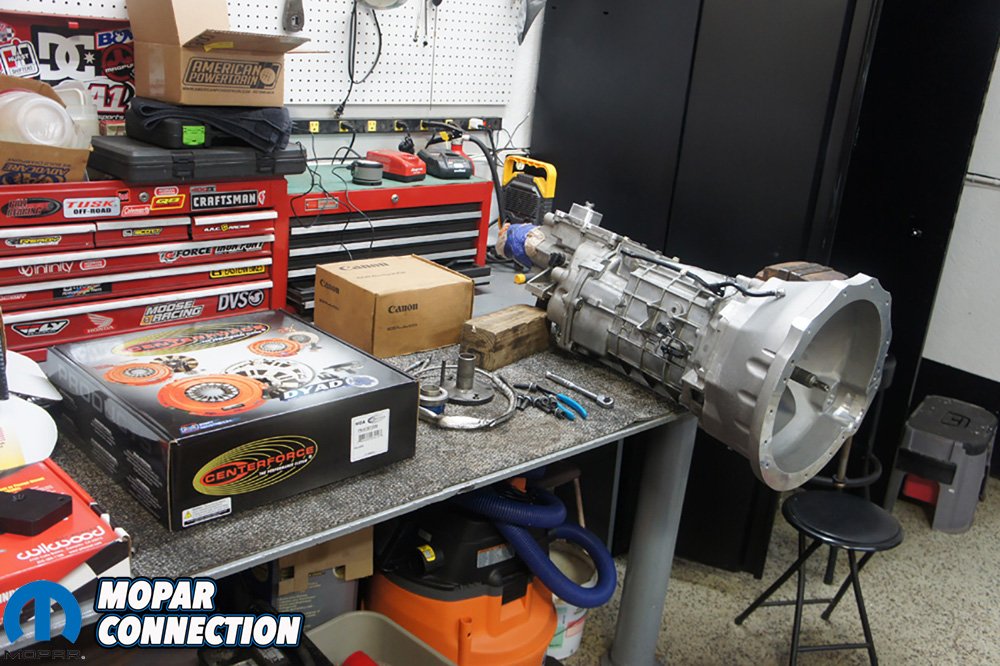
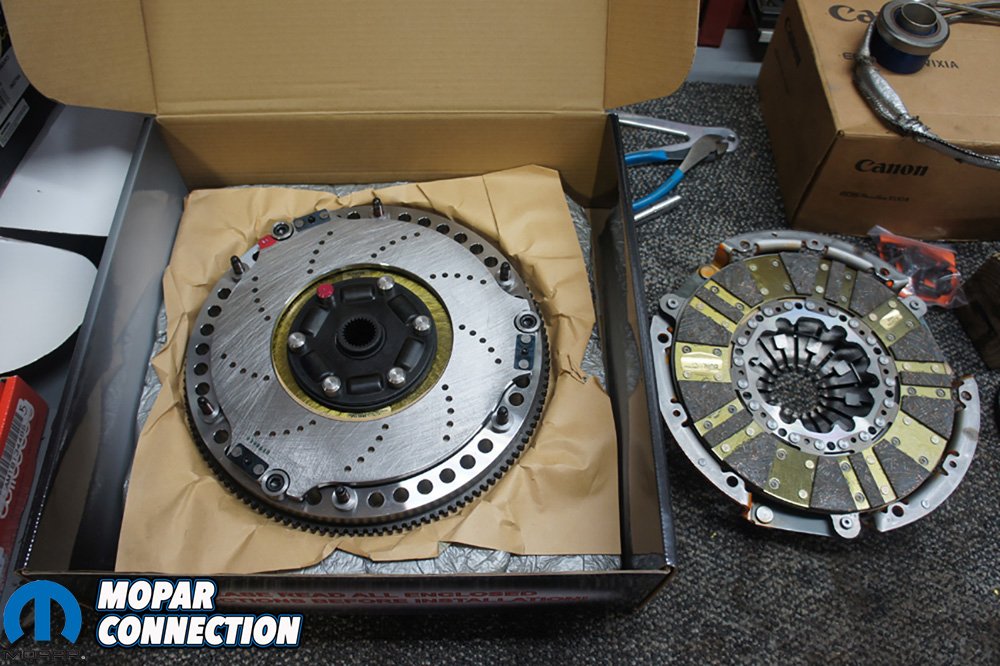
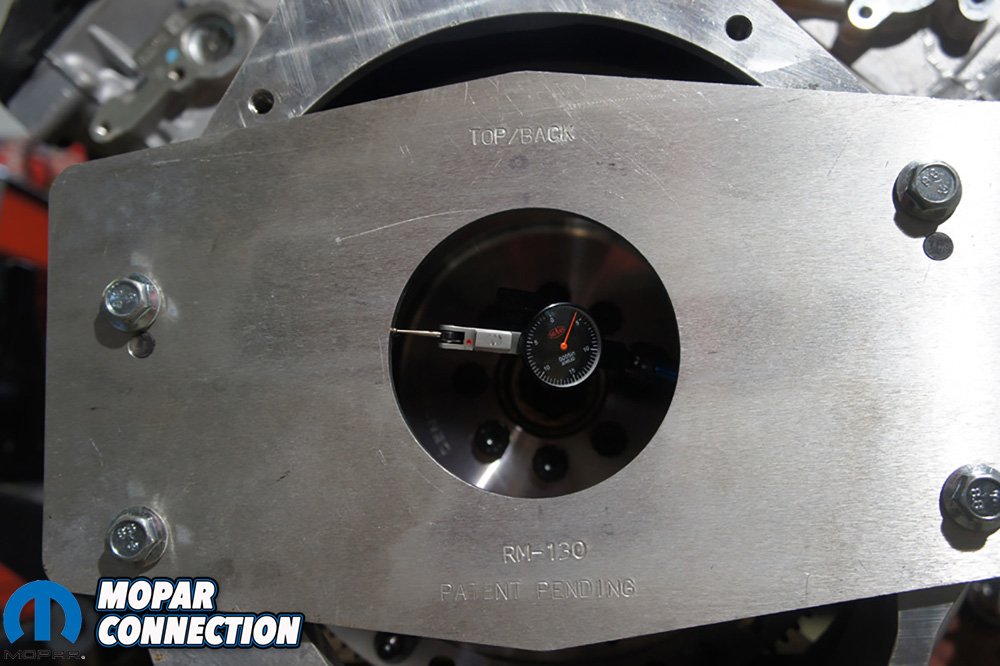
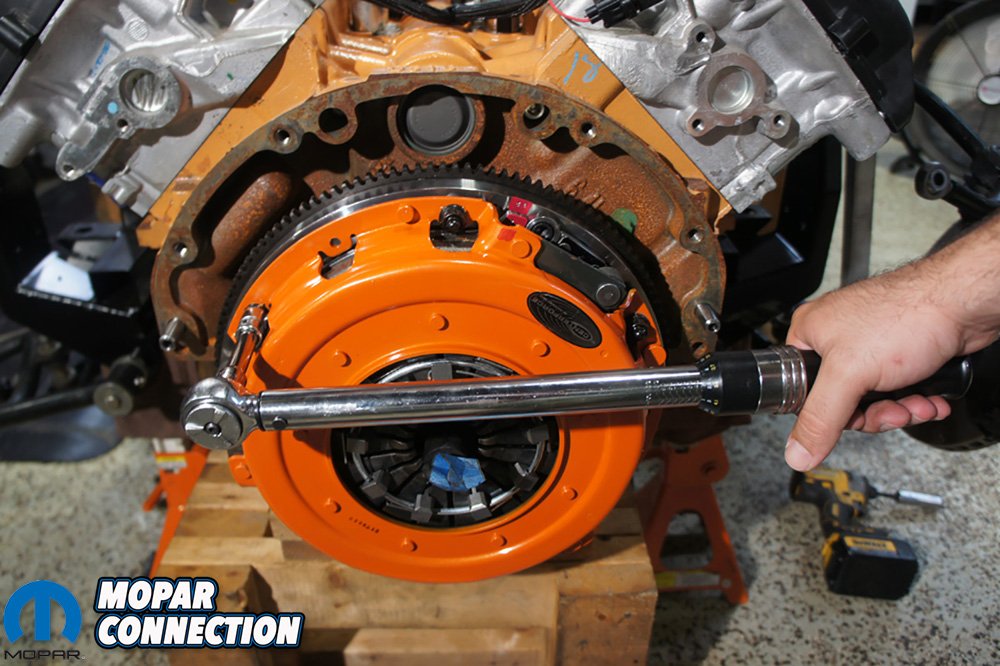
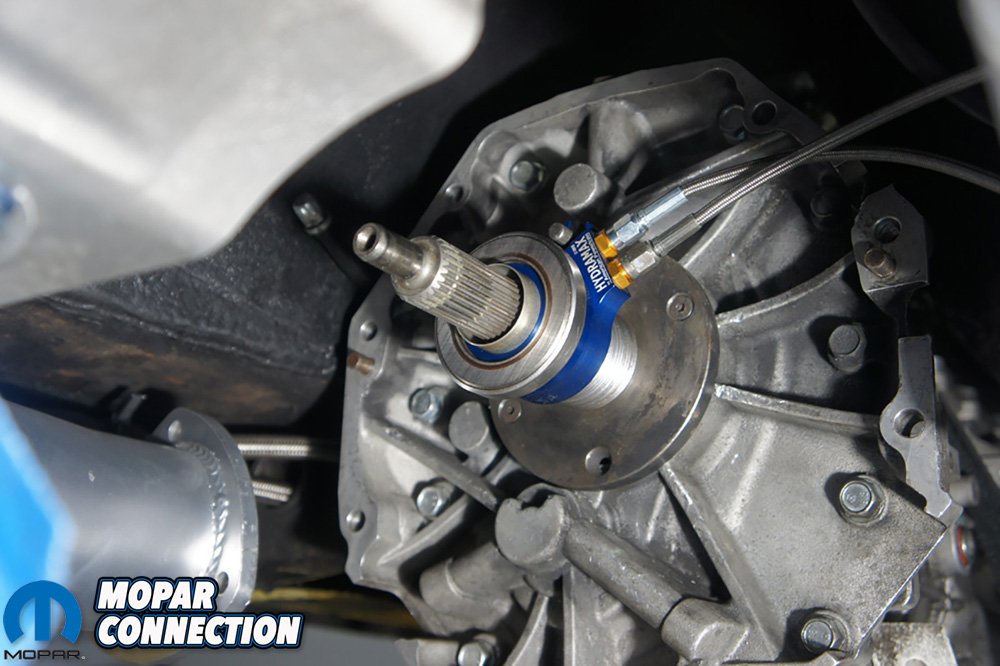
We ended up lifting the car off the suspension, motor and transmission to install our Centerforce DYAD clutch, reship our Hydramax throw-out bearing and dial indicate our Quick Draw Brand aluminum bellhousing from American Powertrain. The Magnum T-56 was already centered to our previous 360 but any time you swap a new bellhousing or different motor you must re-dial indicate the bell housing to prevent any vibrations or premature wear in the transmissions. The tolerances on the new transmissions like our Magnum T-56 is much tighter than an old A833. We found using RobbMc dowel pins to be the proper .496″ size. DO NOT pound .500″ dowels into your block, that .004″ does make a difference.

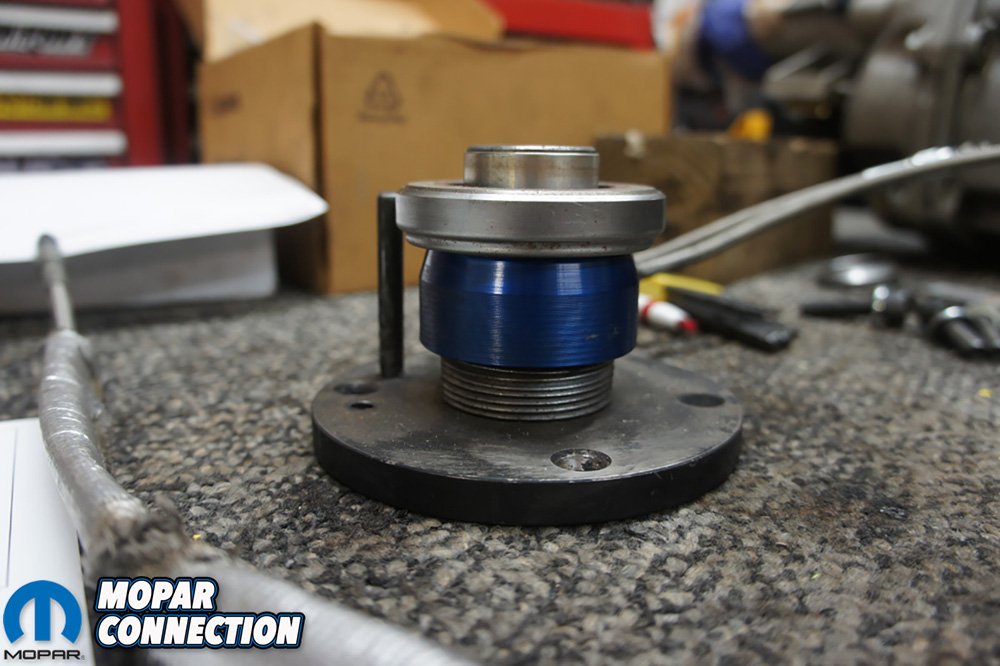
Above Left: Lifting the off and back down on the drivetrain is much easier than pulling the wide Hemi through the top of the engine bay. Above Right: With the American Powertrain Magnum T-56 out we measured for our Hydramax throw-out bearing.

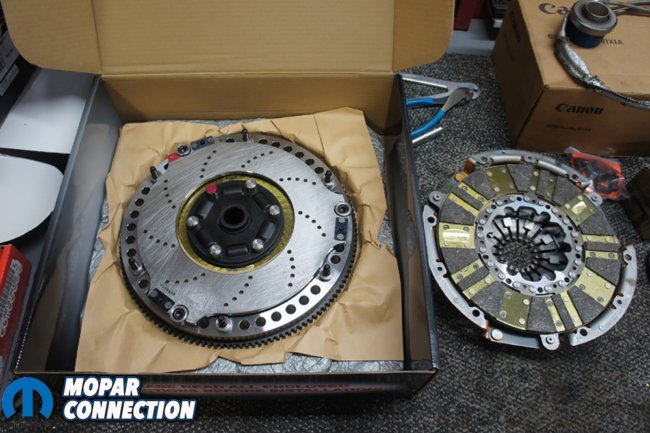
Above Left: The Centerforce DYAD clutch from American Powertrain is not the cheapest option but considering its one complete package from clutch to flywheel and given performance, we think it’s a steal. Above Right: We could star at Centerforce DYAD for hours, but we were itching to see how it performs.
Once bellhousing was centered and the Centerforce DYAD clutch was torqued to spec, we measured for the APT Hydramax throwout bearing. Note, the Hydramax bearing is available for A833, TKOs and more. Spoiler, the combination of American Powertrain’s Hydramax bearing, White Lightning shifter and the Centerforce DYAD clutch was perfection. The Magnum T-56 shifts like butter with the White Lightning and the feel of the clutch is unbelievable. It feels like a newer stock sports car, no slip and we have piece of mind that the Centerforce DYAD is good to at least 1000hp.
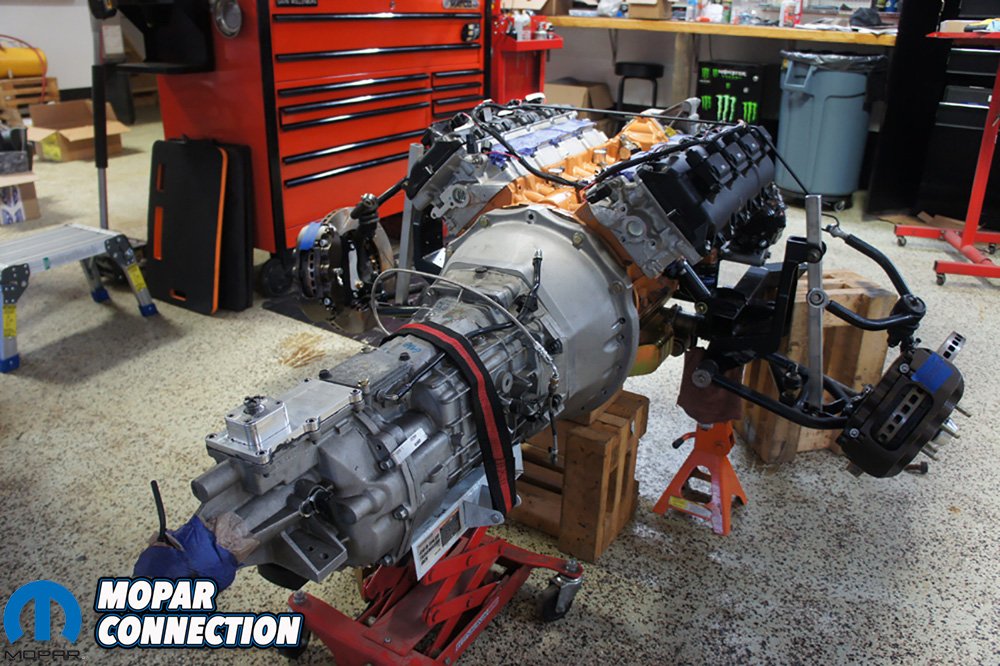
Before we dropped the car back down on the suspension and drivetrain we touched up the bottom of the car with DEI sprayable Boom Mat for an extra layer of sound deadening. With the American Powertrain Magnum 6-speed, Centerforce DYAD Clutch and Hydramax bearing all setup and bolted together, we dropped the car back down. We installed the suspension and transmission crossmember. With everything secured in the car, we got started on the exhaust.

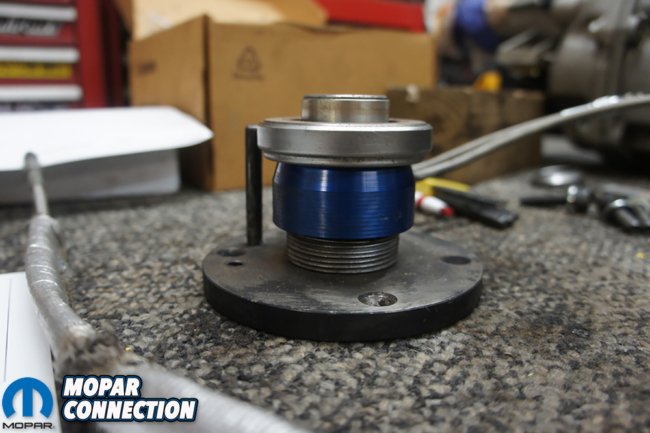

Above Left: Some may think this is over dramatic but Dial Indicating (centering your bellhousing) is a must for newer overdrive transmission and required for warranty. Above Center: Using more than just a couple shims can be necessary, numbers don’t lie. Above Right: On our Quick Draw Bellhousing from American Powertrain has an inspection hole and once our Hydramax throw-out bearing was installed, we checked to make sure the bearing was not touching the clutch fingers and we didn’t measure incorrectly.


Above Left: While we worked on getting the clutch and transmission bolted together we touched up the bottom and fender wells with DEI’s Spray-on Boom Mat. Above Center: We got out our torque wrench and made sure we torqued the clutch per Centerforce’s instructions. Above Right: With the transmission and clutch installed, we were ready to drop the car back down and put everything back together.
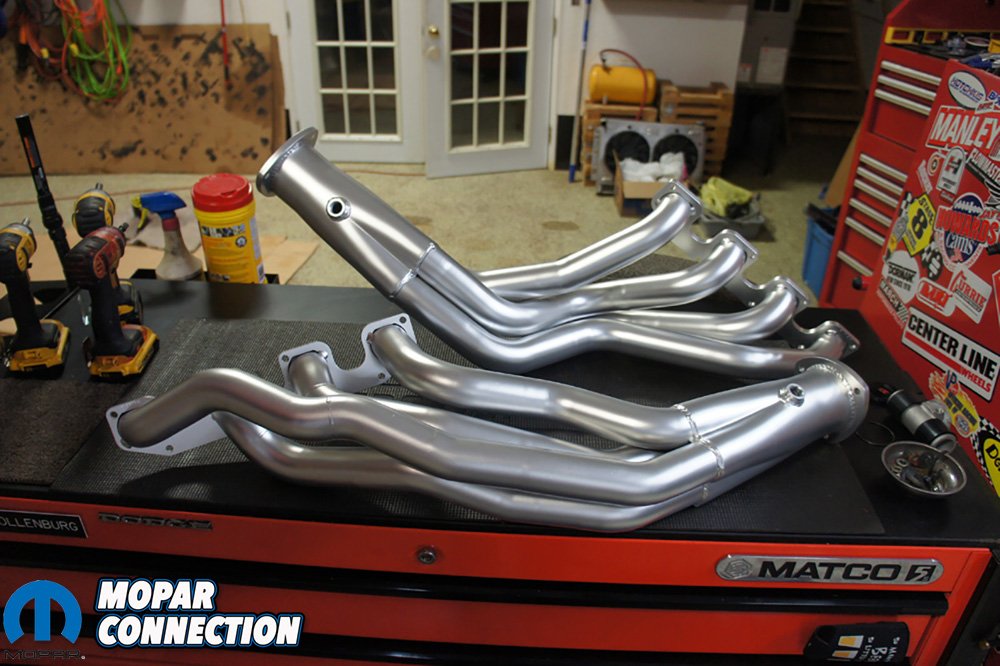
We ordered a set of TTI headers from Mancini Racing. There are not a ton of options for our combination of Reilly Motorsports AlterKtion and 6.4 Hemi and decided to go with the best. TTI has proven themselves for years with fitment and quality. We opted for the 2″ primaries that made for a tight fit and unfortunately had to do a little massaging around the steering linkage for exact fitment. The rest of the headers fit perfect and already had O2 bungs welded in on both sides for our oxygen sensor. The steering linkage can very from vehicle to vehicle and we shortened ours with probably threw off TTI’s fitment.
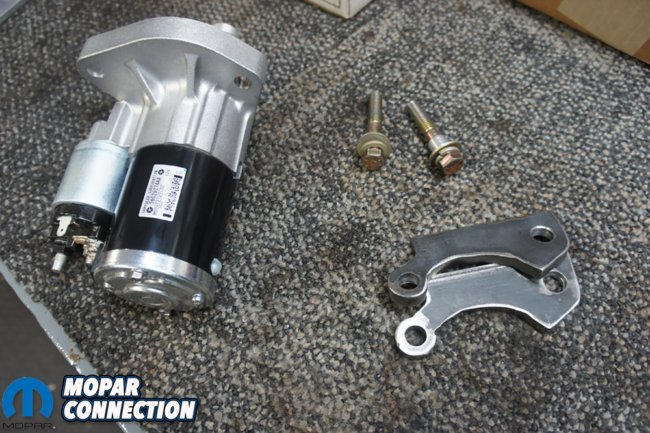
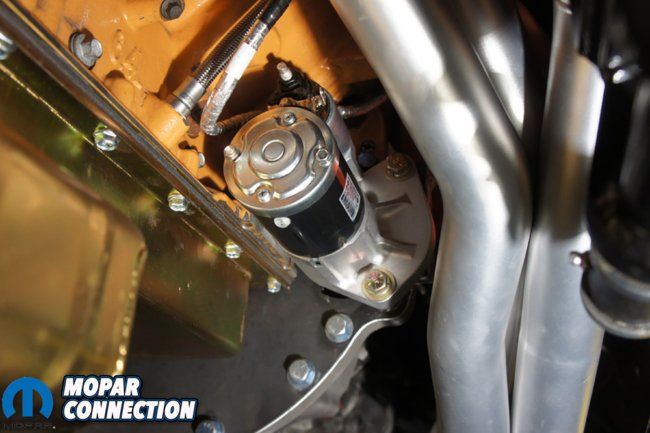
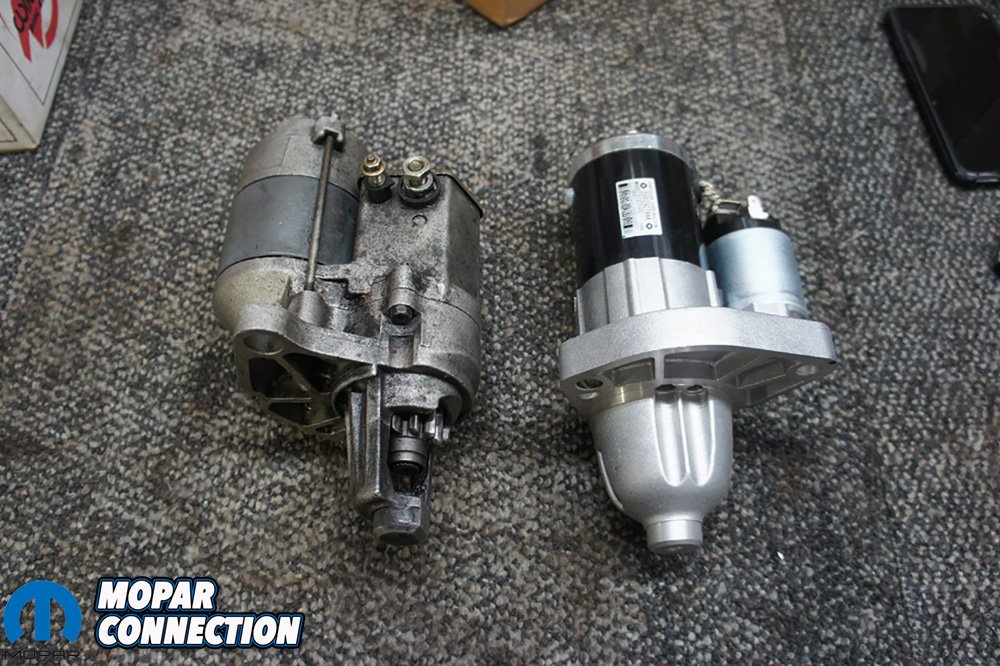
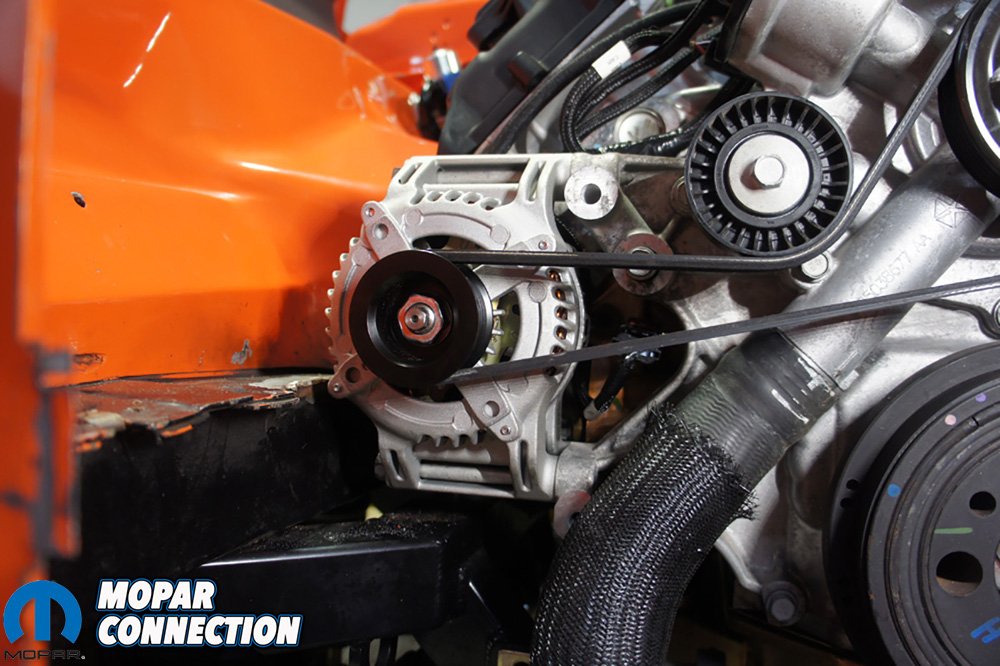
The Quick Draw Brand bellhousing allowed for us to run a drivers side starter. With the headers bolted in, we wanted to install the starter before we went any further on the exhaust. Normally the Powermaster 9523 XS mini-starter is a perfect fit for our setup but, we ran into a hiccup. The Centerforce DYAD flywheel was offset 1/2” closer to the block and needed to shim the starter 1/2” and when we did the starter hit the headers. Other applications and different clutch or transmission setups the Powermaster 9523 XS is a perfect fit, just not for us this time.

Above Left: The TTI headers from Mancini saved a lot of headache and knew they would perform and last a long time. Above Right: We had a couple 1/4″ shims made for the Mancini Racing Extreme Mini Starter.
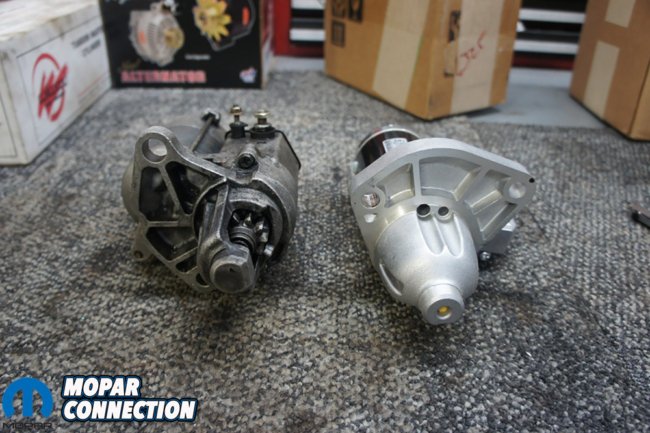

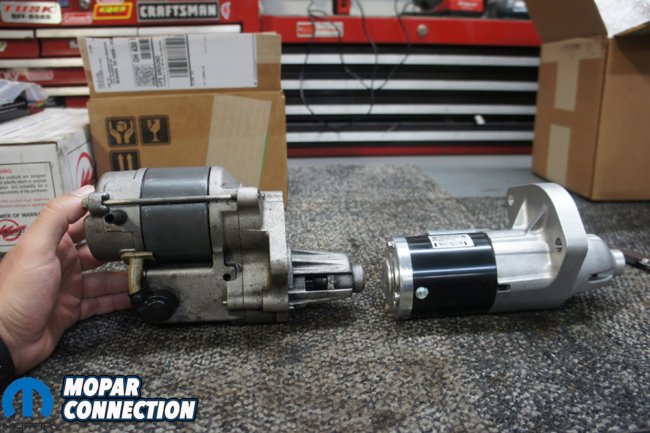
Above Left: Here you can see how the Mancini Racing Extreme Mini Starter is clocked differently than the normal mini starter. Above Center: The connecting post are also moved the the rear for easier access. Above Right: Again, you can see how the motor on the starter is clocked differently, it hugs the block rather than sticking out towards the headers.
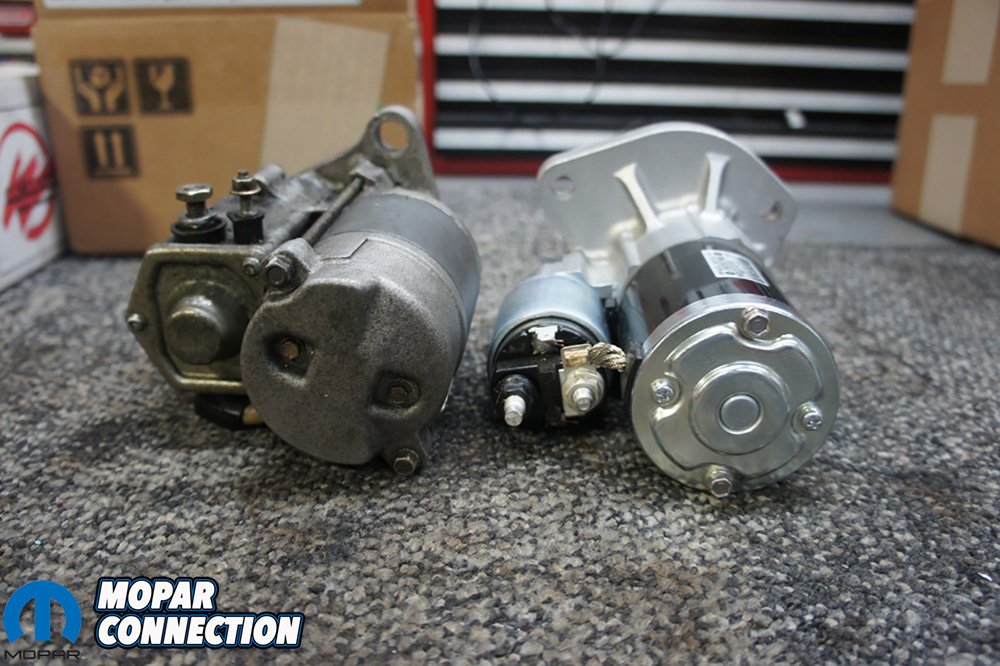
After scouring the web for a few days and multiple calls to different manufacturers, we spoke with the guys at Mancini Racing. They ran into a similar issue on a build and came up with a perfect solution. Their Extreme Mini Starter (MREBU61R274) fit perfectly and freed up a ton of space. The terminals were pointing towards the front and made it much easier to wire. We still had to use a 1/2” spacer to get the starter gear to align with the flywheel. We had to grind some off of the VIN pad to make clearance for the starter.
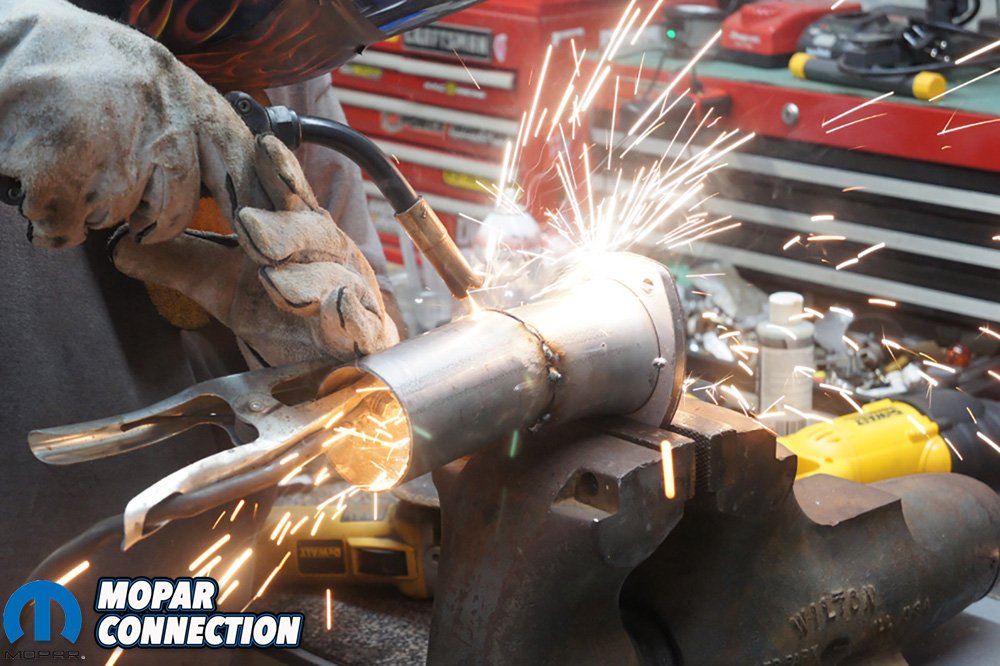
For exhaust we used a Flowtech Universal X-pipe kit and couple Flowmonster 2-chamber mufflers. We called a buddy over one night to help weld it up. It was our first time doing exhaust ourselves and turned out better than any other exhaust we have had on the car. The mandrel bent tubing fit perfectly and did not have nasty kinks in our pipes. We were not worried about going over the axle so dumping it in front made it much easier too. We might turn and go out the sides eventually but we were crunching for time as we wanted to debut the car at Holley Moparty.

Above Left: We had to do a little grinding on the Vin pad of our 6.4 to get our starter to fit. We did take a picture of the VIN so if we ever have an issue down the road. Above Right: The Mancini Racing Extreme Mini Starter was a perfect fit and had room to spare.


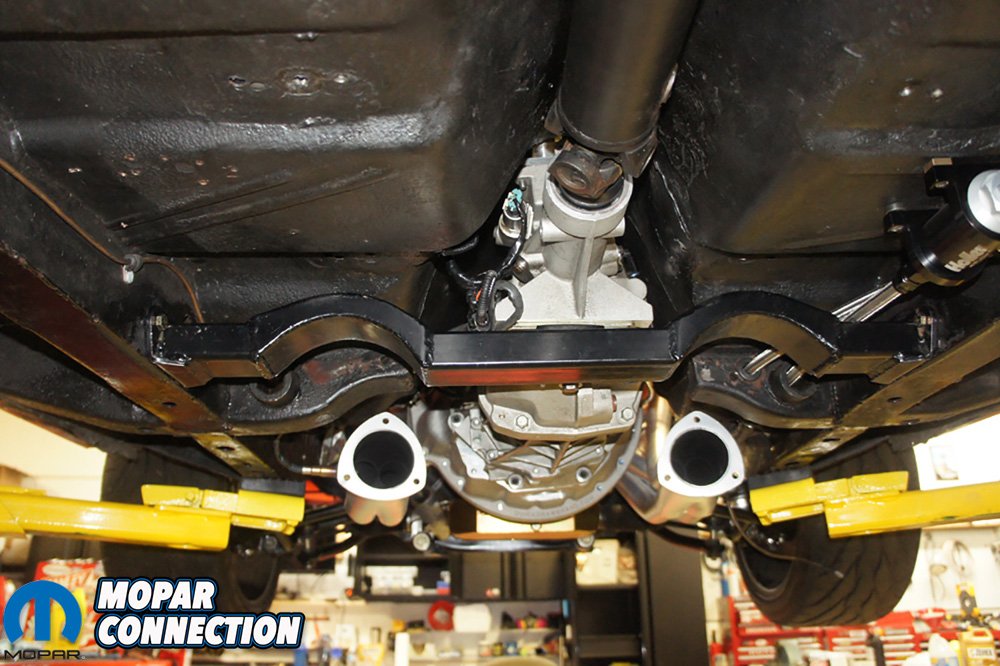
Above Left: You can see our custom crossmember exhaust cut out doesn’t quite align with the TTI headers. Above Right: We had to make some adjustments to our left header collector.
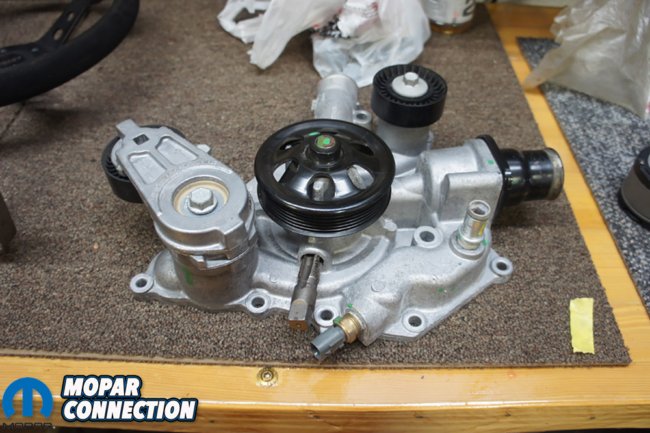
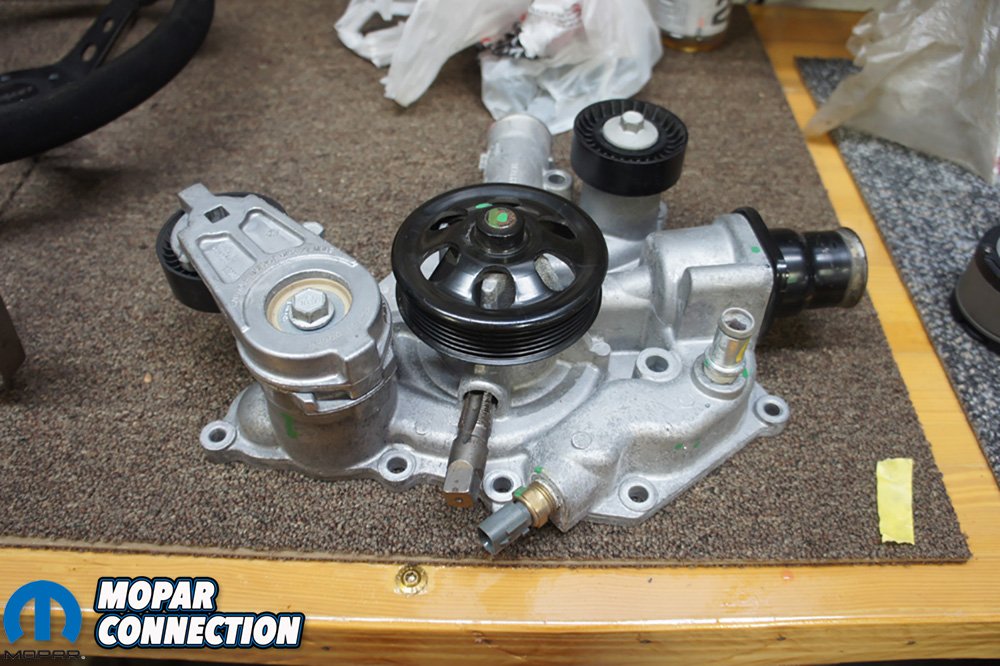
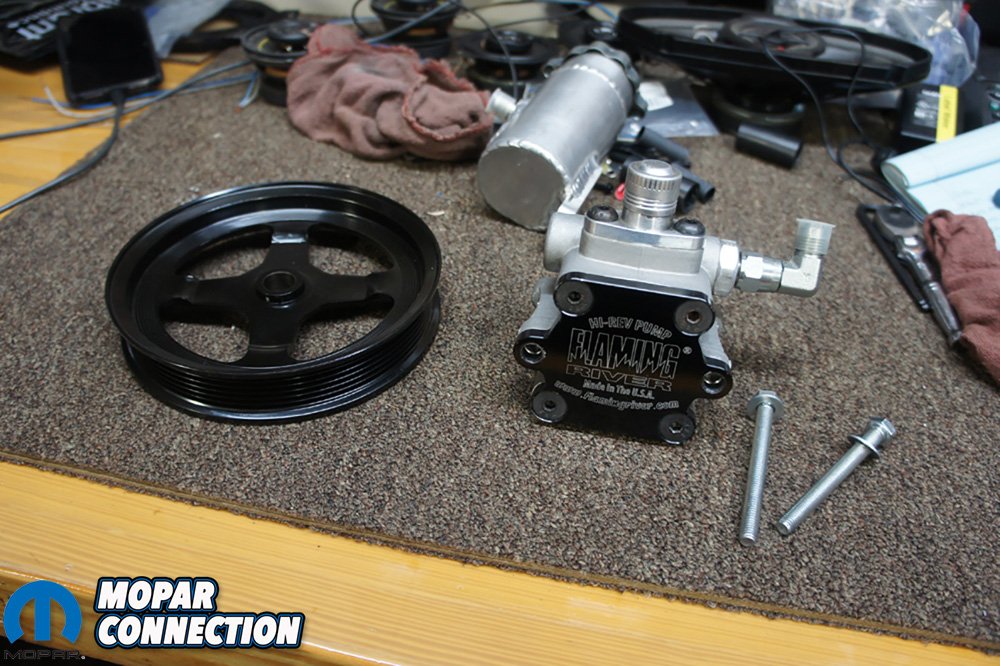
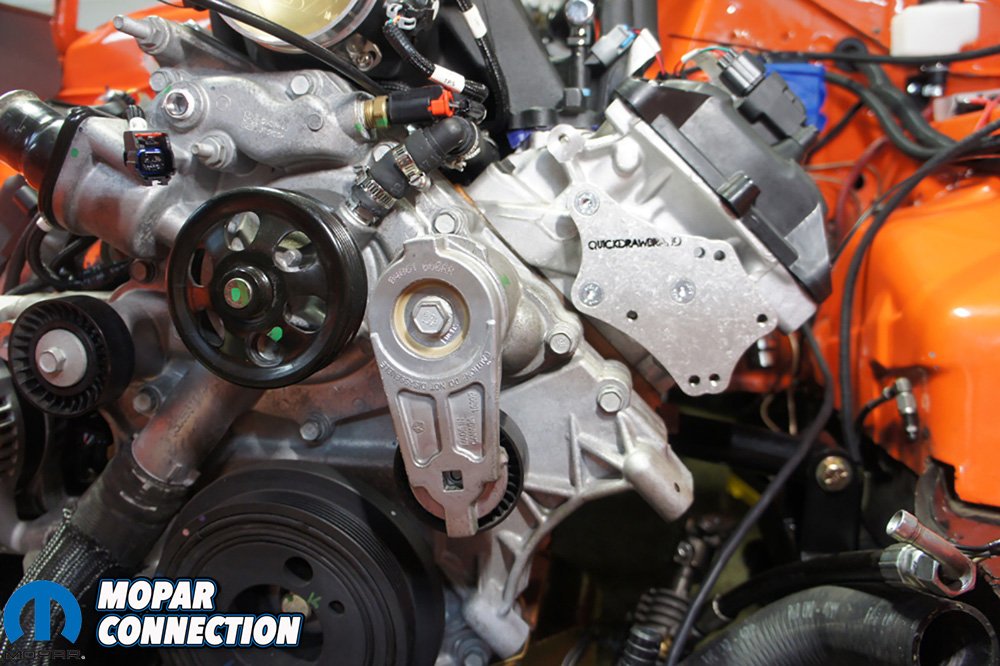
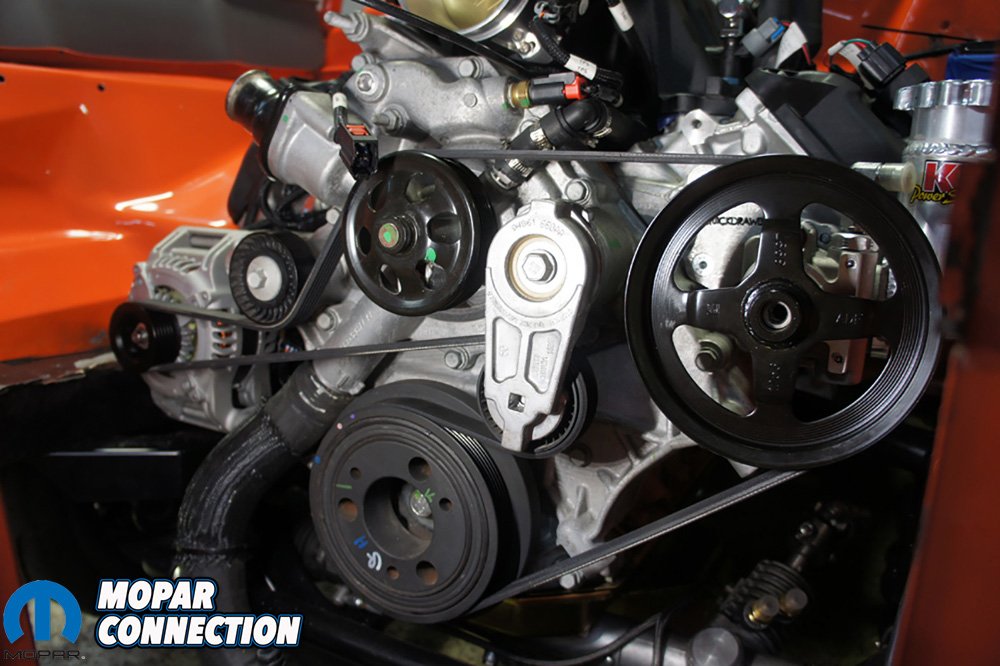
Now that we were done with being under the car, we were off to finish a few pieces and get the motor fired up. Next on our list was getting our Flaming River Hi-Rev power steering pump mounted. We found out that Quick Draw Brand had a bracket for a GM type II pump to properly fit our 392 Hemi. The bracket worked perfectly and our pump bolted on like factory. We used a Holley 97-152 pulley to give us a little over a 1:1 ratio with the crank pulley We later found out that at low idle this pulley was a little too big and might try a smaller pulley. The good with a pulley being a little big is that at high RPMs the pump will not over-rev.
For an air intake we found a used one on eBay to just get us by. We have a full K&N Universal CAI kit to fab up in the future. Our plan is to move the filter to the fender well for colder air source. We did order a new K&N short filter for the end of our eBay intake. We also had to drill a hole and plug our air intake temperature sensor in the boot of our intake.


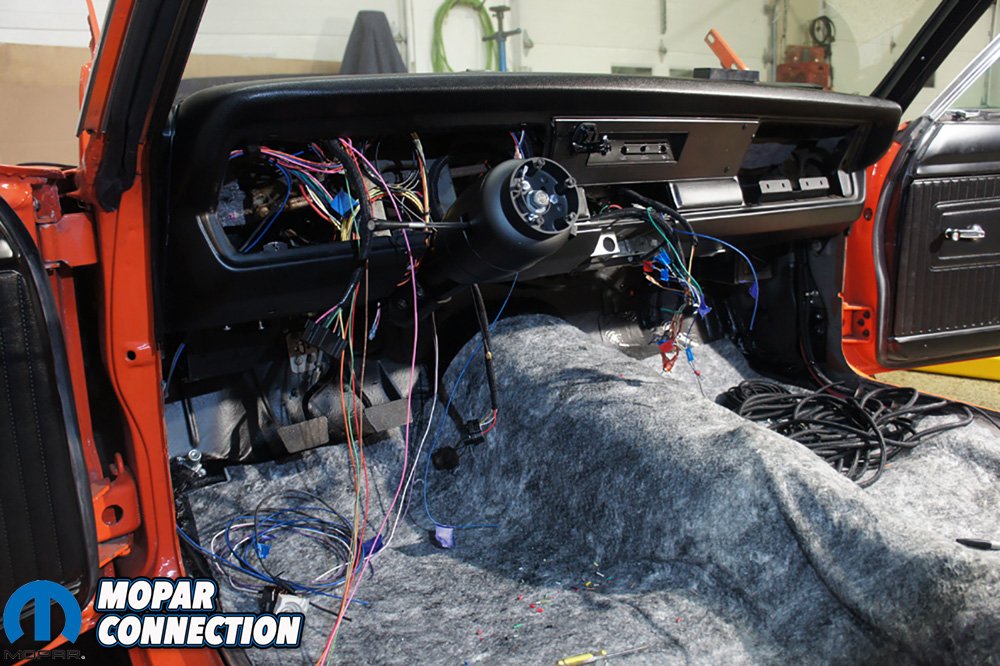
Above Left: No more glass fuses for us. The Painless Performance kit comes with a new fuse block and a couple relays built in for the horn and whatever else you might need. Above Right: We had to stretch the chassis harness out to trace a couple wires that we removed.
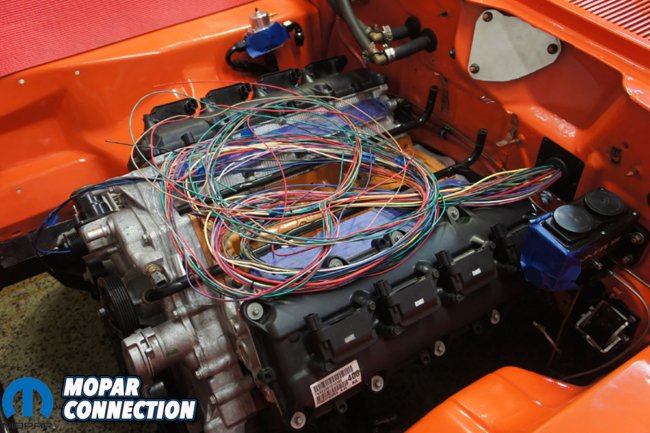
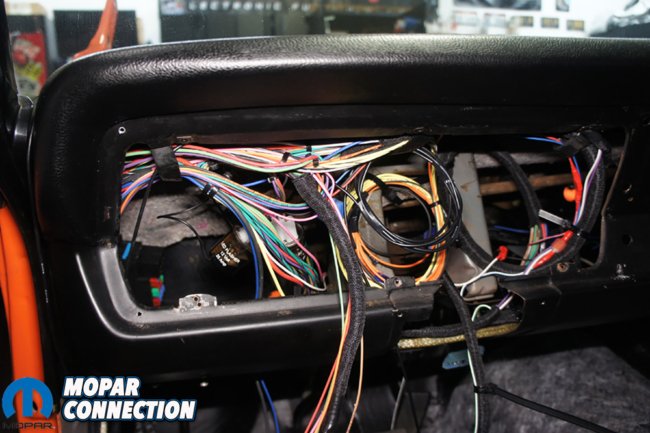
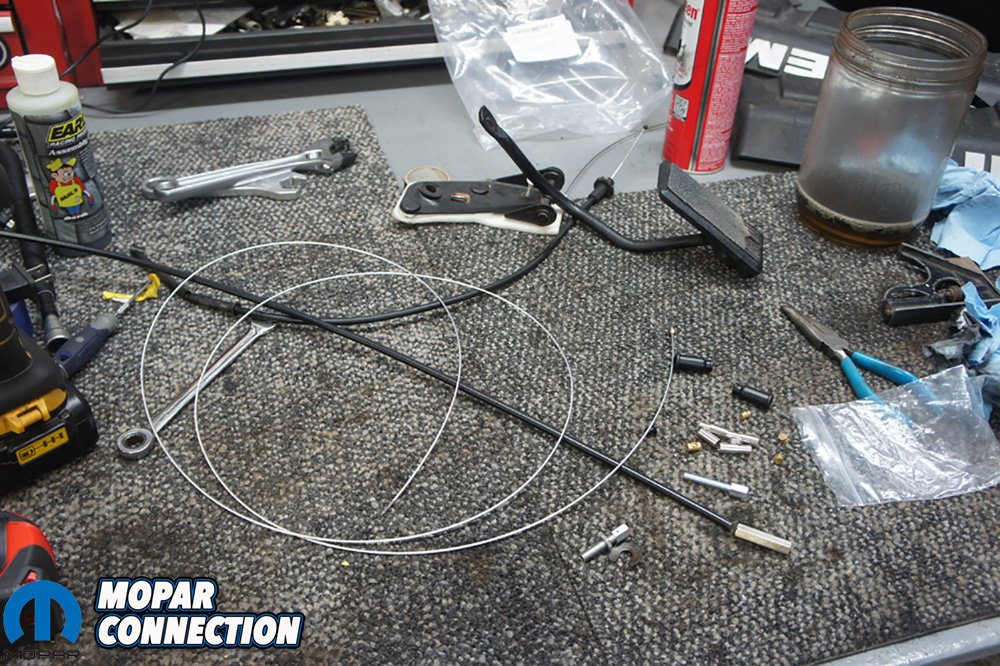
Next step was buttoning up all the wiring on the car. This was the biggest on-take of the whole swap. While a complete rewire is not required for the swap (Holley’s Terminator X really only needs a ground, a constant 12v and keyed 12v to run the motor), we decided to completely rewire the car with a Painless Performance kit. We have started and stopped a few times on the wiring but now that we have all the hard parts in place, we can do a final routing and finish connecting everything permanently.
The Painless Performance kit (#10127) made the wiring Orange Crush easy. The chassis harness was setup for factory motor and dash so we had to remove a couple wires that were not going to be used. The nice thing is all the wires are labeled and the instructions tell you where each wire goes and what it connects to. We suggest to give yourself a few days to do the wiring if you are a first timer like us. Once we got started we kept on it until we were done. We did not want to jump to something else and forget where we left off.


Above Left: There will be multiple times you will look at the wiring and say wow how am I ever going to know where everything goes? We promise it will be alright. Above Center: Working on top of DEI’s under carpet sound deadening was a lot nicer and would add a great layer of sound and heat deadening when done. Above Right: Our dual relays from Painless Performance come wired, weather tight and ready to connect.
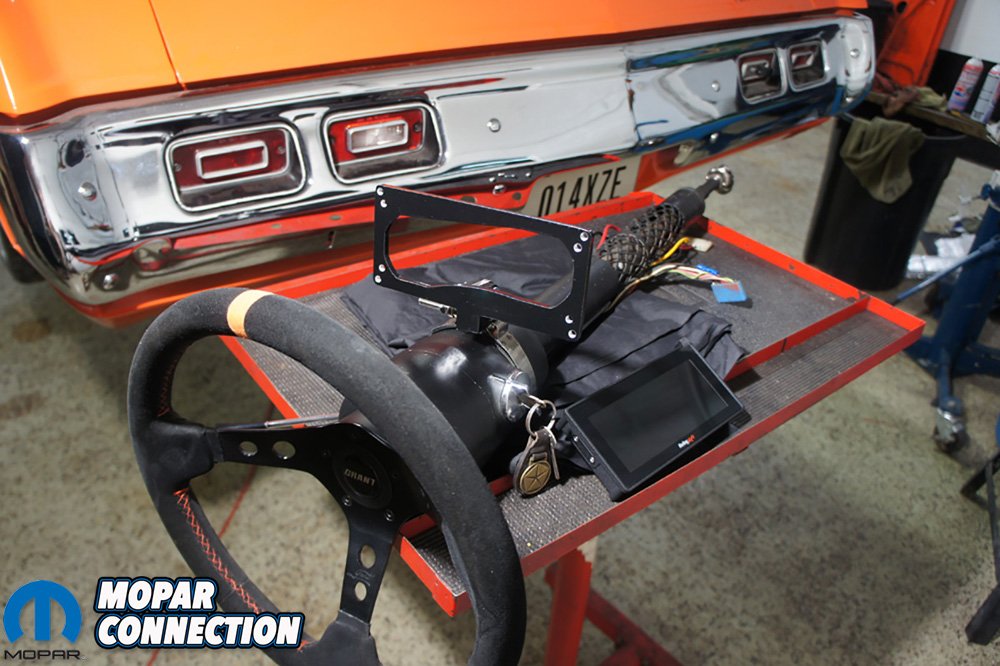
Once the Painless Performance chassis harness was installed, we were able to make the proper connections to the Terminator X harness. The main connections are constant +12v, a ground and a keyed +12v on switch. We opted to run a Holley Pro Dash 6.86 for all of our gauges which just plugged right into our Terminator harness. The dash did required +12v, a ground and a keyed +12v on switch. We made the decision to put the dash and Terminator X +12v switched power on a toggle switch because they both need power while cranking the engine. If you have been around classic Mopars, factory wiring (which is what the Painless kit mimicked) cuts power to almost everything while cranking. This also gave us a quicker off switch in case of an emergency.
There is a bit more to the wiring that we will dive into in a future article. However, we can attest that the directions from Holley and Painless Performance were spot on. Each wire or connection was well labeled in both the Holley and the Painless kits. The only mishap we had with the Painless harness was our doing. We connected what we though was a ground for the taillights to the chassis and it was actually a +12v for marker lights that we smoothed over we the car was repainted.
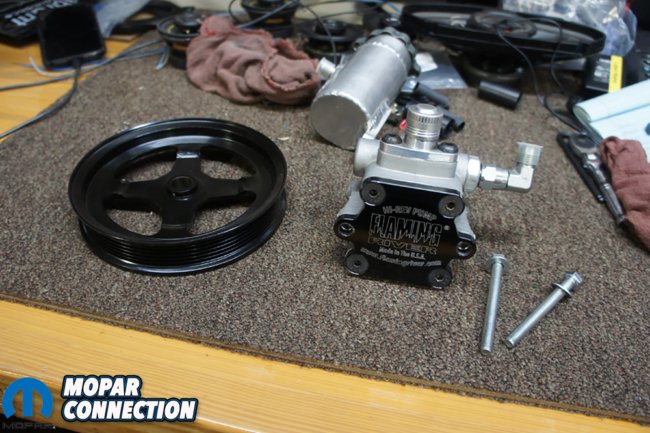

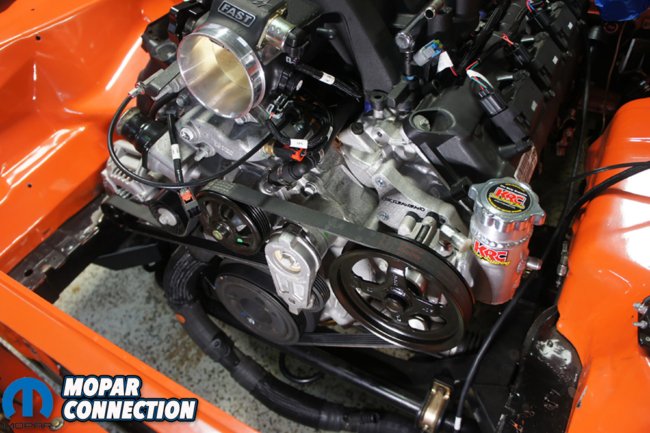
Above Left: We reused our same Flaming River Hi-Rev power steering pump but had to change to a bigger serpentine pulley from Holley. Above Center: Quick Draw Brand’s Hemi power steering bracket made installing our power steering pump simple and offered multiple orientations. Above Right: The motor accessories are complete and found a 5.7 Hemi serpentine belt fit perfectly.
In the cooling department we threw a Stant 180-degree thermostat in the motor. The factory thermostat is 203 degrees and way hotter than what we need. We also mounted a factory 2016 Challenger SRT-8 radiator and fans for the time being. The factory Hemi radiator took some ingenuity to get mounted and we are working on finding a better solution for the swap.
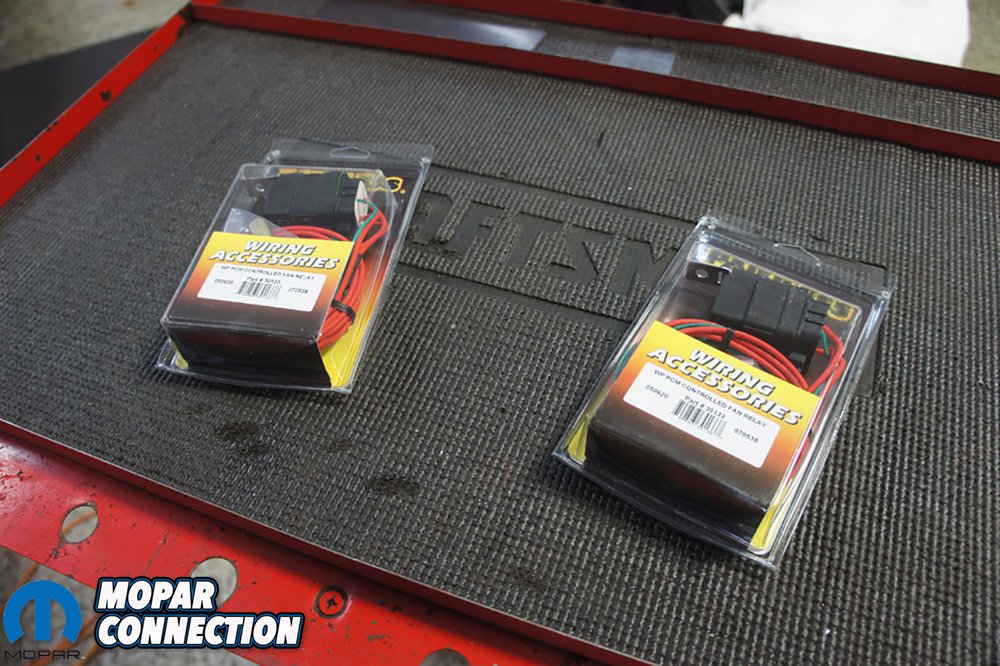
The factory electric fans were wired to a dual fan relays from Painless Performance. Once the Painless Performance relays were wired and mounted on the inner fender well, we used the Terminator X built-in dual electric fan outputs to trigger our relays for the fans. In the Holley 3.5″ handheld you can adjust the on and off temperatures of each fan individually. The output trigger for the relays from the Terminator X is a ground trigger not +12v, we messed up at first and had them connected to the +12v on our relays.


Above Left: We needed a solution for our Holley Pro Dash 6.86″ and Quick Draw Brand had a universal mounting solution that we were able to attach to the steering column. Above Center: The bracket still allowed access to all the ports on the back of the Holley Pro Dash. Above Right: We laid out the Pro Dash connections and made sure everything was wired correctly.
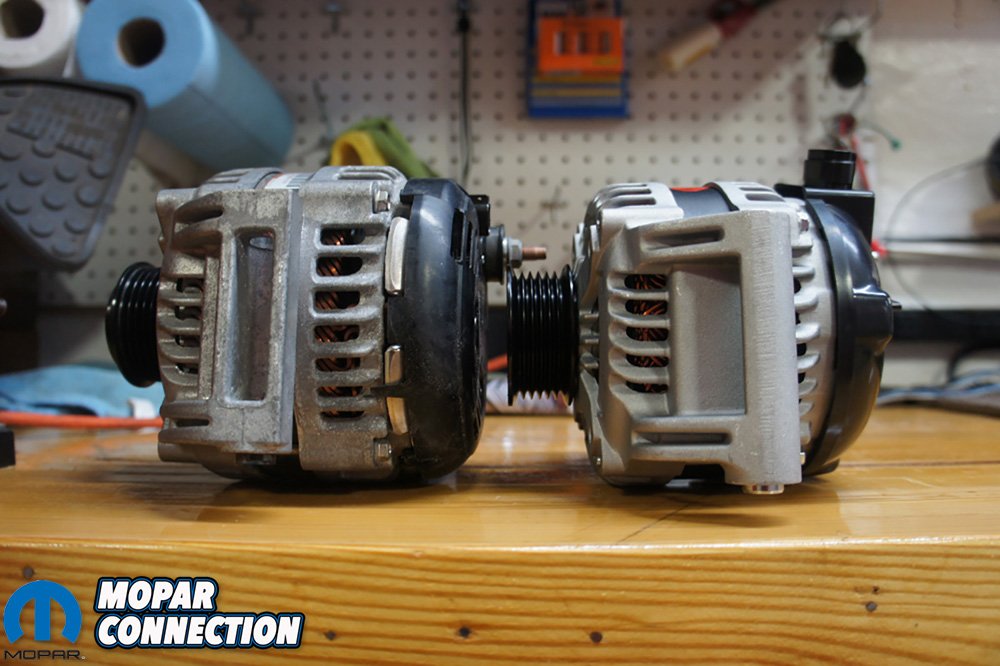
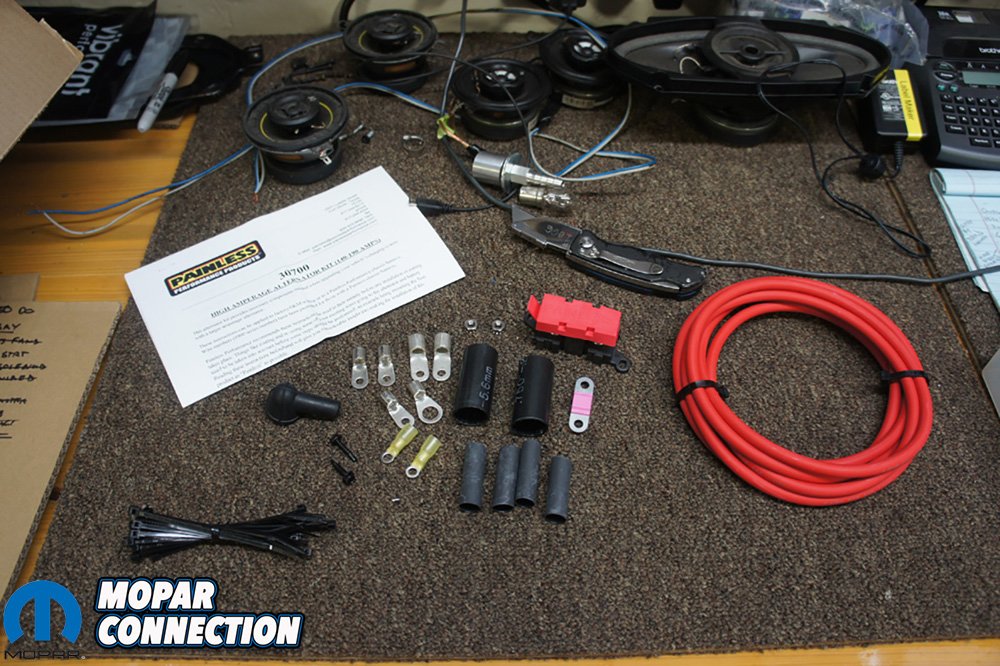
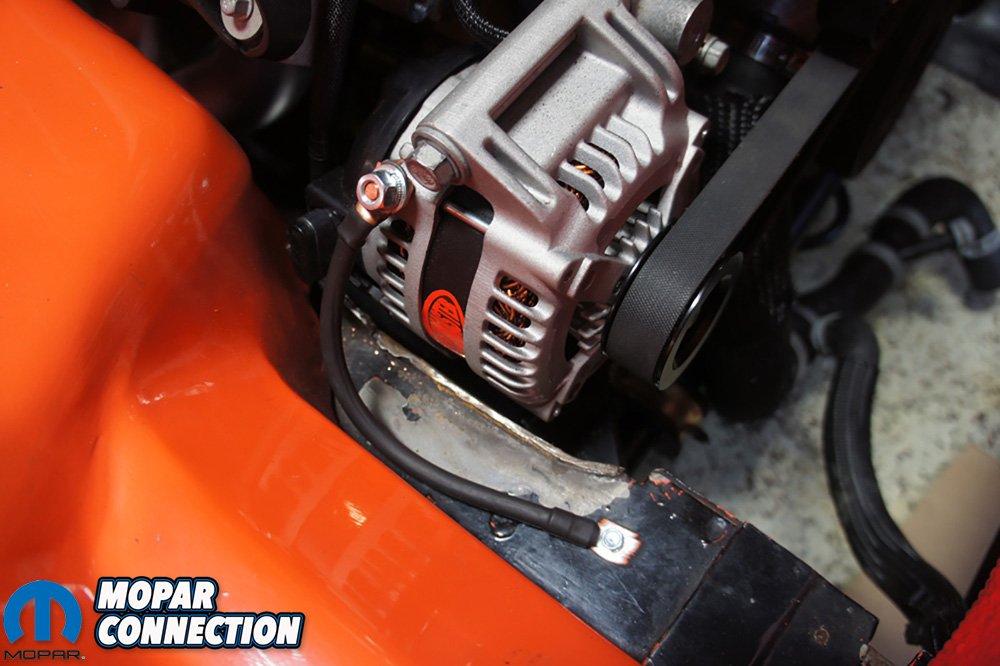
Our charging system was a last minute thought. With additions of fuel injection, electric fuel pump, Holley Pro 6.83″ dash, stereo, electric fans and more, we needed to make sure we had enough alternator. We read where some are using factory alternators and doing some rewiring. We did not want to have something go wrong or fry our Holley Terminator ECU with an over-charging alternator. We called up Powermaster to see what options they had for us. We previously had a 1-wire alternator setup on our 360 and hoping they had one for the 392.
Luckily for us, Powermaster just finished up with a couple 1-wire units that were a direct bolt on for 6.4 Hemi. The alternators are not in Powermaster’s catalog yet, you will need to call them and ask for part number 841574-1. They are offered in black or natural finish like ours. This was a much easier set-up, gave a bit more clearance and peace of mind that we had a reliable alternator with plenty of charging capability.


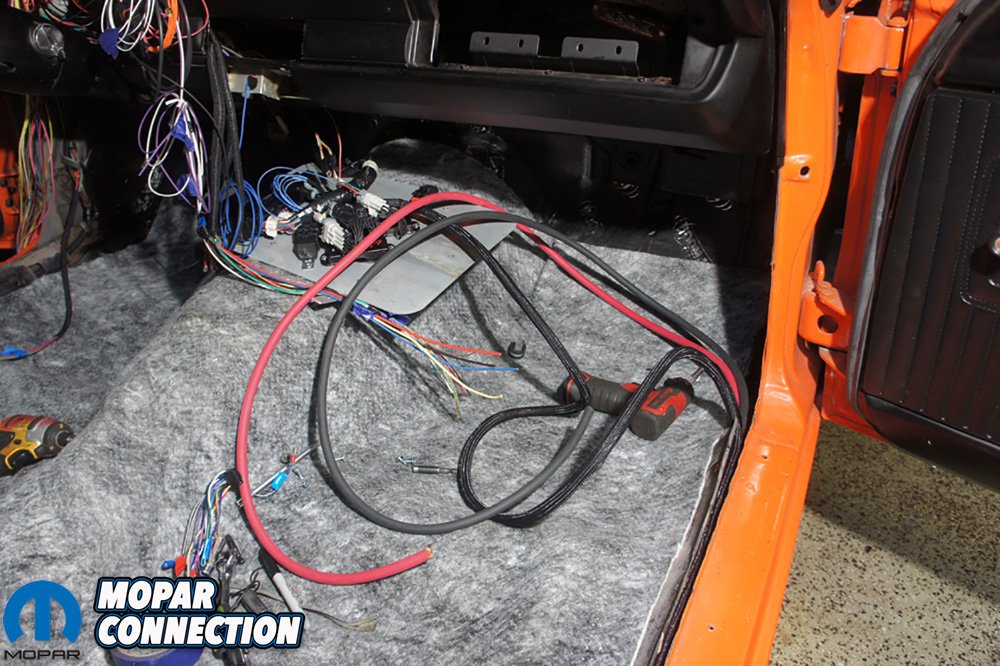
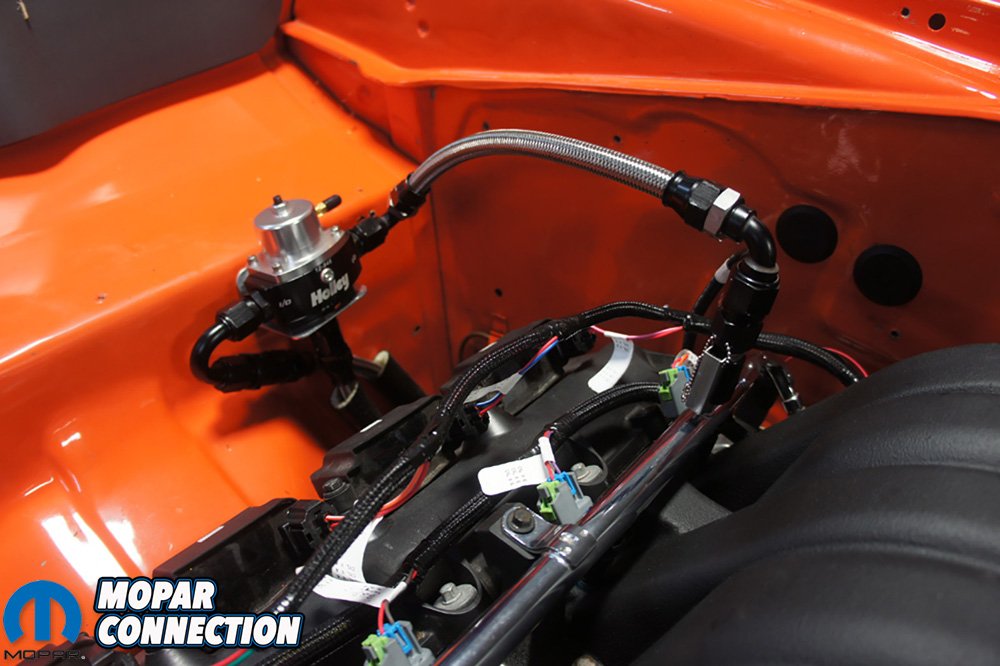
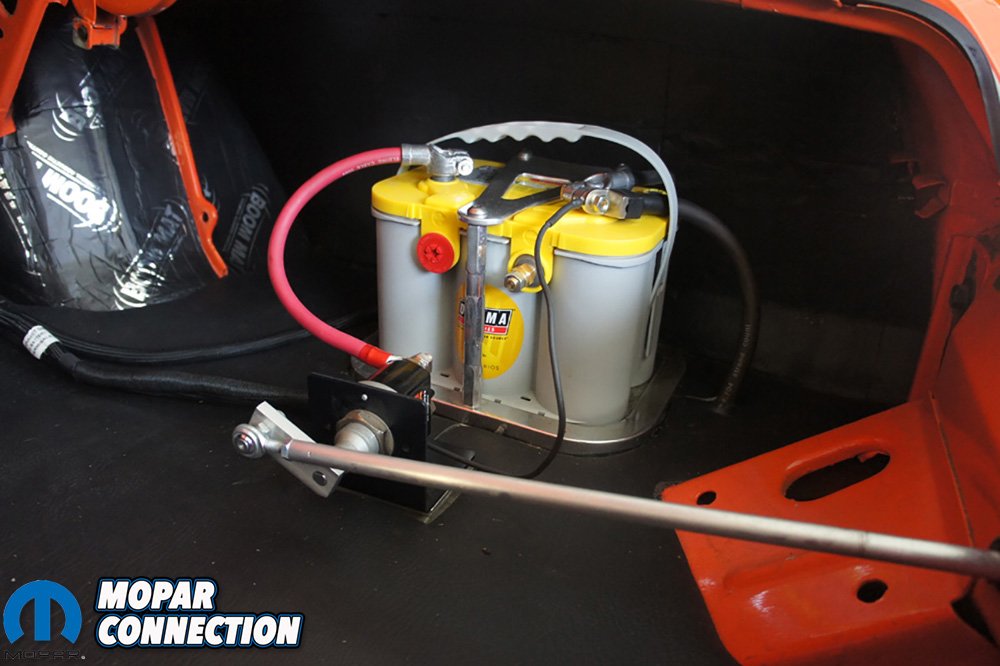
Above Left: We used a Holley EFI billet fuel regulator and an Earl’s Plumbing fuel rail adapter to connect the two. Above Right: Since our Optima Yellow Top Battery is in the trunk, we installed a Painless Performance wire battery relocation kit and did away with our previous wiring.
The Powermaster alternator puts out 175 amps, which would be plenty for our car. We did need to upgrade the alternator wire that came with our Painless Kit. The kit supplied a 10 gauge wire for a 60 amp alternator and we needed at least 6-gauge wire for our 175 amps. We called Painless about our issue and they sent us their Ultra High Amp Alternator kit. This kit is good up to 190 amps, at 175 we were safe. The kit came with proper sized wire and fuse in case of an over-charge event.
The last piece of the puzzle was finding a proper size serpentine belt. We had a couple laying around and one happened to fit. This particular one came off a 5.7 Hemi, part number 53013676AC, and fit our accessories perfectly. With the belt on, we filled fluids and connected our Yellow Top Optima battery.


Above Left: It is difficult to see but Powermaster’s new one-wire Hemi alternator is a little smaller in diameter than stock. Above Center: Comparing the two alternators, they look identical and bolted up perfectly. Above Right: We did do a little cutting on the pinch weld of the frame to give a little bit of extra clearance.
Finally we were ready to fire up our 6.4 Hemi. We started by turning the key on and checking all of the normal functions of the car from the rewire. We checked the lights, radio and made sure the fuel pump and our Holley Pro Dash came on. Then we jumped under the car to check for any leaks in our Holley fuel system. With no leaks found, we went through Holley’s Setup Wizard on our 3.5″ handheld. We answered a few questions and then boom it was time to start cranking. With a turn of the key, the motor fired but then died. Tried a couple more times and the same thing, we were stumped.
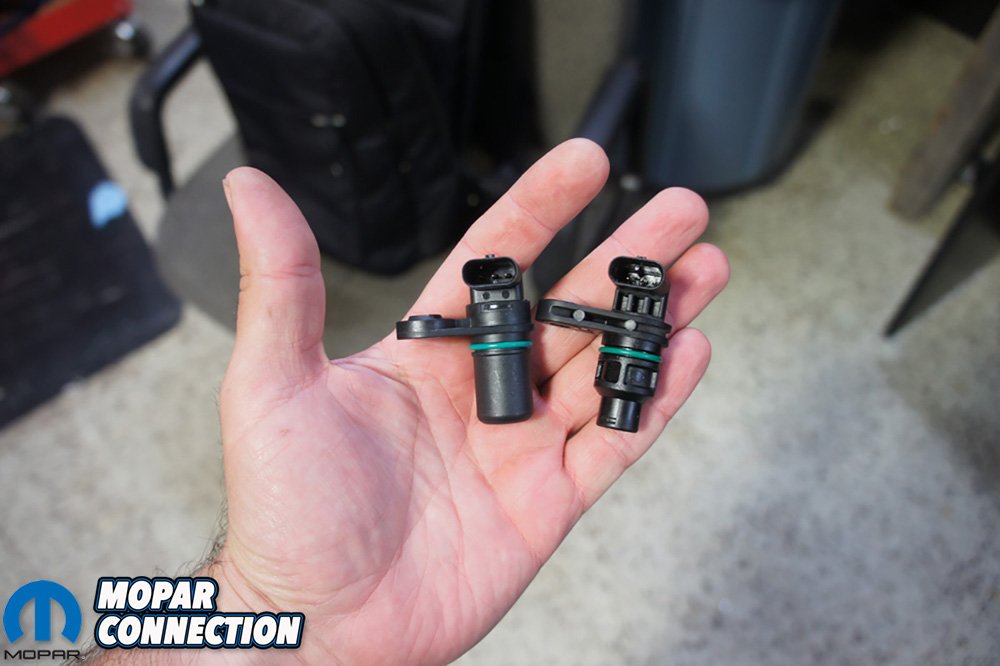
We made a couple calls and found two different issues we had messed up. First was we had the wrong crank sensor. You have to use crank sensor from 2009-2012 Hemi motor. We switched it out and it would run and start up but the motor would not idle below 1100 rpm.


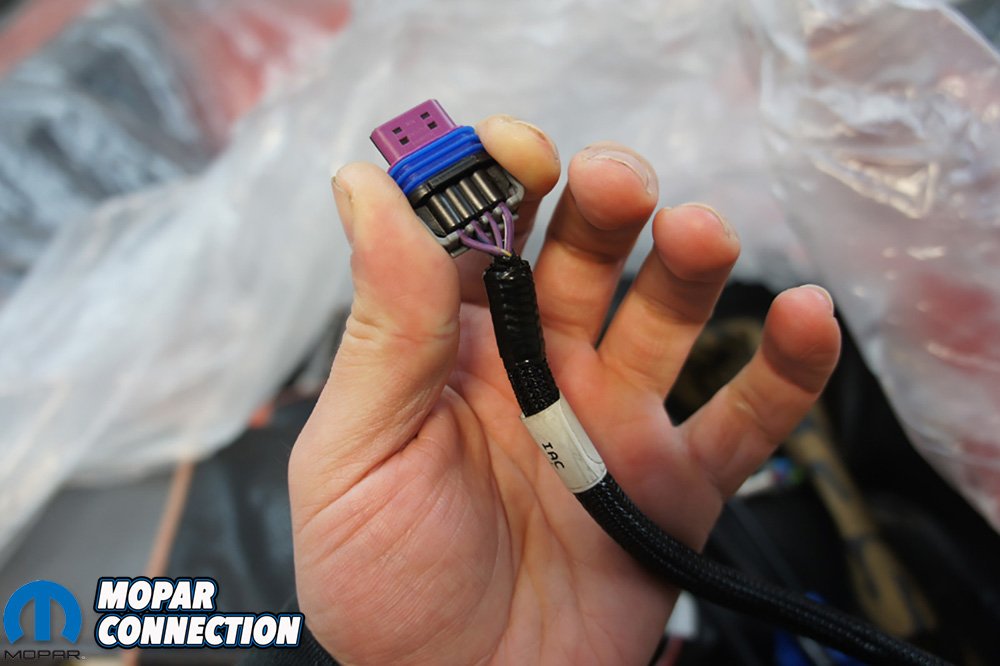
Above Left: You can see the correct 2009-2012 Hemi crank sensor on the left and the factory 6.4 (incorrect) crank sensor on the right. Above Center: Here is the diagram to check your IAC and where each wire needs to go if it is wrong. Above Right: Here is our re-pinned IAC connector.
Once again did some digging and found out that with our F.A.S.T. Big Mouth throttle body had a GM IAC (idle air control) sensor and the Terminator X came set up for a Chrysler IAC. The IAC both use the same plug but the wires needed switched around. We carefully took the plug apart and pulled the wires out with the pins attached and moved them in the correct spots. Plugged it back in and boom the motor fired up and purred beautifully.
We took the car out for the first test drive and wowza! This is the most power we have had in Orange Crush ever. It was a night-and-day difference in power, but more importantly how it was delivered. The throttle is instant, no lag and the motor revs quick. The car blew our expectations out of the water. With all the power, we were glad that we upgraded to Baer Brakes 14” kit to get us stopped, but more on that later.


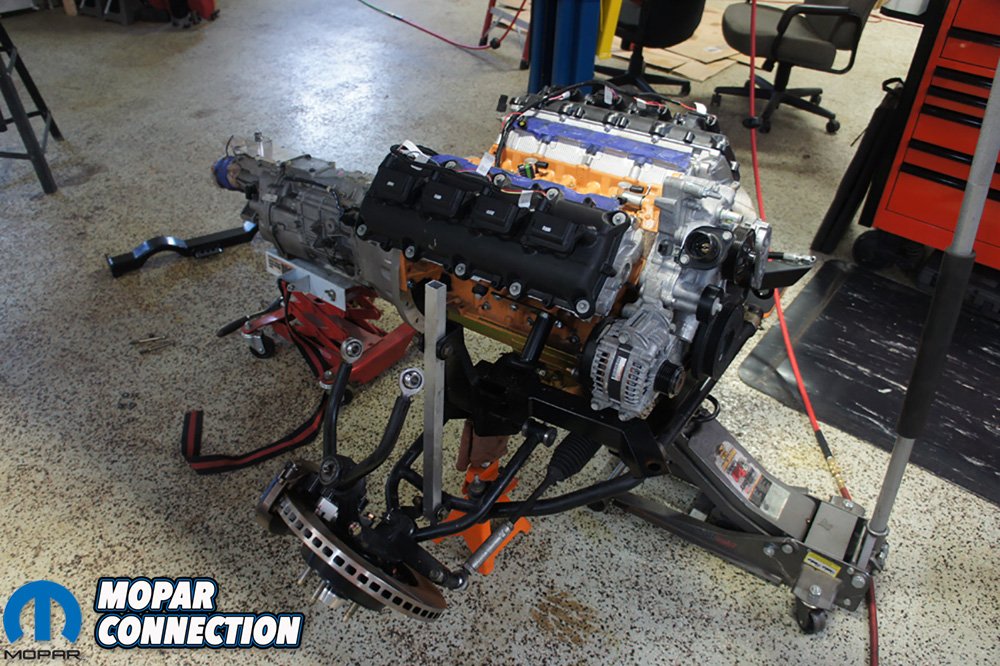
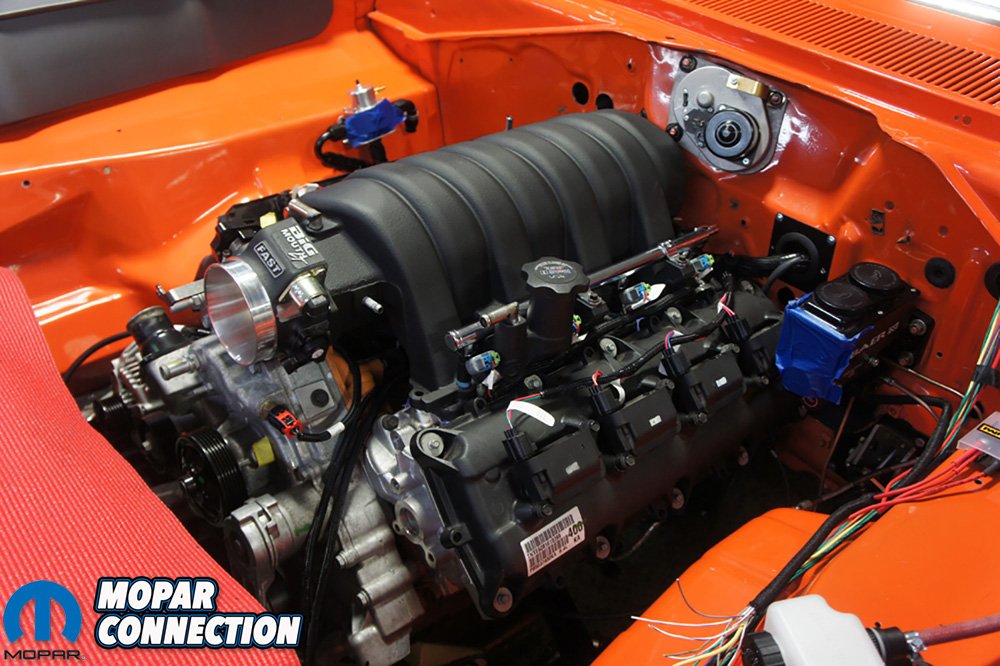
Above Left: We tried very hard to keep the installation clean and minimal. Above Center: Everything fit very well and to our surprise did not have any rattles. Above Right: Not sure if we like the blue CAI but we could stare at this motor for hours.
After the test drive and pulled back into the garage, we just sat back in our chair and took a few minutes to reflect on the whole swap. The biggest part was that we got lucky and had new Hemi swap parts being released during the swap to make life much easier. The best part is they all worked like they were intended. It is such a relief that Hemi swap parts are becoming more available and saving the back yard mechanic from fabricating a bunch of stuff. With the release of Holley Terminator X kits, we feel confident to throw a Hemi into about anything now.
Keep your eyes open for a few follow-up articles diving into the specifics of different parts of the Hemi swap. Oh and by the way, we made it to Holley Moparty, but did not have Orange Crush fully functioning. We did however drive it off the trailer and to our parking spot, which was a win for us. Be sure to catch us next year blowing up the autocross course at Holley Moparty 2021.
Below is a master list of all the parts used for the 392 Hemi swap
- Holley Terminator X Kit – HLY550-1225
- Painless Alternator Wiring Kit – 30700
- TTI Headers – TTI64LHCA-R1C4
- Mancini Extreme Mini Starter – MREBU61R274
- Powermaster 1-Wire Hemi Alternator – 841574-1
- Centerforce DYAD Clutch & Flywheel
- American Powertrain Hydramax Kit – HMCH01301G
- American Powertrain T-56 Hemi Bellhousing – BHCH-10009
- Holley Pro Dash 6.86″ – 553-112
- QDB Hemi 6.4/5.7 VVT Powersteering Bracket – HMPSB64
- Flaming River Hi-Rev Pump – FR1590
- Flaming River Hose Kit – FR1610
- Holley Pulley – 97-152
- Holley Sniper EFI Fuel Tank A-Body – 19-135
- Holley EFI Regulator – 12-846
- Earl’s -8 Speed-Flex Hose – 600008ERL
- Milodon Pro-Touring Pan – MIL31003
- Milodon Pickup – MIL18349
- Milodon Dipstick – MIL22064
- Milodon Windage Tray – MIL32010
- FAST Big Mouth XT Hemi Throttle Body – 54089
- Painless Fan Rely – 30101
- Reilly Motorsports AlterKtion Suspension – RMS301-5
- Painless Mopar Chassis Harness – 10127
- Painless Classic Braid Chassis Kit – 70970
- QDB Holley Dash Mount – QDBHMB
- Mopar Serpentine Belt – 53013676AC
- Holley Flowmonster Mufflers – 43041-FM
- Flowtech Universal X-Pipe Kit – 53623FLT
- Air Intake Temperature Sensor – AX255
- Mopar Crank Sensor – 514-230AA
- Stant 180 Thermostat – 46798
- DEI Boom Mat – 050214
- DEI Spray Boom Mat – 050220
- DEI Under Carpet Sound Deadener – 050110
- DEI D-Mat – 050411
- Optima Batteries Yellow Top – 34/78


