


Hopefully you have been following us on social media for the last few months as we successfully swapped a 392 Hemi into Project Orange Crush. It took us a little longer than anticipated, mostly due to COVID-19, but it’s in and running. We did all the dirty work to gather a complete list of parts used for the swap along with a few tips and tricks to help you.
As you might know, Project Orange Crush is a 1972 Dart. We are going to focus on 1967-1975 A-body Gen III Hemi swap specifics but, a lot of what we are going to talk about and parts used will work on many other applications too. Parts like headers, engine mounts, oil pans, etc. are going to vary on your specific application.

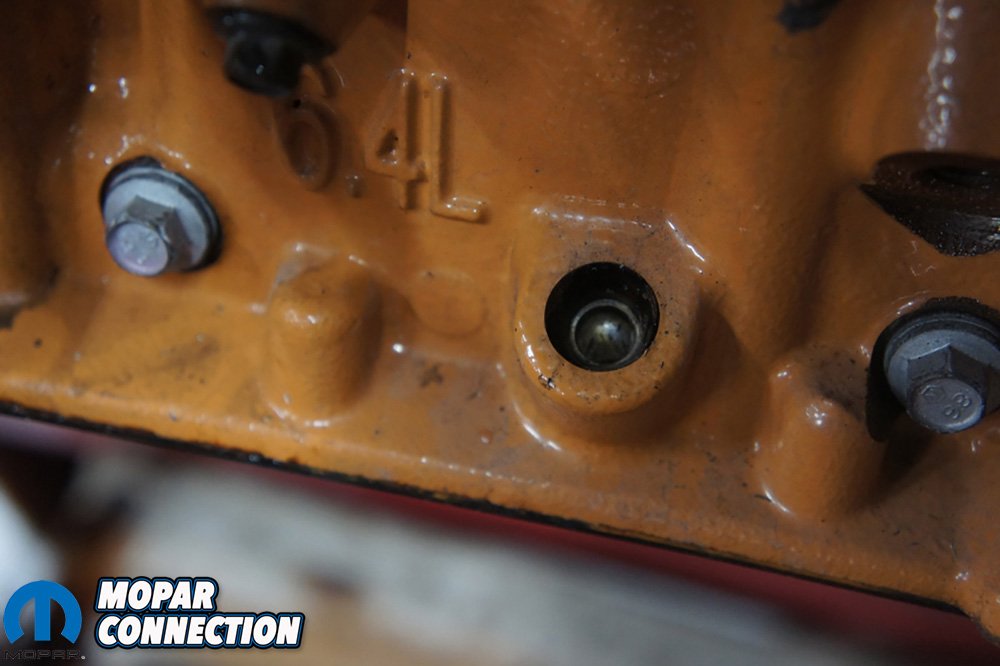
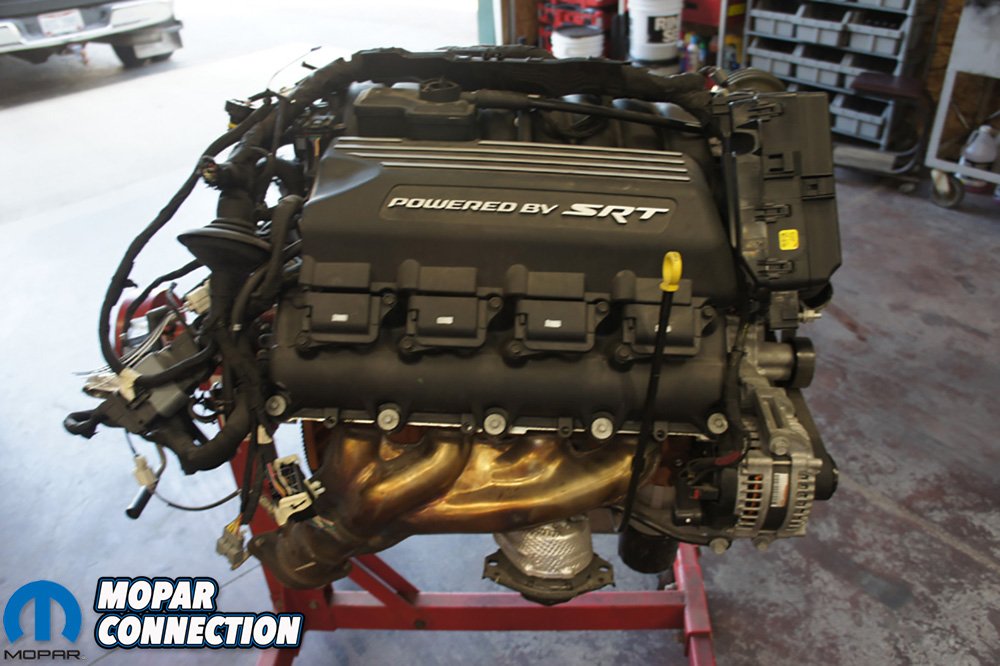
Above: You can see our junk yard SRT-8 392 6.4 Hemi.


Above Left: The 392 Hemi was a complete pullout with manifolds, wiring harness and motor mounts still attached. Above Right: The harness still had the fuse block and all the front runner accessories still installed. Although some wouldn’t be used, was a good peace of mind that we had everything. piece
We acquired the motor a couple years ago off the local Facebook marketplace. As many of you have probably seen, there seem to be a lot of wrecked SRT cars out there. We do not like to see wrecked Mopars ever, but it does help in the budget department when looking for a motor. The motor looked super clean, low milage and complete. The 6.4 392 Hemi came from a 2015 Challenger and cost us $5,000.00.
A word of advice, if you are looking at used engines, never turn down extra free parts. You might think you do not need it for your swap, but we were constantly going back to our extras box for bolts and random pieces. Also, for most swaps you want to be sure to get a car motor. The truck/Jeep motors will work but, you might need to get a car timing cover and they are not the easiest to find. This motor was exactly what we needed and the person included the computer, wiring harness, fuse block and radiator.
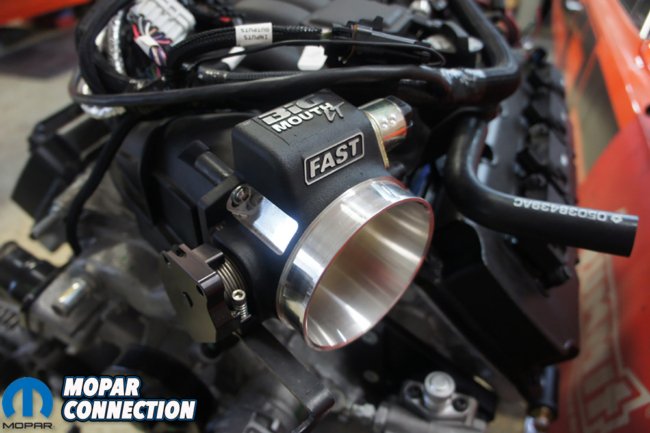
Above Left: One of the first things we did was install our F.A.S.T. Big mouth LT throttle body because it was simple and bolt-on. Above Right: Here you can see the short/long runner lockout that we later found out did not fit in our Dart.
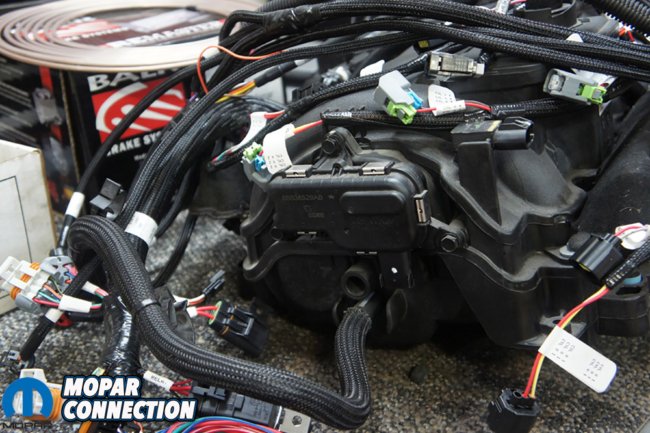
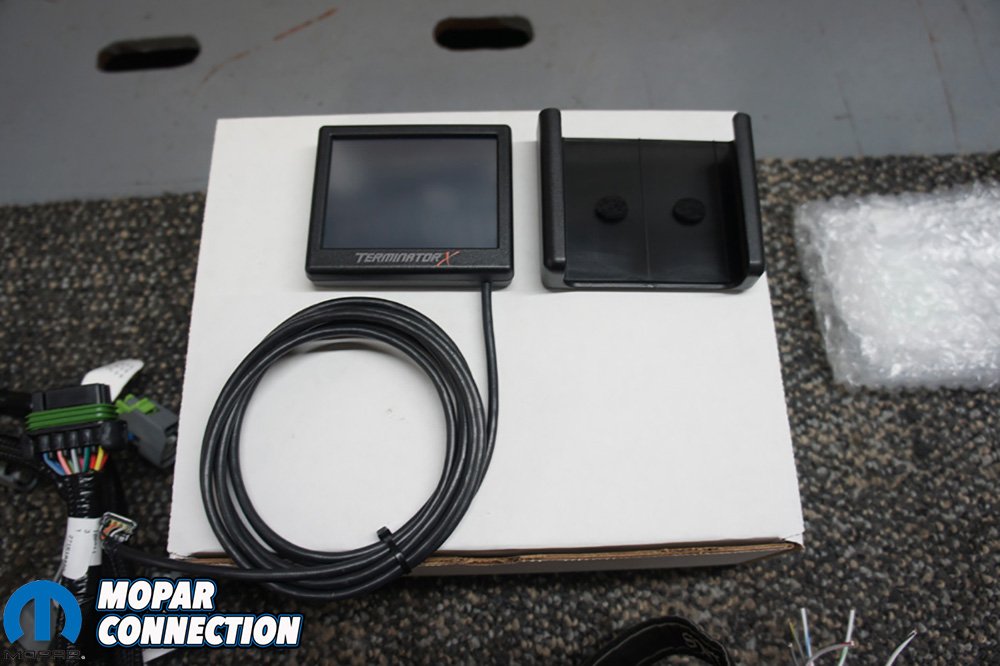
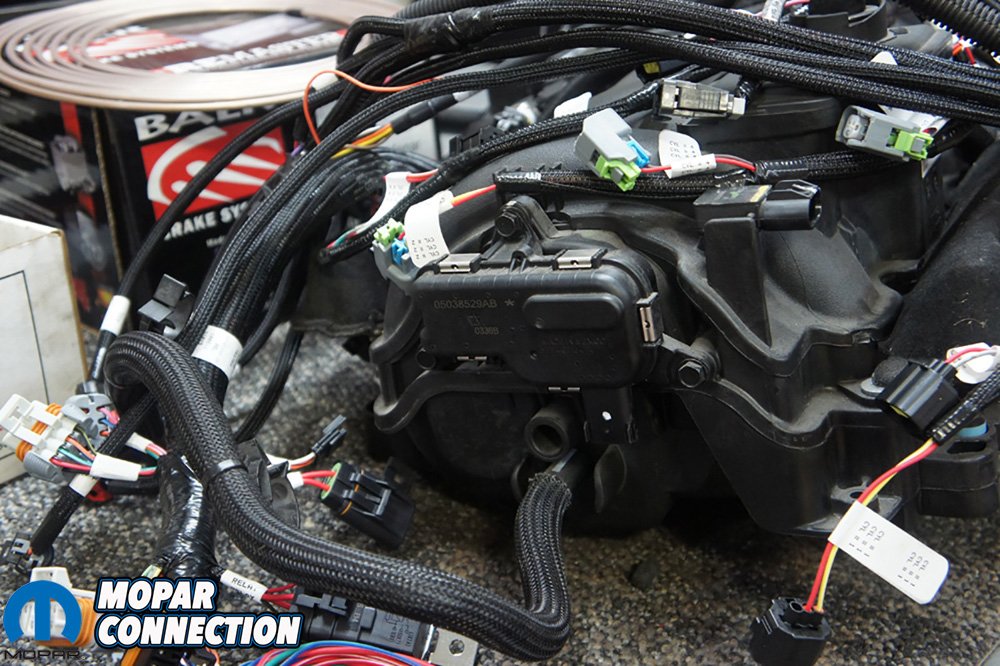
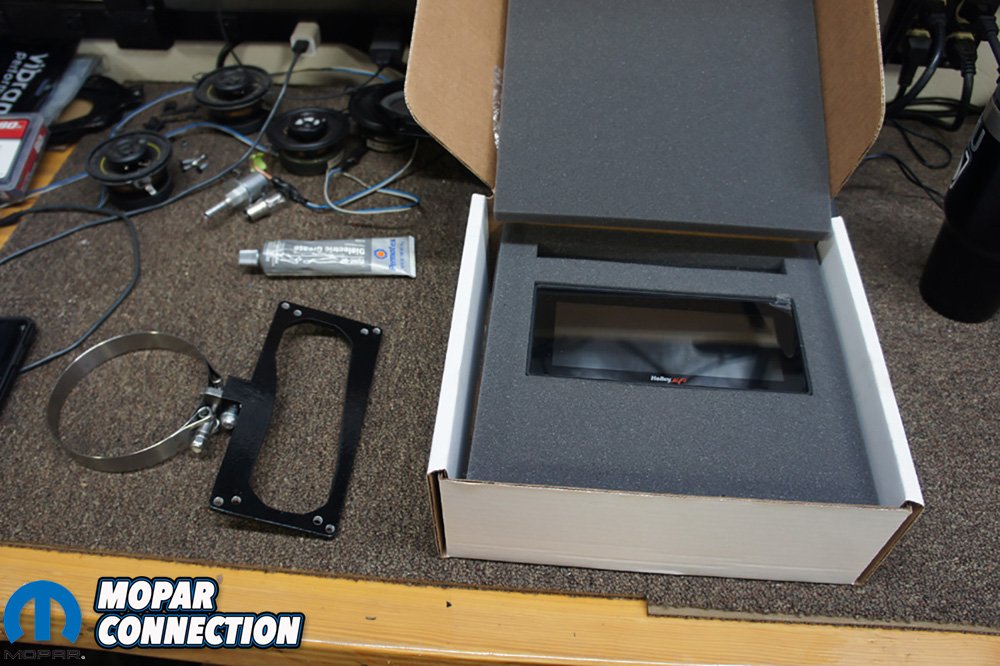
The motor sat under our work bench for a couple of years as we contemplated the swap. Luckily when we decided to pull the trigger, Holley just released their Hemi Terminator X and X Max kits. This was a huge step for us. Their kit provides the harness, ECU, 3” digital dash, O2 sensor and more. For most enthusiasts the wiring is a big hurdle and Holley makes it a simple step with their Terminator Kits.
Decided to move forward with the swap, we were still very new to Gen III Hemi platform. We immediately got on Amazon to order a copy of Car Tech’s New Hemi Engines 2003-Present: How to Rebuild. This helped us out a ton along the way. This pictures and information saved us a lot of time and searching the web.

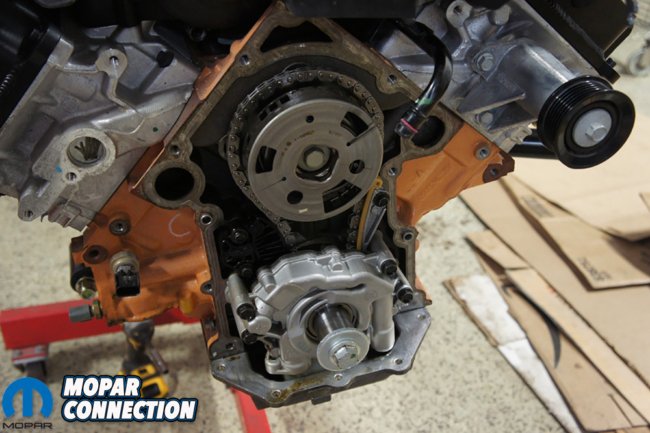
Above Left: We needed to dive into the front of the motor to lockout out our variable valve timing (VVT) with Comp Cams Phaser Lockout Kit. Above Right: With the timing cover off we had access to the cam phaser bolted on the front of the cam. We did have to pull the oil pump off and use a paper clip to take tension off the timing chain.
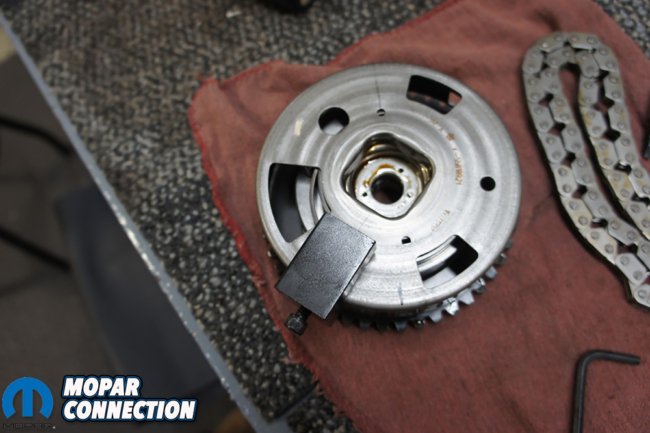
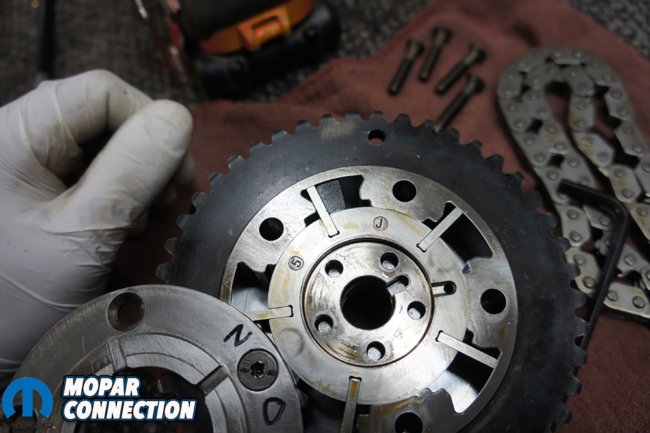
Above Left: Comp Cams Phaser Lockout kit comes with a tool to hold the spring in place while you take the bolts off the backside. Above Right: You can see the Phaser Lockout installed at 12 o’clock. There is a great video showing the installation that you can watch here. It is a simple installation but if you do not follow directions you can cause some major damage to the motor.
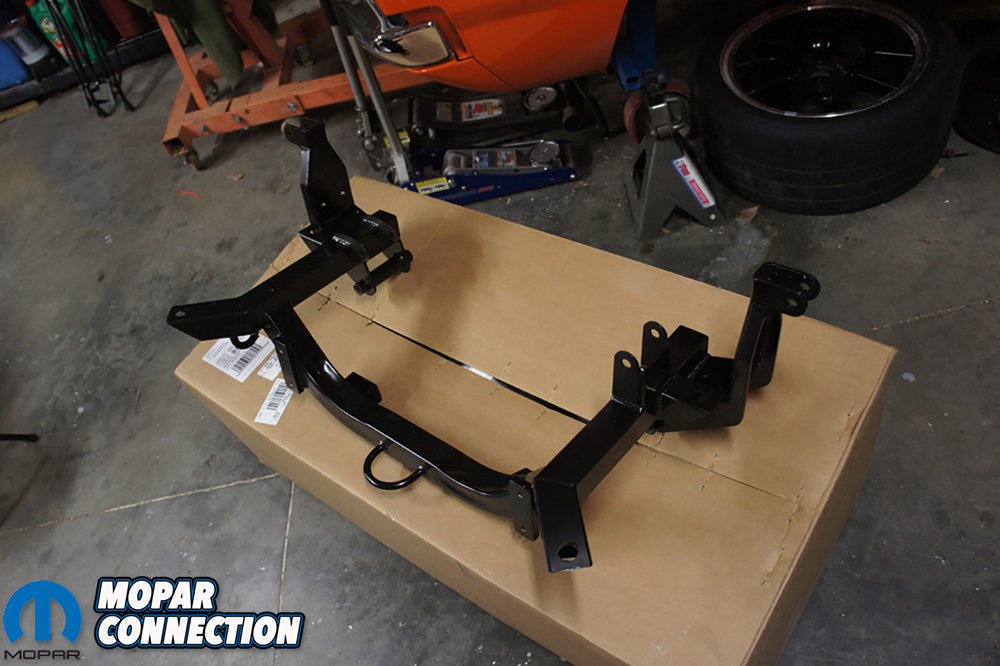
Our first call was to Bill Reilly at Reilly Motorsports. Currently we are running his AlterKtion front suspension but, it was set up to fit small block Mopar. Talking with Bill about our plans and he said it is not a big issue. We had to order a new crossmember but the rest of the suspension would bolt right back up. We asked about engine swap mounts but he advise us there were fitment issues trying to use them with his small block cross member. So we placed our order and had a new crossmember and motor mounts at our doorstep a couple weeks later.
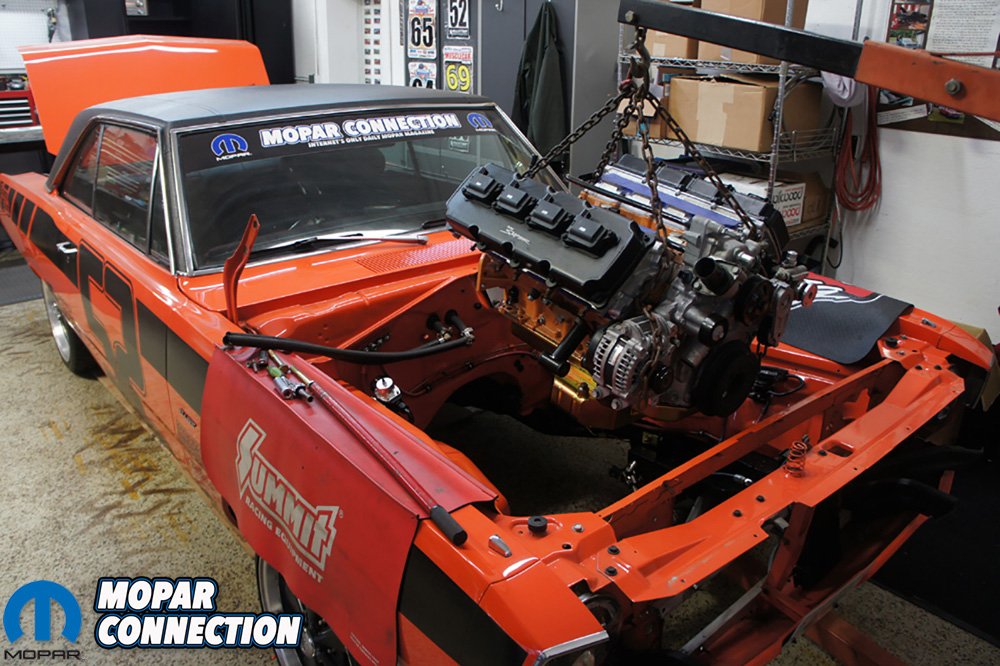
With the new AlterKtion crossmember in hand, we got to work getting the suspension back together and the car ready for the motor. We found out later that since the Gen III Hemis are so wide, it would have been easier bolting the suspension, engine and trans together and lowering the car on top of it. That is not how we initially did it but the only way we will do it from now on.


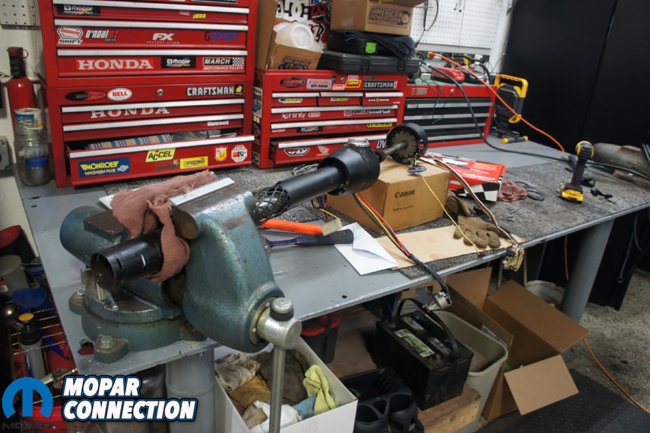
Above Left: There is never enough workbench space when you need it. Above Left: The Milodon Pro-Touring pan fit great and looked even better. We can not wait to put it to the test on the track.
The Reilly Motorsports AlterKtion really helped gain us a lot of clearance and centered the motor in the engine bay a little better. We understand that not everyone has an AlterKtion setup and there are other outlets for motor swap mounts that you can order from parts stores like Mancini Racing.
Before we dropped the engine down in Project Orange Crush, we had some work to do on the 392. We started by stripping off the parts we did not need like the wiring harness, throttle body, A/C compressor, power steering delete pulley, exhaust manifolds, and a couple other things.
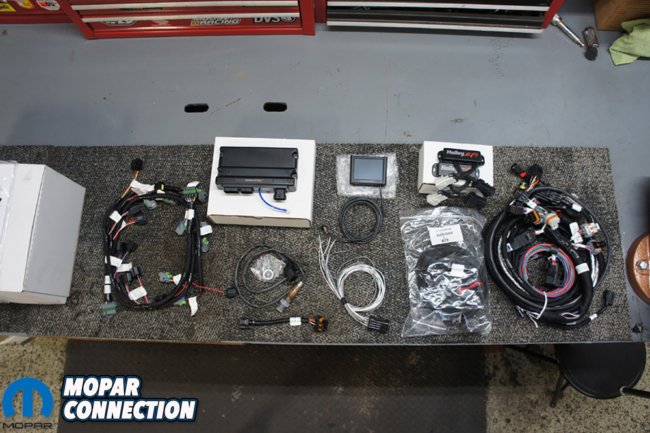
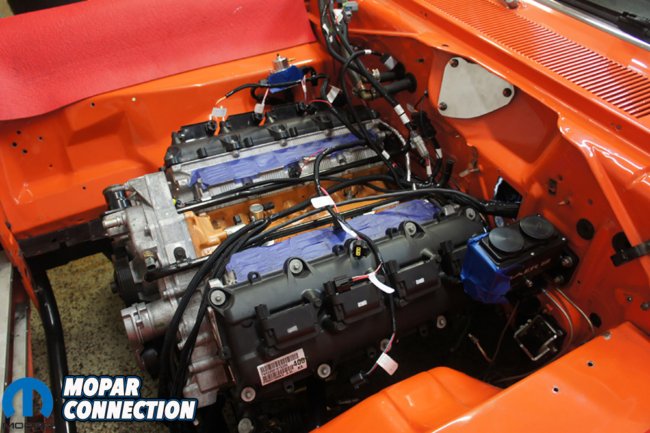
Above: Here is the Holley Terminator kit for our 2015 6.4 392 Hemi. The kit had everything we needed to make the motor run, every connection was well labeled and very easy to get setup.


Above Left: In conjunction with the Holley 3.5″ we opted for the Holley Pro Dash 6.86″ for all of our gauges and used a Quick Draw Brand mount. Above Center: You can see how well each connector on the harness is labeled. Above Right: The Terminator engine harness comes ready to plug in. It was pre loomed and everything was perfect length.
With the motor stripped down to bare bones, we started installing parts we needed for the swap. We began with bolting on the F.A.S.T. Big Mouth XT cable driven 87mm throttle body. This thing engulfs the puny factory throttle body. We did not want to mess with a DBW (drive by wire) throttle pedal. Plus our Holley Terminator X does not support the DBW pedal. The Terminator X Max does, but we just went with the regular X version.
The throttle body is fairly straight forward to install. We opted for it to be equipped with a GM style IAC (idle air control) valve and TPS (throttle position sensor). The only issue we had with the throttle body is having to re-pin the plug on the Holley Terminator X hanress. Holley’s Terminator X harness was setup for a Chrysler style IAC not GM. It was easy to take the connector apart and move the pins around and plug it back in.
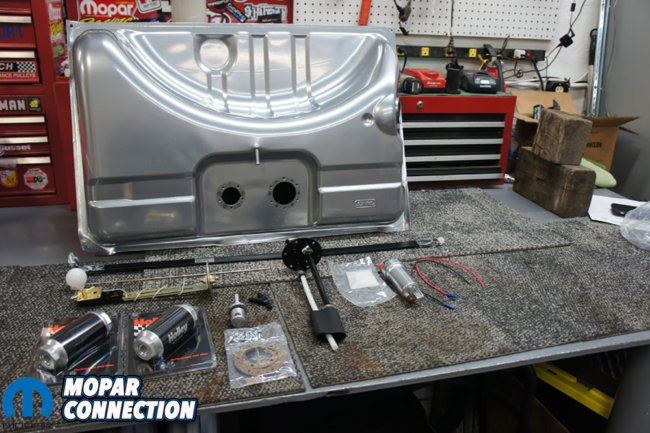
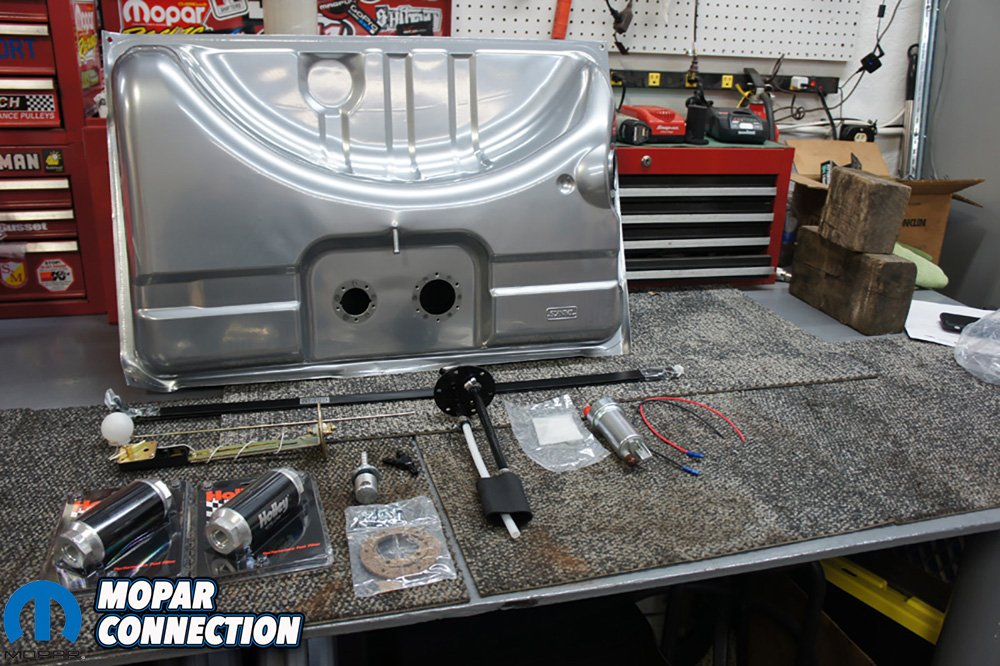
Above: Along with the Holley Terminator kit, we opted for the Holley Sniper EFI direct fit tank, couple Holley EFI fuel filters and upgraded Holley 400lph pump that would support up to 100psi.
To help spruce up the engine we installed Holley Sniper fabricated valve covers. The valve covers installed perfectly and as long as you follow instructions and torque them down in correct sequence, they will not leak. Unfortunately, we had to remove them later on because they would not clear our passenger side inner fender. We were really bummed and might clearance the inner fender down the road. E, B and many other body styles will not have this issue and will fit the engine bay just fine.


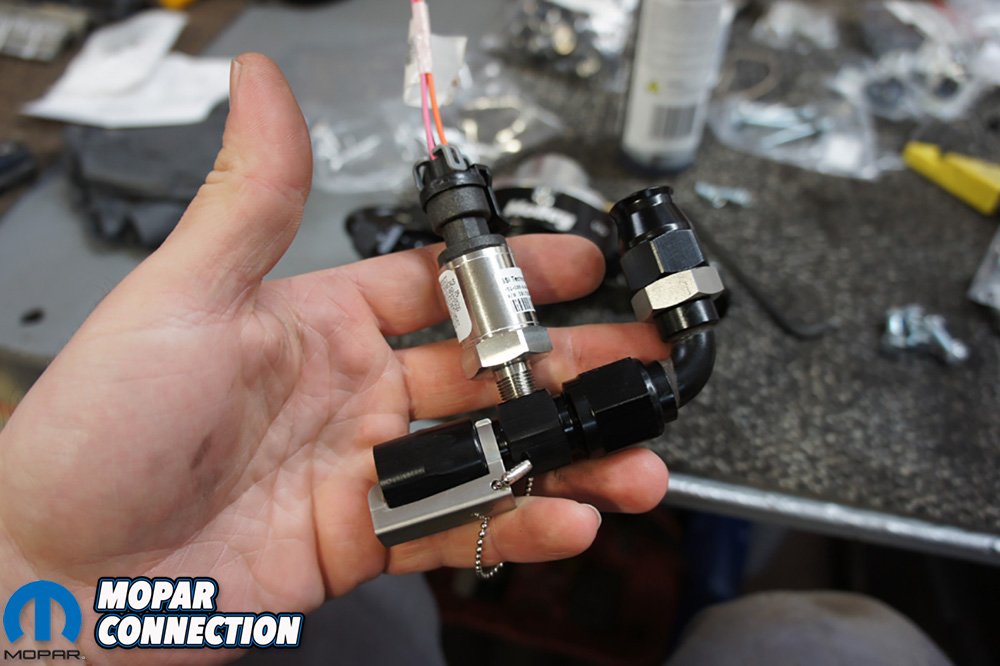
Above Left: We found Earls O.E. Quick Disconnect to -6 adapter. We also installed a Holley Fuel Pressure sensor that plugged right into our harness. Above Right: We added a couple Earls fittings to our Holley EFI Billet fuel regulator for our supply, feed and return lines.

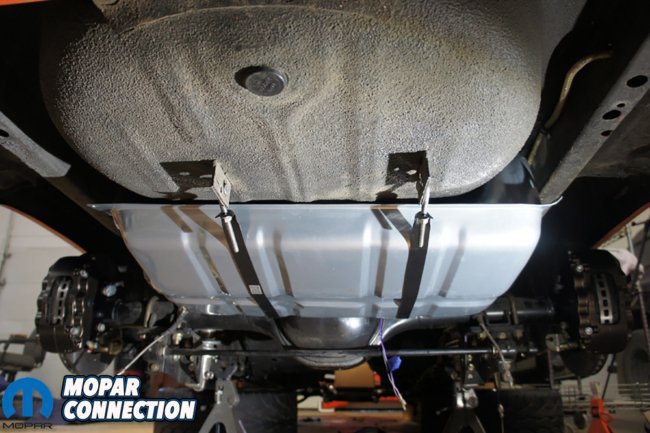
Above: We installed the pump and sending unit in the Holley Sniper EFI tank and was ready to mount it in the car. Above Right: The Sniper tank fit perfectly without any issues and gave us little more clearance from the backside of the 8.75 rear end since the lines come out from the top.
One problem with our 392 was controlling the VVT (variable valve timing). When we did our installation, the Terminator X did not support VVT. That has recently changed along with controlling the long and short runners in the 6.4 Hemi manifold. For our purposes we chose to lockout our VVT and ended up with a 6.1 Hemi intake. To lockout timing we called Comp Cams for one of their Hemi Phaser Limiter kits. It was easy to install and the only additional items we needed was a new timing cover and water pump gaskets.
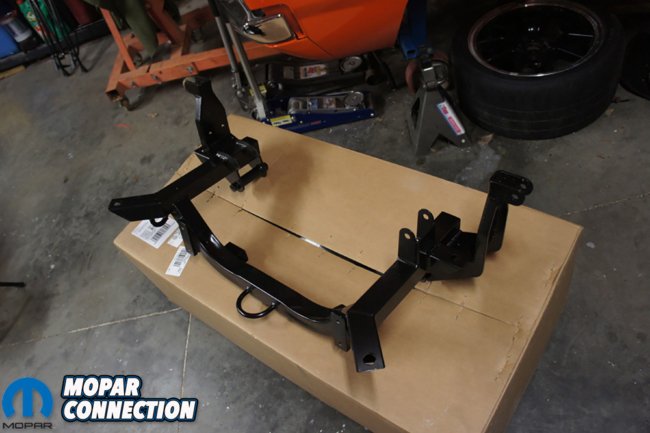
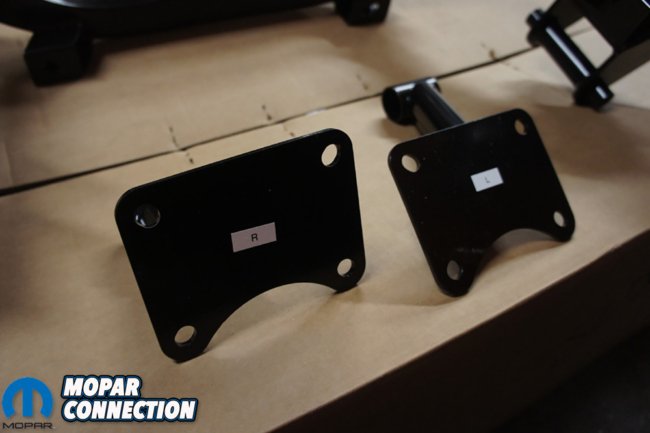
Above Left: The Reilly Motorsports AlterKtion subframe with the Gen III Hemi mounts was back and ready to install all of our old components. This unit was a little updated with tow hooks and tie down points. Above Right: You can see the new Hemi motor mounts and labeled for each side.
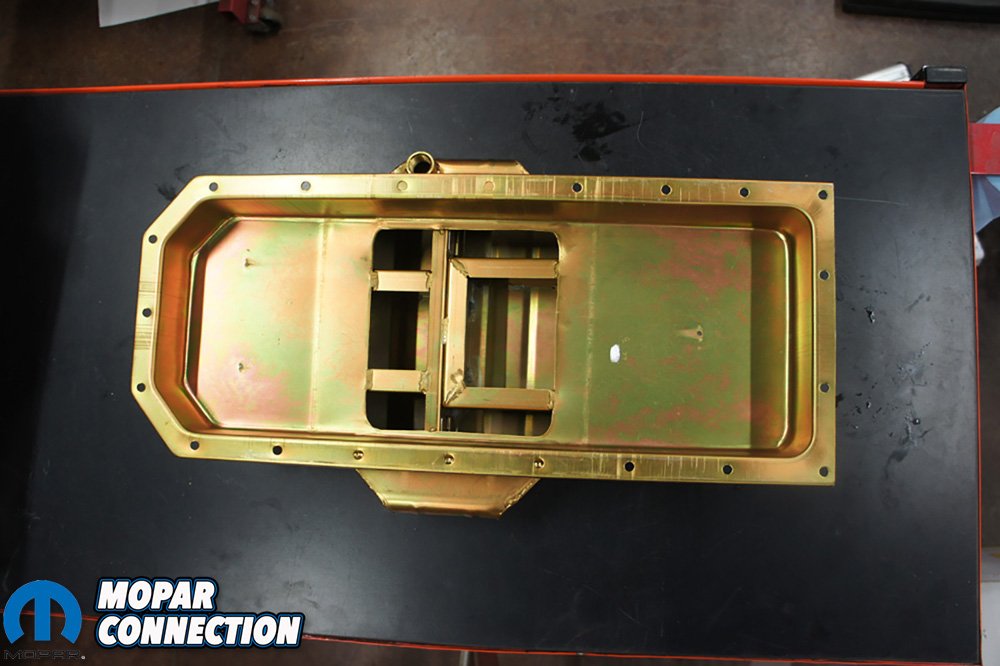
We flipped the motor over on our engine stand and removed the stock oil pan, pickup and windage tray. They would not work with the RMS AlterKtion. Instead we used a Milodon Pro-Touring pan and pickup. Orange Crush likes curves and we needed a pan that would keep the oil in the sump during hard g forces in every direction.
The Milodon Pro-Touring oil pan has trap doors to help keep the pickup covered in oil during cornering, aggressive acceleration or hard stopping. It also fit the RMS AlterKtion and gave us the most ground clearance while still holding 7quarts of oil. The pan comes with a welded on bung that you could use for an oil temperature sensor, for now we plugged it. In addition to the pan we picked up gaskets, windage tray, pan bolts and a dipstick to complete the pan installation.
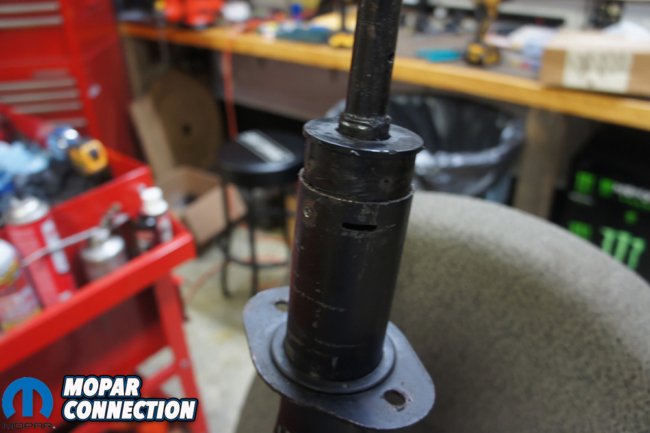
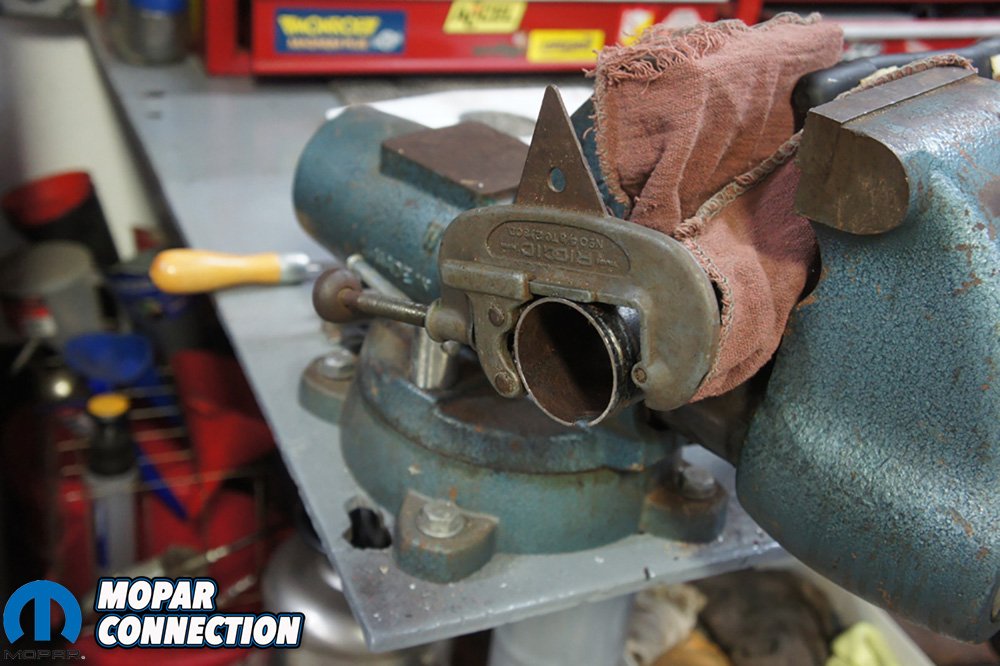
Above Left: Our original steering column hit the motor and had to shorten the tube. We are using a Reilly Motorsport plastic busing from when we initially installed the AlterKtion. Above Right: We gently secured the steering column in our Wilton combination vise. We just snugged the column without collapsing the tube.

Above Left: We did not have a good bandsaw for a clean straight cut but happened to have a big enough pipe cutter that worked great. Above Right: It took us two tries to get the tube short enough. Once we did, we slid the plastic bushing back in and put our steering column back to gather. It is still a tight fit but it works.
The pan installation went fairly smoothly. We did order the wrong pickup at first and there is a very slight difference in the 5.7/6.1 pickup and the later 5.7/6.4/6.2 pickup. Be sure to get the correct one. The difference is so close that we thought we had to bend the pickup but DO NOT bend the pickup. If you have questions give Milodon a call to get the correct one for your application.
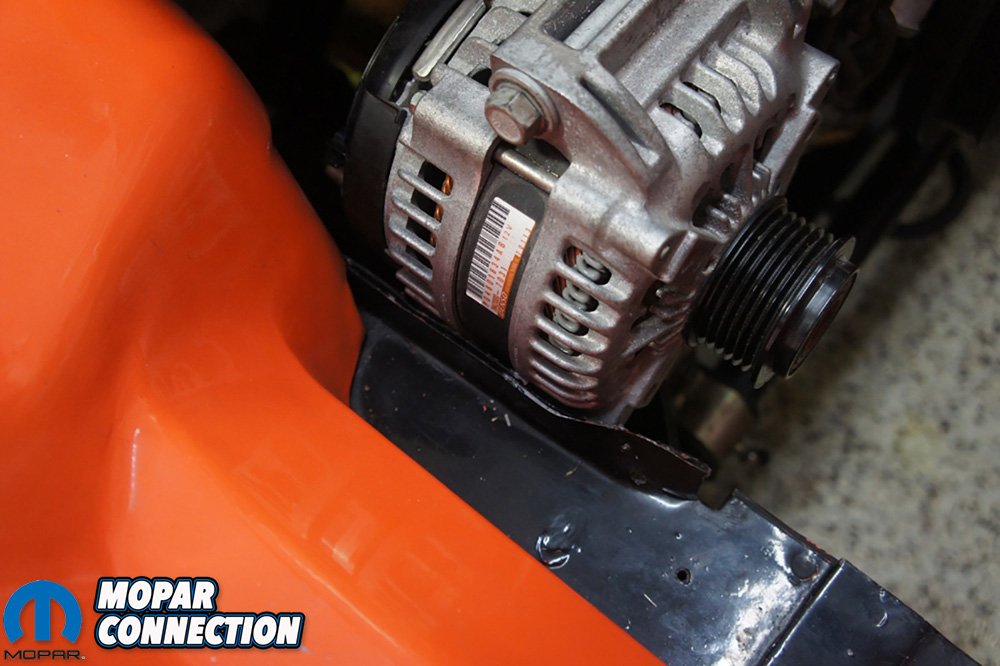
While we are talking about the oil system, we wanted to notate that we removed the factory oil cooler/filter mount. The AlterKtion allows for us to screw an oil filter directly to the motor without an adapter. For a lot of applications you need to relocate the filter or use an angled adapter. Both of which Mancini Racing offers.


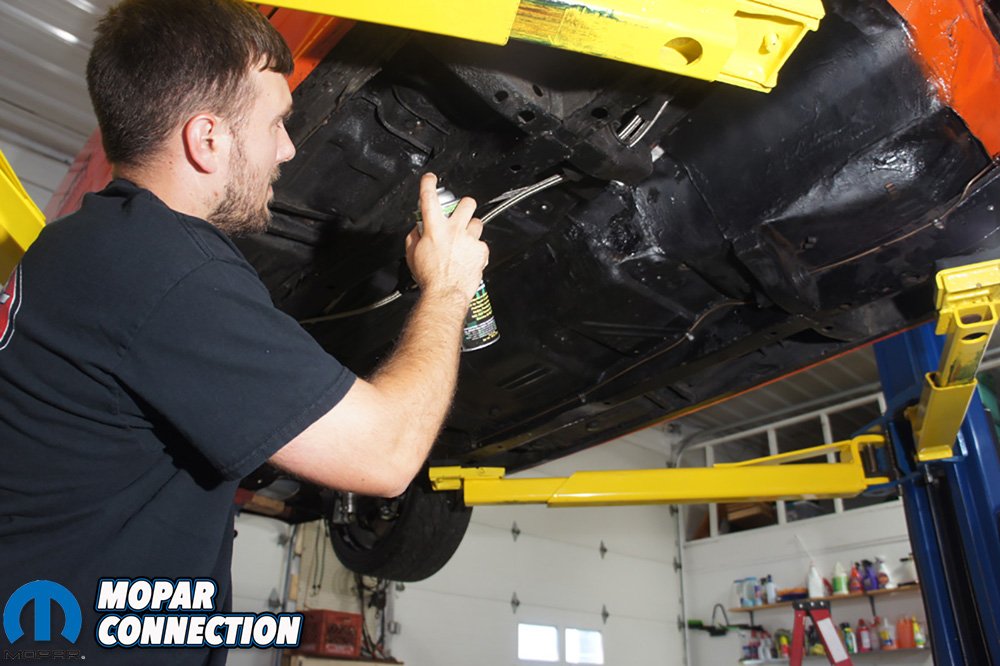
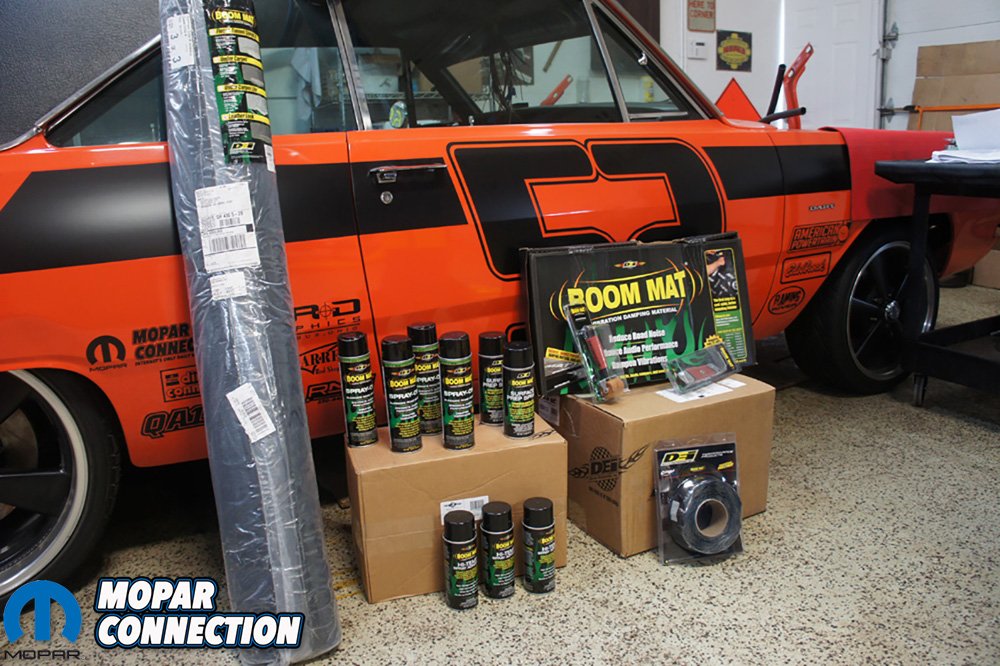
Above Left: You can see we installed our Yellow Top Optima battery that replaced our Red Top. With all the new electronics we wanted to make sure we had plenty of juice. Above Right: The team at Design Engineering Inc. (DEI) sent us a ton of sound proofing and heat control products to help Orange Crush feel like a modern day car.
With the Milodon pan and Comp Cams Phase Limiter installed, we were ready to drop the motor down in the car. Before we could throw the motor in, we had some other work to do on Orange Crush first. Since we were moving to a 392 Hemi, we decide it was time to rewire, insulate and re-plumb the whole car.
Painless Performance, DEI, Optima Batteries and Holley hooked us up with everything we needed for the car. This is a much larger topic and we will dive further into what all we did in a future article. For now we included the part numbers of the parts we used. We can attest that we feel safer and interior is much more quiet now that everything is done.

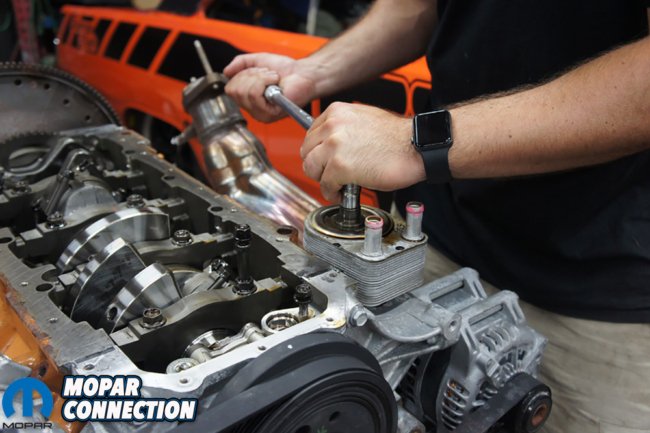
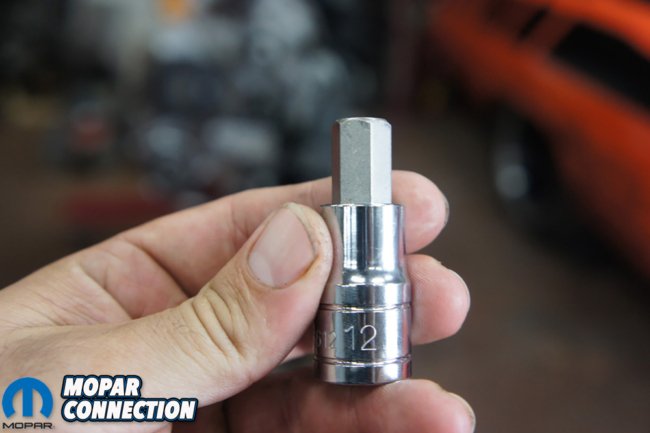
Above Left: We took advantage of the drivetrain being out of the car and coated some spots with DEI Sprayable Boom Mat to help with interior sound and heat from the road and exhaust. Above Center: Before we dropped the motor in we removed the factory oil cooler. Above Right: To remove the cooler you need a 12mm hex.
Once we had the car fitted with sound deadening, heat protection, new fuel lines, gas tank, Yellow Top Optima and updated wiring, we were ready to drop the motor in. It took us a couple of tries because the Holley Sniper valve covers were hitting and had to be removed. As we mentioned earlier, we found out dropping it down in was a bit more difficult than lowering the car on top of it.
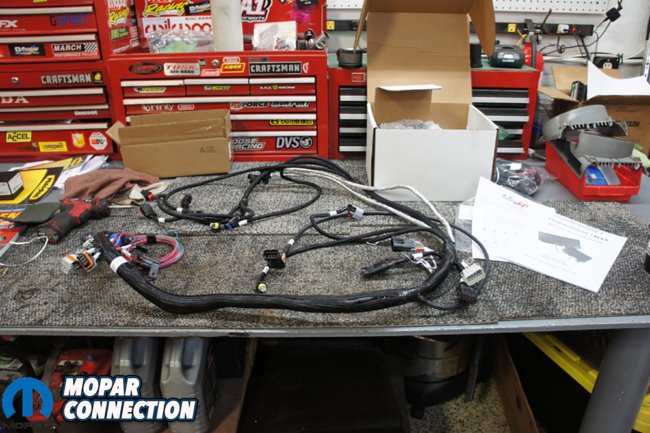
Although we had the car wired with our Painless kit, we still had to wire our Holley Terminator X kit. The kit came with everything we needed to make the Hemi roar. The Terminator X kit makes life very easy. There are some little things that you have to be aware of but, in a nutshell, it takes 3 wires to hook up and make the engine run. Once again there is a lot to dive into about the Terminator X & X Max kits but we will cover that in a future article.


Above Left: It was time to drop the 392 Hemi down into the engine bay. Above Right: We were unsuccessful our first try as the Holley Sniper valve covers hit the inner fender and did not want to clearance the inner fender to make it fit. We swapped to O.E. valve covers to clear the inner fender.


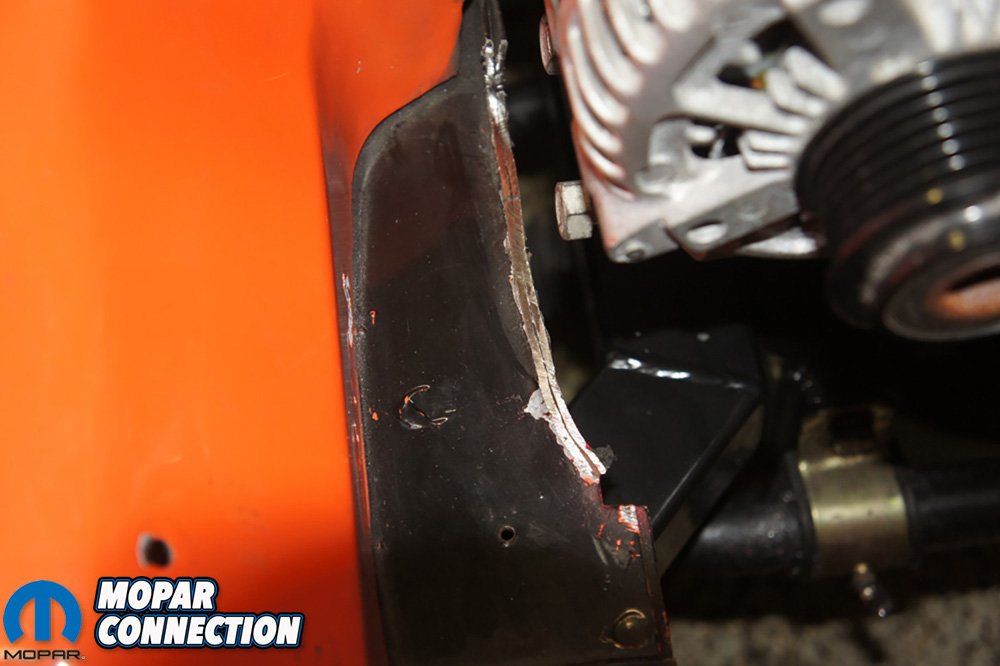
Above Left: We thought the motor was about to slide into the motor mounts and we ran into a small issue with the pinch weld on the frame. Above Right: We trimmed off the pinch weld and gave us plenty of clearance. We ended up going back and welding the seam for extra strength and plan to cut the rest of the pinch weld off this winter.
The Terminator X kit had everything we needed for the wiring harness, O2 sensor, ECU, coil drivers, handheld and more. The harness plugged right into all the factory sensors on our motor. We left the MDS and VVT unplugged and left the sensors in place for now. This will not hurt anything. Eventually we will order some block off plugs from Mancini Racing. We did have to swap out our crank sensor for proper 514-9230-AA sensor. It was direct replacement and without it the motor will not start, ask us how we know.
Above: Well, we got the motor in and some of the Holley Terminator harness laying in place. We thought we were moving quick and found out we still had a lot to do.
It took us a little longer than most to mount our Terminator ECU due to wanting to keep engine bay clean. We opted to mount the ECU under the dash. There was plenty of harness to place it under the dash. The pig tail for the ECU all fit through a 2” hole like it states. It is a tight fit and little larger hole would have been easier, but it is doable with a 2” round hole.
We would like to continue but there is just a lot to squeeze into one article. The good part is we have included our master list of parts with links to everything below. Although some items have not been covered yet, we will get to those in our next article. The next half will be up soon. Until then feel free to browse some of the swap parts we have listed below for your Hemi swap.
Below is a master list of all the parts used for the 392 Hemi swap
- Holley Terminator X Kit – HLY550-1225
- Painless Alternator Wiring Kit – 30700
- TTI Headers – TTI64LHCA-R1C4
- Mancini Extreme Mini Starter – MREBU61R274
- Powermaster 1-Wire Hemi Alternator – 841574-1
- Centerforce DYAD Clutch & Flywheel
- American Powertrain Hydramax Kit – HMCH01301G
- American Powertrain T-56 Hemi Bellhousing – BHCH-10009
- Holley Pro Dash 6.86″ – 553-112
- QDB Hemi 6.4/5.7 VVT Powersteering Bracket – HMPSB64
- Flaming River Hi-Rev Pump – FR1590
- Flaming River Hose Kit – FR1610
- Holley Pulley – 97-152
- Holley Sniper EFI Fuel Tank A-Body – 19-135
- Holley EFI Regulator – 12-846
- Holley 400lph Pump Assembly
- Earl’s -8 Speed-Flex Hose – 600008ERL
- Milodon Pro-Touring Pan – MIL31003
- Milodon Pickup – MIL18349
- Milodon Dipstick – MIL22064
- Milodon Windage Tray – MIL32010
- FAST Big Mouth XT Hemi Throttle Body – 54089
- Painless Fan Rely – 30101
- Reilly Motorsports AlterKtion Suspension – RMS301-5
- Painless Mopar Chassis Harness – 10127
- Painless Classic Braid Chassis Kit – 70970
- QDB Holley Dash Mount – QDBHMB
- Mopar Serpentine Belt – 53013676AC
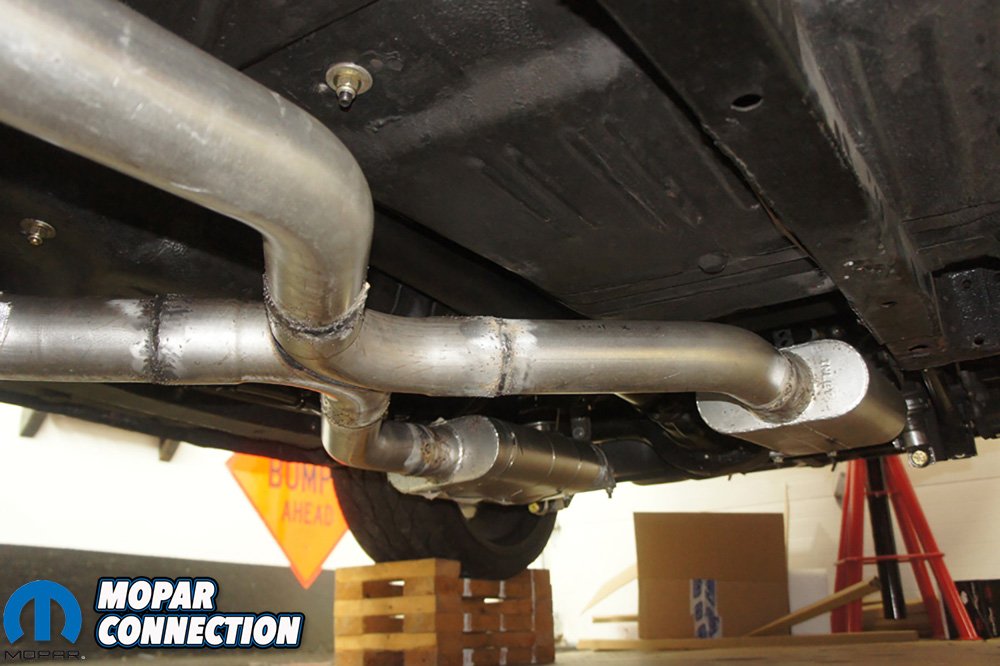
- Holley Flowmonster Mufflers – 43041-FM
- Flowtech Universal X-Pipe Kit – 53623FLT
- Air Intake Temperature Sensor – AX255
- Mopar Crank Sensor – 514-230AA
- Stant 180 Thermostat – 46798
- DEI Boom Mat – 050214
- DEI Spray Boom Mat – 050220
- DEI Under Carpet Sound Deadener – 050110
- DEI D-Mat – 050411
- Optima Batteries Yellow Top – 34/78


Looking for a stock Kframe for a 1973 Plymouth duster with a stock 340!
Check this out