


When it comes to outdoor, automotive events, rain is one of the least favorable weather forecasts. Whether it is racing, a car show, or just taking a destination-unknown cruise, the rain will postpone the happening, or if by chance it did start, the rain will end it early. Most enthusiasts protect their prized possessions from the rain, but on those rare occasions when the ride gets caught in bad weather, it must be weatherproof. Our 1975 Dart has developed a problem of leaking water onto our feet on the rare ride in the rain. Familiar with the leak problems on A-bodies, we surmised the wiper pivot seals were the likely culprit, but because of the difficulty of repair, we had put it off.
Adding to our concerns, the most recent storm required extended wiper usage. After about fifteen minutes of operation on low- or medium-speed, we began hearing excessive clunking from under the dash accompanied by the wipers not clearing the entirety of the windshield. As the under-dash thumping continued, debris began falling onto the driver-side carpet.
Once home, we recognized the chunks on the carpet; they were the pieces of a polyurethane retainer bushing from the wiper linkage. The bushings were 45-years old, and one (or more) had finally disintegrated to the point of failure. To make the repairs, we contacted YearOne about bushings (part no. WB22) and an A-body wiper pivot seal kit (part no. WP301), which included upgrade grease (zerk) fittings for additional rotating shaft lubrication.


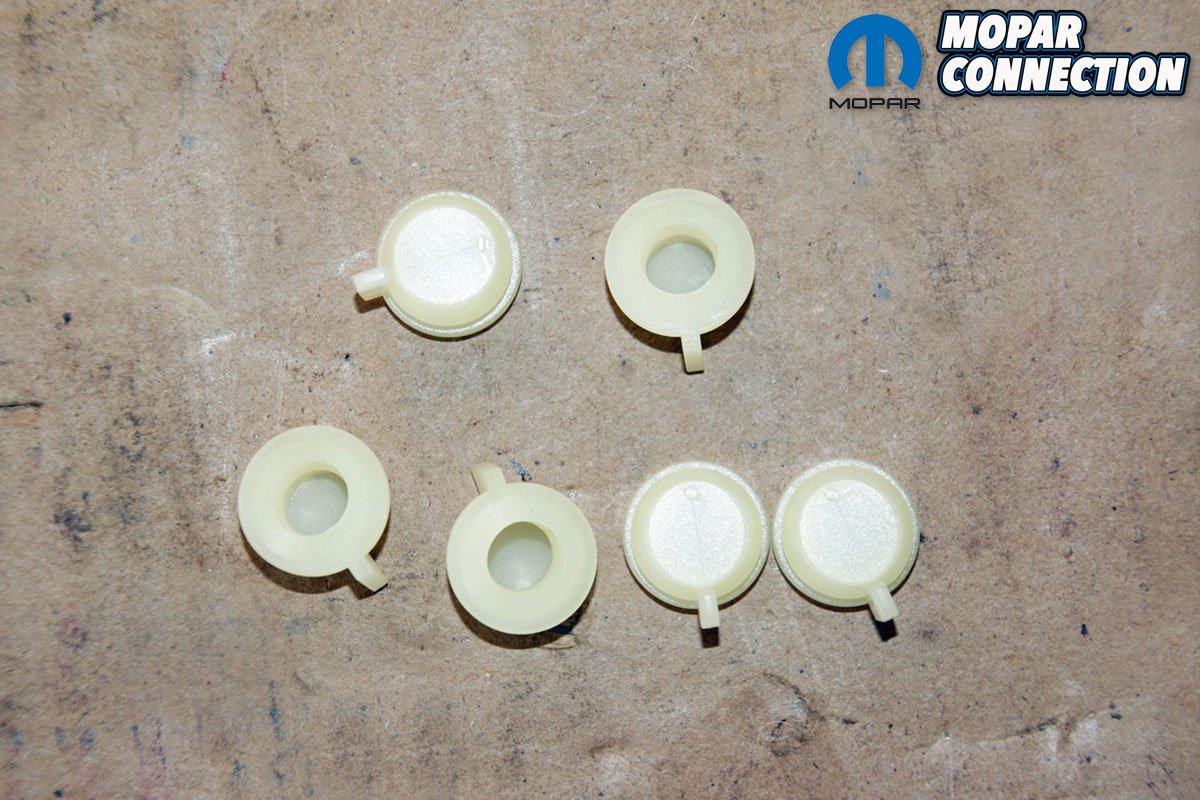
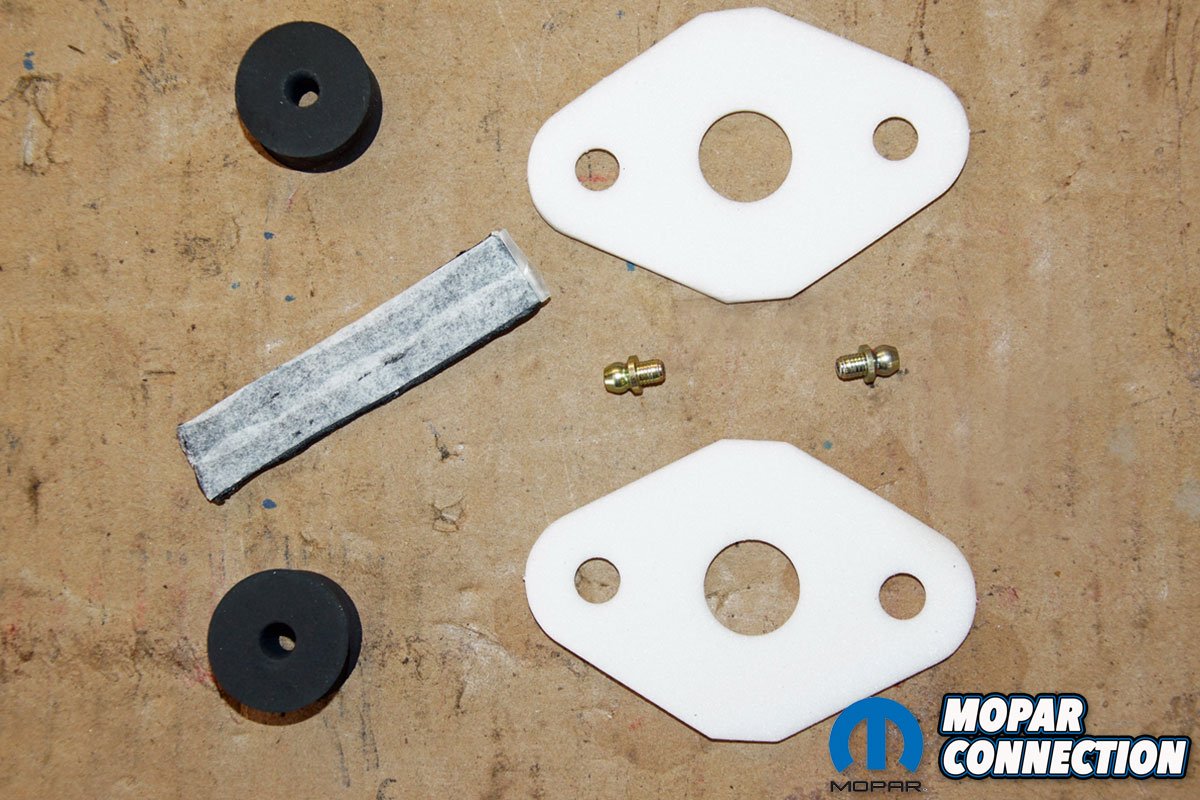
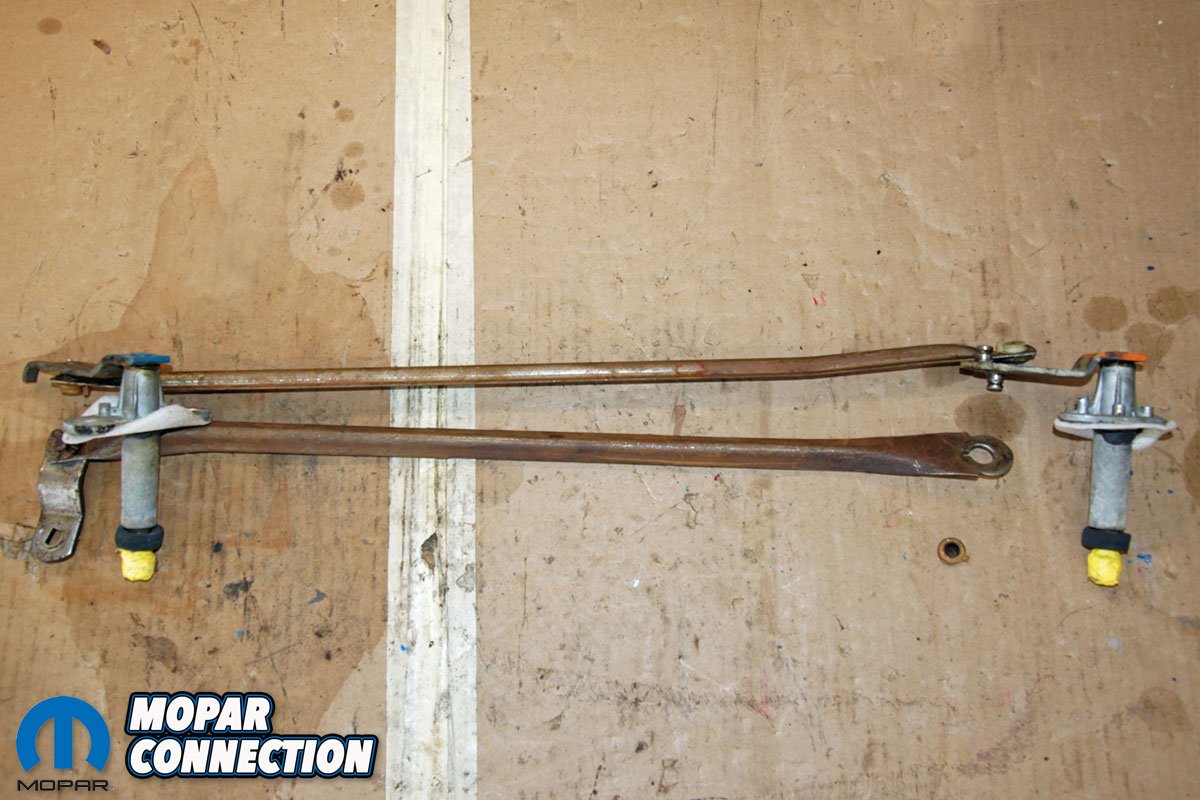
Above Left: To repair our wiper linkage related problems, we contacted YearOne about its linkage bushings (part no. WB22). We picked up six bushings even though our 1975 Dart only required three. The additional bushings were purchased as insurance in case we damaged one (or more) during the installation. Above Right: To reseal the wiper pivots, we picked up a YearOne A-body wiper pivot seal kit (part no. WP301). The kit included a pair of water seals, two base gaskets, and two caulk strips. The kit also included upgrade grease (zerk) fittings for additional pivot shaft lubrication.


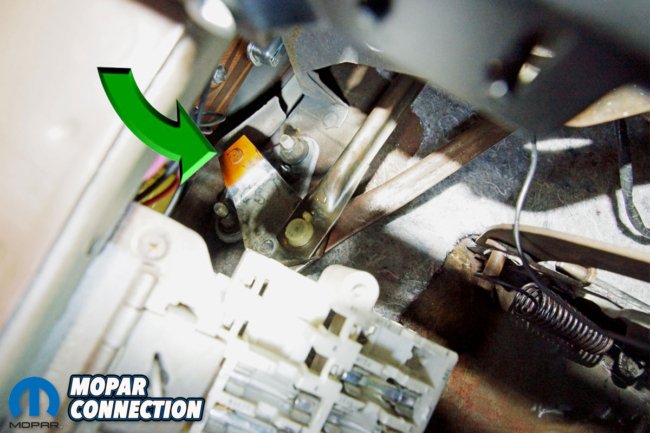
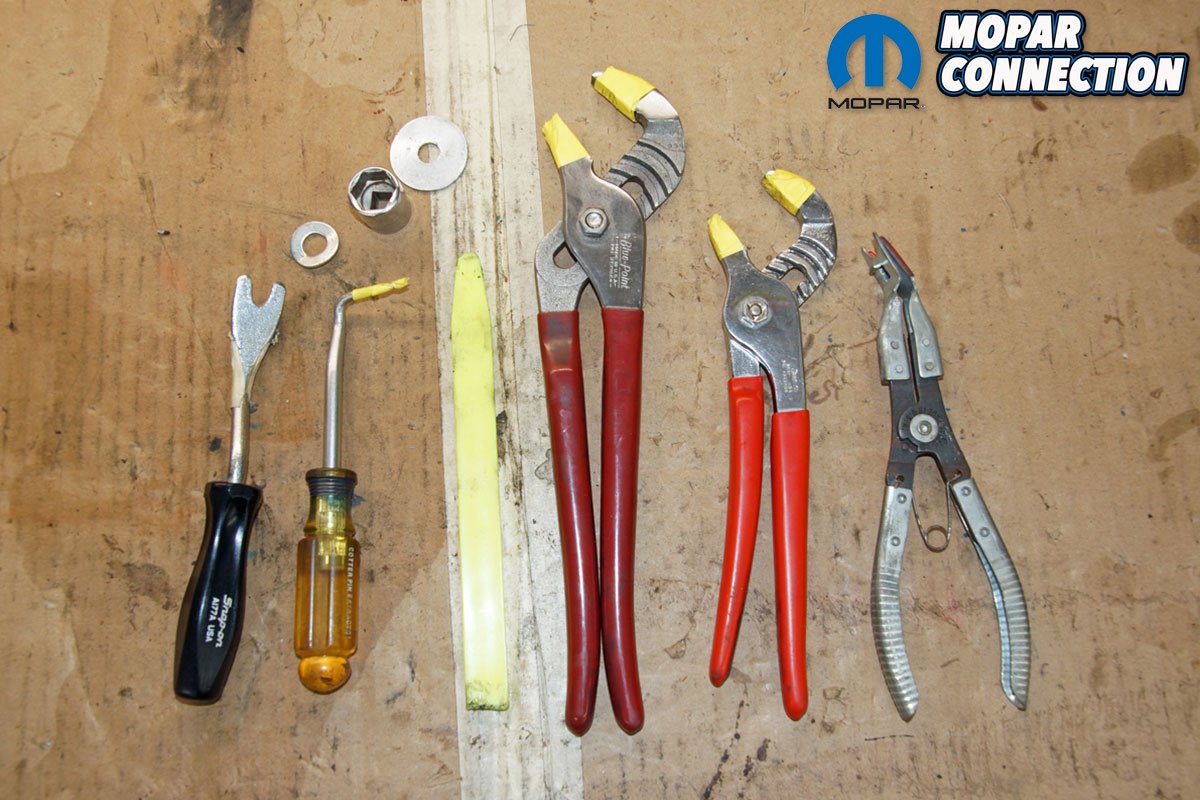
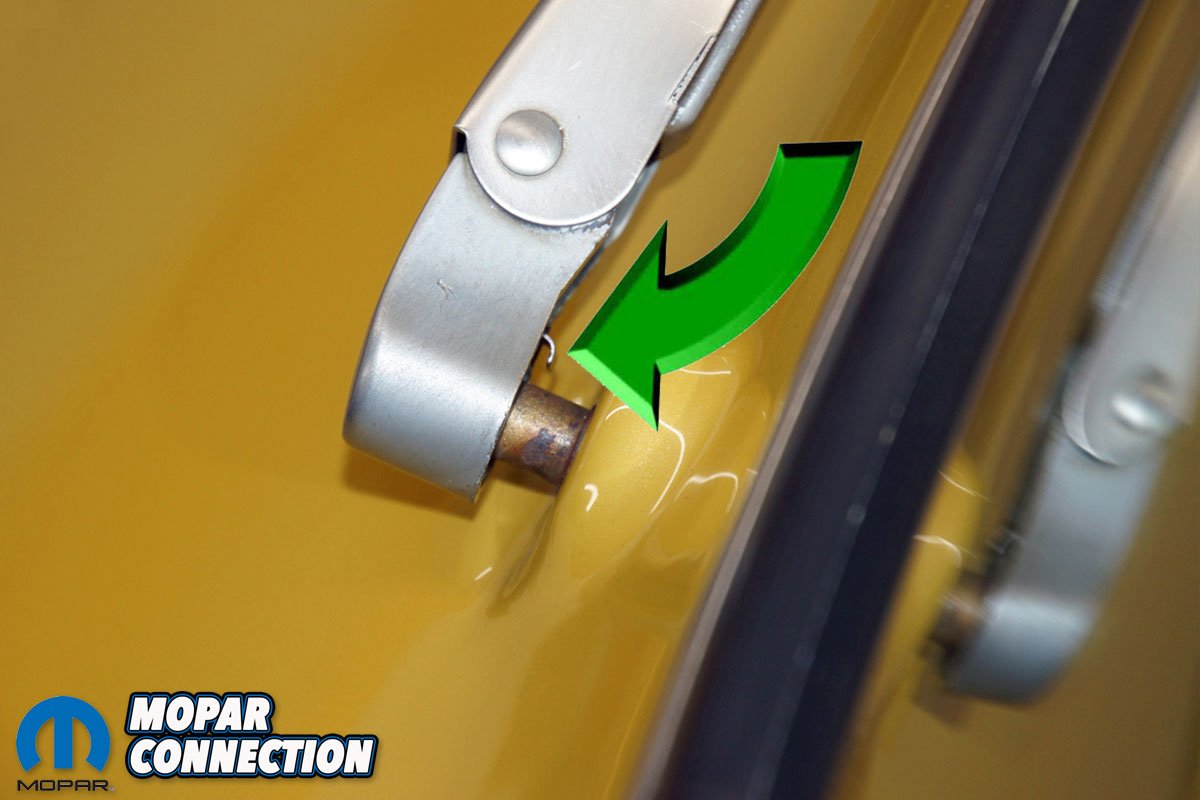
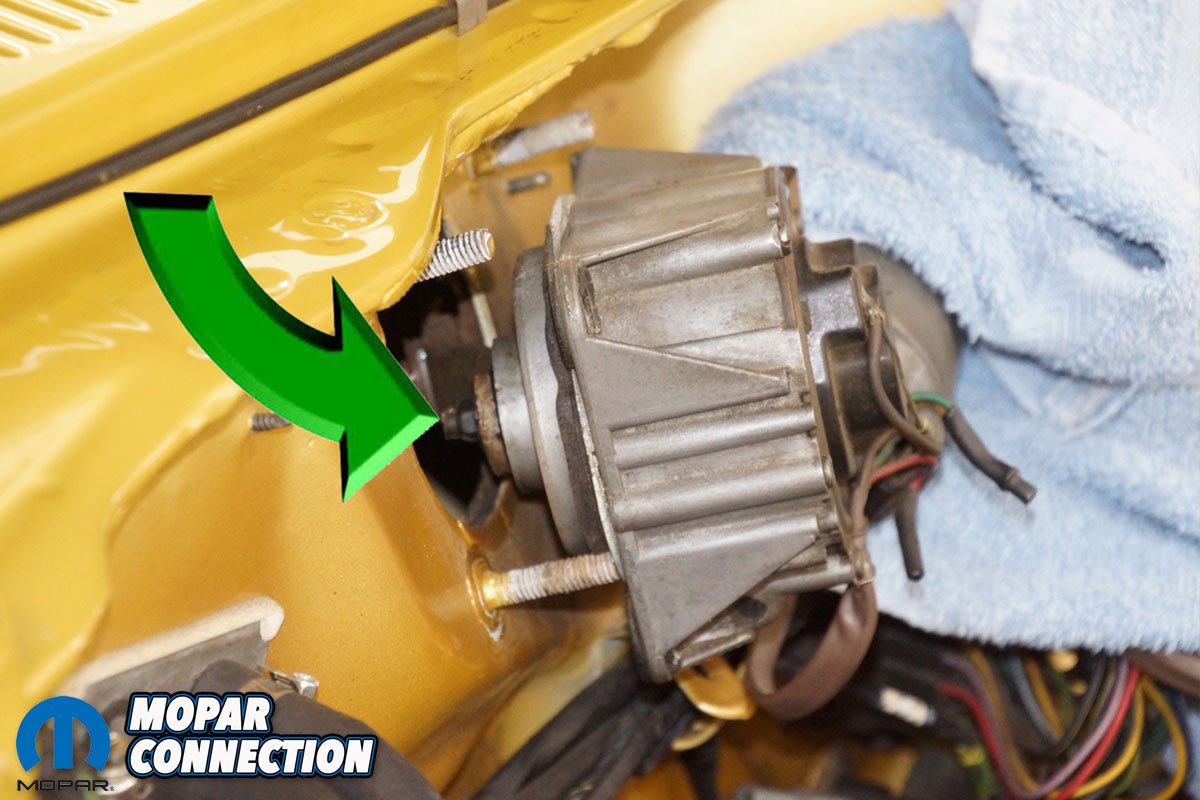
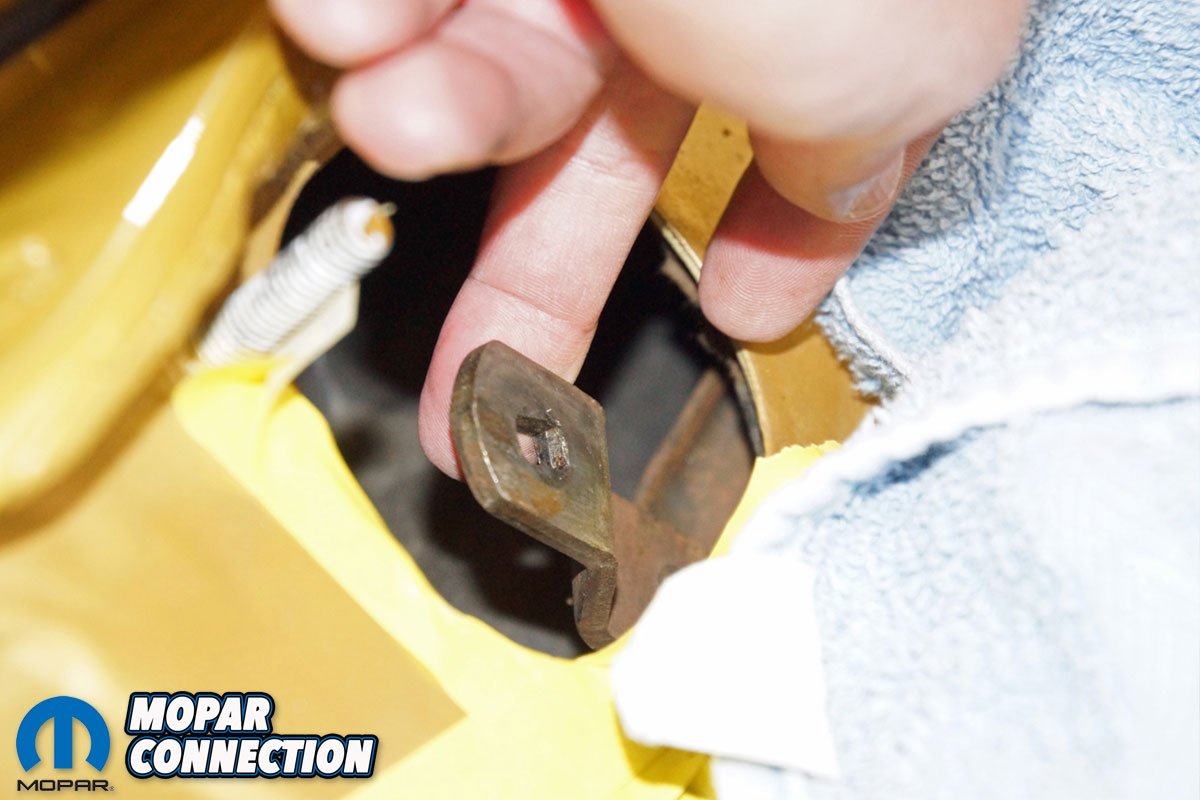
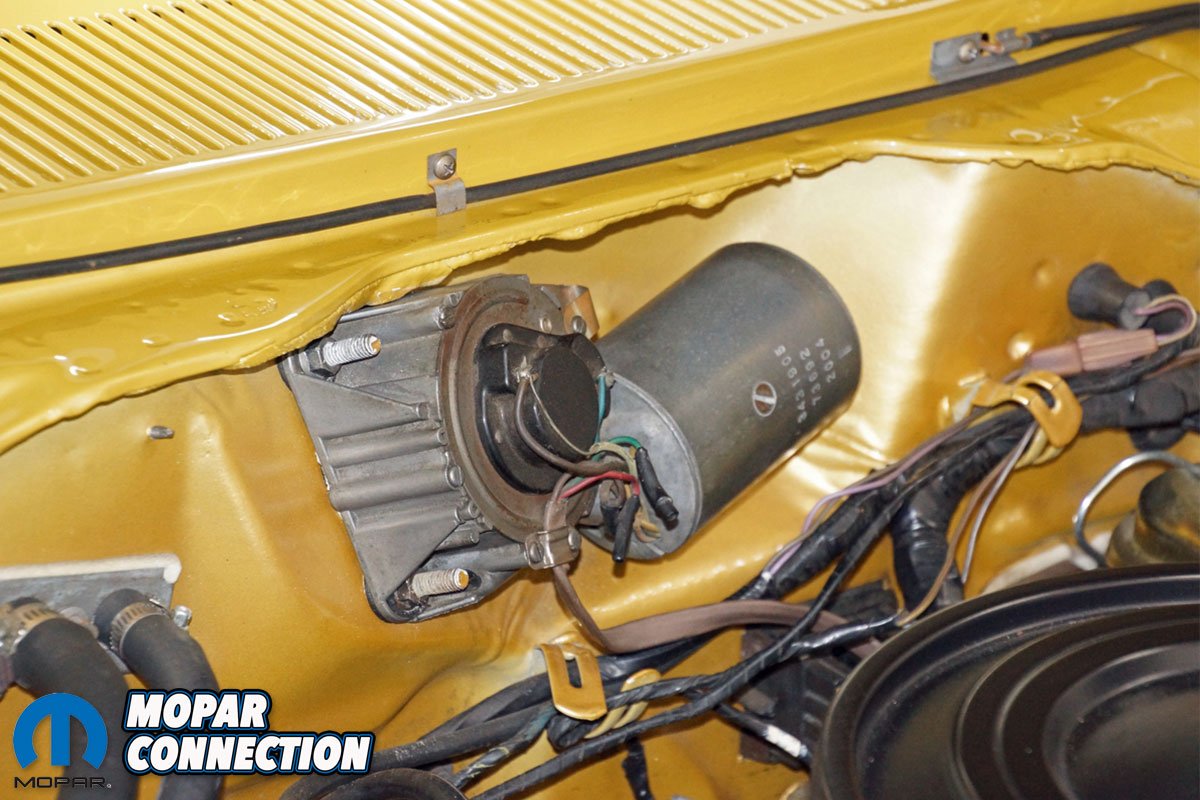
Above Left: Removing the wipers and linkage required several tools. We needed a door panel and a cotter pin removal tool, various washers and sockets, a plastic pry tool, channel locks, and wiper arm removal pliers. Above Center: The tab (green arrow) on the wiper arm needed to be pulled back slightly (with a cotter pin removal tool). While the tab was retained by the tool, the wiper arm removal pliers pried the wiper arm from the wiper pivot shaft. Before we attempted this procedure, we applied plenty of masking tape to the painted surfaces around the base of the wiper arm. Above Right: To gain access to the nut that retained the wiper motor crank arm, we needed to remove the three fasteners holding the three-speed wiper motor to the firewall. With minimal access, we un-threaded the nut from the wiper motor. Our Dart is an AC car, so this procedure was required (according to the factory shop manual). If the car had been a non-AC A-body, access would have been from under the dash.
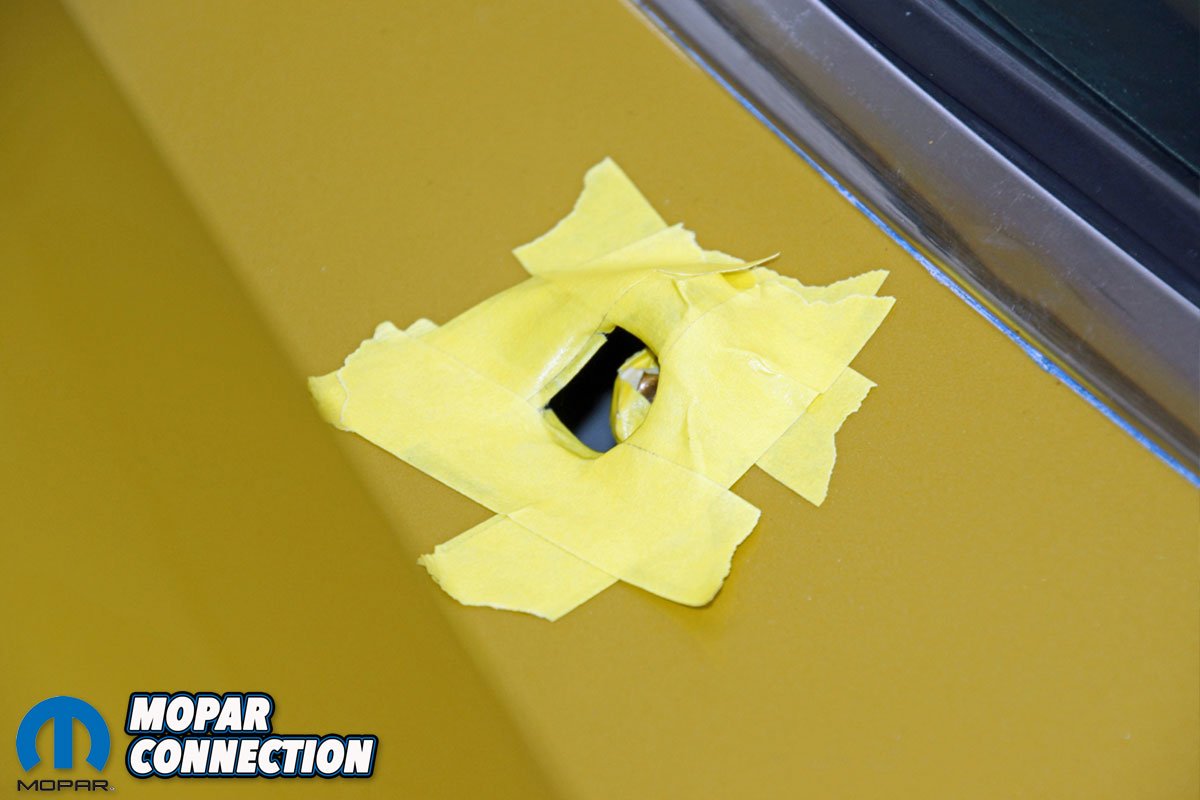
To get started, we taped the paint around the base of the wiper arms (at the cowl) to protect the area from damage during the wiper arm removal. We needed a pair of windshield wiper pliers to assist in the removal of the wiper arms. The pliers, in our case, actually “pried” the wiper arms from the pivot shafts without flexing the arms or marring the painted surface of the cowl area. Once the wiper arms were removed, we moved our focus to the wiper motor located in the engine bay at the center of the bulkhead (firewall).
Because our Dart is a factory-equipped air conditioning (AC) car, the factory service manual (FSM) stated that we must remove the motor to gain access to the nut on the motor crank arm. If the vehicle had been without AC, the motor crank arm nut could have been removed via the glove box opening (after the glove box liner was removed).
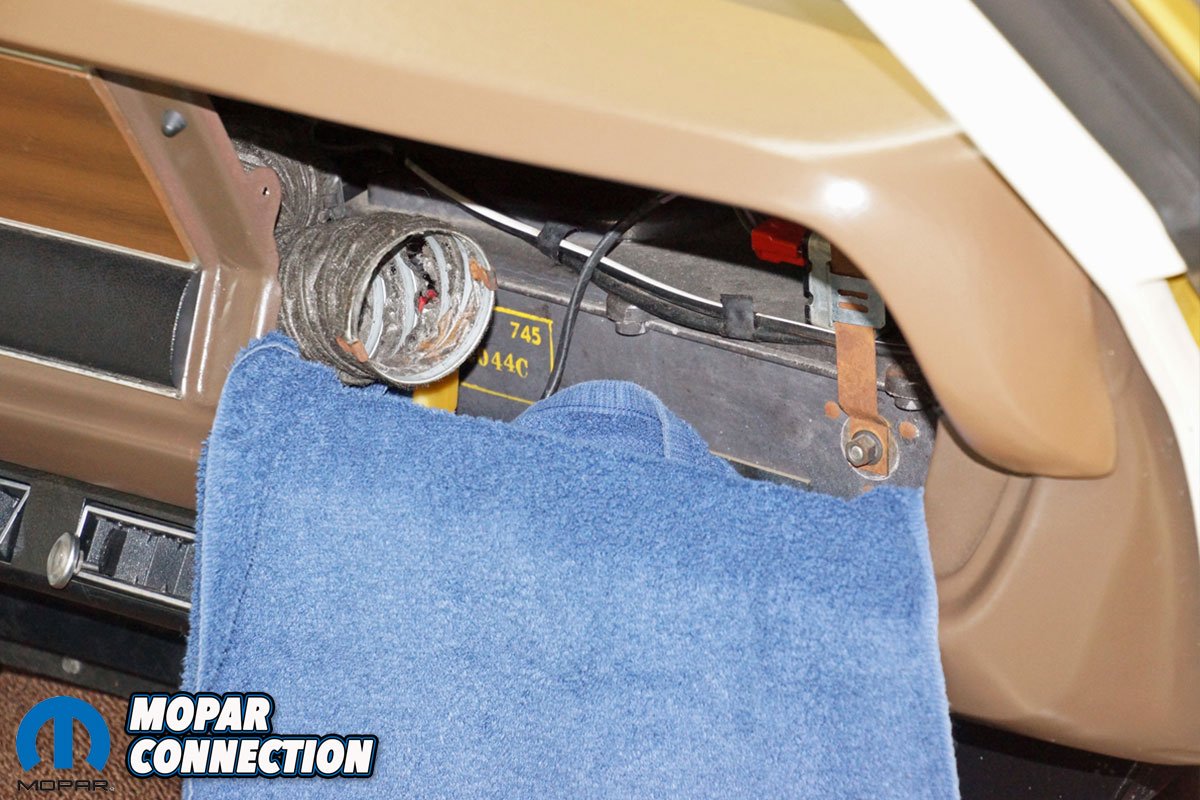
When we disconnected the crank arm from the motor, the linkage fell on top of the AC box. After removing the defrost ducting, we fished the loose linkage through the glove box opening and out of the Dart. The link, at one time, was connected to the driver-side wiper pivot, but the bushing had broken down. If the bushing had remained attached, we would have had to release the bushing from the driver wiper pivot to remove the link.

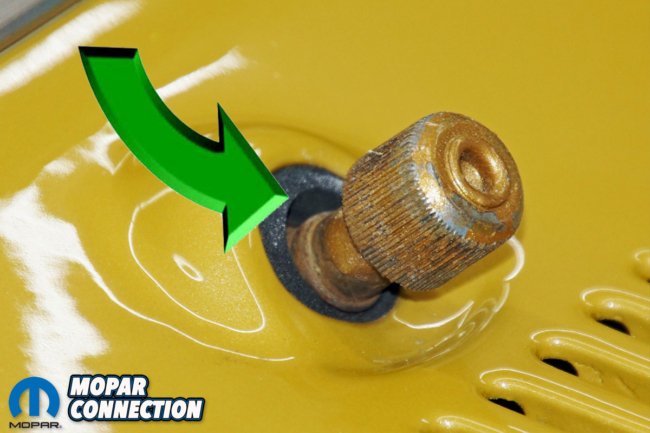
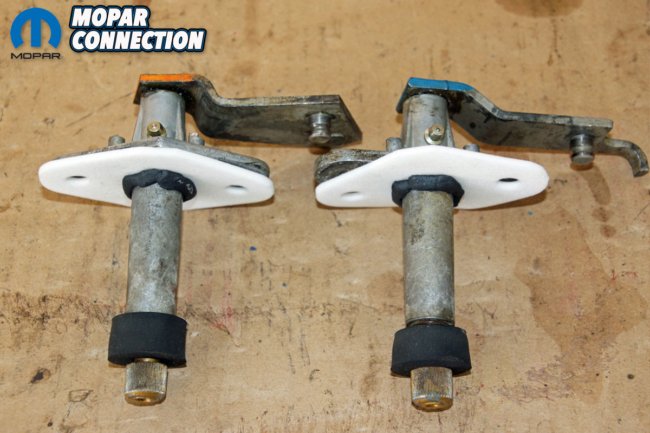
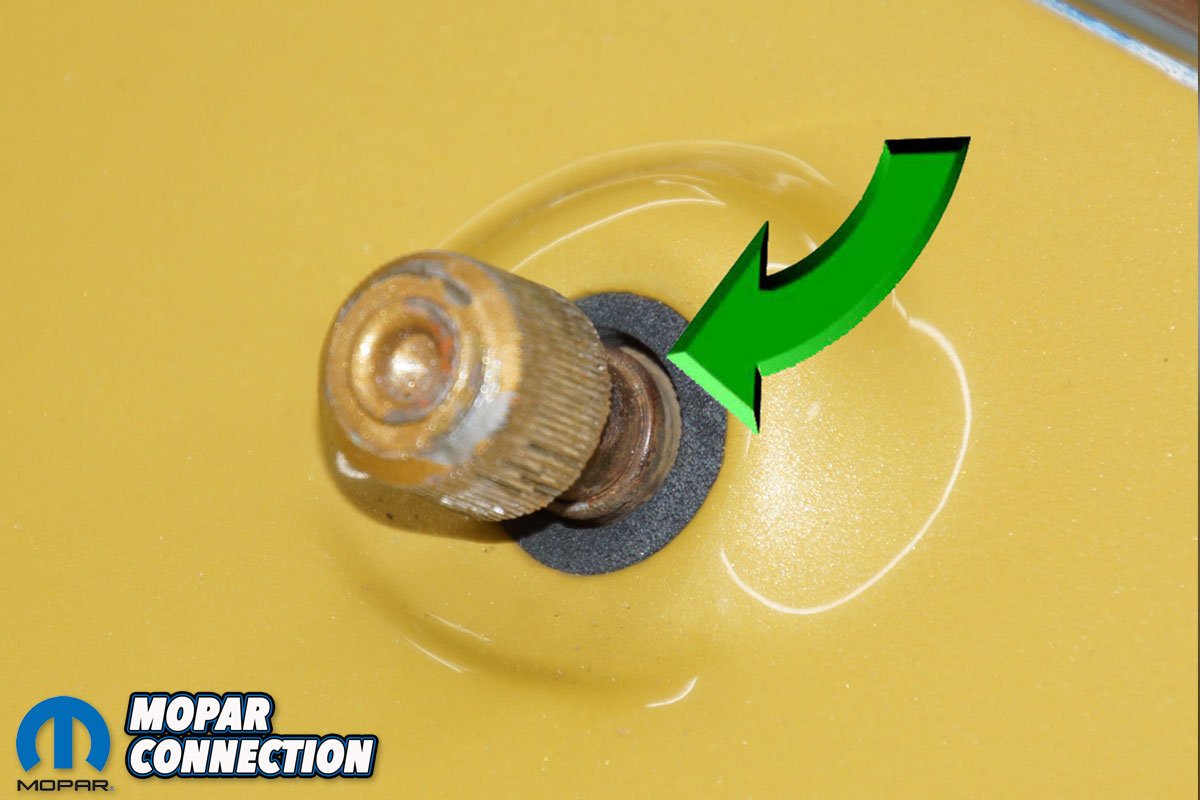
Above Left: With the wiper arm off, we noticed a large gap between the wiper pivot shaft and the water seal (green arrow). This gap certainly contributed to the water entering the Dart’s interior. Above Right: Observing the passenger-side water seal, we noticed an even greater gap (than the driver side) between the seal and the wiper pivot shaft (green arrow).


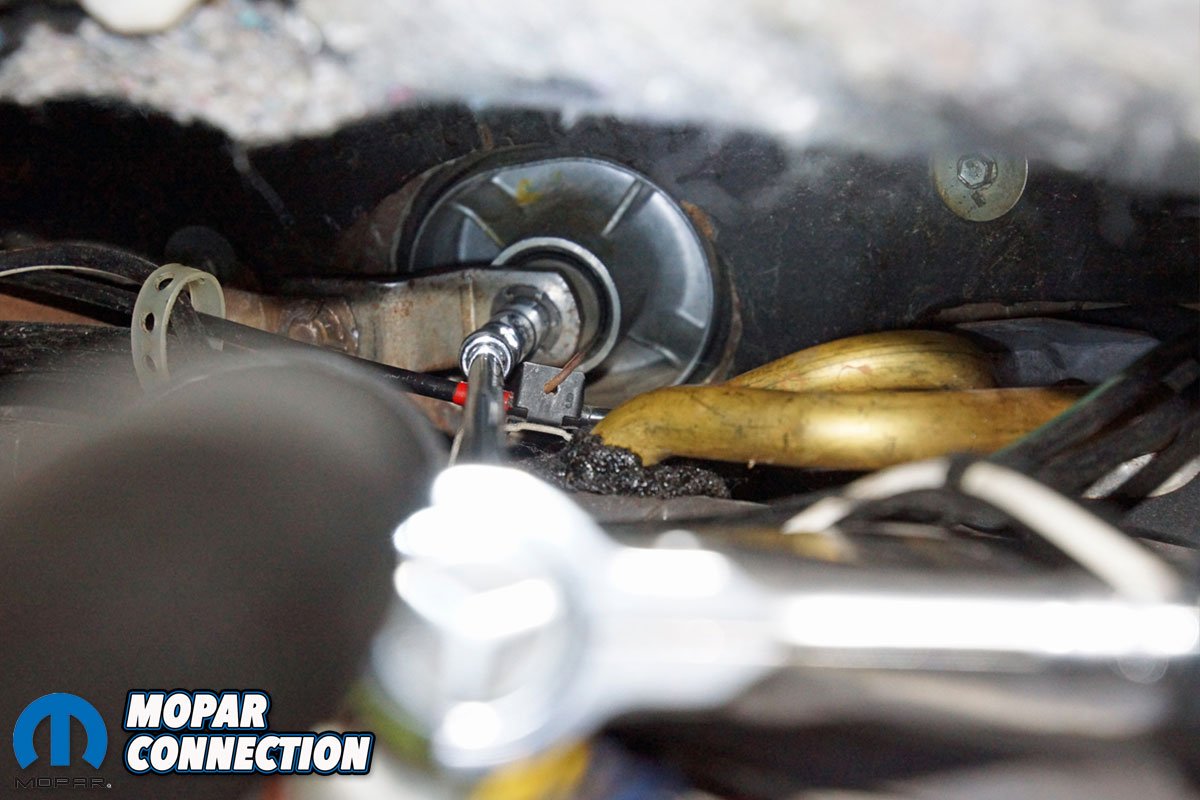
Above Left: With the nut removed, we were able to free the keyed crank arm from the motor. We let the crank arm and link drop onto the heater (AC) housing. Above Center: We were able to access the driver-side wiper pivot housing from under the dash. The driver-side pivot shaft was barely attached to the motor by a link (and crank arm) due to a damaged bushing. The driver-side pivot shaft was also attached to the passenger-side pivot shaft via a second link. Above Right: With the wiper pivot housing disconnected from under the dash, we pulled the housing down through the cowl area. To protect the paint, we had previously taped the area around the pivot shaft extending through the cowl.
While we were working through the glove box, we removed the two nuts from the passenger-side wiper pivot studs and pulled the pivot housing through the cowl and into the under-dash area. We were able to access the driver-side wiper pivot from under the dash just to the left of the steering column (near the A-pillar area). Once we removed the two nuts from the studs, we pulled the pivot housing through the cowl and under the dash.
We could not remove the two wiper pivot housings from under the dash with the link connected between them. Therefore, we ended up disconnecting the link from the driver pivot bushing, and this allowed us to free the driver pivot housing from the Dart. After maneuvering the passenger-side pivot housing (and link), we were able to slip the assembly out through the glove box opening.

Above Left: Access to the passenger-side wiper pivot housing was much better than the driver’s side. It did, however, require us to remove the glove box liner and the defroster ducting. We placed a towel over the glove box opening to protect our skin from any burrs in the metal. Above Right: The passenger-side wiper pivot housing was pulled under the dash similarly to the driver’s side. Because we could not remove both pivot assemblies from under the dash while attached by the linkage, we had to remove the link from the driver-side pivot housing. The motor link and the passenger side pivot link (attached to the shaft) were removed via the glove box. The driver’s side housing slipped out from under the dash.


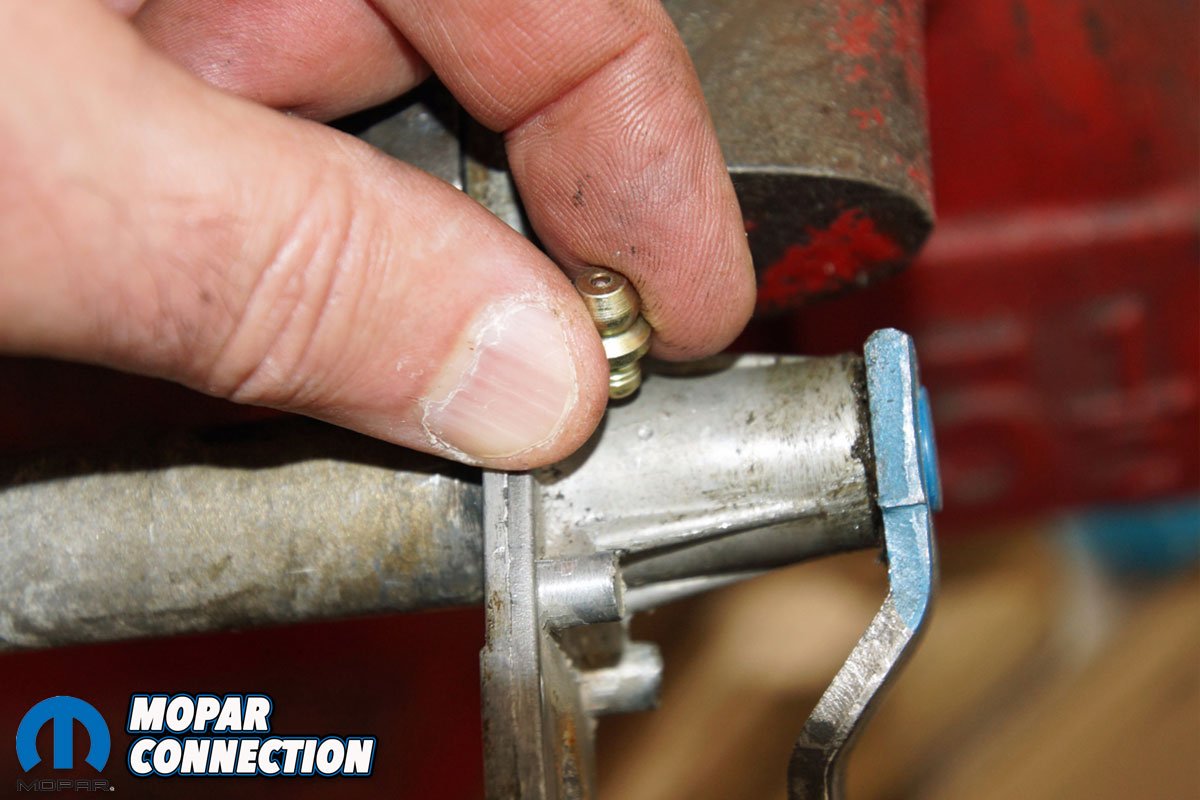
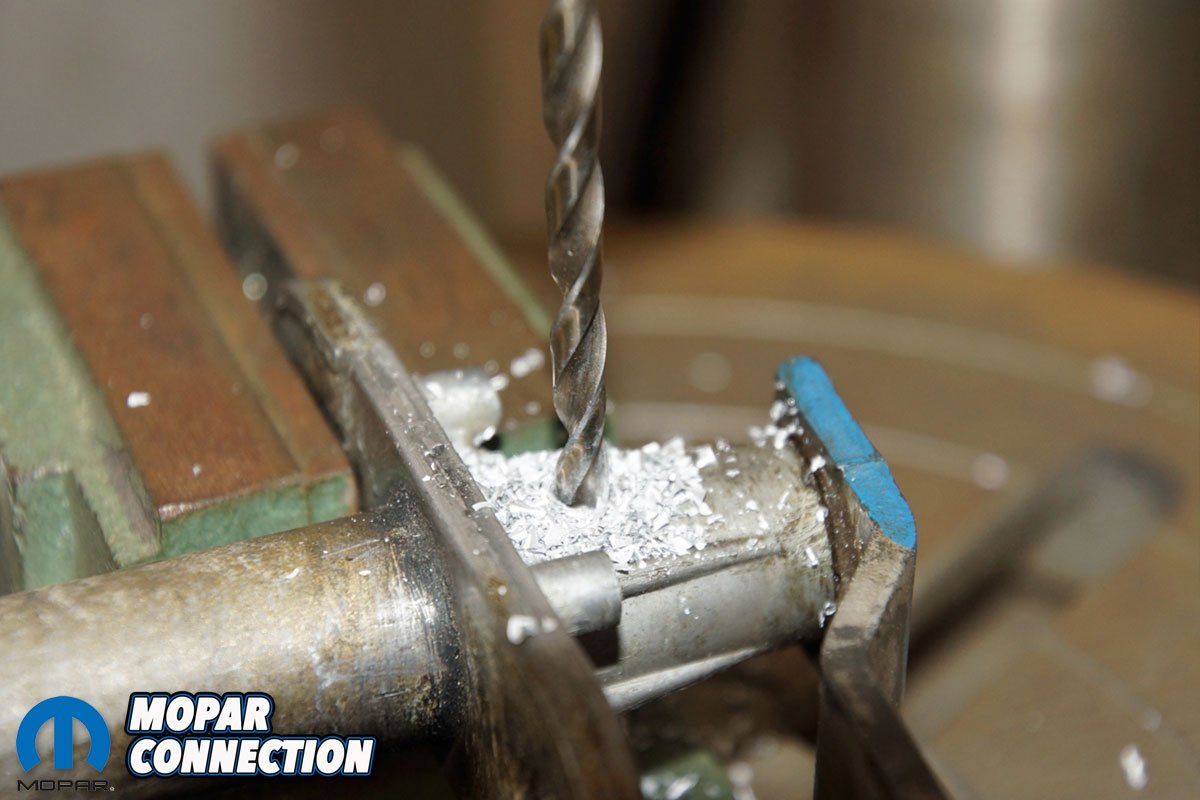
Above Left: The motor linkage had a damaged bushing at the driver’s pivot housing (right). The connecting link between the housings had bushings that were still intact. We planned to remove all the bushings and replace them with the new YearOne bushings. Above Center: The pivot seal kit included grease fittings, which would provide additional lubrication of the pivot assemblies. We selected a location for the grease fitting that would be easily accessible for future greasing of the pivot shaft. Above Right: Using a 3/16-inch drill bit, we drilled a hole through the aluminum housing but not into the pivot shaft. There was a noticeable change in the sound of the drill when the drill bit plunged through the aluminum housing.
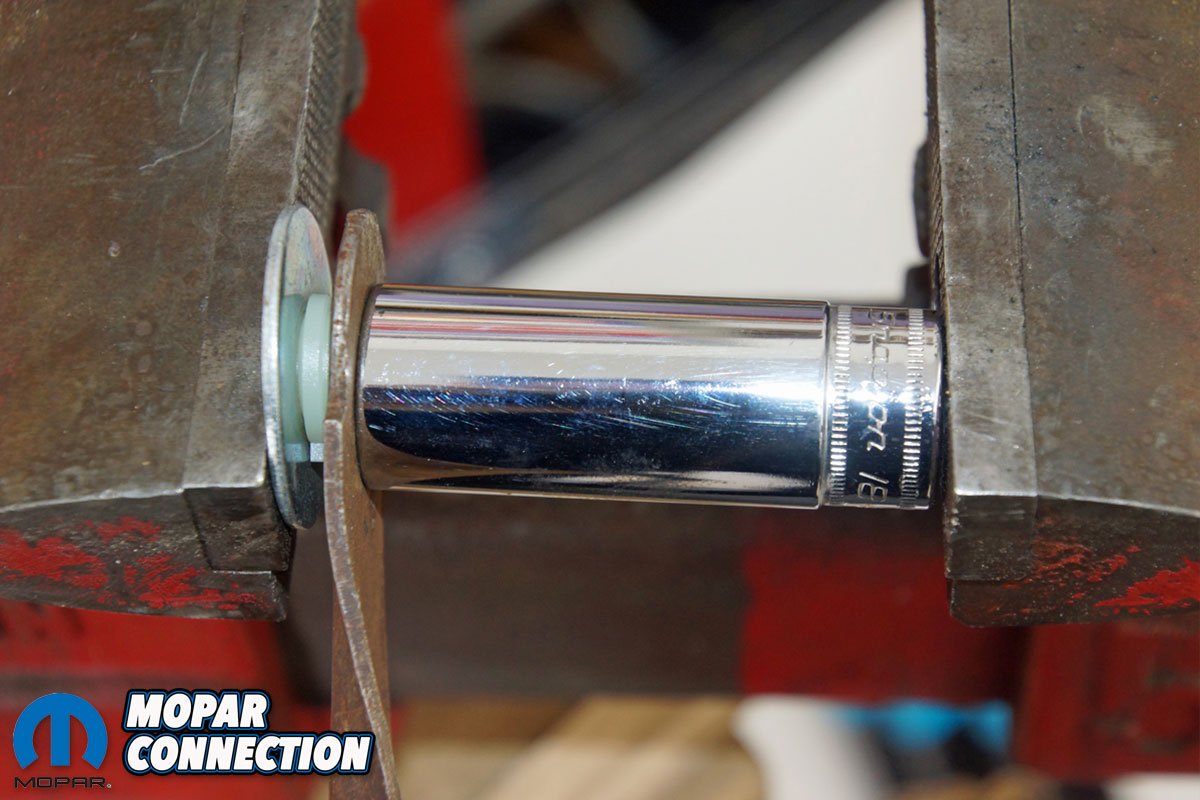
With the links and housings on the workbench, we released the remaining bushing from the passenger wiper pivot stud. After removing the old bushings from the links, we cleaned both wiper pivot housings (removing the seals and gaskets), and we wiped off each link. We used a bench vice and an 18mm socket to press three new bushings into the two links.
There were two bushings; one pressed onto each end of the link that connects the driver- and passenger-side wiper pivot studs, and a single bushing was pressed into the link at the end attached to the driver wiper pivot stud. The other end attaches to the motor crank arm with a metal sleeve and pin assembly rather than another bushing. The sleeve and pin were in reusable condition.
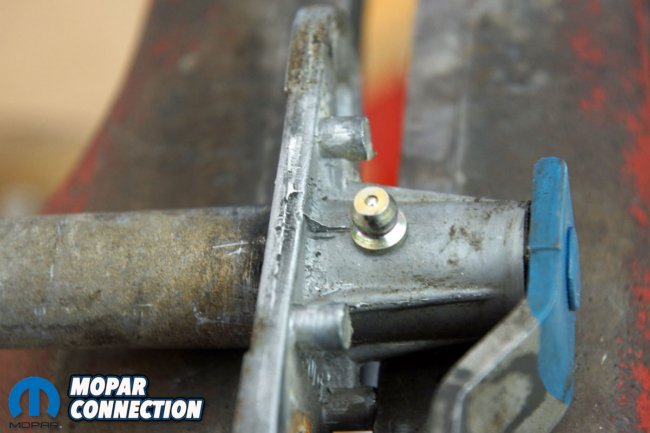
Above Left: The drilled hole in each housing was blown clean of debris. We also took this time to clean the housings in preparation for reassembly. Above Right: The grease fitting was pressed (tapped) into the freshly drilled hole. We used a ¼-inch socket and extension along with a brass hammer to install the fitting.


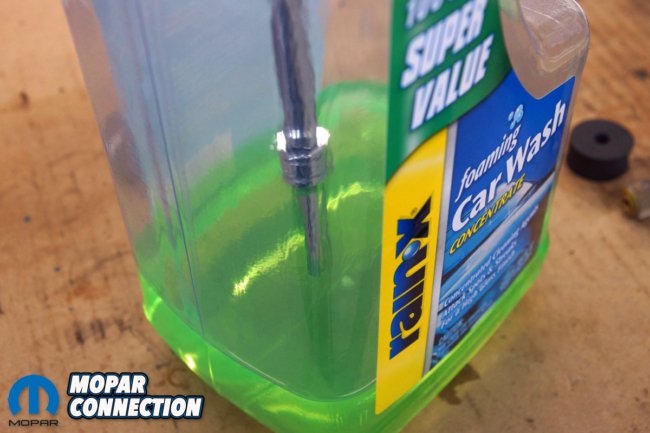
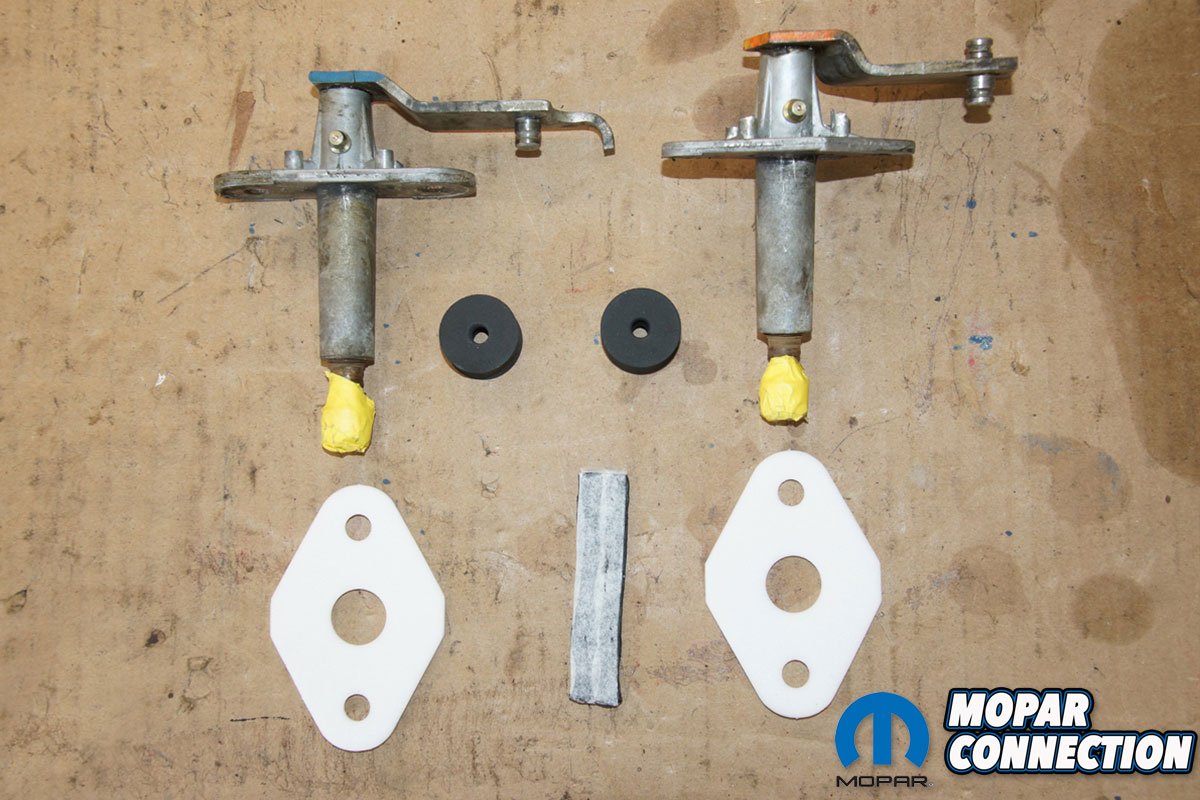
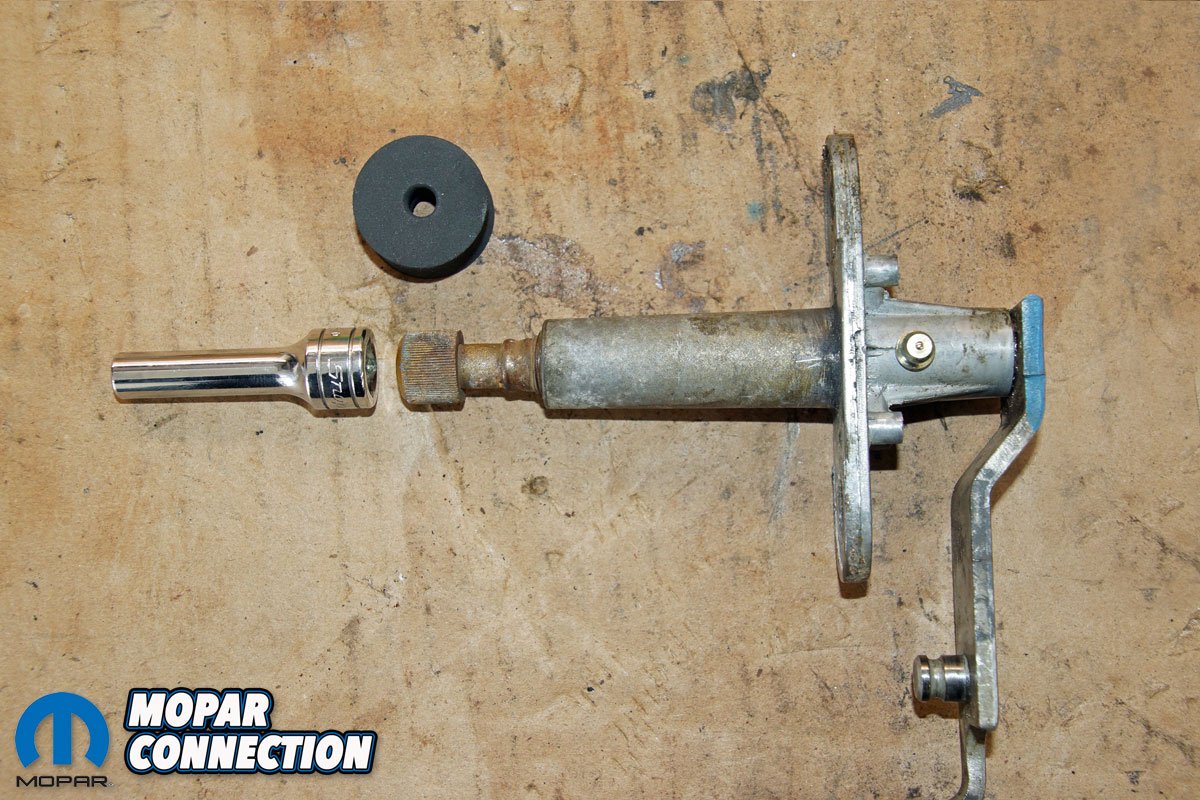
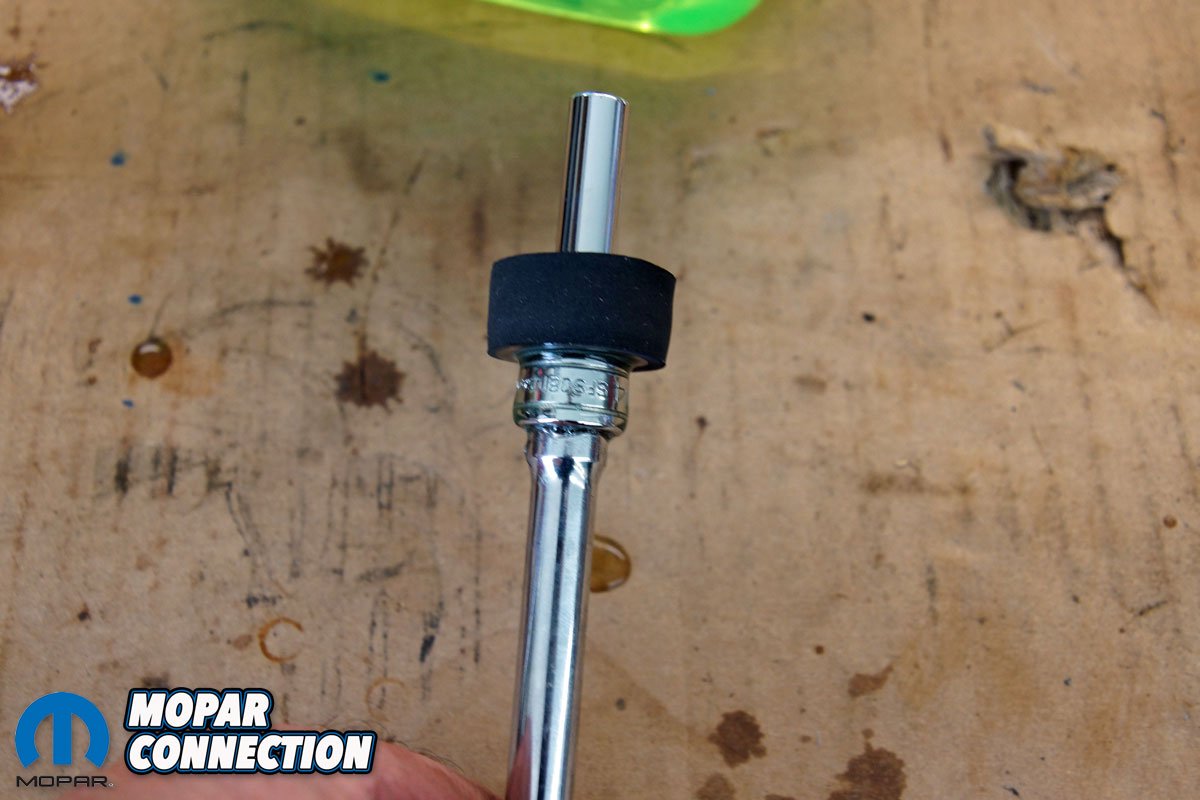
Above Left: With a grease fitting pressed into each wiper pivot housing, we still had to install the water seals (black donut) onto the pivot shafts before re-installation. Above Center: The water seals do not easily slide over the splined area of the wiper shaft. We found using a tapered 3/8-inch drive, 5/16-inch socket has a similar size as the spline area of the wiper shaft. Above Right: The first step in installing the water seal was to lube the socket. We used an extension to assist in dipping the socket into a container of car wash liquid soap.
After scrubbing each pivot housing, we looked them over, and the assemblies were damage-free. There was zero pivot shaft endplay, and each shaft rotated 360° without binding. Even though the housings could have been installed with just new gaskets, we decided the addition of a grease fitting on each pivot housing would increase the reliability of the assemblies. To install the grease fittings, we oriented a fitting on each pivot housing.
The proper alignment would allow us access to the fittings once the housings were reinstalled under the dash. We marked each location and used our drill press to penetrate through the aluminum housings. After diligent cleaning of the pivot assemblies, a grease fitting was pressed into each housing. Once installed, we greased each pivot assembly. Besides increased lubrication, if a small amount of end play with the shaft in the housing existed, the grease would have filled the void and stopped any water leakage between the housing and the shaft.
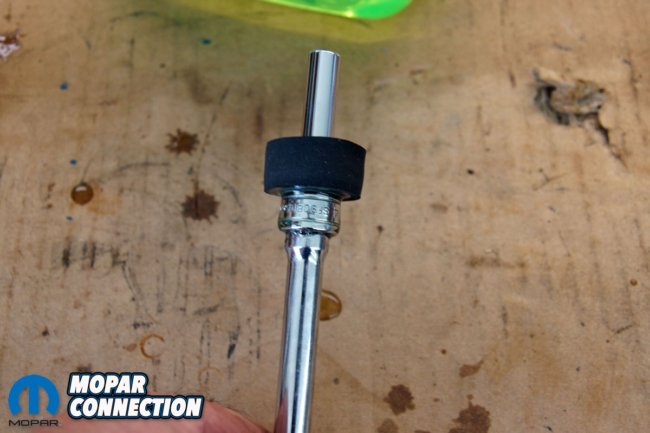

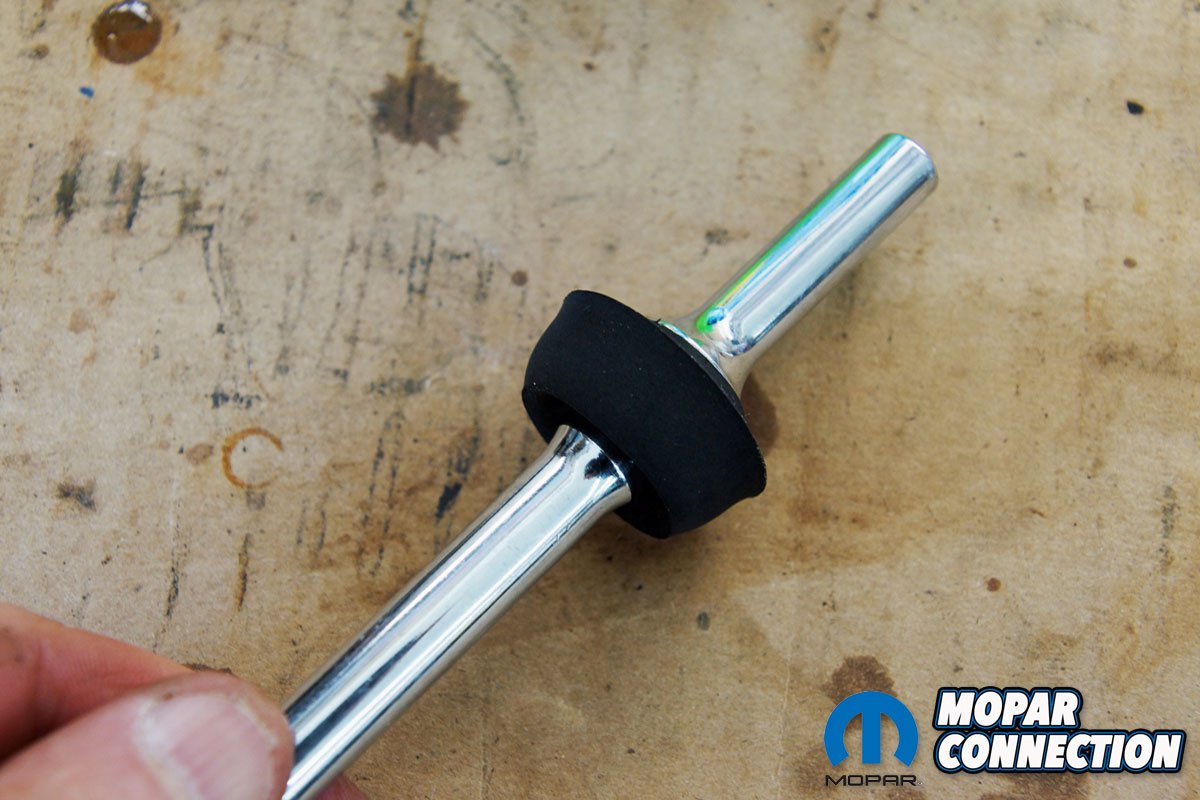
Above Left: We slipped the seal over the socket while attempting to keep the soap off the outside of the seal. If soap had gotten onto the external portion of the seal, it would need to be wiped off, so a proper grip could be maintained. Above Right: While supporting the extension and socket on the workbench, we pushed the water seal over the step of the socket. A large amount of pressure may be necessary to perform this step. Do not use a tool (other than the socket) to assist with this step. If the seal had been damaged, a new one would be necessary to complete this task.


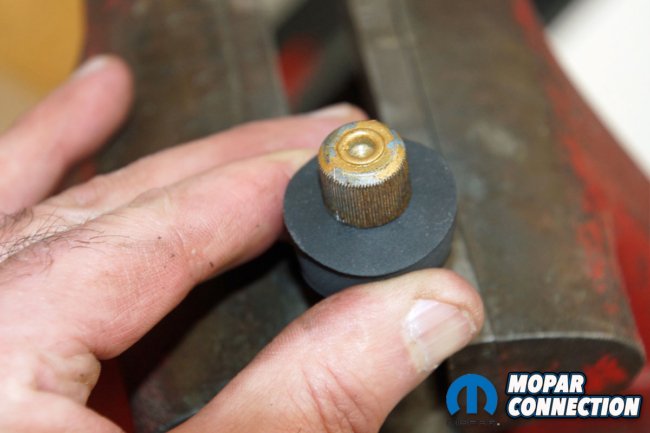
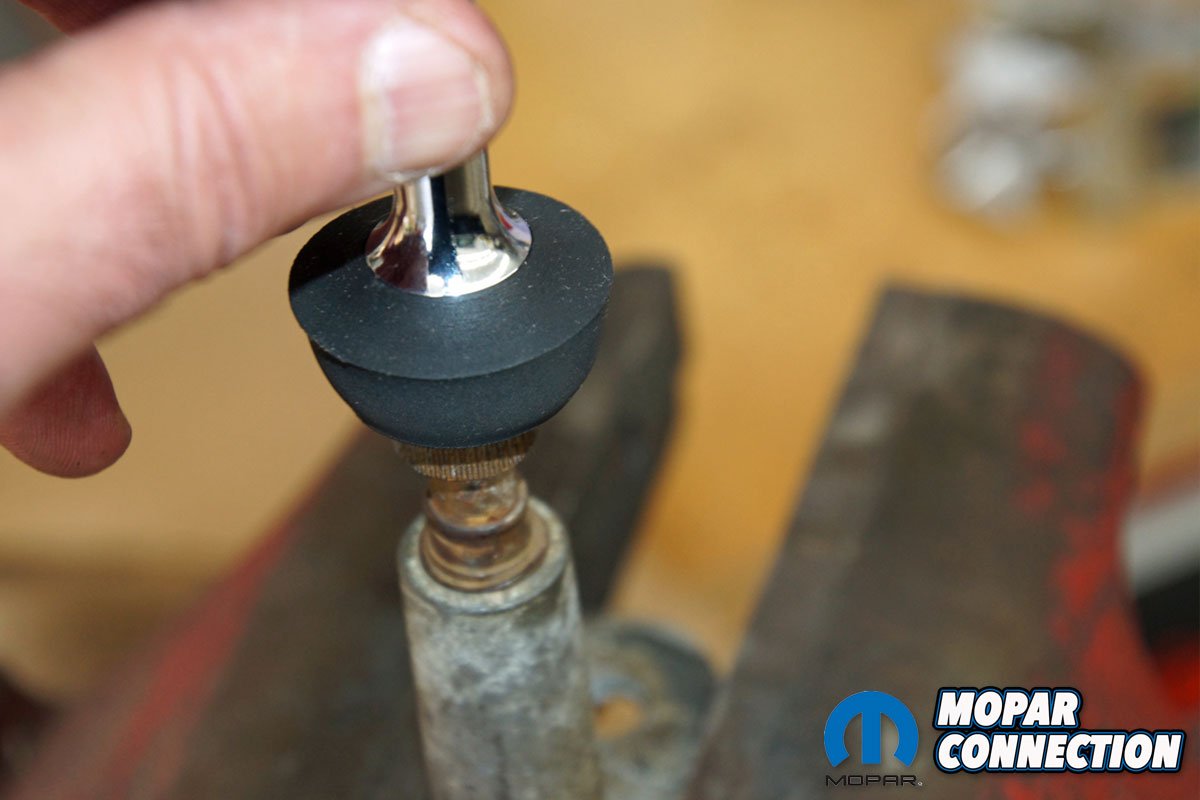
Above Left: We removed the extension from the socket, and the socket was placed over the wiper pivot shaft splines. The objective was to hold the socket in place against the splines while pushing the water seal over the splines. If the seal popped off the splines or the socket, the procedure would have to be started over. Above Center: The water seal slipped over the splines with little resistance. The residual soap aided in the installation of the seal over the splines. Above Right: With one water seal installed, we repeated the procedure with the other wiper pivot shaft. These water seals were in much better condition than the originals we had removed.
Each housing required a base gasket and a rolled layer of caulk strip to seal the gasket to the housing. To install the water seals over the pivot shafts, we needed to stretch somehow the inner opening of the seals over the splined end of the shafts. For the best results, get a tapered 3/8-inch drive, 5/16-inch socket and an extension. Snap the socket onto the extension and dip the socket (while holding the extension) into a container of car wash liquid soap.
With the socket now slippery, slide the water seal over the smaller end of the socket. Place the extension’s end (opposite of the socket) onto the workbench. Push the seal over the socket’s taper and onto the larger portion of the socket. Once the seal is seated on the larger portion of the socket, remove the extension, and place the socket over the pivot shaft splines (the socket is similar in size to the splines). Push the water seal down over the splines and into place.

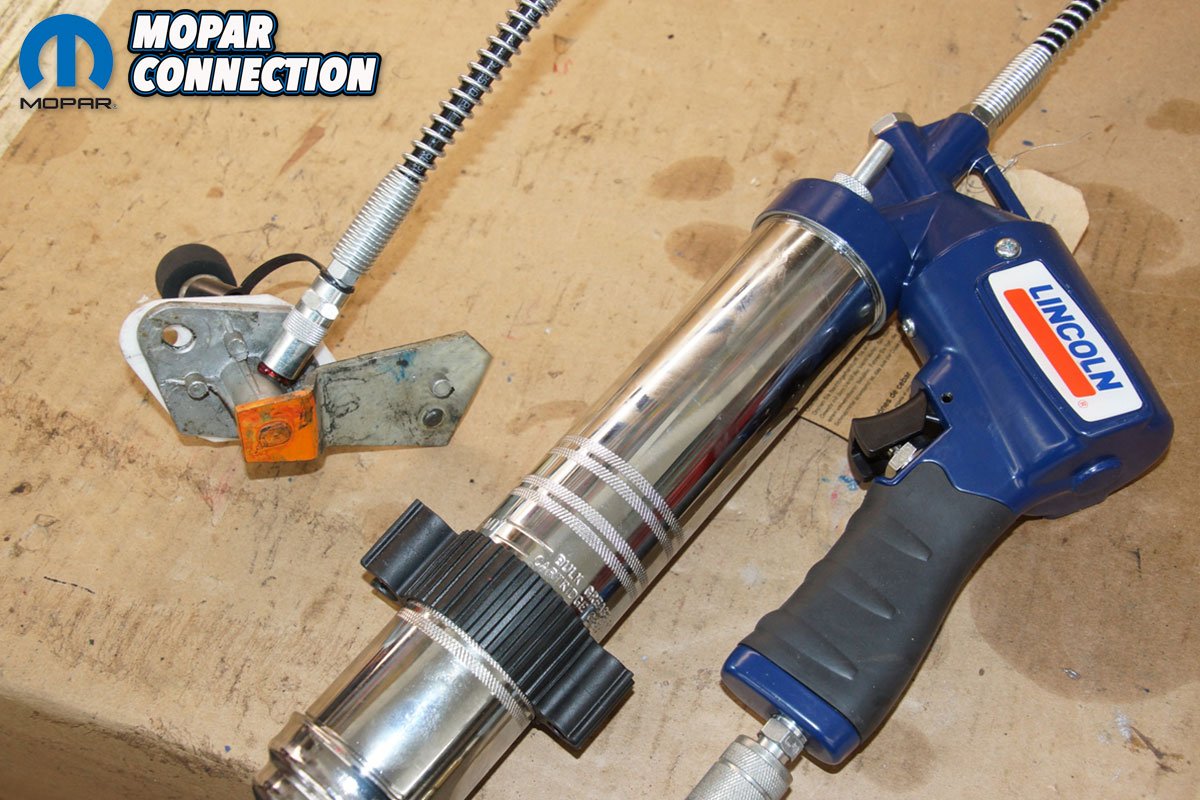
Above Left: The wiper housings are ready for installation. The base gaskets, water seals, and caulk have been installed on each housing. The caulk was installed in a continuous roll around the base of the pivot housing at the water seal. Above Right: We added grease via the new grease fittings to each pivot housing. The addition of the grease provided a layer of protection between the housing and the pivot shaft. If end play had been present with the pivot assembly, the grease would provide additional waterproofing to stop water from passing between the shaft and the housing.


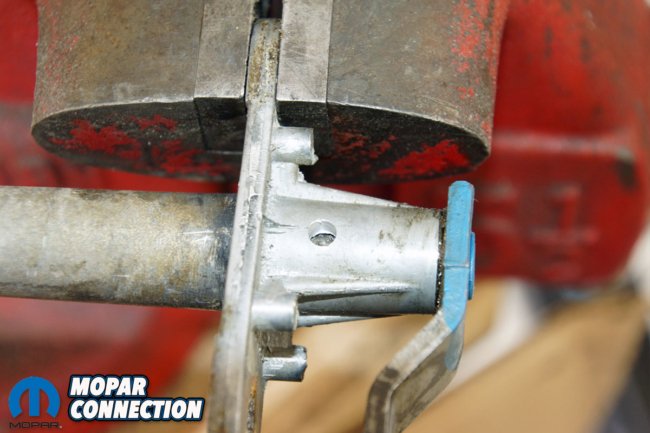
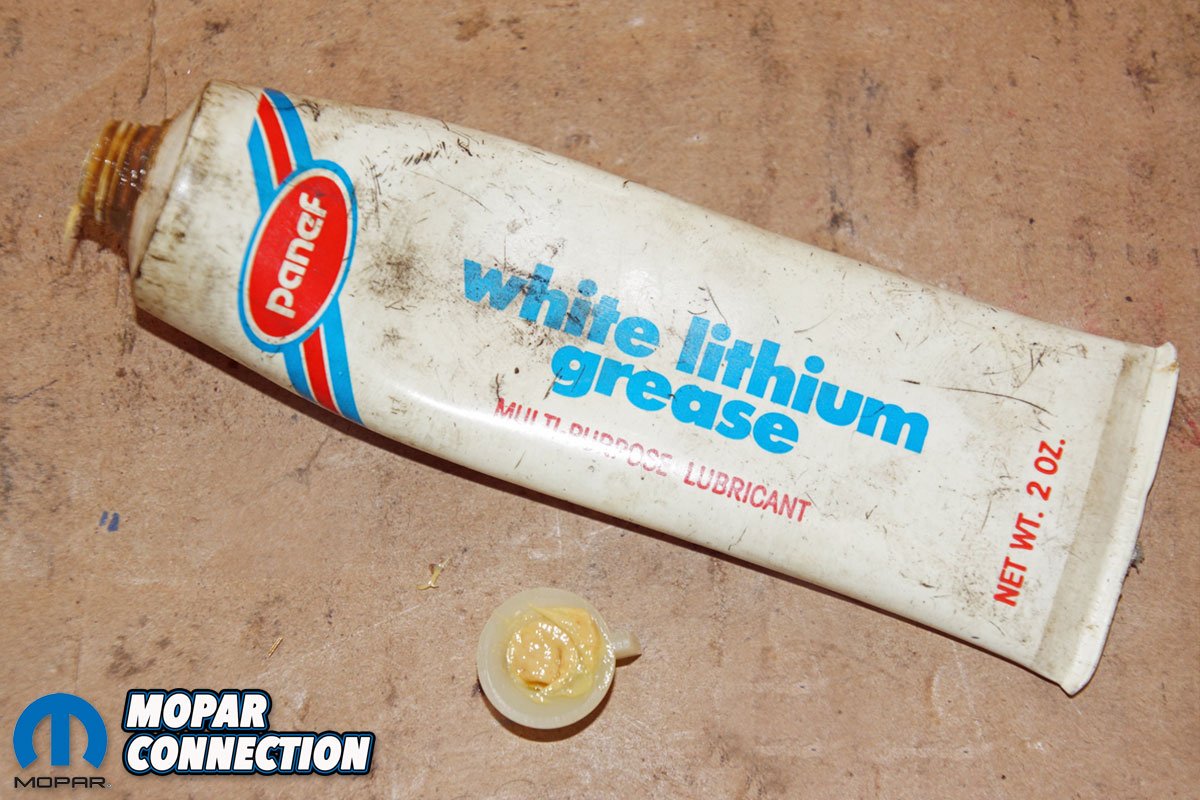
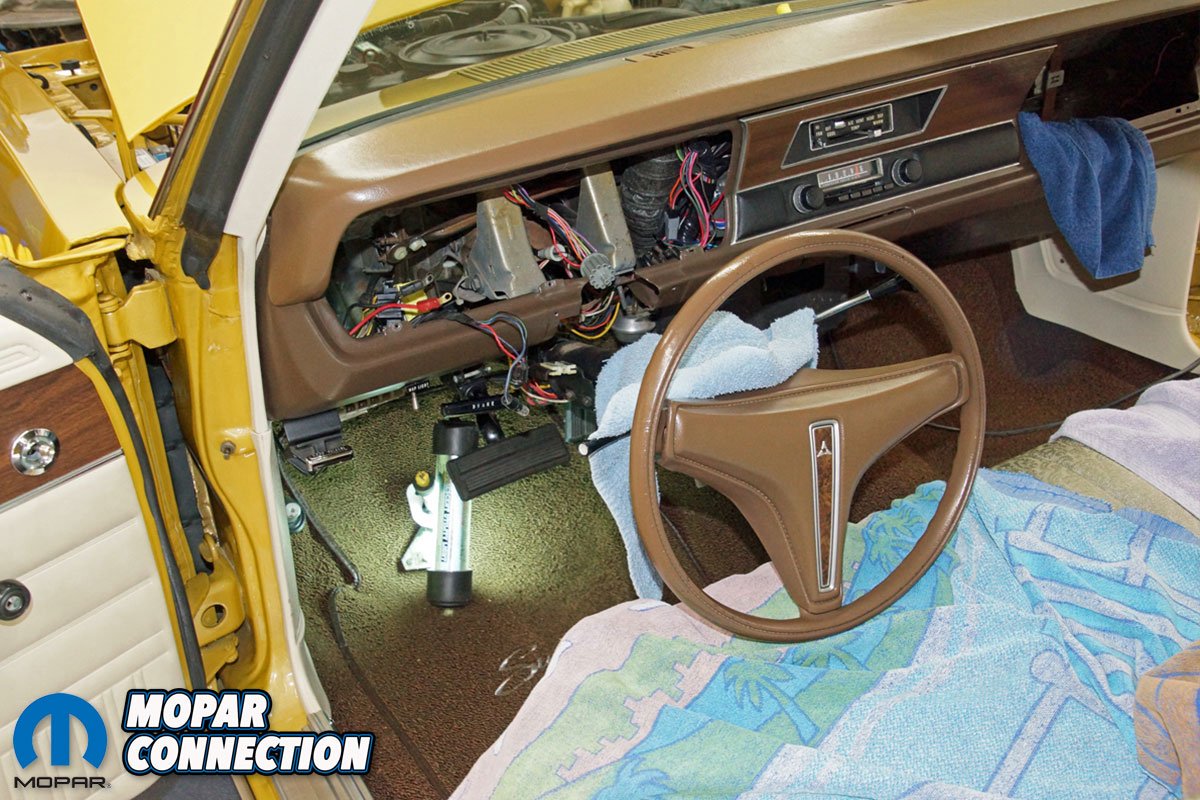
Above Left: The YearOne bushings were pressed into the links. We used a washer (to support the bushing) and an 18-mm socket to push the link end over the bushing. The use of a vice provided the “press” action. Above Center: Each bushing was filled with a generous amount of white lithium grease. The grease would stay in place during the installation and would remain effective for years of wiper service. Above Right: We attached a link to the passenger side pivot stud, and the link along with the wiper motor linkage was slipped into place through the glove box opening. Unfortunately, we could not connect the two links to the driver-side pivot assembly (due to limited workspace), so we had to remove the instrument cluster. Although it looks like we were destroying the interior, it was the only option we had.
For the installation, we applied white lithium grease to each bushing and pressed the link onto the passenger side pivot stud. We slipped the link and pivot housing through the glove box opening. The pivot shaft was pushed through the cowl, and the housing nuts were tightened onto the studs. The motor linkage was guided through the glove box opening and laid in place under the dash. It turns out we could not attach the two bushings to the driver-side pivot studs without dropping the steering column and removing the instrument cluster.
With the cluster out of the way, we used channel locks and an 18mm socket to press each bushing onto the pivot assembly. The pivot shaft was pushed through the cowl. The housing was secured with the factory nuts on the studs. We determined that the wiper motor could be accessed through the glove box, so we reattached the motor and proceeded to line up the motor crank arm onto the motor shaft. We secured the crank arm with the factory nut. With the linkages all in place, we reassembled the interior.


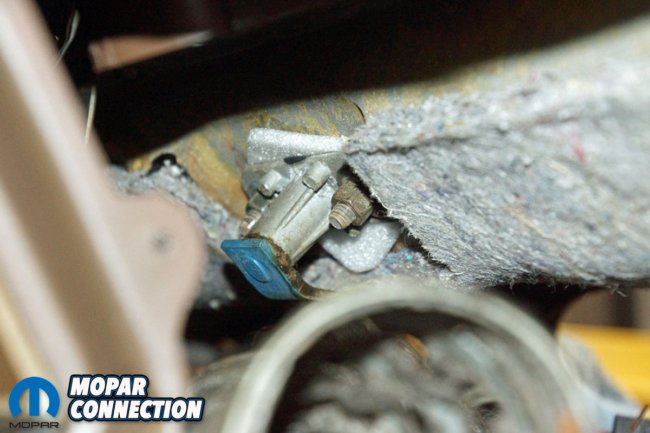
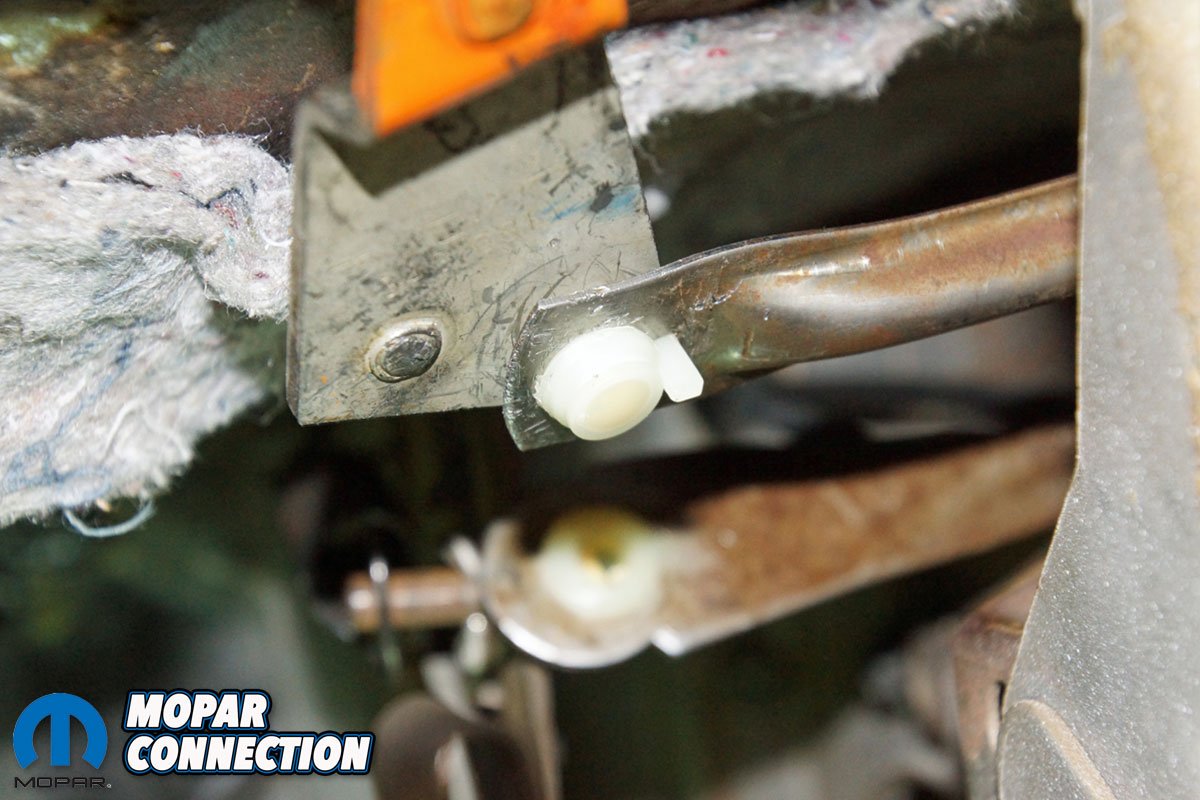
Above Left: With the links in place, we needed to ensure they were oriented correctly. The link to the rear (green arrow) would need to attach to the driver-side wiper pivot stud (backside), and the link in the foreground (blue arrow) would attach the driver wiper pivot stud to the passenger side pivot stud. Above Right: To attach the links to the driver-side pivot assembly, we used channel locks and a socket to press the bushing onto the pivot’s stud. The reason we removed the instrument cluster was to gain this unobstructed access to the driver-side pivot housing.


Above Left: Once pressed in place, we wiped away any excess white lithium grease that had squeezed out during the assembly. The rear link was pressed onto the pivot assembly in the same fashion. Once both links were installed, we pushed the driver-and passenger-side pivot assemblies through the cowl area. Both were secured with the factory hardware. Above Center: The wiper motor was secured to the firewall. Although we could have attempted to reattach the motor crank arm and nut, it was challenging, so we came up with another option. Above Right: We were able to fit the crank arm onto the motor from under the dash (while reaching through the glove box opening). It was a tight fit, but it could be done. The nut was threaded onto the motor, and it was tightened with a ratchet, extension, swivel, and socket.
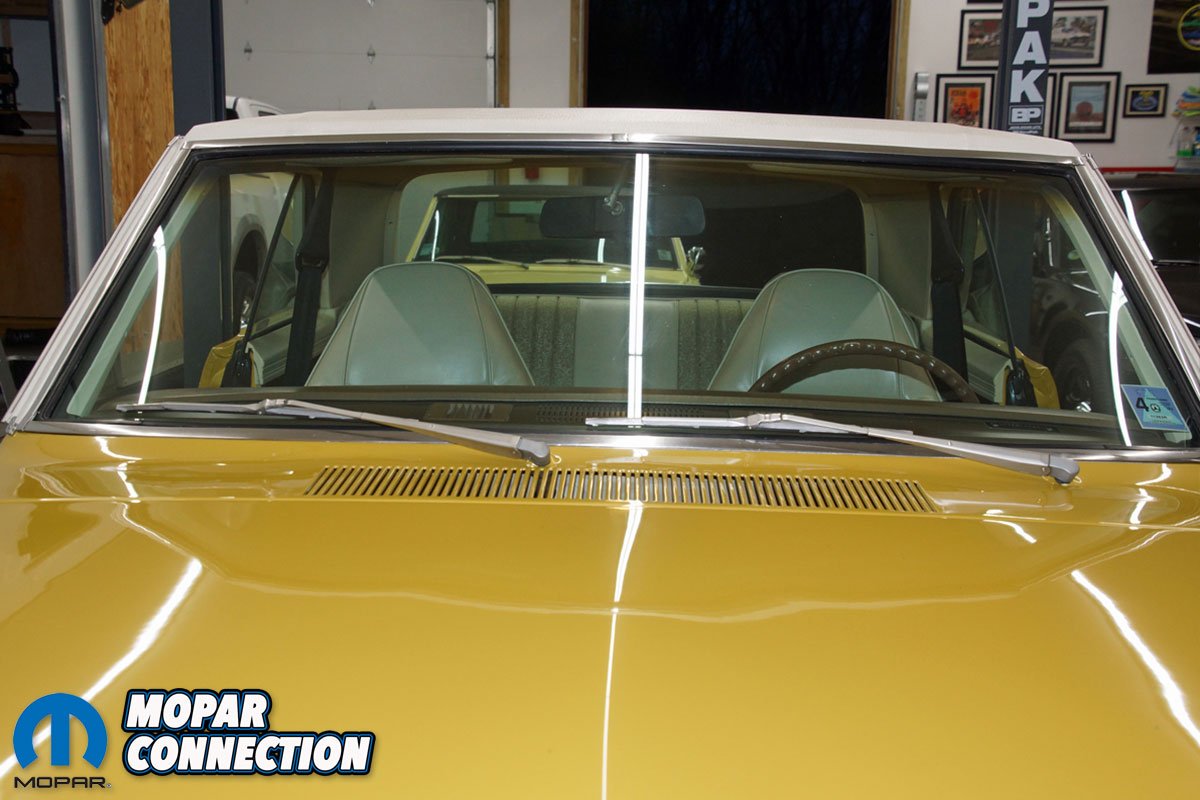
Before installing the wiper arms, we operated the three-speed wiper motor to ensure the rebuild was successful. The shaft and linkage motion was smooth and noise-free. We turned off the wiper switch and let the wiper motor move to its park position. At this point, we carefully installed both wiper arms at the bottom of the glass and again tested the wiper operation. The wipers traveled the full distance of the windshield, again in a smooth and noise-free movement. With a garden hose, we showered water onto the windshield and cowl area and were pleased to find the water remained outside of the Dart.
It took us a full Saturday to complete the bushings and gaskets. Be prepared to be uncomfortable (physically and mentally) during this task. At times, you will be in awkward positions under the dash, and it will look like you are destroying the interior of your ride, but with proper planning and care, nothing will be damaged or scratched (on you or your car). Thanks to YearOne, we have correctly restored our wiper system for those unfortunate days when we get caught in the rain. If you have a wiper concern, contact YearOne for information about the products used on our Dart or any Mopar components from their vast catalog.
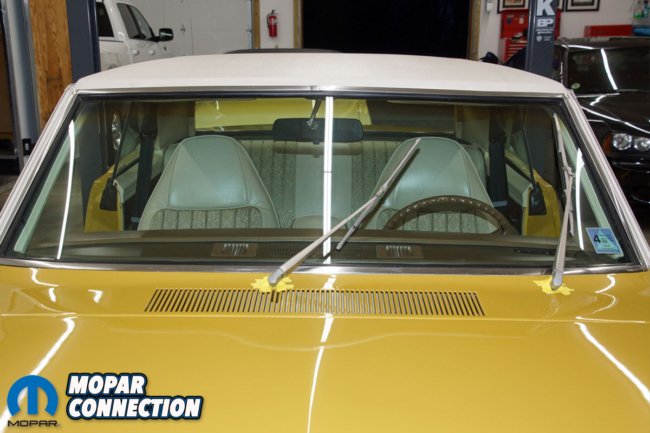

Above Left: After reassembling the entire wiper system and the interior, we installed and tested the operation of the wipers. The wiper blades moved across the windshield, providing adequate stroke to clean the windshield. There were no unjustifiable noises or slack in the wiper arm movement. Above Right: The wiper blades came to a stop and parked at the bottom of the glass. The YearOne bushings provided flawless operation, and during our water tests (with a garden hose), the wipers cleared the glass while the YearOne pivot seal kit kept the water out of the interior and off our toes.


