

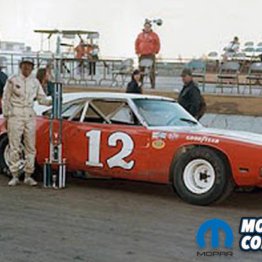


Now that the “Comeback ‘Cuda” is home there is a lot to do! All new steel. No rust. Basically a brand new car. Finally on easy street, right? Not even close. The hard part is just beginning! Step One on the “Comeback ‘Cuda” – now that it is home – is to get the bodywork done. That includes welding on any brackets that are missing, completely assembling the hood, trunk doors and front and rear valence to make sure everything lines up. Then, we need to get all the metal straight so the body is ready for paint. Unless you have done this yourself, you have no idea how many hours it takes to get to the paint stage of a complete restoration.
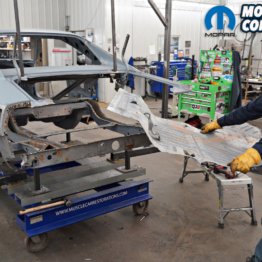
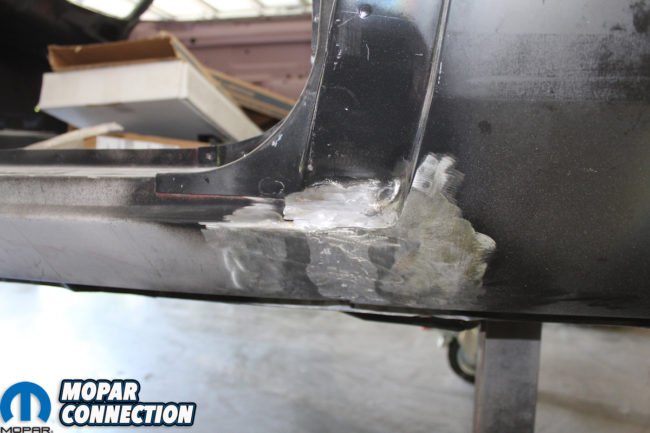
The first thing that jumped out after getting the car back from Classic Muscle Metal and the AMD Installation Center was all the factory spot welds and the 4 major seams that must be filled. Below both doors are the seams where the rocker panel, floorboards, and quarter panels meet. The other two seams are where the Dutchman panel and the rear quarters meet. The fastest way to seal these would be with fiberglass re-enforced filler. But that is not the way the factory did it. They used lead to make sure these seams lasted.
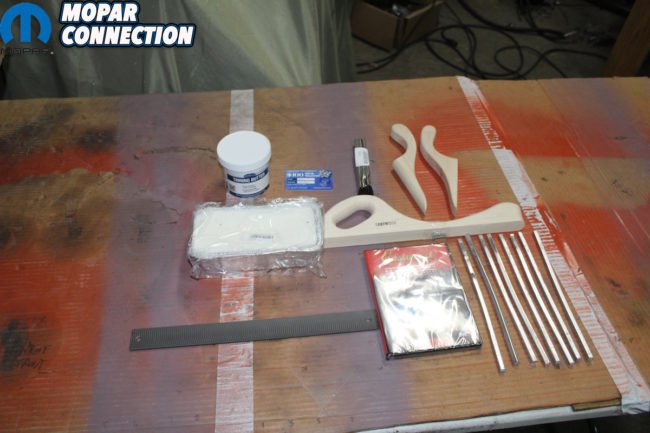
Above: The basic lead kit from Eastwood comes with everything you need to get started. It includes the tools, supplies, and a professionally produced, “How To” video. The lead sticks, tinning butter, paddles, file, tallow, are all needed to apply the lead. If you do more than one car additional lead sticks are available from Eastwood’s site.
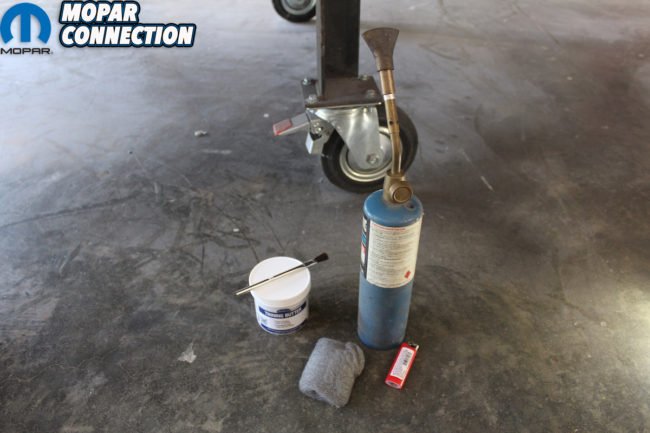
Above left: The heat source can be an acetylene torch or even a propane torch. The “tinning butter” is acid based. You need a steel wool or copper wool pad and the application brush comes with the kit. Above right: Using the torch, you heat the metal area where the lead will be applied. With the brush, you apply the “tinning butter” to the hot metal. Then with the steel wool pad you lightly brush the “tinning butter” ensuring an even coverage.


Above left: Once the metal has cooled you need to take a mixture of baking soda and water and clean the area you just “tinned”. This will neutralize the acid and ensure that the metal isn’t effected by the acid after the lead is applied. Above right: A pan of “tallow” and a flat and a rounded paddle come in the kit. These paddles must be treated with the “tallow” so the lead can be spread evenly without sticking to the wooden paddle. The flat paddle will be used on all of our seams.
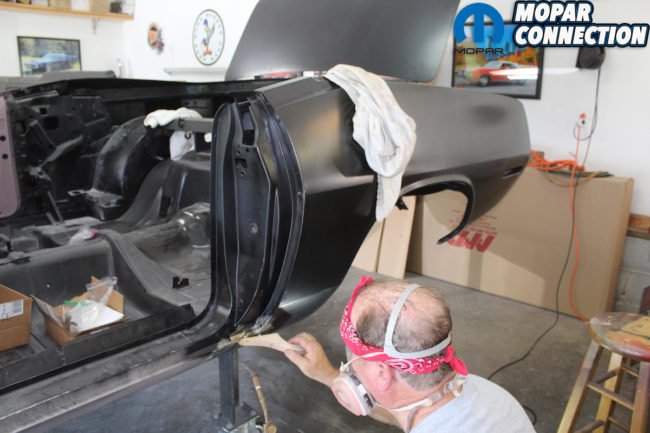
Lead work is quickly becoming a lost art. Even getting the suppliers used to be difficult because you are actually using molten lead. When heated the lead gives off toxic fumes so be sure to use a mask and goggles when applying. So where do you go to get supplies and instruction on how to use the lead to seal the seams? Why, Eastwood of course! When we went online to order the basic lead work kit they were out of stock. After calling in on the toll free number we were told it would be back in stock within two weeks. Just as promised we were able to order the kit.
The basic kit includes:
- 2 lbs. of Body Lead Solder
- 1 Flat Paddle
- 1 Half-Round Paddle
- 1 File Holder
- 1 English Body File (flat)
- 1-lb. Tallow
- 1-lb. Tinning Butter
- 5 Acid Brushes
- Instructional DVD
All for $89.97 Here is a direct link to the product page at Eastwood’s website.

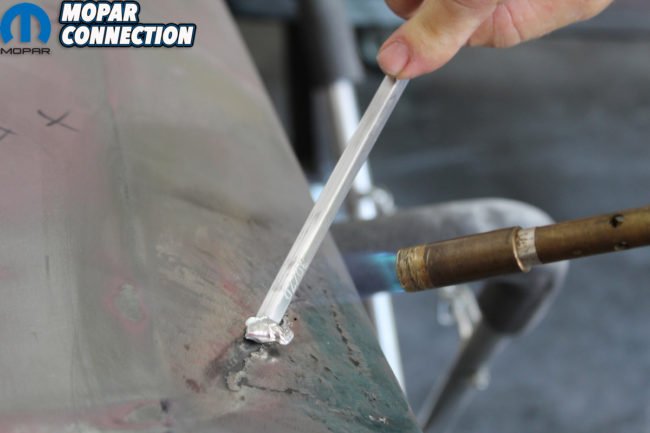
Above left: With the torch, you heat the metal. Be sure and get it hot enough to accept the lead but not too hot for the lead to fall off. Alternating the heat between the metal and the lead stick. Then you push the lead onto the metal. Above right: While keeping the metal and lead hot enough to be pliable you spread the lead with the paddle making sure any bubbles are worked out.

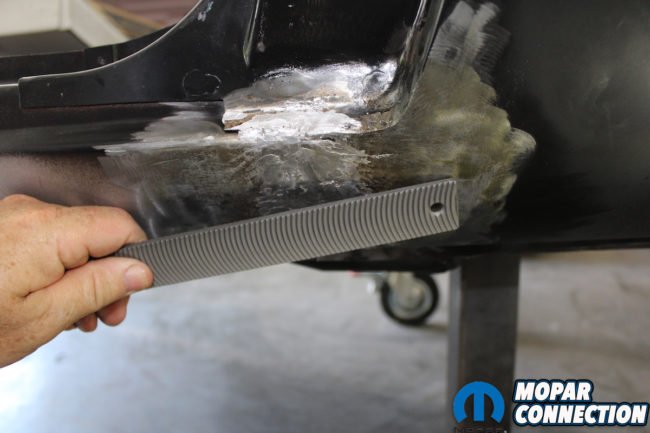

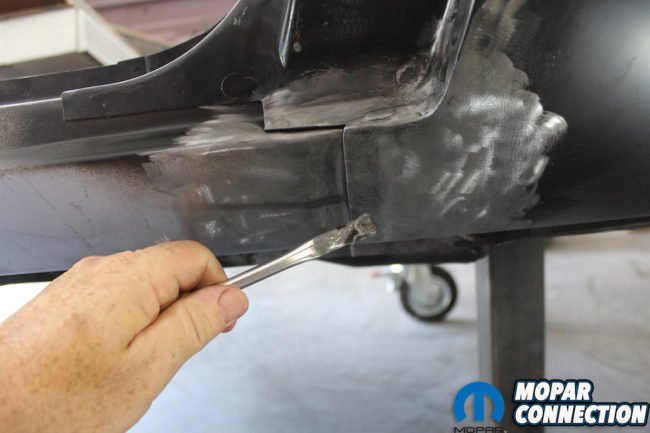
Above left: You continue the process until the seam area is filled. In fact, you want the lead to be higher than the seam recess and extend past the recess. This way the lead can be leveled and feathered. Above center: With an English flat file, you take off any excess lead. The file is designed to only go in one direction unlike a regular metal file that works in both directions. Eastwood provides a wooden handle to mount the file to if you are going to use it on a large area. For our situation, it wasn’t needed. Above right: Now the lead is even and has filled the seam area as needed. As you can see we made sure to lead not only the lower part of the seam, but we also sealed the upper part of the seam where the quarter panel attaches.
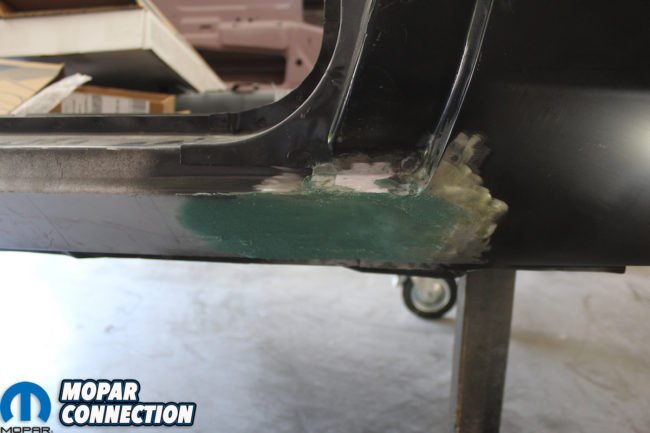
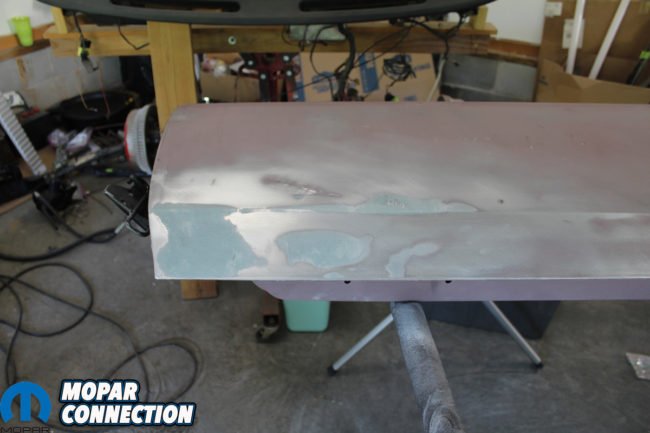
Above left: After filing the lead even, we went back over the lead patch with the angle grinder and the 80-grit wheel to prepare the surface for additional fiberglass re-enforced filler to even out the bodyline. Above right: The seam has been filled and the integrity of the lead patch is solid. The fiberglass re-enforced filler is then applied. This is a thin layer only used to complete the patch and make it level so that when the plastic filler is applied it too will be a thin coat.
The instructional DVD was very helpful and not only had demonstration of “How to” use the lead but also basic body filler instruction. The professional made the process look very easy, but there is definitely a learning curve to using this product. Also, you are using heat from a torch and metal that must get very hot to accept the lead. So much care needs to be taken or you can get burned.
To begin the process rough up and clean the seam of all primer with an angle grinder and at least 40-grit discs. This will give the lead something to bite into and guarantee good adhesion. Then you have to “tin the metal.” This is done by heating the metal and using the acid brushes apply the “tinning butter.” Lightly brush the tinning butter while it is still hot with a copper wool pad. After the area cools wipe the area with lacquer thinner. This is followed by a light bath of baking soda and water to neutralize the acid. This is important to ensure the acid doesn’t continue to eat away at the metal under the lead.
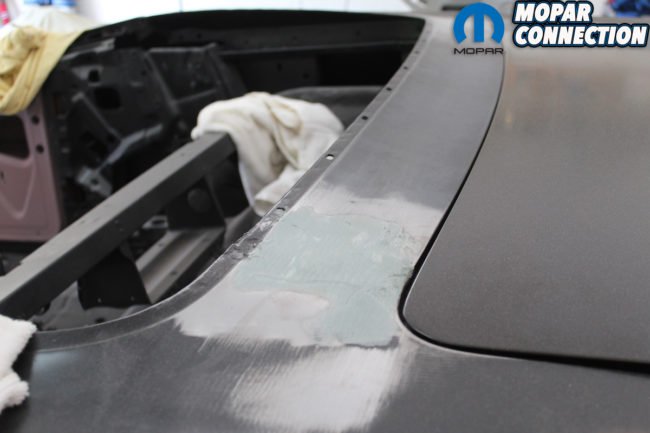
Above: This same process was used on the passenger side lower seam as well as the two Dutchman panel seams between the truck and the convertible well edge.

Above left: To better show the lead process we took the driver’s door where we had cut out a rust area and patched it by butt-welding in a new piece of metal. This could have been just leveled with filler but we chose to use the lead first. Above center: After “tinning” the area and neutralizing the acid with a mixture of baking soda and water we heated the metal area. Above right: Alternating the heat from panel to lead stick until the right melting temperature is achieved we applied the lead to the panel. This was much easier than the lower body seams since it was level and the lead didn’t drip off as bad.
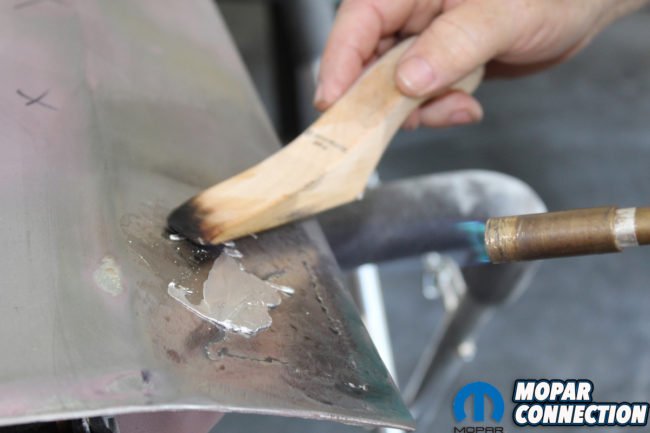
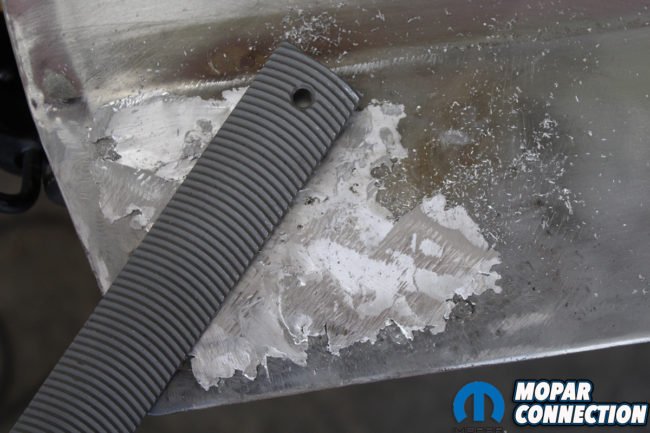
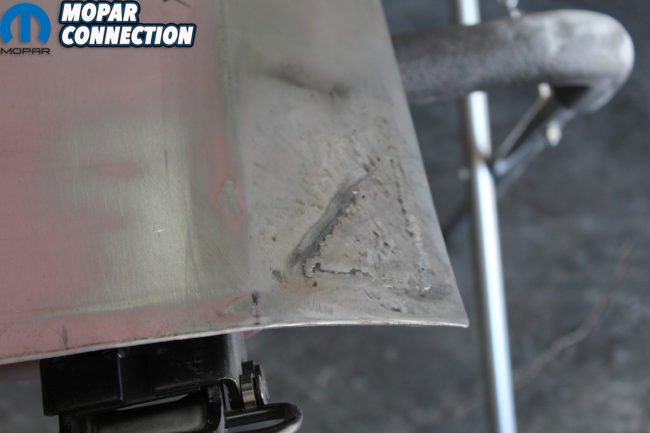
Above left: Then, using a “tallow-treated” paddle, we worked the lead getting it smooth and bubble free. Again, keeping an equal amount if heat on the metal and the lead. Above center: Using the English file in one direction the lead was worked until it was level. The file marks are clearly seen in this shot. Above right: Re-enforced fiberglass filler was then used to build a solid base for additional sanding and plastic filler to make a completely smooth panel. With this process no one level of filler is too thick but all work together to provide a patch that will never rust out again.
Next you apply the lead. This is very similar to soldering, in that the metal must be hot enough to melt the lead for it to stick. But you also have to heat the lead stick to get it to melt for application. This is the most difficult part of using lead. If it isn’t hot enough it won’t stick and if it is too hot it will drip off the surface. Then while keeping the lead hot you spread it with the wooden paddle dipped in tallow pressing out any bubbles in the lead. Once you get the seam filled it needs to cool completely.
The lead will still be very rough so you use an English body file to shape the lead. File in one direction since that is the way the file is designed to work. After filing we used some fiberglass re-enforced filler to seal and smooth the seam. After sanding the filler you can then skim finish with plastic filler and primer. In all it will take some practice to be able to use the lead to fill the seam the same way the factory did! But it is well worth the time and not that expensive with the help of the good guys at Eastwood! Next step for the “Comeback ‘Cuda” is getting all the bodylines to match on the doors, fenders, hood, truck lid and valences.


 Mopar Connection Magazine – The ONLY Daily Mopar Magazine © 2022. All Rights Reserved. Mopar Connection Magazine is the ONLY daily Mopar Magazine bringing you the latest Mopar news, technology, breaking news, and Mopar related events and articles. Find out the latest information about Mopar, Mopar products and services, stay up to date on Mopar enthusiast news, dealership information and the latest Mopar social media buzz! Sign up for the Mopar Connection Magazine newsletter for the latest information about new products, services and industry chatter. Mopar Connection Magazine is the best and only source you need to be a Mopar industry insider!
 by
by