


If your car came with 14-inch Road Wheels, there can be much confusion about the wheel, what it is made of, and especially the trim rings. Depending on the year of your car these wheels can differ dramatically and can be very difficult to restore or replace. In this article we will show you the differences in each year’s wheel, how to correctly restore them.
Fourteen-inch Road Wheels (or Magnums, as they are commonly called) manufactured before 1969 would have come as chrome-plated wheels without trim rings. These wheels are reproduced and are easy to find. They also come in 15-inch if you want to upgrade your ride from the factory standard 14 x 5½-inch. Our friends at Coker have these in all sizes and are ready to bolt on your car.

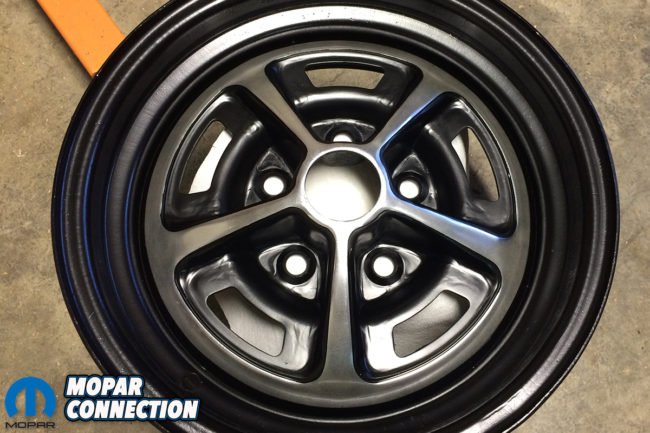
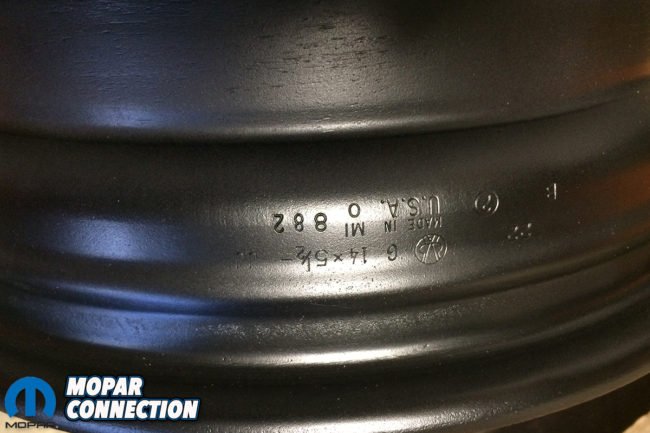
Above left: An original 1969-and-later Road Wheel is not chrome, but stainless. The black is semi-gloss and the center stainless is masked off and sprayed between the spokes to create the iconic look. Above center: The stainless center is welded to an outer steel wheel ring that is black, not chrome or stainless. They were only available in 14-inch diameter, even on a Hemi car. Above right: Here is the inside of an original Road Wheel: As you can see the size is stamped into the wheel and is 14 x 5½. This is a date-coded 1970 wheel in fantastic original condition after being soda blasted and then painted.
In 1969, Mopar introduced the Road Wheel. From first glance, the pre-1969 wheels and 1969 wheels look similar, but they are completely different. The original Road Wheel has a center that is made of stainless steel. This center is welded to the outer steel ring, which is black. They are still 14 x 5½ but have an additional brushed trim ring. The Road Wheel is now reproduced but the center is chrome instead of stainless. The original brushed trim ring is almost impossible to find in any decent shape, let alone ready for show condition.
The original 1969 brushed trim ring has many unique features that are easily spotted if you know what to look for. First, the hole for the valve stem is round instead of oval like the reproduction rings. The inner edge has a pronounced lip, and the attaching ring is steel, black, and only has four attaching points. Finally, they have a brushed finish with a polished outside trim surface.


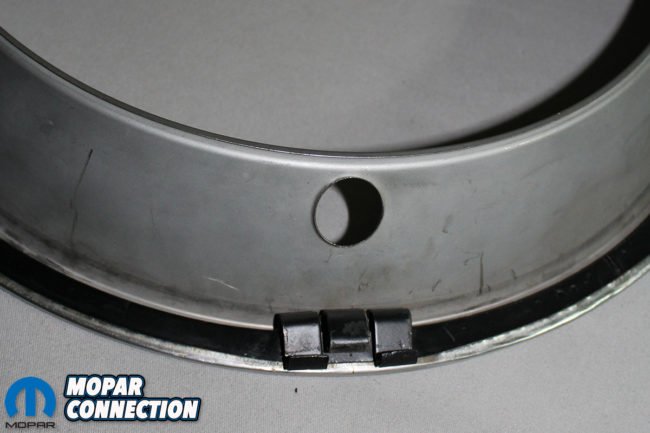
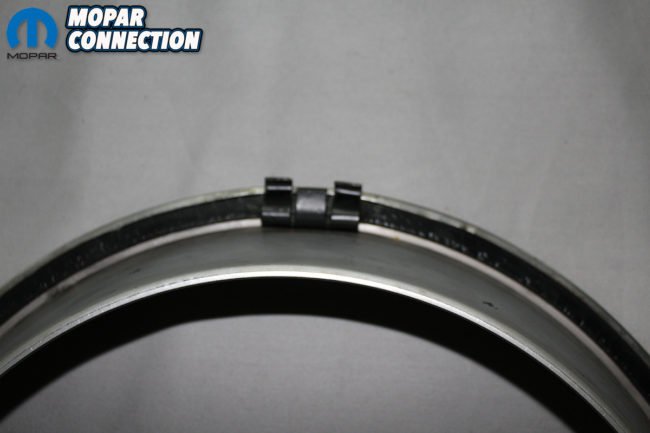
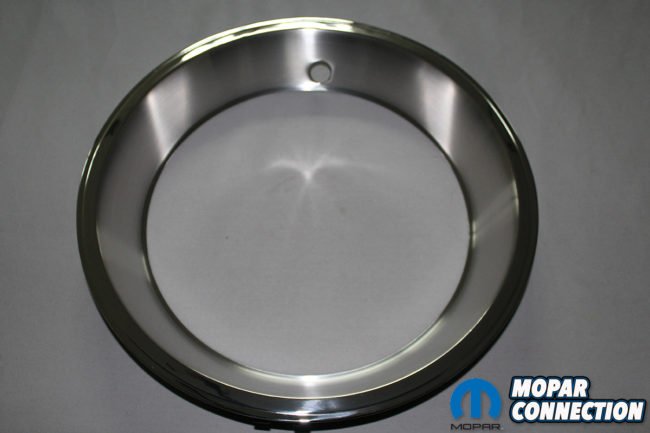
Above left: Here is an original trim ring for 1969 only. As you can see the valve stem hole is round and there is a pronounced inside lip. This wheel has a protruding dent of some size. So bad that it was is need of a real professional to repair it. Above center: The finish is brushed, the inside lip is pronounced and the exterior lip is polished. With the round valve stem hole the only thing left to make sure this is an original ’69 ring is to turn it over. Above right: The back side proves this indeed is a rare and hard to find original 1969 trim ring. The two hooks go over the outside of the wheel and the center tab rests in the concave edge of the wheel.
The 1970-and-newer trim rings have no pronounced inside lip, an oval valve stem hole, and an attaching ring that has many fingers that hold it on to the wheel. After driving a car with the original 1969 trim ring it is easy to understand why this was a one-year-only part. The ring easily flies off while driving down the street, while once the post-1970 ring is on, it is difficult to pry off. These later and reproduction rings are much more available but still difficult to find.
After locating a set of the original 1969 trim rings for this 1969 Road Runner convertible, we discovered they all needed restoration to be in show condition. While searching the web for someone that had the expertise to restore these wheels, we went to our go-to place Moparts.com. There, we discovered and contacted Brian Kapral. Brian is a dyed-in-the-wool Mopar B-body guy. After exchanging e-mails and sending pictures, we were able to arrive at a ballpark cost of restoring these rare trim rings. His communications during the process were great and the results speak for themselves.


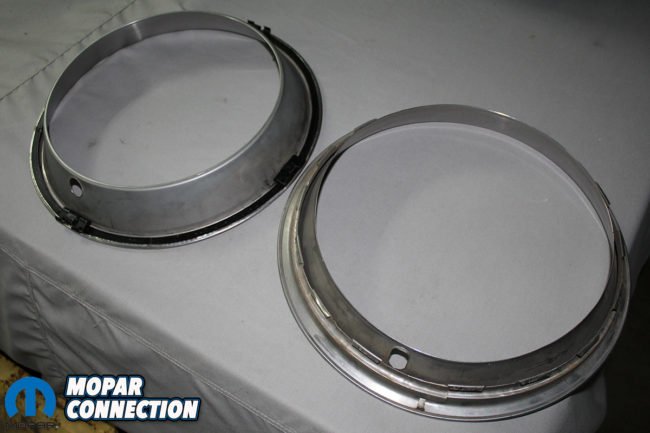
Above left: There are four tabs positioned at 12, 3, 6, and 9 o’clock. These tabs and their poor design only lasted one year and are mainly responsible for the extreme rarity of these trim rings. Above center: In 1970, Ma Mopar redesigned the trim ring and replaced the four tabs with multiple gripping fingers that once they are installed are very hard to get back off. In fact, they make getting the ring to seat on the wheel no walk in the park either. Above right: A side-by-side comparison of the 1969 trim ring and the 1970-and-later trim ring show the major differences between the two. The ’70-and-up ring is the style that is reproduced but are still hard to find.
Brian gave us a rundown of all that is involved in taking these rings from junkyard to show room:
[Just remember he is an experienced expert and knows what can be done and what can’t be done. If you try this on your own, you are just that, on your own. -Ed.]
“I’ve recently started undertaking stainless steel trim restoration along with other items I restore. Again, with any part or piece, the end result greatly depends on the condition of the piece that you start with. You first need to start with assessing what kind of damage had been done to the stainless piece. Dents can come in two forms. An inward dent which is usually the most common from dings and other type of strikes from installing the part or even something as simple as a shopping cart in a parking lot. The other type of dent is an outward dent. This is commonly from taking the trim off or something getting behind the ring and causing the dent. Both dents have specific steps that must be followed to get the desired result. Once you establish this, you can start working on your trim piece.”
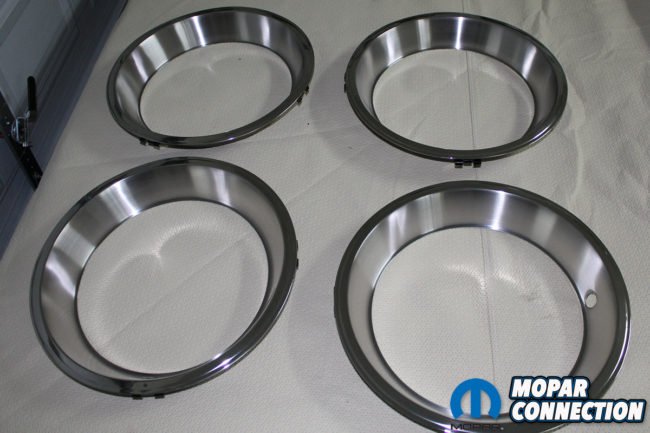
Above left: Brian takes the black mounting ring off of the trim ring, restores the trim ring and the mounting ring and reattaches them together. The final results are amazing. Above center: This is a pic of the ring that we showed you earlier with the protruding dent. The ring has been disassembled, repaired, polished, and brushed. The quality and finish is well worth the time and expense it takes to save one of these rare rings. Above right: A full set of 1969 original trim rings. The only way to get a set like this is to find them NOS and pay around $1,000-plus each or seek high and low to find individual rings and then have Brian restore them. Either way having four matching rings is a feat few have achieved.
“The other common issue with stainless steel trim rings is something called curb rash. This is when the trim piece gets scraped up, usually with deep gouges that require sanding to get them flat again. Sanding or any kind of removal of material can be risky as sometimes trim pieces are very thin to begin with. Depending on how deep the scratches and gouges are dictates what grit sand paper you would want to begin with. Always start with the least aggressive grit. This way, should you need to be more aggressive, you are not adding work, by putting deeper scratches into the piece than you are trying to remove. Another thing to keep in mind is that metal stretches. Depending on how hard or deep the dents are, the metal could be stretched enough to not allow it to return to the original shape. If this is the case, extra care really needs to be taken so more damage can be avoided.
“To begin working on the piece, you start sanding the part where the damage is with the sand paper wrapped around a straight piece of wood. This will allow you to see if you were able to hammer out all of the dents enough or if more working needs to be done. If more hammering is needed, continue taking breaks to sand the area again to see your progress. Once you get the desired straightness, you then start sanding the entire area of damage. Continue going finer and finer till you can start using the different rouges for the buffing wheel. Different materials require different rouges and different buffing wheels. Some rouges cut faster than others while other rouges are for bringing out the color in the metal.

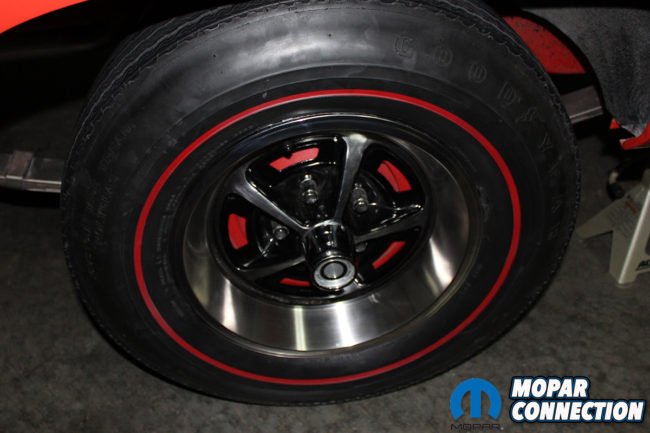
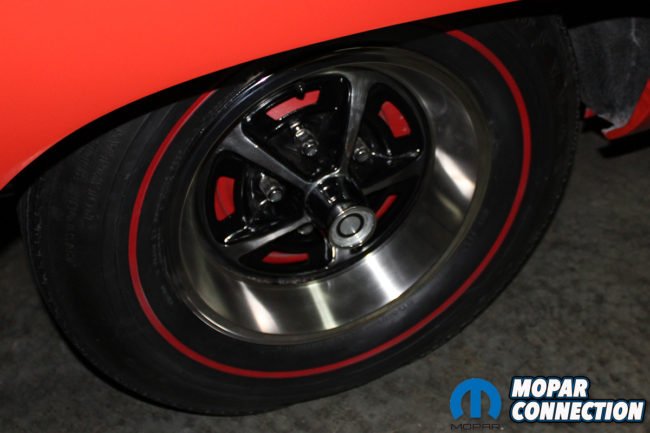
Above left: Here is a finished, date-coded Road Wheel with a new reproduction center cap and red line G70 x 14, 4-ply tire from Coker, with an original restored 1969 trim ring. No more myth, but correct. The next time you are at a show you will be able to know the correct 1969 wheel and tire for a B-body. Above center: All 1966–74 styled wheel brake drums were coated with red paint on the outer edge so that it shows through the wheel openings. This paint was put on with a brush and is found not only on Road Wheels but also on Rallye Wheels. Cars with steel wheels did not get this red paint. Above right: Mounted and ready to show these correct wheels, tires, and rings, once you know what to look for, will always stand out when installed on a correct B-body.
“Again, this is a very delicate process as sanding and buffing cause the metal to heat up. Heat can cause a burn mark in the metal or even burn through the metal creating a hole in it. Once the metal is gone, the piece is ruined. I can’t stress enough, you need to take your time while doing this or, leave it to a professional! Sometimes it’s worth the extra money to have someone do it for you. With each stage of sanding or buffing, you will have less and less scratches left in the material. Your eventual goal, while it might take quite a few hours, is to completely remove all of the scratches left in the material from your sanding. Your finished piece should look just as good as when it was new.
“As always, know your level of skill before you try any of this. Always wear safety goggles, eye protection, gloves, and use common sense should you under take this process. The high speed buffing wheel can catch stainless and shoot it across the room and can cause bodily harm.”
So now you know what Road Wheels came on your 66-68 B-body, what Road Wheels and trim rings came on your 69 B-body, and what Road Wheels and trim rings came on your ’70-and-up B-body. You know where to buy them and how to get your originals restored. To contact Brian Kapral, you can email him at resq302@aol.com


great info where can I find 1 rim and 4 of the centers any help will be greatly appreciated email dusty0@windstream.net thank you, john
You’re better off hitting up the Facebook communities than us. We’re just a magazine.
thanks for clearing all that up. is there any info on how deep the original ’69 trim rings are? please let me know or tell me where i can find out for sure, thanks
Hello – just seeing this thread and interested in getting in touch with Brian for some restoration work. Can someone please provide his contact info to me at pcheplick@yahoo.com? Thank you.
I can, not a problem.
I boughta new 68 RR. I thought it had some ‘road wheels’ that resemble those in the above article. I’m trying to determine if they actually were avaiable as a factory option on the 1968 RR. As so often was the case back in that day, I have no pictures or documents on the options etc of this car. (Old age = hazy.)
Can anyone factually confirm/deny any optional wheels available on the 68 RR? Thanks…
Hello, my Dad and I are almost done with a 1969 GTX restoration and I had a few questions;
-Does this mean that the chrome version was not available in 1969? So the only options for wheels in 1969 for the GTX would have been the stainless road wheel with a trim ring, or the plain steel wheels? Also, was there a 15″ option in 1969? Or just all 14″?
I need 2 brushed stainless trim rings for 15 inch wheels. Don’t know if the wheels are 15×7 or 15×8. Rim size make a difference for the trim ring application?
Bob Gates
The reproduction 15 inch trim rings are 2 3/4 inch deep and the original expensive ones are 3 inches deep. Both will work on either width wheel.