


The “brain” of any car is the dash assembly. Dash frame, gauges, and the wiring harness make up one of, if not the most important part of a car. Yet, I see many times in restored cars this is where corners are cut. Non-restored gauges, old wiring harness, non-functional radio, dash frame, and even the VIN plate is reused without being restored. The restoration process of the Comeback ‘Cuda is so involved that we are going to divide it into three articles. This article, what we’ll call “Part 1” will cover the disassembly and restoration of the dash frame. Part 2 will cover the testing and restoration of the gauges, and Part 3 will detail the remaining switches and rebuild of the functional parts and final assembly.
Once the dash assembly is out of the car the disassembly will begin. Documenting every step of disassembly with pictures is a must. After labeling and documenting every part removed from the dash reassembly will be much easier. By building a crude but effective way to mount the dash assembly so that both the front and rear of the dash can be accessed will be a great help. We will show you the support we built and the step by step restoration of the dash frame, dash pad, and VIN in this “Part 1” article.


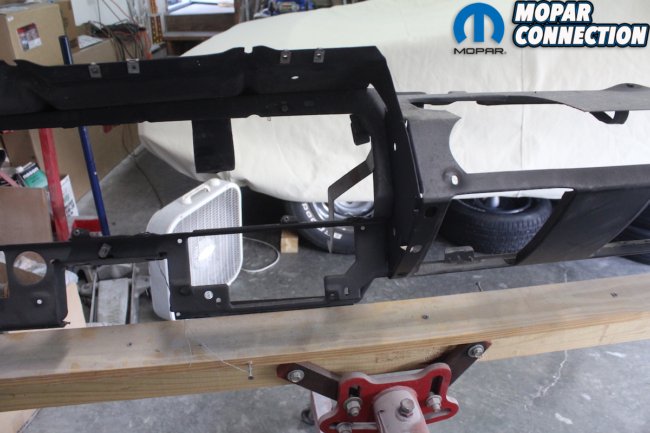
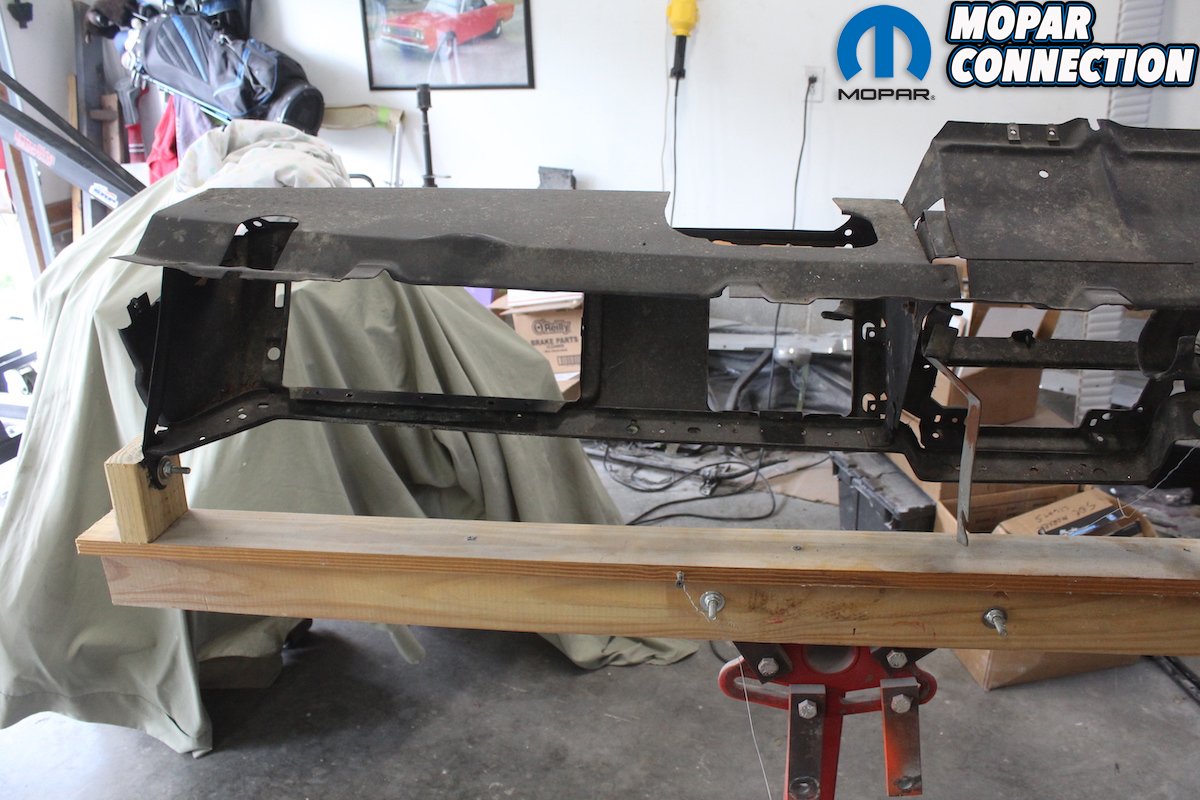
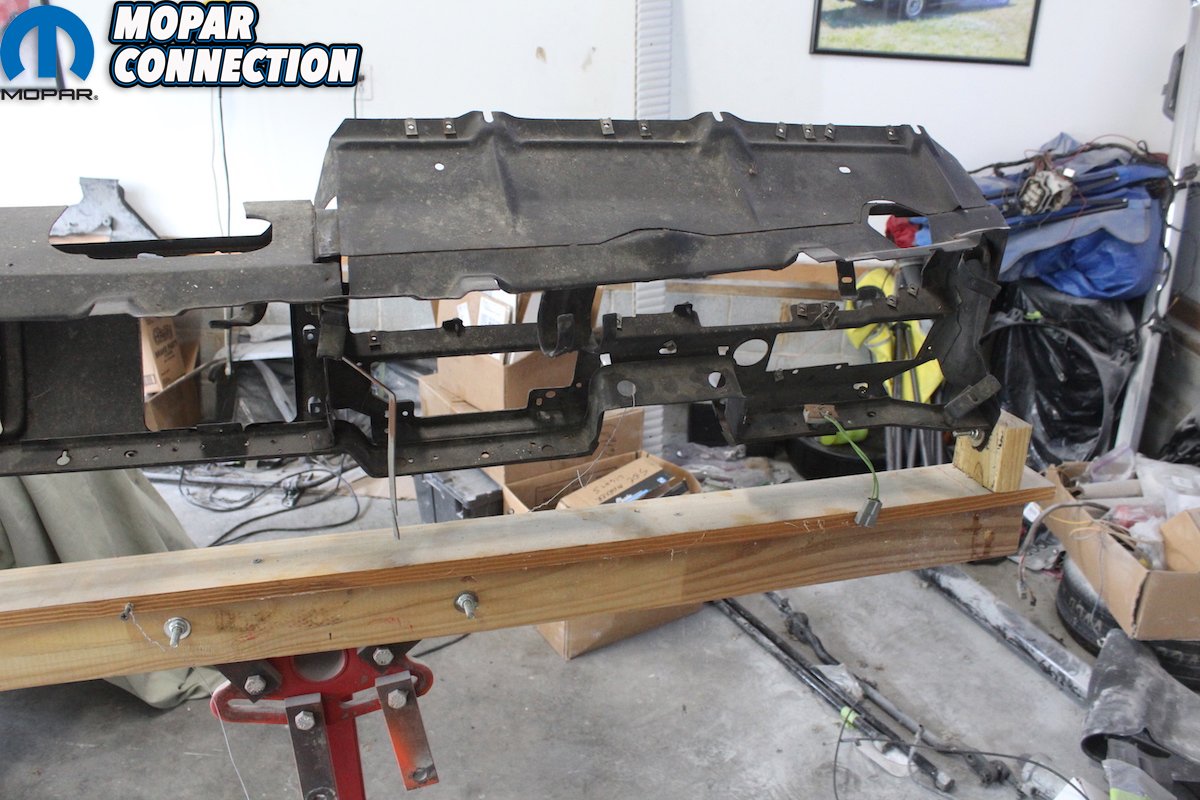
Above: First step is to build a simple frame out of wood. It needs to be heavy enough to support the dash. Use attaching bolts on each end to secure the dash where it mounts in the car. We attached ours to a 3 leg engine stand so it can be moved around as needed. You will see pictures of the stand later. Once mounted, take as many close- up pictures of the back of the dash wiring as well as the front of the dash while disassembling. These pictures will help you put it all back together in the correct place. Here is the type of pictures you will need. They should be up close and detailed focusing on the areas where the wiring harness plugs into the cluster.
Some of the products and tools needed to restore the dash frame are as follows:
- A portable media blaster and black aluminum oxide media
- A compressor large enough to supply air for the blaster
- SEM Trim black. We bought a gallon because we have used it on many parts. If you are just using it on the dash a quart is enough.
- Rolling engine stand, wood and screws to build the dash support
- SEM spray can of Landau black for the correct Dash Pad finish.
- ECS dry rub transfer of the “Chrysler” logo on the V.I.N.
With the dash support built it is time to restore the actual frame to original appearance, quality, and functionality.

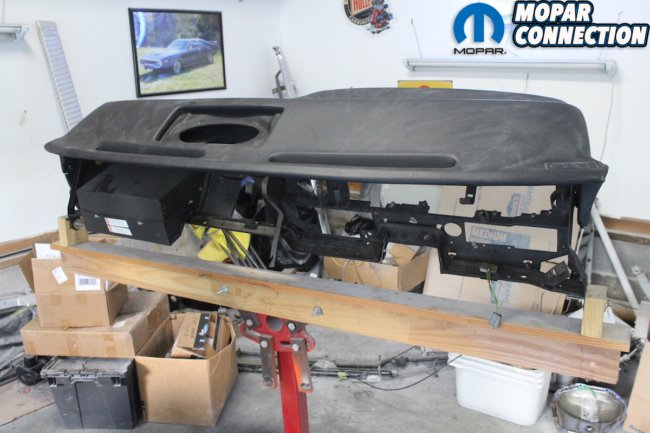
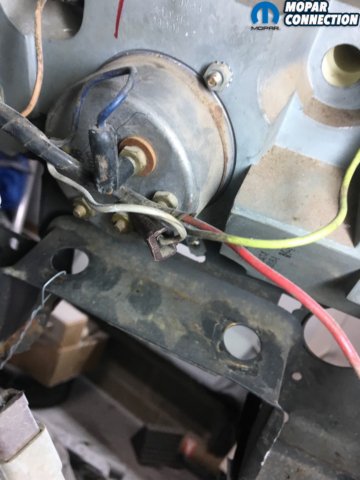
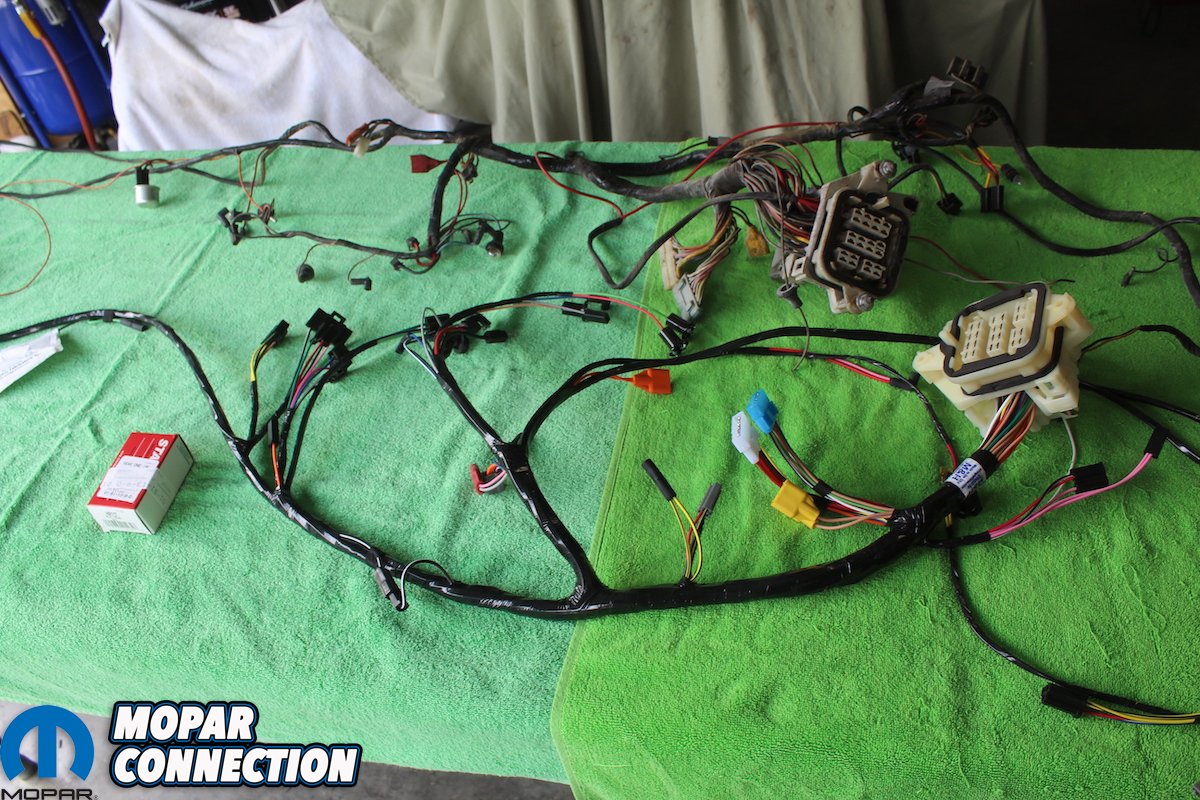
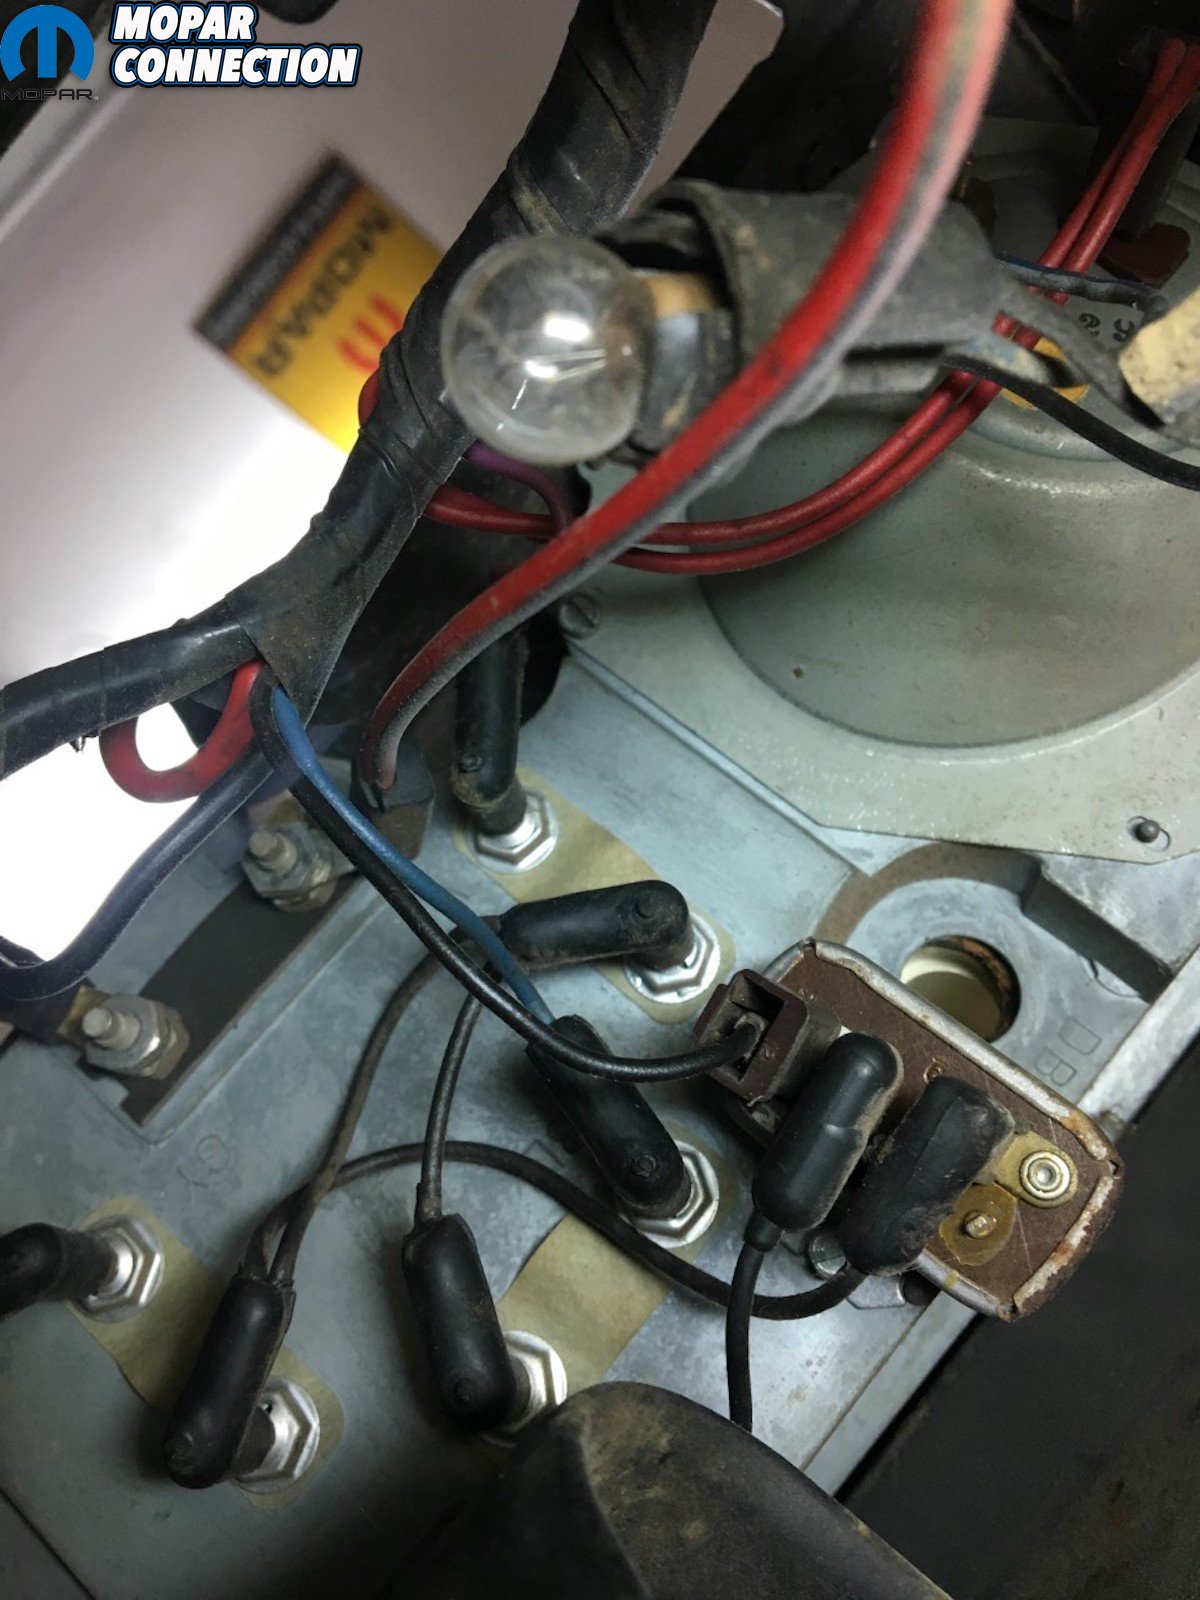
Above left: Next disconnect the dash wiring harness paying close attention to the routing of the harness. We then took the new wiring harness provided to us by Classic Industries, one of our valued sponsors of the Comeback ‘Cuda. We cannot say enough about the quality and correctness of this part. It is the only way to go. It is recommended that you compare the old wiring harness to the new one to make sure they are the same. When we did, we indeed found out we were missing the convertible top switch wiring pigtail. So, we ordered one. Otherwise they were exact and matched up correctly. Above right: Here is a clear picture of the dash support we built with the dash attached, and almost everything but the dash pad removed. We also attached a wire to the front and back side of the support, so we had a safety wire for when we had to tilt the dash forward or back. Since it is mounted on a rolling engine stand, we could move it wherever we needed.
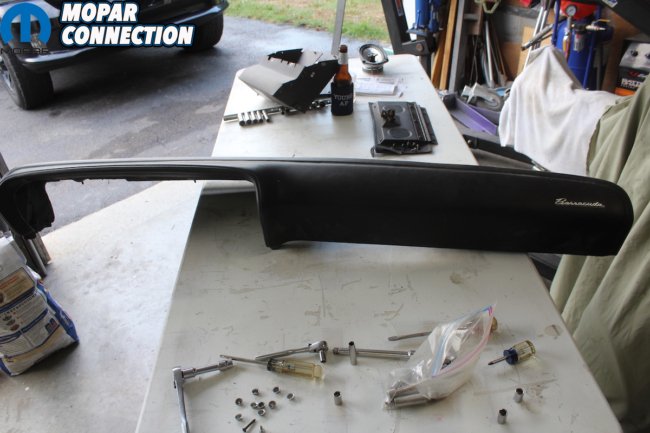
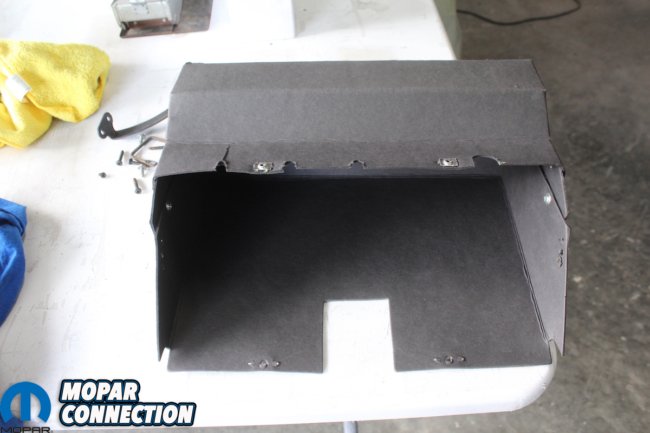
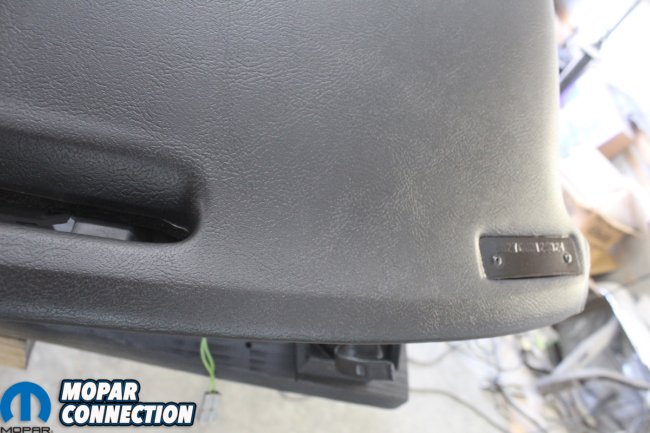
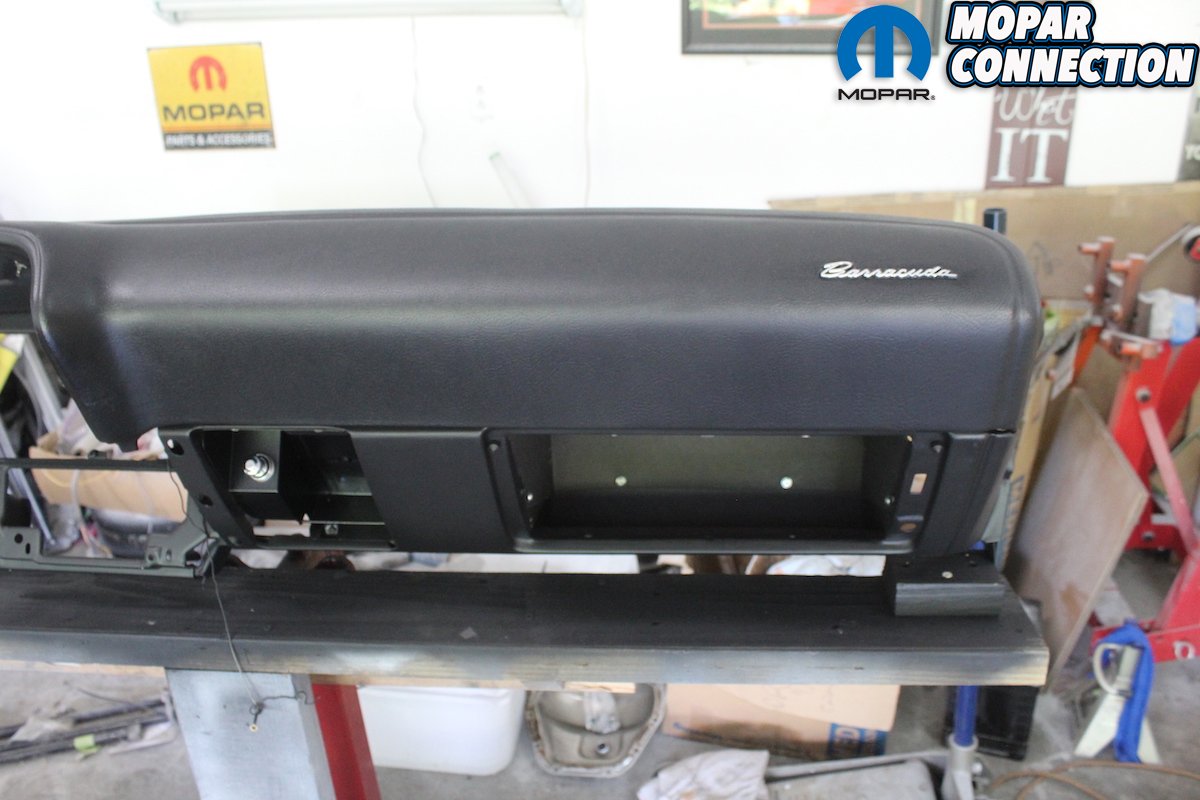
Above: We removed the rest of the pieces of the dash and the dash pad was in fantastic shape. No cracks or dents. Notice the one year only chrome script saying “Barracuda” on the pad. It is molded to the pad and so much care is needed when detailing the dash pad. The VIN is attached to the pad with the factory rivets and will require a different finish than the pad itself. As always bag and tag all the attaching hardware.
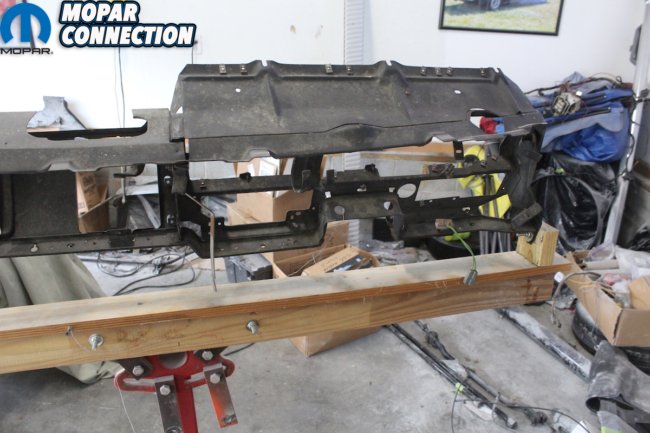

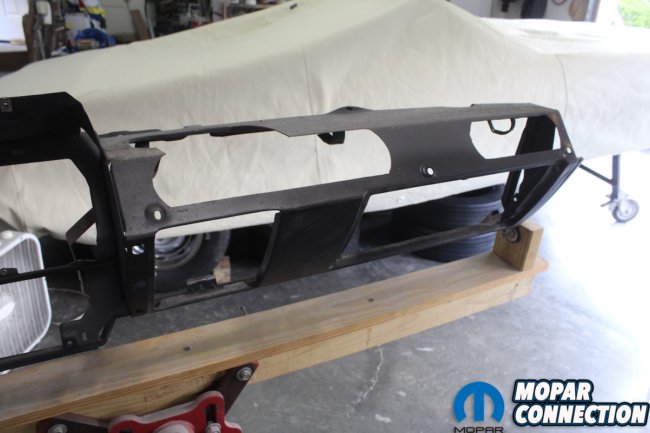
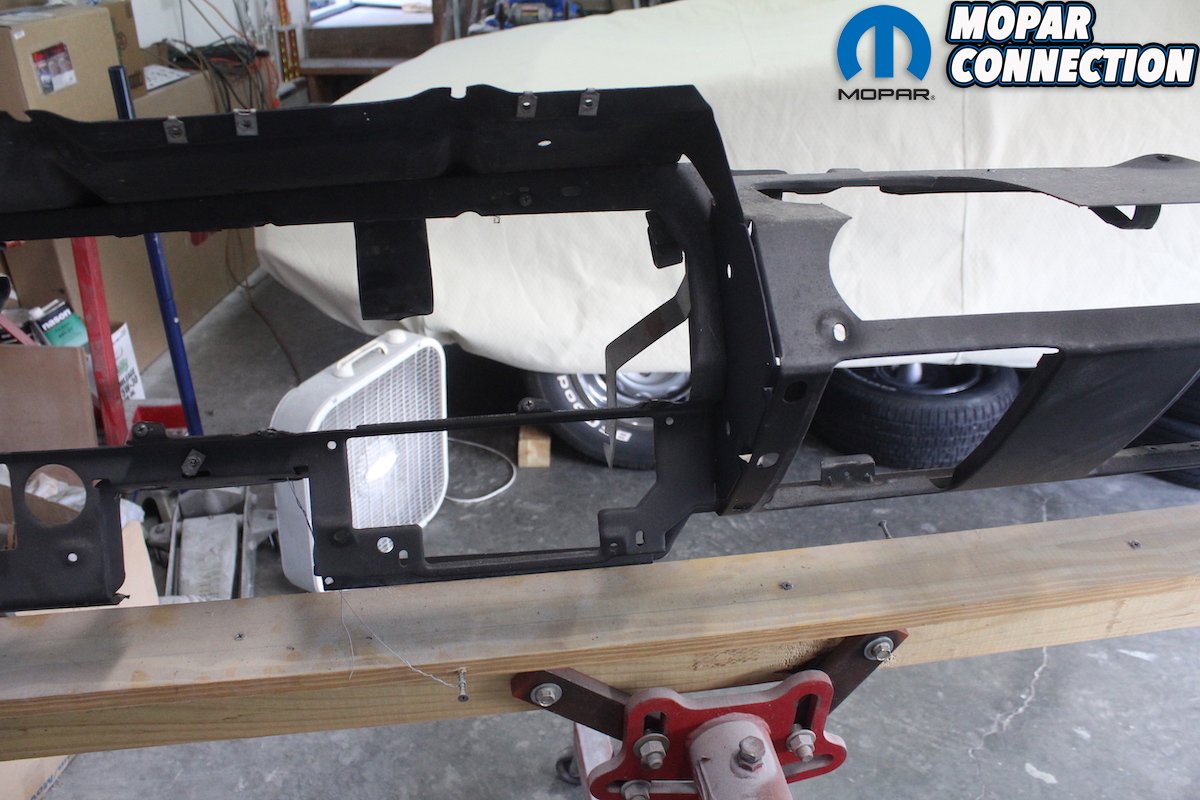
Above: After everything is removed check the dash frame for any rust or damage and document with pictures. Here is a shot of the left and right, front and back of the dash frame. All is perfect with no rust whatsoever. This is a perfect time to see what the original finish was. The color, and especially the texture, is important to document. The finish we have put on a 69 and 70 B-body dash frame is completely different from this 70 E-body. The B-bodies frame was more textured while the E-body was less textured.

Above: Since we have the dash frame support built, we can roll it outside where we will blast the frame down to bare metal. Our Eastwood portable blaster with Black Aluminum Oxide media from Harbor Freight works great for these types of parts. Not too aggressive to change the finish of the metal.
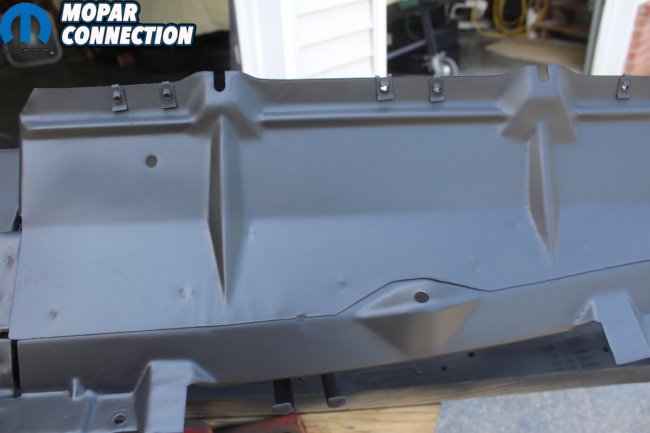
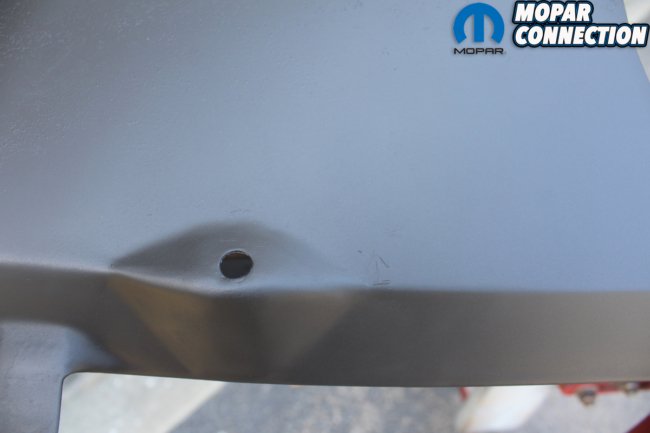
Above left: We then shoot the dash frame with the SEM Trim Black paint. This paint can match several different textures on the car depending on how wet or dry you shoot it. It can be mixed 1:1 with reducer to produce a slight sheen or with lacquer thinner for a flatter appearance. We applied the lacquer reduced paint with medium wet coats to get the finish that matched what we found. It may take a couple of spray outs to get a perfect match, but it can be done with a few minor adjustments. Above right: Here is a close- up shot of the finish, color, and texture we were able to achieve with the SEM Trim Paint. It was dead on to the factory finish we found under the dash pad. Notice the little arrow that was stamped into the frame.


Above left: This shot gives you the full view of the finish of the paint on the dash frame. It also shows you the perches that hold the dash frame to the rolling dash support. Simple but it works! Above right: It is the small details that make a restoration correct. We removed the ash tray and then took the frame and blasted it in the cabinet. We replaced the cigar lighter with a new unit we got from YearOne another valued sponsor that is helping us bring the Comeback ‘Cuda to life. Notice it is painted “semi-gloss” black and is attached with natural zinc finish screws.
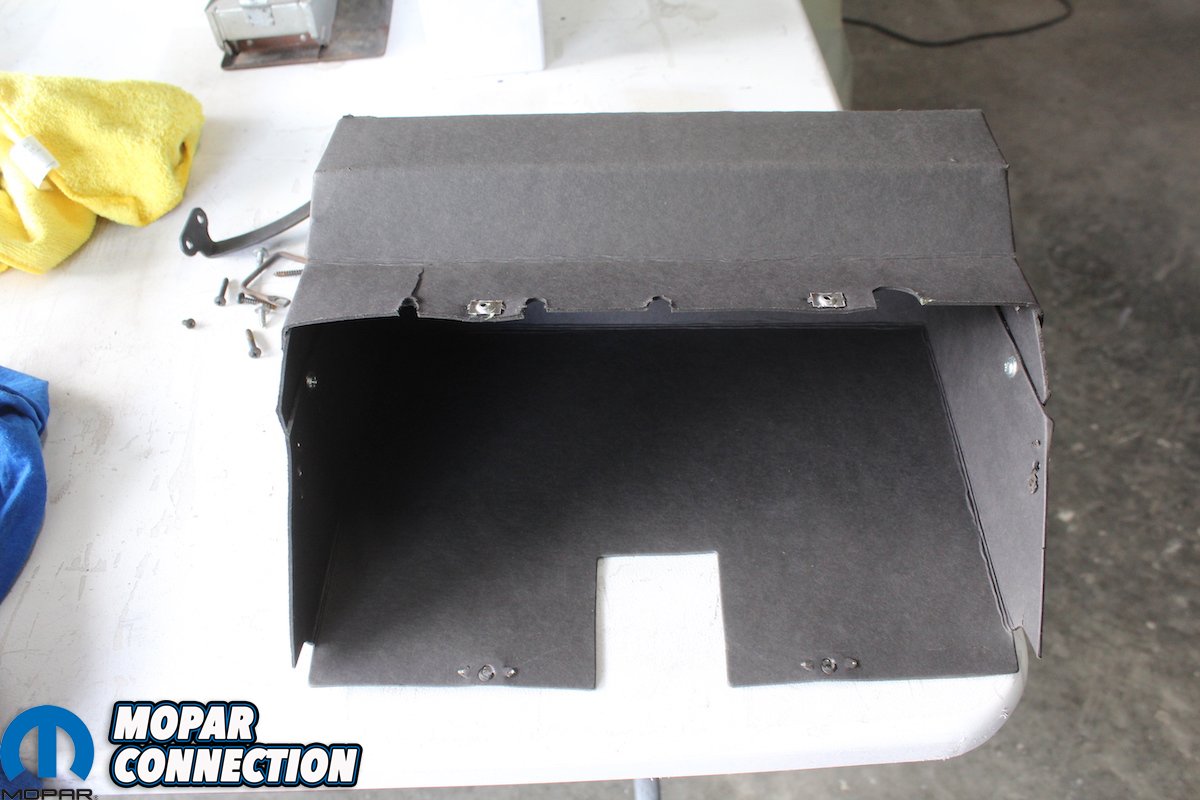
Above: The original glove box had been replaced before with a reproduction one, but it was looking a little tired. We decided to replace it with one provided to us by YearOne. Quality parts = quality results!
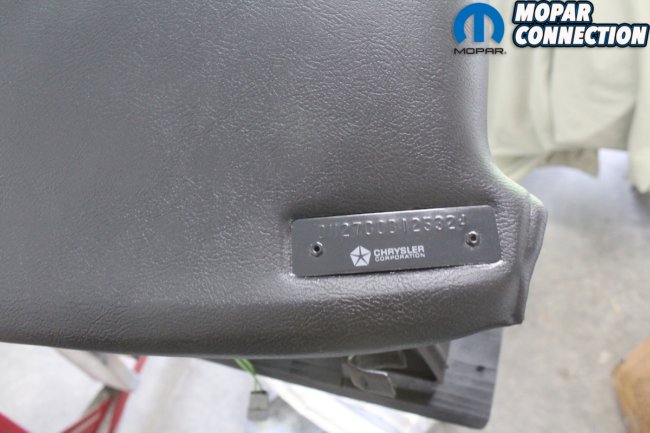
Above left: We didn’t want to remove the VIN from the dash since it was in great shape. So, we masked it off and cleaned it to the bare metal with lacquer thinner. This was done before we finished the dash pad. It is painted a semi-gloss black also. After it dries, we applied the “dry rub” Chrysler decal from ECS. As far as we know they are the only source for this decal. They also have an abundance of other totally unique products to make your restoration as original as possible. Get one of their catalogs or go online or call 855/532-7846 today. Above right: By using the SEM Landau black in a spray can, we were able to reproduce the correct finish on the dash pad. We cleaned the pad with lacquer thinner let it dry and then masked off the VIN. With a couple of medium wet coats, the pad looks great. It even retained its original “grain.”
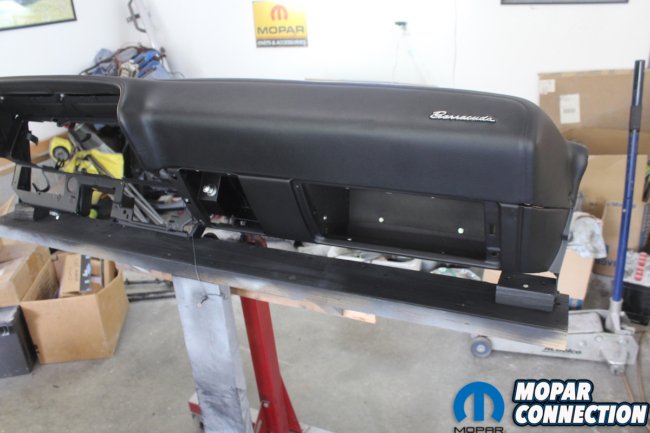

Above left: When we painted the dash frame, we also painted the ash tray door, glove box door, and hinge. That way when assembled everything will match. Natural zinc screws attach the new clove box liner. Notice all the different finishes on the dash and its various parts. When installed in the car the attention to detail will stand out. Above right: That pesky little script on the dash pad must retain its chrome appearance. We have seen where people have just painted over the script. To be completely original, it has to be chrome. We didn’t want to try to remove it and taping it off wasn’t going to work. So, we took a very small detail brush and some Vaseline and put a thin coat on the face of the script before shooting the pad with SEM Landau Black. After it all dries you just wipe off the Vaseline and give the chrome and brighter shine with a little 0000 steel wool. Take a lot of time and you will get a perfect finish.


Hi Mike, It was nice talking with you in Columbus at the Nats. I’m going to start disassembly of my 71 Challenger convertible. I appreciate all your advise when I start to begin working on it. Take care, Frank Aiello
Please email Mike Wilkins at moparmike69@outlook.com. He doesn’t read the comments.
Just a good article with lots of details. Showed me one mistake I made before, so thanks, Mike and Kevin.
Great article. I have a couple of questions, as my dash frame is sitting right here waiting for me to restore it.
1. You didn’t mention the little ‘wire brackets’ that are dipped (?) in rubber. Did you just tape them off an leave them alone?
2. Did you apply a primer before you applied the SEM Trim Black Paint to the dash frame?
3. Also, just curious if they have other colors that would be appropriate for different color dash frames?
Thanks,
Here’s what Tech Editor Mike Wilkins had to say:
1. If they are in good shape tape them off. If not you can get liquid rubber in a can and coat them.
2. No the factory did not so in order to recreate it exactly I did not use primer.
3. Yes there are several companies that produce correct dash paint in different colors.