


On most late-model vehicles, the headlamps are constructed of plastic, and the sun’s ultraviolet light can haze the lens coverings. Additionally, the daily usage of the car results in chips and scuffs on the lenses. There are plenty of polishes and sealants that can treat the damage, but eventually, these problems reoccur. Our 2006 Charger suffered from hazy headlamps, so we had them sanded and clear coated in 2014, but by 2020, the haze had returned.
American Muscle recently introduced its new Charger Store packed with an expansive product line. With our lights looking sad, it was a great time to update the Charger with a pair of new headlamps. We selected the Spec-D Tuning Dual Halo Projector Headlights with a matte black housing and clear lenses (part no. CR1162). During the Spec-D Tuning headlamp installation, we planned to mount a factory fog light kit that would complete the front-end lighting.
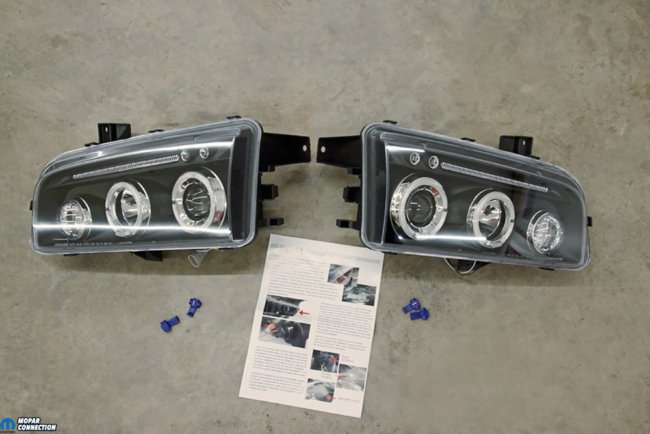
Above: For our 2006 Charger, we selected the Spec-D Tuning Dual Halo Projector Headlights with a matte black housing and clear lenses (part no. CR1162) to replace our hazy factory units.
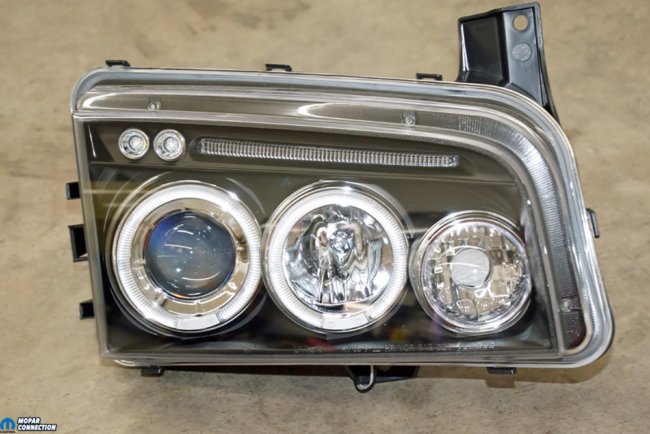
Above Left: The Dual Halo Projector Headlights provide ample light. You must reuse stock sockets and bulbs for the blinker lights with these headlamps, but they come with dual halo and LED lights, H1 low- and high-beam bulbs. Above Right: Each Spec-D Tuning headlight has three white (or white/black) wires and three black wires for the Halo and LED lights. Additionally, there are factory weather-pack connectors for the low- and high-beam bulbs. The factory blinker sockets and bulbs would need to be swapped to the new headlamps.
First, let’s start with a little history about the Charger. In late 2012, we secured access to a Mustang chassis dyno. To evaluate aftermarket components and tuners, we wanted to pick up a late-model Mopar. We found a 2006 Police Package 5.7L Hemi Charger SXT for sale on eBay. It turned out the Charger was in the next town over, just ten miles away. With the auction still active, we met the owner and looked over the Charger.
While it was in decent shape (including a Holstein cow paint option – black and white), there were some misgivings about purchasing a police car due to the abuse it may have suffered while in service as a daily patrol car. Nevertheless, we ended up buying the 80k-mile Charger. The Hemi and NAG1 (automatic transmission) had recently been replaced with factory new units and had low miles on them and made us feel good about the purchase. With a $12K budget, which included the purchase price, we began cleaning and repairing the Charger.
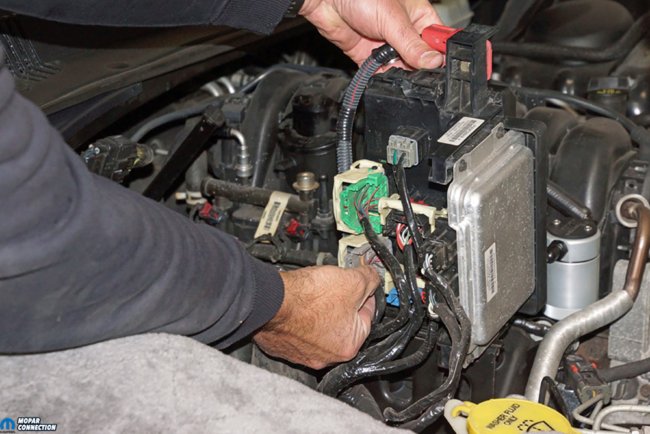
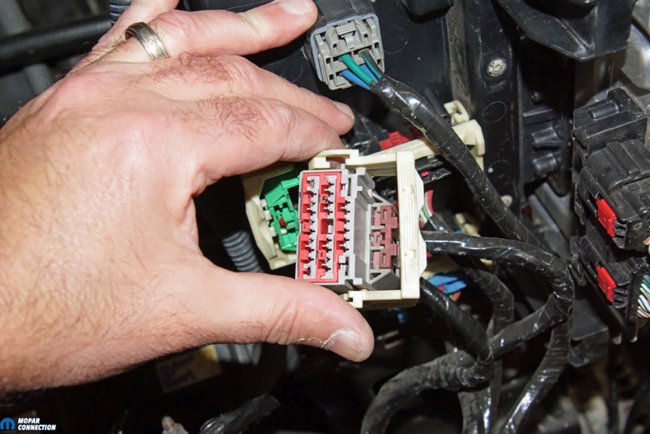
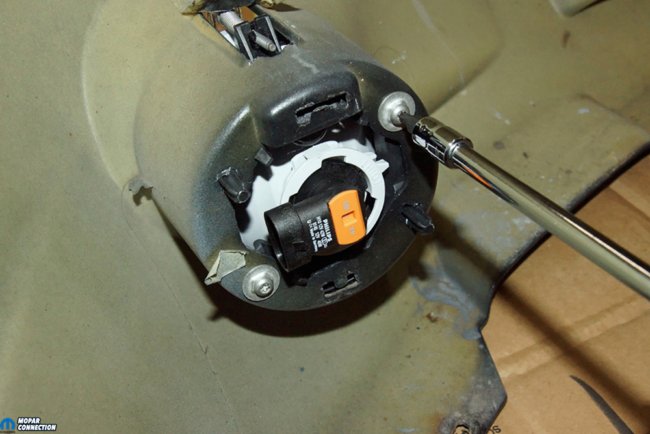
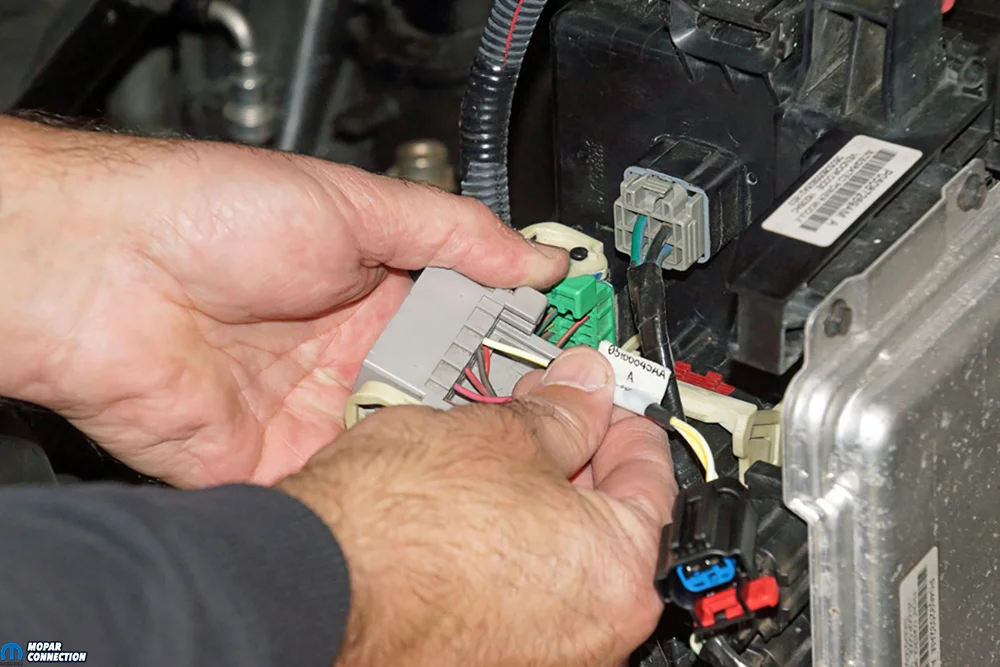
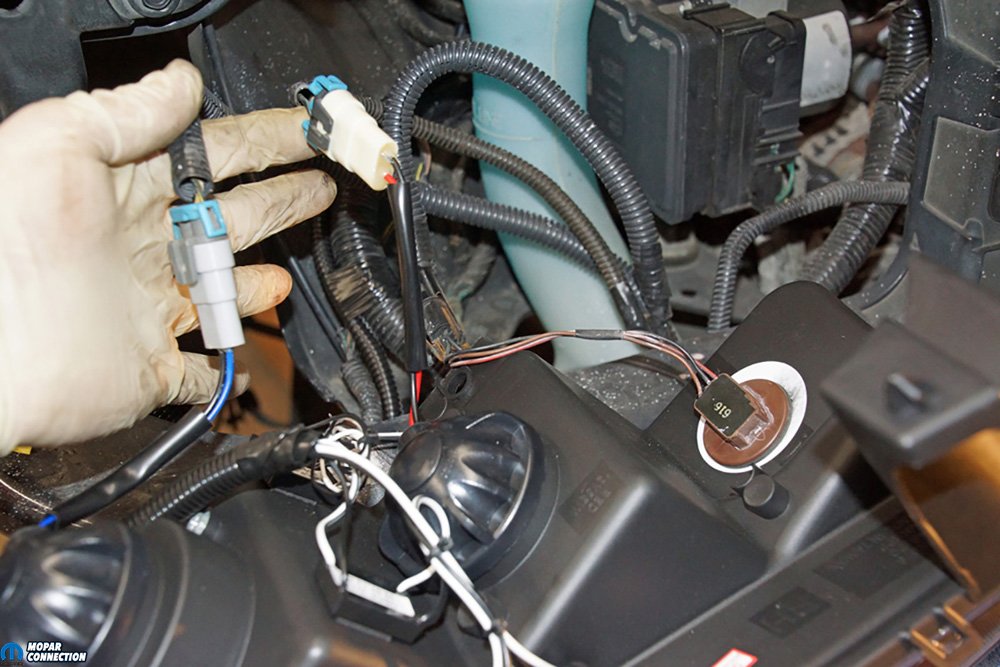
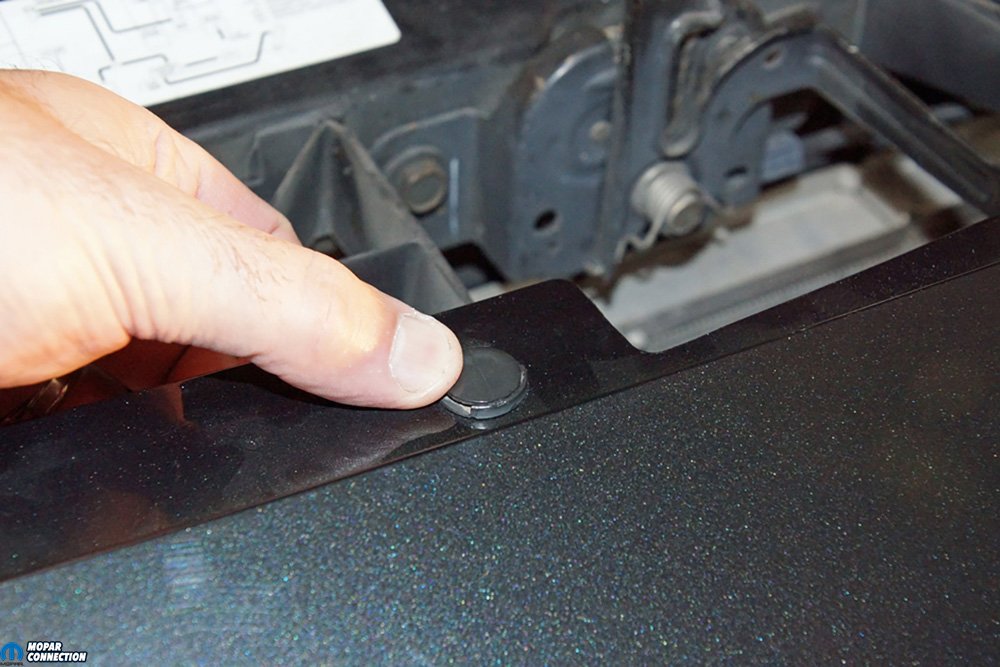
Above Left: The fog light harness had to be installed into the Totally Integrated Power Module (TIPM or fuse box). Luckily the Chrysler engineers located the fuse box in an easily accessible area of the engine bay. Above Right: We had to fight with the white lock on the connector, but eventually, we released the lock and pulled the connector from the fuse box.

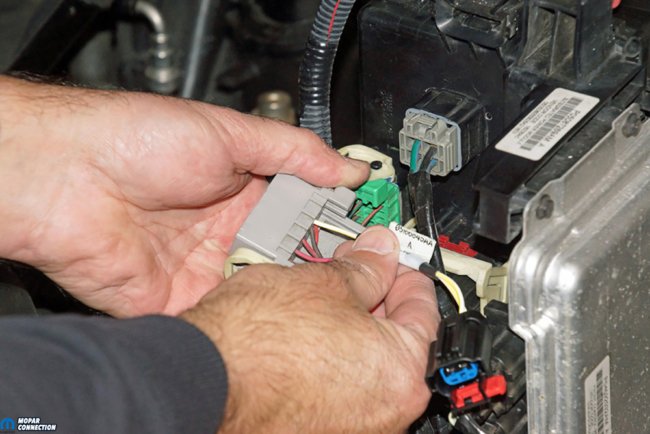
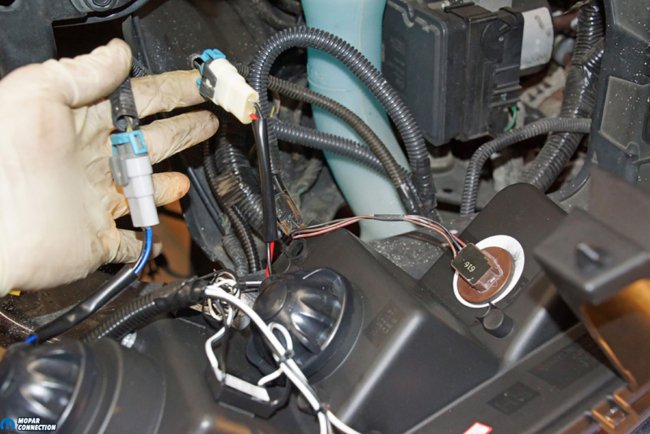
Above Left: The red retainer was released from the gray connector with a pocket screwdriver. The plastic was brittle, so we took our time not to damage anything while releasing the retainer. Above Center: The power terminal yellow wire supplied with the factory fog light kit was pushed into cavity 19 of the gray connector. Once the terminal clicked into the connector, we reinstalled the red retainer, and the connector was re-latched into the fuse box. Above Right: To follow the OEM wire routing, we taped the yellow power terminal wire to the factory harness. We plugged the fog light kit harness into the power terminal connector. The fuse box was hinged back down and clicked in place.
Soon after the purchase in 2014, the Charger became our test mule to evaluate parts. The Charger also established itself as our “company car,” which we used to haul our camera equipment to events and photoshoots. In 2020, with a small yet volatile segment of society having a problem with law enforcement officers, it was time to complete the Charger’s de-policing, beyond what was done in ’14-’15. We removed the push bar and the dual spotlights and installed a honeycomb grille, subtle blacked-out emblems, and matching black R/T badging.
The American Muscle headlamps came equipped with factory-type weather-pack connectors for the low- and high-beam lights. However, the factory blinker sockets and lights would be swapped from the original headlamps to the new housings. Each headlamp had three positive white (or white/black) wires and three negative black wires for the halo and light-emitting diode (LED) lights that needed to be attached to the fog light wiring circuit.

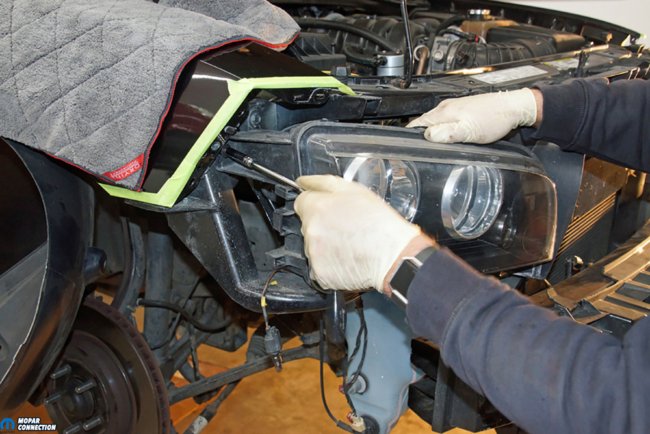
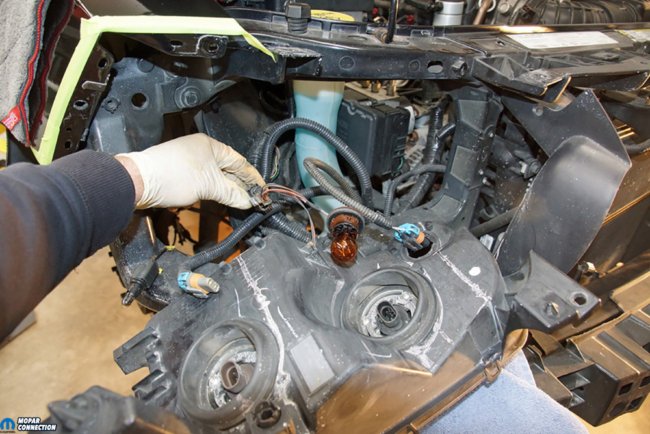
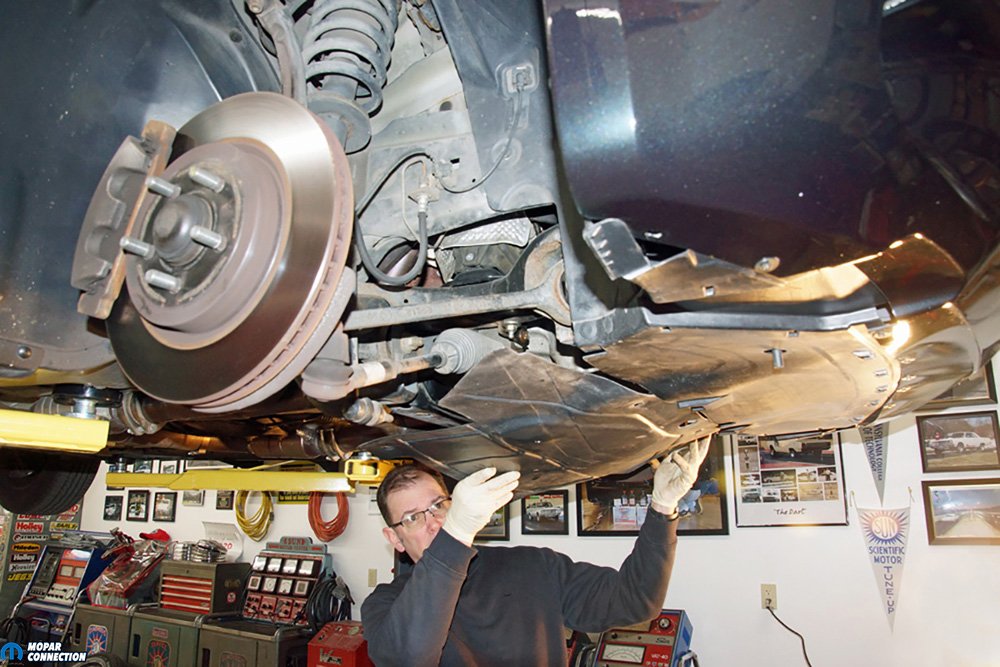
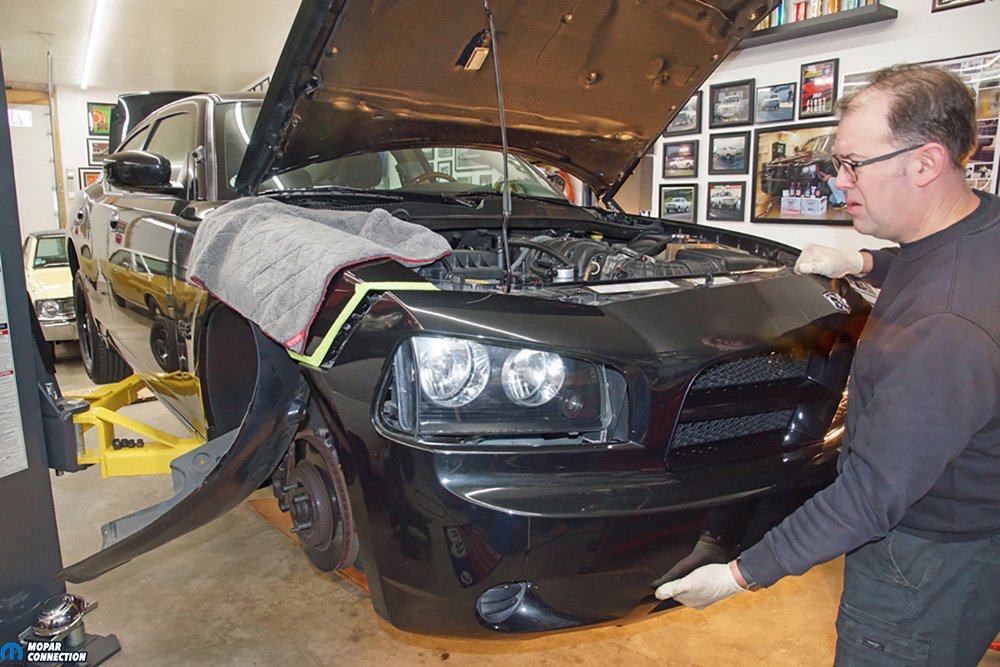
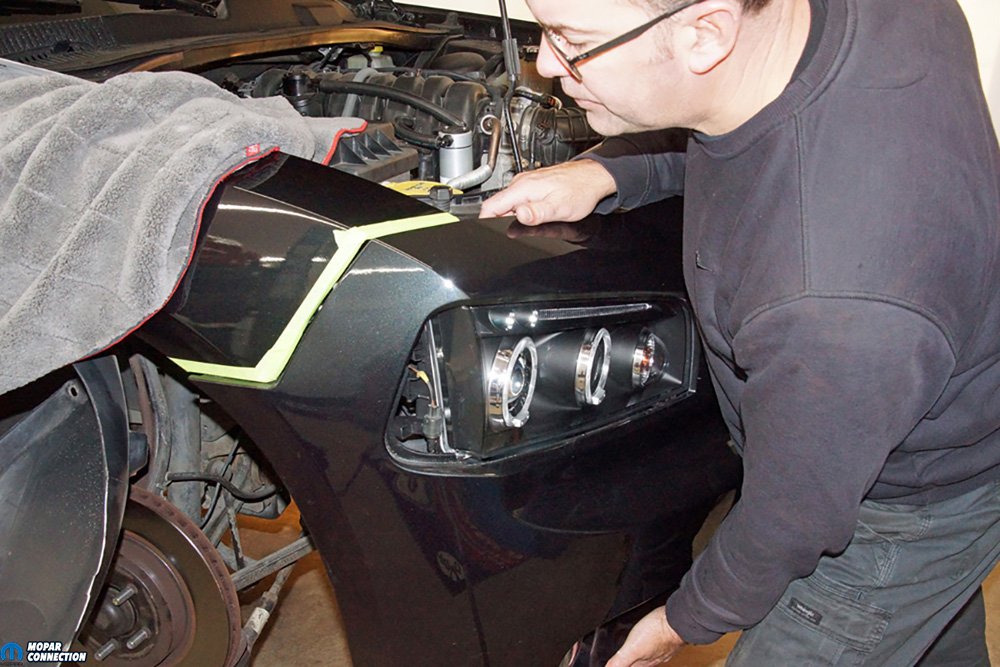
Above Left: We taped the fender seams to reduce the chances of chipping or scratching the fenders or fascia during the removal. The bumper cover is not heavy, but it is awkward, so a good grip at the top and the bottom provides the best control while removing it. Above Center: Once the fascia was removed, we had full access to the headlamp assemblies. Three bolts retain each housing to the radiator support. Above Right: We pulled the housing out and supported it on the bumper bracket. We unclipped the low- and high-beam connectors and unscrewed the blinker light from the factory housing.
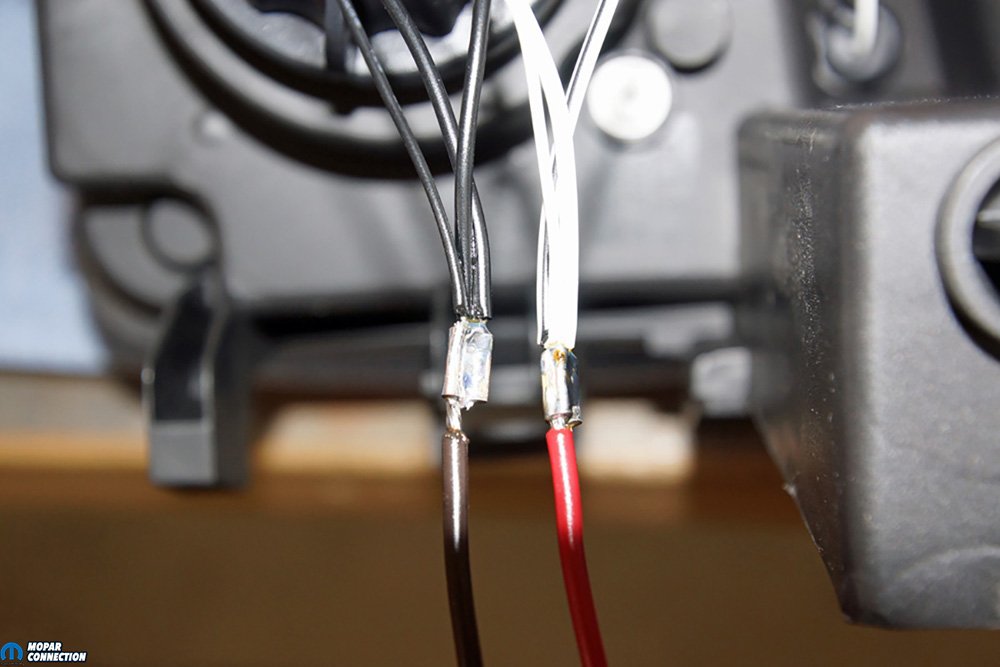
On each headlamp, we trimmed the white wires to the same length. The wires were crimped, soldered, and shrink-wrapped to a three-foot, 14-gauge red wire (one red wire per headlamp). We followed the same procedure of cutting, crimping, soldering, and wrapping the three black wires of each headlamp to a 14-gauge black wire (again one wire per headlamp).
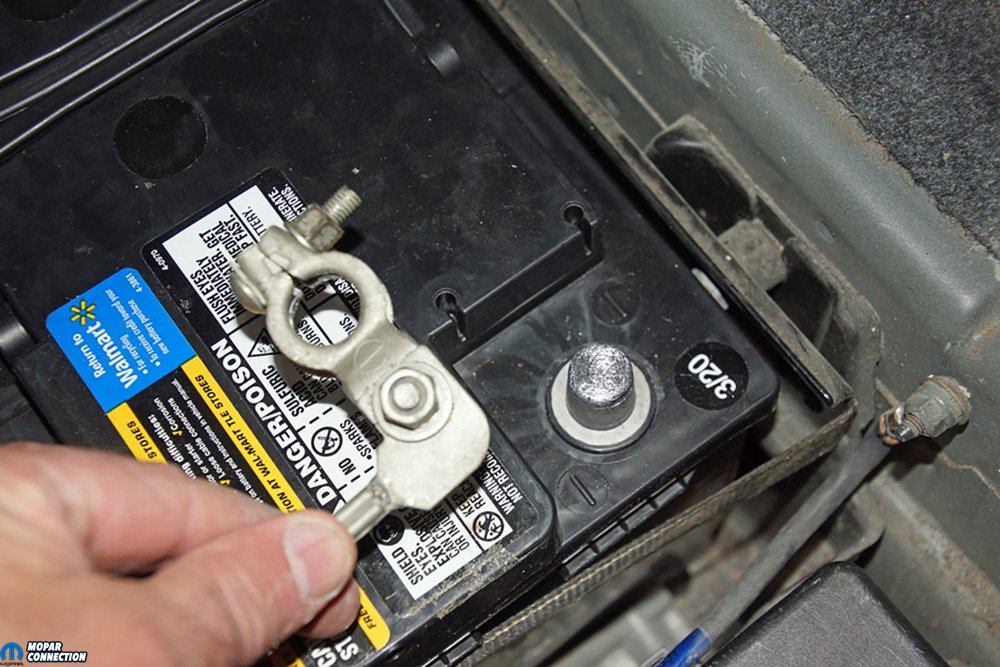
Once the headlamps were ready for installation, we disconnected the Charger’s negative battery cable from the trunk-mounted battery. Because our Charger did not have factory fog lights, we started with their installation. If the vehicle already had fog lights, the following information would not be relevant to the headlamp installation.

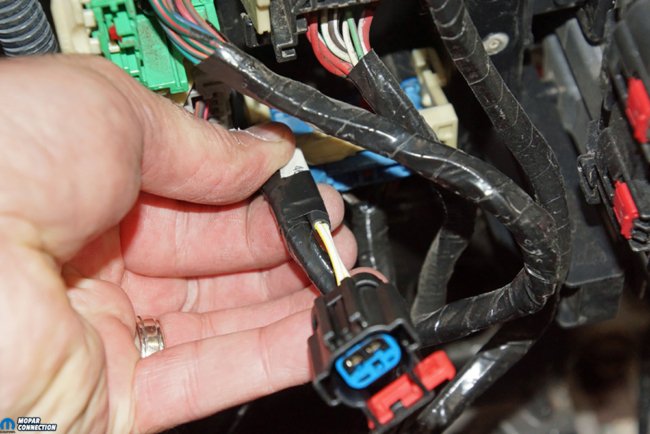
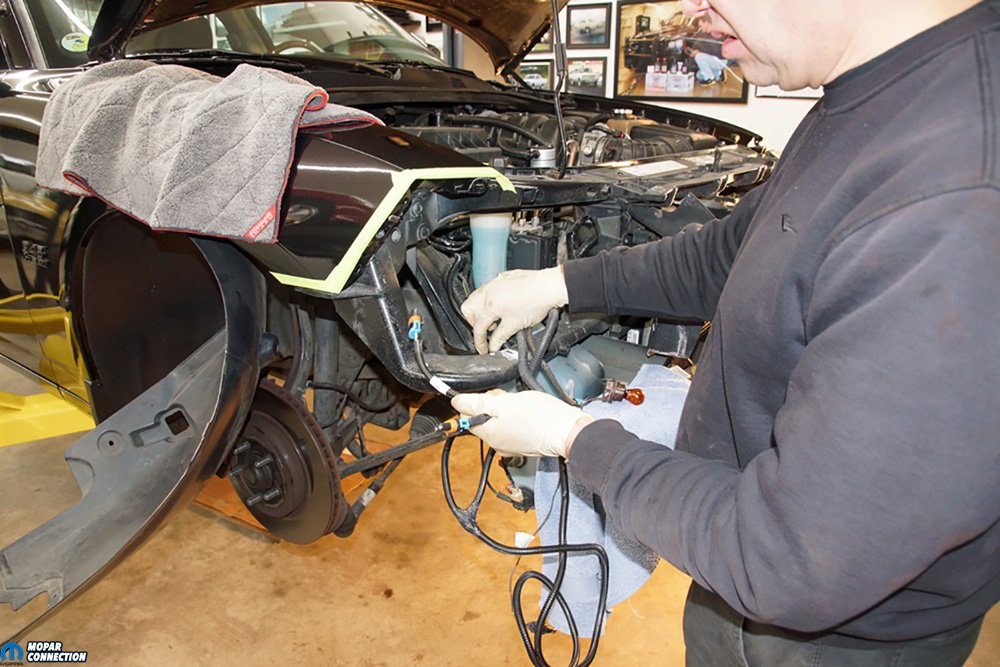
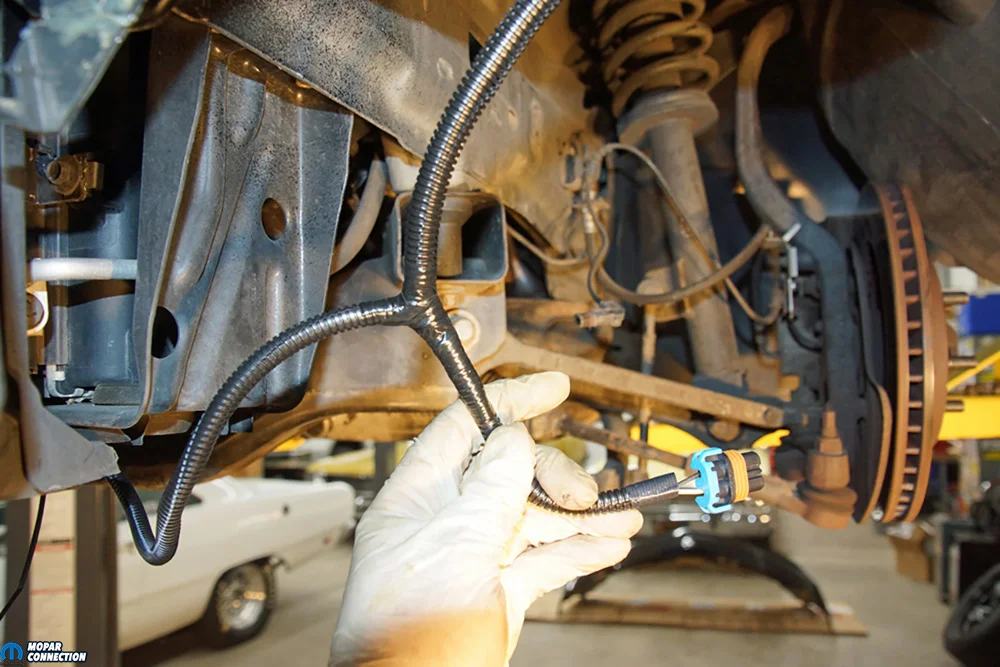
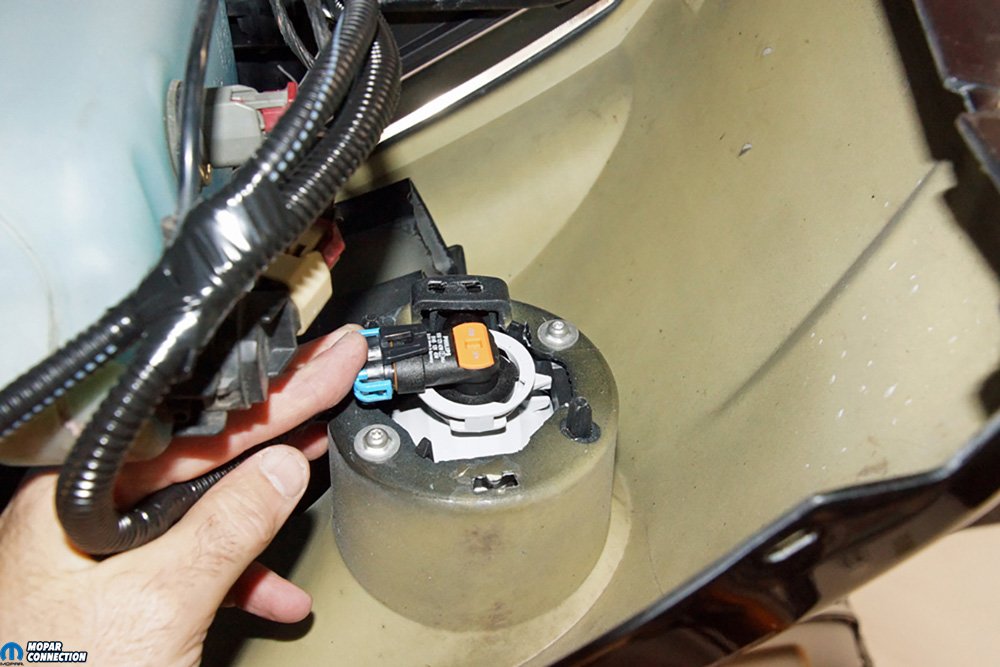
Above Left: We pulled the fog light wiring harness up from the lower apron area of the Charger. We needed to attach the Spec-D Headlights to the fog light harness positive and negative wires. Above Right: The factory connectors for the low- and high-beam clipped on to each light. We screwed the blinker light into the housing.

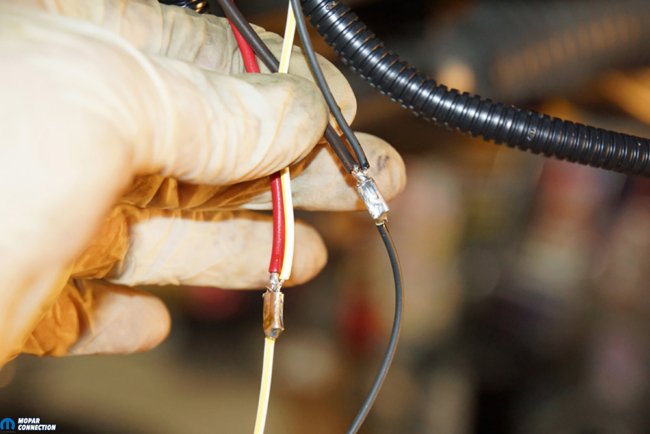
Above Left: The red and black wires we had soldered to the headlamps were routed around the bumper bracket down to the fog light wiring harness. We reused the three retaining bolts to secure the headlamp housing. Above Right: We crimped the red (positive) and black (negative) wires from the headlamp to the white/yellow positive wire and black negative wire from the fog light harness.
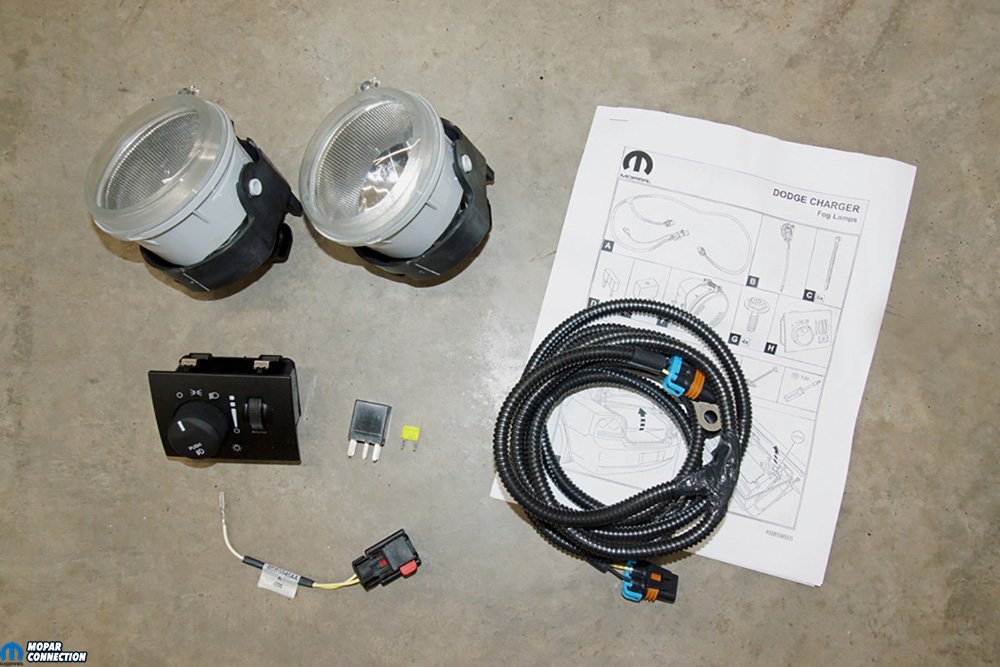
The factory fog light kit came with a wiring harness, relay, fuse, power terminal, light switch, fog lights, and mounting screws. Dodge designed easy accessibility to the underside of the Totally Integrated Power Module (TIPM or fuse box) by hinging the mounting bracket. With the fuse box swung up to expose the multi-wire connectors, we released the red connector lock, and the gray connector slipped from the fuse box. After removing the connector retainer, we pushed the yellow power terminal wire into cavity 19. Once the power terminal clicked into place, we reinstalled the retainer and secured the gray connector into the fuse box.
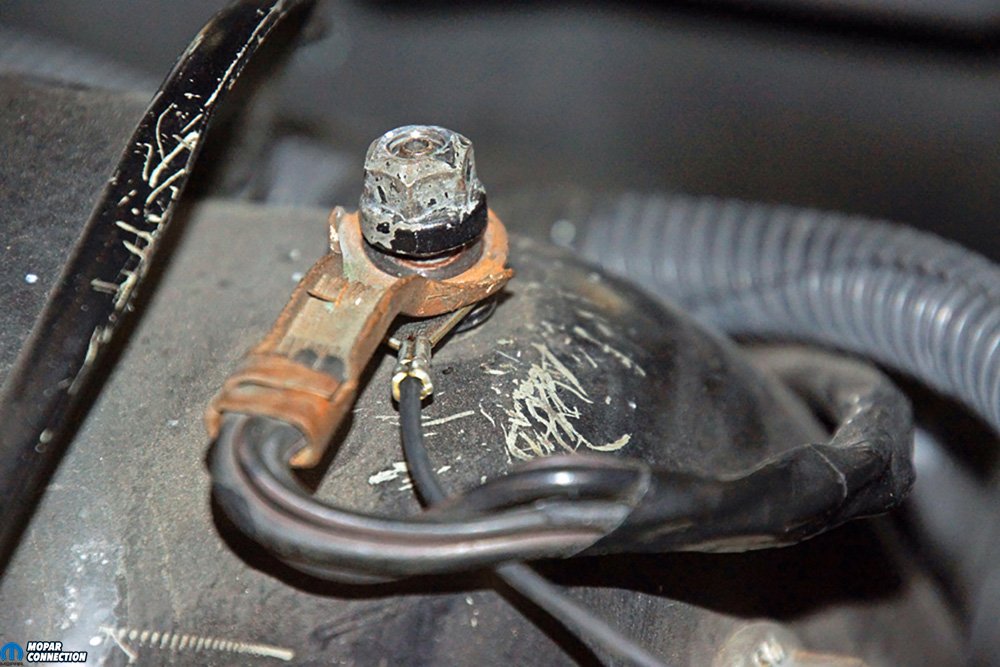
With the gray connector reattached, we snapped the weather-pack fog light wiring harness connector to the power terminal wire. The harness ground wire was fastened to a factory ground point at the strut tower. We torqued the ground nut to 133 in-lbs. and swung the fuse box back into place. The fog light kit included a 20-amp fuse and a relay, which we installed into the F7 and the fuse box’s relay E locations. Lastly, we ran the fog light wiring harness down the passenger side apron toward the Charger’s front end.
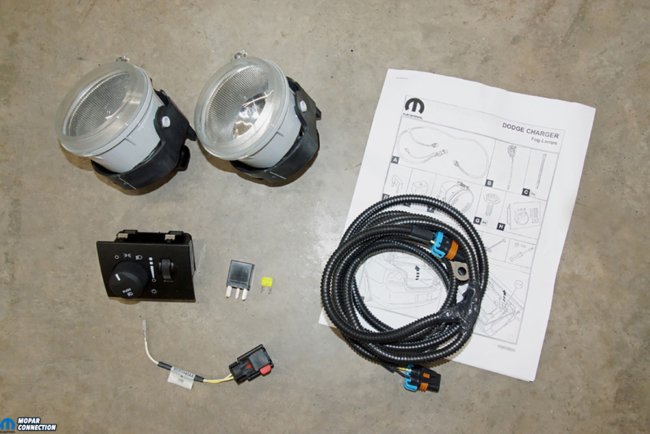

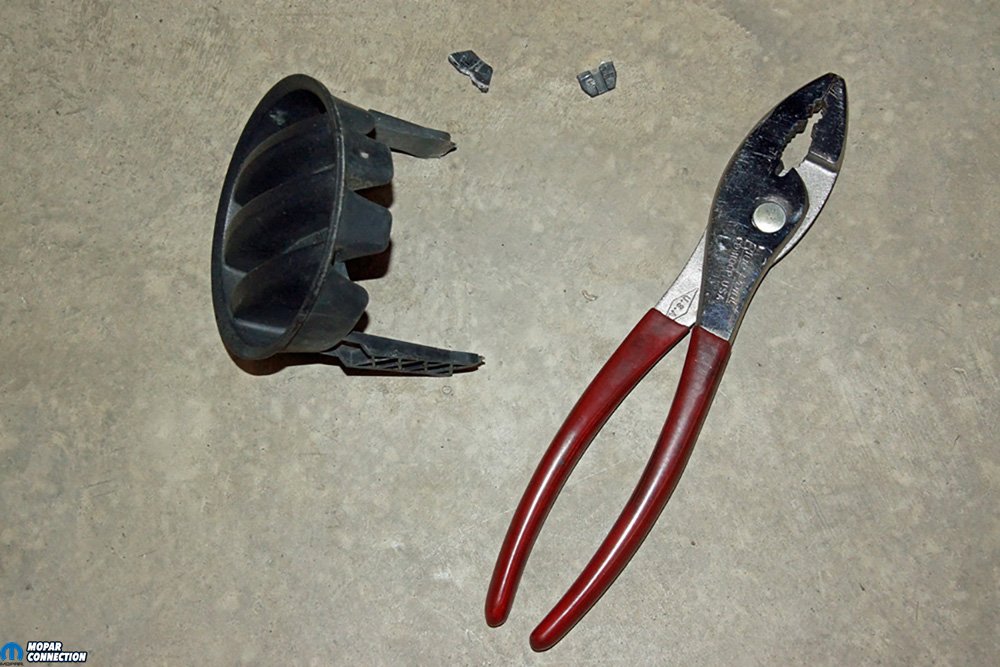
Above Left: We wanted to install a factory fog lamp kit at the same time as the Spec-D Tuning headlights. The kit included a wiring harness, relay, fuse, power terminal, light switch, fog lights, and mounting screws. Above Right: The retainer clips on the plugs were so brittle. We ended up breaking them while attempting to remove the plugs.

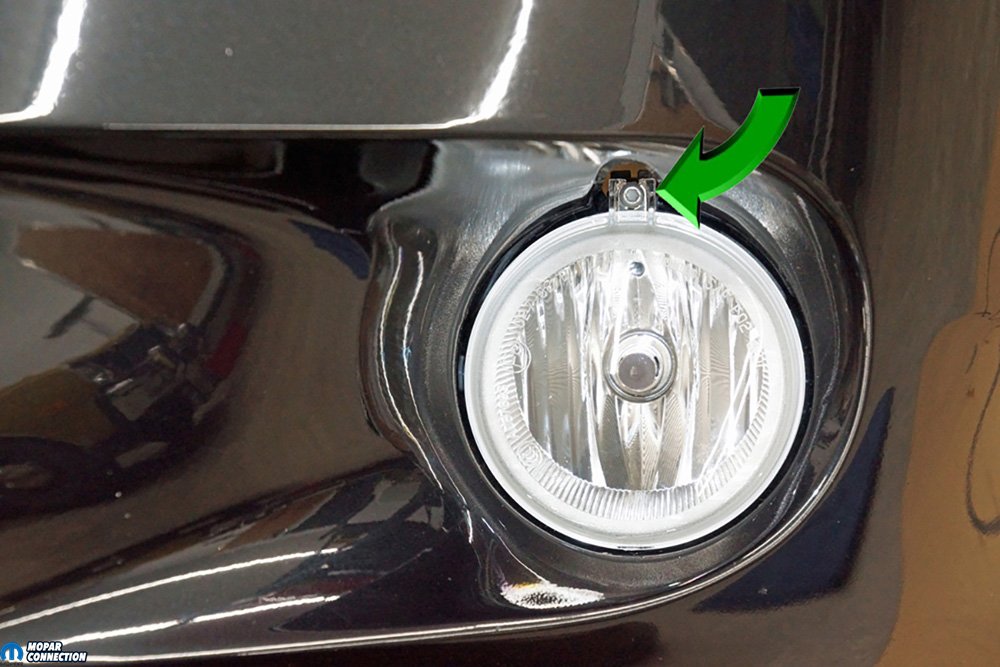
Above Left: The fog lights slipped into the fascia, and with the supplied fasteners, we secured the fog lights. Above Right: Although not necessary for our Charger, if the ride height had been altered, the fog lights come with an adjuster screw (green arrow) and instructions explaining how to achieve the correct lighting pattern.
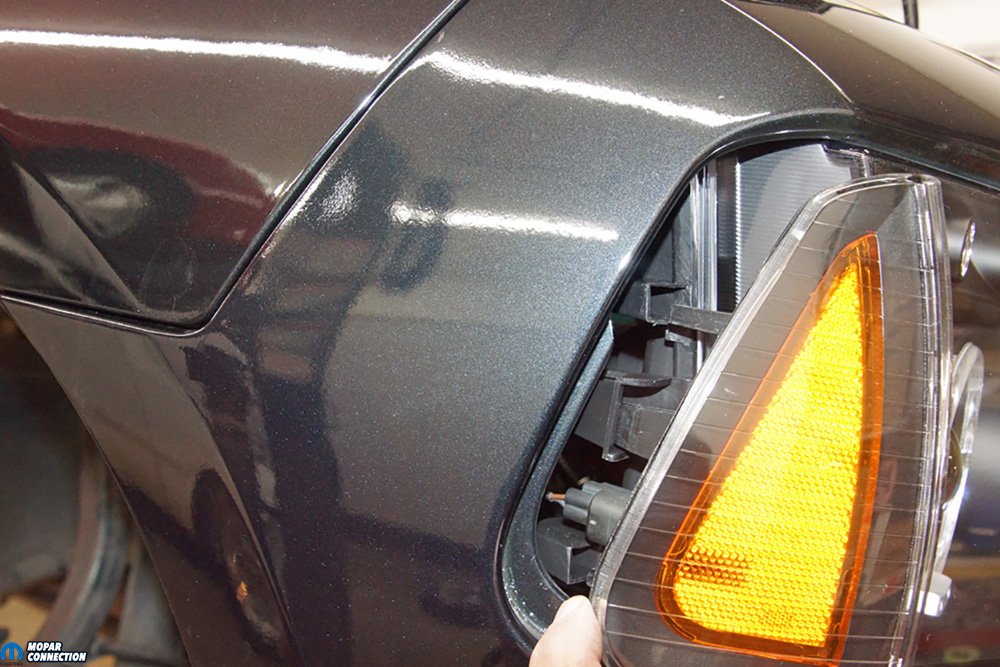
After completing the fog light wiring, we removed several screws and clips that fastened the fascia, two belly pans, the wheel well liners, and the ABS wiring to the Charger, which allowed access to additional bolts and retaining nuts. Although it appeared that we had removed every retainer, the bumper cover still did not release. It turned out there was a 10mm nut on each side of the fascia (at the front fenders) that could not be easily seen, but each was removable with a socket, extension, and ratchet. With the nuts backed off, the side marker lights were released from the headlamp retainer clips, and we pulled the cover from the front of the Charger.
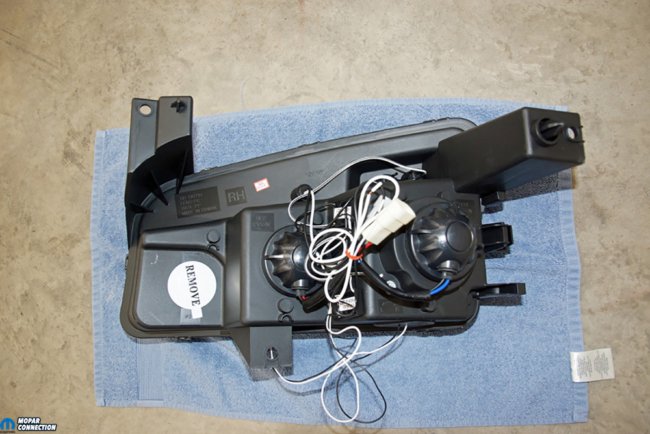
Once the fascia was out of the way, we removed the passenger headlamp retaining bolts from the radiator support bracket. We unscrewed the blinker socket and light from the housing. After removing the blinker light, we unclipped the low- and high-beam wiring connectors from the bulbs and detached the wiring harness clip from the headlamp. The housing was set aside; we would not reuse it.


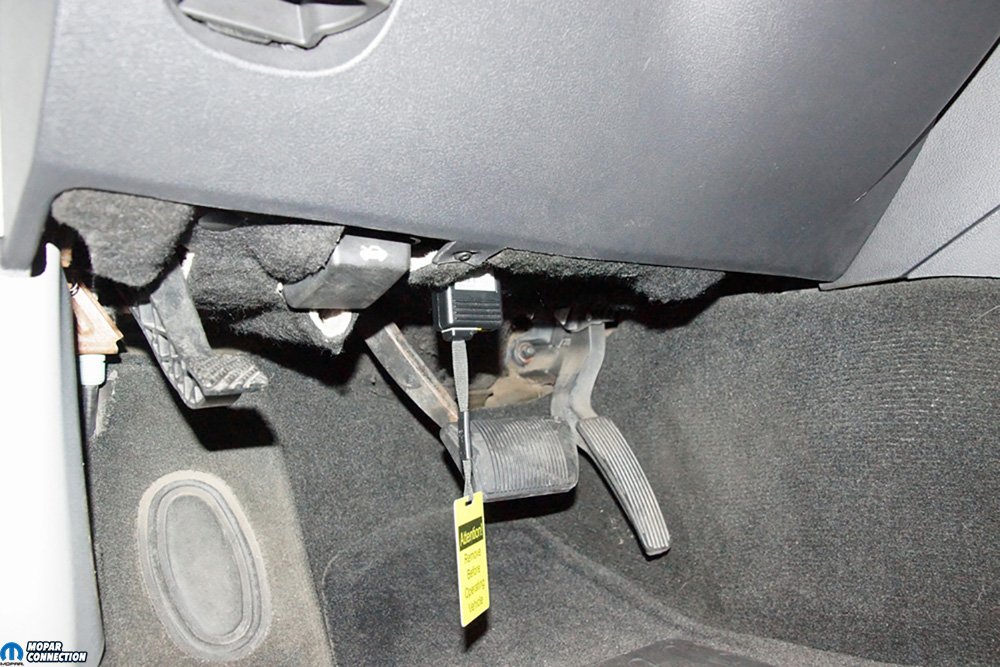
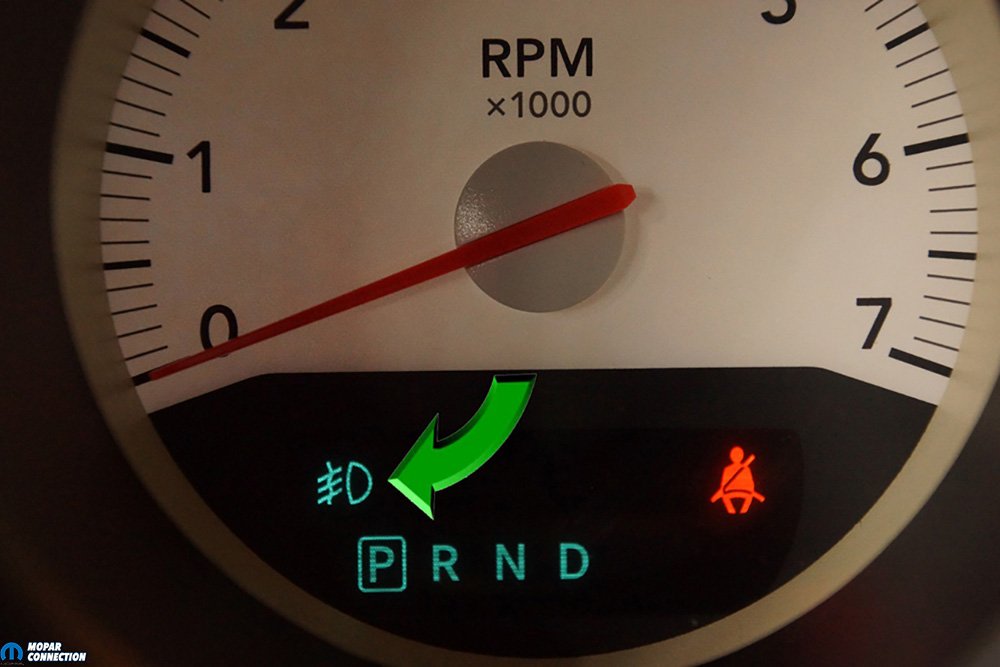
Above Left: The headlight switch had to be replaced with a unit that had the fog light depress option. We used an interior trim removal tool to pop the switch out without damaging the surrounding area. Above Center: The new switch that came with the fog light kit had all the same detents as the original, but with the addition of the fog lights. Above Right: To activate the fog light circuit, we had a Dodge technician update the Charger’s sales codes to include “dealer-installed” fog lights. Once the upload was completed, we clicked the headlamp switch to the park position and depressed and released the button. The fog light indicator (green arrow) on the cluster illuminated, and the fog lights turned on along with the halos and LEDs on the headlamps.
To assemble the Spec-D Tuning headlamp, we attached the factory low- and high-beam connectors to the installed headlamp bulbs. To finish the headlamp assembly, we twisted the blinker light socket into the housing and secured the wiring harness. We fed the red and black wires from the headlamp to the fog light area of the Charger. With the wires adequately routed, we secured the headlamp with the three factory bolts. Once the passenger side headlamp was installed, we followed the same installation procedure on the Charger’s driver side headlamp.
For the halo and LED lights to operate with the factory fog lights, we wired each headlamp red wire to the white/yellow wire of the newly installed fog light harness. We secured the black headlamp wires to the black wire from the same fog light harness. We could have used the supplied scotch locks, but we elected to crimp, solder, and shrink wrap all four connections (two for each headlamp assembly). The factory fog light harness was run from the passenger side to the driver side, just like the OEM. After completing the harness routing, we wrapped the headlamp and fog light harnesses in convoluted tubing that mimicked a factory technique.

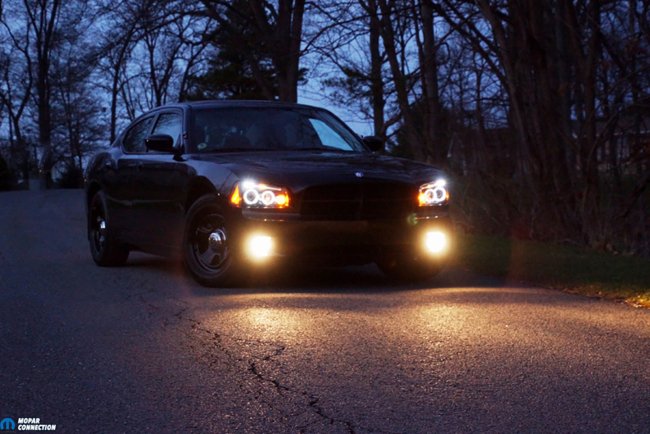
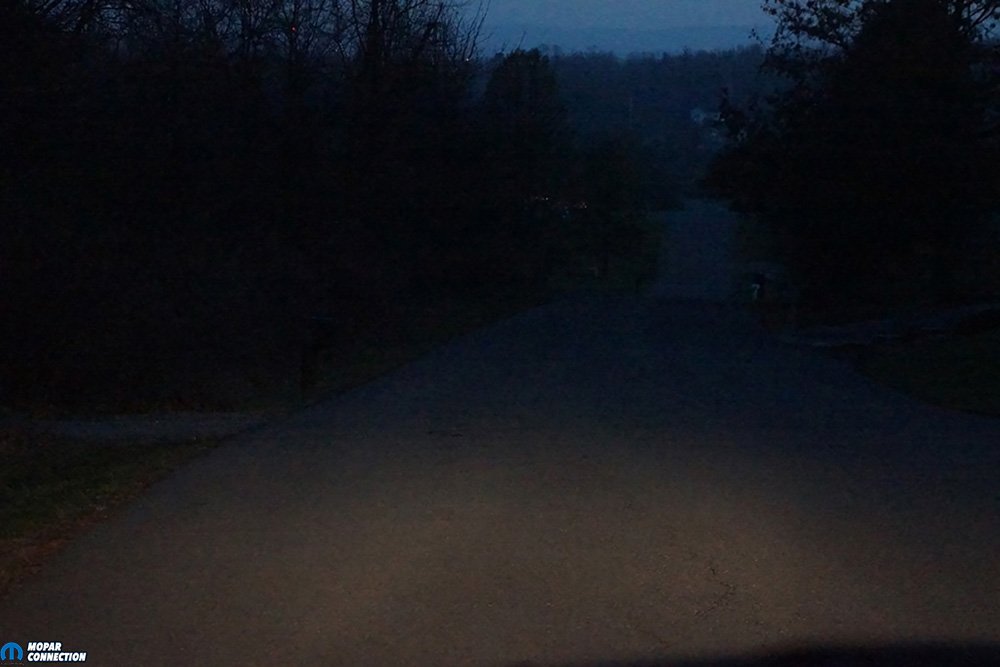
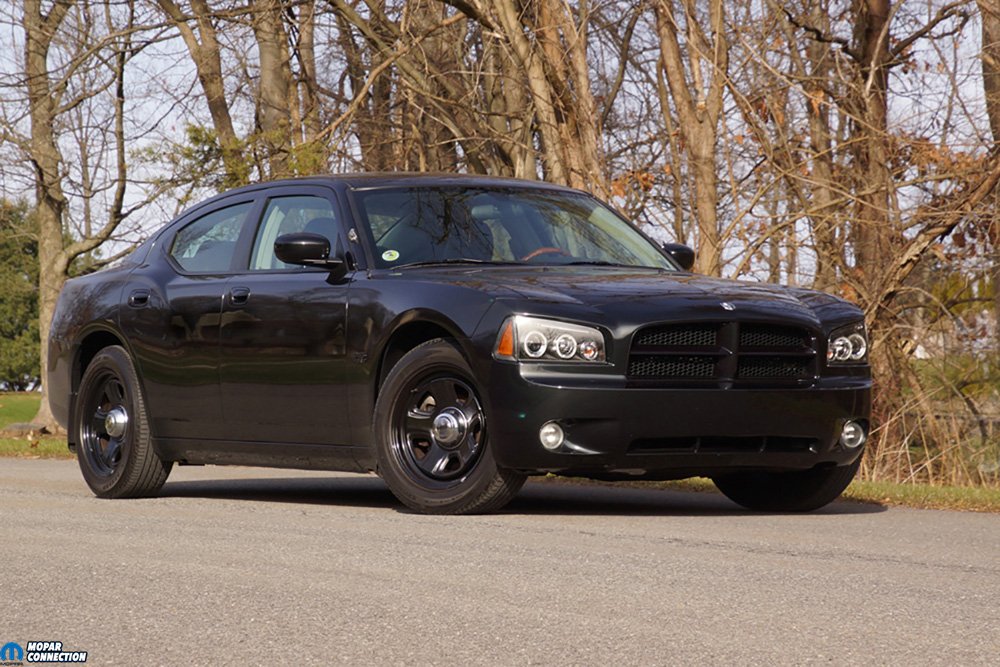
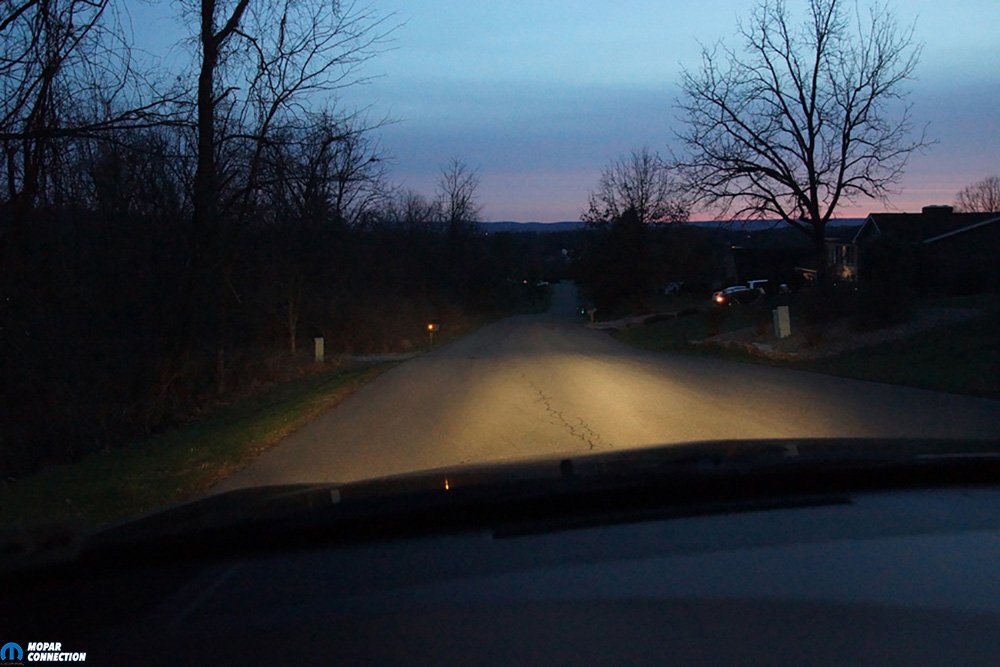
Above Left: Our Charger came with a Police Package option. When we purchased it in 2014, we had the hazy headlamp lenses sanded and cleared. It helped for a while, but have started to haze once again becoming dull. Also note there is no fog lights. Above Right: The Charger’s nighttime lighting is substantially improved. The Charger looks much less like a police car and more like an R/T. With the low-beams and fog lamps on, the lighting is excellent. The difference between the new setup and the old headlamps is like night and day.
Before the fascia re-installation, we had to remove the fog light plugs. After eliminating the plugs, each fog light was guided into the bumper cover receptacles and secured with the provided screws (two per fog light). Once the cover was assembled, we guided it onto the locating pins on the Charger’s front end and secured it with the factory bolts and nuts. We clipped the side marker lights to the headlamp housings. To finish the fascia installation, we connected the fog light connectors to the fog lights. We secured the lower cover, the two belly pans, the wheel well liners, and the ABS connectors with the remainder of the clips, screws, and bolts.
To have the fog lights and the headlamp halo/LEDs operate, we installed a new headlamp switch with a fog light button depress option. However, even with the fog lights and the new switch installed, the fog lights still needed to be “activated.” The activation usually required a Dodge dealership visit. However, we had a friend at a local Dodge dealership access Chrysler’s DealerCONNECT software and add the sales code (LNJ) option to our Charger’s list of build options. The other option would to run a separate toggle switch for the fog lights, but we wanted a factory look and function.

Above: Ok…show me. This is my best impression of Arnie Cunningham from the movie Christine. The new look of the Charger is spectacular. If you need new lighting, check out American Muscle to find the look for you.
After the sales code data upload, we went to Pennsylvania College of Technology to take advantage of its Mopar CAP equipment to activate our fog light circuit. With a Chrysler WiTech II scan tool, we downloaded the new information to the Charger. Once completed, the Charger’s fog lights, instrument cluster indicator, halos, and LEDs operated flawlessly.
With the Spec-D Tuning headlamps installed, we were pleased with the Charger’s aggressive appearance, but it was the illumination that really impressed us. The low- and high-beam forward lighting is broad and exceptionally bright. If your Charger already has factory fog lights, the installation of the headlamps takes an afternoon, but in our case, the installation took longer due to the fog light software update requirements. Are your Charger’s headlamps looking aged or is a new appearance desired? If so, then check out American Muscle’s Charger Store for headlamps (and other components) to update your ride.


