


Making big power and going fast is fun but breaking parts is not. With the aftermarket exploding with go-fast goodies for modern Mopars, it is becoming fairly easy to make big power from your Gen III HEMI. Although making big power is at the forefront of most enthusiasts mind, how that extra power will affect the rest of the vehicle is not. One of the most overlooked items until they break are driveshafts. Luckily GForce Engineering offers multiple drivetrain parts including driveshafts.
Waiting for parts to fail is not the best method of deciding when to upgrade. Being prepared for making big power will save you time, keep you from wasting track days, leaving you stranded, etc. It is a lot easier to reach the limits of stock components than you think. Just because you read online that a guy’s stock drivetrain on his Charger R/T has survived 1400hp and 50lbs of boost is not a valid argument on waiting to replace certain parts.

Above: Many of you might remember our trusty ’13 Dodge Charger R/T Daytona from previous articles trying to make a solid, bulletproof street machine.


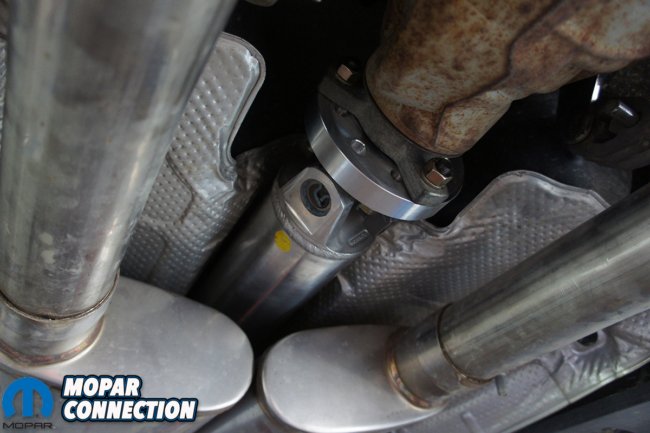
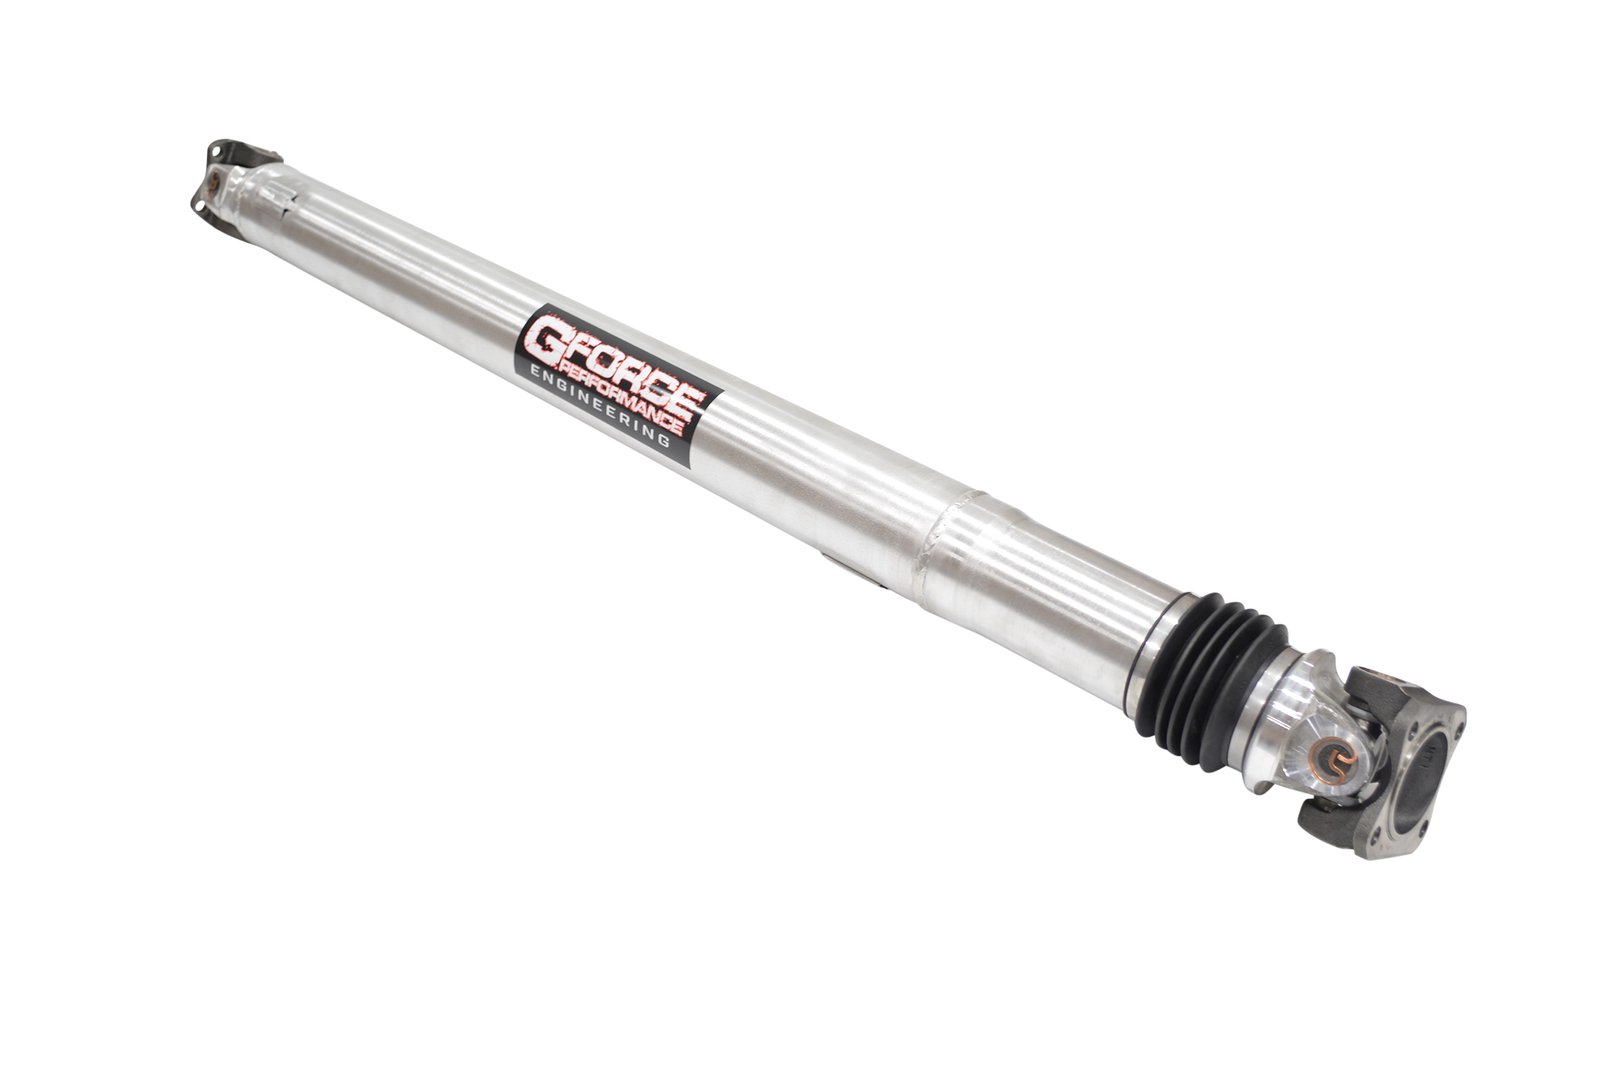
Above Left: GForce Engineering’s beautiful one piece driveshaft. Above Right: A closer look at GForce Engineering’s splined slip-shaft; a tightly fitted splined assembly allows the shaft plunge in and out but also gives the shaft the ability to spin vibration free with incredible strength.
Stock components are made to withstand the abuse of daily driving along with the torque and horsepower of the motor from the factory. When things like axles and driveshafts break, it can damage other parts of the car and put your safety at risk. This is why we called upon our friends at GForce Engineering for help with getting a new driveshaft in our 2013 Charger Daytona R/T.
The stock driveshaft in our Daytona is heavy and weak. Although the Daytona makes 370hp from the factory, a couple bolt-ons and a set of sticky Mickey Thompson tires will have the driveshaft looking like a pretzel. It utilizes rubber couplers at each end of the driveshaft that wear out quickly and does not transfer energy very efficiently.


Above Left: With the Daytona on the lift we can start removing the braces and exhaust. Above Right: We started by disconnecting the headers and then working our way back.
A little while back we installed new exhaust and tuned our Daytona to give our 5.7 Hemi a little more pep. You can read all about the installation of the Hooker Blackheart Exhaust and HP Tuners tune here. Although the stock driveshaft may handle the extra power for now, there are future plans for the motor that would surpass the limit of the stock driveshaft. There are a couple benefits we will gain immediately all while keeping peace of mind that our driveshaft will not be an issue at the track now or in the future.
GForce Engineering’s one piece driveshafts for modern Mopars are precision-engineered and designed to withstand high-horsepower. Whether you drive the car on the street or track, GForce’s one-piece driveshafts will handle it. While withstanding aggressive driving, it will provide you with mild manners you would expect from a modern vehicle. You will gain the best of both worlds, bullet proof parts that will hold up at the track and keep street manners for daily driving.

Above: With help of our transmission jack we were able to keep the exhaust in one piece and lower it down and out of the way.
Unlike the factory 2 piece driveshaft, GForce builds their driveshafts in one piece using 4” t606-T61 aluminum driveshaft tubing. With the removal of the CV joint and use of aluminum over the steel, the GForce driveshafts can shave 7+ pounds depending on your exact vehicle. That might seem like a small amount but it comes directly from the rotating mass in the drivetrain. This relieves stress on the motor which will free up a couple ponies as just one added benefit.
Not only will shaving weight help the motor but also help the transmission. Less weight sitting on the front of the shaft lessens the stress on the output shaft and seals. This will lead to a prolonged life of the transmission.


Above Left: With exhaust out of the way, we have access to the driveshaft and heat shields. Above Right: We were able to leave the rear heat shield with some massaging but the middle one had to go.
GForce driveshafts are all aluminum, splined slip-shaft assemblies designed with a tightly fitted splined assembly that lets the shaft plunge in and out but also gives the shaft the ability to spin vibration free and with incredible strength. The splined area comes with a boot to protect it from dust and other road debris. All GForce driveshafts come equipped with solid core, heavy-duty U-joints front and rear.
Every driveshaft GForce builds receives a high speed balance on some of the best equipment in the industry. Balancing is done to eliminate noise, vibration and harshness (NVH). They balance each shaft between 7-8,000 rpms to ensure it stays perfectly balanced on the track or during commute to work.

Above: We needed to put the car in neutral to spin the driveshaft around for access to all the bolts. Be sure to not leave the car in neutral for too long as the car will not shut off and could drain your battery if left alone.
They also ditch the factory rubber couplers found at the differential and transmission. These couplers wear out and will not withstand a lot of torque. Adding more power and big sticky Mickey Thompson tires, the rubber couplers can tear and come apart quite easily. GForce uses CNC machined billet couplers in place of the rubber. The solid billet couplers ensure every bit of power is transferred directly from the transmission to the differential. The billet couplers will not rip like the stock rubber ones and weigh a lot less also.
Along with the billet couplers, GForce uses solid core HD u-joints at the front and rear of their driveshafts. The solid core u-joints are stronger and do not require any service unlike the greaseable u-joints. There is a lot of debate on greaseable vs. solid u-joints but the guys at GForce explained that when it comes to withstanding big power having solid u-joints is the only route. There is a reason your grandpa’s John Deere has greaseable u-joints.


Top Left: If you are lucky, you can remove the 3 bolts going to the transmission and pop the coupler off with driveshaft. Top Right: The rear of the driveshaft is set up the same as the front. Bottom Left: We left the carrier bearing mounted to help hold driveshaft up until we got both ends of the driveshaft loose. Bottom Right: The rear was stubborn and had to remove all the bolts and pry driveshaft off the coupler and then pry coupler off.
When we ordered our driveshaft from GForce all we had to do was tell them our make and model. They have all the dimensions for all the popular modern Mopar platforms including Challengers, Chargers, 300s, Magnums and Grand Cherokees. We did not need to fill out measurements or any extra work. The only reason they may need additional information from you would be due to transmission or differential swaps.
Once we ordered our driveshaft it did not take long for it to show up on our doorstep. When the packaged arrived we were eager to get it installed. Picking up the box we worried they forgot the driveshaft because it was so light. After unboxing the driveshaft we made sure that all the bolts and adapters were present. Our next stop was the shop for installation.


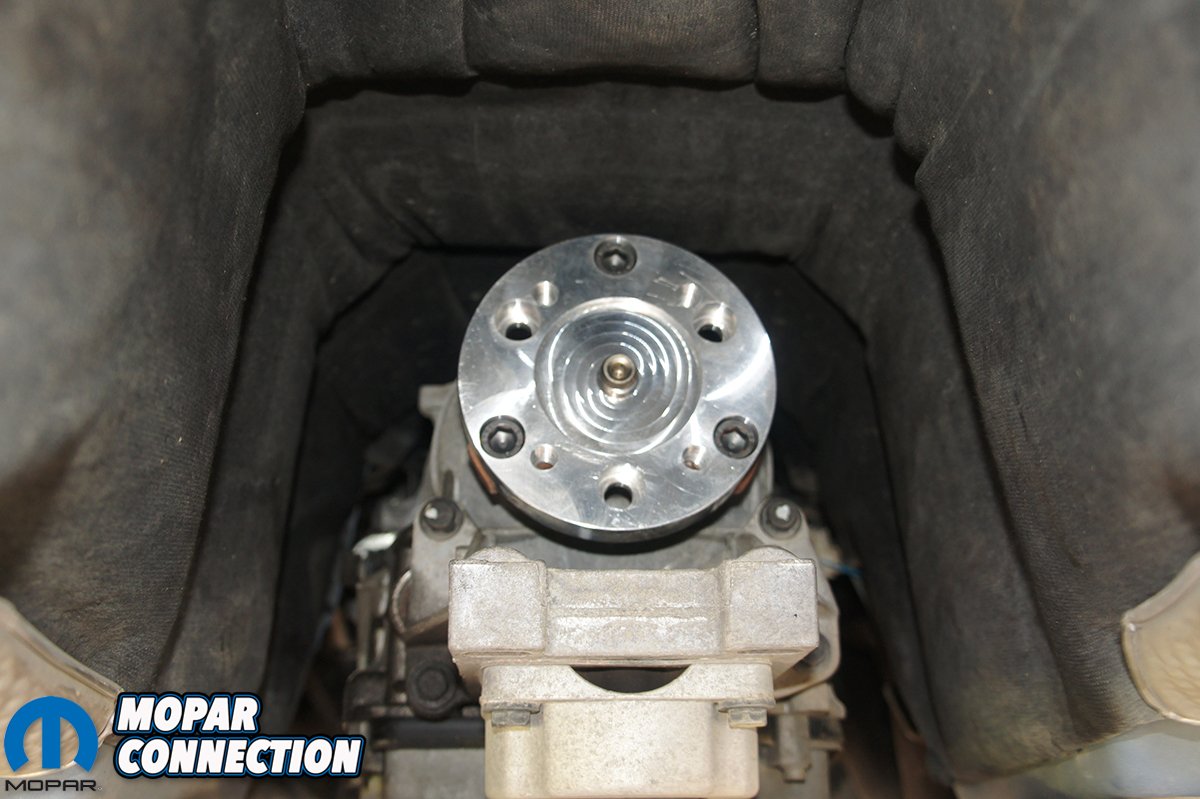
Above Left: The rear differential has an alignment pin the factory driveshaft slides onto. Above Right: You can see that our rear rubber coupler did not come off as easy as it should have been.
The installation of the driveshaft could be done in your driveway on jack stands if you do not have access to a lift. Plan on a whole day to install incase of any hiccups. We had to remove our Hooker Blackheart exhaust from the headers back along with a few other items. Luckily we had access to a lift which made the installation a breeze.
Once we got the Daytona on the lift we needed to get the old shaft out. Unlike the older cars, the drive shaft is tucked up in the floor tunnel and hidden by heat deflectors and exhaust pipe. The first step was to remove the Hooker Blackheart exhaust. Luckily we recently installed it and removing it was fairly easy. Everything came back apart without much hassle. With the help of our transmission lift we were able to remove the exhaust in all one piece.


Above Left: A side by side comparison of GForce’s one piece and the factory Dodge 2 piece driveshafts. Although the GForce shaft looks bigger, it weighs a lot less. Above Right: Our rubber coupler was in good shape but after time it would dry out and crack. Not to mention the give the rubber has vs GForce’s CNC machined adapter.
Before removing the exhaust, we needed to remove both body braces which were simple. Having an extra hand or in our case an extra ratchet strap and transmission jack can really help. The full exhaust is not light, although its lighter than stock it is still heavy and awkward to handle by yourself. Using the transmission jack and a ratchet strap we were able to hold it in place and lower it down safely by ourselves.

With the exhaust out of the way we had complete access to the factory drive shaft. Looking at the stock driveshaft it’s a wonder it can handle much power at all. Although it is made of steel, the shaft is very small in diameter and made up of two pieces. Factory utilizes a carrier bearing to support where both shafts are connected. Again for factory vehicles this is a great design, for the track it is not.
We loosened the two bolts holding the carrier bearing but did not remove it yet. We moved to the transmission side and started removing the bolts from the rubber coupler. To save you some time you should only need to remove the bolts to the transmission flange, leaving the coupler bolted to the driveshaft. We also put the car in neutral to allow the driveshaft to spin for better access to all the bolts.
Once the front bolts were out and the rubber coupler was loosened from the transmission flange, it was time to repeat it at the differential. The same process was used at the rear of the car. Only the bolts going to the differential flange would need removed. Driving the Daytona through the winter has caused some corrosion and we had to remove the shaft from the couplers and then pry the couplers from the transmission and differential flanges separately.


Above Left: We used blue Loctite on the new bolts for the front and rear of the driveshaft. Above Right: Unlike the factory 3 bolt set up, GForce utilizes a 4 bolt setup from the driveshaft to the adapter.
With the old driveshaft out of the way we were ready to install the new shaft. GForce included grade 8 bolts and all the correct sizes we needed. The differential has some clearance issues if you do not use the correct length bolts. We used blue Loctite on all the bolts to prevent any nuts or bolts coming loose. You should always go back and check the bolts after a couple days of driving to make sure everything is still tightened.
Before we completely bolted the new driveshaft in we needed to make sure we had enough clearance. GForce’s driveshaft is 4” round which makes for a tight fit in the tunnel. There are 2 heat shields that might give you some trouble. The front one we removed, there was no way to modify it. The rear one by the differential we used a hammer to massage the shield. The new driveshaft just barely rubbed before we massaged it. If you are worried about it we suggest removing it also.


Top Left: We help up the new driveshaft and was just barely rubbing the factory heat shields. We could have remove them but with a little massaging we made it work. Top Right: You can see how close the heat shield comes to the driveshaft. Bottom Left: The splined slip-shaft joint can be mounted at the rear or towards the front, its user preference. We opted to mount it towards the front in hopes of keeping road debris away from the boot. Bottom Right: We bolted the exhaust back up and didn’t have any clearance issues.
With everything out of the way and enough clearance, we were ready for the shaft. First we bolted the billet couplers on the differential and transmission flanges. With both billet couplers installed, the driveshaft is ready to bolt into place. The GForce driveshaft can be installed with the rubber booted splined assembly to the front or rear. It does not make a difference either way. We chose to put it towards the front hoping it would receive less wear from road debris than facing the rear.
Now that the driveshaft and couplers are bolted into place and torqued down, it was time to reinstall the exhaust and body braces. The exhaust came close to the rear of the driveshaft but not close enough for any exhaust modification. The Blackheart exhaust cleared great.

After driving the car a few days to work we were pleased with the new driveshaft. We did not have any new noises, vibration issues or hard shifting. Honestly we could hardly tell that our driveshaft could withstand 1000hp. We were worried with the rubber couplers gone that shifting into gear would be very harsh but it was not. Neither big power or sticky tires will twist this driveshaft. Thanks to the guys at GForce Engineering, we have peace of mind that our driveshaft is not going to come apart and blow through the floor or cause any other damage.


