
We have be in need for a solution for our dash in Project Orange Crush. We have gauges that do not work, some that are useless and others have no values for exact readings. With our Edelbrock Pro Flo 3 EFI, the included tablet gives us a lot of info but still missing a few important gauges for the road. We called up industry leaders Classic Dash and AutoMeter Products for their help.
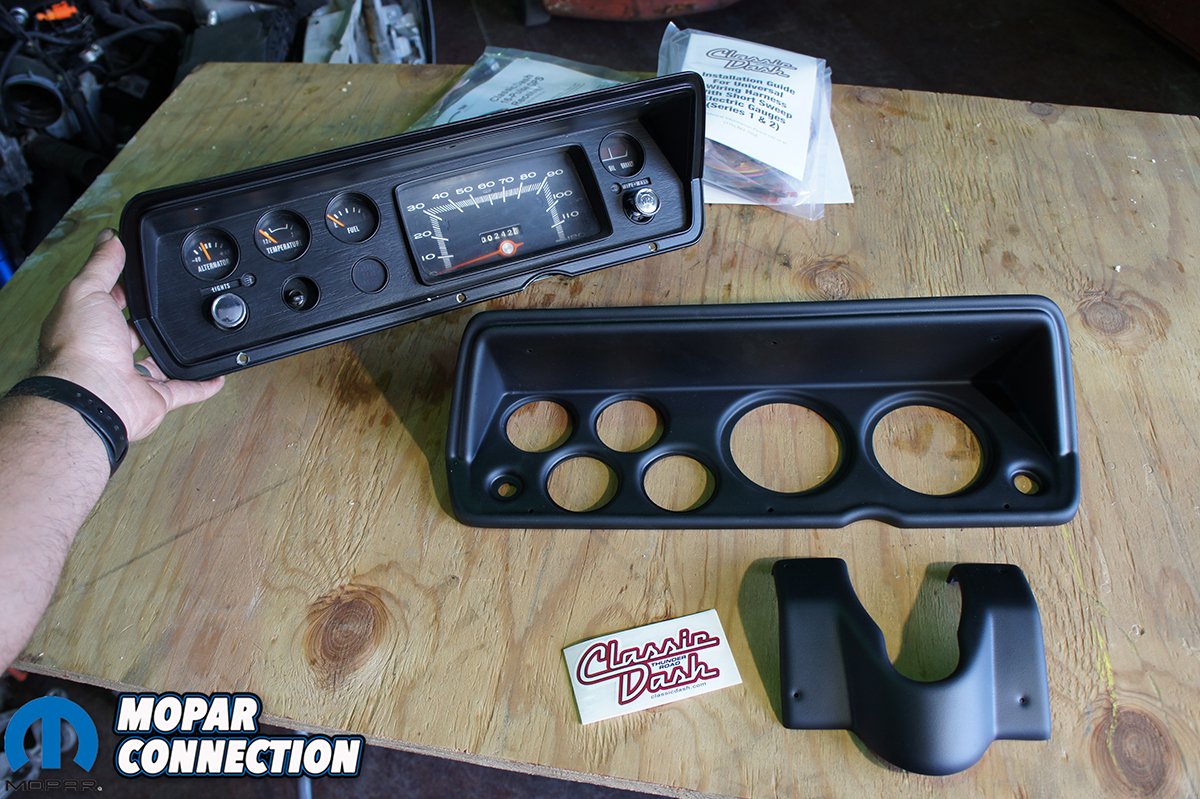
Classic Dash has focused on building quality ABS molded dash panels for a ton of different vehicles. They have a variety of Mopar dashes along with other manufactures across the board. Molded from factory pieces, their dashes have a O.E. like fit. Due to the lack of quality control on the classic cars there might be small modifications needed but nothing major. Each dash insert is made from a specialty 5/32-inch thick UV-resistant ABS composite material.
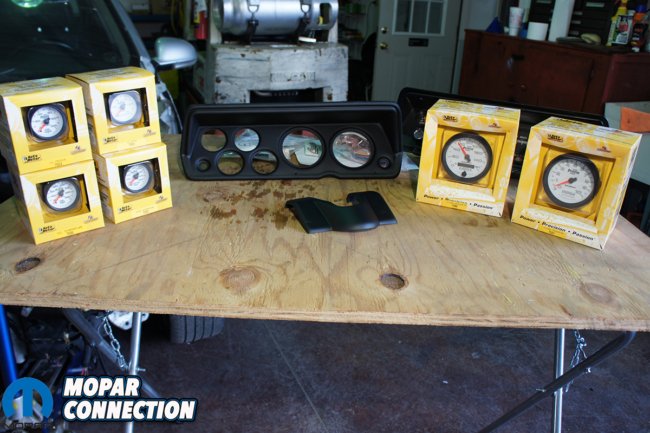
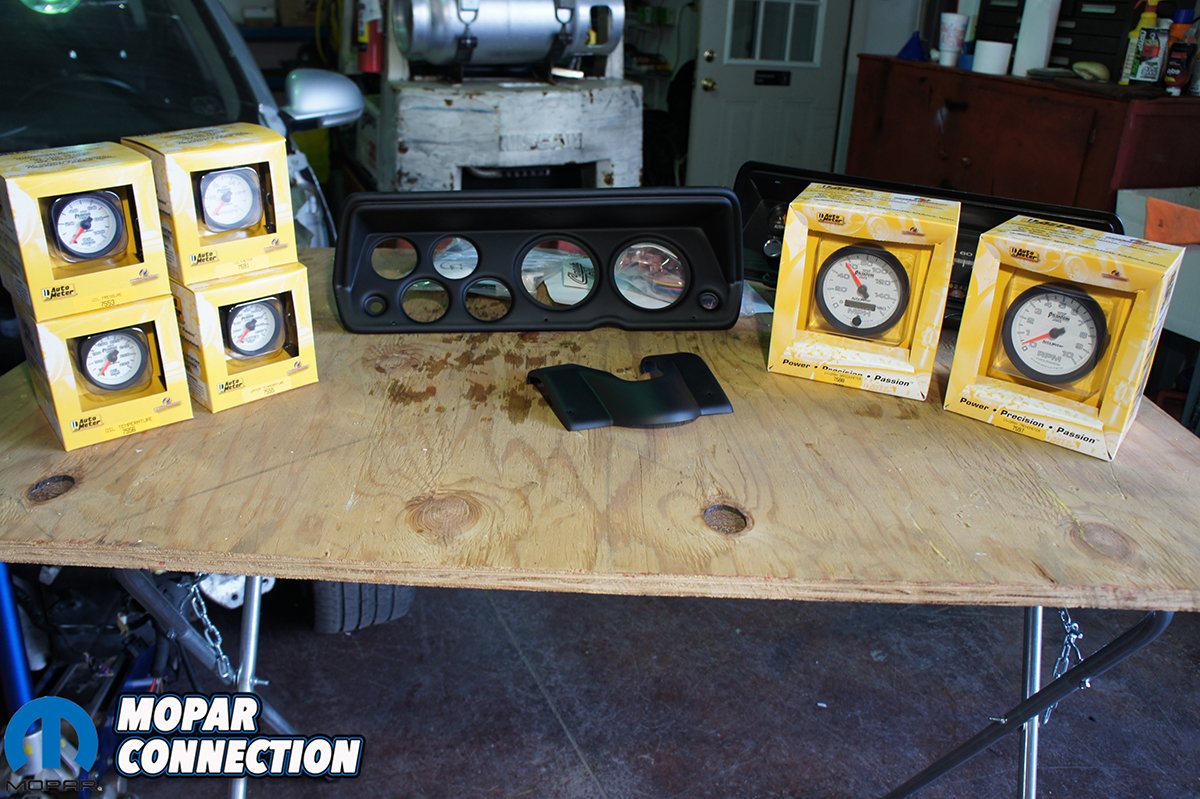
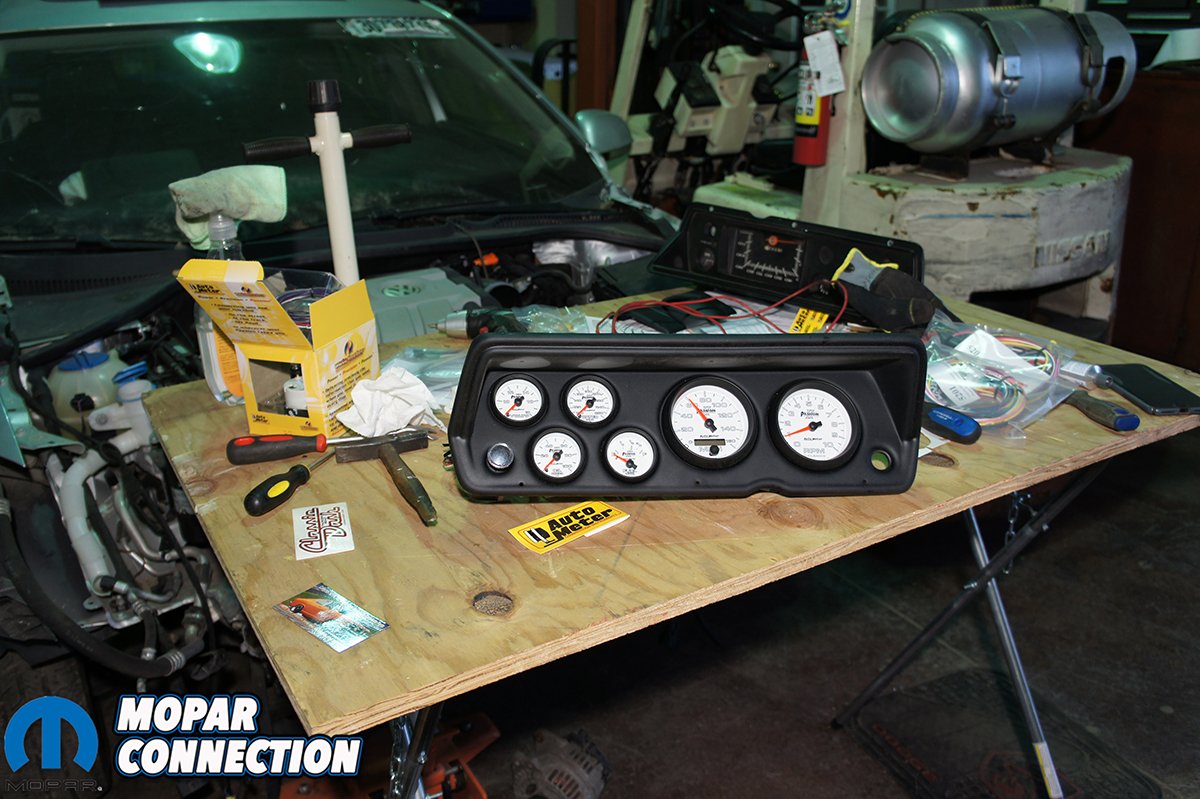
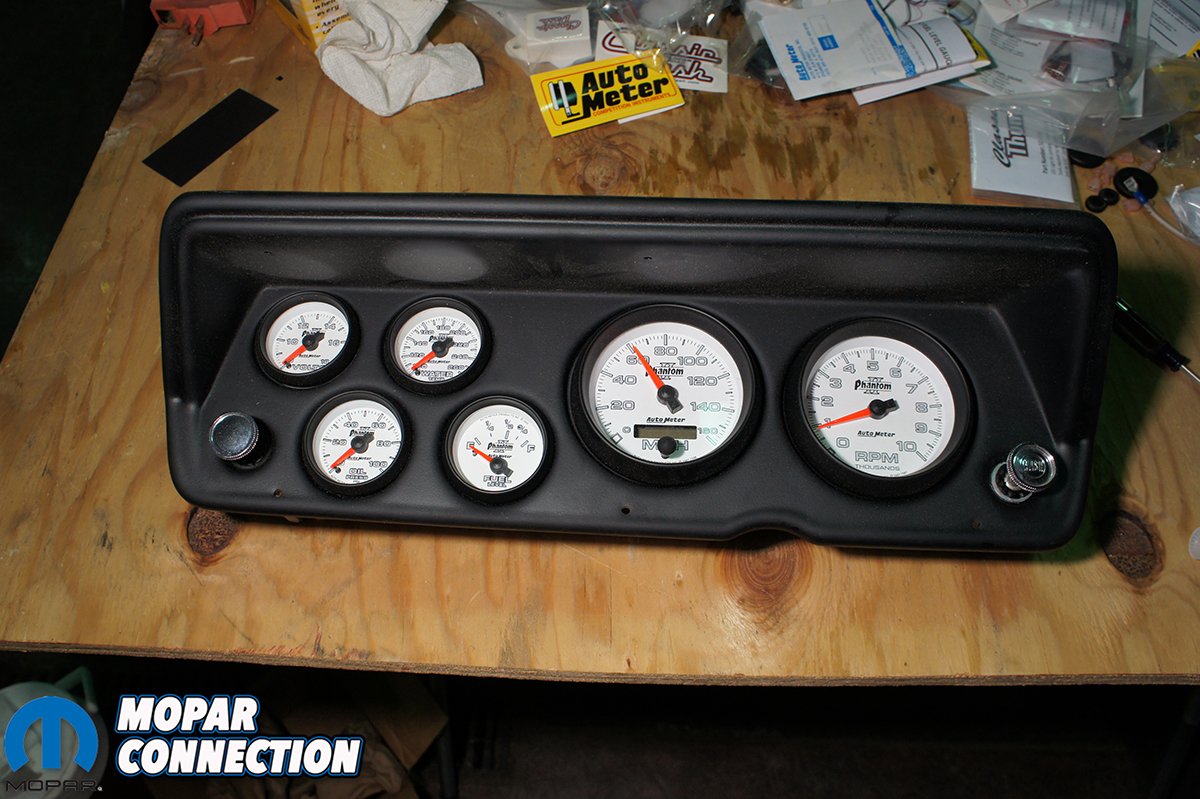
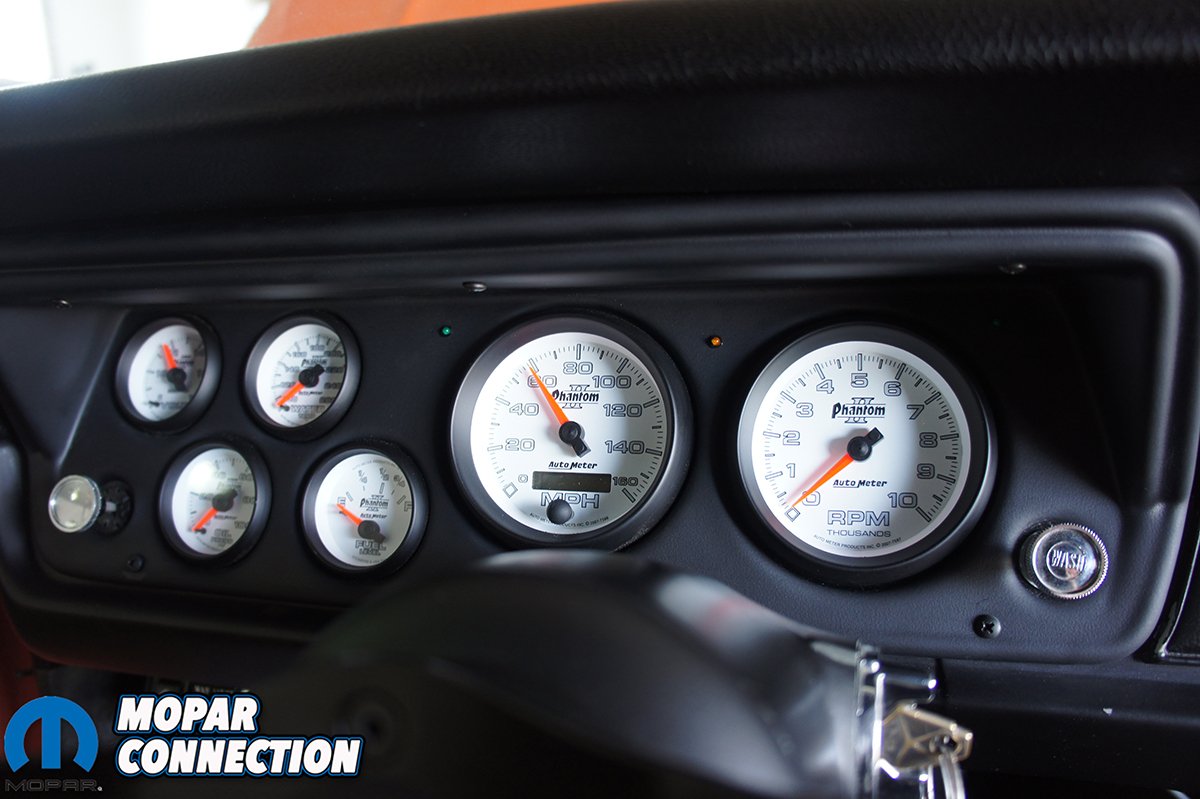
Above: AutoMeter Phantom II gauges and Classic Dash gauge cluster and steering column cover.
Since Orange Crush is far from stock, a custom dash insert was exactly what we needed. It would save us from cutting up our original dash or trying to build a custom panel ourselves. We would be able to complete the installation over a weekend and without removing the dash frame.
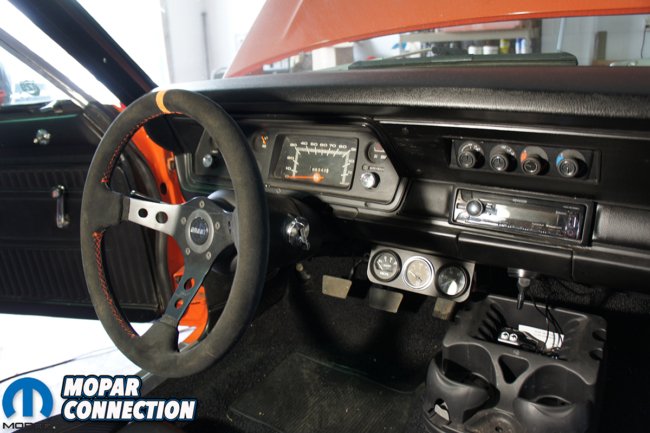
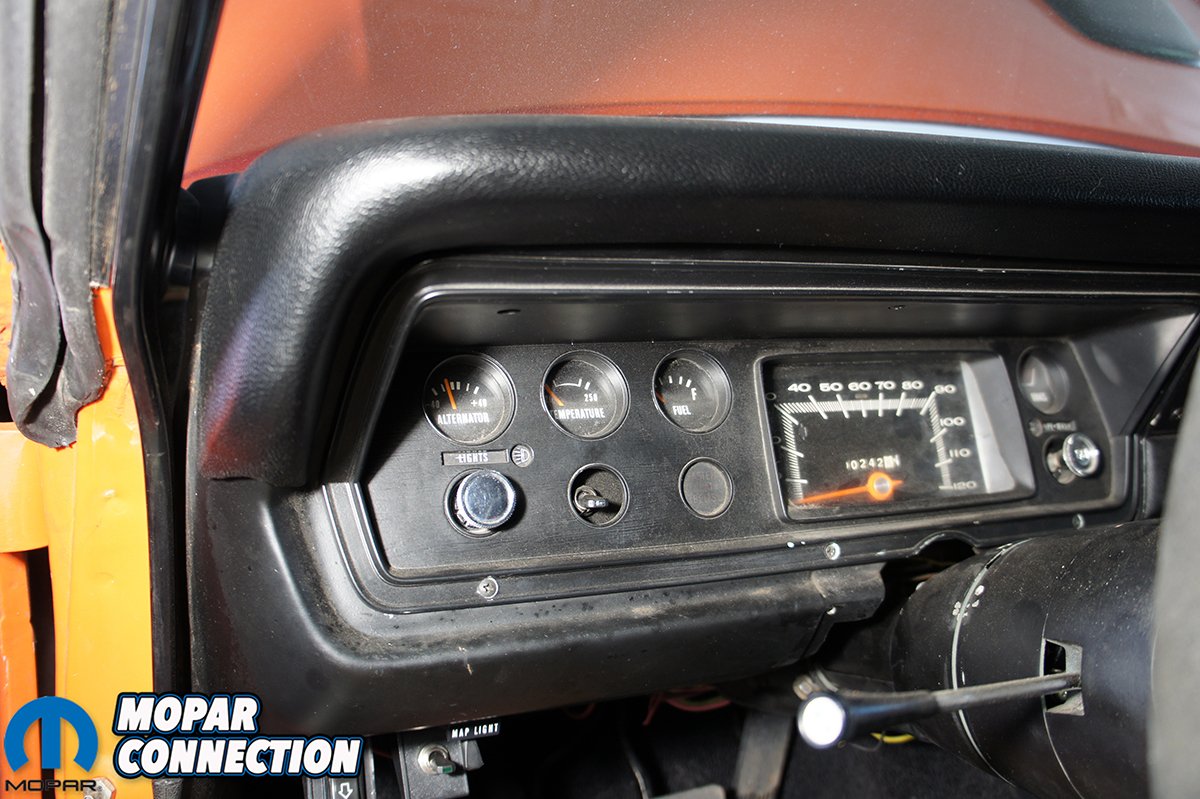
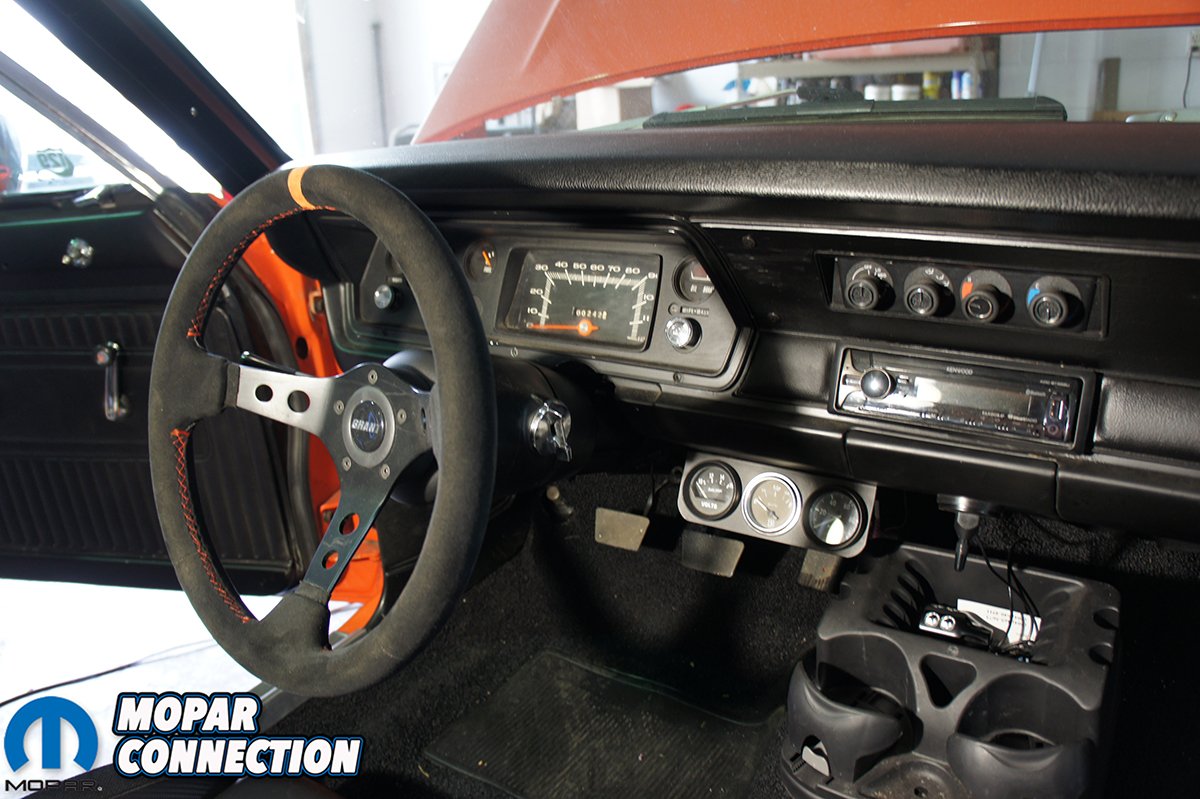
Orange Crush’s original dash gauges were vague and most stopped working. The speedometer took up the majority of the dash space and the other gauges stopped working or were bypassed for the Edelbrock Pro Flo EFI. We could have the dash restored but it would be a hefty cost and even then we would still have old vague gauges.

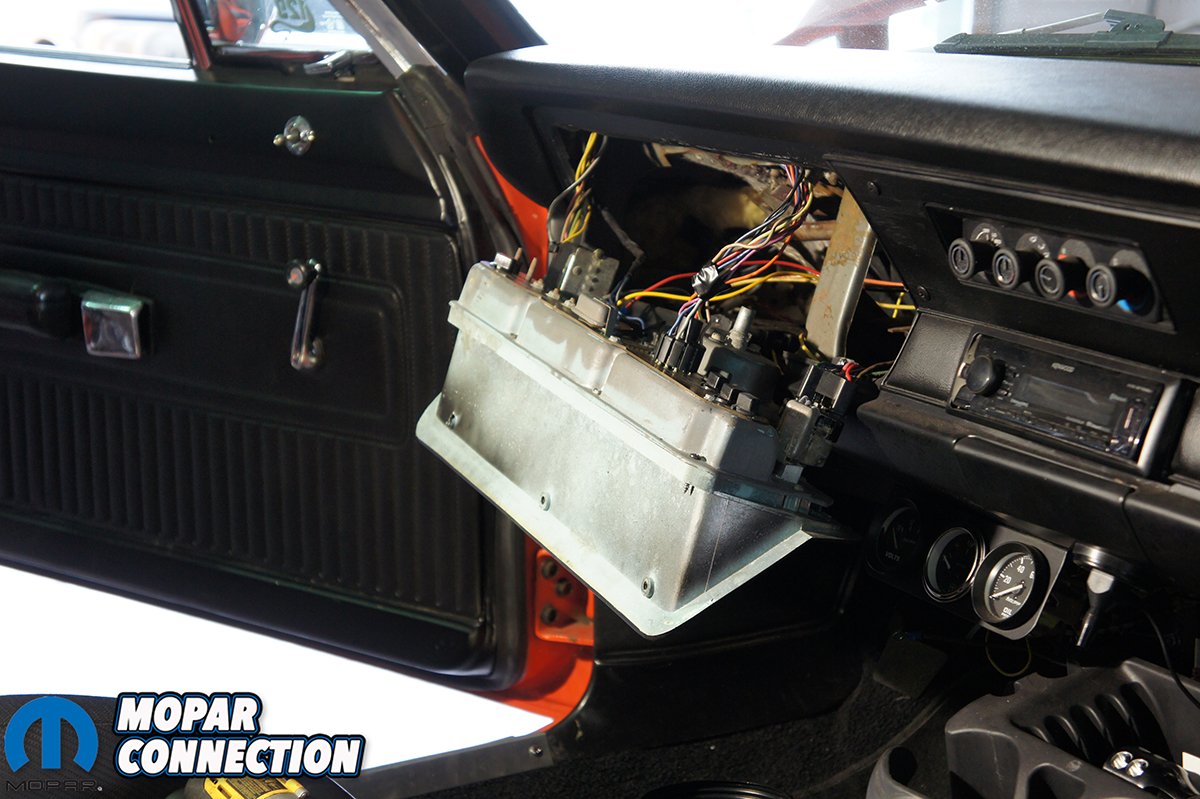
Top: You can see the factory dash has seen better days and does not give us much information. Bottom Left: Pulling the steering column gives much easier access to the dash. Bottom Right: The gauge cluster is held in with a few phillips screws.
Classic Dash offers an array of gauges for all price points. With racing Orange Crush we needed to have reliable gauges that would keep us informed. There was only one gauge company that has won more championships and trusted by the pros and that’s AutoMeter.
AutoMeter has been offering gauges since 1957. Their dedication to providing performance enthusiasts with the information they need to win is unparalleled. They have set the standard for accuracy, precision, and durability. We knew that what ever style gauge we choose would perform.
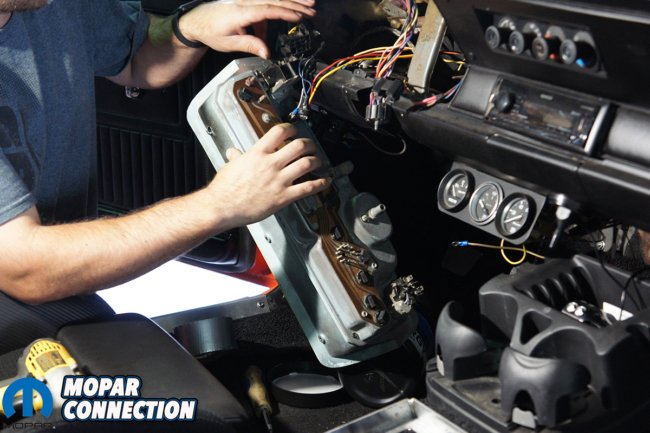
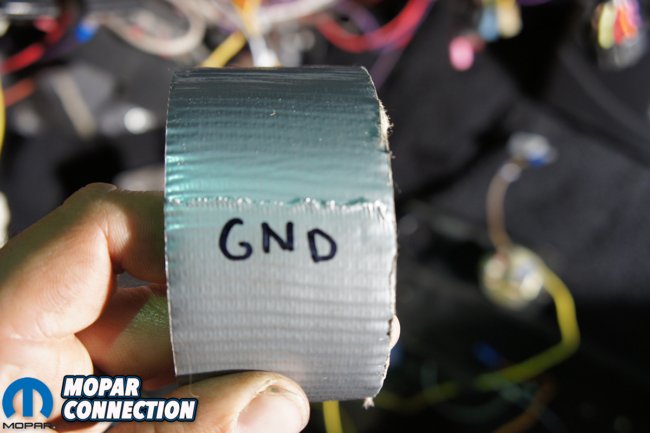
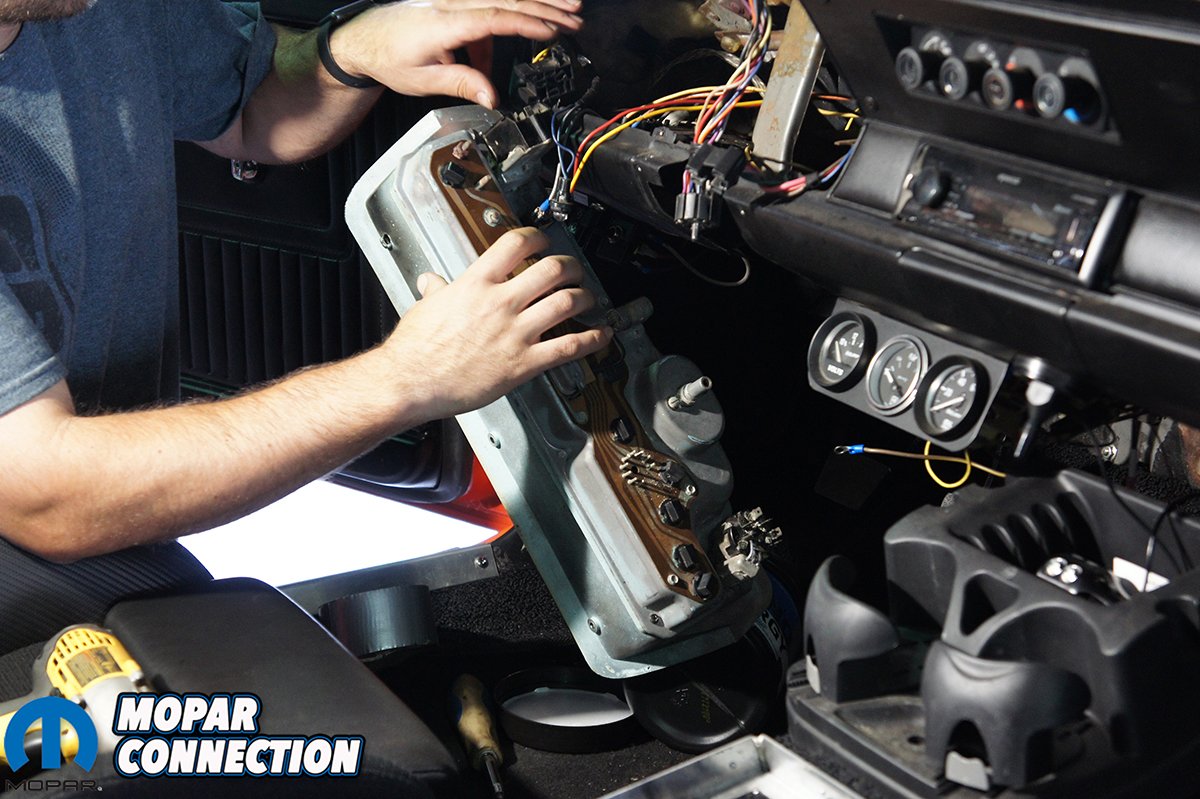
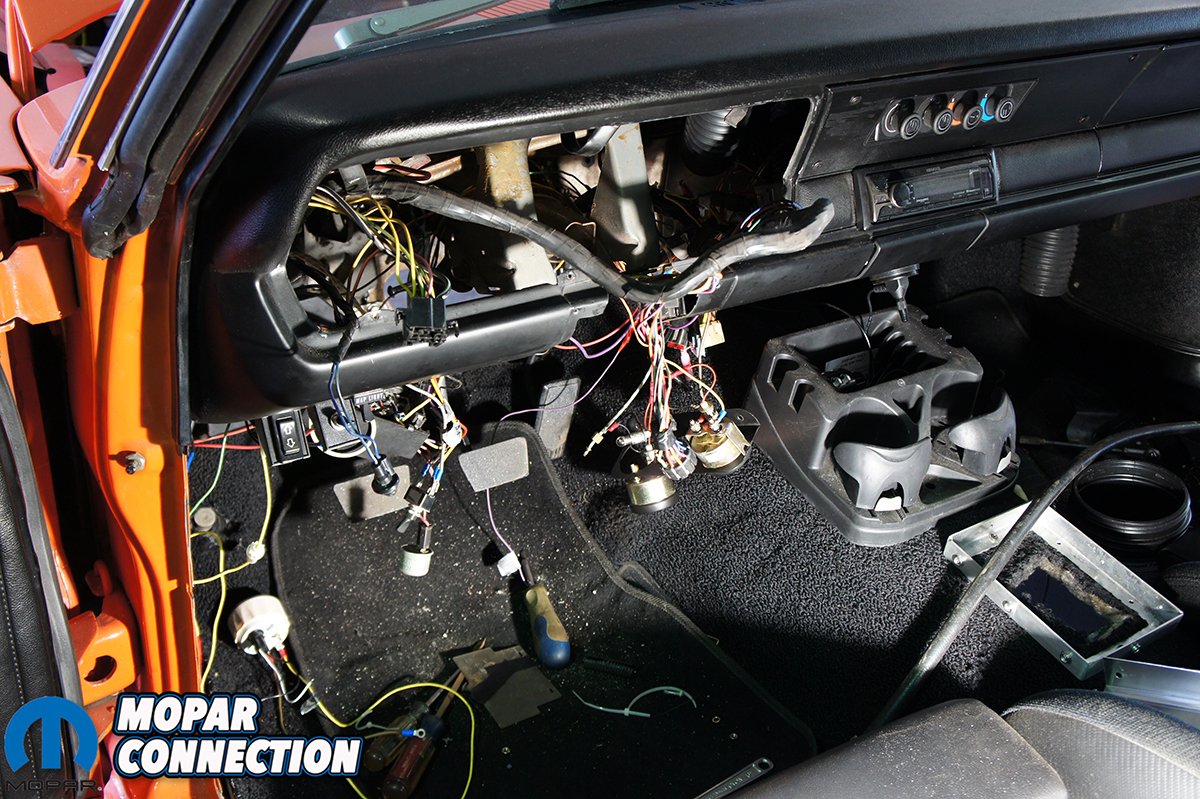
Top: Removing the gauge cluster is pretty simple and does not need much force. Be sure to unplug the wiper switch, speedometer cable and headlight switches when removing dash. Bottom Left: With the dash out we have a lot better access to the factory wiring. Bottom Right: We always make sure that if a wire is removed from a switch or dash that we mark it so we do not forget where it went.
Classic Dash has gone through AutoMeter’s catalog and put together complete packages that includes their dash. The packages come with your standard gauges including speedometer, tach, oil pressure, water temperature, fuel level and voltage. Most dashes use 3-3/8″ tach and speedometers with 2-1/16-inch auxiliary gauges.
Choosing one of the sets from Classic Dash will give you the best deal and will ensure that all the gauges are compatible with the dash and can be easily wired in with Classic Dash’s gauge harness. The gauges in the packages are only offered in short sweep versions. For more detailed readouts we wanted to go with full sweep gauges.
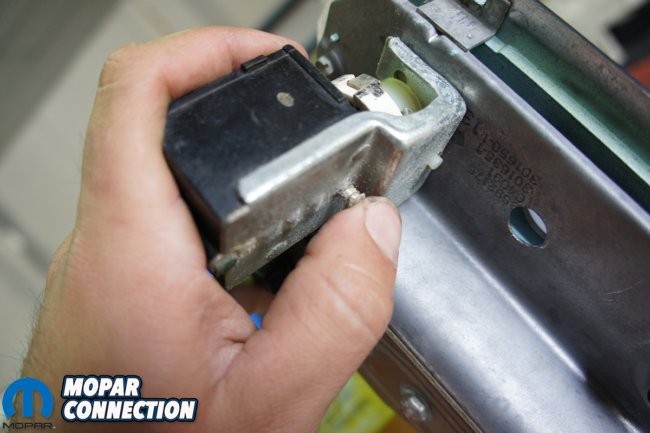
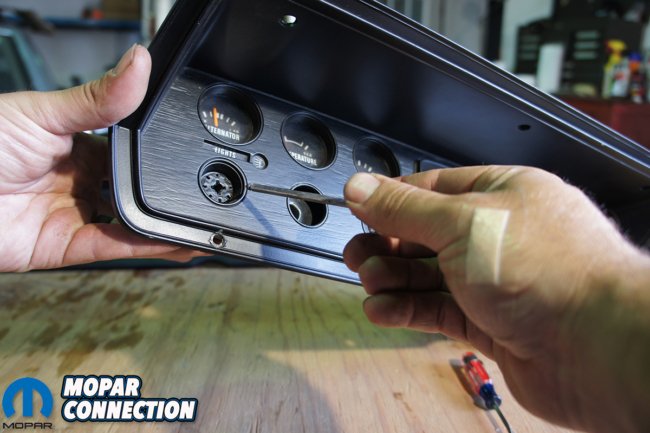
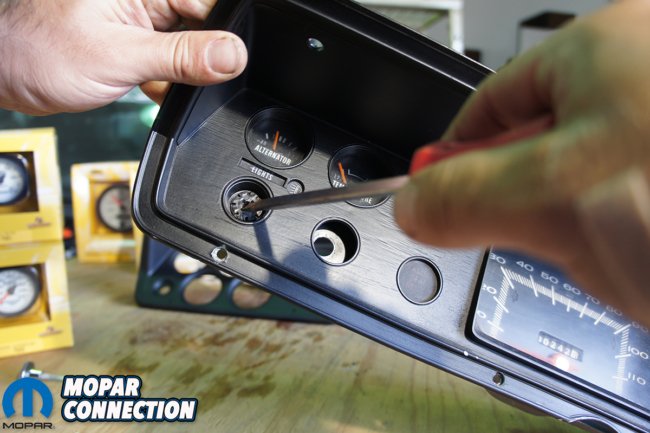
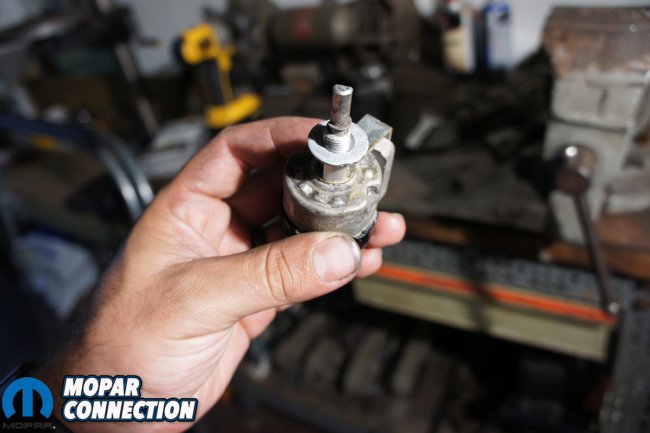
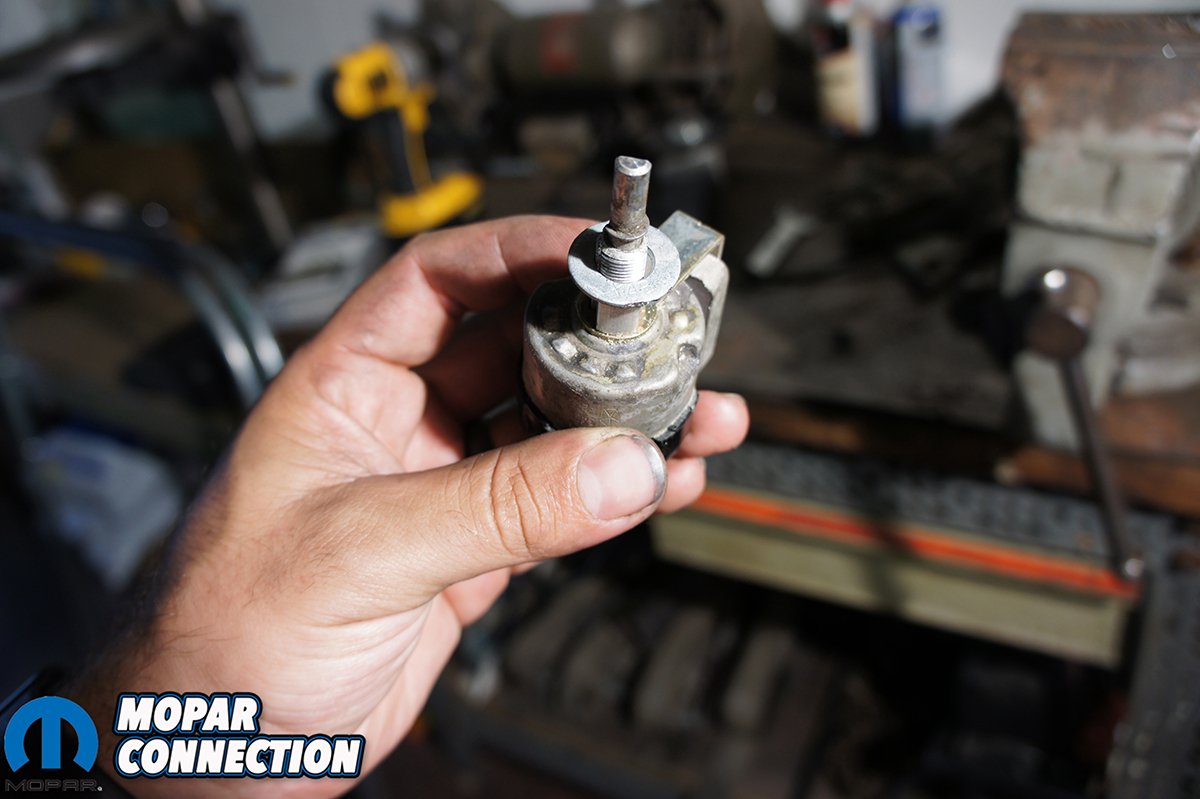
Top Left: When removing the headlight switch you will need to depress the small button on the back side to slide the lever out of the switch. Top Right: With button depressed we can pull the lever all the way out. Bottom Left: We used a flat screw driver and slowly turned the lock nut until the switch was off. Bottom Right: The switch is out and ready to mount to the new gauge cluster.
Short or long sweep gauges refer to how far the needle on the gauge moves. Short or half sweep gauges the needle moves from about 10 to 2 o’clock. Full sweep gauges are about 7:30 to 4:30. They both offer extreme accuracy but the full sweep gauges offer more readouts since there is extra room for more values.
We called AutoMeter directly to see what options they had for Orange Crush. The amount of options is quite overwhelming. AutoMeter continues to come up with innovative gauges and new designs all the time. Trying to narrow it down to just one was tough. We contemplated going with AutoMeter’s Custom Shop but that opened up endless possibilities.
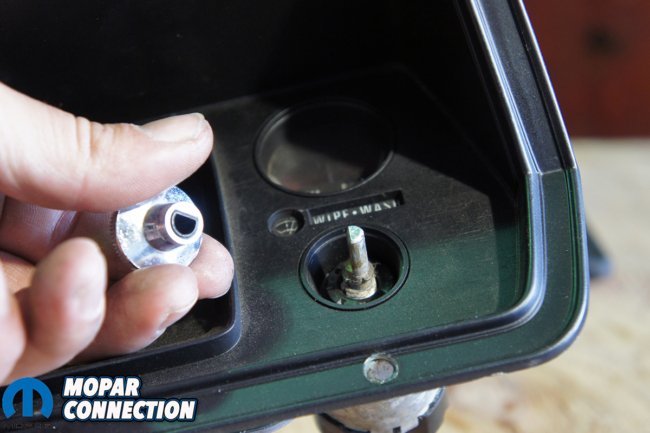
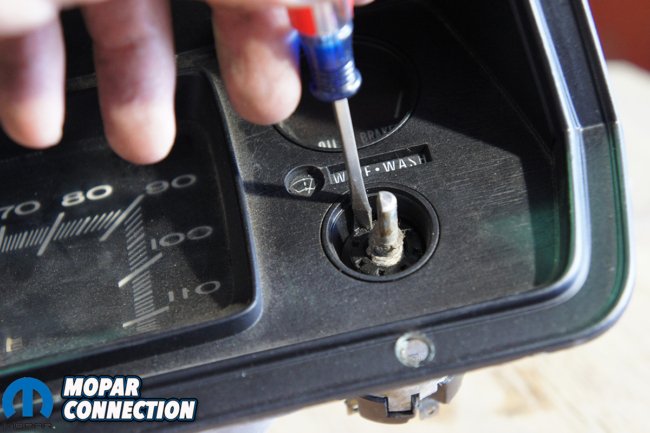
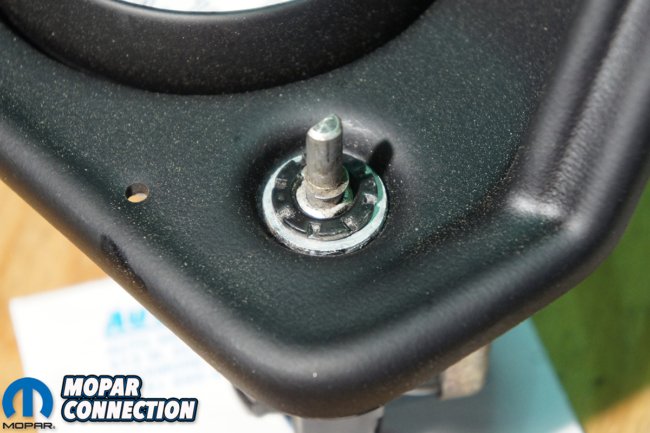
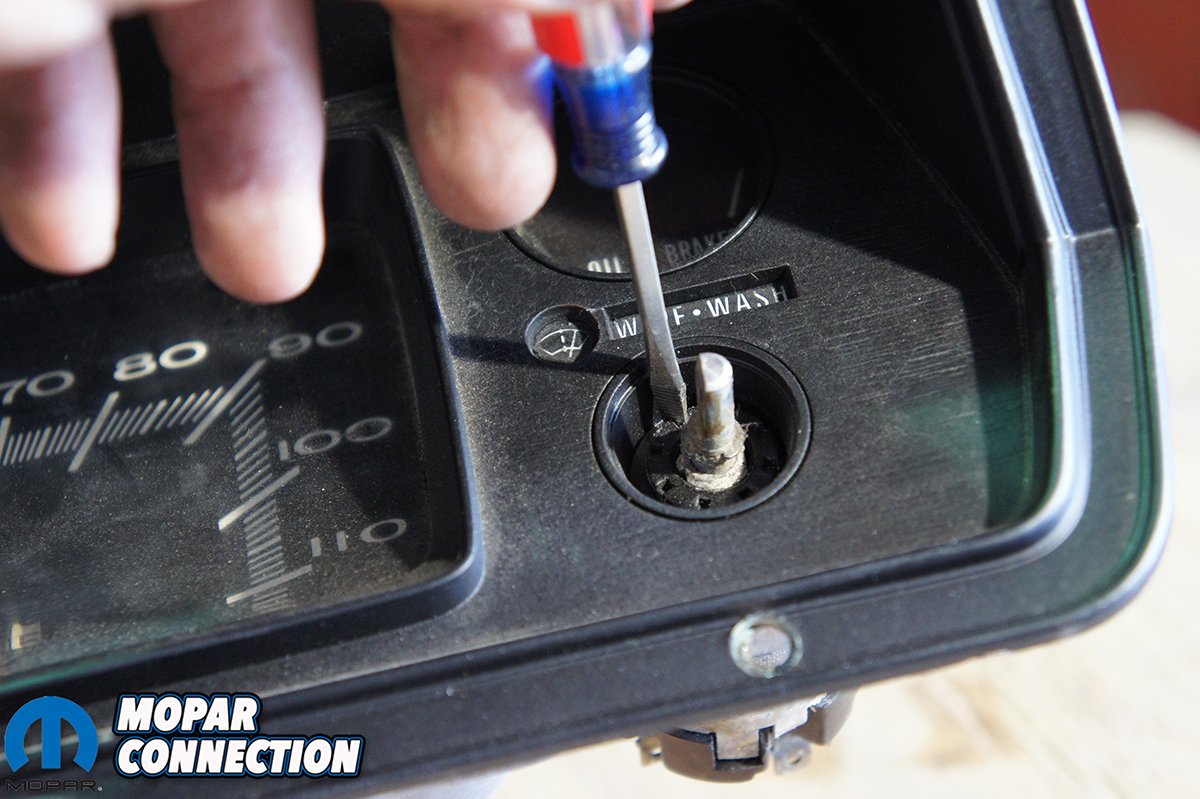
Top Left: The wiper switch differs from the headlight switch and the knob pulls right off. Top Right: Similar to the headlight switch we used a flat screw driver to unscrew the lock nut. Middle Left: To make the wiper switch fit the new gauge panel with found a washer that fit the new gauge panel and drilled out the middle to go around the wiper switch. Middle Right: You can see how the washer fits tight around the wiper switch. Bottom Left: With the washer in place we reinstalled the lock washer for the switch. Bottom Right: With the lock washer tight we popped the knob back on.
We wanted to keep it simple but wanted full sweep gauges. We wanted to plan ahead some and make sure the set we choose would have a lot of options for additional gauges like boost, air/fuel ratio, trans temperature, and more. This only slightly helped narrow the gauge choices down.
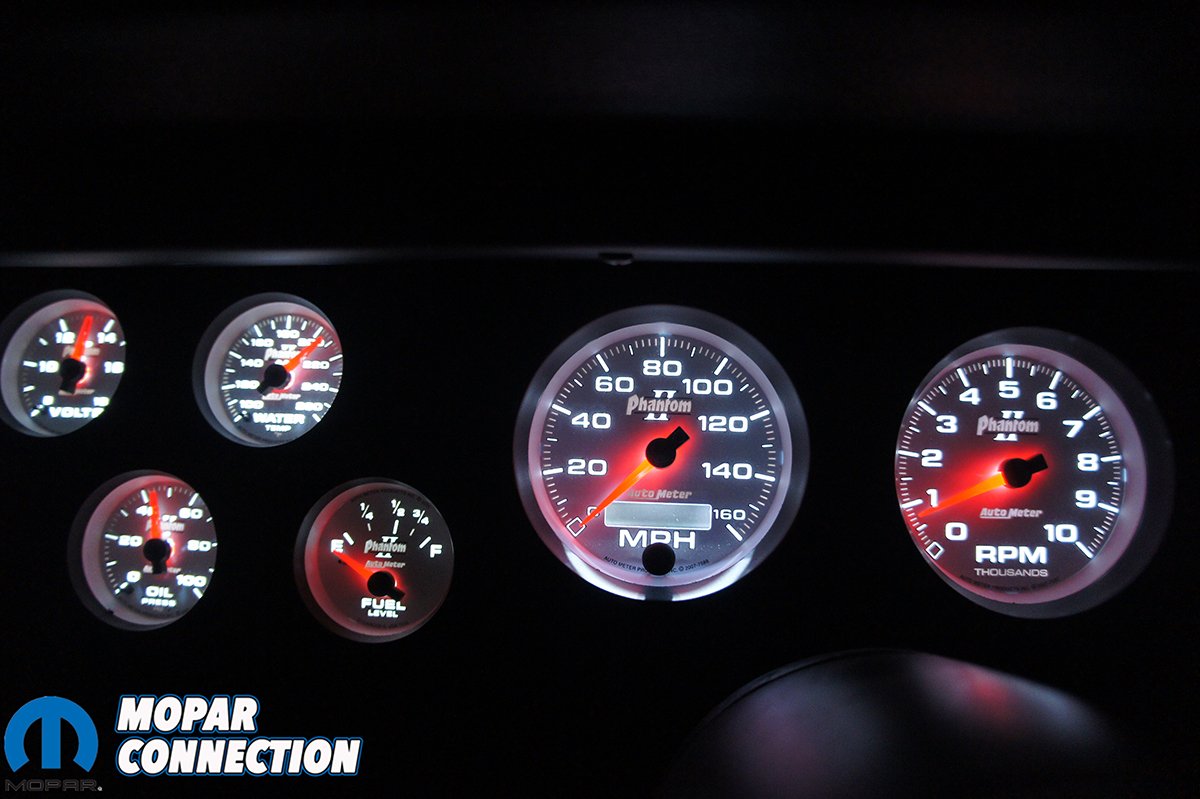
After days of searching and thinking about what would fit Orange Crush’s interior we landed on AutoMeter’s Phantom II design. The white background and bright orange needle would be easy to read while racing and the night mode would not blind us during night driving. The black bezel would be non-reflective and match the rest of our blacked out dash.
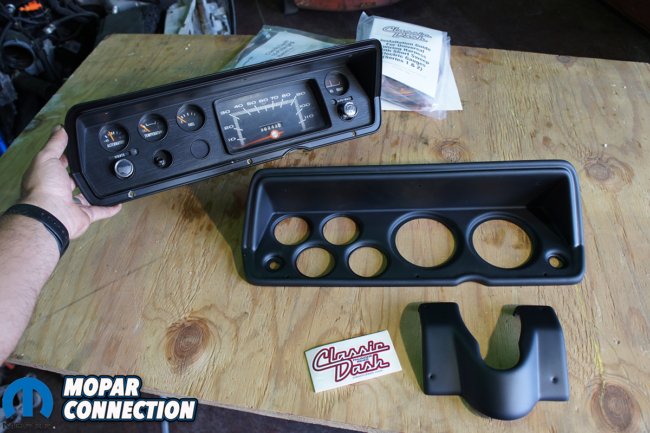
Above: Classic Dash makes it too easy to customize your dash.
With the gauges ordered, we called Classic Dash to see what else we would need for installation. We told them what gauges we choose and they recommended their 1970-76 A-Body Gauge Wiring Kit (818701937) and their Universal GPS Speedometer Interface Module (PT# 69248). We went ahead and order them along with the 1970-76 A-Body dash panel in black.
A few days later we had the all of our gauges, dash panel and the accessories delivered. It did not take long before we jumped in to installing the dash and gauges. Before we started diving in too far, we needed to pre-fit the dash insert and drill some holes for the LED indicator lights. As you guessed we started by removing the old dash cluster.
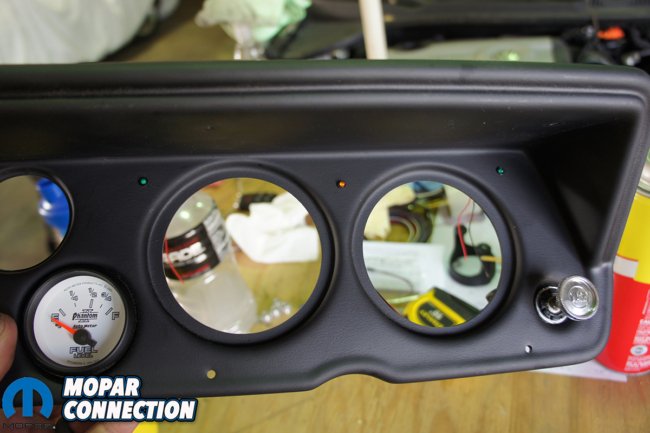
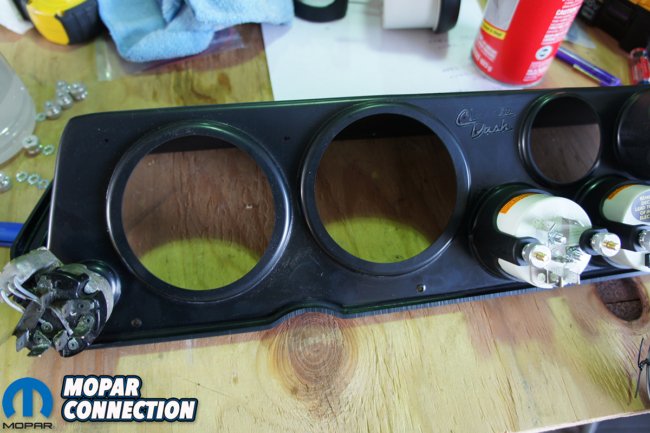
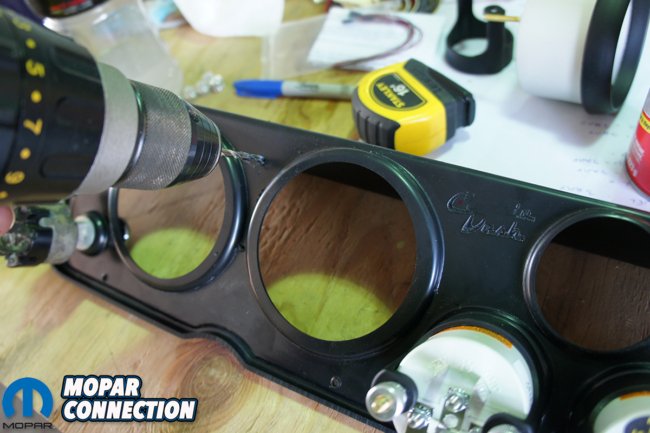
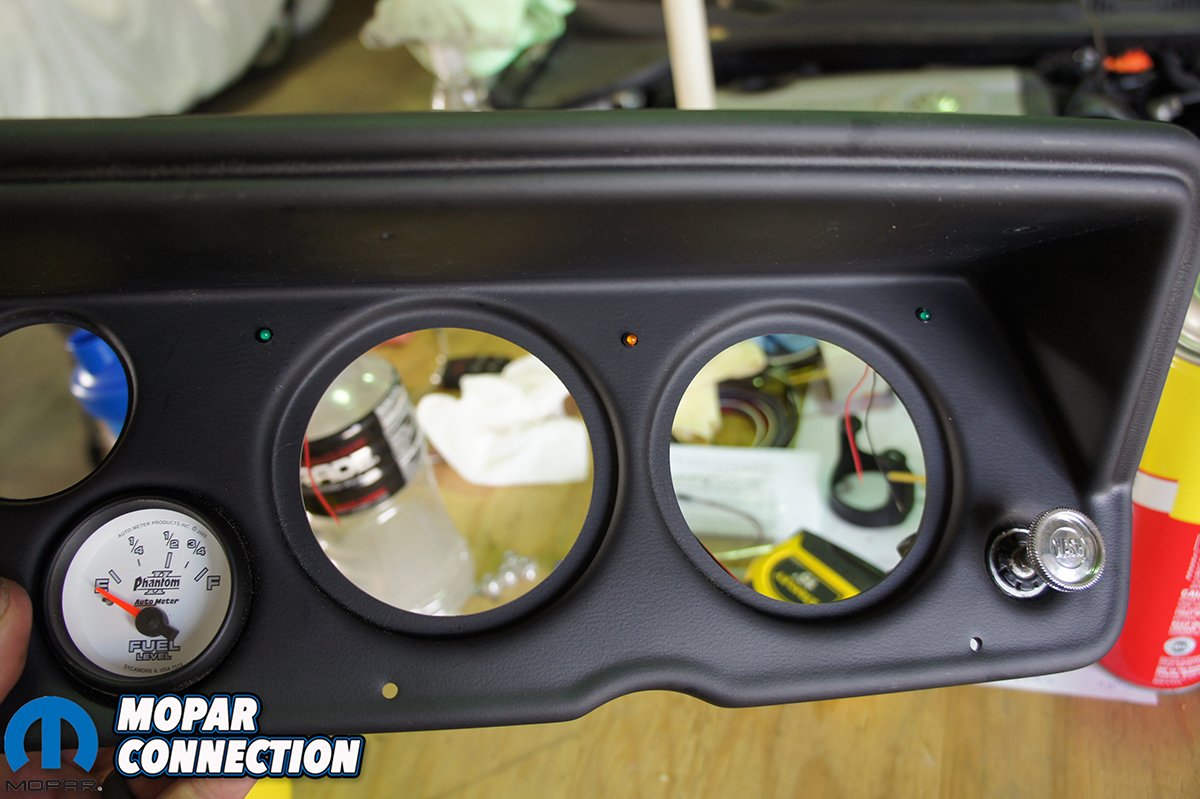
Top: You can see the 3 LED indicators, we left out the parking brake indicator for the time being. Bottom Left: We marked out placement of the LED indicators with a marker. Bottom Right: Drilling the dash from the rear was easier.
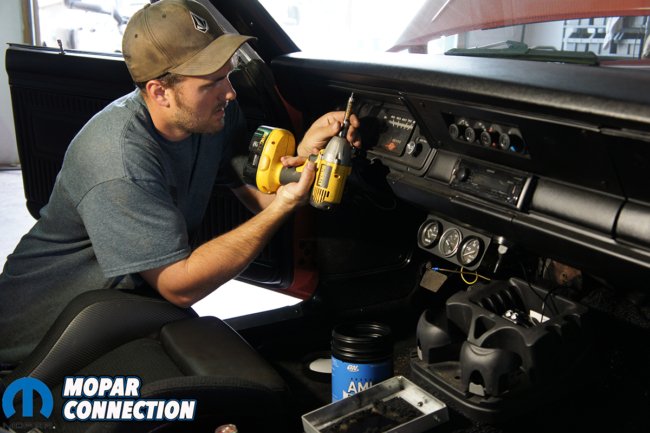
When working with any part of the vehicle’s wiring disconnecting the battery is a must and should be done first. Disconnecting the steering column wiring harness was next and then we removed the steering column from the car. It is possible to leave it in the car and drop it down but we highly recommend taking the whole column out, you will thank us later.
We removed the two bolts at the base of the steering column on the fire wall, disconnected the column from steering box, then remove the three bolts under the dash and the steering column slid right out. The toughest part of removing the column is disconnecting the rag joint. We had already went through this before when we installed the Reilly Motorsports AlterKtion. The column itself should not take much force to be removed but the rag joint might take some prying to get off.

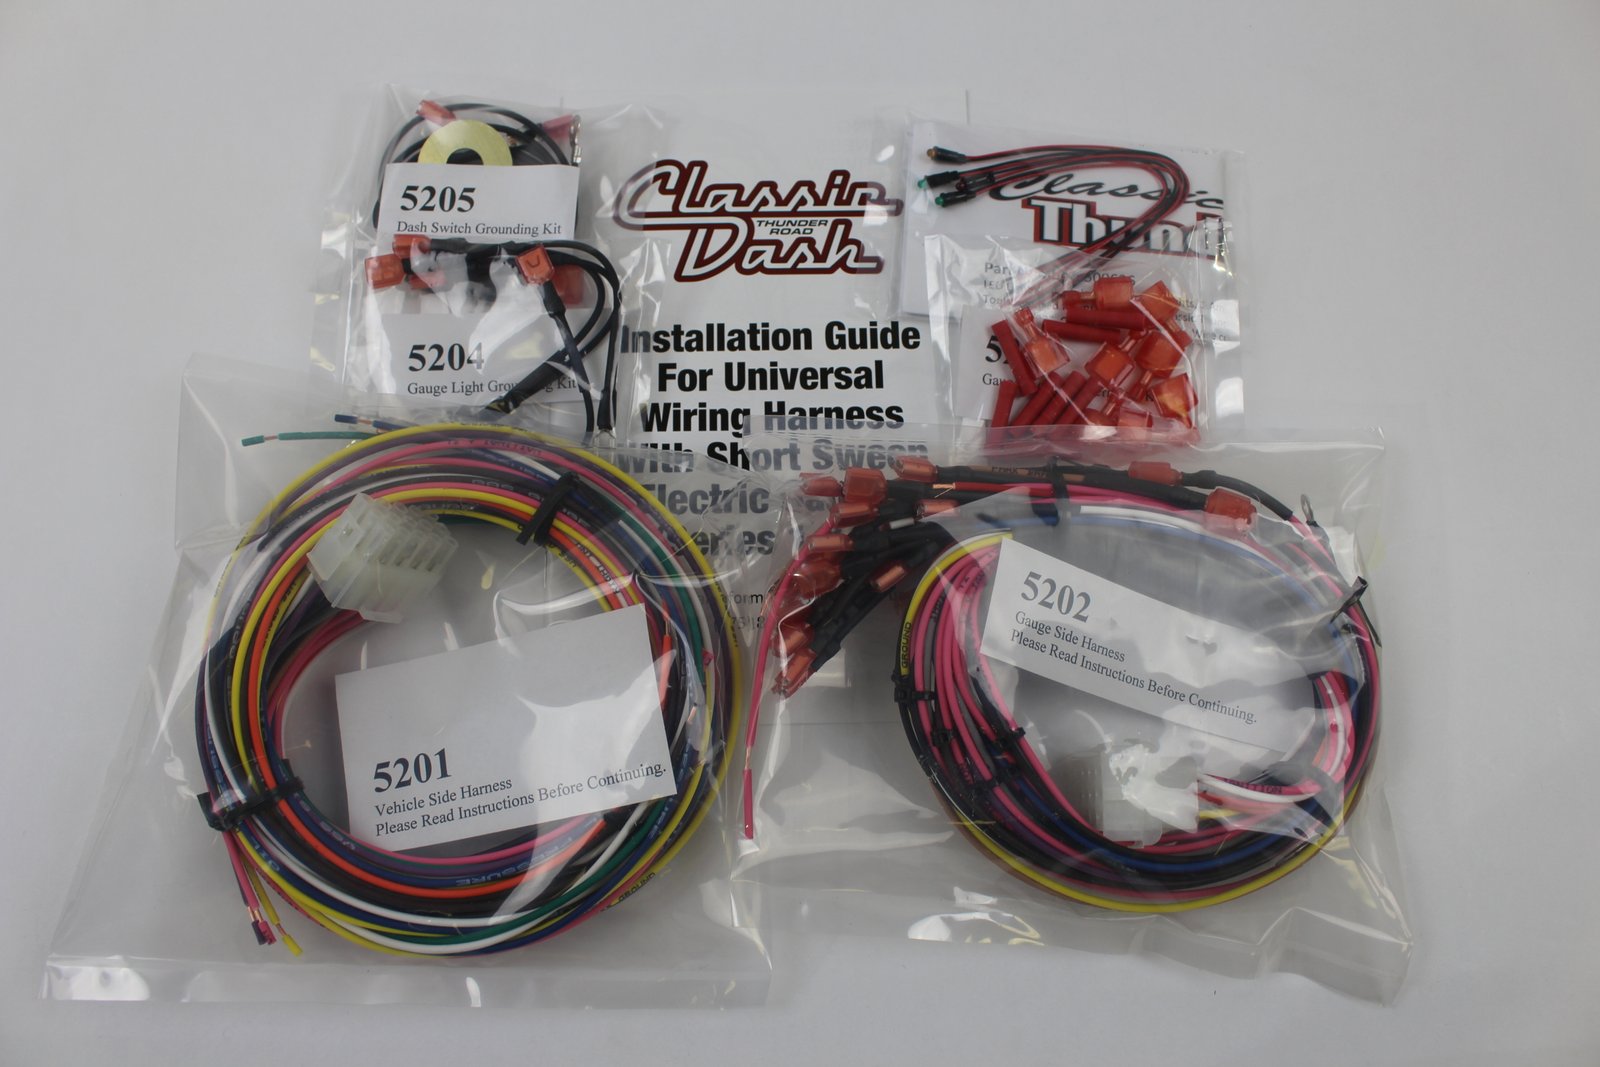
Above: Classic Dash’s gauge wiring kit saved time and made wiring the car and gauges a breeze.
Once the steering column was removed and out of the car we were ready to remove the factory gauge cluster. On our 1972 Dart the cluster is fairly easy to remove. Start by removing the 6 phillips screws from the dash panel. The dash cluster will start to pull out of the frame but you will need to disconnect the wiper switch, speedometer cable, main harness plug, light switch and the wires from the alternator gauge to finish pulling it the rest of the way out.
With the dash cluster out were able to test fit the Classic Dash panel in the dash frame. There are predrilled holes in the new panel but since quality control was relaxed in the ’70s, some of the holes may not align perfectly and will need to drill a new one. We had 4 of the 6 screw holes align and drilled new ones for the other 2.

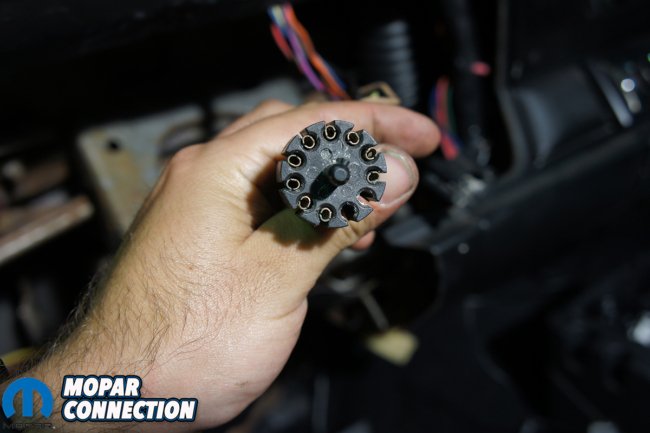
Above: The back of our 1972 Dodge Dart factory gauge cluster with the wiring harness cut off for reference. Bottom Left: Looking at the front of the dash harness you can see there are a couple spots not used and there is a small notch on the center pin. Bottom Right: Be sure when you pull the plug off the dash that the wires all stay in the proper spots, some of ours stuck on the dash and we had to put them back in the correct spots.
Knowing Classic Dash’s panel was going to fit it was time to drill holes for the LED indicator lights. To maximize space for the gauges on the dash insert, Classic Dash uses LED indicators for your turn signals, bright lights and parking brake. We do not have a parking brake switch anymore so we only drilled 3 holes for our turn signals and bright lights.
Mounting the headlight switch was fairly straightforward but the wiper switch required a little ingenuity. The spot for the headlight switch was the perfect size to tighten the original switch just like the factory dash. The hole for the wiper switch was oversized and required us to make a small shim. We found a washer that would fit the hole and drilled out the center with a step bit for the wiper switch to fit through. Then we used the washer to mount the original switch to the dash.

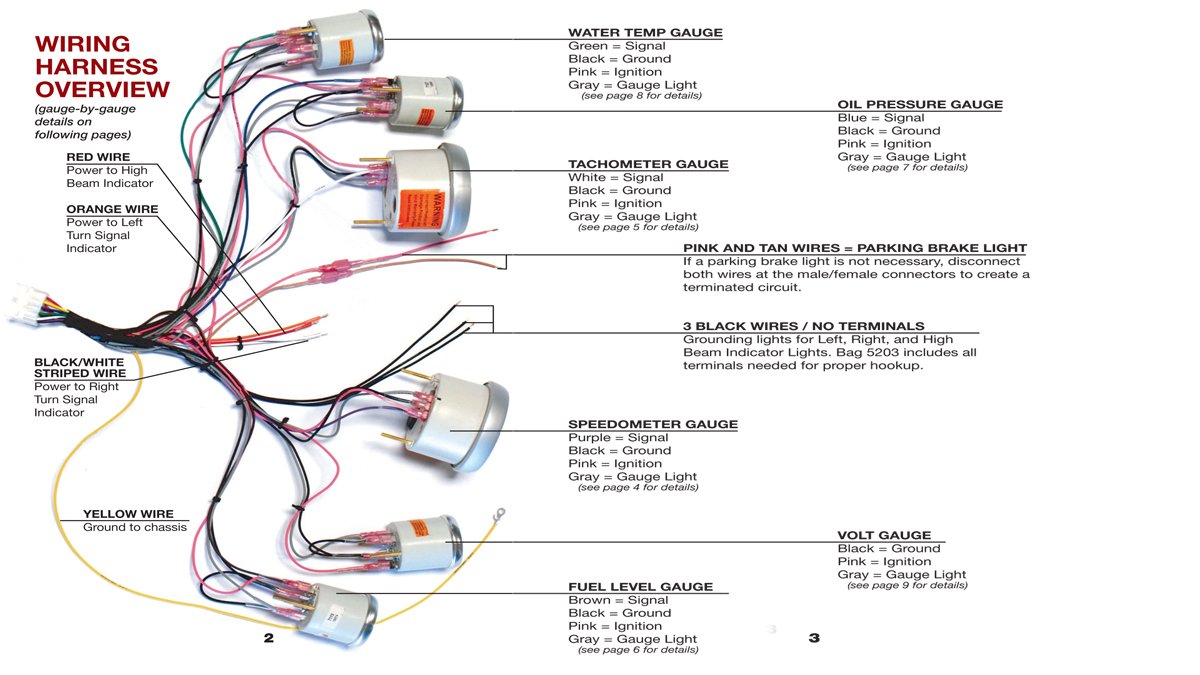
Above: Classic Dash includes great photos and descriptions of their wiring harness and where each wire goes.
Now that we have all pre-fit work done and switches mounted, we are able to move onto the fun part, mounting the gauges. Classic Dash already has all the holes cut and placed perfectly on their dash panel. All we had to do was insert the gauges and tighten up the mounting cups that come with the AutoMeter gauges.
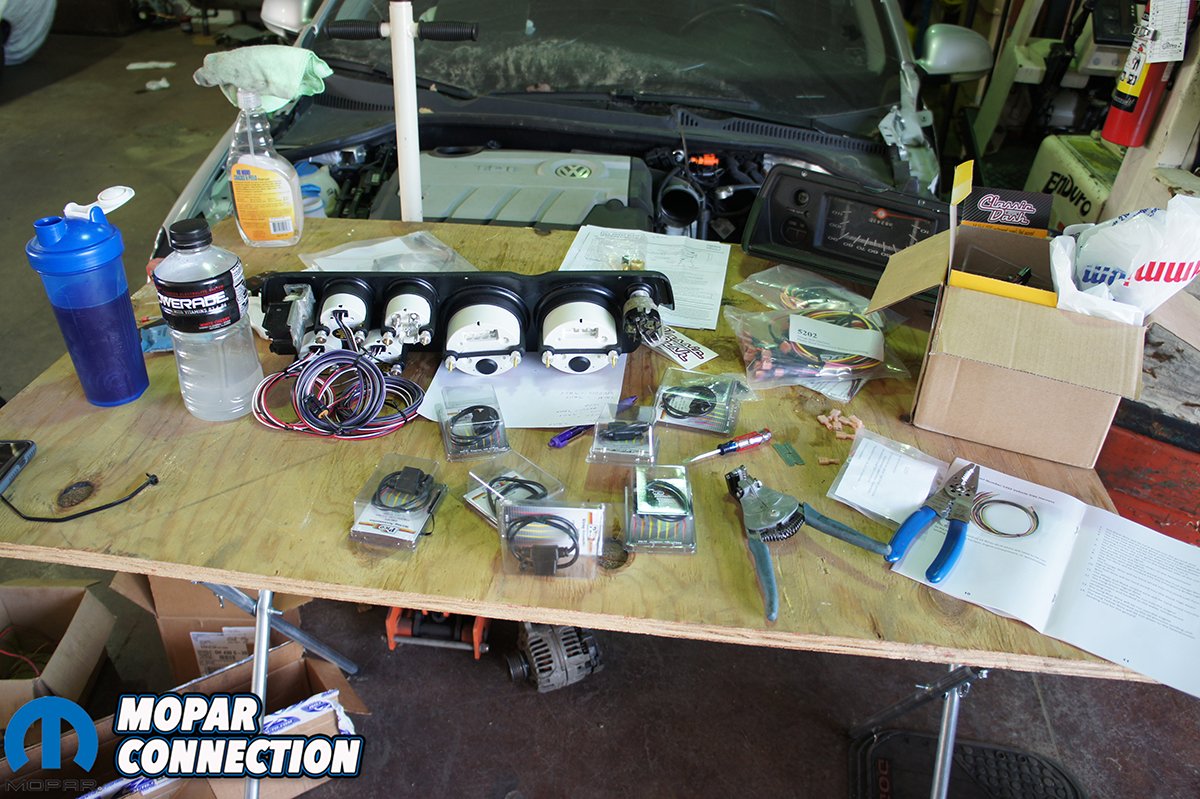
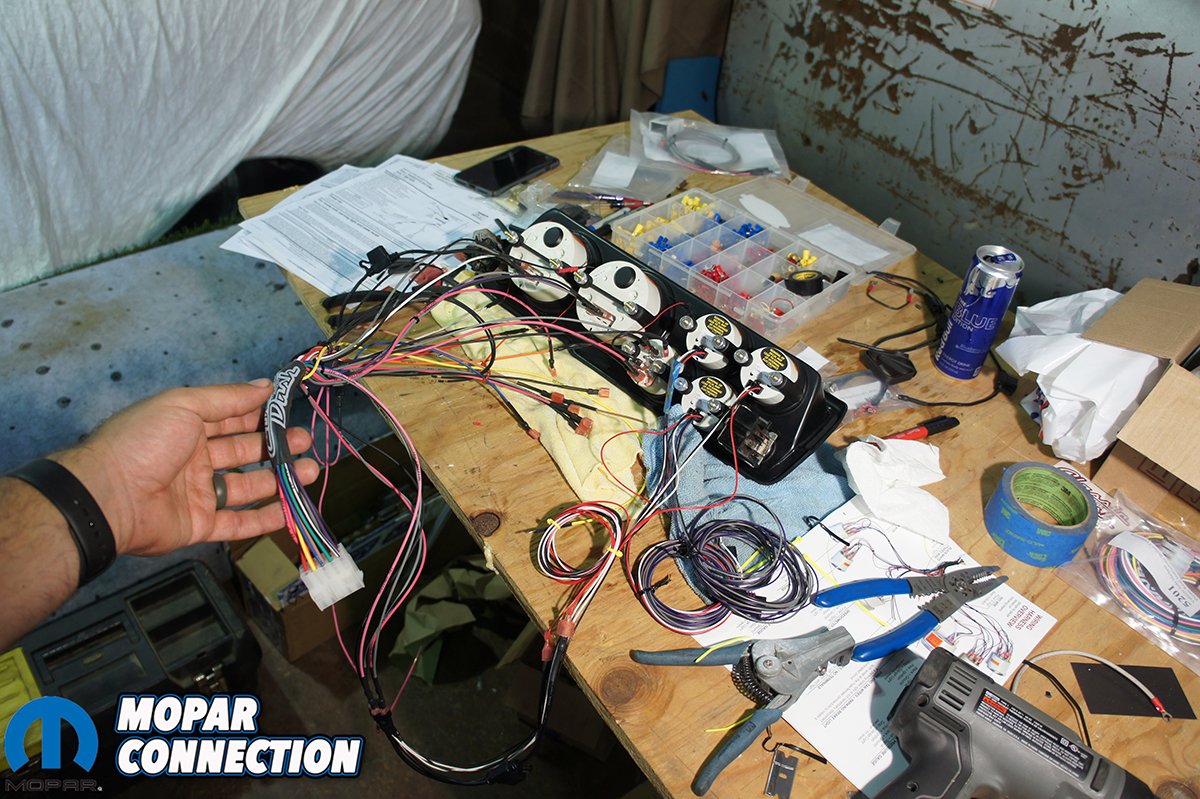
Be sure that when you start to wire the gauges you have plenty of room to spread out the wires. It can become confusing quickly if you are working on a small work bench. If you do not have a large work top or bench spread out a towel or blanket on the living room floor. Unlike wrenching on other parts of the car, wiring the dash does not require getting dirty and can be done inside the house.
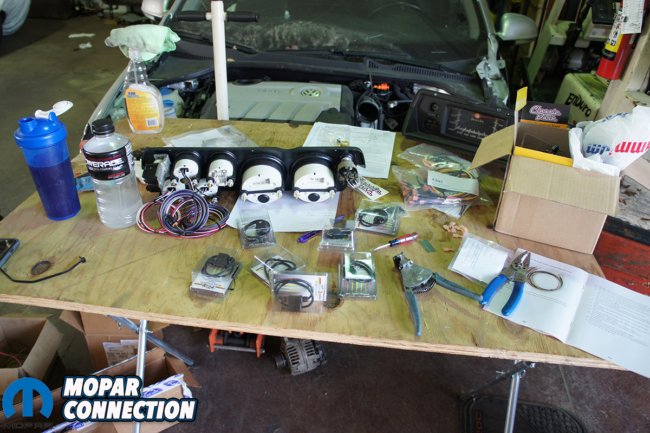
Top: Wiring can get messy and is best to lay everything out and try to keep it neat as you go. Bottom Left: Along with descriptions in the manual Classic Dash also labels each wire. Bottom Right: Wiring can get repetitive but it is much easier doing it on the work bench than inside the car.
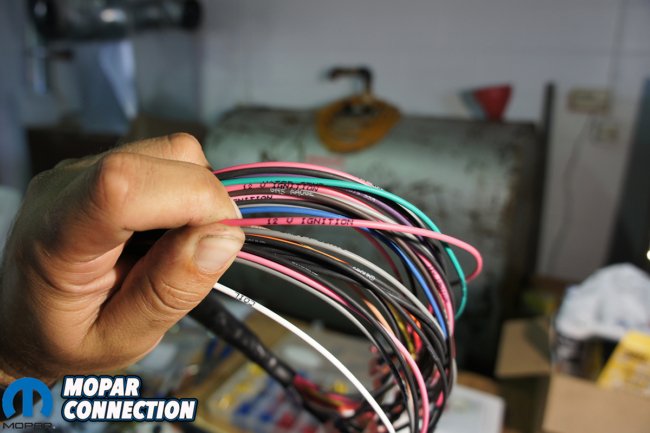
Classic Dash offers vehicle specific gauge wiring harnesses to simplify the installation. The harness allowed us to install the gauges and wire everything before we stuck it in the car. We hate wiring but this way made it a lot easier. The harness has a gauge side and then a vehicle side so once everything is wired all you need to do is connect the two bulkheads.
It would have been even easier and would not have needed to add in fuses if we went with short sweep. Instead we choose to go with full sweep Phantom II gauge set (PT# 818701111). Our electronic full sweep gauges all required a 3 amp fuse to be installed on the +12v connection (red wire).
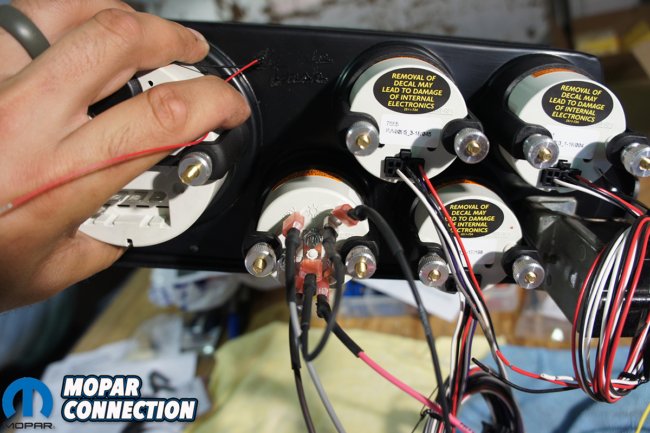
We went through and added fuses to each +12v lead on the wiring harness from Classic Dash. This was required due to the full sweep digital gauges we choose. Our fuel gauge was a short sweep gauge and did not require a fuse and plugged right into the wiring harness. Once the inline 3 amp fuses were wired in, we followed Classic Dash’s instructions for wiring each gauge.
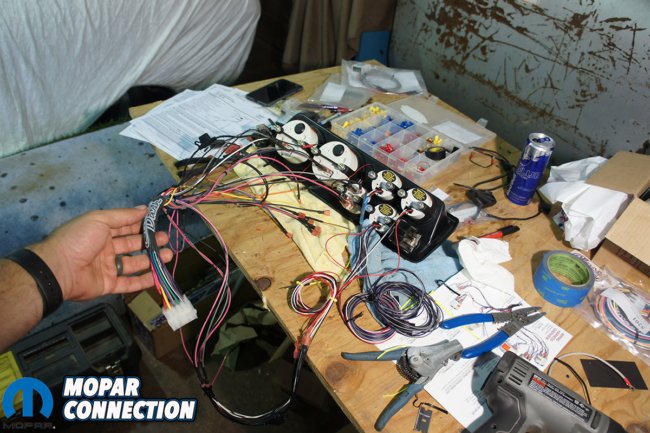
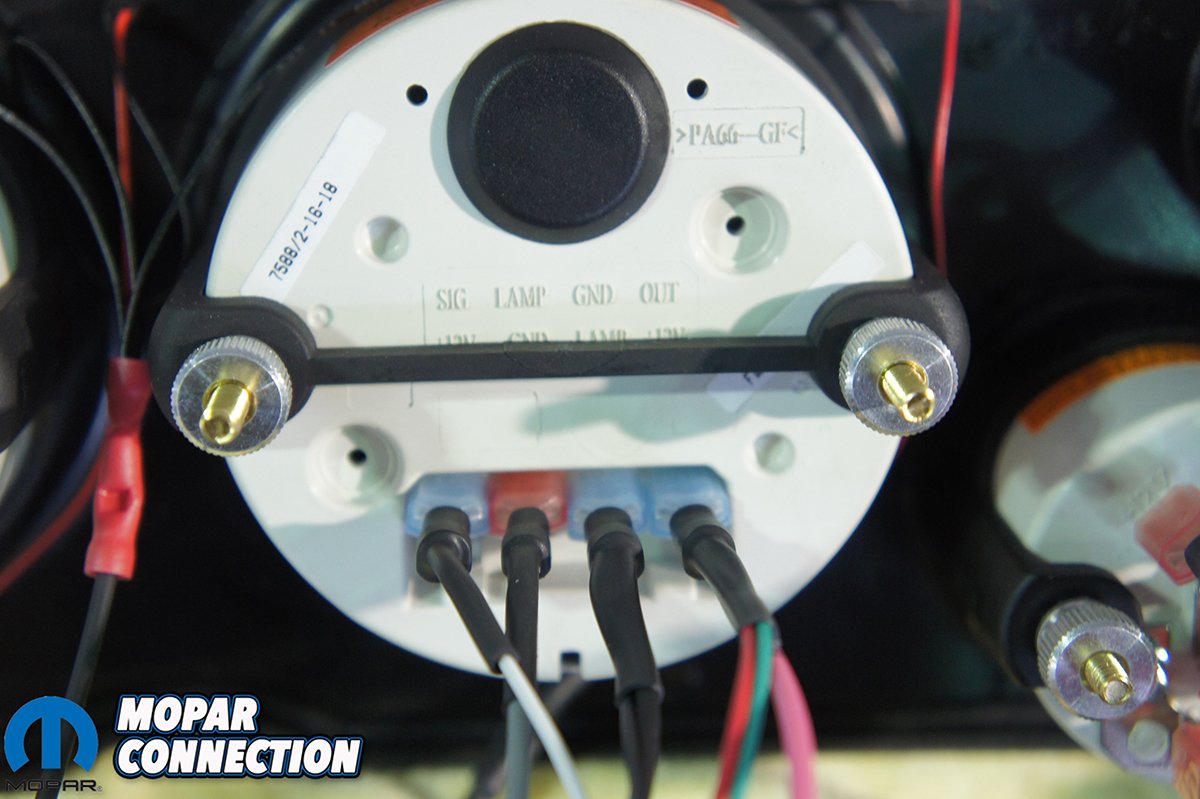
Top: As we wired in each gauge we looped the extra wire and zip tied it together. Bottom Left: The back of the speedometer was labeled and we just had to push on our connectors in the corresponding spots. Bottom Right: The fuel gauge was a short sweep gauge and the leads plugged right in. The rest were full sweep and required us to wire in male connectors and 3 amp fuses for each gauge.
The instructions that came with Classic Dash’s wiring kit were very thorough. They had multiple color photos, each wire was color coated and labeled what it was for. The instructions are universal so be sure to cross reference them with the gauge manufacturer’s instructions. If we did not add the 3 amp fuses we could of fried our gauges.
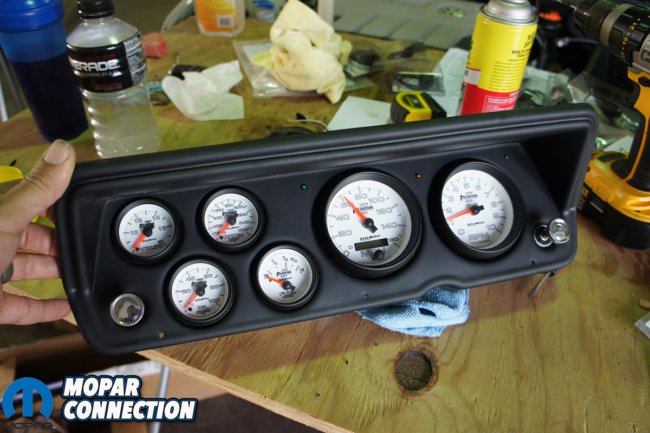
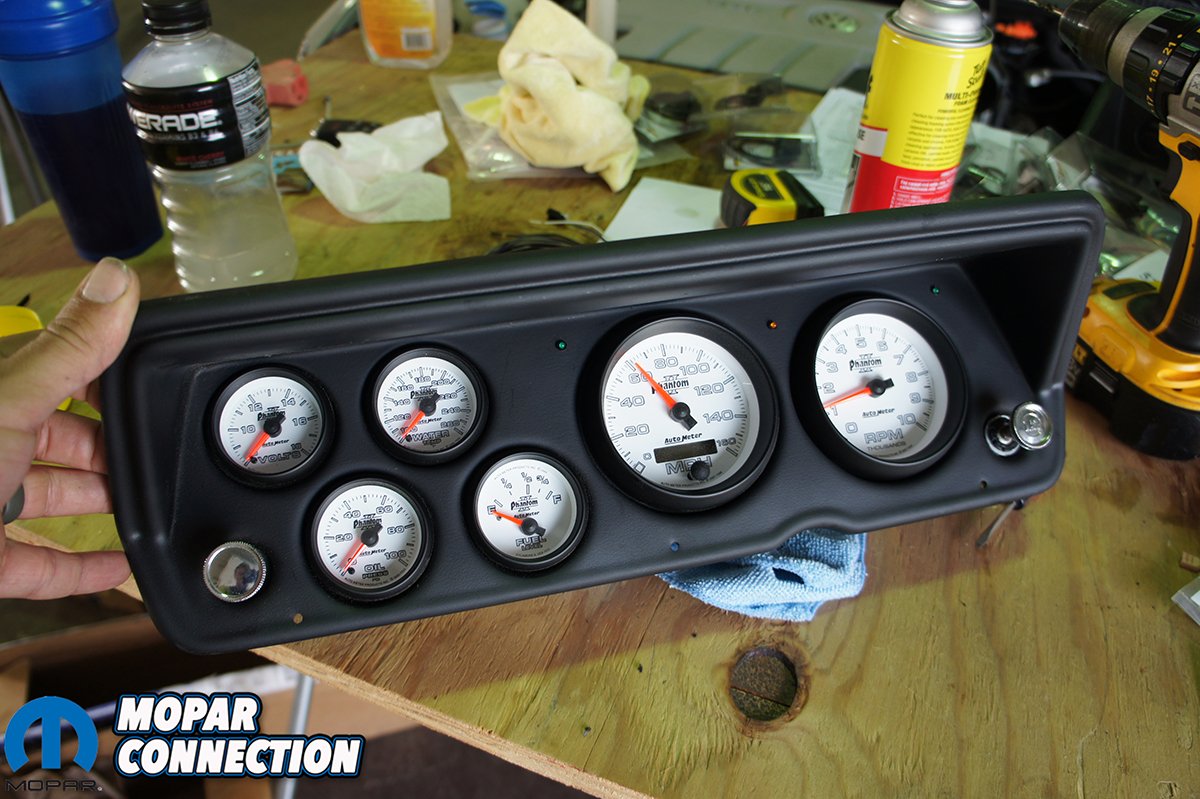
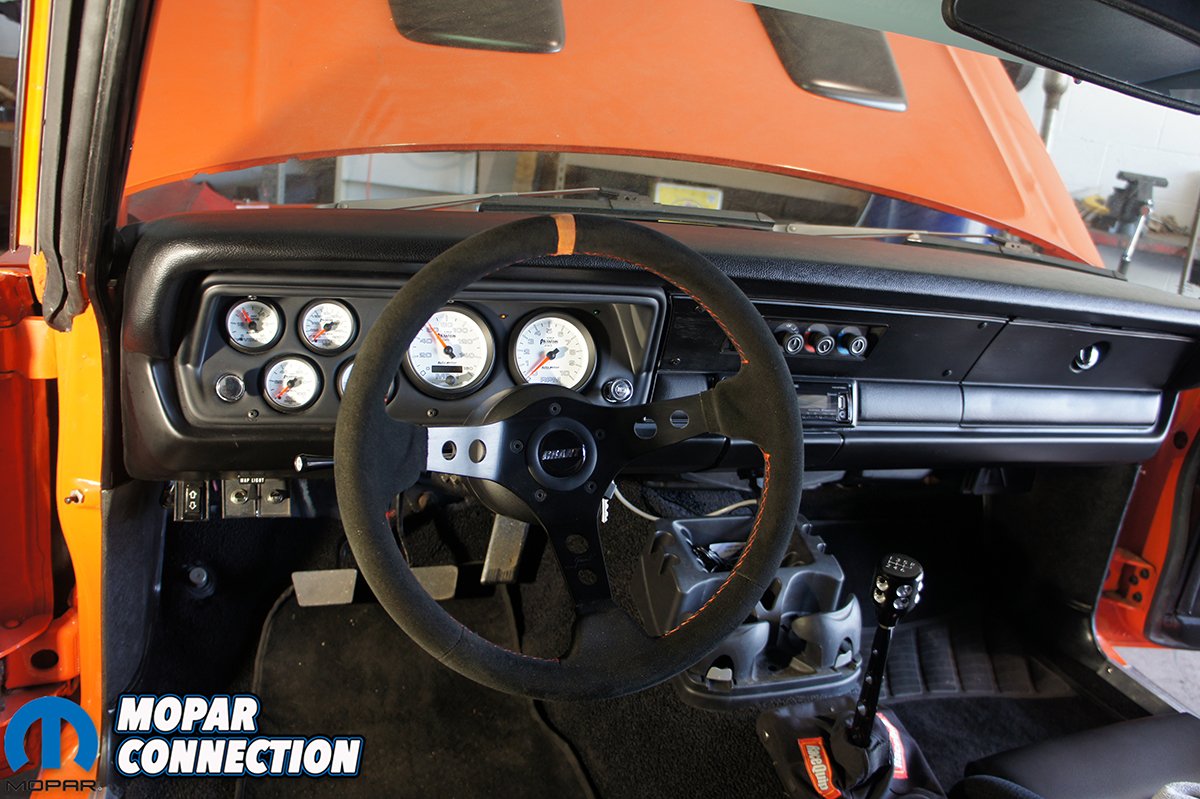
Above: The completed dash looks awesome and is ready to install.
Classic Dash’s wiring harness was labeled and all we had to do was match it up with the wires from the round plug from the factory gauge cluster. When we cut the original round plug from the car we left a couple inches of wire in case someone else would need it and we could refer back to it if we had issues. There is plenty of wire provided with the Classic Dash wiring harness.
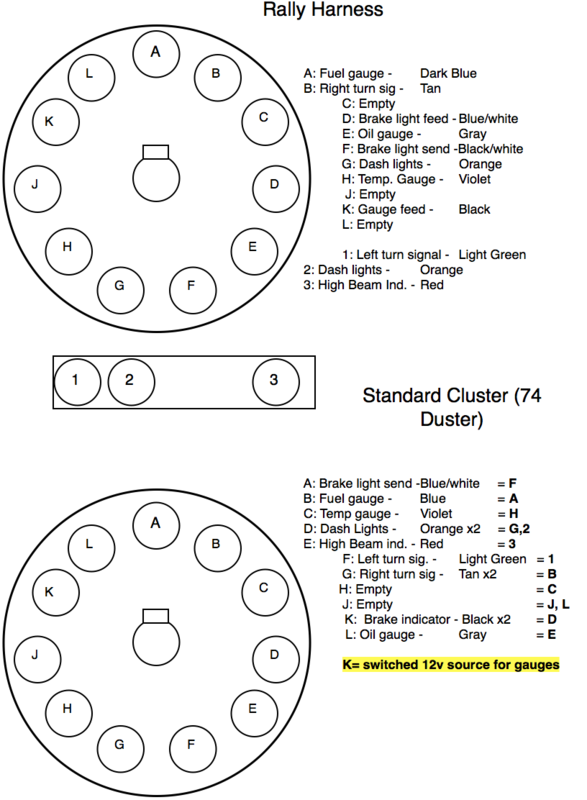
Classic Dash includes all the butt connectors that you will need to wire in the vehicle side of the gauge wiring kit. We went through and stripped wires and matched up each wire with the corresponding wire from the original dash. You can refer to factory service manual or trace each pin around the circuit board to see what each wire controlled.
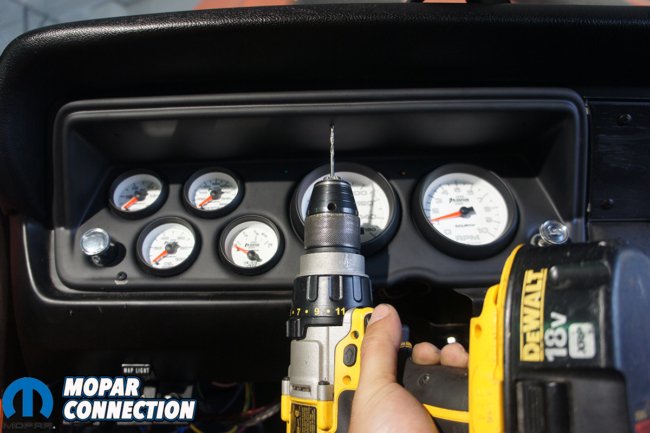
Above: We should of pre-fit the dash before the gauges were in. Luckily we only had to drill 2 new holes.
The last part we had to wire in was the Classic Dash Universal GPS Speedometer Interface Module. The module saves us time, is more accurate and never needs calibrated for tire or gear changes. It does require the module to have a good line of sight from the car to the sky where it can communicate with the satellites. Have a couple locations in mind in case your first spot does not work and have to move it.
It was a straight forward installation. The module was already wired with female spade connectors ready to push on the AutoMeter digital Phantom II speedometer. We ran +12v power to the speedometer and was ready for us to turn on the key.

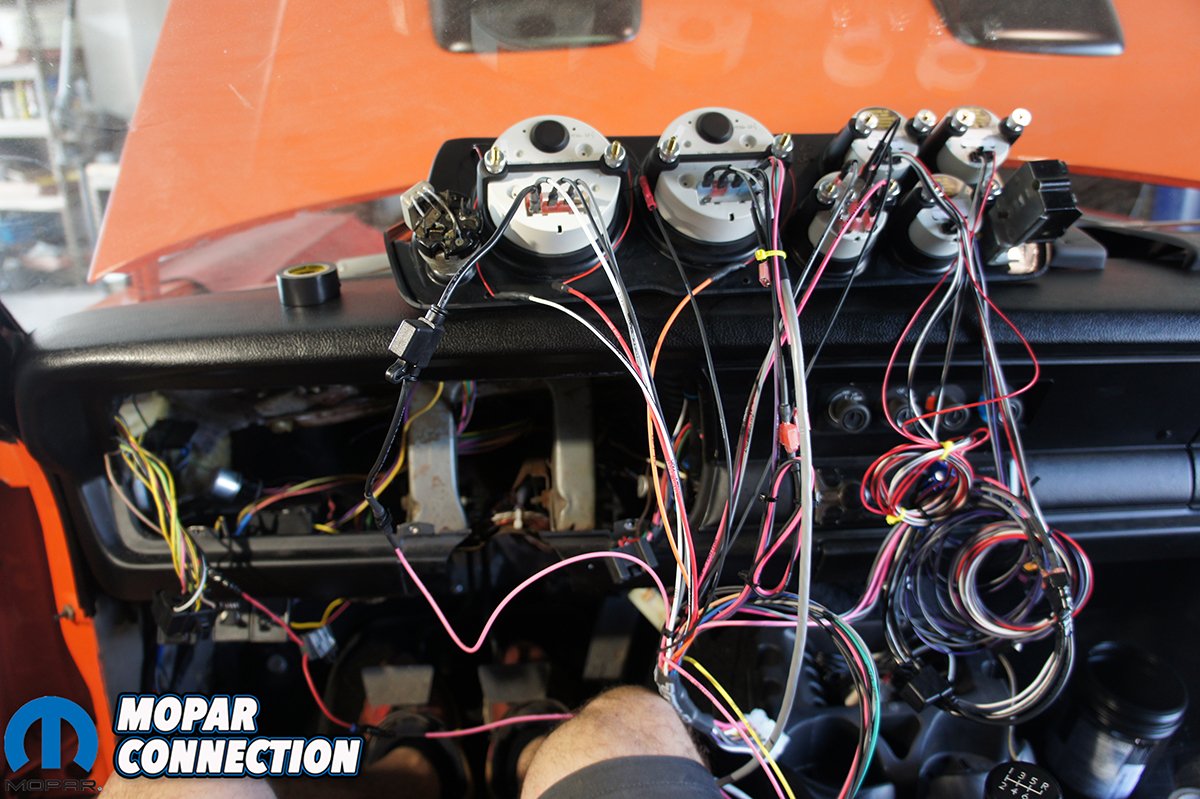
Above: It looks like a disaster. We laid the dash down while we plugged in our bulk head and the rest of the switches.
Once everything was wired and all the gauges were installed in the dash we plugged the bulk head into the car. We temporarily plugged the steering column in and reconnected the battery. We wanted to make sure the all the dash lights, gauges and LED indicators worked before we completely installed the new dash.
Most of the dash worked but we were not getting a reading from our speedometer. We found out we had the +12v plugged into the wrong spot on the gauge. Turned the key on again and everything worked like it should. The only hiccup we had, which was our fault, was no brightness adjustment for the gauges. The Phantom II gauges use LEDs for their light source and require a special dimmer. All we need to do is order the AutoMeter LED dimmer switch (PT# 9114) from Classic Dash. For now the backlights will work fine but they will be on full brightness.
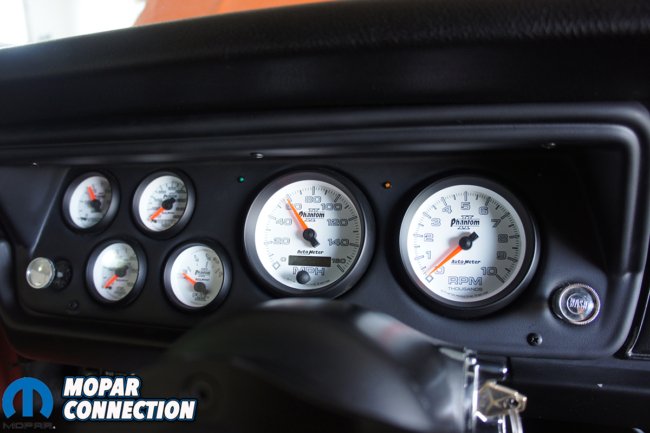
Above: During the day or night the AutoMeter gauges look incredible.
We had a lot of extra wire and did not want to trim it down yet because we have plans of rewiring the whole car eventually. For now we wound the wire into neat loops and zip tied as much as we could together. It did not look the prettiest but it was functional.
Using the new screws provided by Classic Dash, we installed the complete dash back into the dash frame. With the dash in and all switched plugged in we reinstalled the steering column. Be careful when installing the steering column that none of the wires get pinched. Its easy to do and not fun to fix.
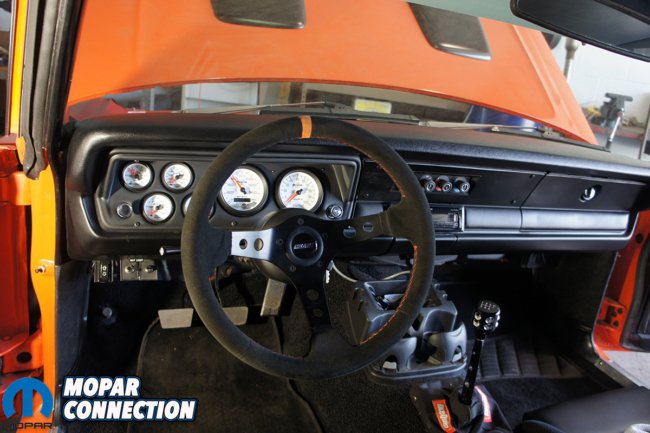
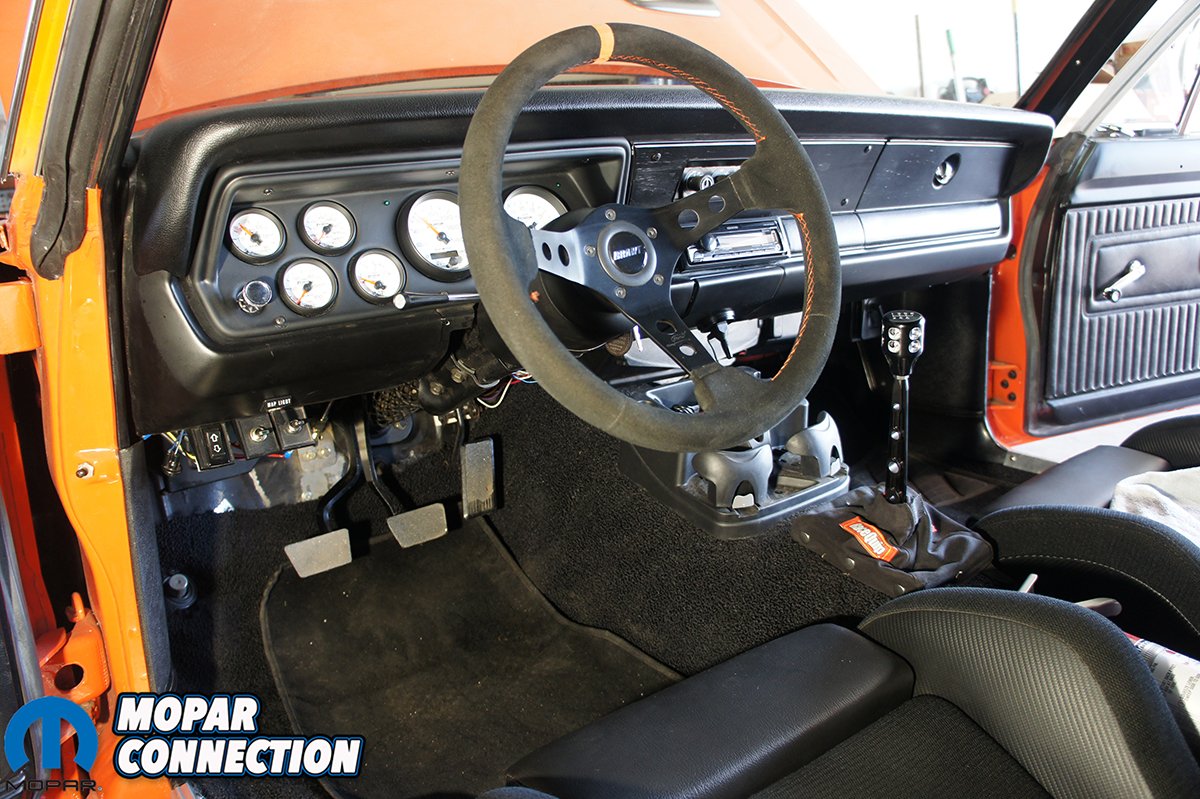
Above: Classic Dash and AutoMeter surpassed our expectations. The transformation is awesome and very suiting.
With everything back in the car, it was time to fire Orange Crush up and take it for a drive. Just like we expected everything on the dash worked like it should and the speedometer was dead on. We finally had a speedometer again along with more accurate and easy to read gauges for the cars vitals.
Looking back we wish we would have done this years ago. The installation took us one weekend and gave the interior the much needed modern feel. We have useful gauges and our speedometer back. We are still blown away how easy Classic Dash makes the installation with their dash insert fitment and gauge wiring kit. The AutoMeter gauges perform as well as they look. Stop procrastinating and order your dash and gauges today from Classic Dash and AutoMeter.






























This is has been on my wishlist for quite awhile. Great article! Now I know what I’d be getting myself into if i did it. Doing this modification isn’t inexpensive. It’s about $1,000 bucks which is why it hasn’t moved from my wishlist to the done-list.
Thank you for the compliment. The Classic Dash and AutoMeter gauges have been one of the best upgrades we have performed on Orange Crush and know you would not be dissapointed. Classic Dash is running 15% off right now until October 31st just use code Classic15.