


For those who have followed this Police Package Dodge Charger series since its inception, this installment will conclude the run. If you are new to the series, here is a little history about the Charger.
It started when I purchased a retired Police Package-equipped 2006 Dodge Charger with a 5.7L HEMI that needed serious attention to return to roadworthy condition. After repairing the drivability concerns, attention was given to the bodywork and paint for the next several months.


Above: The Charger had a lot of black paint that needed something to break it up. Vinyl Imagination had just what was needed—a pair of hockey stick graphics for the quarter panels. The graphics were matte black but reflective white under certain light.
With a fresh coat of Brilliant Black paint on the flanks, the interior moved to the forefront. Every interior component was cleaned, repaired, or replaced so the finished results looked as spectacular as the Charger’s black exterior. New tires were added, and several drivetrain repairs were required.
The latest installment of the series covered installing a new steering wheel and repairing the backlighting of the instrument cluster and the HVAC control head. To conclude the series, I added some quarter panel graphics, gathered chassis dynamometer numbers, and made a few runs down the quarter mile.


Above: The Hemi hockey stick graphics were similar to the 1970 Plymouth E-bodies in appearance. After several measurements, the driver-side graphic was taped to the quarter panel. The graphic was adjusted up, down, forward, and rearward to locate the hockey stick.
Below are the previous installments:
- Retired Cruiser Returned to Action – Part I
- Beginning Collision Repair on a 2006 Dodge Charger Pursuit – Part II
- The Body Work on this ’06 Dodge Charger Police Pursuit Continues – Part III
- The Collision Repair & Paintwork Concludes on Pursuit Charger – Part IV
- Refurbishing the Interior of a Police Pursuit Charger – Part V
- Tires, Interior Parts & Setbacks for Charger Pursuit Project – Part VI
- Lighting and Steering Wheel Upgrades for a Charger Pursuit – Part VII
The Charger’s exterior needed a subtle contrasting graphic to break up all the black. There are several aftermarket factory-type graphics for the Charger and many different color options, but nothing I came across met my expectations. Everything seemed so insignificant to add to the car or overbearing in size or color that I almost entirely dropped the idea of a visual.


Above Left: The graphic backer was removed, and with the quarter panel sprayed down with Right-On solution, the graphic was positioned into place. Above Right: A squeegee forced the solution and bubbles from under the graphic. The surface of the graphic was not damaged because there was a film over the graphic, so the pressure on the squeegee was not transferred directly to the graphic’s surface.
However, I found a perfect graphic for the Charger from Vinyl Imagination. It was a “hockey stick” design like the 1970s E-body Plymouths but beefier-looking for the Charger. What caught my attention was that I could get these hockey sticks in a reflective black color. The sticks would look matte black in daylight but flash a light onto them, and they would be an intense white color.
Moreover, I could provide my custom text for the hockey sticks. With subtly in mind, I selected “HEMI” in the middle part of the graphic and “5.7 LITER” in the lower section. I ordered the graphics online, and the next day, I received a copy of an image of my graphics and a request for my consent. I approved, and I had the graphics in less than five days.


Above Left: The installation of the graphic continued. With the more significant portion of the graphic in place, the “handle” end of the hockey stick was lubricated. Above Center: After removing the bubbles, the protective film was removed from the graphic. Above Right: After cutting the graphic at the fuel door opening, the squeegee was used to force the graphic around the door edges.
Without experience installing large graphics, I looked over the installation paperwork provided by Vinyl Imagination. Early on, I decided that a wet application would be more forgiving than a dry installation. I was not concerned with the total installation time, so a wet installation would give me more opportunities to get the graphics where I wanted them, even though drying time would be needed.
A Penn College body shop professor suggested I try a solution called Right-On to aid in installing the graphics. With the quarter panels cleaned, measured, and marked (with tape), I removed the backer from the door section of the hockey stick graphic. Then, I applied the Right-On spray solution onto the Charger’s door and the hockey stick graphic. I worked the graphic with a plastic squeegee to clear the air bubbles and ensure I had removed the application solution.


Above Left: The last part of the hockey stick “handle” was installed onto the door. The same wet installation process was used. Above Right: The ends of the graphic were tucked into the door opening.
The same process was performed on the quarter panel section of the graphic. I let the transfer tape (pre-mask) dry for about an hour before I removed it to expose the graphic. With the squeegee wrapped in a protective soft cloth, I worked the graphic again, wrapping it into the door opening area and the gas door area on the driver’s side of the Charger. I performed the same procedure on the passenger side of the Charger.
The hockey stick graphics installation was a great experience. The Right-On solution and the Vinyl Imagination installation paperwork made the job much less formidable than anticipated. The results are just what I wanted: a subtle look that makes you double-take to ensure you saw something. Depending on the lighting and viewing angle, the hockey sticks’ color seems to progress from matte black to brown, honey gold, steel blue, gunship gray, and bright white.

Above: The matte black hockey stick graphic is barely visible. Even though I had no experience installing graphics, the installation process went smoothly on the Charger’s driver’s side.
With all the work completed on the Charger, it was time to post performance numbers on the Penn College Mustang chassis dyno. I performed a series of WOT pulls. With the assistance of a 93-octane Diablo Tune from a Diablosport InTune tuner, the Hemi laid down 307 horsepower at 5200 rpm and 338 lb/ft of torque at 4250 rpm.
After gathering the dyno numbers, the Charger was driven to Beaver Springs Dragway (BSD) in Beaver Springs, PA, for some quarter-mile passes. I am familiar with this track, making thousands of runs down the strip over the years and acquiring two track championships with my ’69 Dart.


Above: The same process employed on the driver’s side was used on the passenger’s side of the Charger. Everything worked out just as well on the passenger’s side. The Vinyl Imagination graphics fit perfectly and look great.
Once at BSD, the Charger passed tech, and while I waited to make a pass, I was allowed to weigh in on the BSD scales. Many competitors offered their guesses as to the beast’s weight; I guessed 4300 lbs. My guess was the closest, as the Charger weighed 4280 lbs. With me in the Charger, the total weight was 25 lbs. short of 4500 lbs.
The Charger’s on-track performance left much to be desired. I was disappointed with the elapsed times; all the runs were in the 15-second zone and inconsistent. The best elapsed time of the day was 15.497et, which was a full half-second off my expectation.

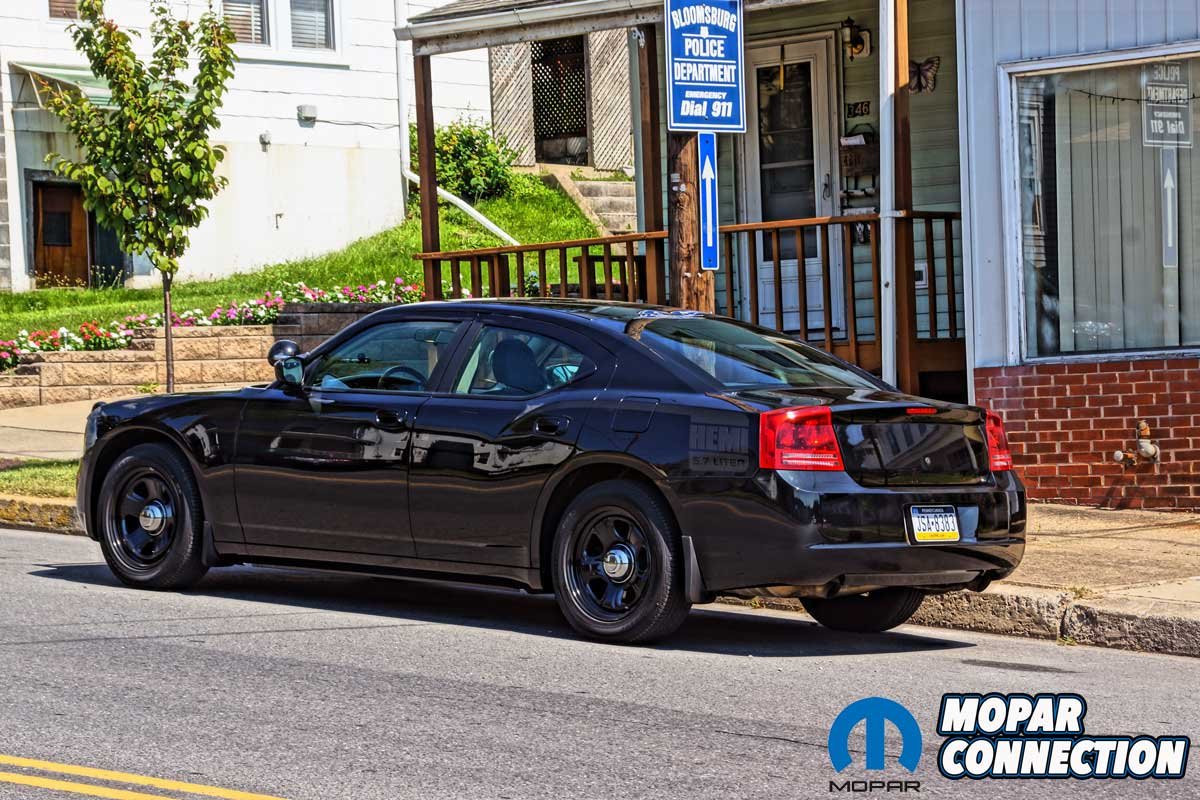
Above: Many people think the Charger is still an active police car, so I am taking advantage of convenient parking. The Bloomsburg, PA police thought it would be cool to get a photo of the Charger by the sign. I did not park in a restricted parking space.
What caused the slow elapsed times? Tire spin with street radial tires. No matter what I did and how the ESP (electronic stability program) was set, tire spin was a problem all day. Even though I tried to feather the throttle out of the hole, when the last amber flashed, my drag-racing experience caused my right foot to punch the loud pedal to the floor, resulting in traction-related problems.


Above: The Charger restoration project turned out great. The car drives great, and the interior and exterior finishes are perfect. The nearly yearlong project ended $125 over the $12,000 budget.
The Charger’s mph was more consistent, ranging from 92.45 to 93.10 mph. Using the mph and the 3250’ altitude density (91.7 degrees, 52.3% RH, 29.21” barometer, and a track elevation of 642’), a conversion to sea level put the rear wheel horsepower (RWHP) at just over 308 hp. The dyno and the track RWHP numbers were almost identical. The HEMI has plenty of power; it needs some better tires to help hook the horsepower to the track.
That brings this series to its close. I have been asked a few questions about this year-long project. “Is this project something I can do?” “How much will it cost?” “How long will it take to complete?” A police car is going to be beaten up. Suppose you do not possess diagnostic skills, fabrication abilities, a good network of connections, and access to inexpensive labor, then the best answer is maybe it is a good project. Turning this type of car back into a nice, clean cruiser will be costly without some talent, and it may take some time to complete.


Above: The graphic is barely visible depending in the light. It will change color slightly with changes in ambient lighting. However, when a flash from a camera is introduced, the color is a reflective and noticeable hockey stick graphic.
Could you get by just putting on some tires and fixing a few things to keep it on the road? Yes, but that is not my style; I wanted a clean car. Do I enjoy driving the Charger? Yes, it is quite an experience. The vehicle earns respect regardless of who is in it. For instance, I was mistakenly assumed to be a police officer by road attendants, who waived through a traffic jam at a major accident scene while those stuck in traffic waited.
On two separate occasions, I have been flagged down for help with directions. The best (worst) is that I can pace the speed on any interstate (two lanes or more). If I am in the “slow” lane driving the posted speed limit or slightly above, I will end up with two lines of cars behind me (probably cussing me) or occasionally one attempting to slow creep by me in the left lane.


Above: The Charger was a disappointment at the track. It could only muster mid-15-second runs. The problem was the radial tires would not grip the track, which resulted in tire spin. Based on the trap speed, the Charger was making around 308 horsepower. The Mustang Chassis Dyno predicted 307 hp when the Charger was put through its paces on the dyno.
On those rare occasions when there are no lines of cars behind me, a person will come up on me quickly, moving to the passing lane, only to realize that the Charger must be a “police” car. They hit the brakes violently, dropping the nose of their car harder than a bracket racer holding five and trying to scrub it off at the stripe (those are some bracket racing terms; just be sure they slammed the brakes, trying not to pass).

Above: No matter where I go with the Charger, it messes up traffic. On any interstate in Pennsylvania, the Charger stacks up cars behind it. Few attempt to pass the Charger.
I am pleased with how the Charger turned out. It is an extremely comfortable car that rides smoothly and achieves just over 20 mpg. Since I am not a paint-and-body person, I thank collision professors Shaun Hack, Loren Bruckhart, and the Penn College collision students for their time and effort in the Charger.
After all this work, I am happy to report that I adhered to my budget, which was $12K in total. I exceeded it by just $125. The Charger’s restoration is over, but the adventures with the Cruiser are just beginning.


