


Vehicle restoration is always a significant undertaking. Although some individuals state, “it is an easy restoration,” problems usually arise. In January, I revealed the plan to return a 2006 Dodge Charger Police Pursuit to civilian duty. The first step was to clean the Charger, repair several components illuminating the dash lights, fix the wiring harness damage, and change the fluids. Then, in the February installment, the body work began. A previous repair had resulted in rust formation on the passenger side quarter panel.
Starting where we left off last month, with the quarter panel removed, the Pennsylvania College of Technology students addressed the outer fender well, the dogleg, and the C-pillar areas. Other than a small section that needed minor fabrication on the dogleg, there were no other major rust concerns. After some cleanup and treatment of the exposed metal, the surface was prepped for the new quarter panel.

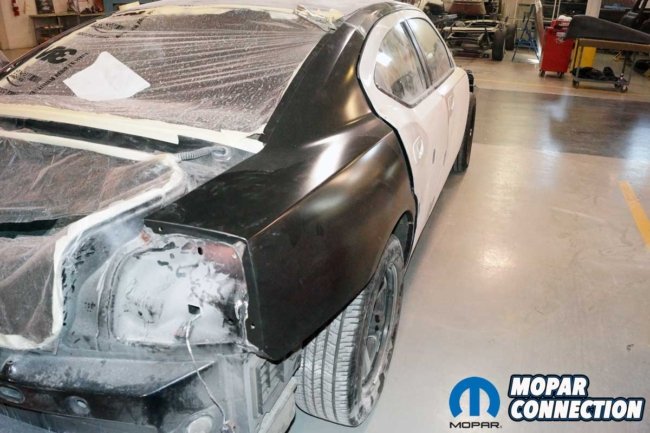
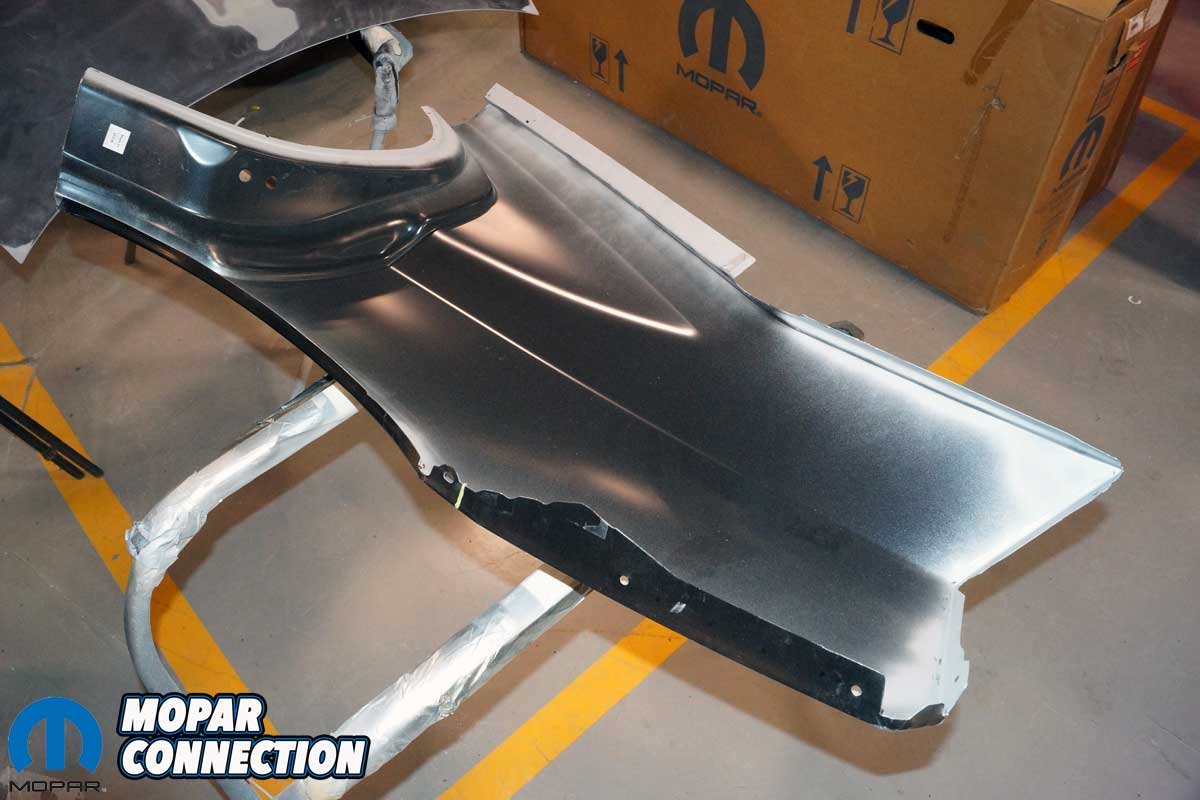
Above Left: The Penn College students added rust protection to the wheel well. The coverage should stop the chances of a reoccurrence of rust. Above Right: The new quarter panel was laid on the Charger. Getting the quarter panel lined up correctly took plenty of test fits. The trunk lid, bumper cover, and taillamp housing still had to be installed to verify the fit and the gaps.
Following additional measurements, a few significant cuts were made on the quarter panel, followed by a test fitting that revealed more minor cuts were necessary. Finessing of the metal was required before the perfect fit was achieved. With the quarter panel off the Charger, the students punched or drilled holes in the perimeter of the quarter panel so spot welds could be employed to affix it to the chassis.
The inner perimeter of the quarter panel was sanded to remove the e-coat, and a layer of weld-thru primer was applied to the bare steel. The area of the Charger’s chassis where the quarter panel would be welded was also sanded, and weld-thru primer was applied to the surface. The weld-thru primer would not burn off when the heat from the welding process was applied. A weld-thru primer forms a high zinc area that reduces the possibility of future corrosion development.

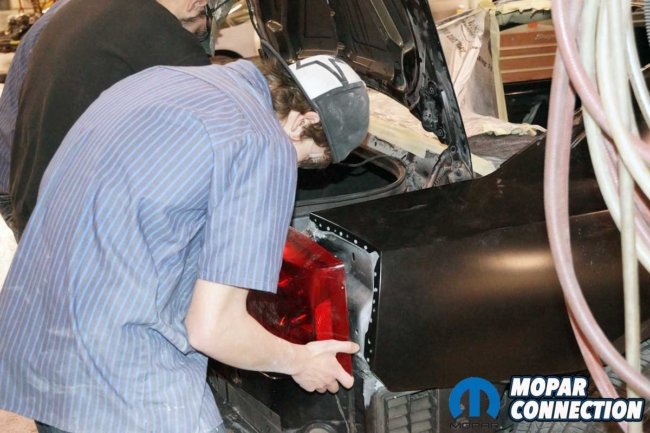

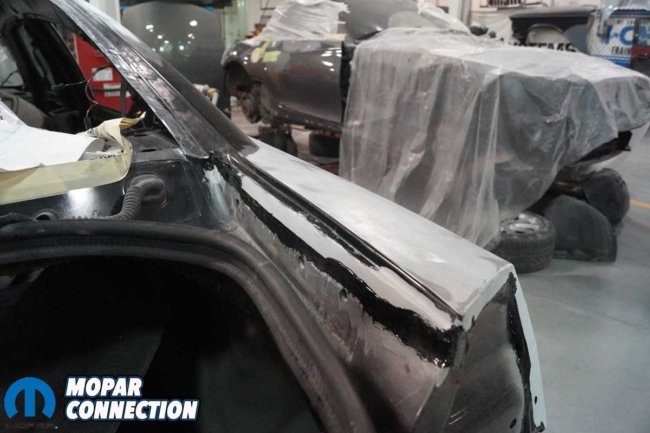
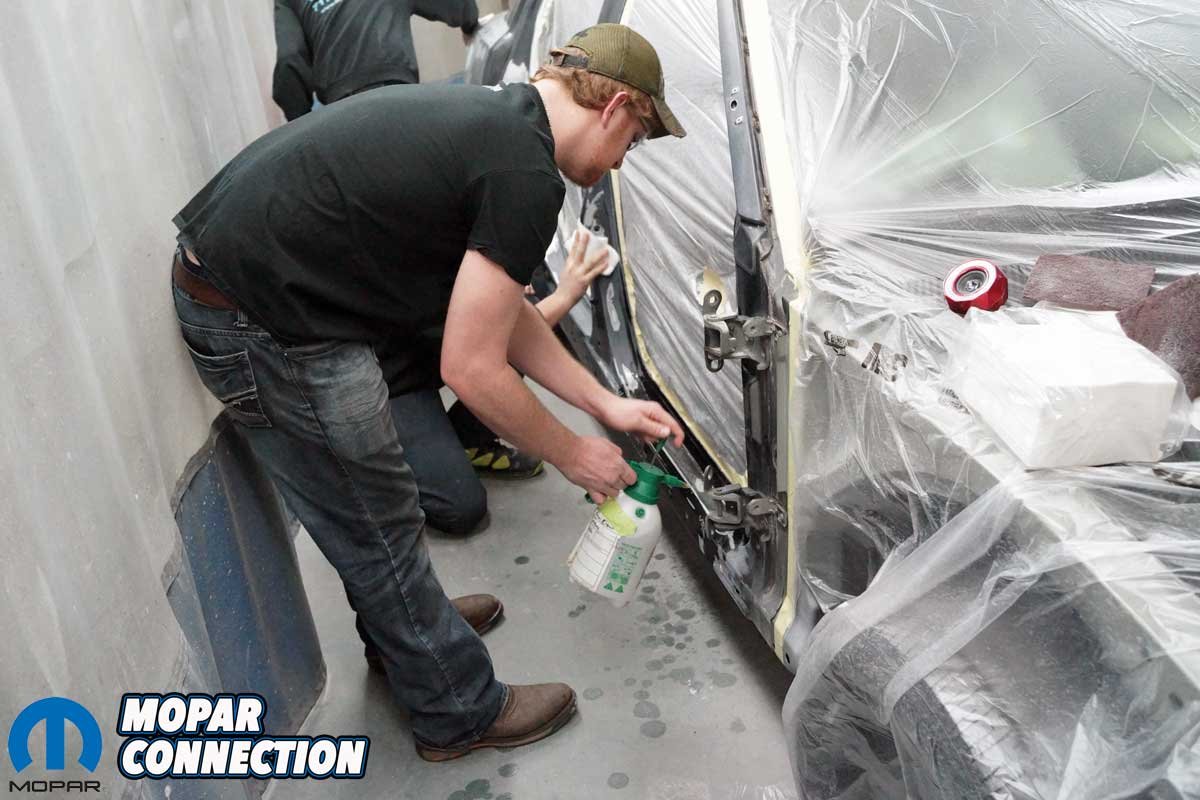
Above Left: Weld-thru primer was added to the inner areas of the quarter panel. Before the primer was applied, the e-coat had been sanded off. Above Center: Nathan Deitrich test-fitted the taillamp housing. Notice the holes punched in the quarter panel. They are there to allow for spot welds. Above Right: Hunter Jenkins (left/hidden), Nathan Deitrich (center), and Zach Graybill (right) checked the bumper cover panel gaps.
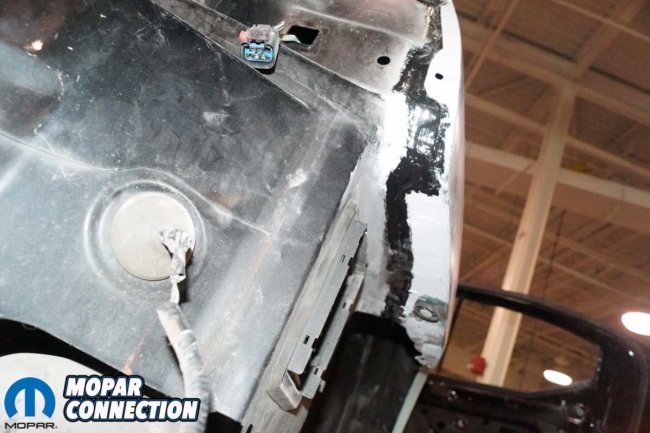
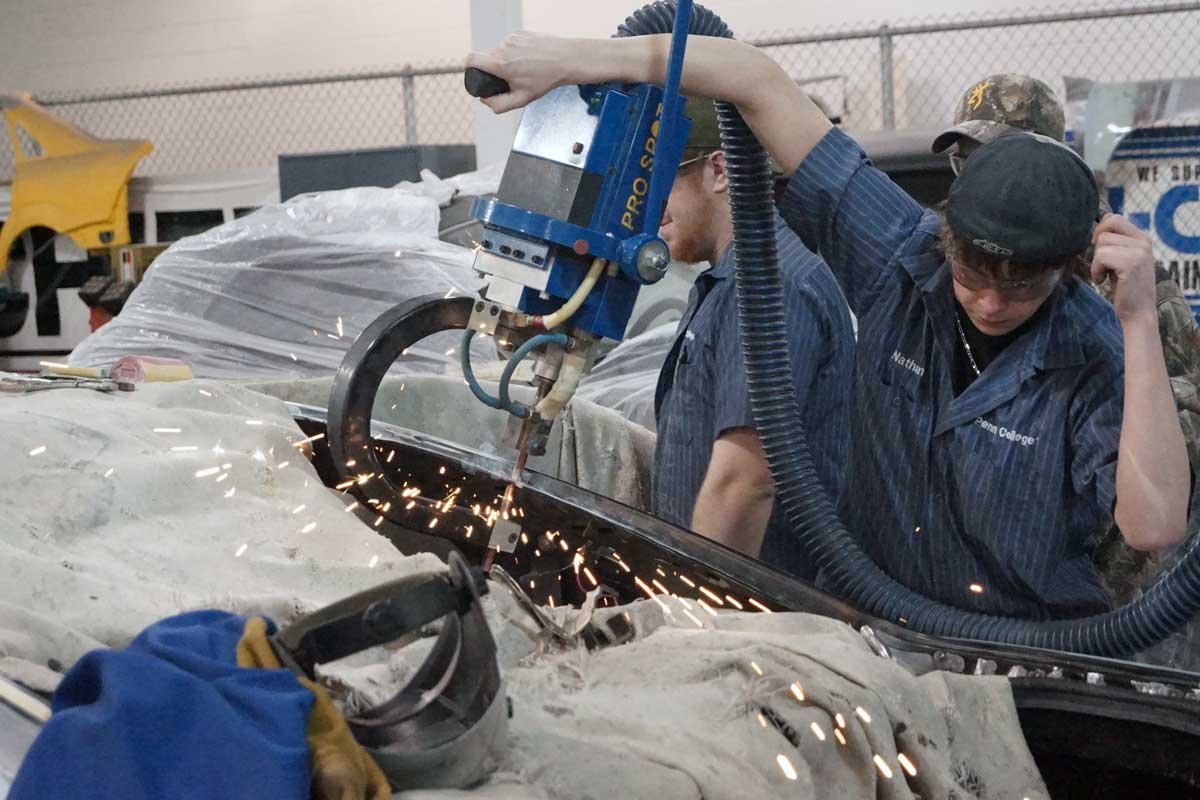
The students established the rear passenger door and quarter panel gap. Then, the quarter panel was clamped into place, and the students employed a resistance spot welder to apply a few tack welds to the quarter panel at the C-pillar and the dogleg areas. The resistance spot welder is designed to provide a weld as strong as the factory assembly line.
The students fitted the trunk lid and the taillight housing to the Charger. They moved the quarter panel (at the taillight area) to the proper location to maintain the gap between the trunk lid, the bumper cover, and the taillight housing. With the quarter panel measured for proper gaps, the rear of the quarter panel was welded into place with the resistance welder.


Above Left: The Penn College students moved the Pro Spot welder into place. Above Right: With the quarter panel clamped in position, Nathan let the sparks fly. He applied several spot welds to the panel. Each weld mimicked a factory weld. At least three dozen spot welds were required to weld the panel to the Charger.
Following the professors’ suggestions of replacing the entire quarter panel was a good idea. If I had just elected to have the rust bubble fixed by the students, more rust spots would have arisen soon after the repair because of the hidden damage. Replacing the entire quarter panel ensures a trouble-free repair.
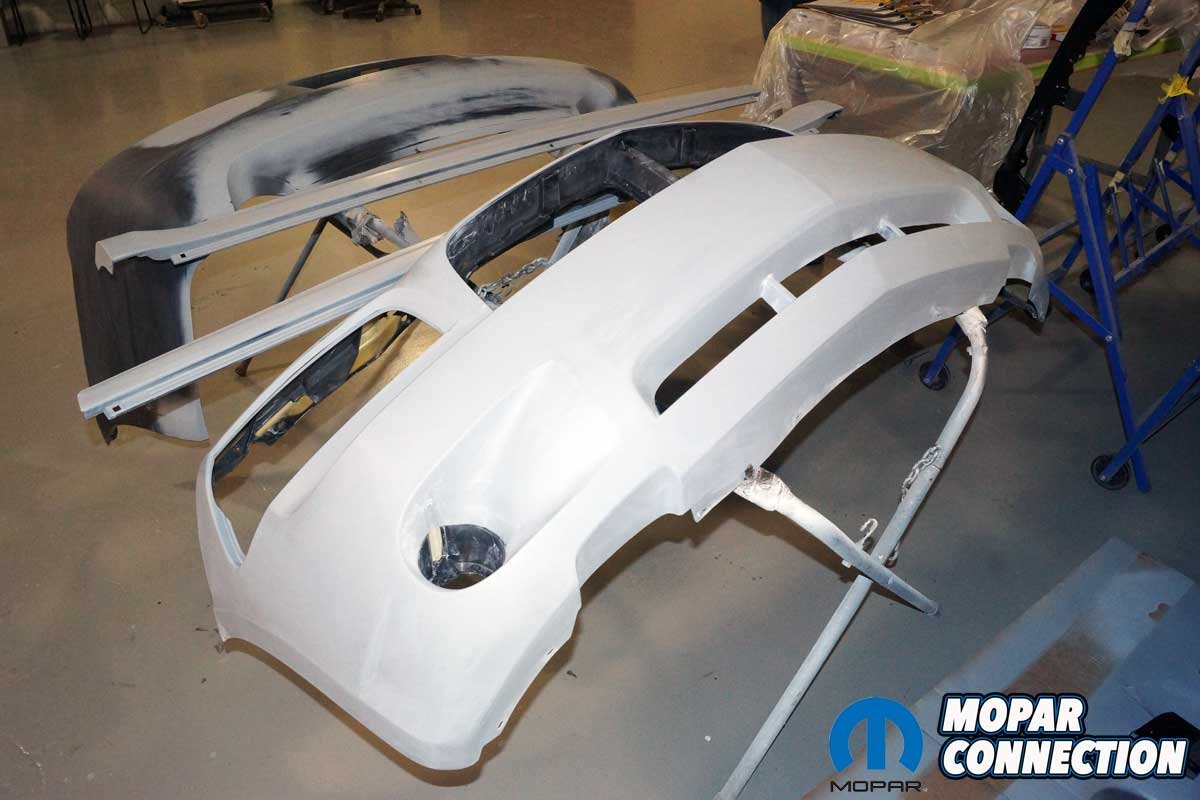
Once the quarter panel was installed, the body prep continued. Any remaining imperfections were massaged, and a skim coat of filler was added to the panels to achieve the proper contours. The previously removed front fenders, the hood, and the rocker panel trim were all sprayed in high-build primer so that additional long-board sanding could be performed.

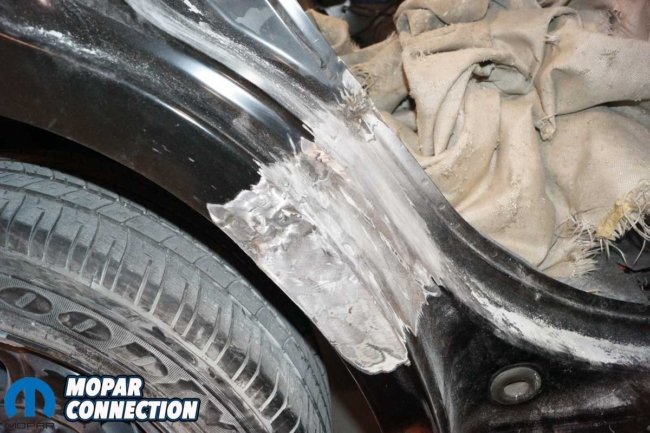
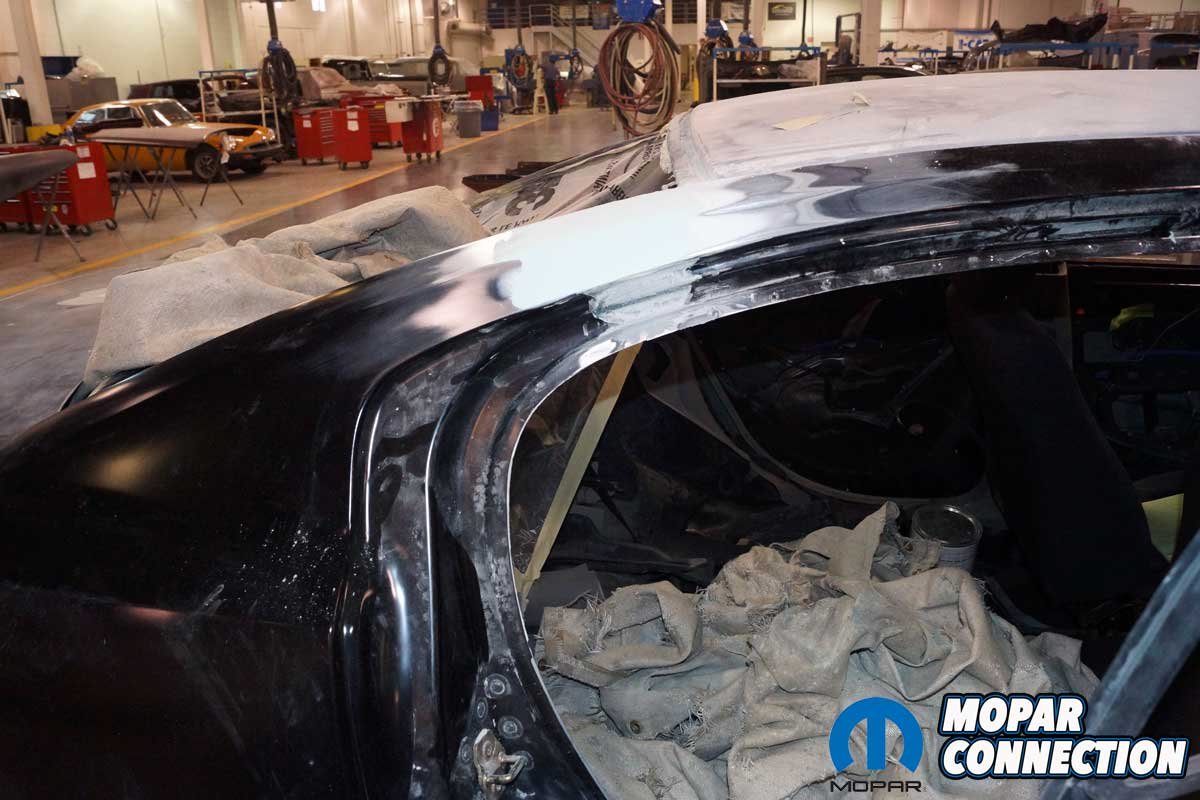
Above Left: The welded area at the C-pillar was ground down, and a layer of filler was applied and sanded flat. Above Right: The dogleg welds were smoothed. After the photo, a skim layer of filler covered the minor imperfections.
The front bumper cover was the last piece to be repaired. It had two one-inch-long impact splits. The work began on the painted side of the bumper cover. Using a die grinder, the students worked the length of both cracks into a V-channel shape.
Because the damage was extensive, grinding through the entire bumper cover at the splits was expected. The inner surface of the bumper cover was smoothly sanded and cleaned so an adhesive patch could be affixed to the damaged area. After applying the patch, the bumper cover was flipped over so the splits could be addressed on the outer side (painted side).


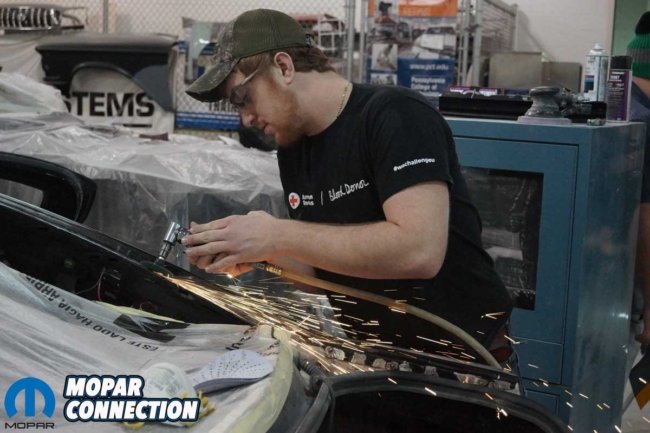
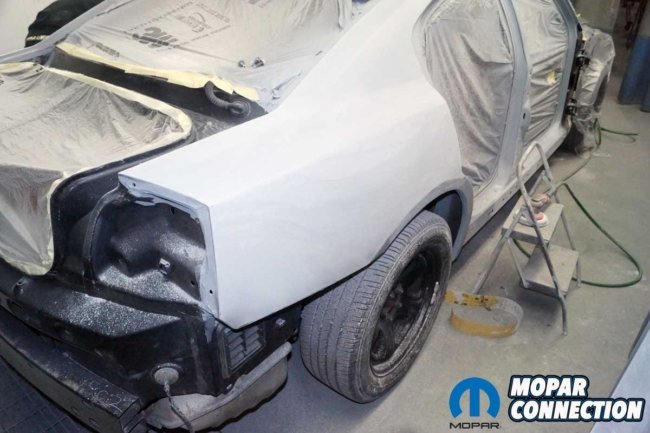
Above Left: Hunter added another layer of body filler. Most of it ended up on the floor after he sanded the area. Above Center: The quarter panel was nearing completion. The wheel lip required a little filler to adjust a few imperfections in the panel. Above Right: Zach knocked down a few high spots on the welds before smoothing them with body filler.
A flexible filler was applied and forced into the V channels. The filler selected was a 3M product (refer to Table 1 for the product list). It was a high-performance two-component epoxy-finishing adhesive that could repair most flexible plastic parts, including bumper covers. Once the flexible filler dried, it was sanded by hand and then with a dual action (DA) sander. The product sanded quickly and developed excellent featheredged results.
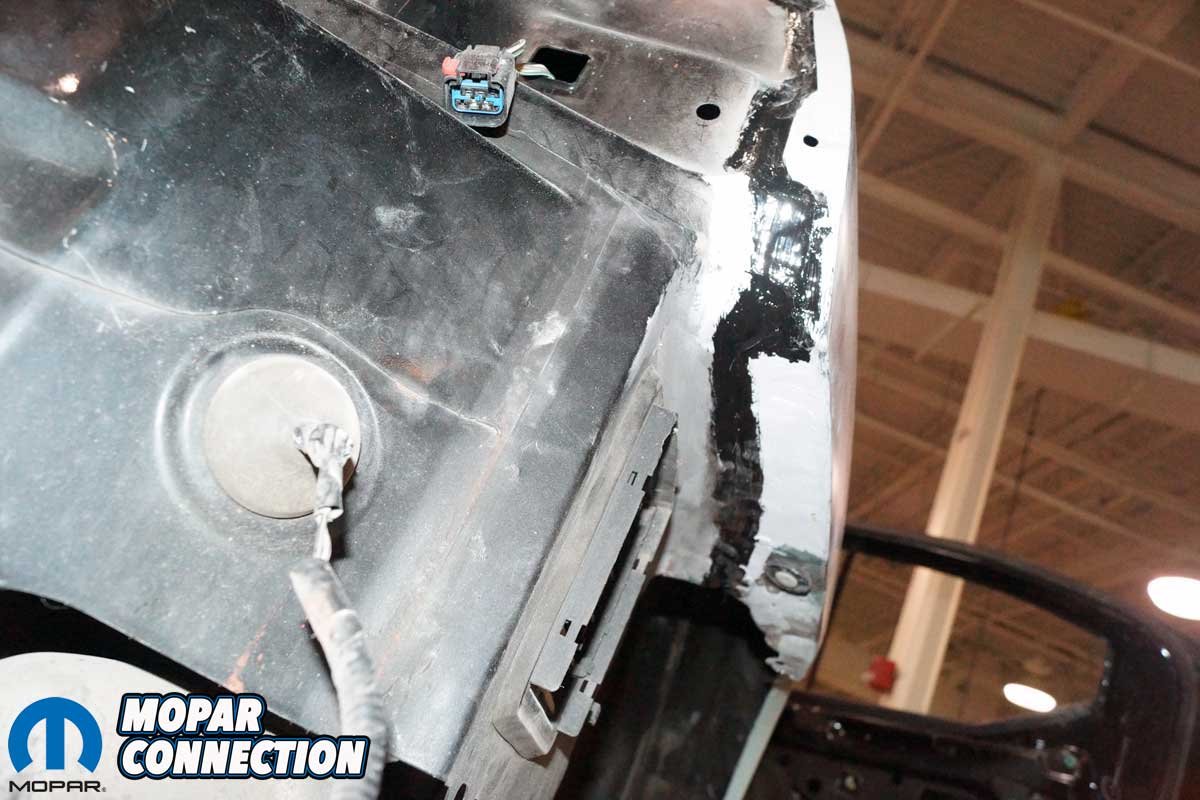
Above: The Penn College students added seam sealer along the old metal at the trunk lip and the wheel well to the new quarter panel.
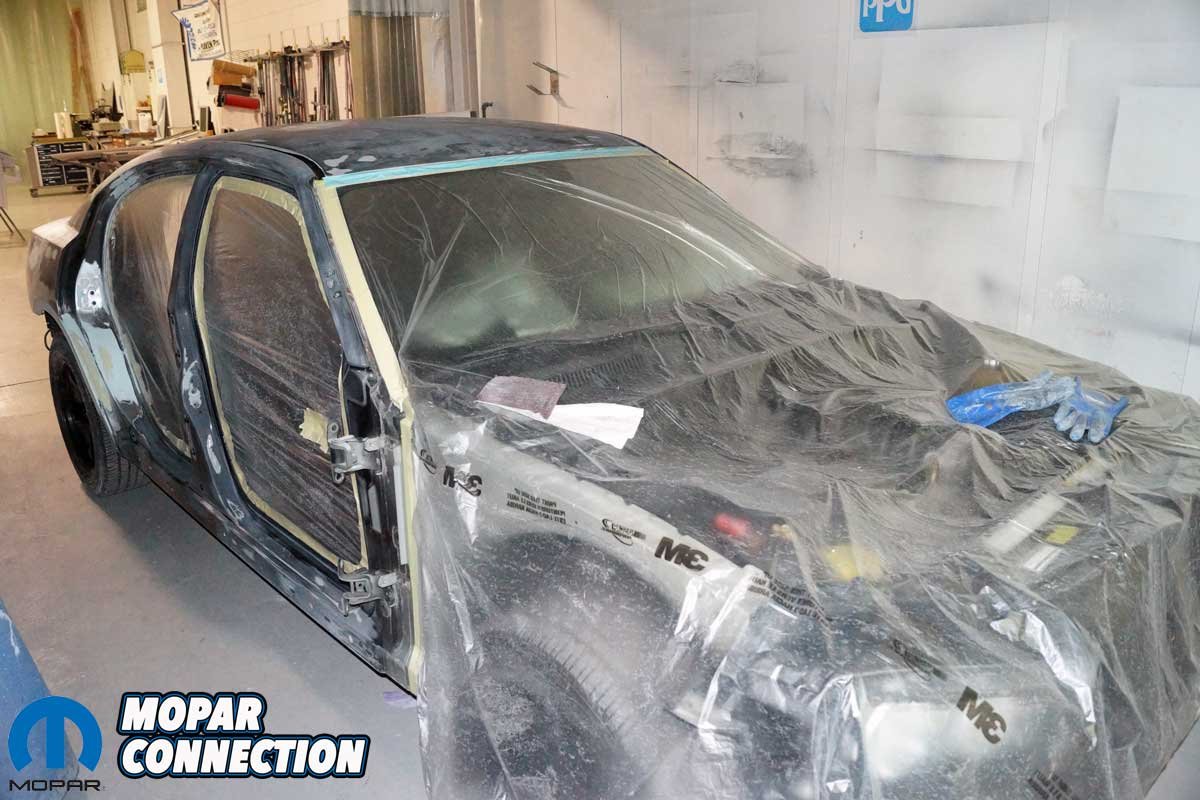
Upon completing the body repairs, the Charger’s doors were removed to be prepped separately from the chassis. The primer chosen for this project was a two-part component, non-isocyanate primer manufactured by DuPont that provided corrosion resistance and excellent adhesion characteristics for direct-to-metal applications.
The DuPont primer sealer and the accompanying activator were chosen because they dry to a dark gray color when mixed correctly, thus requiring fewer coats of basecoat paint product for complete surface coverage. Additionally, the selection of this primer allowed the bumper covers to be shot in primer without the need to add a flex agent.

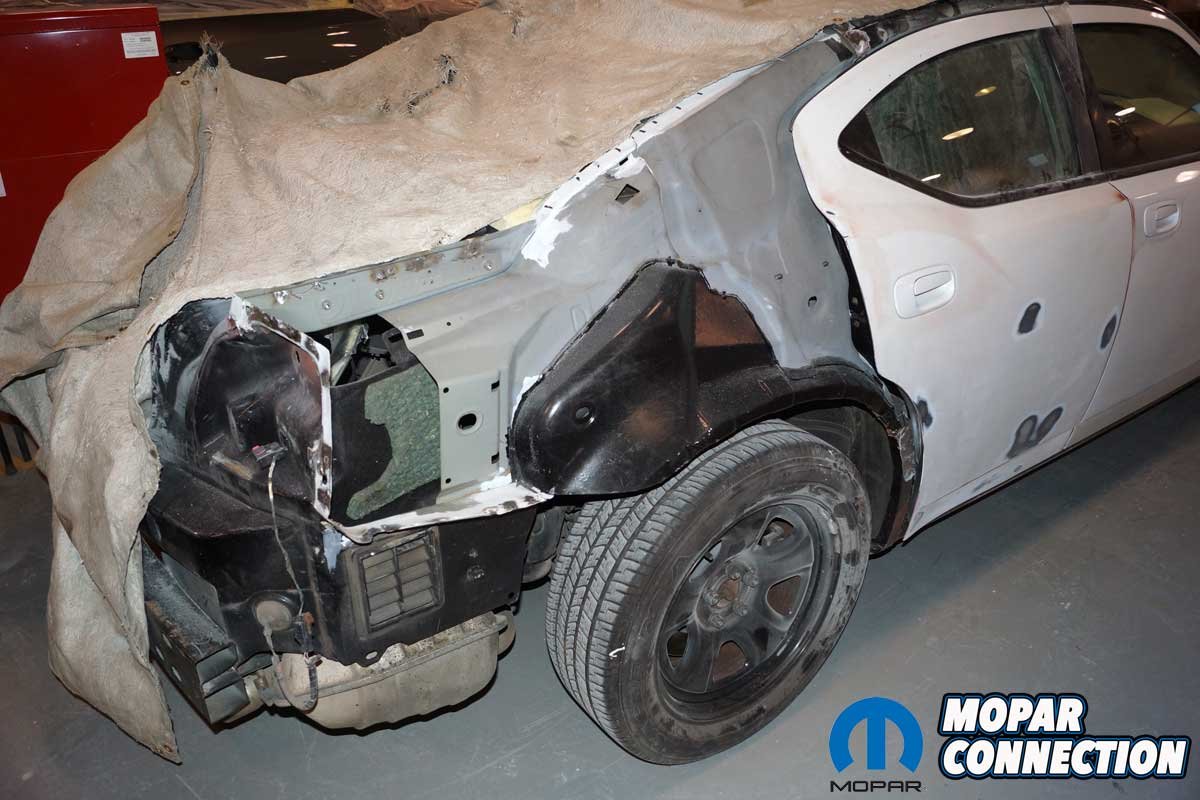
Above: The Charger once again had a passenger-side quarter panel. However, this time it was correctly prepped and installed, so the chances of future problems are negligible. After finding plenty of rust concerns when the old quarter panel was removed, I am glad a quarter panel was installed rather than a patch panel repair.
As the sealer primer application continued, the Charger’s chassis was cleaned and prepared for its turn in one of the prep booths. When a booth opened, the chassis was rolled in, and the interior, trunk area, and front of the car were taped. The entire vehicle was scuffed with a Scotch Brite pad to ensure enough “tooth” (mechanical adhesion) for the primer to adhere cleanly.
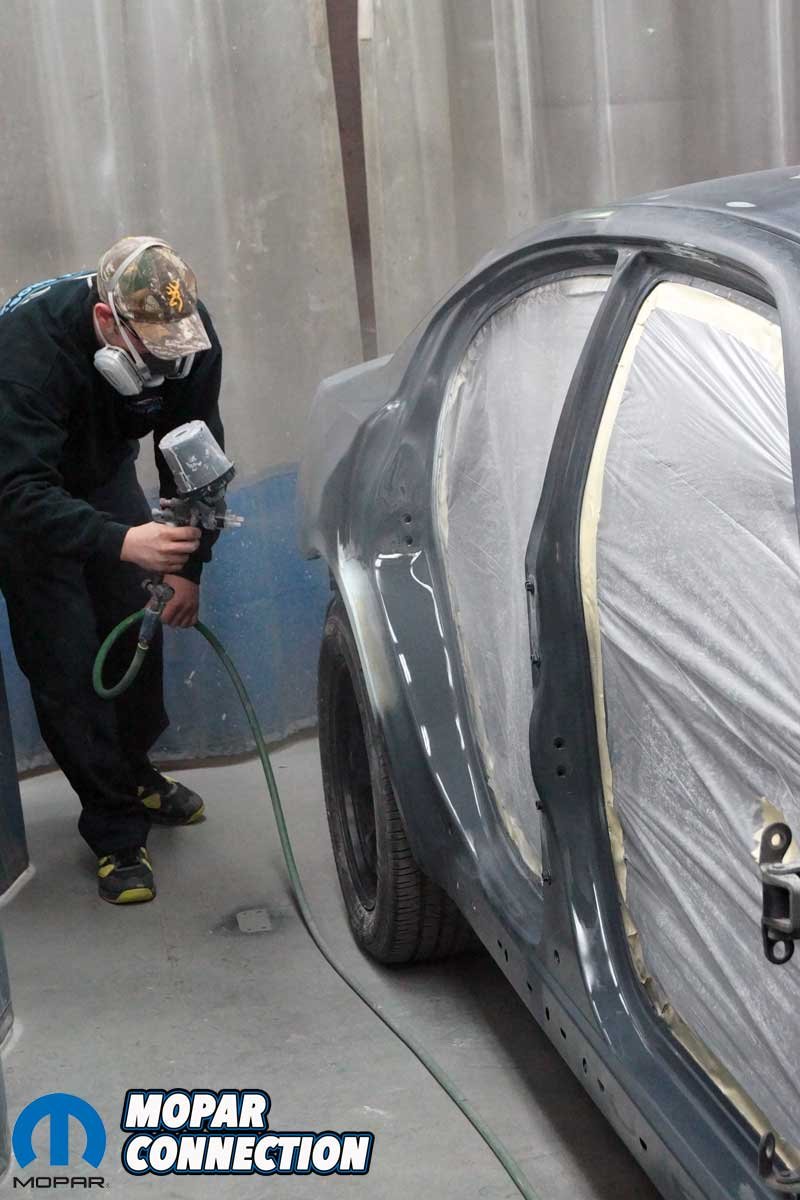
The students blew off all the Charger’s body panels with compressed air and treated the surface with a prep solvent to clean it before applying the DuPont sealer primer. With the paint gun loaded with primer, two medium coats were laid down, providing sufficient coverage. The primer was left to dry in the 75˚F prep booth. The two medium coats of primer supplied a thickness of about 2.0-2.2 mils.


Above Left: While the quarter panel was being prepped and installed, parts such as the front bumper, rear bumper, and rocker panel trim were sanded and sprayed with primer. Above Center: The Penn College students applied a waterborne basecoat paint with a solvent clear. The factory Brilliant Black looked great. Above Right: However, Hunter and Zack found a thin spot in the basecoat with a sun gun, so the cover had to be sanded, painted in primer, and then reshot in black and clear.
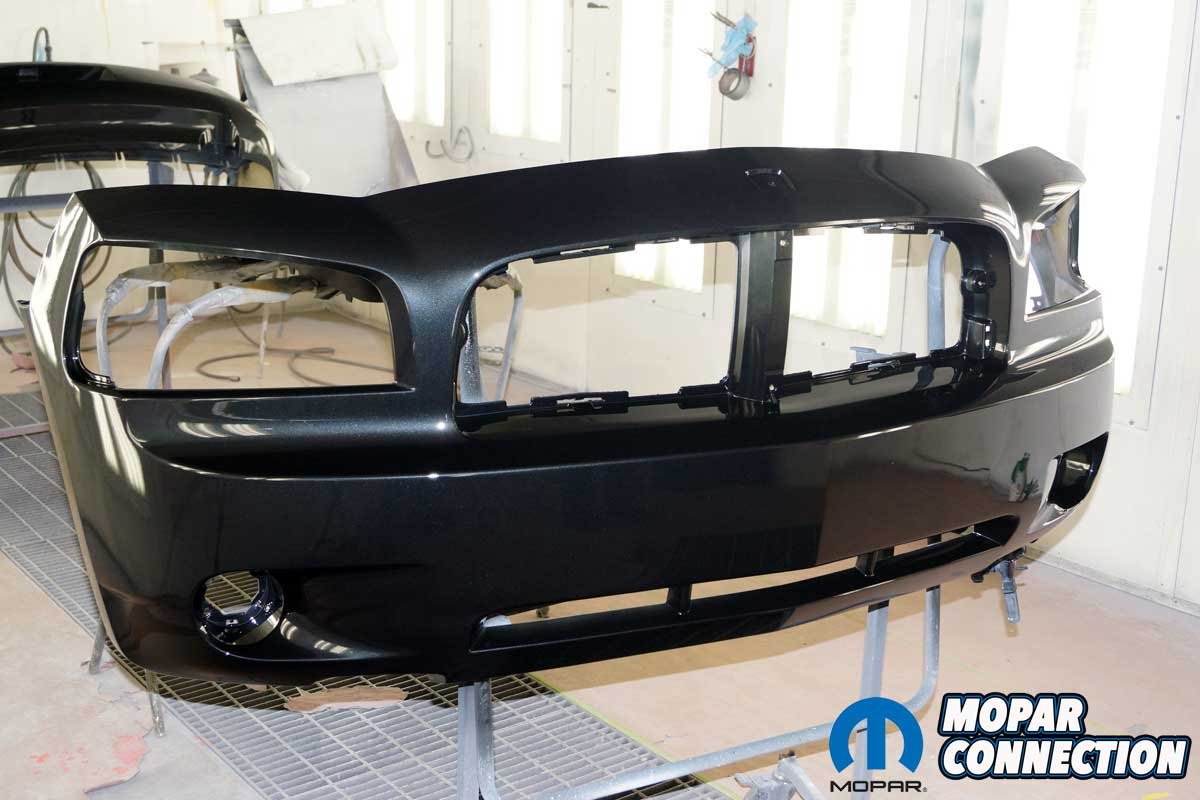
After sufficient drying, the primer was scuffed with a DA sander in preparation for the basecoat paint. The color selected for the Charger was the factory Brilliant Black (code XR). An Axalta Coating Systems Cromax Pro paint series was chosen to put the Charger “back in black.” To match the factory color, the mix colors required were Cromax Pro Black, green, satin white pearl, and satin blue pearl. A Cromax Pro binder and medium-fine aluminum were also needed to complete the factory paint color mix.


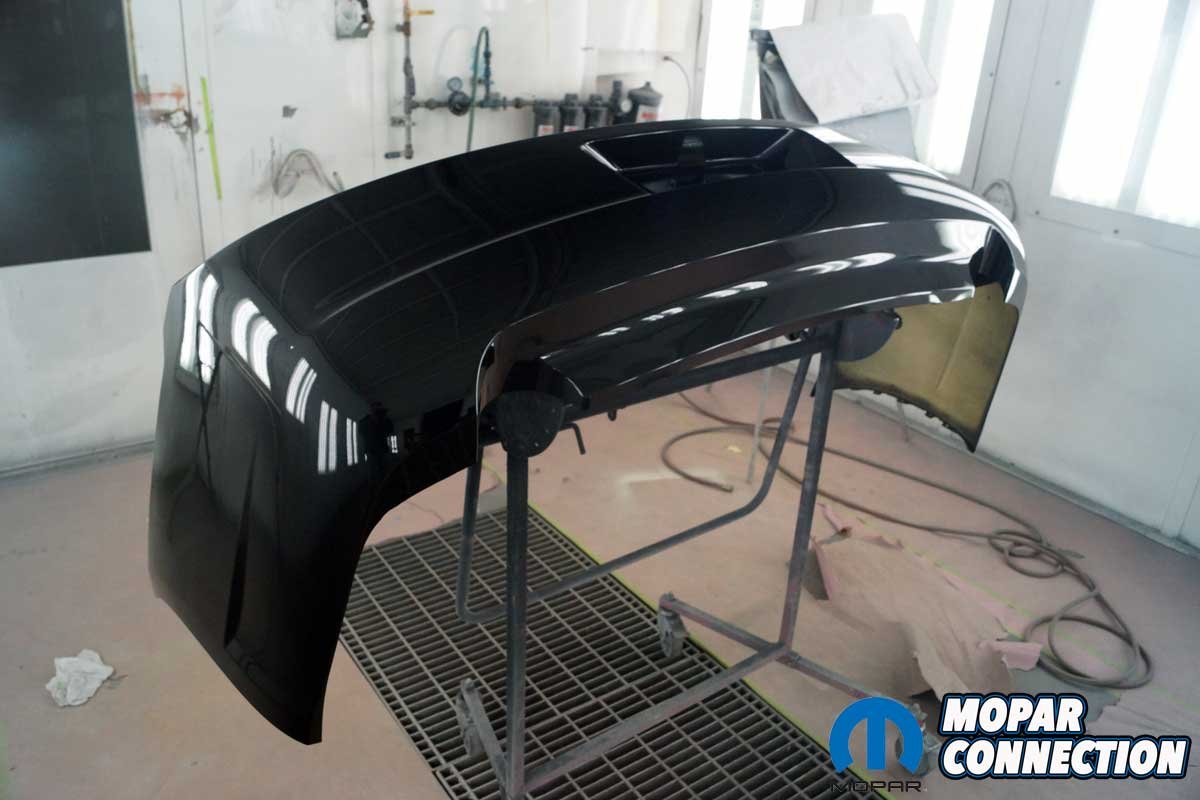
Above: The grill and the rear bumper cover looked fabulous. Each passed the sun gun test. Both parts were set aside until the remaining components of the Charger were painted.
The Cromax Pro basecoat series was a waterborne paint, a standard in the painting industry. Waterborne paint is formulated with much less solvent yet more pigment. The third-generation paint is designed to cover completely in one to two coats using a fast, wet-on-wet application process.
Waterborne paint requires different paint guns and some training in the paint application, especially if the painter has previous experience shooting solvent-based paints. With the additional speed and fewer products, a painter should adapt quickly. Due to less paint product usage, a business will benefit from increased efficiency and reduced costs. The cleanup of waterborne paint is also easier than that of solvent-based paints.


Above Left: The Charger was rolled into one of the prep booths. It was taped off, and the dust was blown off with dry, compressed air. Above Right: Zach did a final cleaning with prep solvent. The students wiped down the Charger one last time.
It was decided to paint the basecoat on a minor body part before painting the chassis, giving the students some practice time with the waterborne paint. The front bumper cover, already in the DuPont primer, was the first body part shot with the Cromax Pro waterborne basecoat. The students shot several layers of basecoat, and the coverage looked great.
After the proper drying time, a traditional DuPont solvent-based clear coat was applied to the cover. Coming out of the paint booth, the bumper cover looked almost ready to install. However, its combination of curves and turns made it one of the most challenging parts to paint on the Charger.


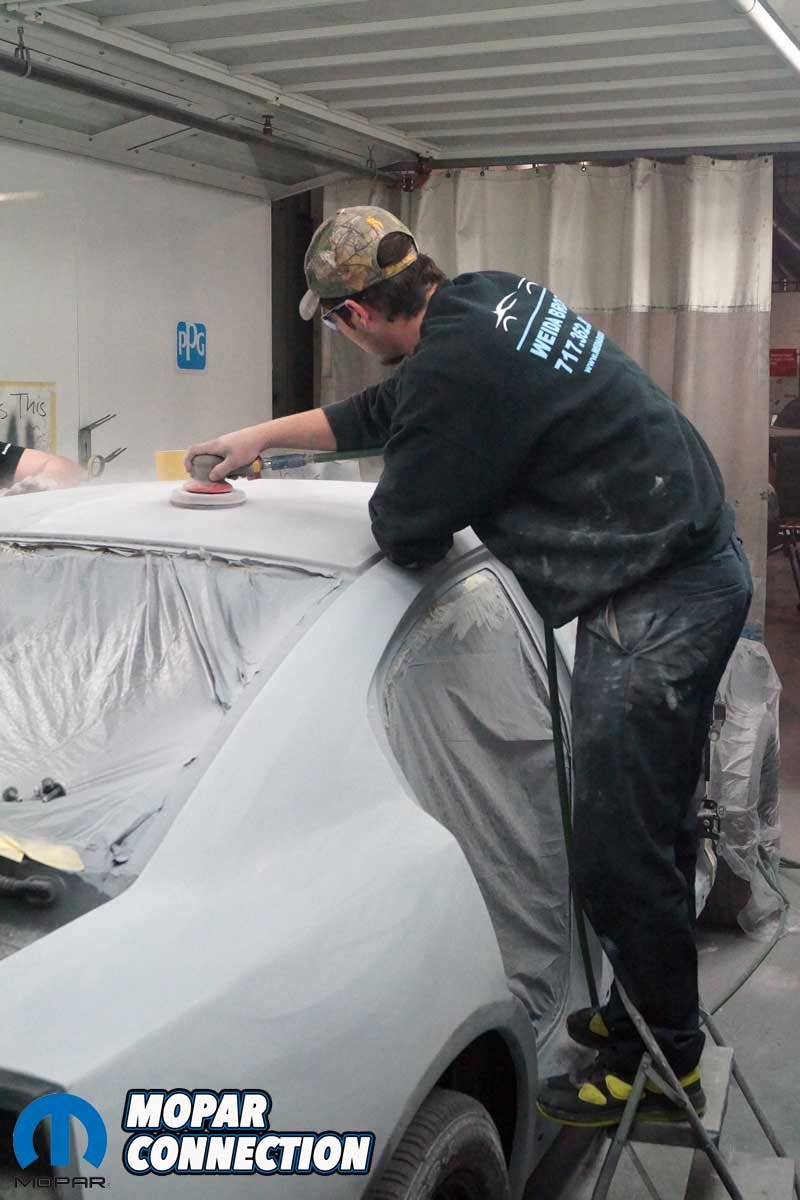
Above Left: Zach (left) and Hunter (right) referred to the charts to determine the proper mix ratio for the primer. Above Center: Hunter sprayed the primer over the entire Charger. The students applied two coats of primer. Above Right: Once the primer had dried, Hunter sanded the panels with fine-grit sandpaper on a DA sander.
The following day, the front cover was inspected with a “sun gun” light gun. A sun gun can determine the correct variant or alternative color chip, verify coverage, and match color. It can also identify pre-paint defects, including pinholes, scratches, and solvent pop. Furthermore, it can locate post-painting defects such as swirl marks, burn-through, sanding scratches, and dirt nibs.

Above Left: All four doors were primed and readied for paint. Above Right: The quarter panel and chassis were ready for the basecoat and clear. Check back next month when the Charger is “back in black.”
While using the sun gun, the students found a translucent spot in the lower bumper cover where the basecoat was too thin, and the primer could be seen. Even though the rest of the cover looked great, the cover had to be stripped and re-shot. After completing the prep work, the students applied a more substantial basecoat coverage, and the bumper cover was successfully repainted. With the clear coat applied, the sun gun showed full paint coverage on the entire cover.

With some of the Charger’s parts in final paint and the rest in primer, the Penn College students will get the rest in black next month. Also, I plan to focus on the interior. I will add a new console, find new carpet modules, and decide how to restore the seats. Be sure to check back next month for updates on Charger Five-Oh.


