


When it comes to your engine bay, usually the first thing that you see is the air cleaner. Sitting right on top of the engine, the air cleaner can make or break the look of the entire engine bay. If you are restoring your Mopar or just cleaning up under the hood, your air cleaner is an absolute must not forget item. Over the years, Ma Mopar produced a ton of different air cleaners and sometimes it can be quite hard to pin point exactly which one your particular car would of came with from the factory. When you need to identify an air cleaner or figure out which one your car came with, we highly recommend checking out Nick’s Garage. He has an absolutely fantastic page dedicated just to air cleaner identification!
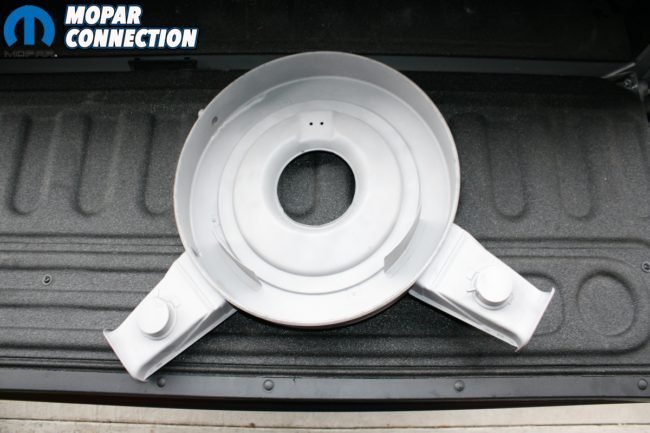
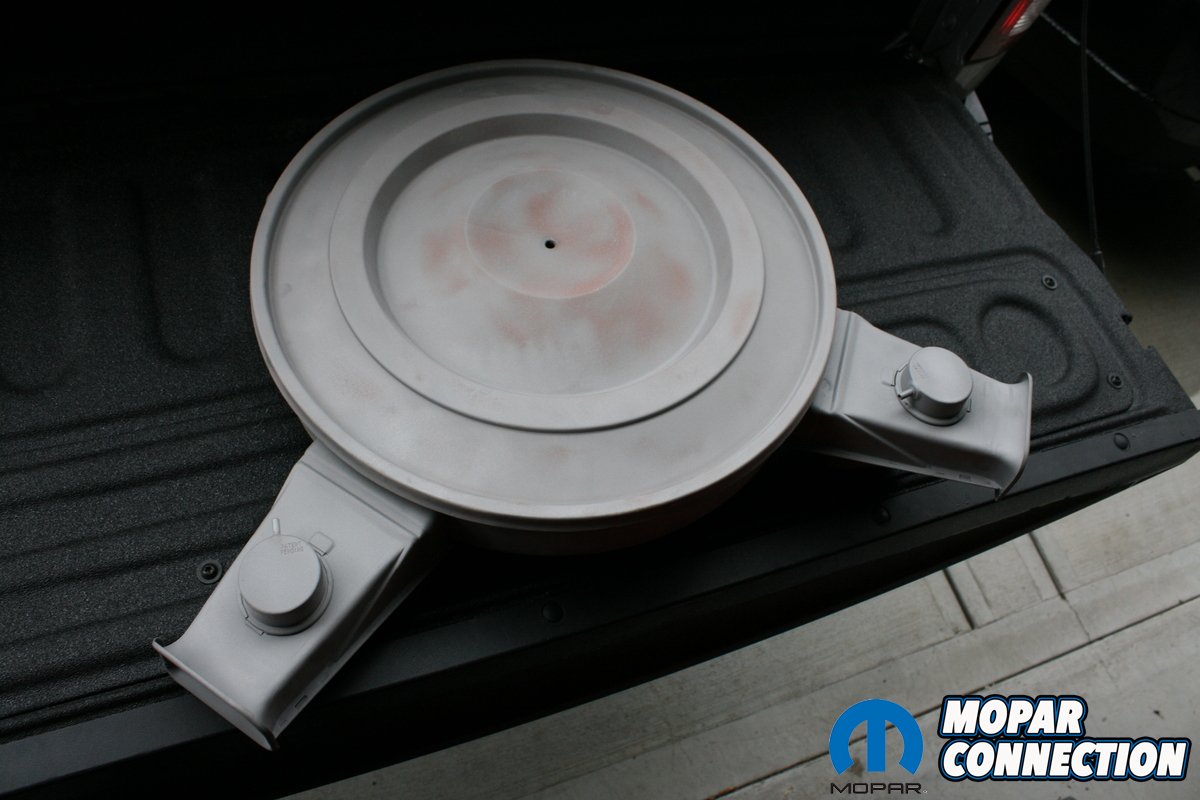
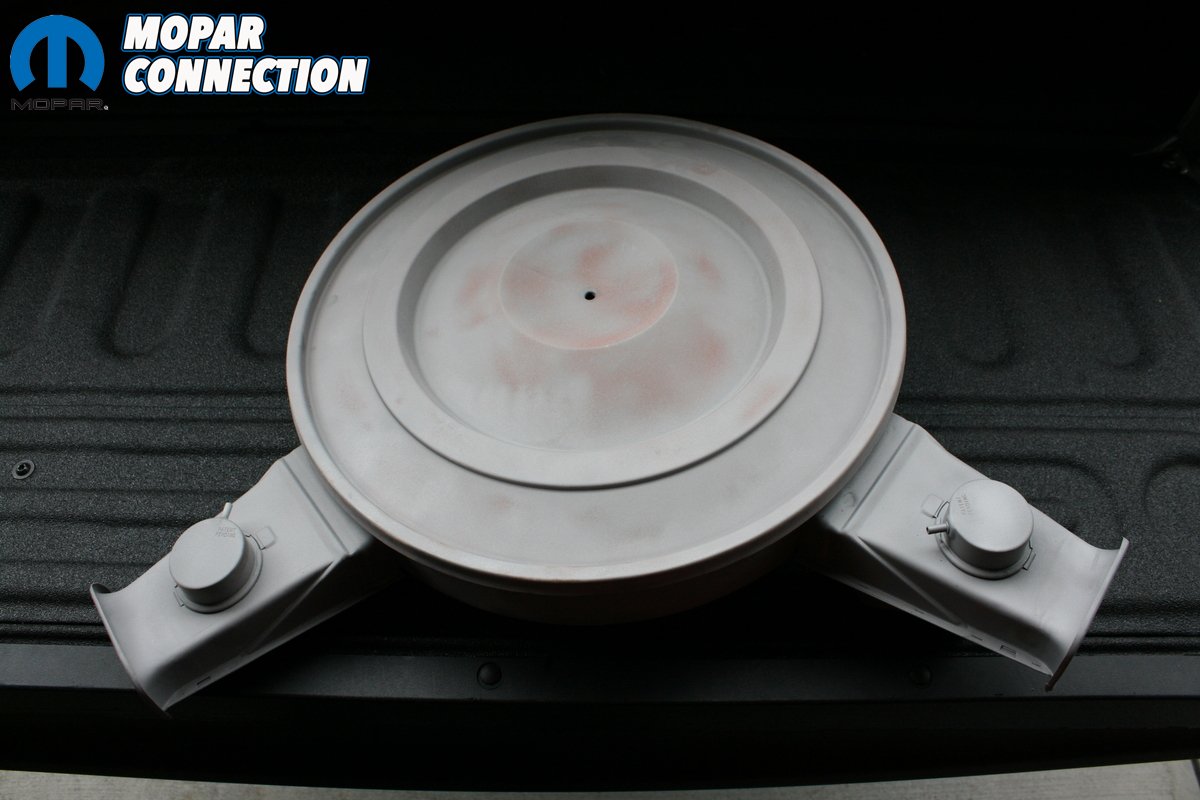
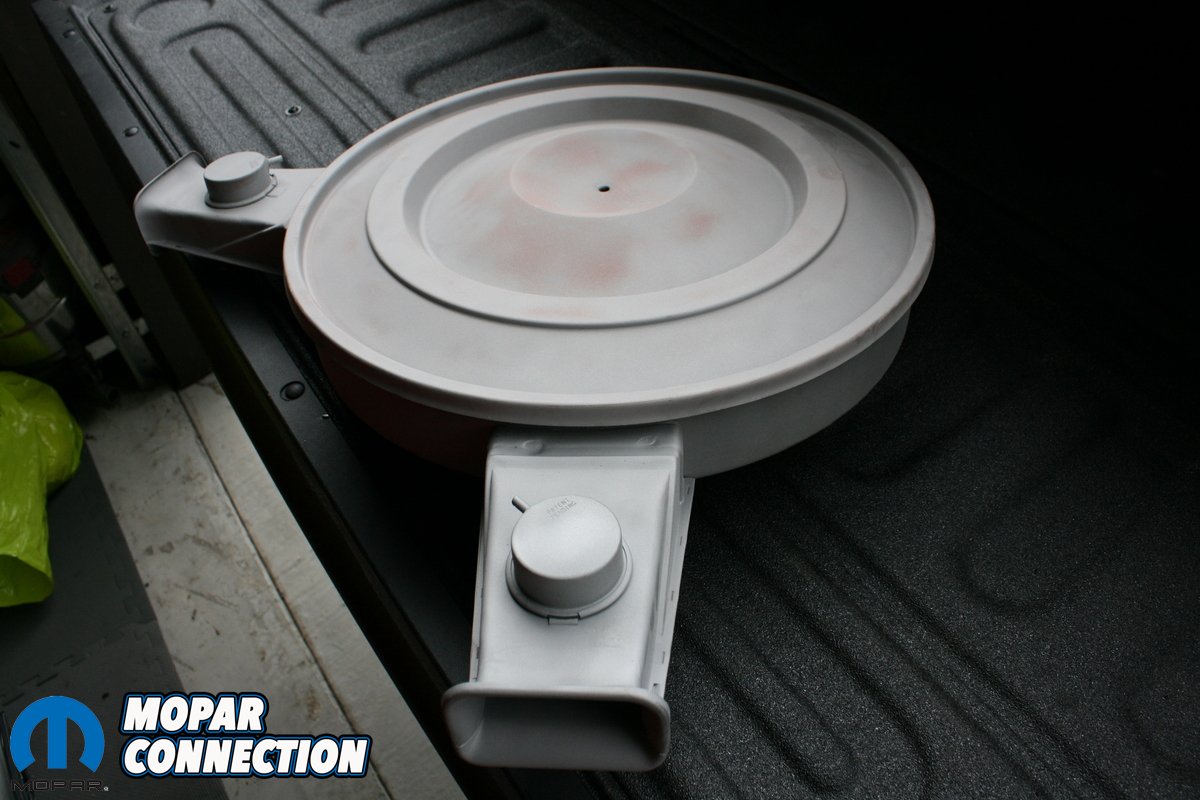
When we picked up our 1971 Dodge Charger R/T project car, we quickly noticed a number of engine parts were missing from the 440 such as the original air cleaner, exhaust manifolds and carburetor. We managed to score some exhaust manifolds last winter so next up, we picked up a dual snorkel air cleaner from a good friend of ours. 1970-1971 dual snorkel air cleaners are very popular items and therefore sell for a pretty penny.


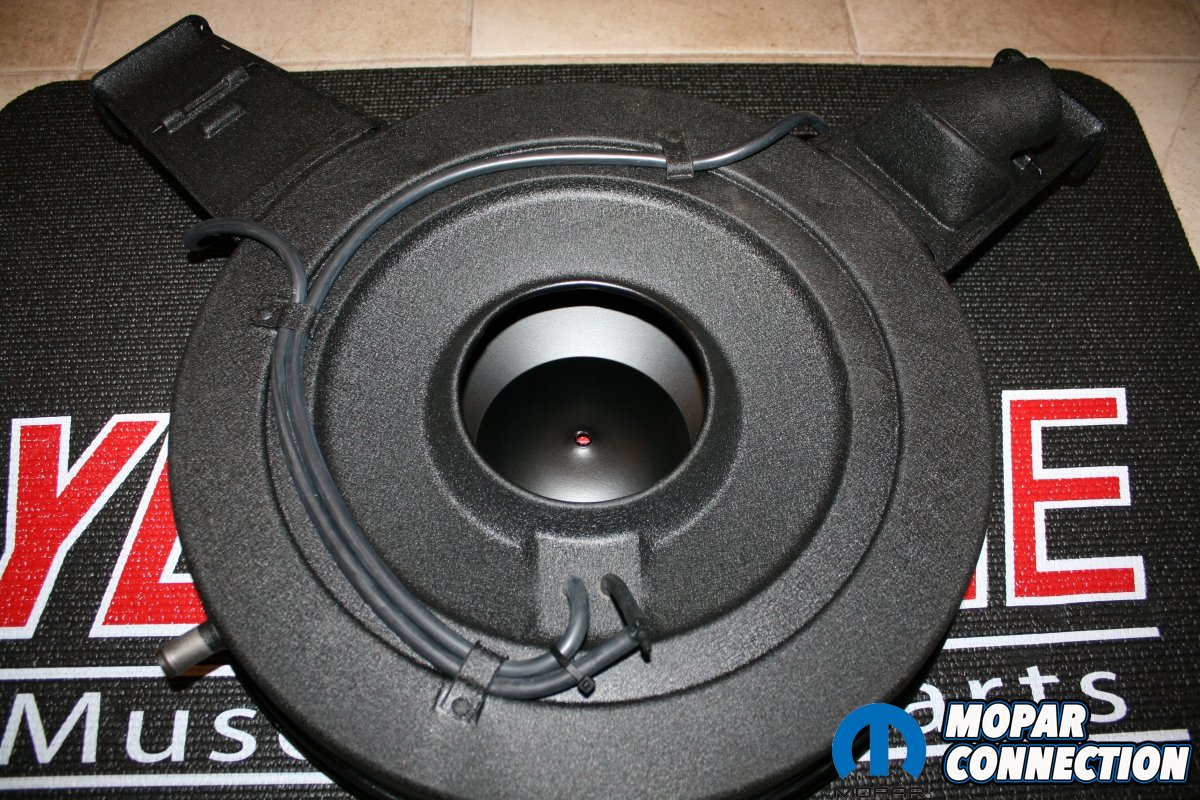
They were used on all 383 and 440- 4 barrel 1970 and 1971 B-body and E-body vehicles. What many don’t know is the 1970 parts were actually different from the 1971 parts in a few ways. The biggest difference is the breather hose that runs to the passenger side valve cover. In 1970, the breather hose was short and came off the back of the air cleaner. However, in 1971, the breather hose was quite long and came off of the driver side snorkel, ran along the back of the air cleaner and eventually found its way to the passenger side valve cover. Being as our air cleaner has the hose coming off the rear, it’s a 1970 part. Another difference is the crease lines on the snorkels. On the 1970 parts, both of the snorkels have straight crease lines. For 1971, there are two versions of the right snorkel design. Some of them have a straight line running diagonally and other have a hump in the line. 1972 air cleaners are very similar but have a curved crease line on the right side snorkel. While it’s not 100% correct for our 1971 Charger R/T, we went ahead with restoring it for the car.
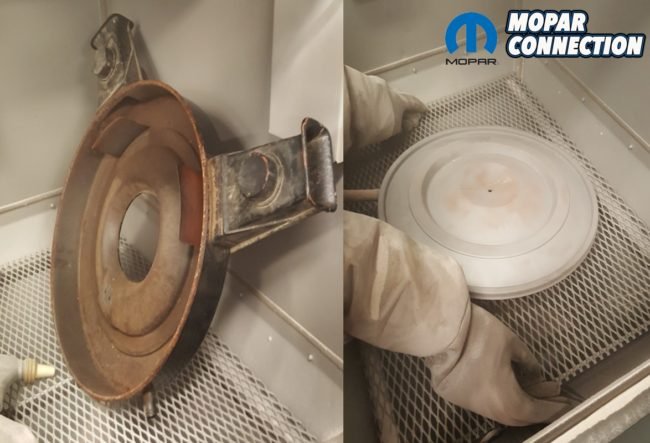
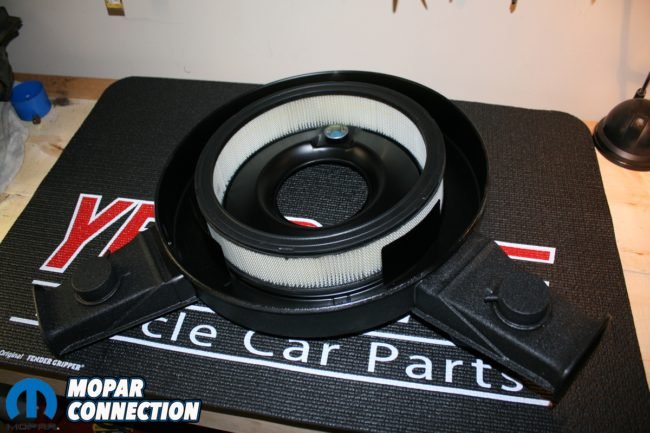
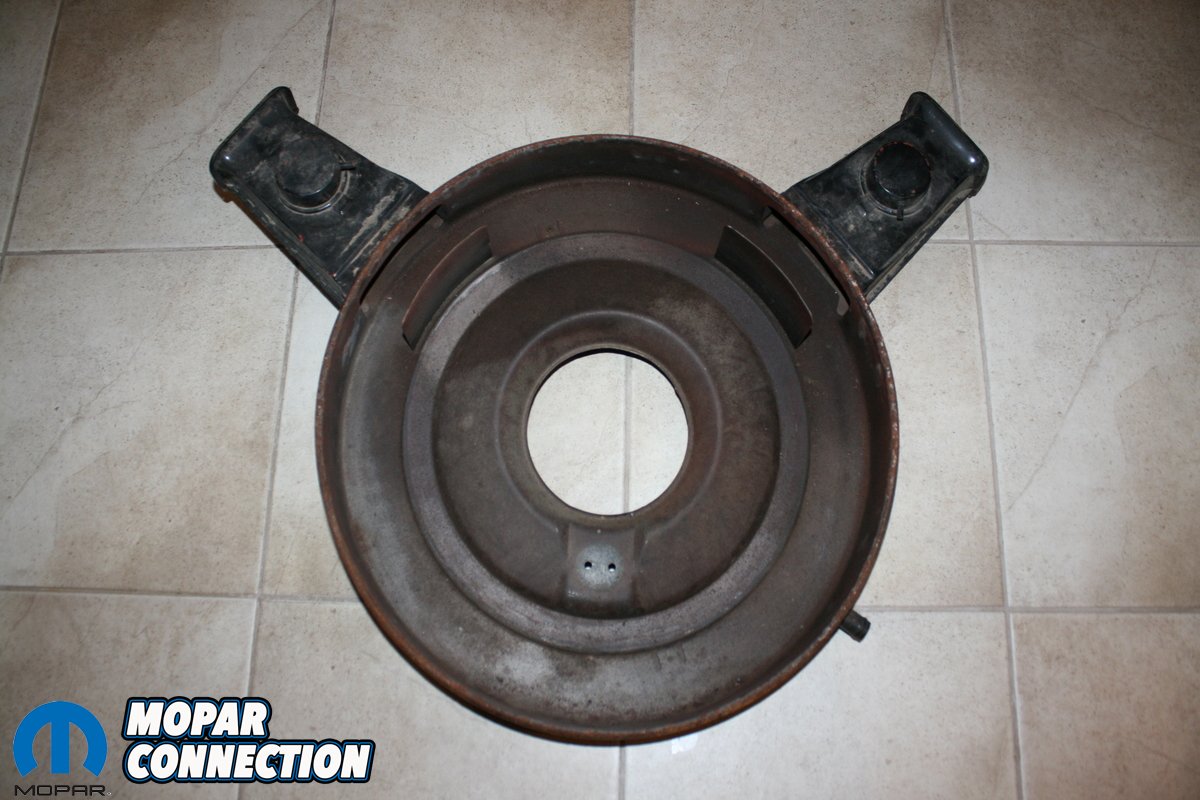
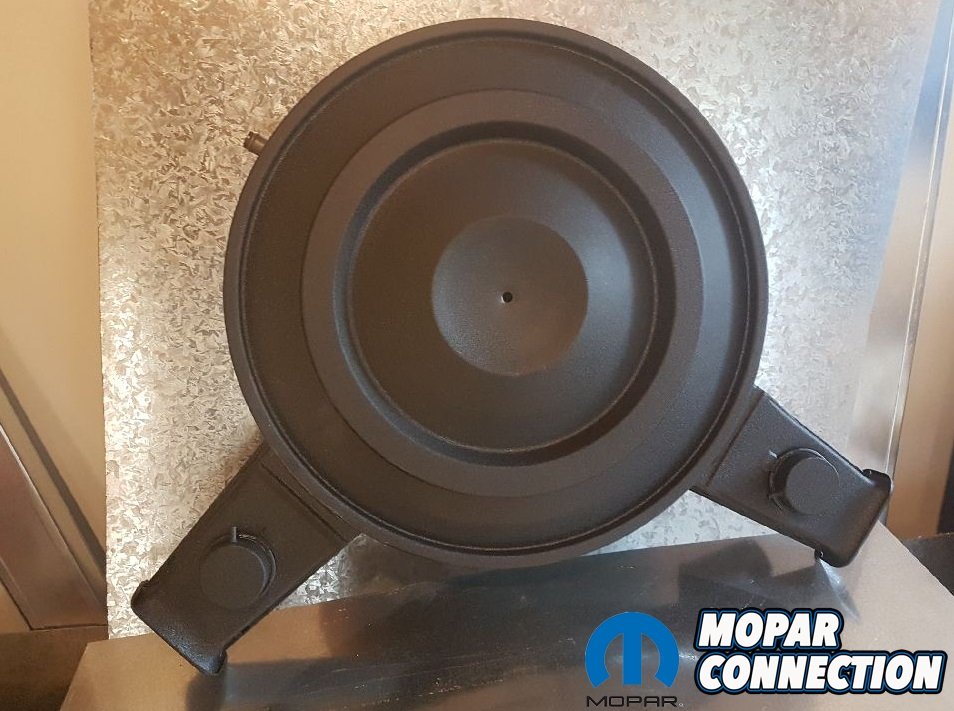
Once we got our air cleaner home, we examined it for damage. Over time, they can get little dings or dents. These are easily fixed though with a little bit of filler putty. Thankfully, ours was in very nice shape with no dings, dents or rust so we skipped ahead directly to the blasting stage. Our air cleaner was a bare assembly however if yours has the vacuum line assembly, you want to remove all of that before blasting. Using our good friend Mark Hemrich’s sandblasting cabinet; we blasted the entire air cleaner assembly clean of any paint, dirt or surface rust. The overall process took around 30 minutes as we made sure we blasted every inch. We do recommend for this process that you put a little bit of tape on the vacuum pot nipples on each snorkel to avoid getting any sand or other particulate matter inside the pots.


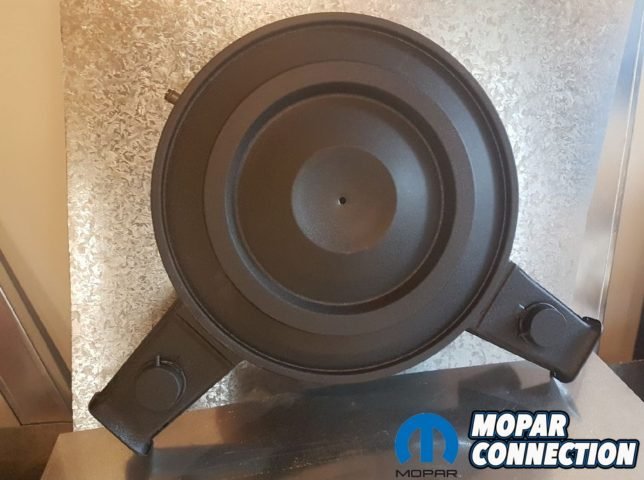
After the air cleaner was blasted clean, it was time to re-finish it. For these air cleaners, Mopar used two different types of paint. For 1970 and early 1971 cars, the air cleaner was finished in a matte black wrinkle finish. At some point in 1971, they switched the paint to smooth gloss black going forwards. We aren’t sure of the exact date this changed happened but being as our car was built in August 1970; we went with the wrinkle finish. Once you figure out what finish you want to do, the next step is to choose how you want to re-finish it. A lot of people like to use spray bomb when re-finishing their air cleaner and have plenty of good results but we opted for powder coating for better durability and overall result. There are a number of spray bombs that can be used for both the wrinkle and smooth finish. For the wrinkle finish, we have personally heard Harley Davidson makes a fantastic wrinkle black spray bomb that is close to the factory finish on the air cleaners.
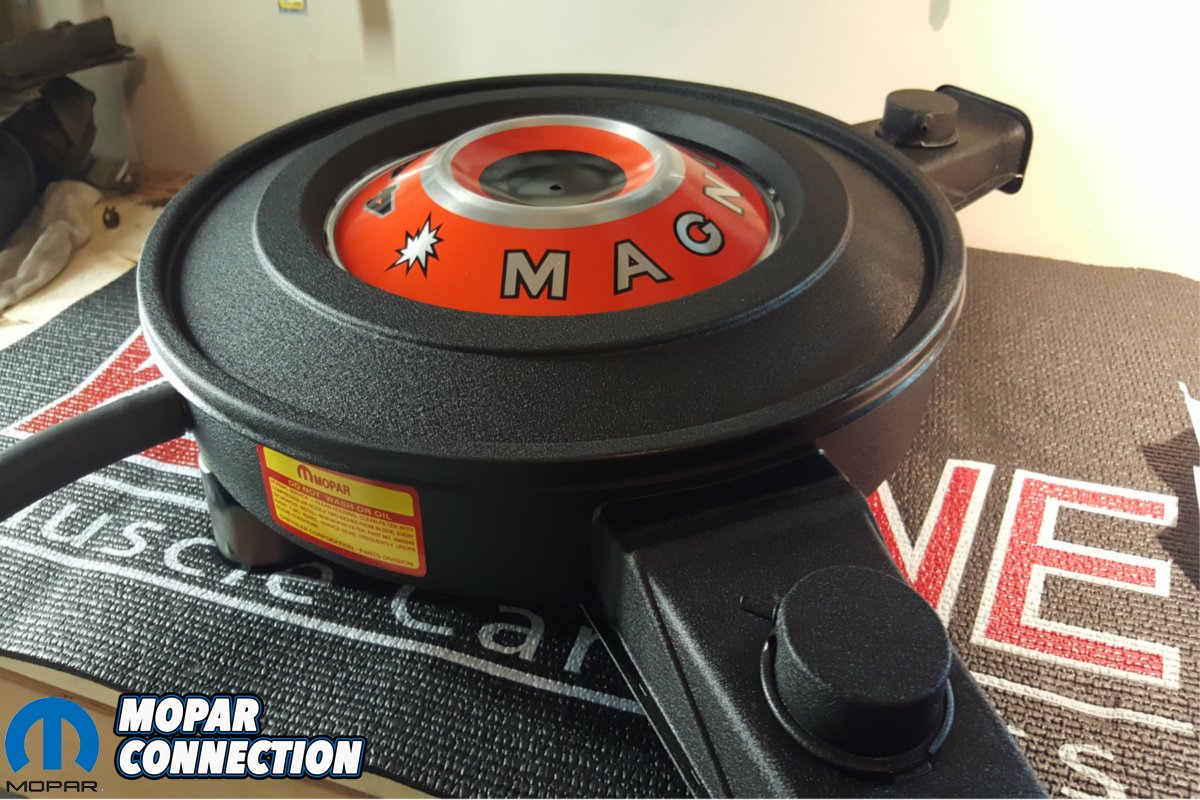
Powder coating can be pricey but in the long run is a good investment as the finish is very durable and easy to keep clean. We got a few quotes of around $200 Canadian to powder coat our air cleaner but upon hearing from our good friend Kori Alexander at Show & Go Restorations that he pays less than that to get two air cleaners re-finished; we decided to do some shopping around. It was at this time that we discovered a fellow named Dave who runs his own home business called “Dave’s Powder Coating”. As it turns out, he had the proper matte black wrinkle finish and told us he’d do it for less than a quarter of the price we were quoted at from the other company. With such a good deal offered and us liking to support small businesses, we gladly dropped the air cleaner off with him. The turnout was quick and within a week, we had our air cleaner back looking like new. We must thank him for the fantastic work on it!


With the air cleaner re-finished and back on the work bench, we went to work with some of the small details. On the outer lip of the underside of the air cleaner lid, the factory put a gasket made out of a cork like material to keep the lid from rattling around on the base. When Dave removed the one on our lid, it came apart in a dozen chunks so obviously that would need to be replaced. We were told this exact gasket is not reproduced however our good friend Kori told us he uses foam door seal strip when he restores his air cleaners and has had good results with them. We picked some up for our lid and are quite happy with the result too.
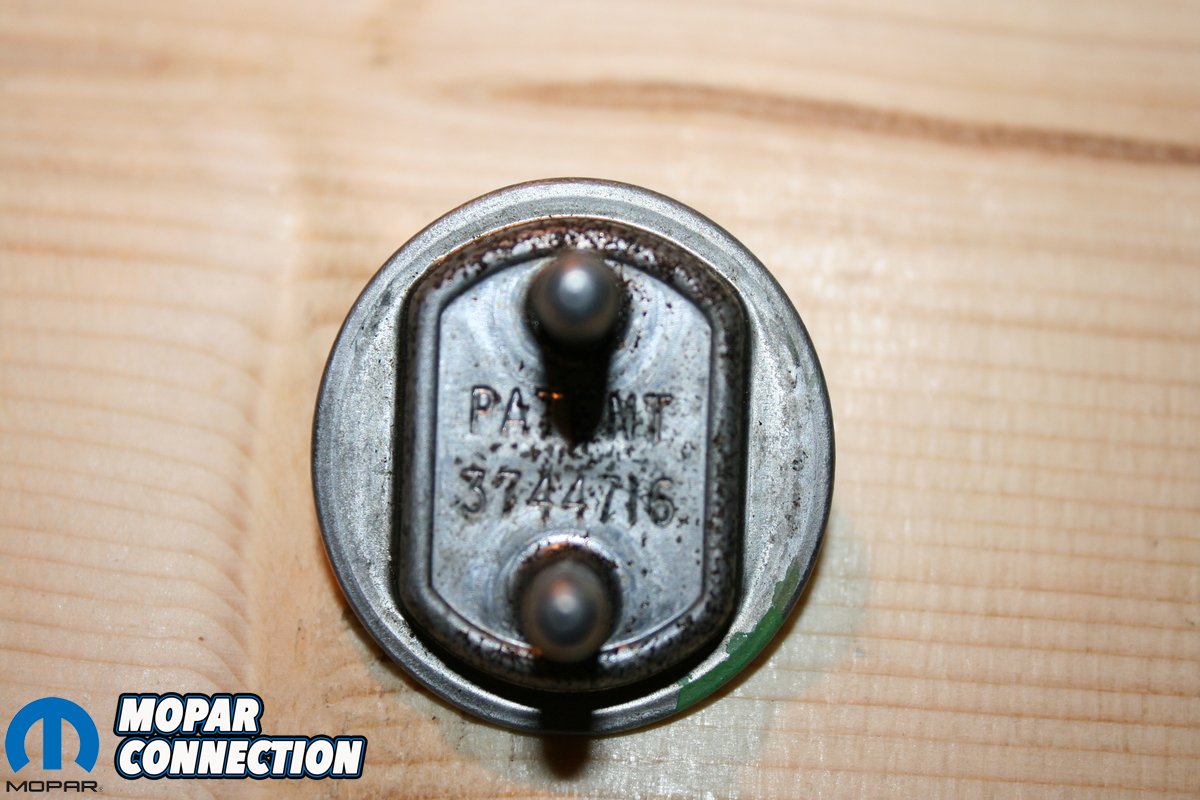
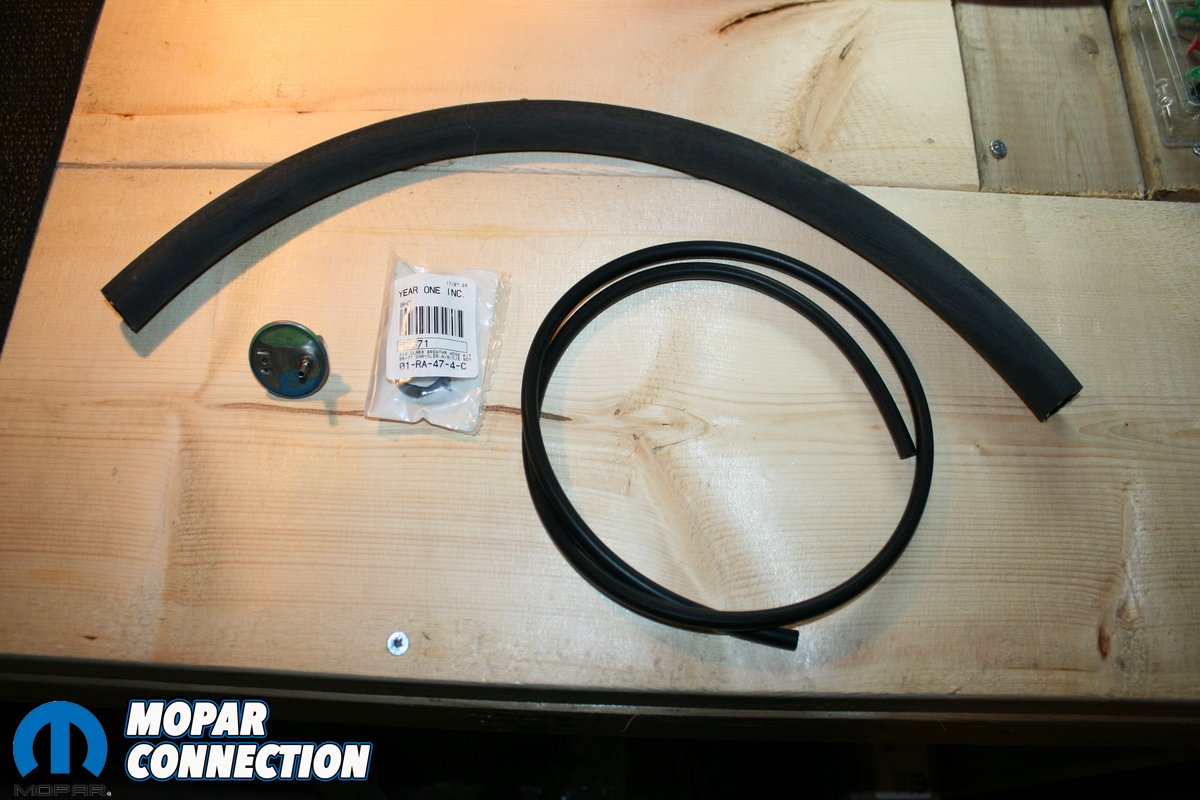
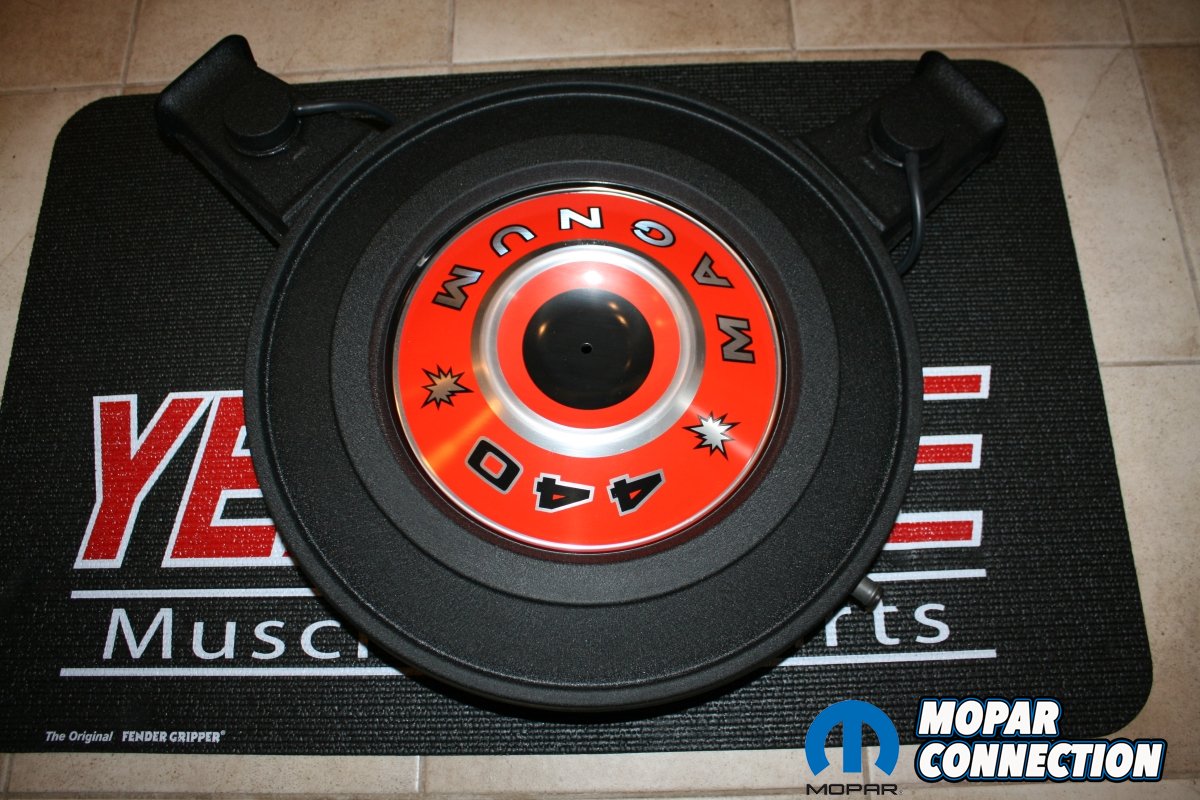
Next up was the vacuum lines and the thermal sensor. On the dual snorkel air cleaners, vacuum lines run from a vacuum pot on each snorkel to a thermal sensor at the rear of the air cleaner. The thermal sensor activates the snorkel flaps. These flaps are designed to close when it is cold. When the flaps are closed, the air cleaner is drawing hot air from the flexible hoses that are attached to the exhaust manifold metal shields. To the best of our knowledge, these thermal sensors are not reproduced. Being as our air cleaner was missing it, we decided to source out a local junkyard where we managed to score one in mint shape for $10.


To our understanding, there is also a black plastic part that attaches to the top of the thermal sensor inside the air cleaner. While ours is currently missing that, we are working hard to find that part and will be sharing a picture of what it looks like to help you source one too if need be. The thermal sensor attaches to the air cleaner using two clips. Be careful though as these clips are easily breakable. We managed to carefully remove the ones from the air cleaner at the junkyard and re-use them on our air cleaner. When installed, the thermal sensor will have two nipples that stick out on the bottom of the air cleaner for the two vacuum lines from the snorkels to attach to.
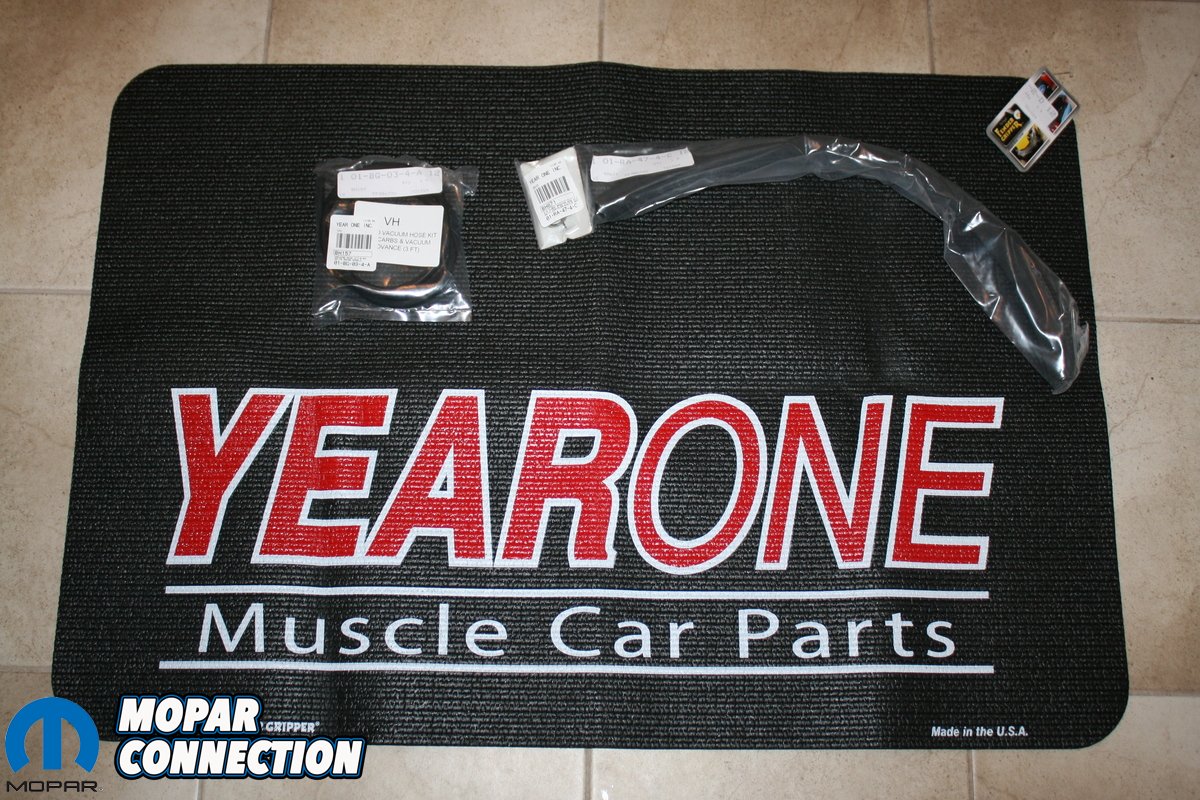
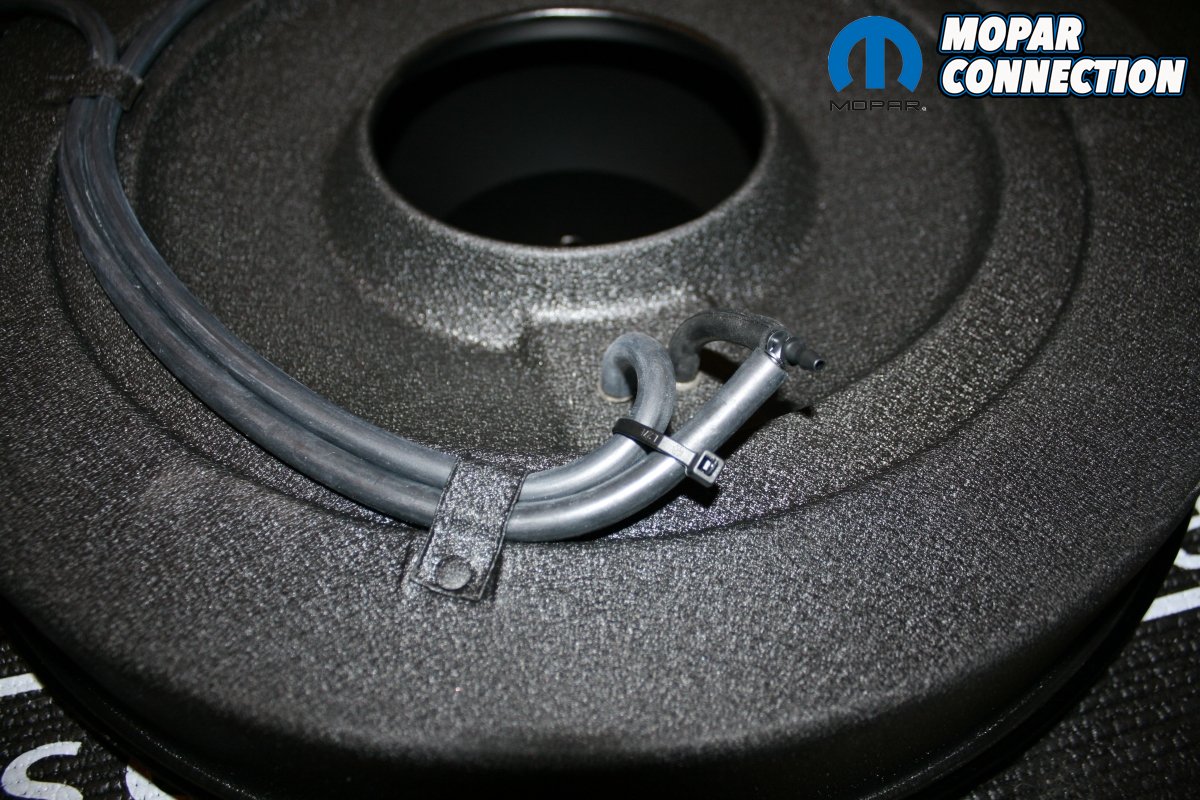
As the vacuum lines are often dry cracked and un-usable, new ones can be purchased from YearOne. While many auto parts stores sell hose similar to the factory stuff, they aren’t exact. In a bind though, 5/32nd hose used in applications such as windshield washer lines will work too however the walls of the line are thicker than the original ones. Regardless if you purchase the correct stuff from YearOne or generic bulk stuff from an auto parts store, you will want around 6 feet of it. When running the vacuum line, we suggest mocking it all into place before cutting it to length. You will need to cut a few various lengths of hose as seen in our pictures. Using pictures of an original unmolested air cleaner supplied to us by our good friend John, we carefully mocked up the hose to the proper locations. The vacuum hose from the driver side snorkel runs directly to the passenger side nipple on the thermal sensor. The passenger side vacuum hose is a shorter piece and runs to a T-connector as seen in the picture. A short hose comes off the driver side nipple on the thermal sensor and then goes into the T-connector. We used a small black zip tie to keep everything neat.


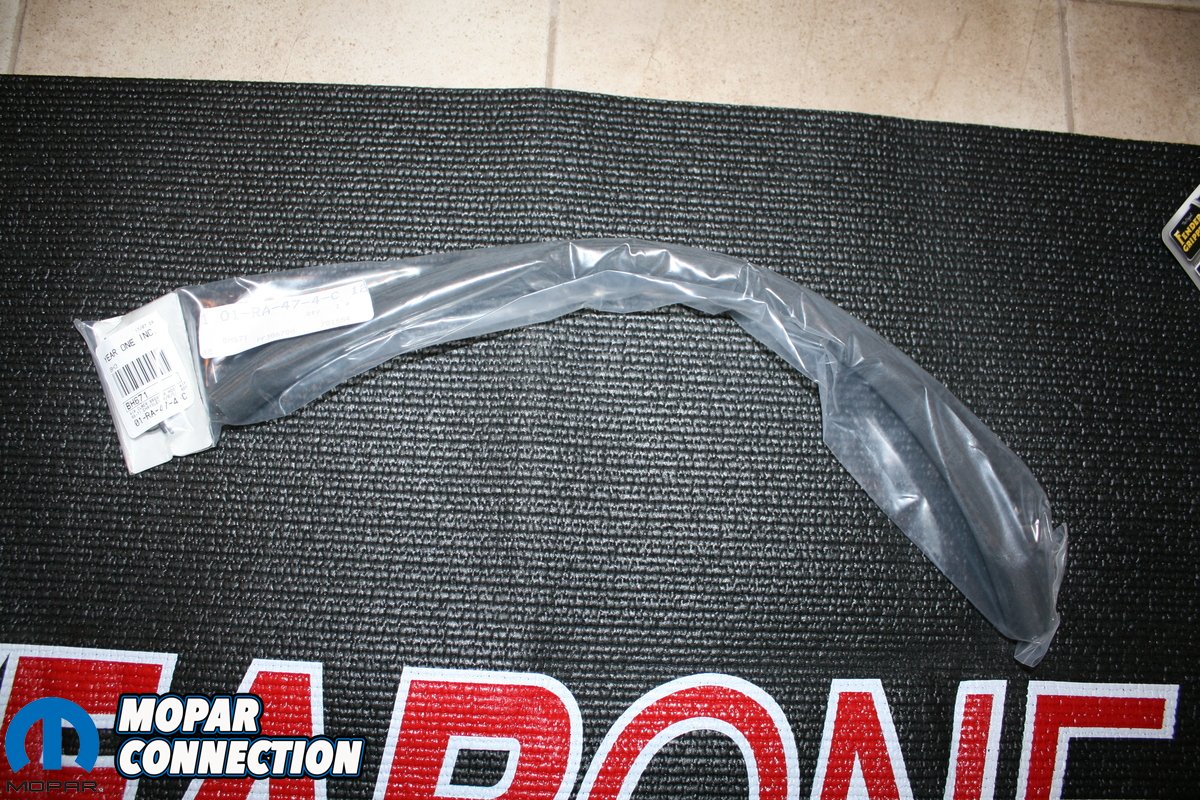
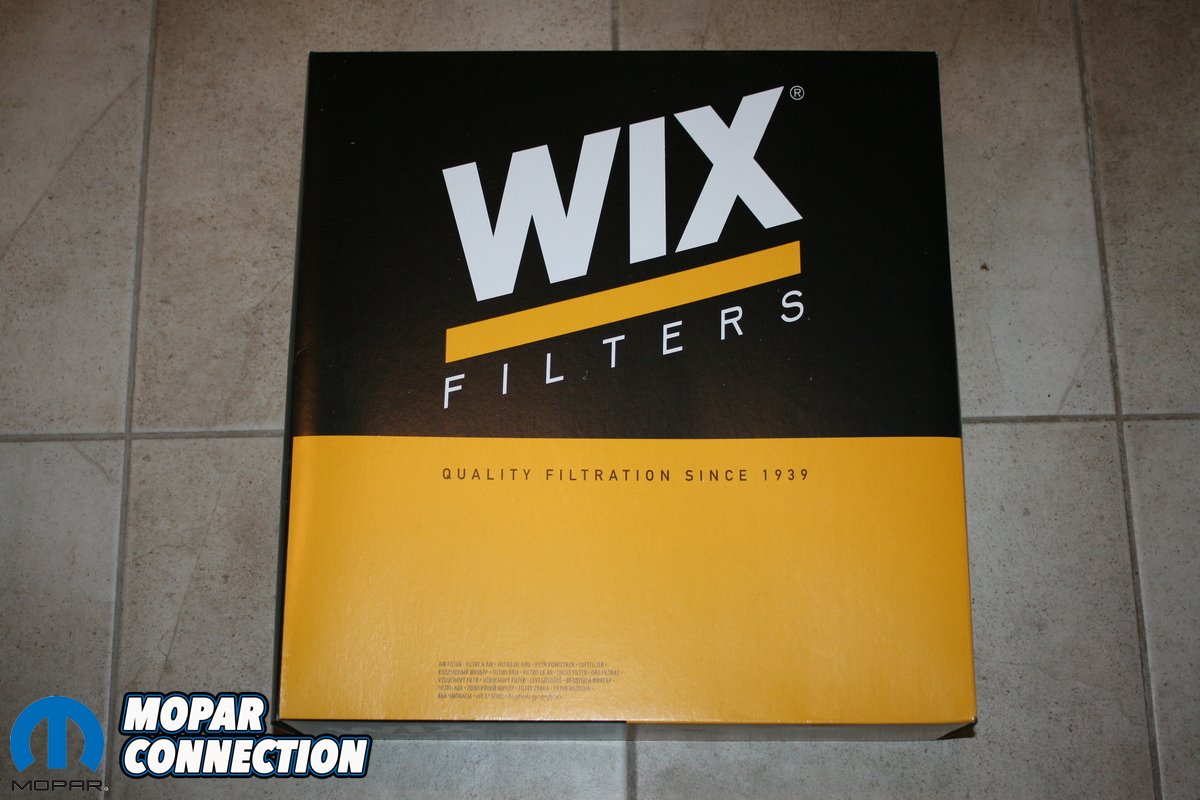
With the breather hose that goes to the valve cover, YearOne also sells a perfect kit exactly for that purpose. The kit features the correct grooved hose and black clamps as the factory used. We do have this kit however we did not install it at this time as the air cleaner isn’t going on our Charger for quite a while. For the air filter, there are many aftermarket choices such as K&N and Fram. We chose to go with a WIX brand filter for our air cleaner wearing part number 42044. This particular filter only cost $7 Canadian to purchase and we’ve been very pleased with the WIX filters we’ve used in the past. If you are looking for a correct looking filter, YearOne sells one that features the original perforated steel band, along with orange colored rubber sides for $29.99 USD.
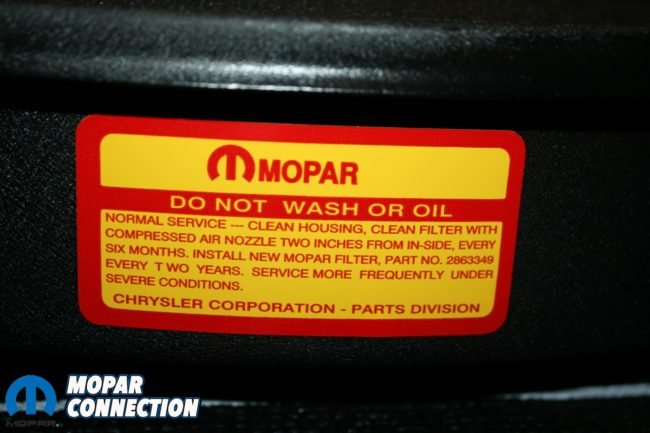
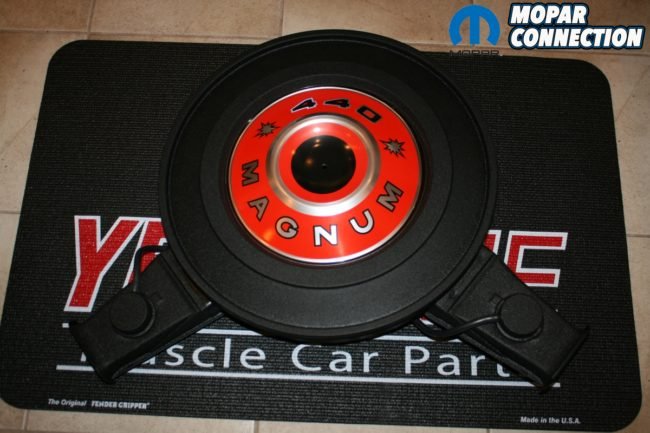
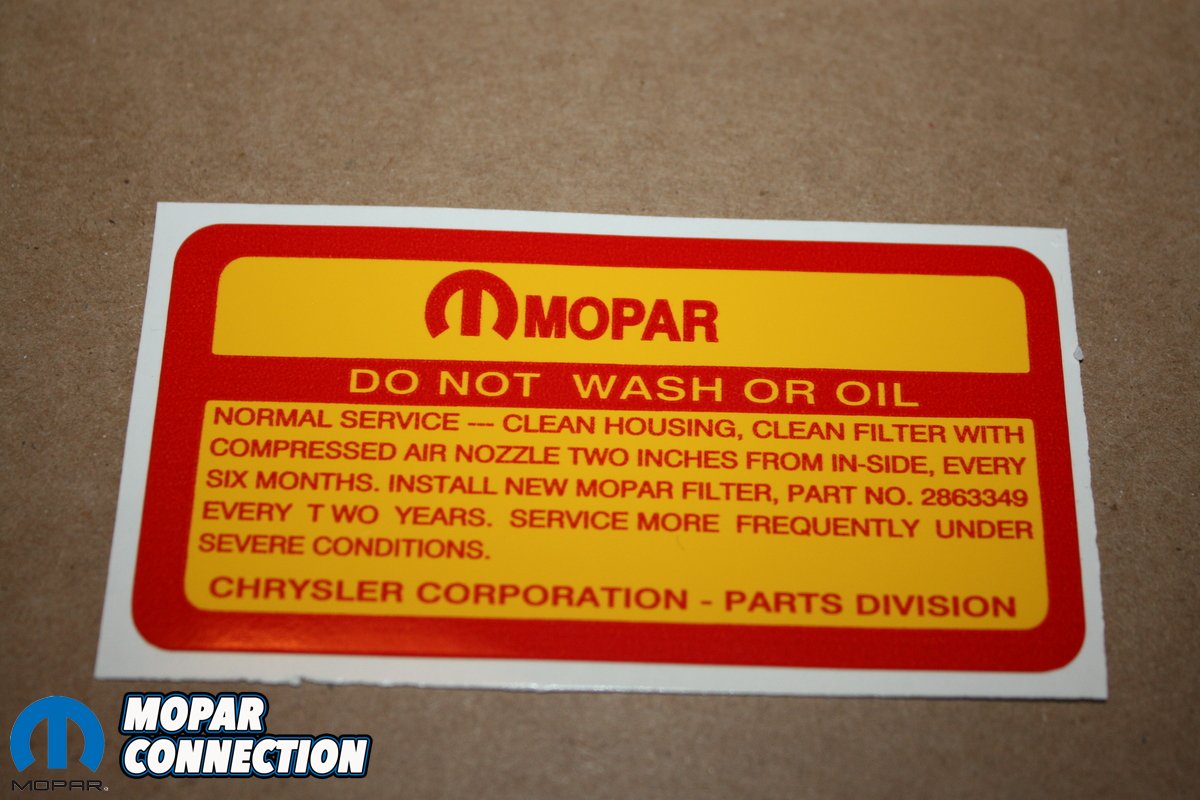
Once that is all done, all you have to do is add the eye candy such as the pie-tin and air cleaner service decal. While many companies offer reproductions of the air cleaner service decal, we got ours from YearOne. Their part is a perfect reproduction of the original and went on beautifully. The proper location for the decal is the passenger side. We’ve seen a number of these decals placed on various locations on the air cleaner such as dead center on the front and that is incorrect. The air cleaner pie-tin was the finishing part to our air cleaner restoration. Many companies sell these pie-tins but what many probably don’t know is you can actually purchase these directly from the parts department at your local Chrysler dealership and they are made in the USA. For the 440 Magnum one we needed, the part number is P4529071, cost around $40 Canadian and only took 3 days to arrive. You can’t go wrong with that!
Now that you’ve seen how to restore your dual snorkel air cleaner for your Mopar, you have no excuse to continue running that dirty, faded and banged up air cleaner. Special thanks to Pat Stanton at YearOne, Mark Hemrich, Kori Alexander from Show & Go Restorations, John H, Dave from Dave’s Powder Coating and all of the others that supplied information to help make this article as correct as possible.


My name is Earl. Iam looking for a air cleaner for a 1970 barracuda 383 four barrel.
Hey Earl, you’re gonna want to hit up YearOne or Classic Industries.
Good article. I have a few questions that I hope you can help with. 1. From the factory, was the black wrinkle on the entire air cleaner, inside and out? 2. Can you safely powder coat the snorkel ‘valves’ or is there rubber in there that the heat may affect? 3. How did you ensure the snorkel ‘flaps’ weren’t sealed shut by the powder coating?
Thanks. Scott