


A look at the history of aftermarket air conditioning systems shows that both technology and the engineering behind it have come a long way. Some of our elder statesmen might recall that one of the first to the market was the window-mounted “car cooler.” First appearing sometime in the 1930s, it was a torpedo-shaped apparatus that hung on the outside of a window. Also affectionately known as a “swamp cooler,” its use of evaporative cooling would lower the temperature of air being blown inside the vehicle. While it did lower the temperature of the air in a dry environment, it was not so effective in areas of high humidity.
As factory-supplied air conditioning systems became more prevalent in the late-1950s, the aftermarket tried to keep pace with universal under-dash units that were often bulky but functional. With those systems, the factory heater box would stay in place and this glorified box fan would be tucked up between the transmission tunnel and the underside of the dash. Unfortunately, most of these were more of a one-size-fits-all product and they didn’t necessarily fit anything particularly well.


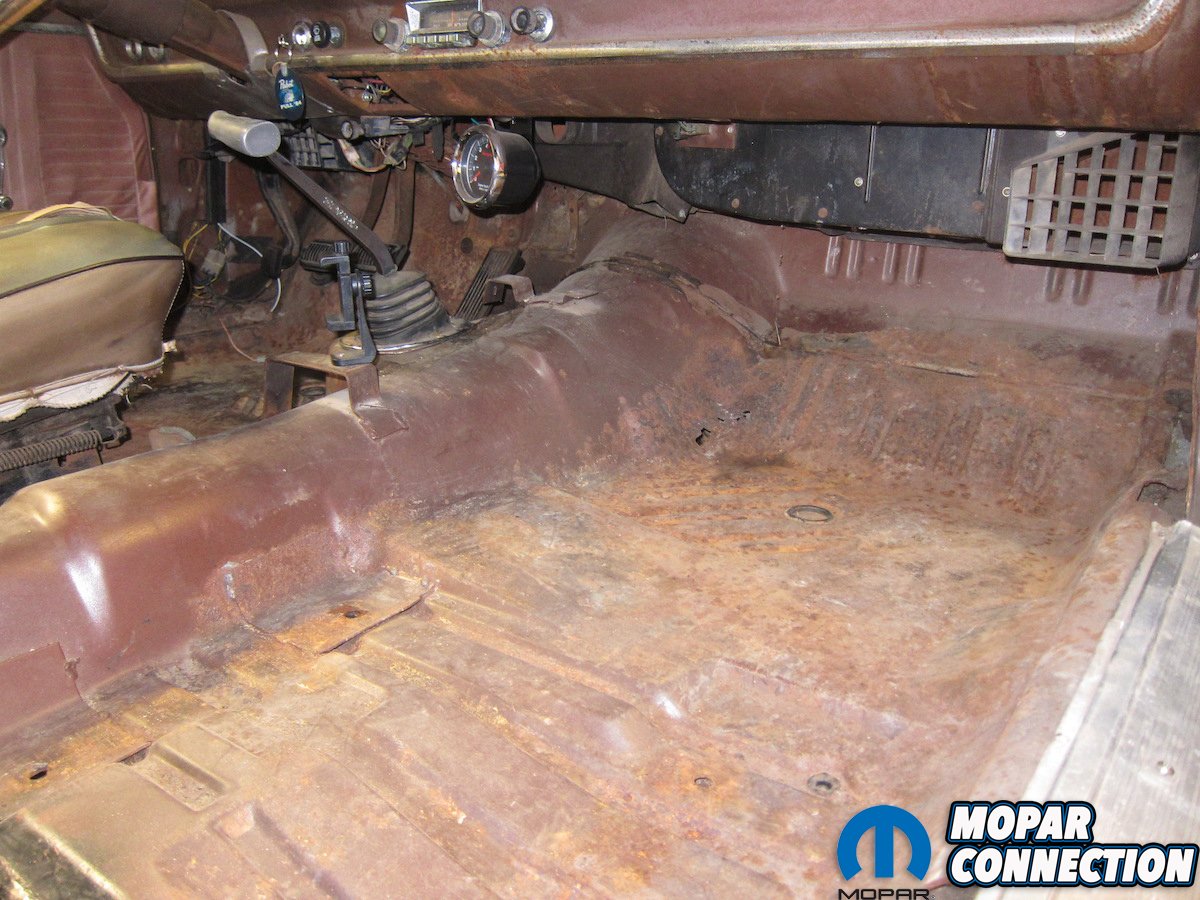
Above: The first step was getting all of the old heater components removed.
That’s pretty much where aftermarket air-conditioning stalled until the mid-1970s when companies like Vintage Air came along to really refine what add-on A/C looked like and, more importantly, how it performed. There were three major hurdles to overcome: ease of installation, visual appeal, and performance. As their product has matured over the last forty-four years, they’ve really honed in on all three aspects of a quality aftermarket air-conditioning system.
Vintage Air’s Gen IV SureFit series is the latest evolution and was specifically designed to be the most complete, bolt-in climate control system on the market. Without a doubt, our installation in a 1967 Plymouth Satellite (P/N 971060) proved that ten times over. Every bolt, clamp, bracket, wire, and measurement were accounted for.


Above: Both the new evaporator and compressor were minuscule compared to original Chrysler parts.

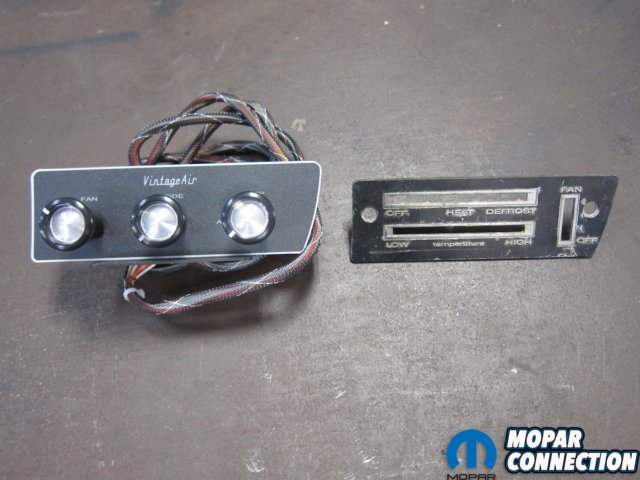
Above: New pulleys and an electronic control panel both added to the stealth of the installation.
The amount of technology packed in to this one-punch kit blew us away. Fly-by-wire electronic servo motor controls eliminate the need for old-fashioned cables and capillary tubes while allowing for infinite air blending and fan speed adjustment to zero in on just the right temperature. The compressor is more modern too with a lightweight Sanden unit upstaging Chrysler’s old standby, the RV-2. Box after box came packed with modern, high-tech components that got us giddy to jump right in.
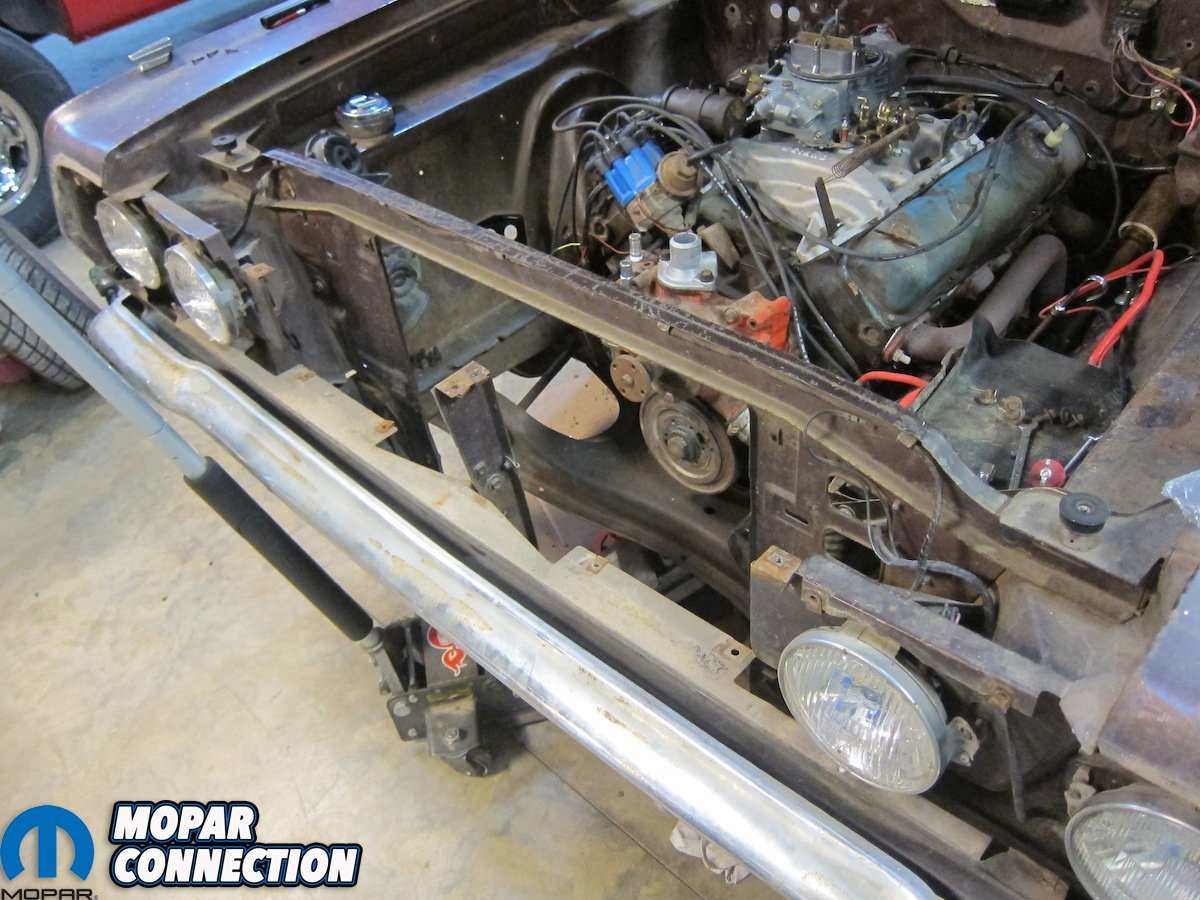
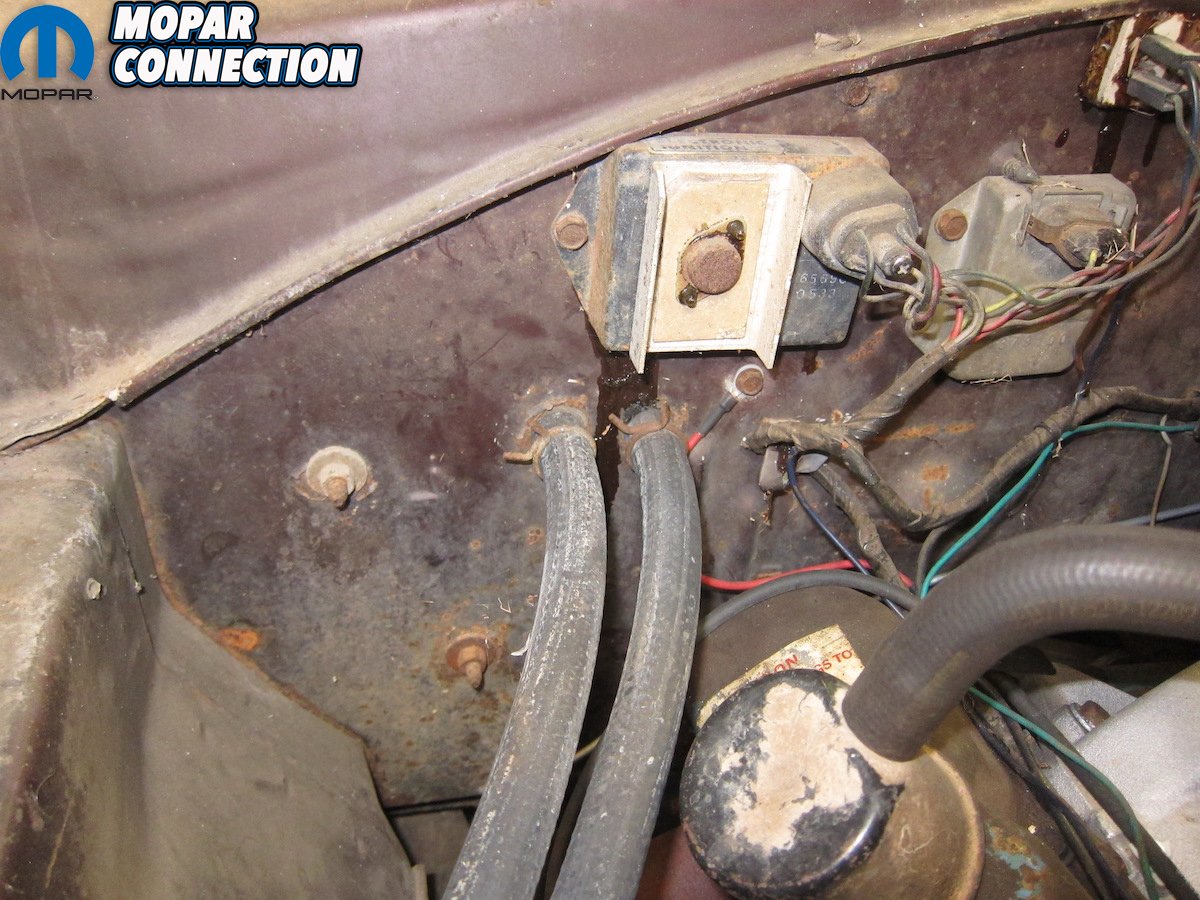
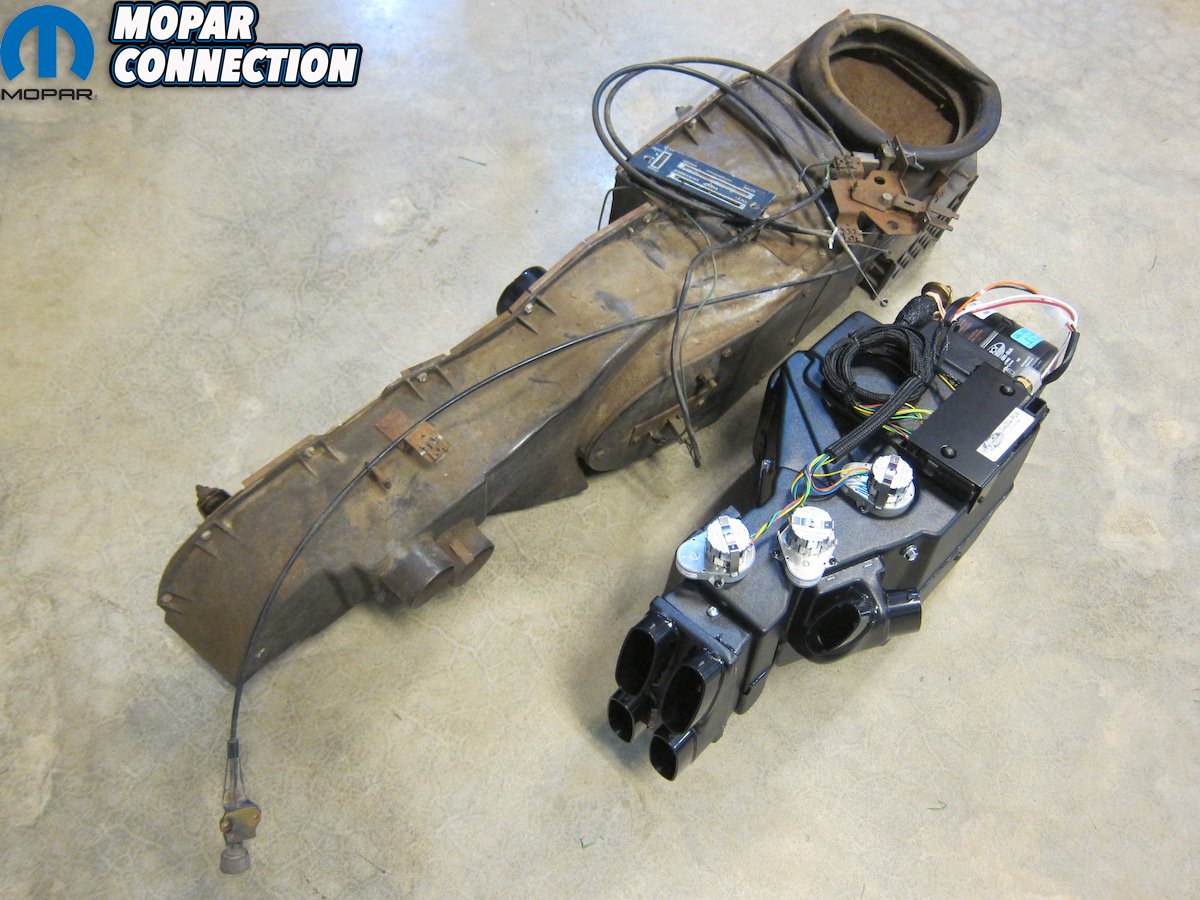
Luckily, the Satellite was not an original air-conditioned car, so removal of the old system was quick and painless. After draining the radiator, heater hoses were the first to go. For maximum working space inside, we removed both ratty front bucket seats and commenced to tearing stuff out from under the dash. The heater box itself was held in via three studs protruding through the firewall plus a support bracket under the dash. With those four mounting points undone, we carefully slid the assembly out the passenger’s side.
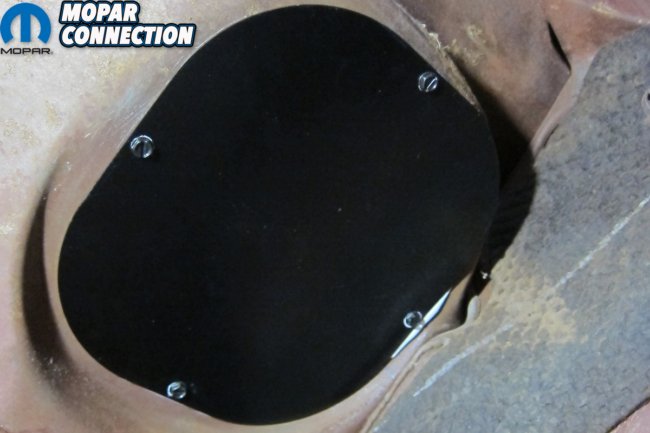
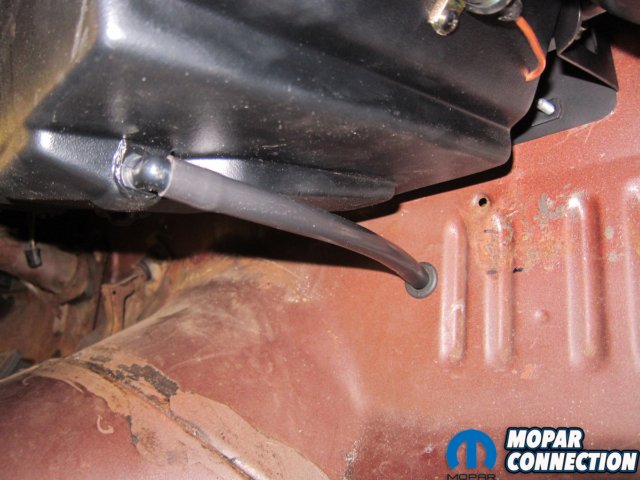
Above: The supplied plate covered the cowl hole while new holes were added in the firewall for hose routing.

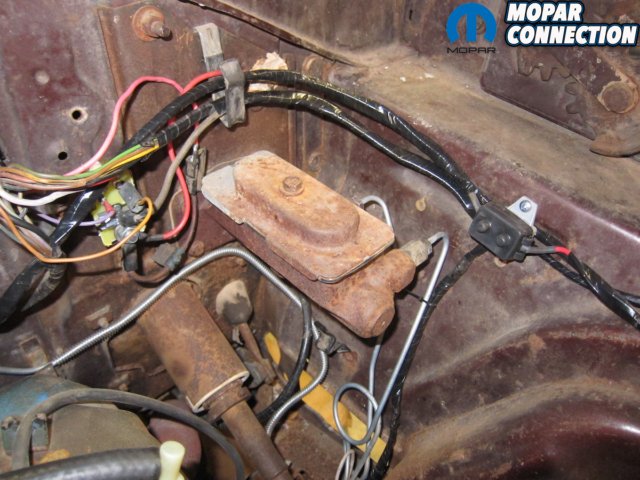
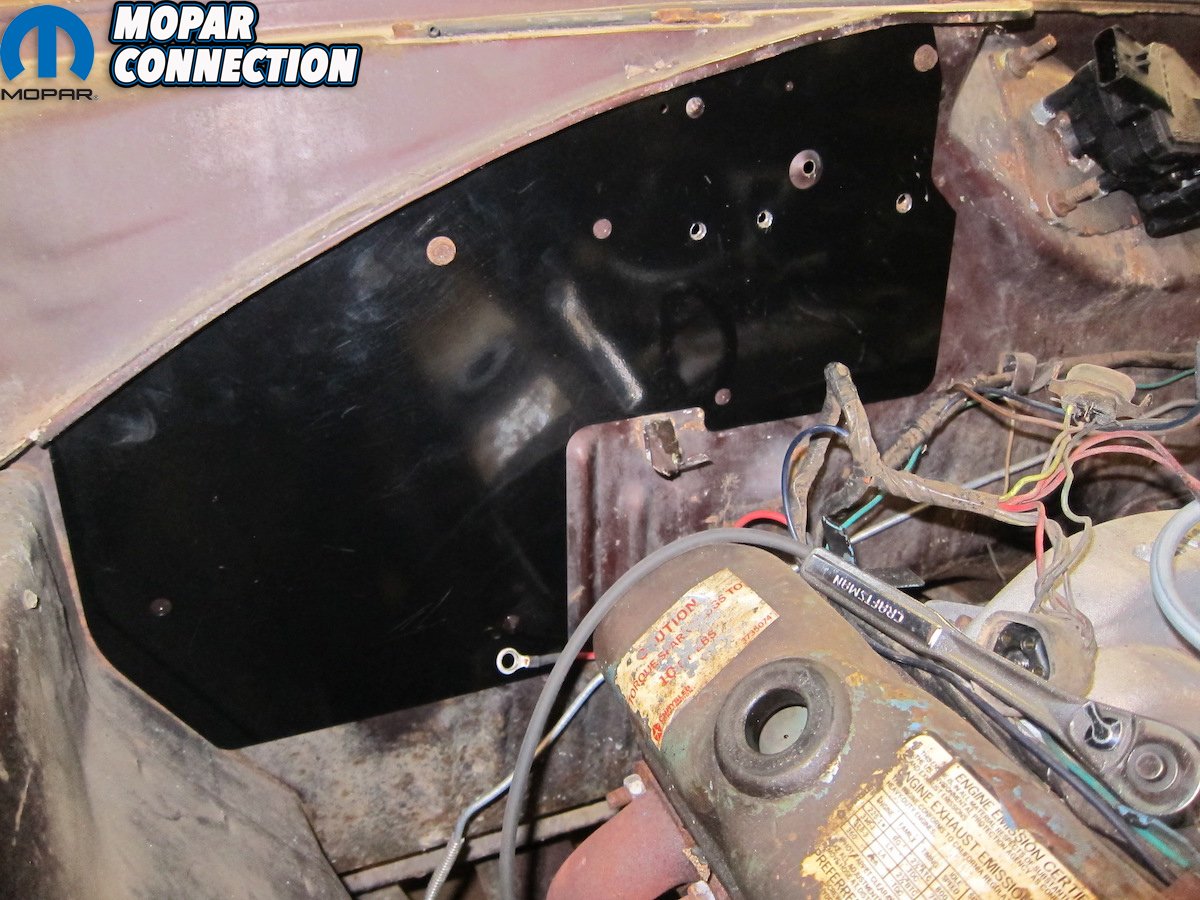
Under the hood, we started at the firewall and worked our way forward. The new evaporator required a bolster plate for maximum rigidity, so we cleared space by removing the ignition ECU, voltage regulator, ballast resistor, and engine ground wire. With the space clean and clear, it was time for a test fit of the reinforcement plate. Unsurprisingly, every pre-cut hole lined up with its corresponding partner on the original firewall. We marked and drilled four new holes for mounting, then continued forward.
Since we were installing a new water pump and housing at the same time, we chose to strip the entire front end of the engine down. The original pulleys and brackets were destined to be replaced, so they were bagged, marked, and stored. The next victim was the front grille as condenser fit up front was snug and we certainly didn’t want to damage anything. With all of that prep work done, it was time to start throwing on new parts.


Above: O-rings were oiled before lines were connected to the evaporator. The firewall bracket was put on while on the bench.

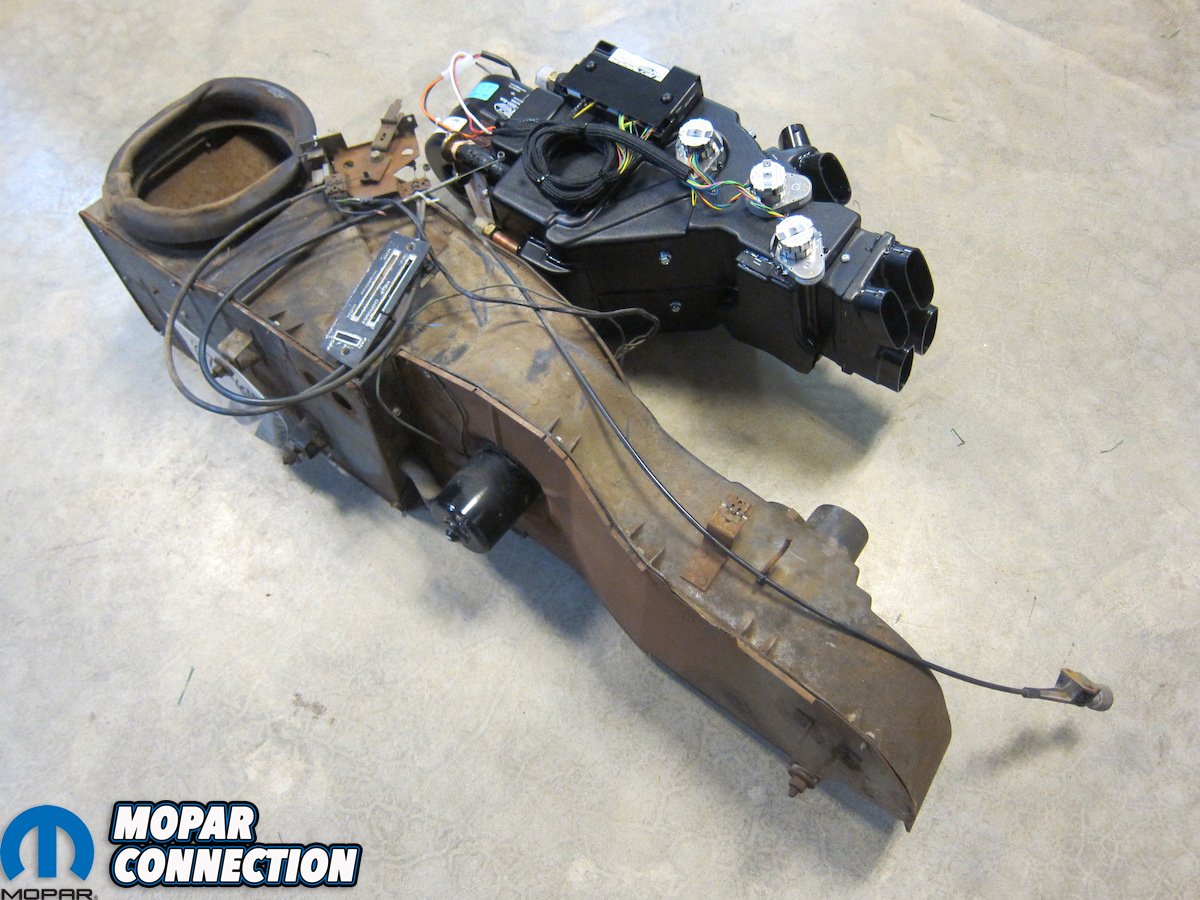
The first task with any new part, as always, is our customary trip to the scales. To our surprise, there was a significant loss of weight between the old heater box and the new heater/air-conditioner unit. Surprisingly enough, even though the new box garners twice the capabilities, it weighed in at over eight pounds less than the outgoing piece. Even with the added heft of a compressor and condenser, losing this much weight under the dash made the overall gain nearly negligible. Also apparent was the difference in overall size. The compact SureFit evaporator made the original heater box’s unnecessary heft apparent as it was nearly a foot shorter on each end without being any wider in the middle.
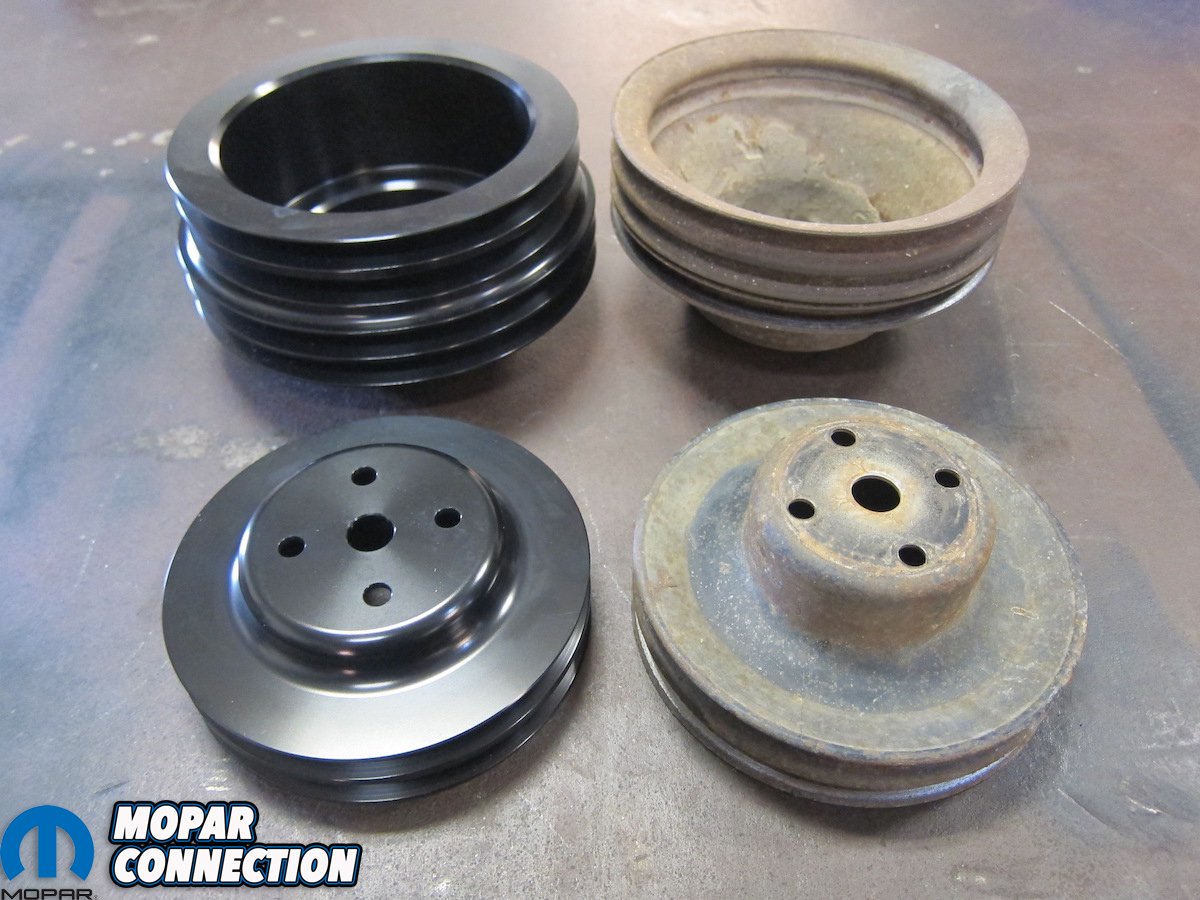
Next out of the box was a pair of new billet V-belt pulleys. Cut from solid chunks of aluminum, these pulleys are really trick stealth pieces to upgrade your pulley system while maintaining a factory look with their black Mil 3 spec hard-coating. We probably could have scrounged a set of swap-meet pulleys, but why do that when these are brand new, precision-machined, and designed to work with this exact air-conditioning system?

Above: Once under the dash, the rear bracket and drain hose were installed.


Above: The new control panel was super slick, perfectly replacing the original while not detracting from the overall look of the dash.
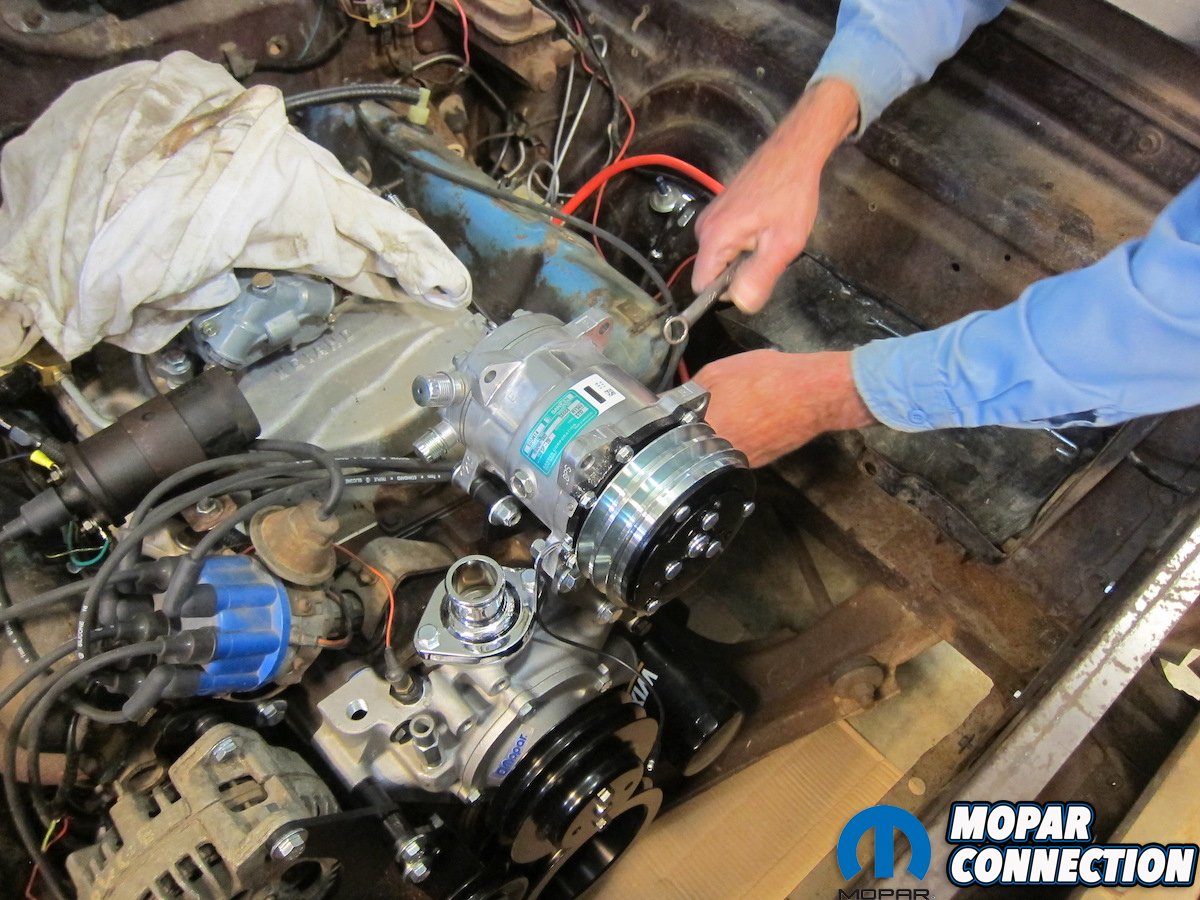
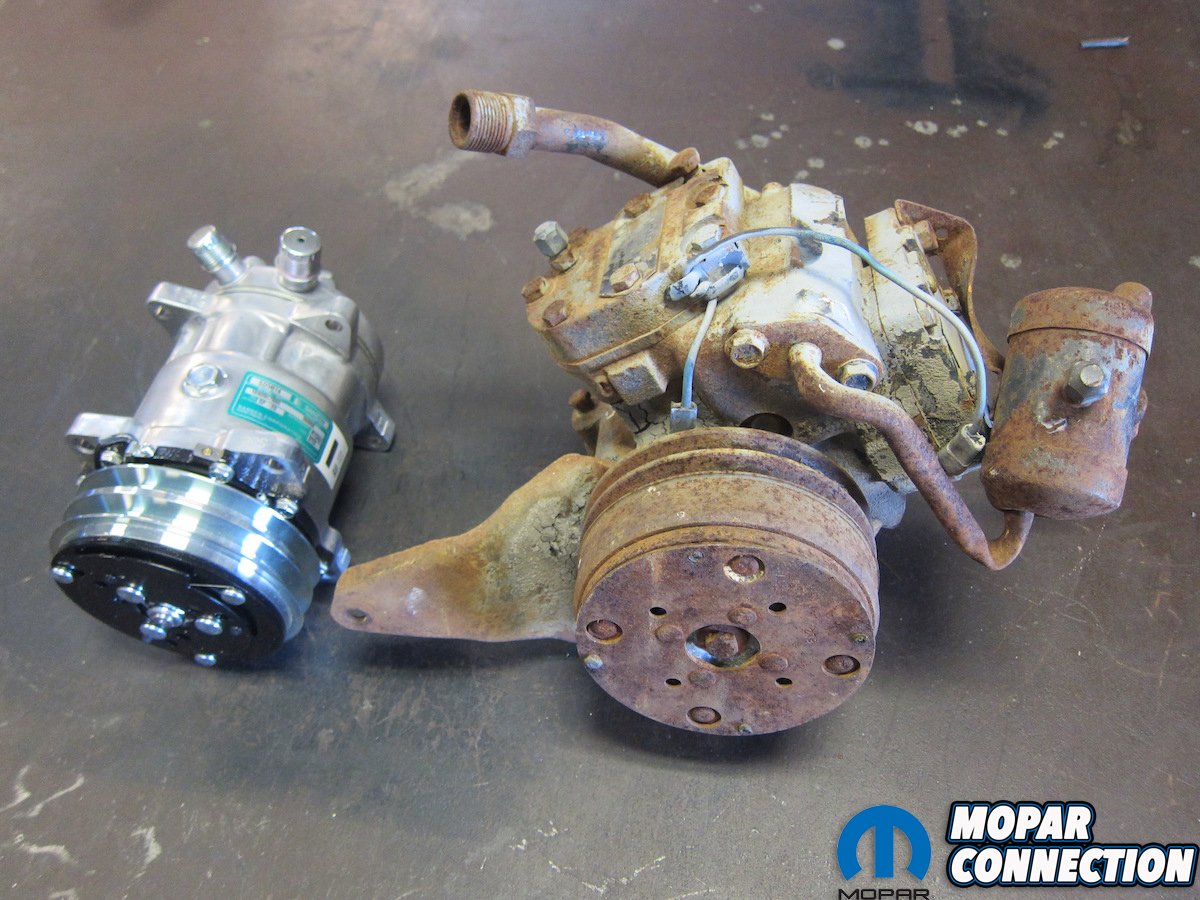
The final big component was the new Sanden compressor. We happened to have a 1973-vintage RV-2 in the scrap pile, so we threw them both on the work bench for a quick comparison. Of course, the massive RV-2 dwarfs the Sanden in every aspect. Outside of an OEM restoration, we couldn’t see the need to ever put an RV-2, that horsepower-robbing anchor, on an engine after seeing such a huge difference between the two.
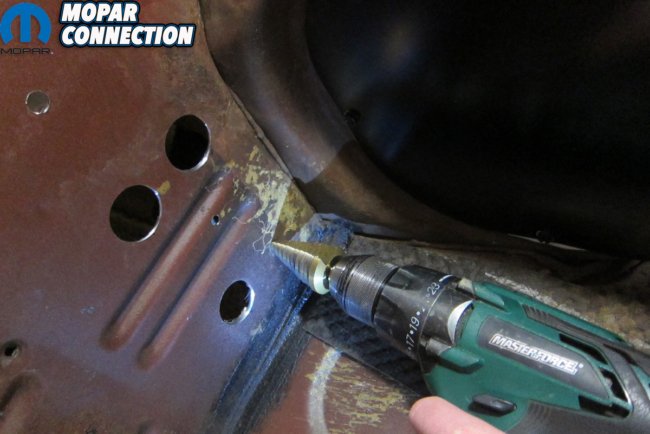
To begin the installation, we started back in the interior. Since the new evaporator draws air from inside of the car rather than from the cowl like the original heater box, a block-off plate is included. Using the plate as a template, we marked and drilled the holes, then fastened the plate with a thin bead of silicone and the supplied hardware. Next up was a set of holes for incoming and outgoing antifreeze and refrigerant lines. Measurements were supplied in the instructions, so we made ourselves a template, punched the holes with a step drill bit, and pushed the necessary grommets in.


Above: The driver’s side defrost vent was repaired and reused, but a new one was included for the passenger’s side.


Above: Vent housings screwed to the underside of the non-A/C dash and were connected with the supplied ducting.
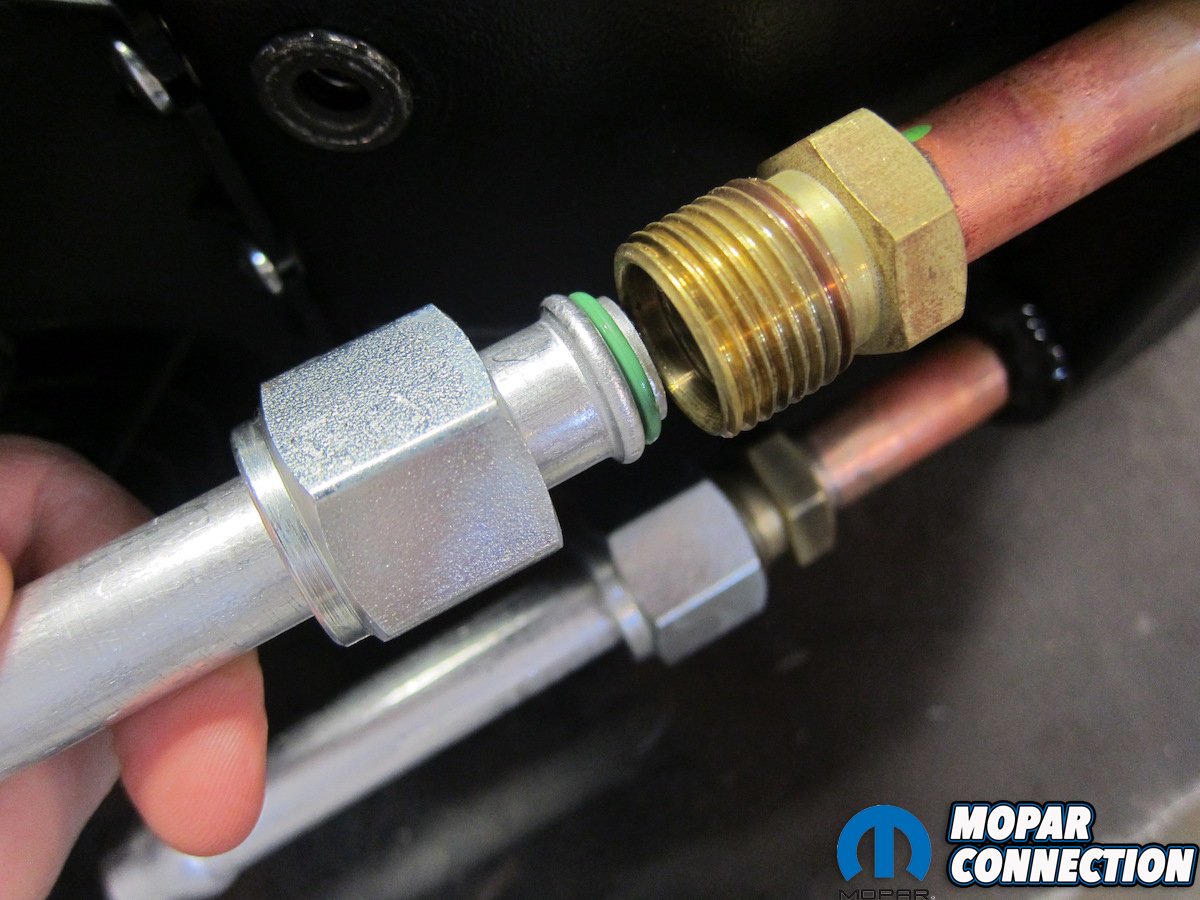
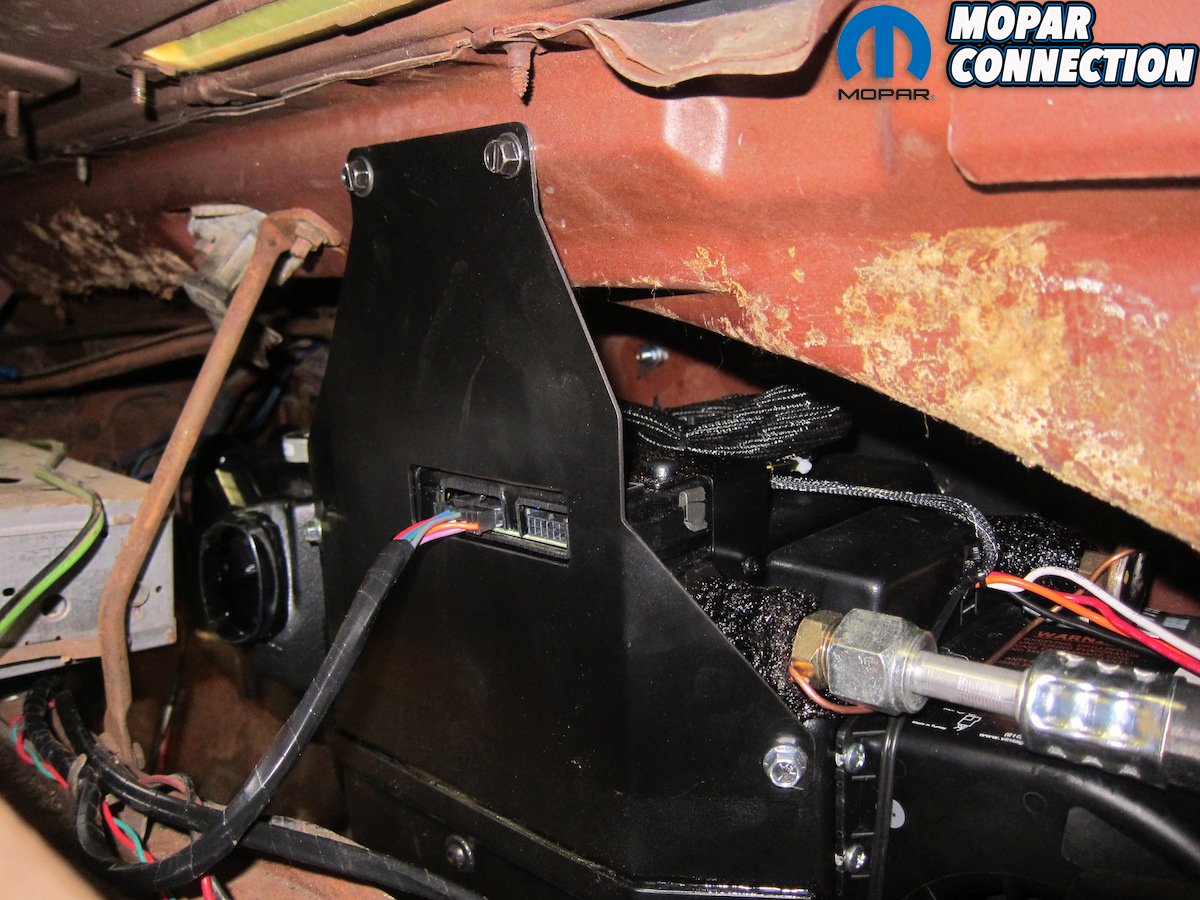
With the firewall ready, it was time to prep the evaporator. New, painted brackets were supplied for the front and back side. The firewall side bracket was bolted on ahead of installation in the car, but the rear bracket was left off for later. Pre-made refrigerant lines were included and sealed with standard green refrigerant O-rings. A small tube of oil was supplied and required to lubricate said O-rings. After a drop or two on each, the lines were connected and torqued to specification.
The firewall bracket holes were threaded so, with one of us inside holding the evaporator in place, another threaded the bolts in through the reinforcement plate from under the hood. The rear bracket that was left off earlier was the final mounting piece once square and level were confirmed. A drain tube was supplied and routed through the firewall with everything else firmly in place.


Above: Old components were temporarily removed to make way for the firewall reinforcement plate.
Next on the list was the new electronic control panel. Perfectly designed to fit in the factory dash exactly like the original, it was barely noticeable after installation. A socket head cap screw was included to mount it in the factory dash hole. One end of its pre-made wiring harness plugged in to the control panel while the other went back to the main control unit on the evaporator case. It can’t get much more sleek or simple than that.
Finishing up the interior were vent assemblies and ductwork. The original driver’s side defrost vent was reused with the supplied adapter, while a new passenger’s side vent bolted to the original mounting points. Our Satellite wasn’t equipped with factory air-conditioning, but the included under-dash vent housings are sturdy, good looking, and simple to mount with a total of five screws. The vents themselves popped into place, then were connected via ductwork that was cut to length. Yes, even the ductwork was included. Actually, a few feet extra were included for any mishaps.


Above: New brackets and pulleys went on without issue.

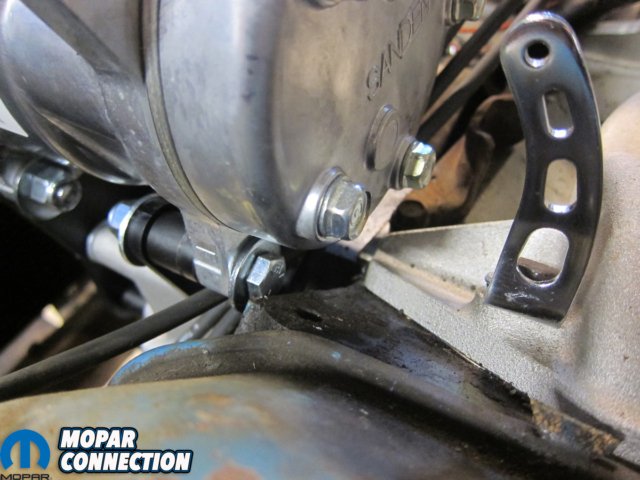
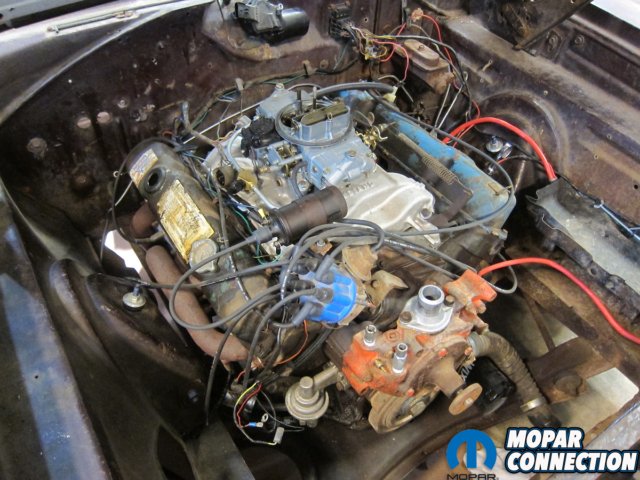
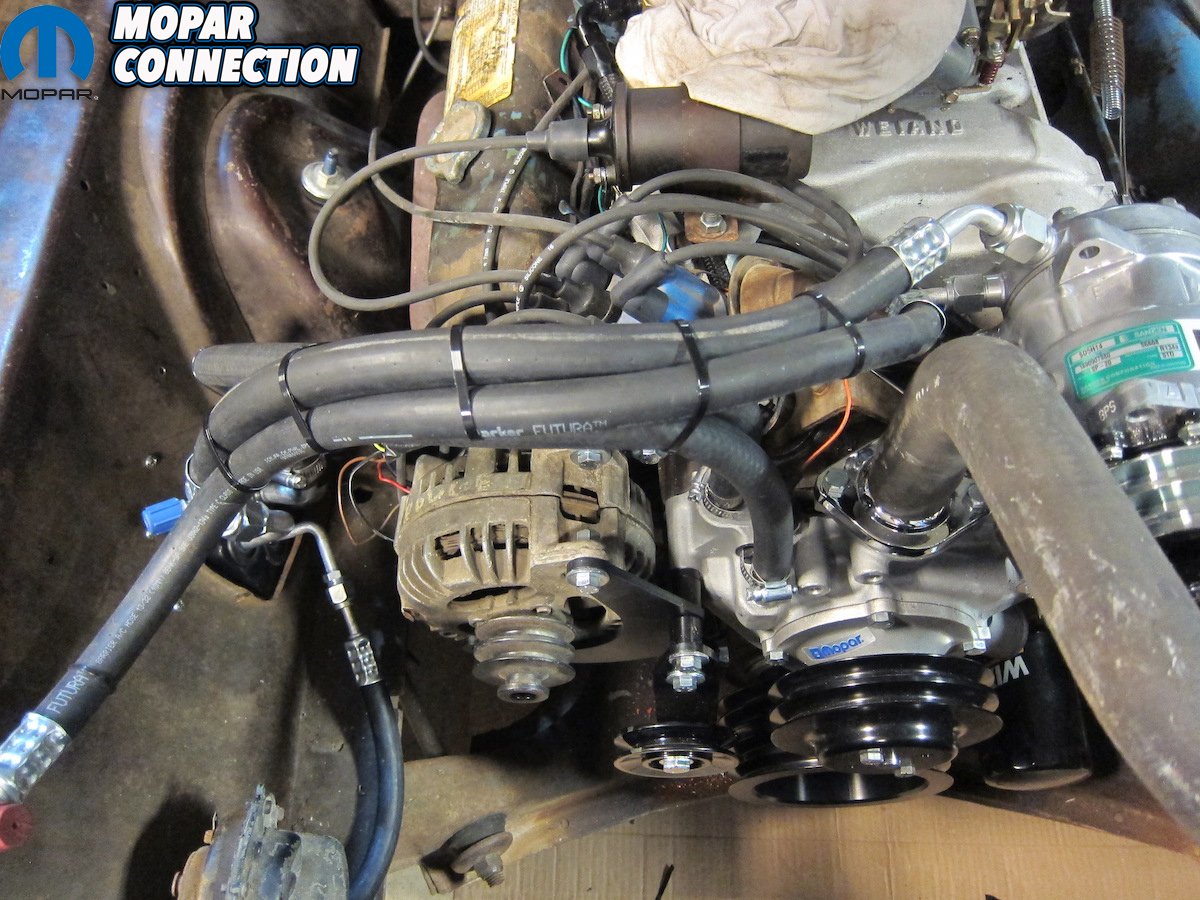
Above: The compressor mounted up top. We were careful to watch for bolt head to cylinder head clearance.
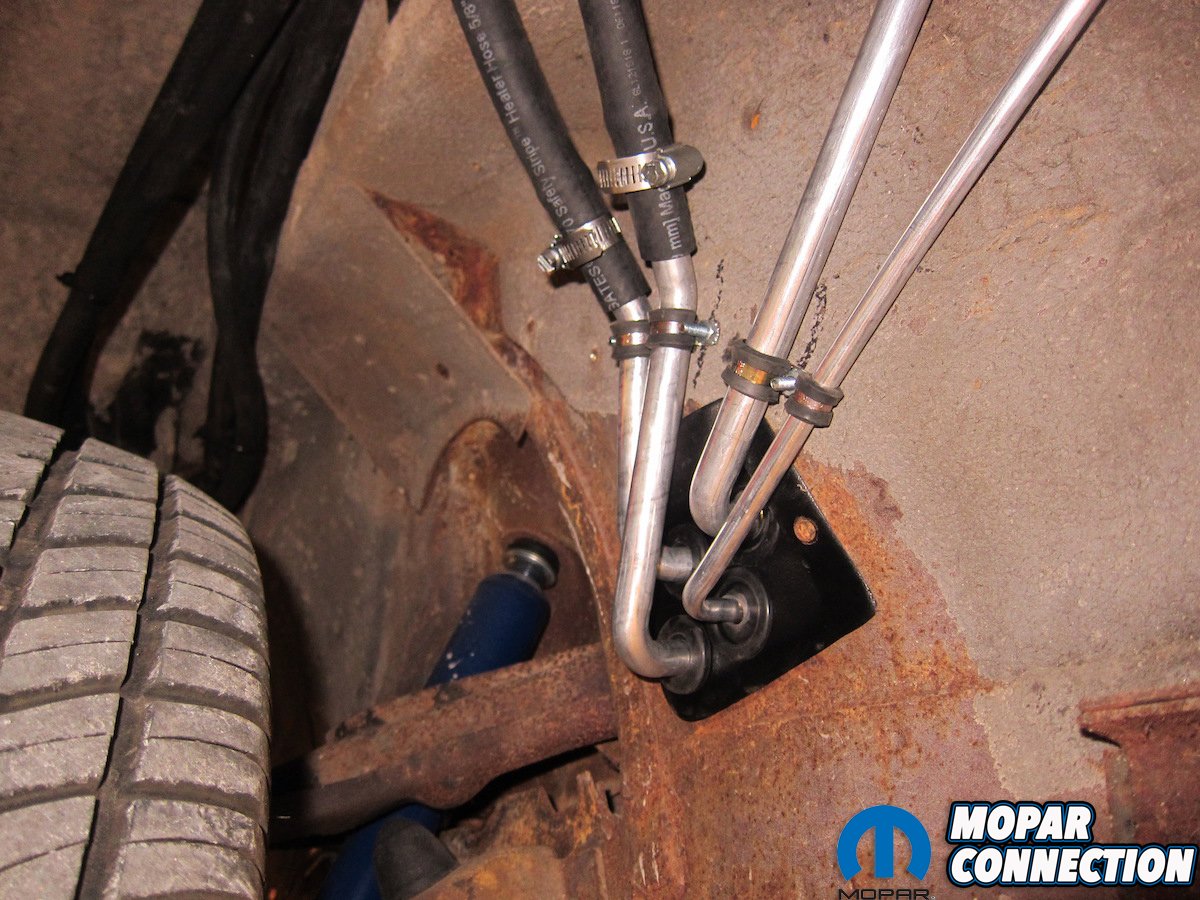
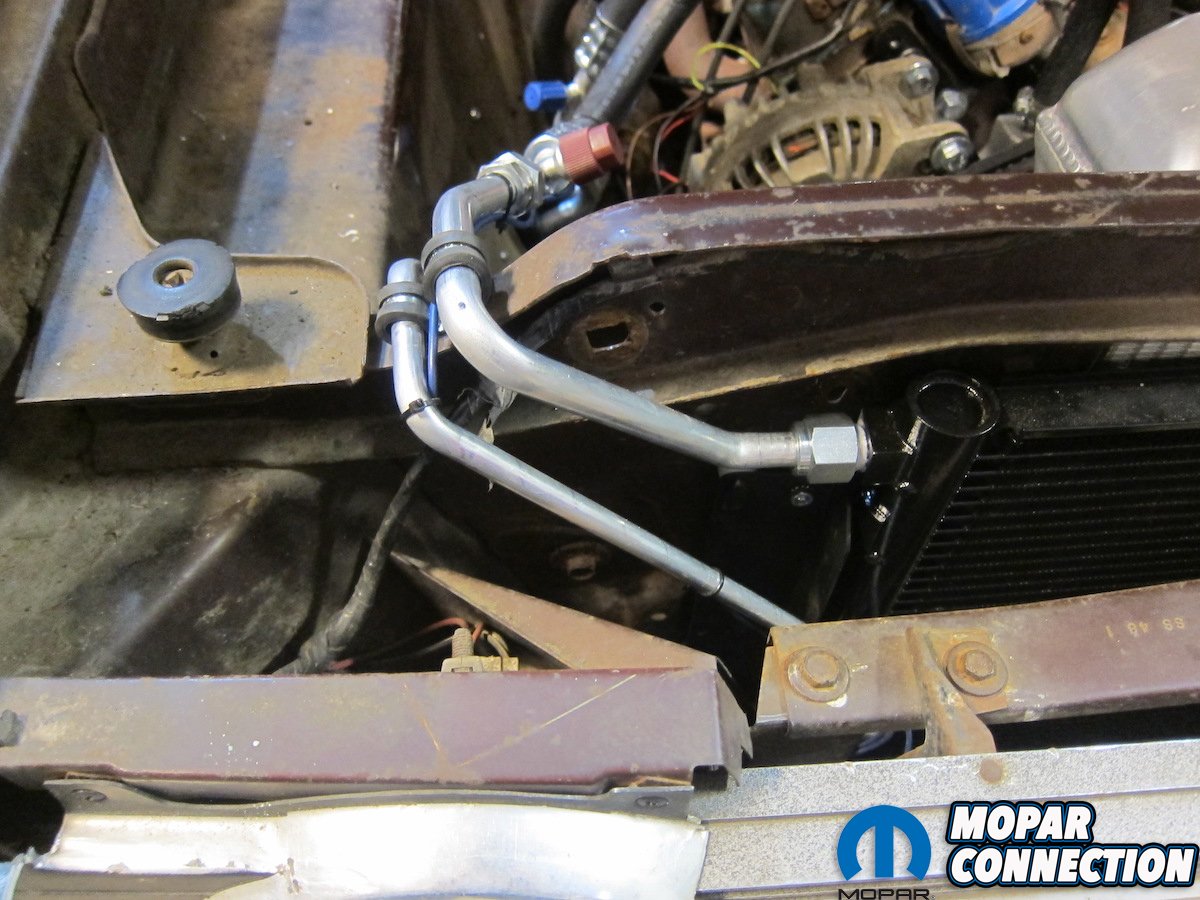
Refrigerant and coolant hose routing really spoke to the cleanliness of the Surefit kit. Rather than cluttering up an engine bay with tentacles of hose running in every direction, Vintage Air chose to route the lines under the fender and through the factory alignment access plate hole on the inner fender. We threaded the hoses through the firewall holes we drilled earlier, then up to the trick molded cover plate with grommets and hardlines to make the transition into the engine bay. It doesn’t get much cleaner than that.
In keeping with the every-part-included theme, a full set of brackets were also supplied in the kit. Laser cut, 1/4” thick steel brackets for the alternator and compressor came unpainted for finishing of the customer’s choosing, so we put on a quick coat of semi-gloss black. Right away, we noticed two things about the attachment points: they were simple and they were rock solid. The stress of a kicked-in air conditioning compressor is nothing to scoff at, especially with two belts in tow. Brackets need to be heavy duty enough to handle the strain and the SureFit parts certainly looked up to the task. All spacers and hardware were included, making them truly bolt-on.


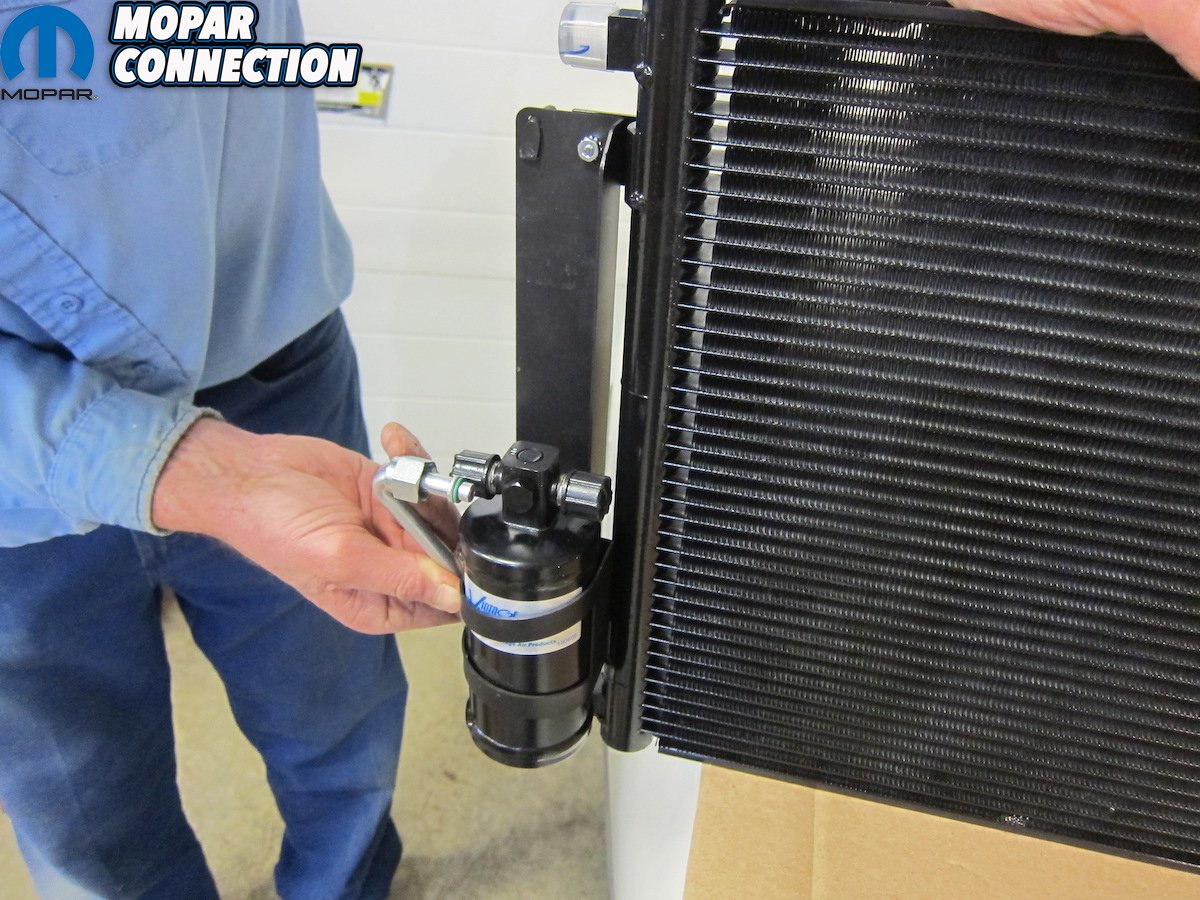
Above: After pre-assembling the condenser, we slid it in and connected its lines.
Since our Satellite was equipped with strong-arm steering, we didn’t have to worry about a power steering pump getting in the way. However, the compressor belt loop includes the alternator, so the lack of a power steering pump left us without a way to tension the belt for the water pump. Of course, Vintage Air had already thought of that with their water pump tensioner kit (P/N 166009). With a simple bracket, idler pulley, and two bolts, the tensioner was a breeze to install. Tightening the belt was easy too since the idler bracket includes a 1/2” square drive for a ratchet.
Moving forward, condenser installation was straightforward as just four holes needed to be drilled in the factory embossed locations on the core support. A full slate of measurements were included for both 22” and 26” radiator openings to confirm placement. While it was a tight fit to get it in, we were pleasantly surprised once everything was bolted back together as there was just enough access space for safety switch wiring and final connections. With all of the major components in place, those final hose connections were made to finish up the mechanical portion of the installation. Not a single part was touching, rubbing, or interfering with any factory body or rotating parts, further speaking to the incredible amount of engineering that went in to this system.


Above: Hose routing was as clean as they come with most of it hidden under the passenger’s side fender.
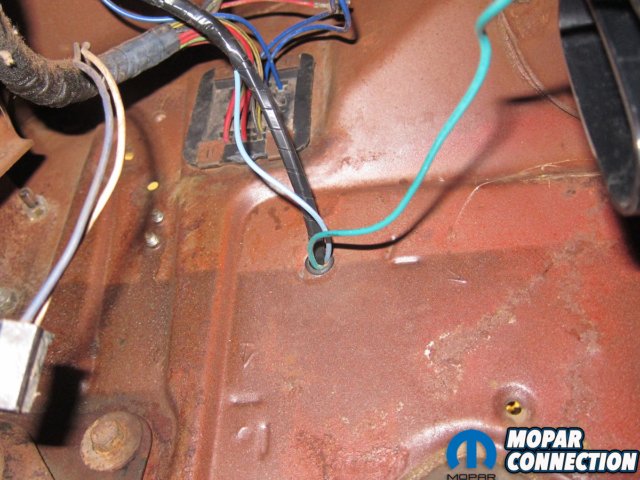
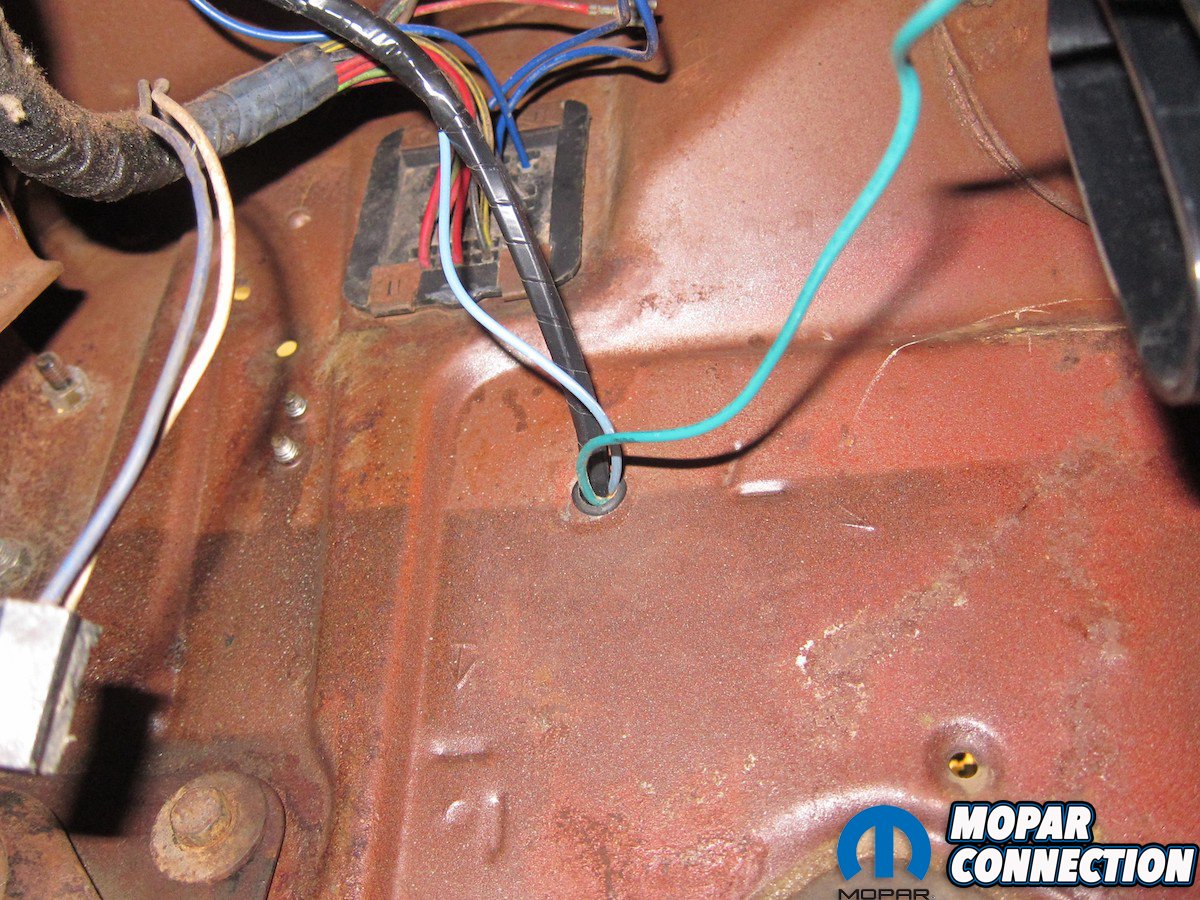
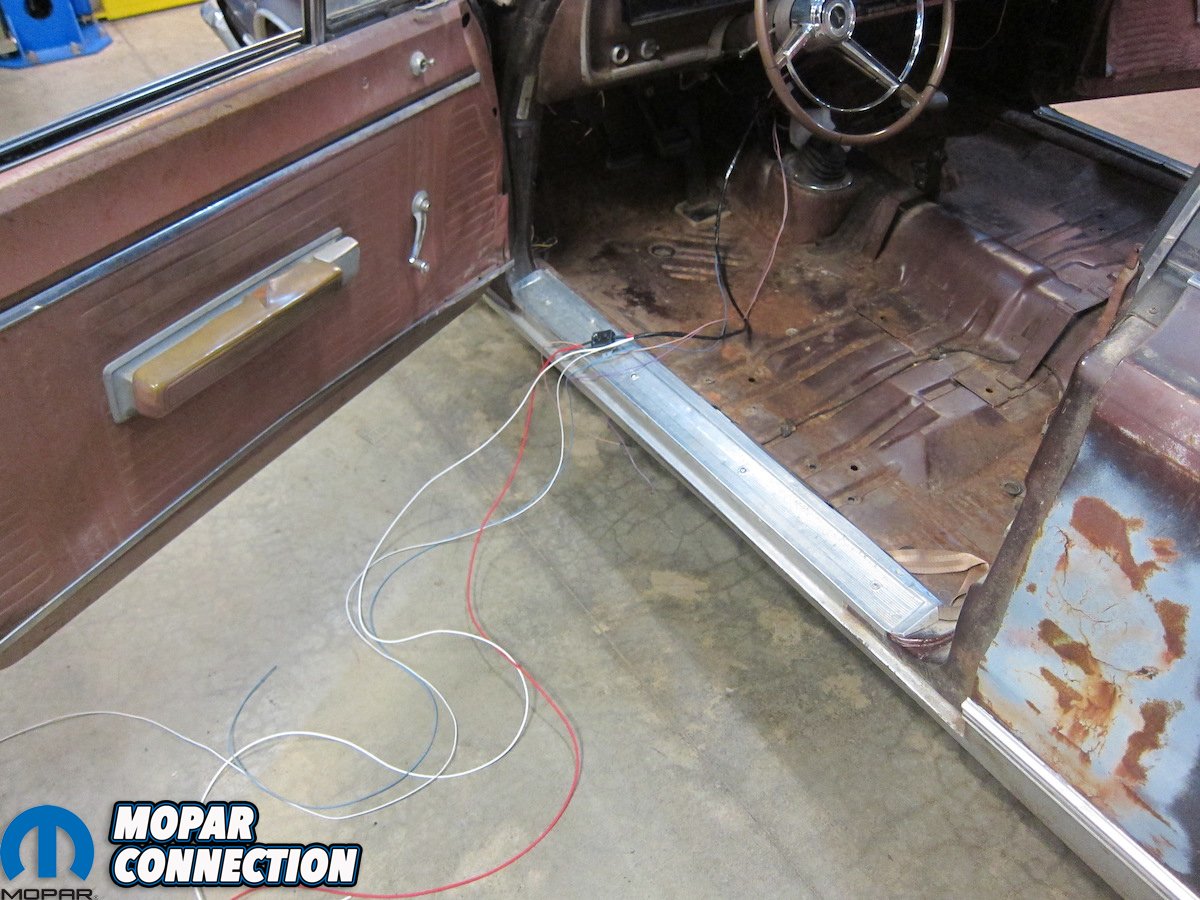
Wiring, while often intimidating, could not have been easier with the SureFit kit. Just five connection points were needed: ignition on, battery power, battery ground, safety switch, and dash lights. A circuit breaker and relay were already wired in, so all we had to do was route the harness. For that, we used the existing factory heater box mounting hole near the bulkhead. Existing holes in the inner fender were ideal for circuit breaker mounting. The pre-taped A/C harness ran right alongside the original forward lighting harness and was barely detectable once in place. The wiring diagram initially looked daunting, but we were done with electrical in less than twenty minutes.
The final hurdle was charging the system. We pulled a vacuum for the recommended forty-five minutes, then broke the vacuum with some quality R-134a. Proper charge volume is key to optimal system operation, so we dialed in 1.8 lbs. (28.8 oz.) of refrigerant. No additional refrigerant oil was required since the new Sanden compressor included the proper amount for the system. Once we were sure we had the system fully charged with refrigerant, it was time for the moment of truth.


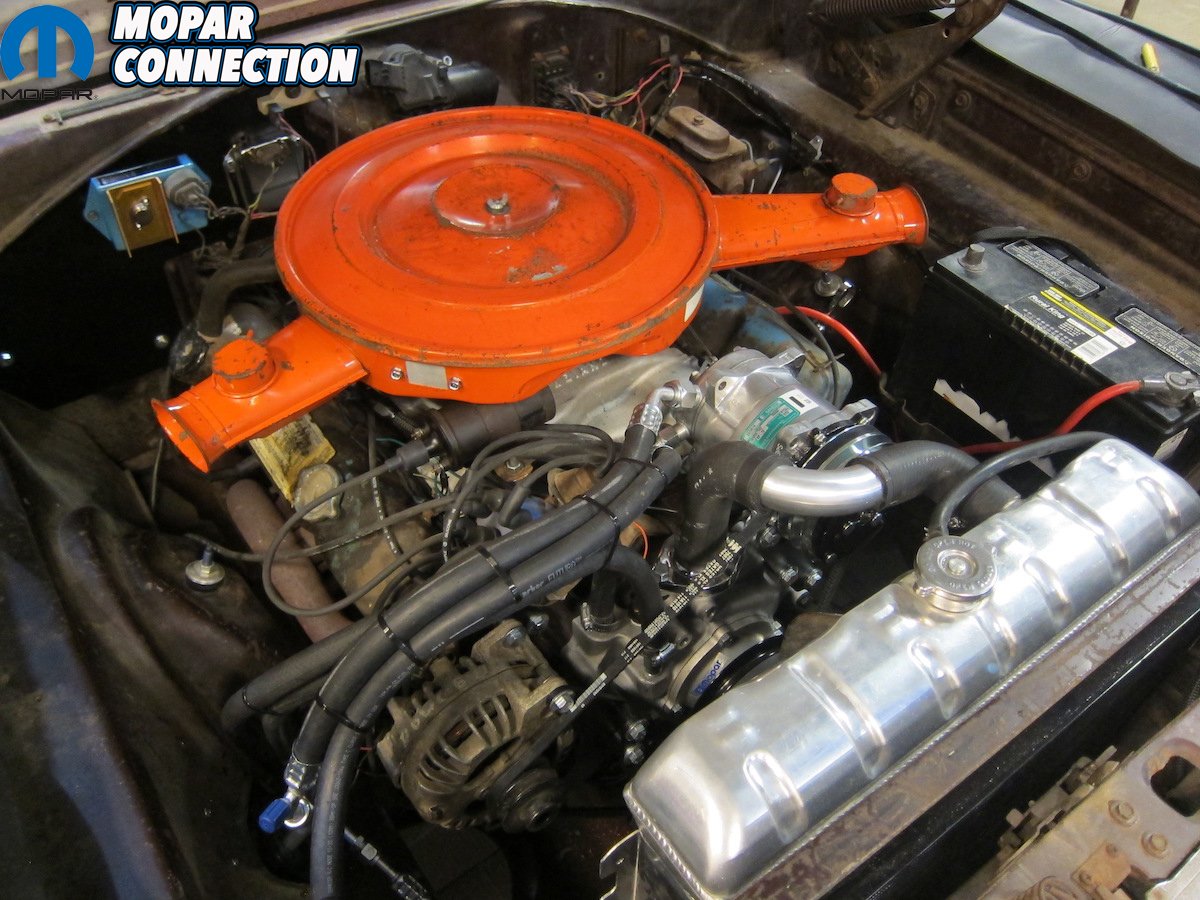
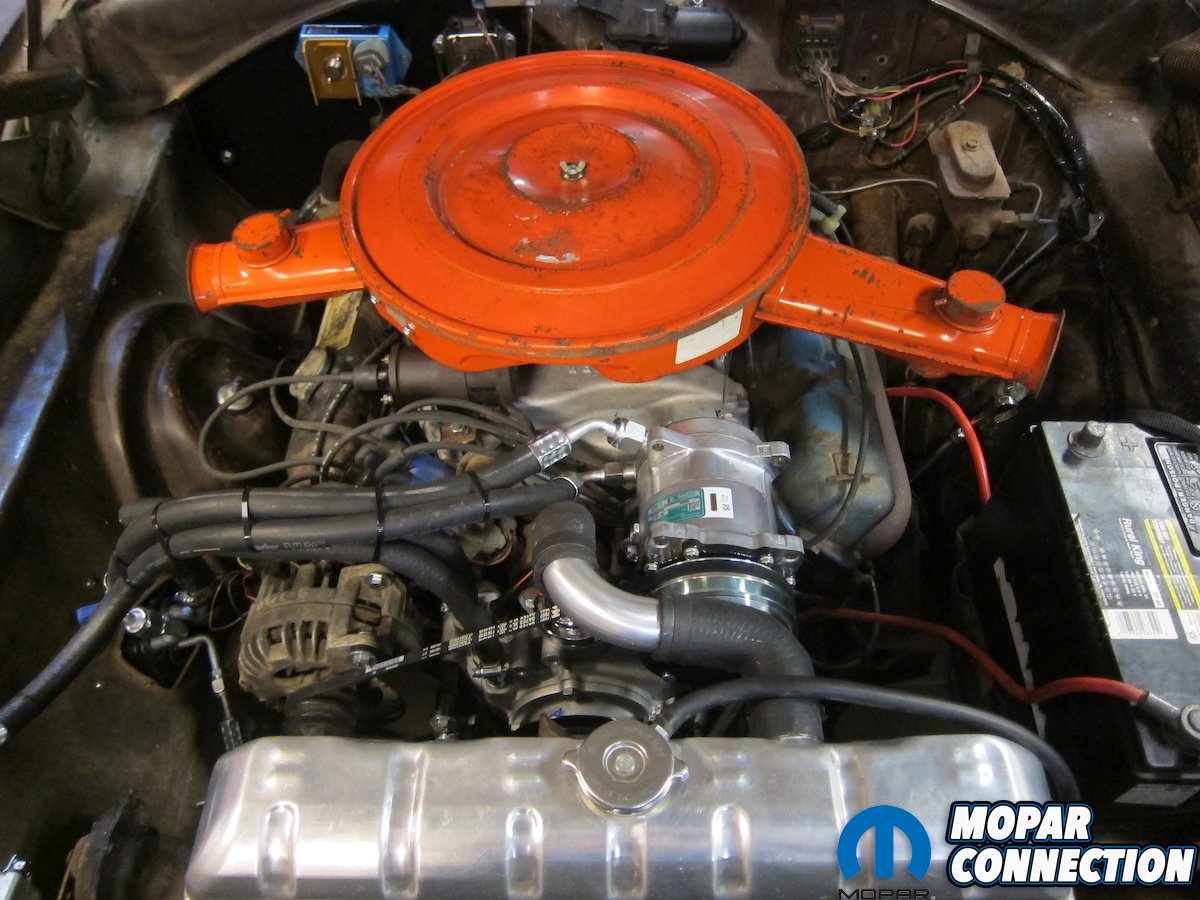
Above: The end result was a engine bay that was uncluttered. Note that our non-A/C radiator required a custom elbow for compressor clearance.


Above: The final step was charging the system with 1.8 lbs. (28.8 oz.) of refrigerant. This gave us a reliably chilly 40-degrees out of the vents. What a difference!
With the car running and our meat thermometer in hand, we took an air temperature reading on the center vent under the dash. The documentation called for 36- to 46-degrees Fahrenheit and we were right in the center at a frosty 40-degrees. After installing something that was so precisely engineered, we didn’t expect anything other than premium performance and 40-degree air will be more than plenty on the hottest of Midwestern afternoons.
Looking back on our Vintage Air Gen IV SureFit experience, our expectations were high going in and we were not disappointed. One might expect to have to make several parts-store trips for an installation of this magnitude, but that absolutely was not the case. The completeness of this kit is second to none and the finished product resulted in a look that didn’t at all detract from the vintage vibe of our driver-quality Satellite. With a high volume of ice-cold air now cooling our suffering passengers, it’s definitely time to start thinking about some door seals, carpet, and upholstery…


