


Now that the “Comeback Cuda” is completely painted including blackout and undercoating it is time to start assembly. There are several recommended steps in order of re-assembly of a car. None are perfect but our assembly order makes logical sense, at least to us.
We begin by focusing on the pedals assembly, Master cylinder, proportioning valve, and brake lines. As noted in our last article, “Back in Black, Front in Black, and Wheel Wells Too,” these were all on the car before it was undercoated. Since the “Comeback Cuda” was originally an automatic we had to find a set of 4-speed pedals. We were able to get a great set by looking in the “For Sale” section on Moparts.com. One of our daily places to visit on the web.
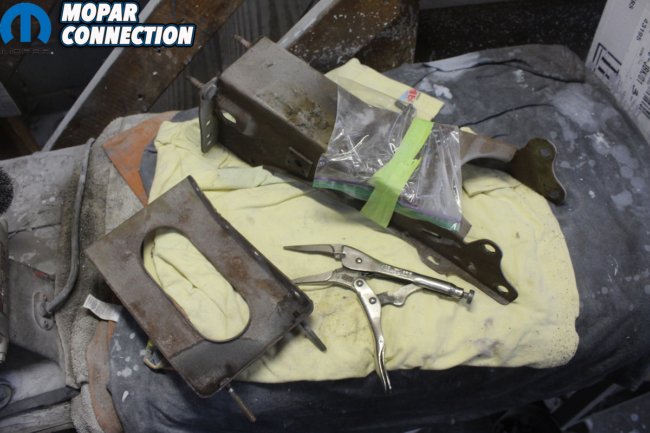
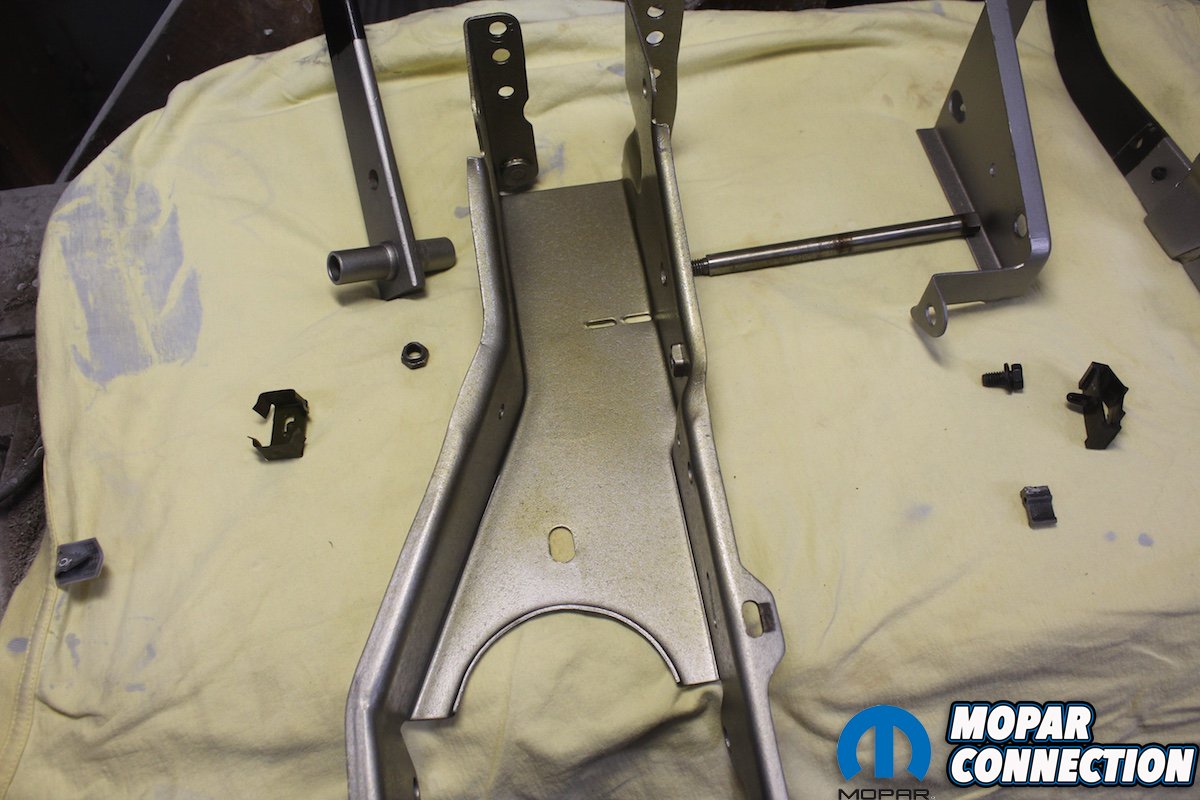
Above left: We needed to purchase a complete 4 speed pedal assembly. After seeing a set for sale, we jumped on them. They were all original and had never been disassembled. Above right: As we disassembled the pedals we were able to identify the finish of the nuts and bolts as well as the assembly. The nuts and bolts were all black phosphate. Between the different plates we discovered that they were indeed dipped in “Cosmoline.”

Above left: Through trial and error, we have tested many different products to make natural metal look natural. When we need only natural metal we use Rust Preventative Magic. To recreate the “Cosmoline” finish we use Seymour’s Stainless Steel paint, Eastwood’s Heavy Duty Anti Rust, and Matte Clear. Above center: We use soda to blast the metal totally clean and use a wire wheel brush on any stubborn areas. Then we shoot three coats of the Stainless Steel paint with the last coat being fogged on to reduce the shine and make the part look more natural. Above right: Then we lightly spray the part with the Heavy duty anti rust. To re-create the dipped aspect just spray more product and hang to dry. After letting the part dry overnight, we then spray the part with two coats of Matte Clear. By doing this the sticky to the touch “Cosmoline” coating is sealed.
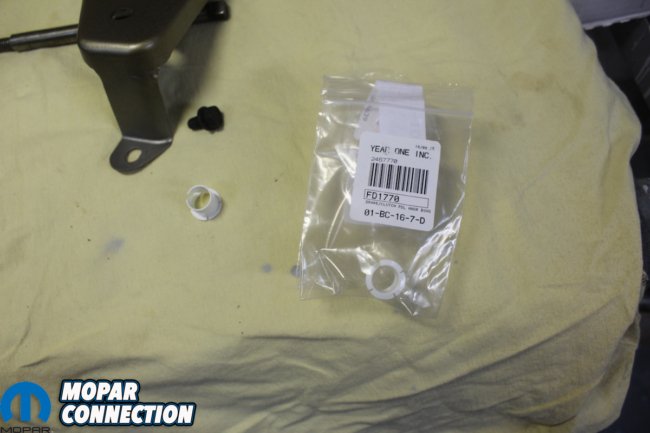

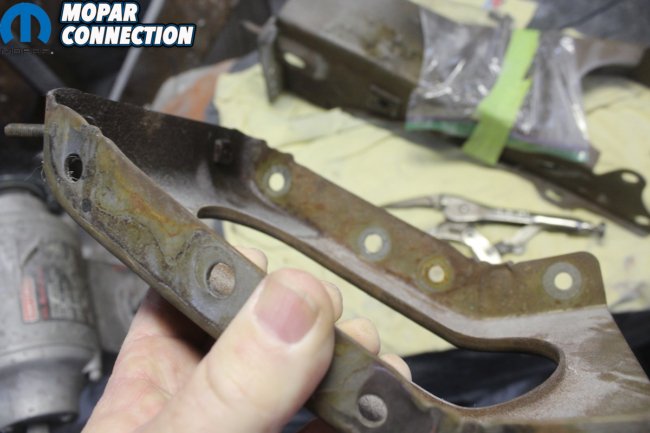
Above left: Here you can easily see the contrast of a part treated with “Cosmoline” and the 4 speed pedal mount, which has only been sprayed with Stainless Steel paint. Above center: The roller bearings in the pedal were in great shape so we just cleaned and re greased them. With our plastic “brake/clutch pedal hanging bushing” from YearOne we are ready to re-assemble the pedals. Above right: We paint the lower ¾ of the pedals with semi-gloss black. Here you can see the distinct line re-creating the original process. We grease up the “brake/clutch pedal hanger bushing” and carefully slide it into the roller bearing part of the pedal. And then slide the support rod through the pedal.
This set was completely original and had never been disassembled. We learned a lot about the original appearance and treatment of the assembly. The bolts and nuts were “black phosphate,” the natural assembly was dipped in “Cosmoline” and the pedals were dipped in semi – gloss black with a distinct dip line visible.
One of our main sponsors of the “Comeback Cuda,” YearOne, was the source for many of the parts needed to rebuild the pedals and brake lines. Everything from this point forward must be rebuilt, restored or replaced. I mean why would you not? Never cut corners. It will come back to bite you.

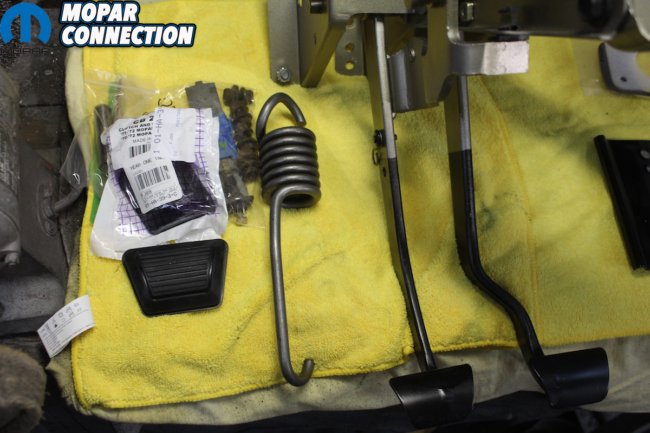
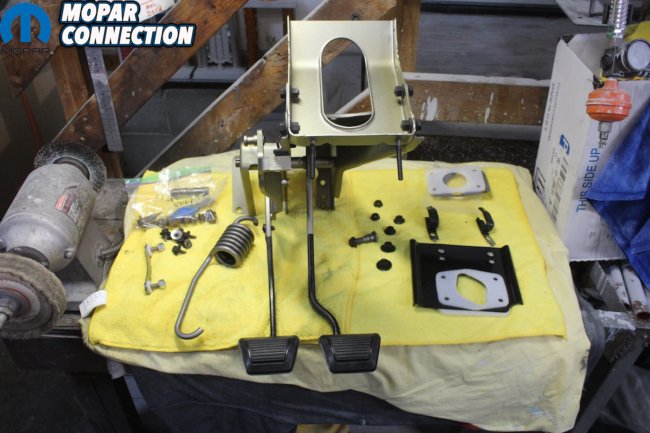
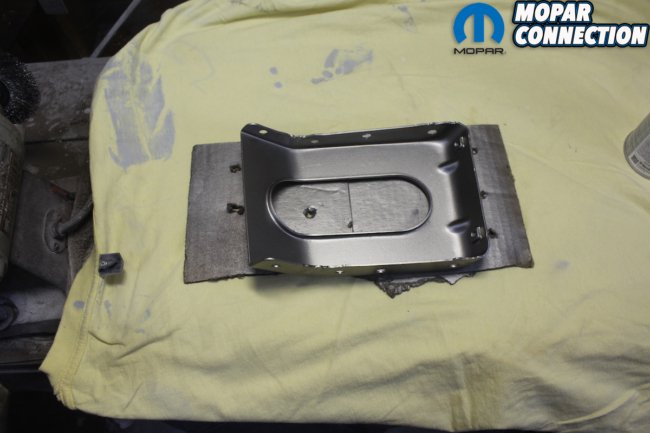
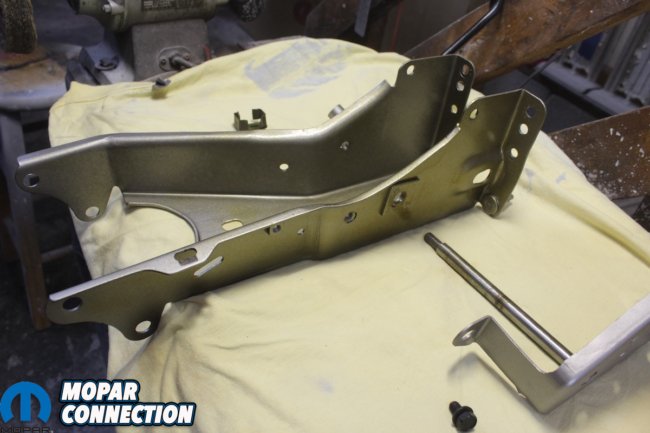
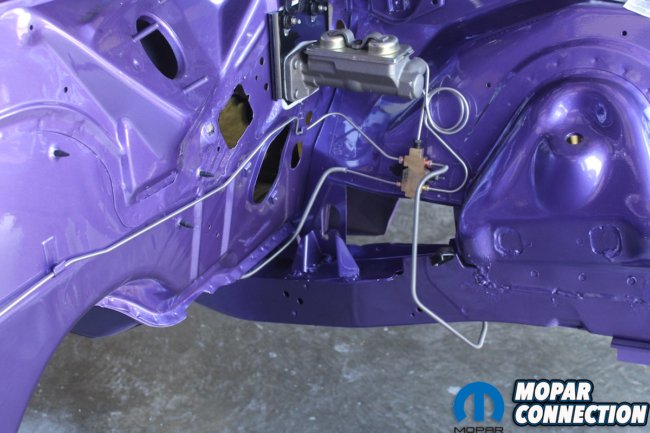
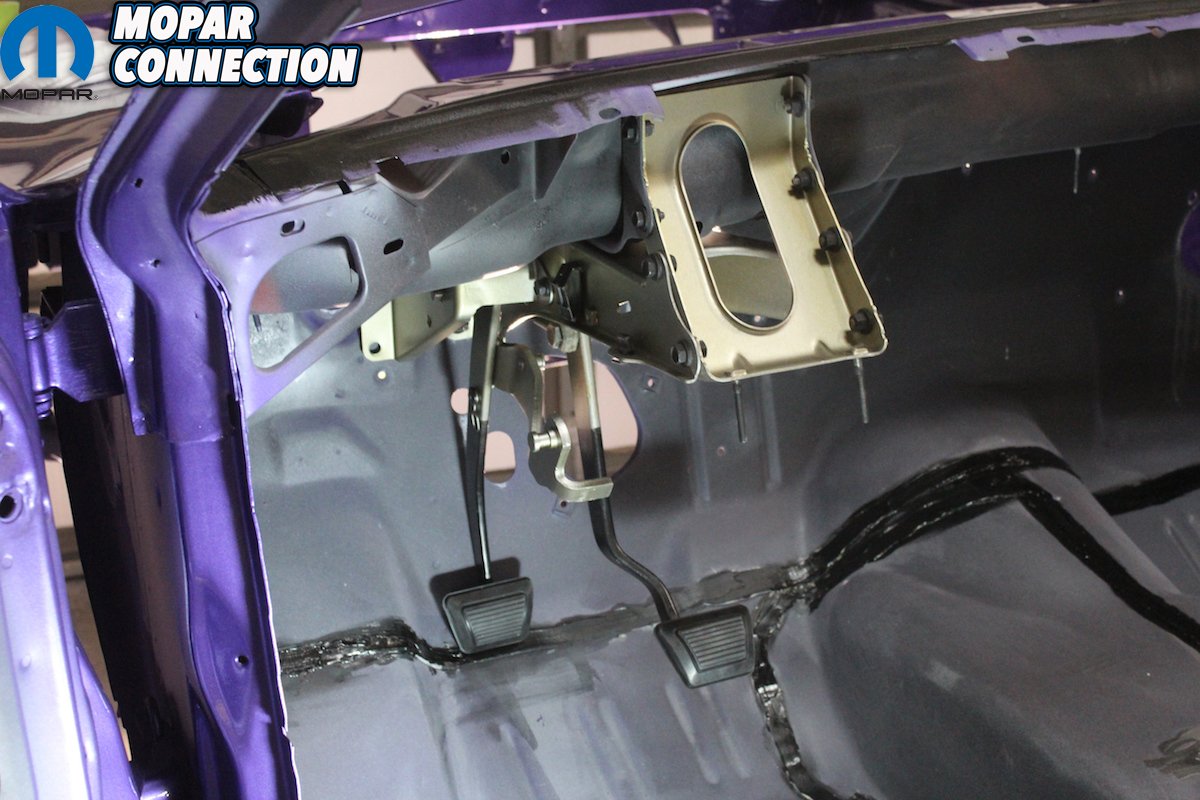
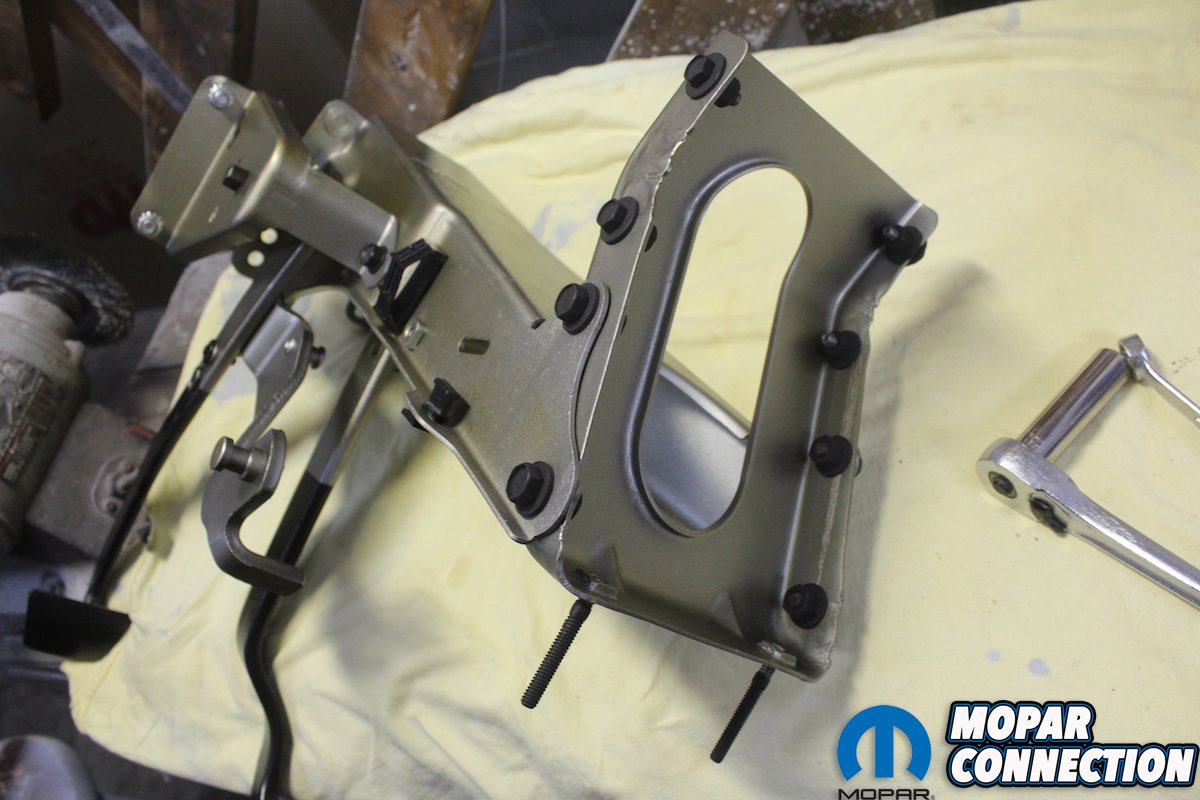
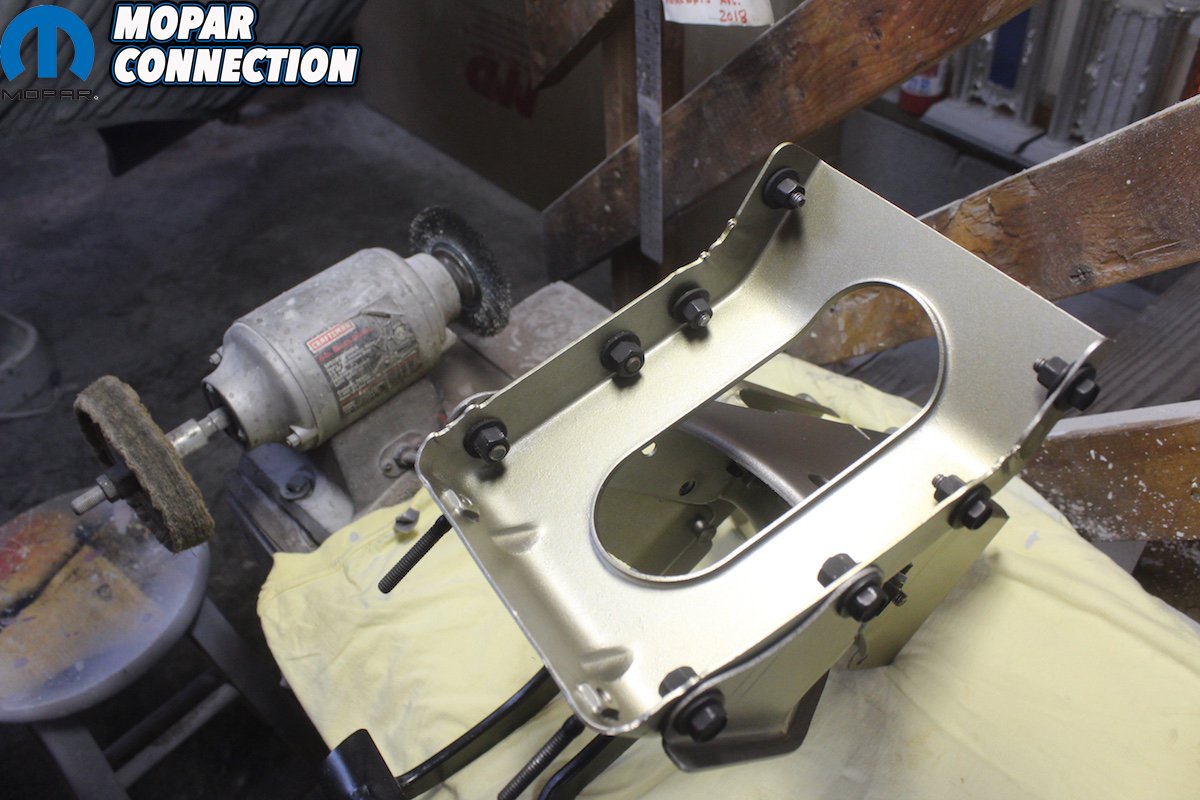
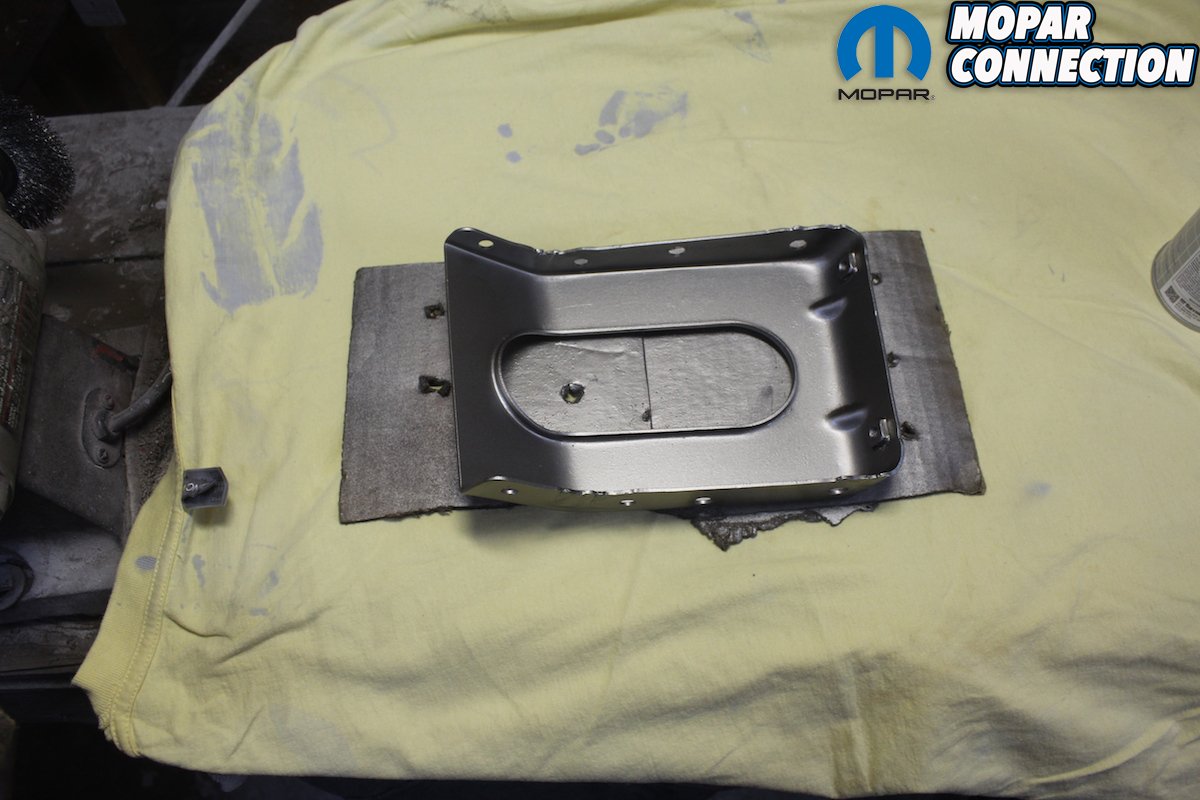
Above left: Since we already had painted all the parts, black phosphate plated the bolts and nuts, and had all the needed new parts on hand, the assembly came together pretty easy. Notice the plastic “speedometer” clip and the rubber “clutch bumper” installed. Above center: Now that the basic 4 speed pedal assembly is done we can move on to the installation. When we bought the 4-speed pedal assembly we made sure it was for a 1970 E-body. Notice the clutch safety switch wire loop on the clutch pedal. It is not there on other years. We also got new pedal pads and clutch spring from YearOne. Above right: Here we have laid out all of the parts and seals needed to install the pedals and master cylinder in the “Comeback Cuda.” The Master cylinder backing plate is gloss black. The foam seals are white and the wiring brackets are natural with the ends dipped in a black rubber coating. The 4-speed bracket has been finished in the “Cosmoline” process. The clutch return spring is natural steel.
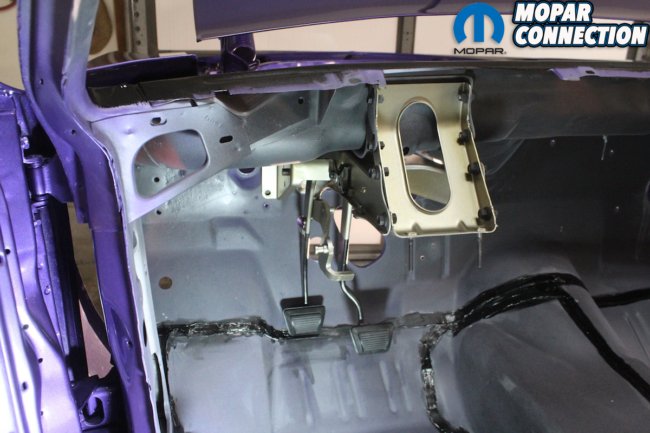
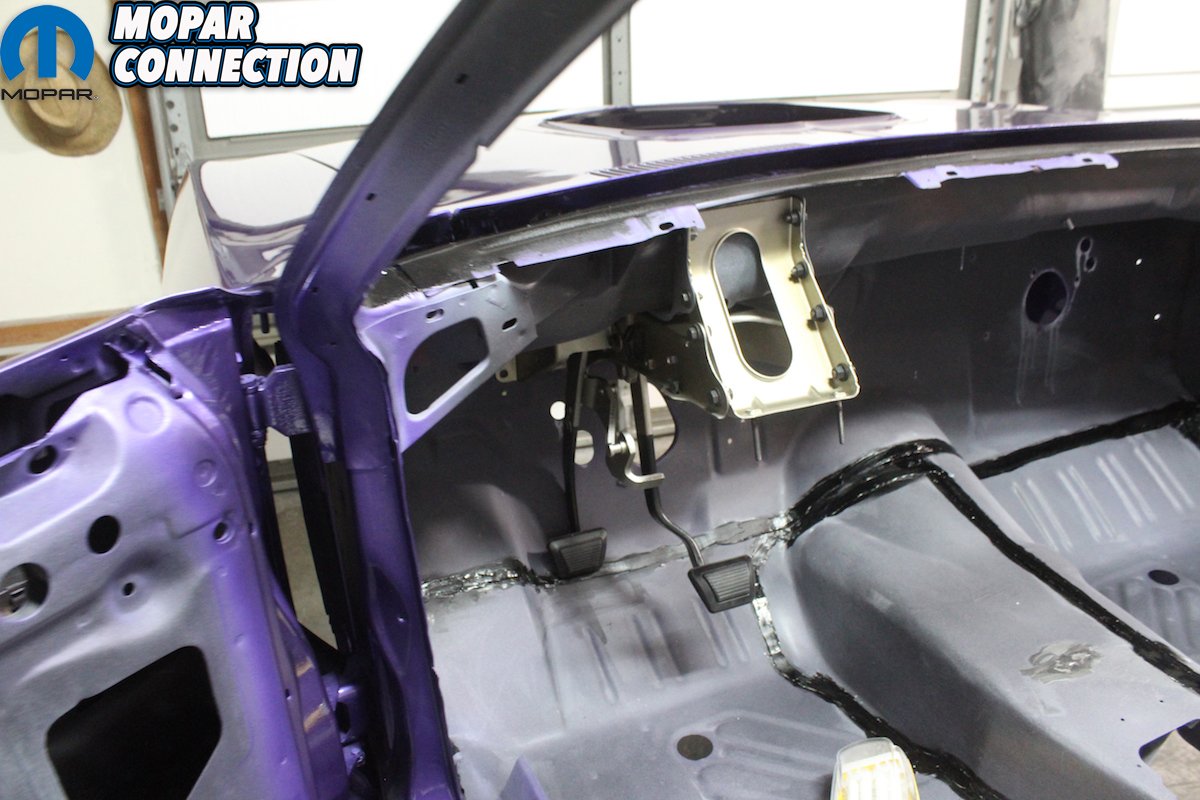
Above left: First you install the pedal assembly and tighten all the nuts and bolts. We then drilled the holes for the 4 speed bracket since the car was an automatic. The great part is that there are dimples all ready in the firewall exactly where the bracket is located. Above right: Using the gaskets from Detroit Muscle Technologies we place the foam gasket that goes between the Master cylinder backing plate and the firewall. As we have already said these gaskets are the best out there and always fit well and have the correct appearance.
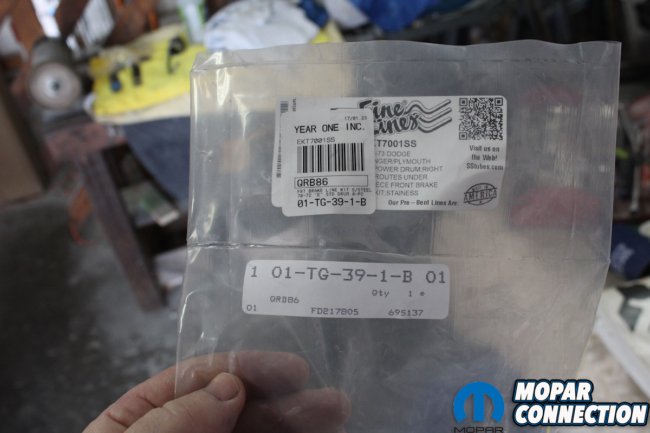

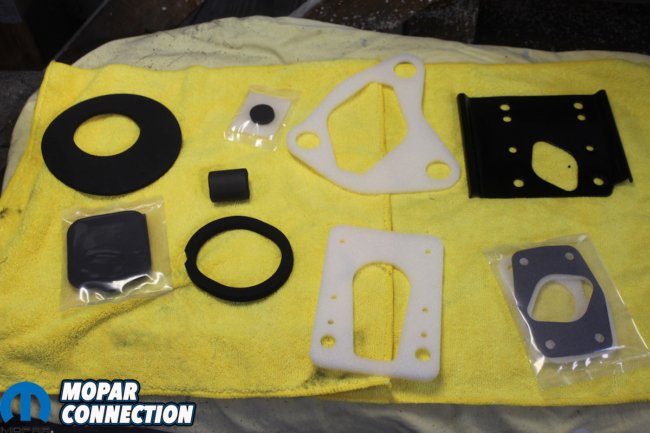
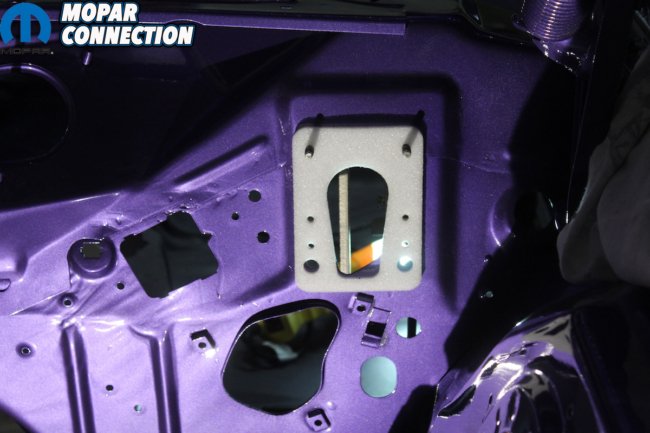
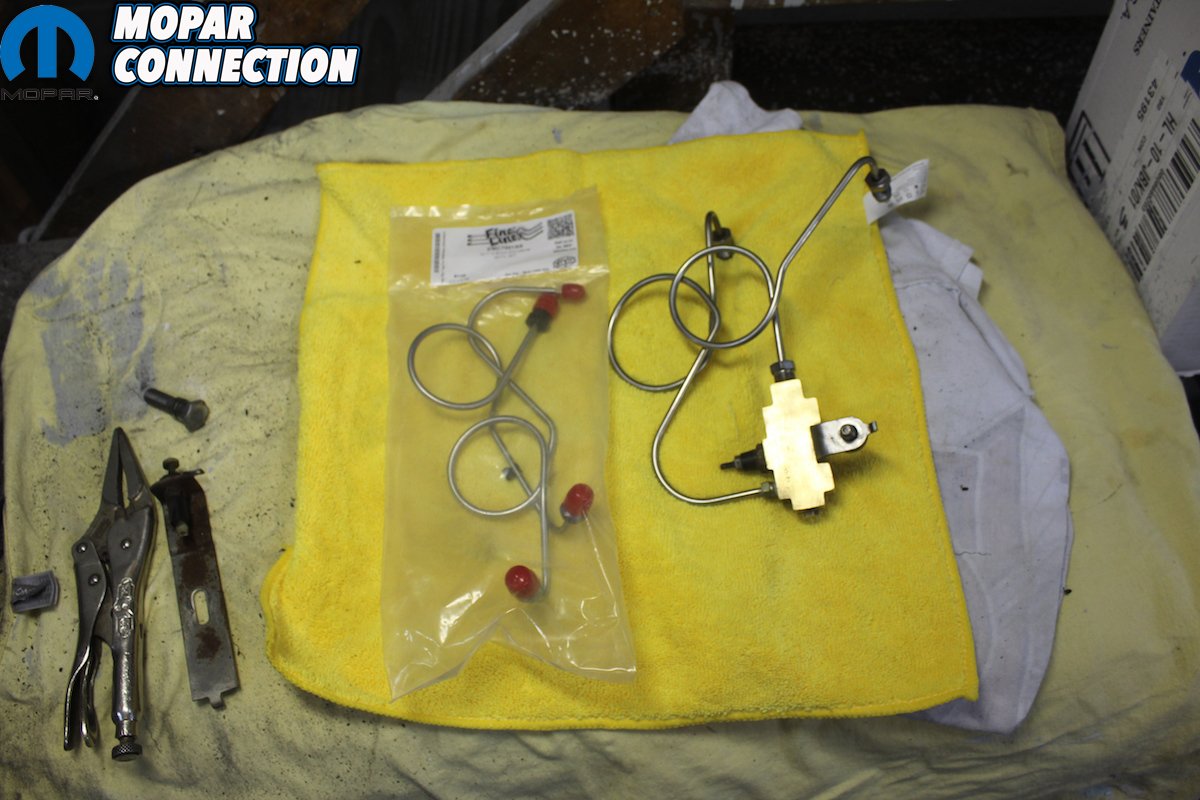
Above left: One of our “Comeback Cuda” sponsors, YearOne provided us with the front brake lines manufactured by “Fine Lines.” We love the fit and quality of the lines. Correct even down to the colors on the ends of the lines that mount to the master cylinder. Above center: Here is our freshly restored proportioning valve. Since we have standard non- power drum brakes there is only one valve. The nuts that hold the Master cylinder are black Phosphate. An “S” clip holds the front and rear brake line together. Above right: Here are more of the gaskets from DMT. Notice they are all made of the correct material and color. Brake backing plate, master cylinder, heater motor, steering column, wiper motor, and heater core sleeve are shown. We have already restored the master cylinder so it is ready to install.
After all, the pure definition of a “restoration” means everything is restored to factory specs, appearance, and function. We would speculate from years of experience that maybe 5-percent of the cars that claim to be restored really are. Many of the rest are just “pigs with lipstick” with short cuts taken everywhere.
Not only did YearOne help with our parts but we also turned to Detroit Muscle Technologies. They have by far the best and most correct seals available. We will feature their heater box rebuild kit in a future article. After re-building the pedals, Master cylinder, backing plate and proportioning valve, we install the new brake lines.
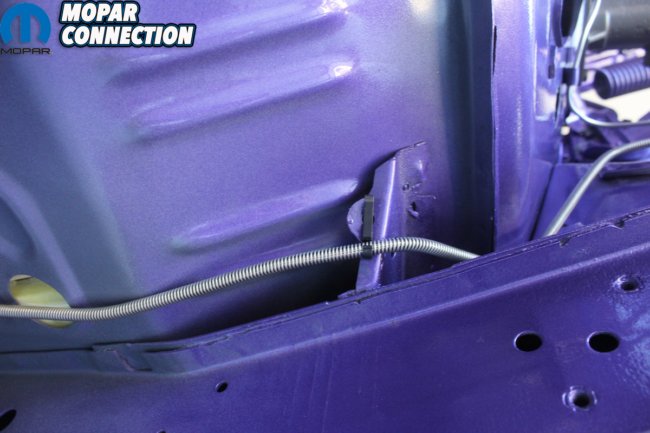
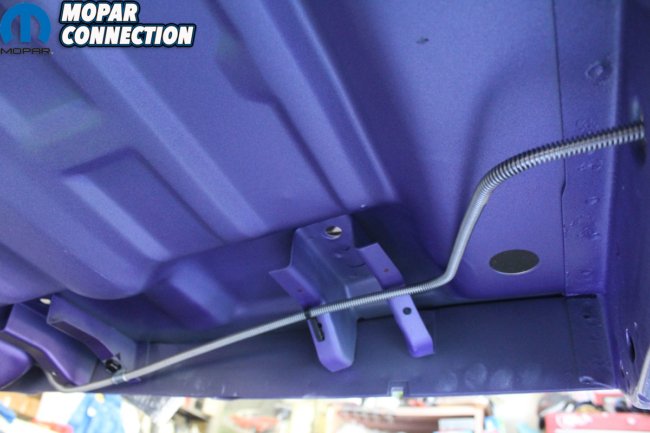
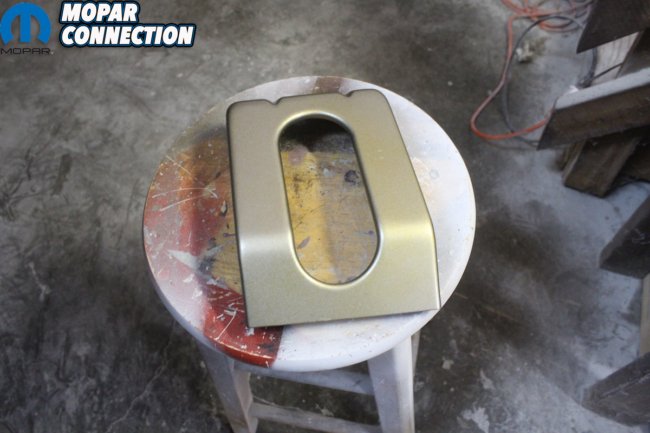
Above left: Just like that everything is installed and tightened. The Master cylinder cover is gold cadmium plated, the hold down bracket is natural, and the “H” head bolt is black phosphate. Since all of the metal is brand new we needed to get the correct place for the holes and brackets to run the rear brake lines. Above center: Using the brake line clip set from YearOne we followed the AAR’s placement of the clips, bolts, and clamps. This first clip is black phosphate plated and fits the coil wrapped line perfectly. Above right: Using exact measurements from the AAR ‘Cuda, we drill two holes in each floor support. The clip location and the bolt with clamp location are based on what we found on the AAR ‘Cuda. Since there are two holes in each bracket different cars will probably have different combinations and locations of these clips. The line is fed through the torsion bar support.
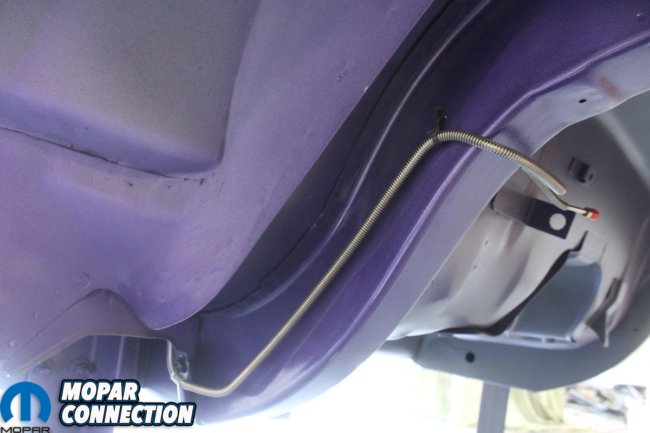
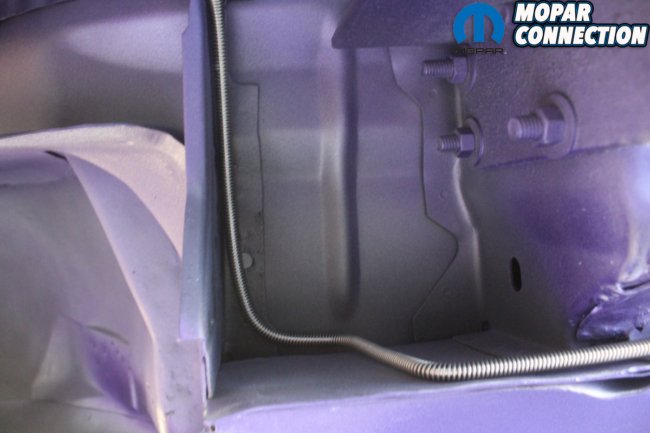
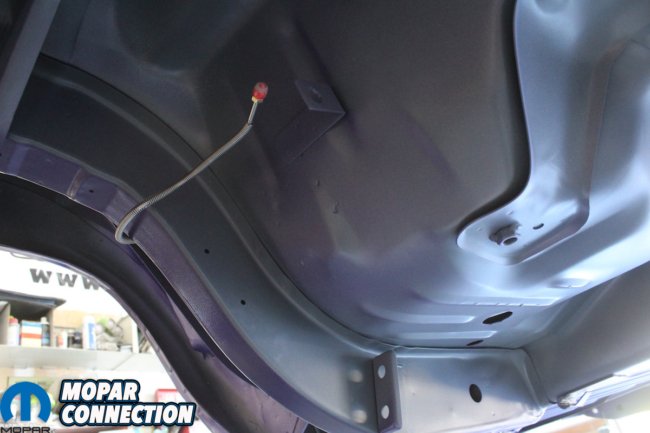
Above left: Here is the brake line routed from inside the frame rails to outside the frame rails. The front of the line is held in place with a bolt and clamp and the then a clip is the final mount. Above center: We can’t say enough about the quality and accuracy of the brake line from “Fine Lines.” Here you can see how perfect the line fits as it passes by the torque box and then up the outside of the frame rail. Above right: The end of the metal brake line attaches through a bracket into the rear rubber brake line that will then attach to the “T” junction mounted on the Dana rear end. Notice the body color on the outside of the frame rail and the dip primer on the inside of the frame rail along with the overspray on the bottom of the rail.
The routing of the brake lines and the clips that are used can be confusing. Especially if your car isn’t an undisturbed original example. Here are the clips and routing of the lines based on several original cars we have seen.
After these components are installed, we turn to rebuilding the emergency brake system and installing all the underdash insulation. That will be followed by a step by step non-A/C, heater box rebuild.


