


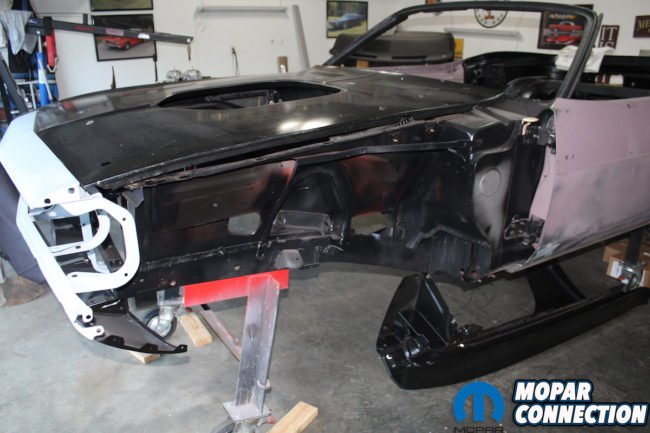
The journey of our ’70 Hemi ‘Cuda convertible project car “Comeback ‘Cuda” is really starting to take shape. In fact, the entirety of this article is all about literally getting it into shape prior to paint. The seams were leaded and the console, spare tire, and the jack brackets have all been welded in place. We mounted the hood, trunk lid, and doors and checked all the body lines and gaps.
We also pre-fit as much trim as possible to make sure everything lined up and fit. After mounting the driver’s side door, we discovered the front fender wouldn’t line up. After careful measuring and a couple of calls to AMD, we decided to try another new fender. Sure enough, the different fender fit like a glove. Just one more example of great customer service from Bill at Classic Muscle Metal.

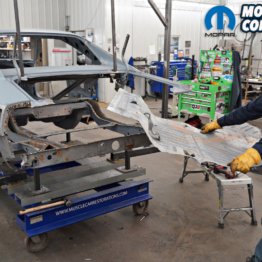
Above left: After getting the “Comeback ‘Cuda” from AMD Installation we pre- fit the doors to the body to begin the process of lining up the door gaps. We ran into a problem with the driver’s door and fender. After working to make them fit to no avail we contacted Bill at Classic Muscle Metal. He suggested we try a different fender and he sent one immediately. With the new fender everything lined right up. Always great customer service from these guys! Above right: Once both doors were pre-fit we took them to a local media blaster. She uses high pressure water and crushed glass to strip the doors. With this process there isn’t any warpage to the metal. As you can see the door is clean and ready for primer.


Above left: At this point we clean and dry the doors and shoot them both with etching primer. This will keep the doors from flash rusting. We also shot Resto Rick’s undercoating inside the door about a third of the way up from the bottom making sure they are sealed against the elements. Above center: We then remount the doors on the body using tape to mark the body lines. We check all the gaps with the doors in place. Above right: After a few adjustments the passenger door lines up great. The driver’s side door ended up with the large of a gap at the top of the door and it had to be removed for welding additional metal to close the gap.

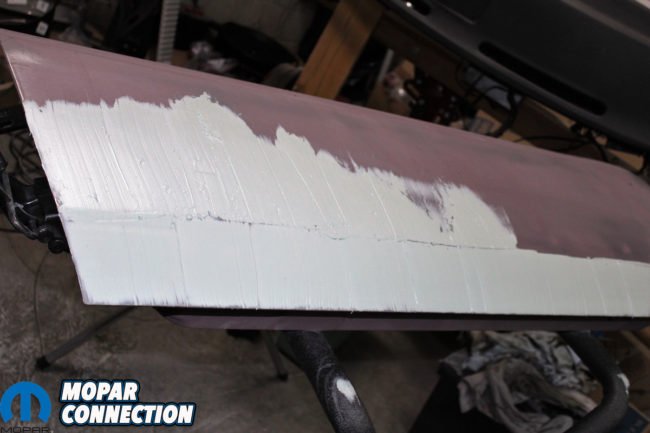
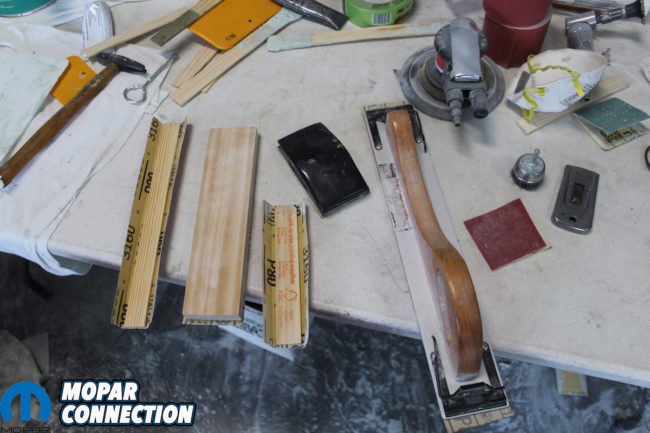
Above left: Here is a layout of the products and tools we will use to get the body straight and ready for primer. Sand paper in 36, 80, 180, and 220. Filler, hardener, and 6 inch and 3 inch spreaders along with a plastic mix board. Thinner for clean up. An air file, long board, and several different sanding blocks. Hammer and dolly. Angle grinder, die grinder and dust masks. Tubes of sealer, paint sticks, and tape are all going to be used during the process. Above right: We start by sanding the door with 36 grit to give the filler something to bite to. Apply the filler with the 6 inch spreader in long even strokes. Base applications are applied vertically while finish application should go horizontally.
Now that we knew the doors would work, we sent them out to be blasted. We used a local company that uses a media/water material that gets everything off inside and out without distorting the metal. Once they were blasted, cleaned, and dried, we hit the doors with self-etching primer. That helped the doors to not flash rust. After repairing the doors and leading the repair, we began to use filler to finish the doors.
We prefer to grind the metal with 36 grit so we can put the filler on bare metal and get a good bite. The gap between the front of the driver’s door and the fender was too wide, so we welded additional metal to create a better gap. We used a brass pipe flattened to create a good backing to the area we are building up. This helped make a better weld and reduced the chance of a burn-through during welding. We ground off the excess and finished after re-fitting the door to make sure the gap was acceptable.


Above left: Using the long board shape to filler with 36 grit followed by 80 grit. Right now we are just establishing the base for the body lines. Above center: While the doors are off of the car we know that there is too large of a gap at the top of the driver’s door. By clamping a copper flattened rod under the area that needs to have additional material added we ensure that there won’t be any burn-throughs. We set the welder on a low power and feed setting and spot weld on the additional material. Above right: Using the angle grinder we dress the weld. As you can see a few more spot welds are needed to make a smooth edge. We make sure and taper the edge to match the desired gap. Here we were able to add about ¼ of an inch to the door edge.

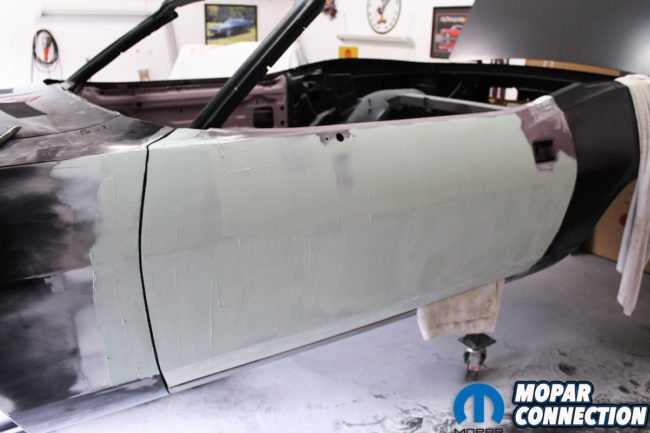
Above left: Using the 3M quality tape we establish a base body line. Then using the air file with 36 grit and the long board with 80 grit we finish the first coat of filler. Above right: Once we get a good base of filler on the door we re-hang the door and re-adjust the gaps. Now we can make sure the body lines and the edge of the fender, quarter panel, and door line up.
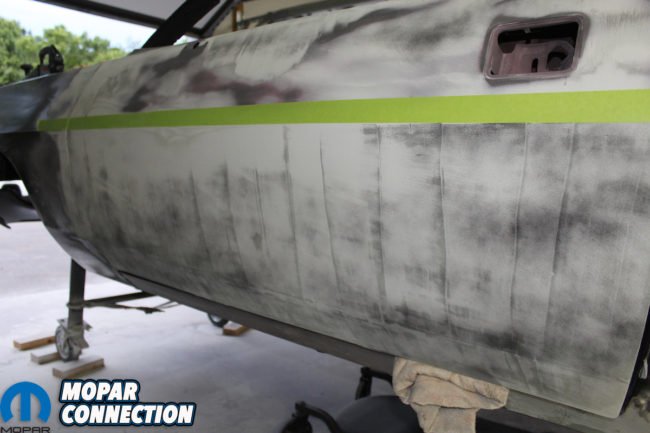
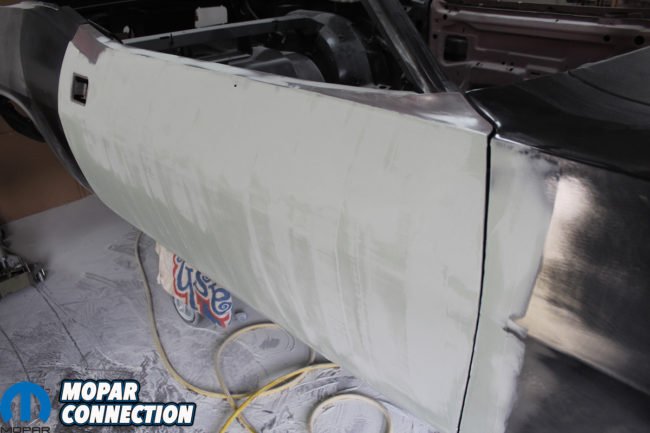
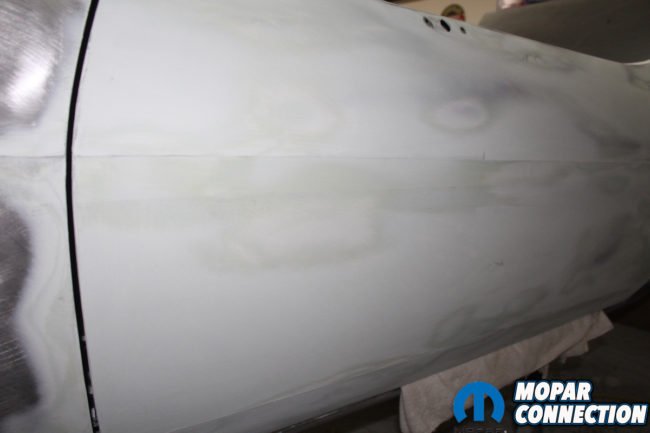
Above left: After again using the tape to keep the body line where it should be, we apply another coat of filler. We then begin using the “guide coat” to help with the sanding process. Low spots show up easily using this product. 36 grit cuts the surface and is used to shape the filler while the 80 grit is used to smooth the 36 grit sanding scratches. Above right: The process continues until the door takes the needed shape. From this point on we like to apply the filler horizontally to make getting the door flat much easier.
Recreating the exact body lines on the doors that perfectly match the front fender and rear quarter panel proved to be a real time consuming effort. There are dozens of books that detail how to use filler and sanding techniques. If you are a beginner, you need to study up and even do some test panels. We are going to focus on the completion of the bodywork on the Comeback ‘Cuda and add some great tips along the way to ensure a great final, outcome.
Now that the door gaps were all in line we applied a base of filler using the wide spreader. Being sure to not add too much filler at one time, we applied it with horizontal not vertical strokes. Once the filler was almost hard, we used a long board with 36 grit and began to shape the filler. The paper began to clog up with the filler so we cleaned the paper with a wire attachment. After we “shaped” the filler using the 36 grit paper we then smoothed the sanding scratches with 80 grit.
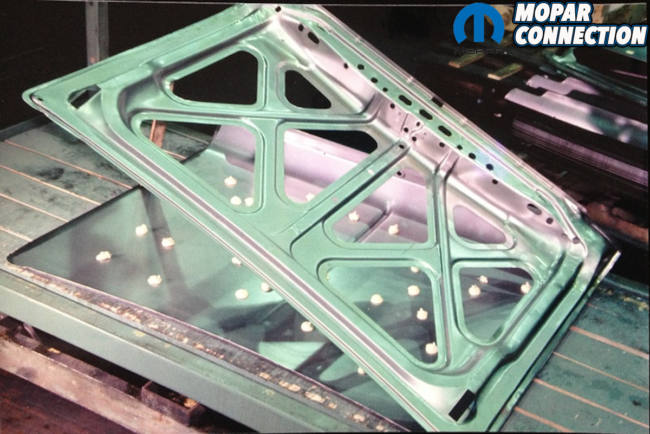

Above left: Claude “Bud” Douthitt worked with Chrysler back in the day as a chemical sealer consultant. Eric, his son, was able to provide us with factory pictures taken by his dad that show the real way these sealers were applied. Here those little blobs of sealer that we always find between the outer hood skin and the inner structure are shown. Above right: There have always been several theories about how the seam sealer was applied to the interior seams. One theory was they had a wide nozzle that spread the sealer in a wide strip. Here is an actual factory picture showing they just applied a bead of sealer with a gun and then just pressed it into the seam with a pole and a curved flat end. It was applied after the dip primer process and before paint as evidenced by the darker dip primer line.


Above left: Different amounts of sealer were applied depending on the seam. Here is original sealer on the “Comeback ‘Cuda” where the convertible sub frame meets the modified convertible only wheel well caps. Above right: With brand new metal panels throughout the entire body of the “Comeback ‘Cuda” every seam is going to need to be sealed. Here on the brand new 4-speed hump the careful, correct, welding work of the guys at AMD Installation is evident.


Above left: Although the color is not black the properties of the Fusor 800DTM direct to metal sealant works great. Just scuff all the seams with a red pad and get out the caulk gun. Above right: You can never have enough Scotch-Brite pads. These will be used to every e-coated surface to insure good adhesion of paint and sealer.
The doors have two major body lines that must line up with the fender and quarter panel. After applying the filler, we applied a guide coat. By doing this, any low spots will show up. Once the general shape of the door and lines was established, we applied a tape line. By using the quarter panel and fender lines as reference points, the tape clearly showed the correct body line for the door.
We applied filler right up to and a little over the tape. Once the filler dried to the touch, we removed the tape and a great line was left. We repeated the process on the other side of the line, sand, and started the process all over again. This must be repeated until the doors match the body lines of the fender and quarter panel. We also used the edge of a metal straight edge to make sure the door was straight and the filler was level over the entire door.


Above left: We apply a good size bead of sealer to the seam and then using a paint stick we press it into the seam and recreate the size of the sealer bead that originally came of the car. Above right: We needed 4–5 tubes of the sealer to cover the interior and the trunk area. The product dries in about an hour to the touch but still remains pliable and not brittle so it won’t crack in the future.


Above left: Returning to the doors for final filler application and sanding we continue to use the tape for the body lines. We are now using 80 grit and guide coat to smooth the door. Above center: This picture shows just how helpful it is to use guide coat even on filler. The line that tape creates can easily be seen and there aren’t any low spots where we have sanded. Above right: We like to use a die grinder with a sand paper roll to remove the filler from the door handle area and any other area that needs a sharp line for final finish.
Above left: You can’t have enough sanding blocks. Here we use and old body man’s trick of using paint sticks as sanding boards. These come in handy and are a necessary tool to create level, straight surfaces in small areas. These are wrapped with sticky 80 grit sanding roll paper. Above right: We now have a door that is straight and level and ready to have the filling glaze applied. The glaze fills and pin holes in the filler as well as any deep scratches. It is sanded with 180-220.
Since we are working with brand new sheet metal we reapplied the seam sealer to all of the interior and truck area the same way the factory did. There have been many theories about how the sealer was applied at the factory. Eric Douthitt’s father, Claude worked was the General Manager of Trenton Chemical, a subsidiary of Chrysler Corporation. Eric was able to share with Mopar Connection actual pictures taken by his father from the factory, showing how this was applied. The black sealer was applied from a gun and then flattened and pressed into the seam with a wand. As they say, a picture is worth a thousand words.
After many hours of sanding and re-applying filler our doors were perfect. We went over the rest of the body with 180 grit to rough up the e-coat in preparation for shooting the entire car with PPG epoxy primer. The next step is to “shoot the fish”, so to speak. We will show the steps to shooting a base of epoxy primer followed by a minimum of two coats of high build primer over the epoxy primer. Then, we will begin the block sanding process on our way to finally getting color on the “Comeback ‘Cuda.” We will also show the correct use of the dip primer from Resto Rick to re-create the factory drips and puddles.


 Mopar Connection Magazine – The ONLY Daily Mopar Magazine © 2022. All Rights Reserved. Mopar Connection Magazine is the ONLY daily Mopar Magazine bringing you the latest Mopar news, technology, breaking news, and Mopar related events and articles. Find out the latest information about Mopar, Mopar products and services, stay up to date on Mopar enthusiast news, dealership information and the latest Mopar social media buzz! Sign up for the Mopar Connection Magazine newsletter for the latest information about new products, services and industry chatter. Mopar Connection Magazine is the best and only source you need to be a Mopar industry insider!
 by
by