


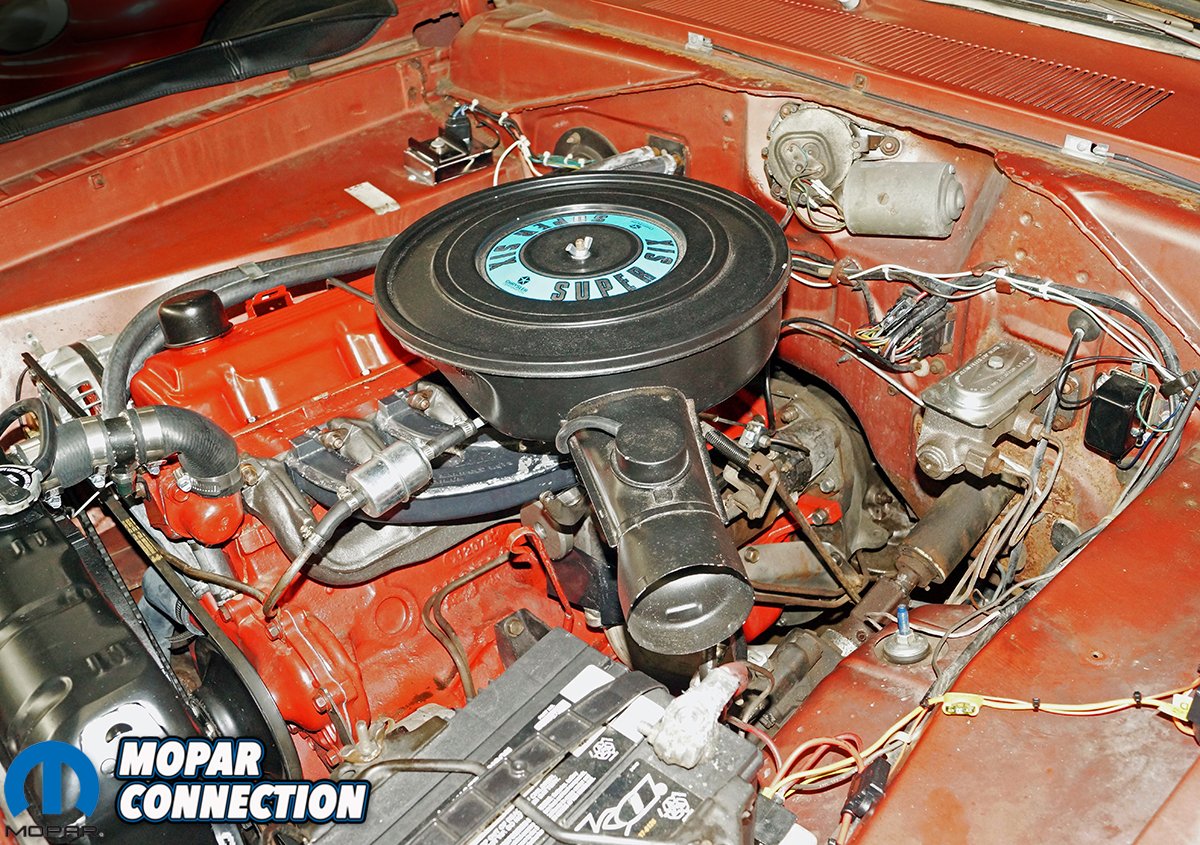
The Slant 6 could be found under the hood of a Plymouth or Dodge from the 1960 model year until the end of its production in the Dodge truck and van lines in 1987. Although the 170 and the 198 cubic inch displacement (cid) versions were introduced and ended between 1960 and 1974, the 225 cid engine was the mainstay of the slant six family. Our 1967 Dart is equipped with the larger displacement 225 cid engine. Although we maximized power from ignition and timing in previous articles, we still wanted more power.
The 225 Slant 6 replaced the flathead engine Chrysler offered in the 1959 models, and it ended with the introduction of the 3.9L V6 engine in the truck line. Between 1960 and 1987, the 225 was offered with an optional cast aluminum block in the early sixties, and a HyperPak four-barrel option could also be ordered in 1960-1962. However, the Slant 6 became much more known for its rugged reliability and toughness rather than its performance attributes.
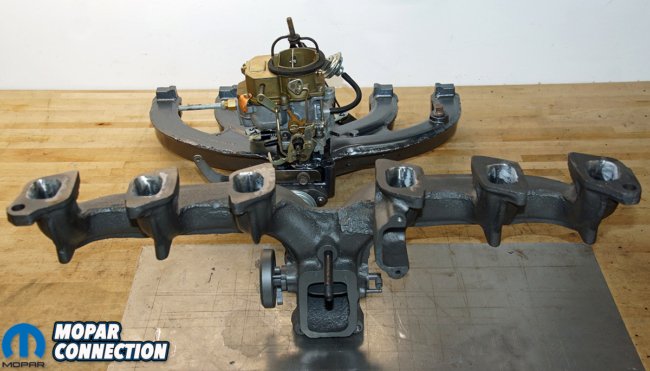
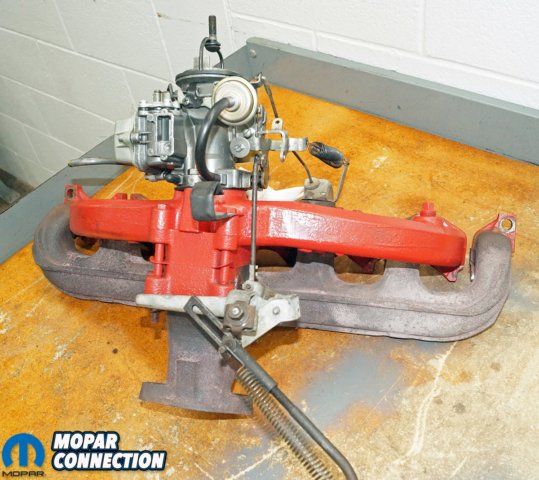
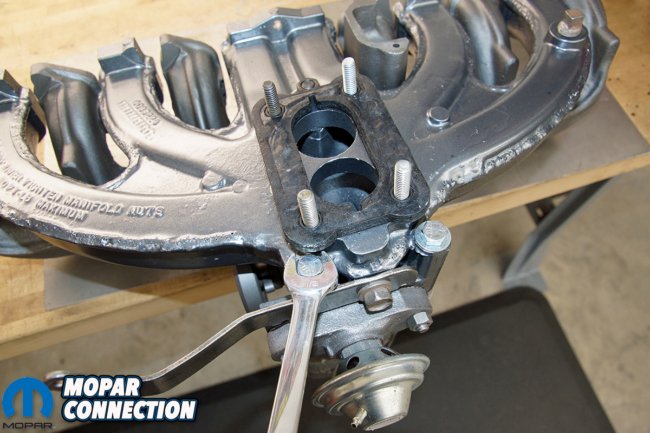
Top: The parts for the swap included an exhaust manifold, an aluminum intake manifold, and a Carter BBD two-barrel carburetor. Additional components (not in photo) comprised of the entire kick-down linkage, all the clips and return springs, and the air filter housing and air filter element. Bottom Left: We cleaned all the parts, and then using the original and new hardware, we mounted the intake manifold to the later model exhaust manifold. Bottom Right: With the Carter BBD installed, the choke heating element was fastened into a cast well on the exhaust manifold. We also ran a 12-volt switched wire to the choke.
The mundane everyday cast iron block and one-barrel carbureted 225 was initially rated at a gross horsepower of 145 hp and 215 lb-ft of torque. As the emissions requirements on the internal combustion engine increased in the late 1960s and 1970s, the 225 was fitted with ever increasing power sapping emissions components, which hampered engine performance and drivability. By 1975, the 225 was rated at a meek net horsepower of 95 hp and torque of 170 lb-ft. This was the low point for the 225.
Although the performance numbers took a hit due to the ever increasing emissions components being hung on the engine, the real reason for the apparent drop was a change in the rating of the engine from gross numbers to net numbers. In 1972, the manufacturers began rating each engine in net (the horsepower and torque of the engine with all the accessories and full exhaust attached when dyno tested) rather than gross (the horsepower and torque of the engine measured without accessories and with an optimized exhaust on the engine dyno) to lower the horsepower ratings for more favorable vehicle insurance rates and reduce the insurance surcharges that accompanied high horsepower engines.

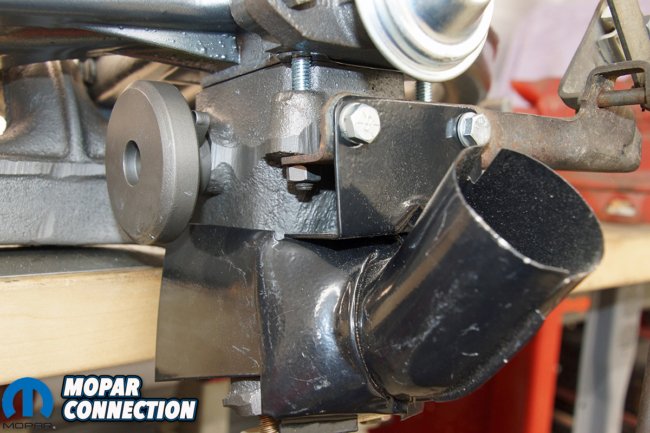

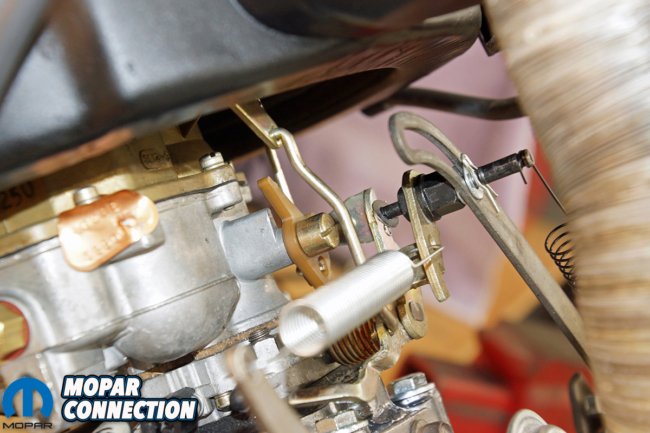
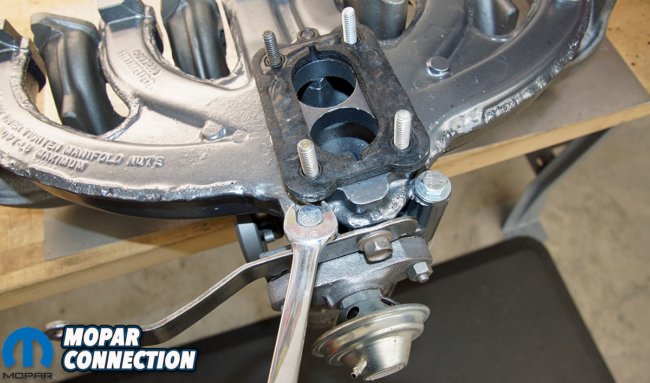
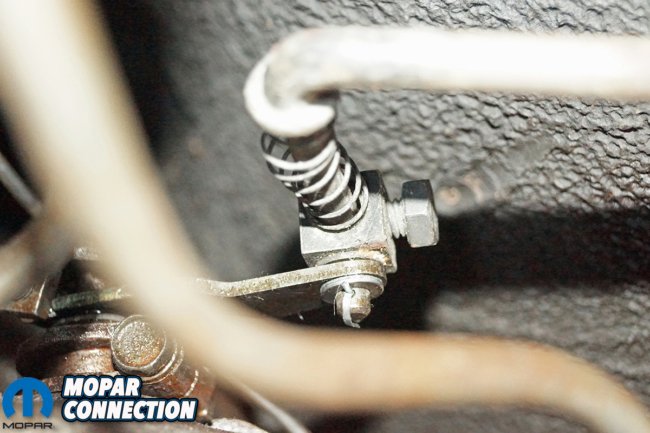
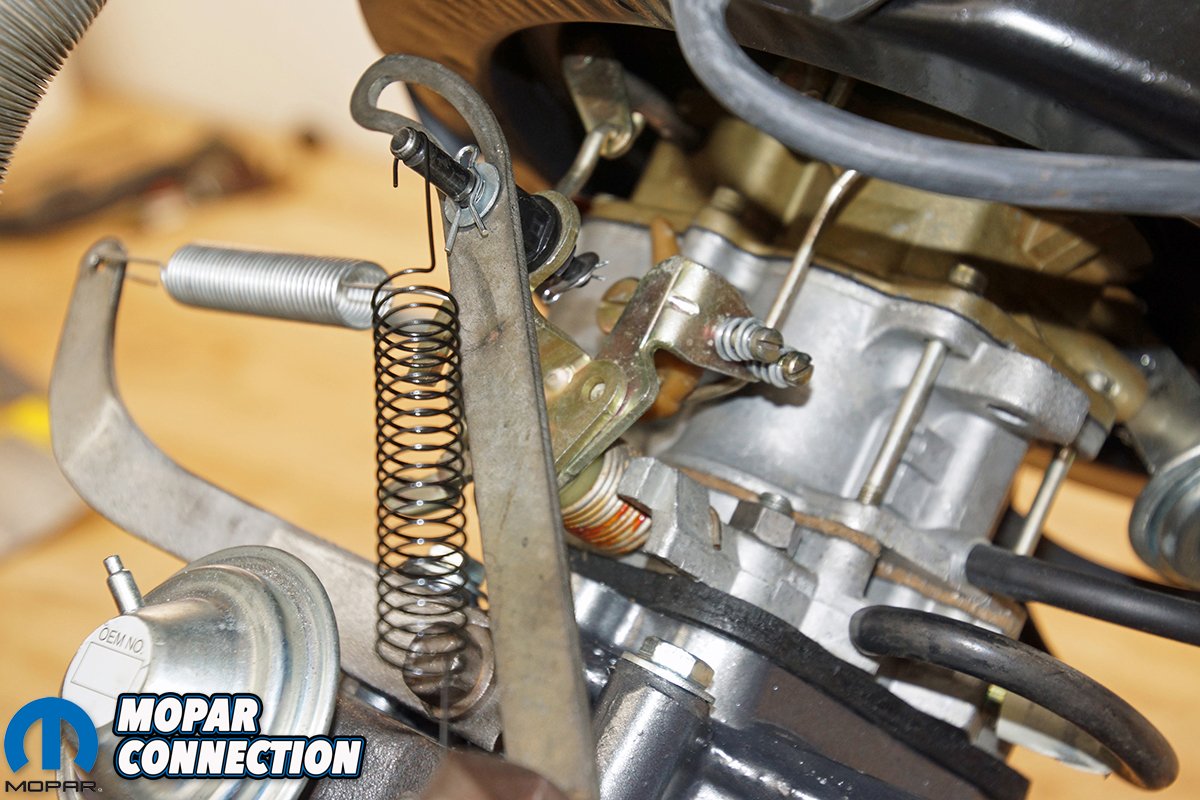
Top Left: The kick-down linkage mounting bracket was attached to the exhaust manifold with studs and nuts. Top Right: The 1967 Dart’s air cleaner housing did not have a provision for the heater ducting, but we wanted to use the Super Six factory parts, so we installed the carb air heater. Bottom Left: The slotted kickdown lever was attached to the carburetor throttle arm shaft. Bottom Right: Another angle of the kick-down lever shows the spring and clip arrangement.
The actual net numbers for a pre-1972 225 Slant 6 were approximately 110 horsepower and 185 lb-ft of torque, so the emissions laden 1975 engine was down about 15 horsepower and 15 lb-ft of torque. Worse than the loss of torque on the street was the terrible drivability associated with the leaned-out emissions yielding 1945 Holley one-barrel carburetor that was still required to provide an adequate fuel and air mixture under less than optimum conditions.
In 1977, Chrysler introduced the Super Six setup for the emissions strangled 225 Slant 6. The Super Six consisted of a Carter BBD two-barrel carburetor along with a matching intake manifold, air cleaner housing, and larger air filter element in the place of the Holley 1945 one-barrel carburetor. If you visit any online site that caters to slant sixes, you will read stories of how much (and at times how little) performance gain can actually be found by adding a Super Six setup to a pre-1977 Slant 6.
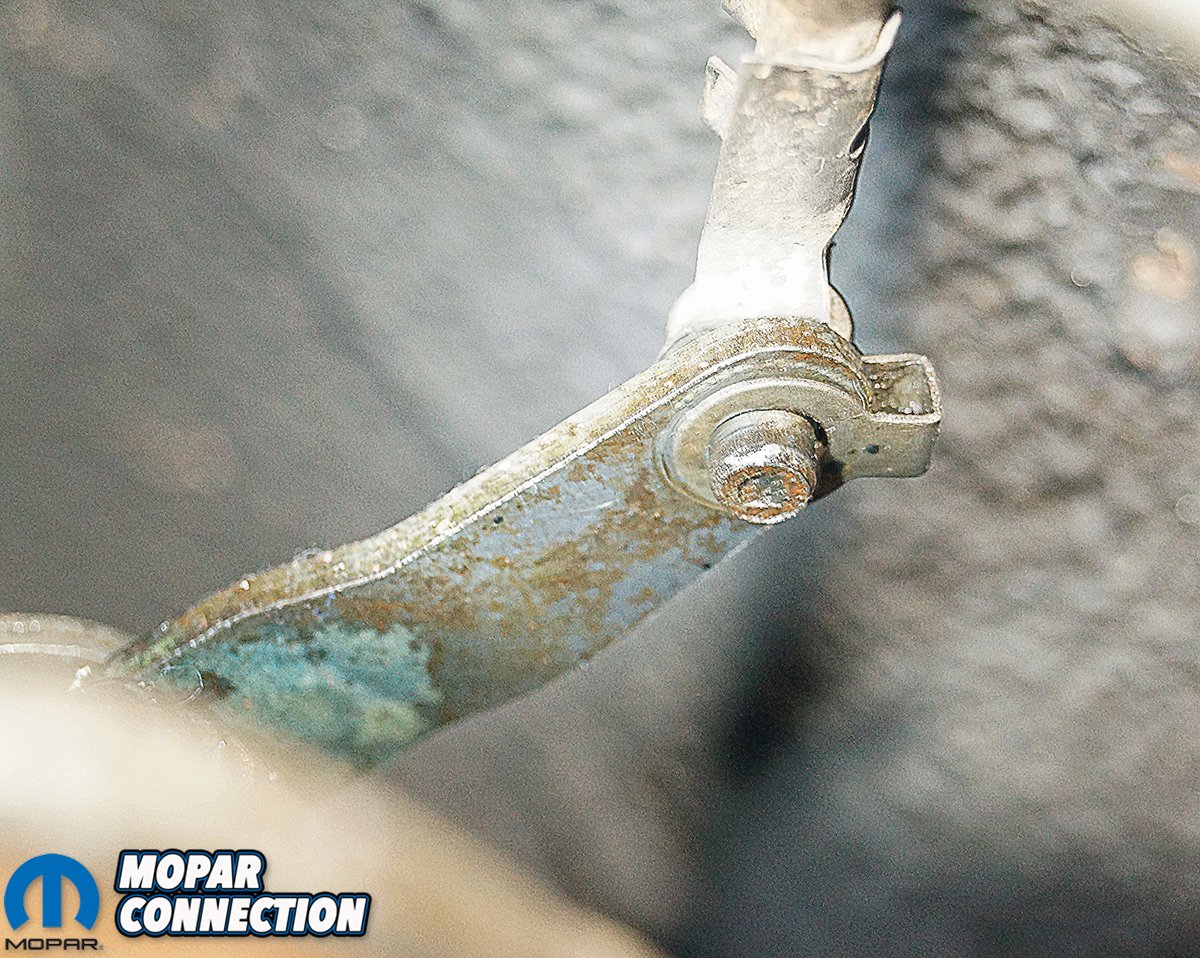
Above: The Dart’s factory brackets, linkages, springs, and clips still remain in place.
We found numbers from less than 5 hp to over 50 hp with just a swap from a one-barrel to a two-barrel carburetor. From Chrysler’s 1977 literature about the Super Six, the introduction of the two-barrel carburetor pushed the factory horsepower rating back up to 110 horsepower (net), which was equivalent to the 1960s output. The torque was up to 180 lb-ft, which was within 5 lb-ft of the highest ratings of the 1960s. With the torque and horsepower numbers back to the pre-emissions values, there was a noticeable improvement in the idle quality, the off-idle performance, the engine’s cruising attributes, and the acceleration of the vehicle.
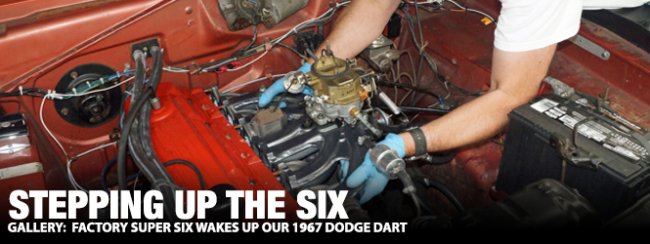
We are constantly fiddling with our 1967 Dodge Dart’s Slant 6 to find additional performance while spending as little money as possible (distributor ignition timing that added 14 horsepower and a used Accurate Exhaust Products manifold back exhaust installation that added another six horsepower), so we took the time to acquire the necessary factory parts to retro fit a Super Six onto our 1967 engine to see if we could pick up some extra power.
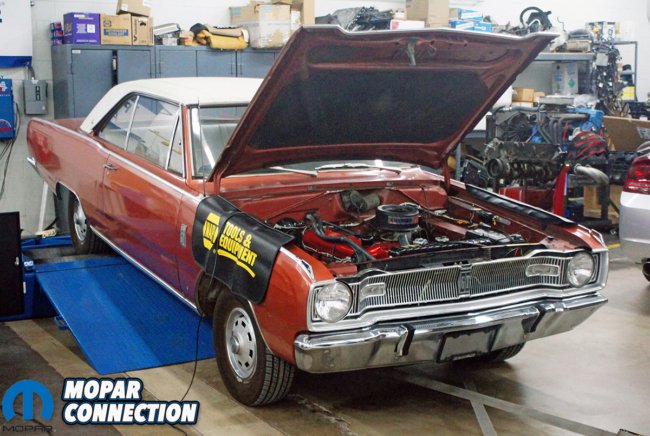


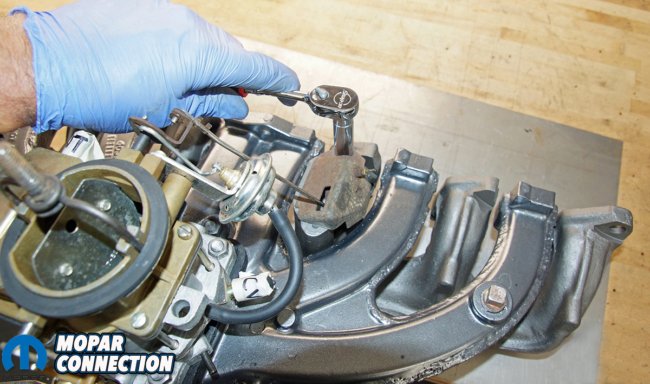
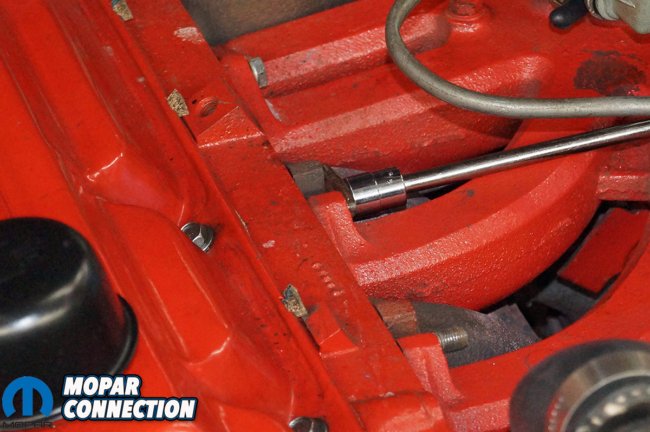
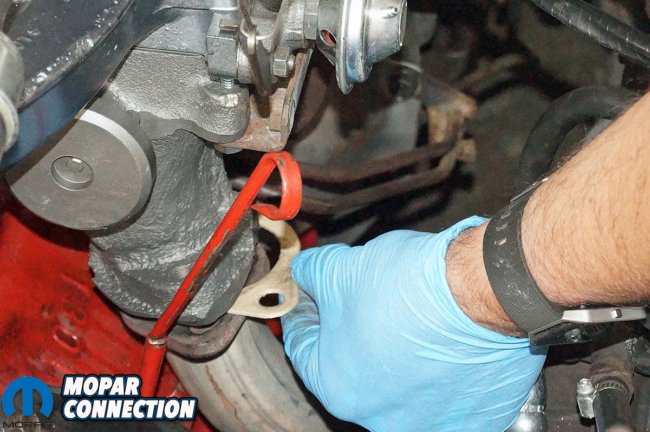
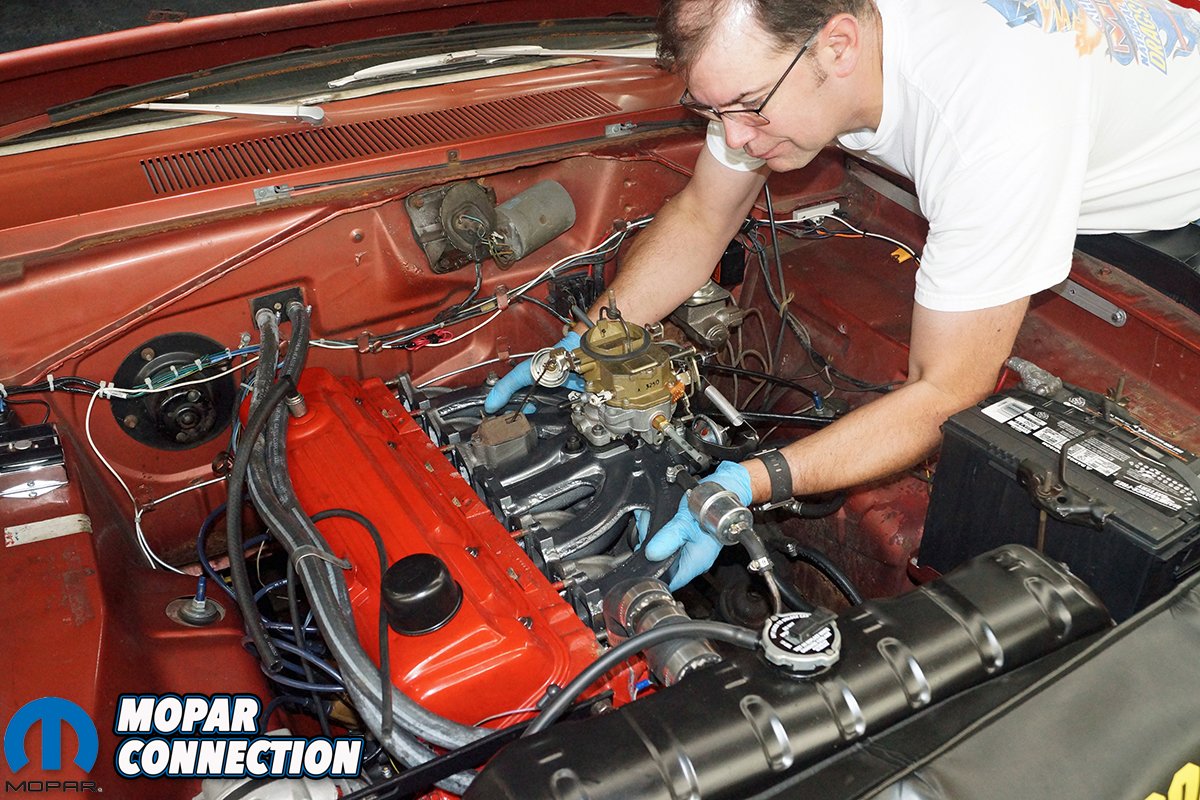
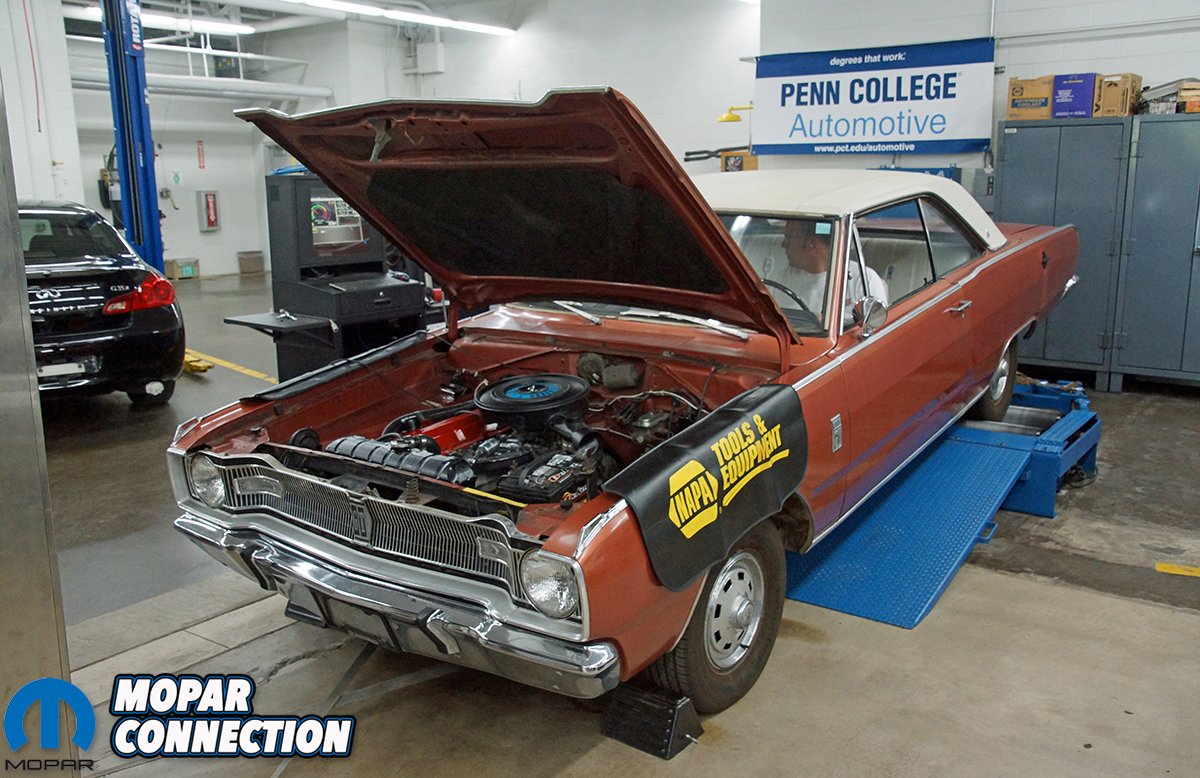
Top: The Dart was ran through the paces on a Mustang chassis dyno at Pennsylvania College of Technology in our previous distributor tuning article, which also gave us a baseline of 99 HP and 151 Ft-Lbs. Bottom Left: Starting with the removal of the one-barrel and manifold assembly, the kick-down throttle rod was disconnected from the transmission shift lever. Bottom Right: With the Slant 6, the fasteners can be accessed from the engine bay rather than from underneath the vehicle.
As we were acquiring all the Super Six parts, we ran our Dart on the Pennsylvania College of Technology’s (PCT) Mustang chassis dyno. After we strapped the ’67 Dart to the dyno, we warmed up the engine and the drivetrain before making a series of three wide-open-throttle (WOT) runs from 2200 rpm to 4000 rpm. All three runs were within 1% of each other, and the baseline for our testing showed a peak torque of 151 lb-ft at 3100 rpm, and a peak horsepower of 99 hp at 3950 rpm. The average torque over the entire run was 144 lb-ft, and the average horsepower was 90 hp. During the dyno runs, the engine was responsive, but it lacked a substantial punch when the throttle pedal was matted. After the peak horsepower was achieved, the performance numbers dropped like a rock in water as the torque and horsepower plummeted rapidly.
The biggest challenge for the carburetor swap was finding all the factory parts. After an extensive search, we were able to score a complete (minus the Carter carburetor) Super Six setup on Slantsix.org. The factory parts included, an aluminum intake, a later model exhaust manifold with an O2 sensor bung, the kick-down linkages, clips, springs, and the air cleaner housing. The parts all arrived as listed, and we were able to disassemble all the components, clean them, and reassemble everything using existing and new hardware.
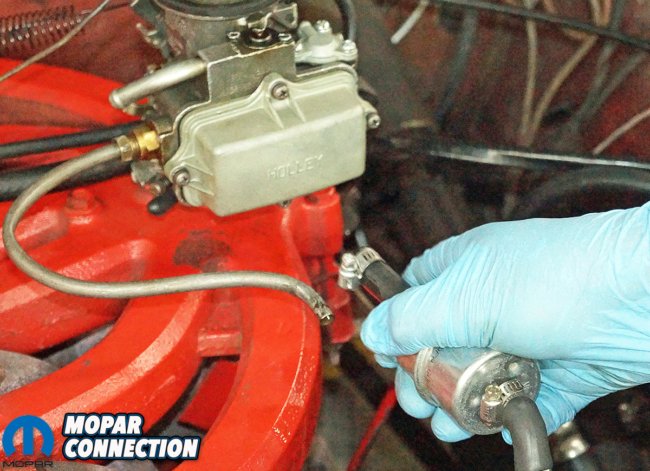
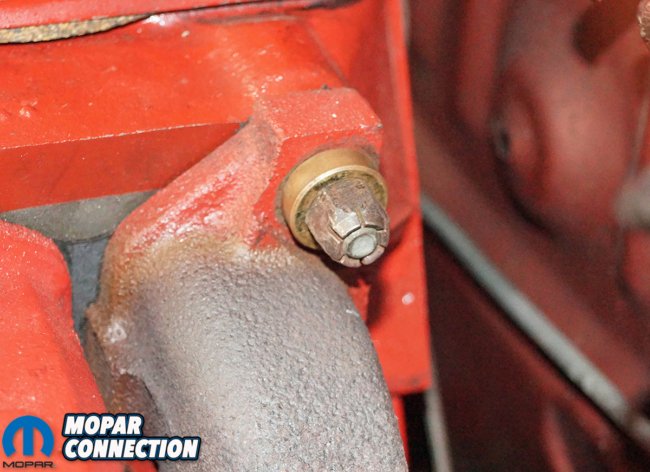

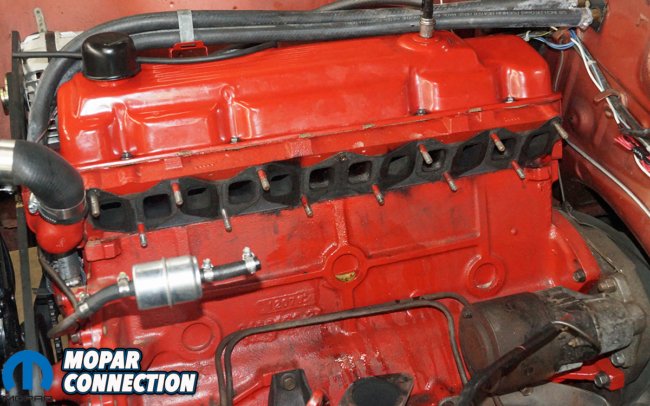
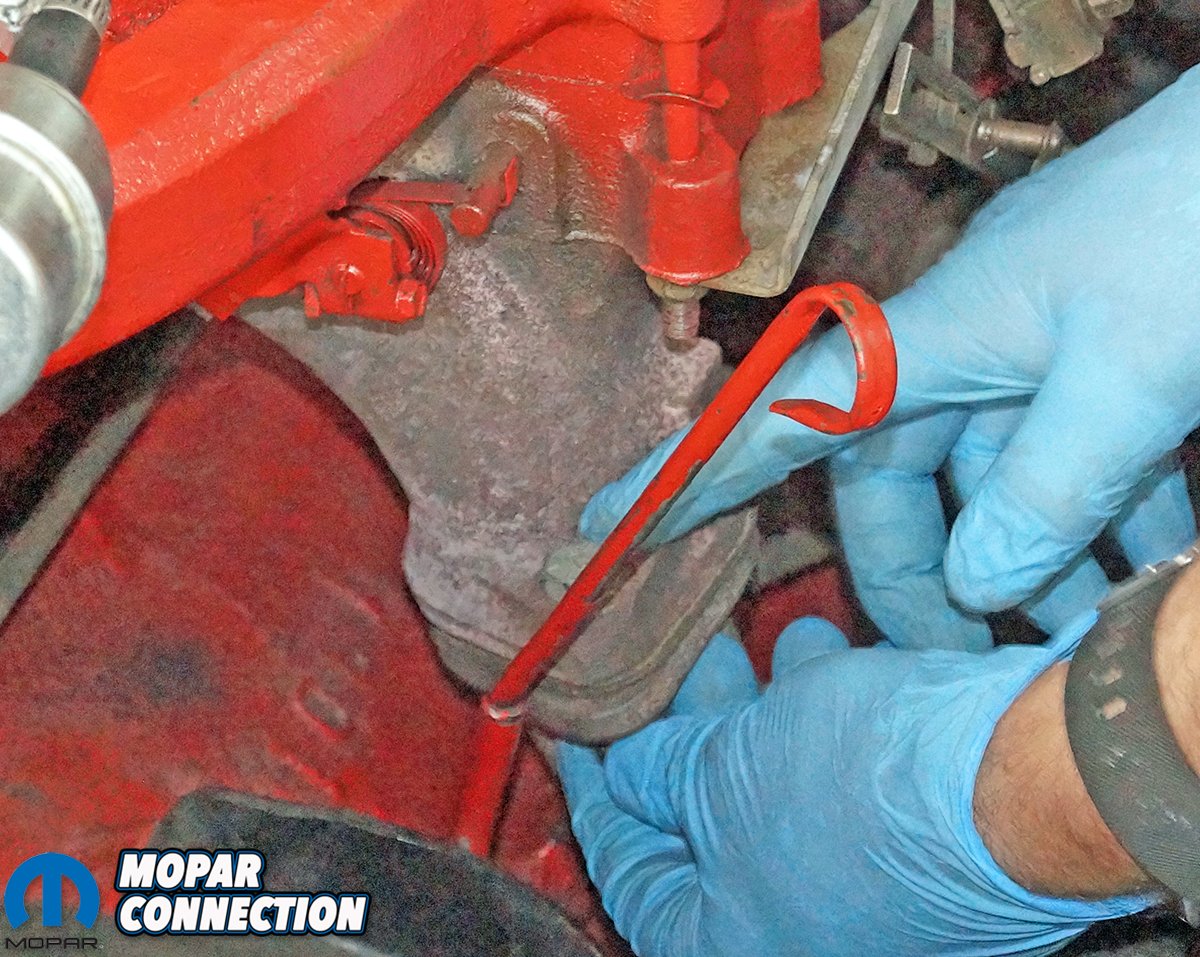
Top Left: Before the line was removed, the gasoline fill cap had been removed to reduce any pressure in the fuel system. Top Right: This is the rear stud on the cylinder head. A round brass washer and a special nut are affixed to the stud at each end of the manifold assembly. Bottom Left: To remove the manifold assembly, twelve nuts and one bolt had to be unthreaded from the cylinder head. Bottom Right: Brace yourself for the heft of the two cast iron manifolds.
The carburetor took a bit more time to find. We eventually scored a new-old-stock (NOS) Carter BBD on eBay. We were ecstatic with the find, but upon arrival, we noticed it did not have a provision for the exhaust gas recirculation valve (EGR), which would not be a problem with the 1967 Slant 6, but if we planned to run it on a mid-1970s or later slant, the EGR valve would be inoperative. This would fail the PA state emissions visual inspection.
The Carter carburetor did have three useful ports. The Orifice Spark Advance Control (OSAC) port (for distributor vacuum advance), the positive crankcase ventilation (PCV) port, and the air cleaner heated inlet air system port were each attached via vacuum hoses to their corresponding component on the engine. We did not need to use the diverter valve port or the canister purge port, so they were each capped with a plug.
Top: The entire assembly was removed with the kick-down linkage still attached to the carburetor. Bottom Left: The surface of the head was cleaned with carburetor cleaner, and the small amount of coolant that leaked from the center upper hole in the head (where the manifold bolt was located) was wiped up. Bottom Right: A new gasket was installed on the cleaned head. We selected a Felpro gasket as we have had no problems with their products in the past.
Lastly, the bowl vent was allowed to vent to the atmosphere. If this had been a newer slant six, the canister purge port and the bowl vent port would have been attached to the canister, the diverter port would have gone to the air pump (if equipped), and the missing EGR port would have been run to the vacuum amplifier and then to the EGR valve.
With the Super Six setup ready to install, we proceeded with the removal of the one-barrel carburetor. The battery negative cable was disconnected from the battery before any work started. The kick-down linkage was removed from the transmission shift lever (under the vehicle), and the linkage was allowed to hang clear of the transmission housing and the exhaust.


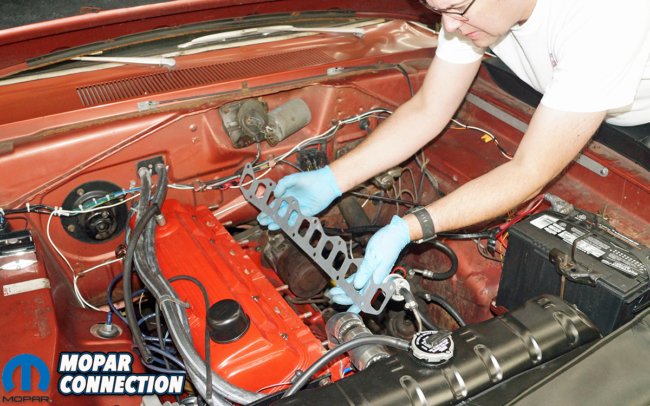
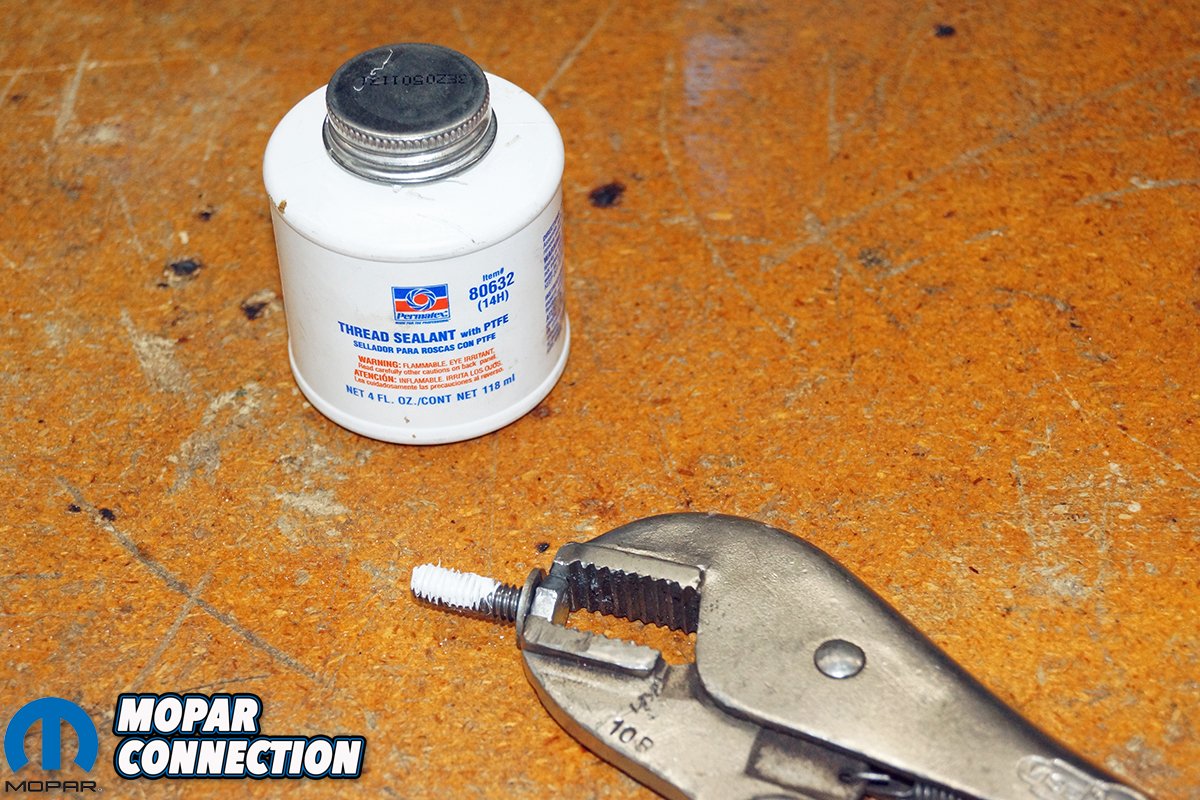
Top: The weight of this assembly was reduced with the use of an aluminum intake, but it is still heavy enough to be a bit of a challenge to slide the manifold assembly into place. Bottom Left: The center bolt extends into the water jacket in the cylinder head. The threads were cleaned with a wire brush, and then a small amount of thread sealant was applied to the threads of the bolt before it was installed. Bottom Right: It can be a struggle to slide the triangular washers into place, especially on the lower studs hidden by the intake manifold. The use of a pencil magnet will aid in the installation of the washers onto the studs.
In the engine bay, the distributor vacuum advance hose and the PCV hose were removed from the Holley 1920 carburetor. The fuel line was disconnected from the carburetor, and the two fasteners holding the Accurate Exhaust header pipe to the exhaust manifold were removed. The throttle cable was freed from the carburetor and hold-down bracket. A systematic removal of the manifold fasteners, which consisted of one bolt and 12 nuts and washers (most triangular in nature) freed the manifold from the cylinder head.
With all the nuts removed, the entire intake, exhaust, and carburetor assembly was lifted up over the driver side fender and out of the engine bay. The intake-exhaust gasket was removed from the head, and a new gasket was fitted to the studs on the head. The Super Six intake, exhaust, and carburetor assembly was mounted onto the head. The center bolt for the manifold assembly was cleaned and a dab of sealant was applied to it before it was threaded into the water jacket of the cylinder head.


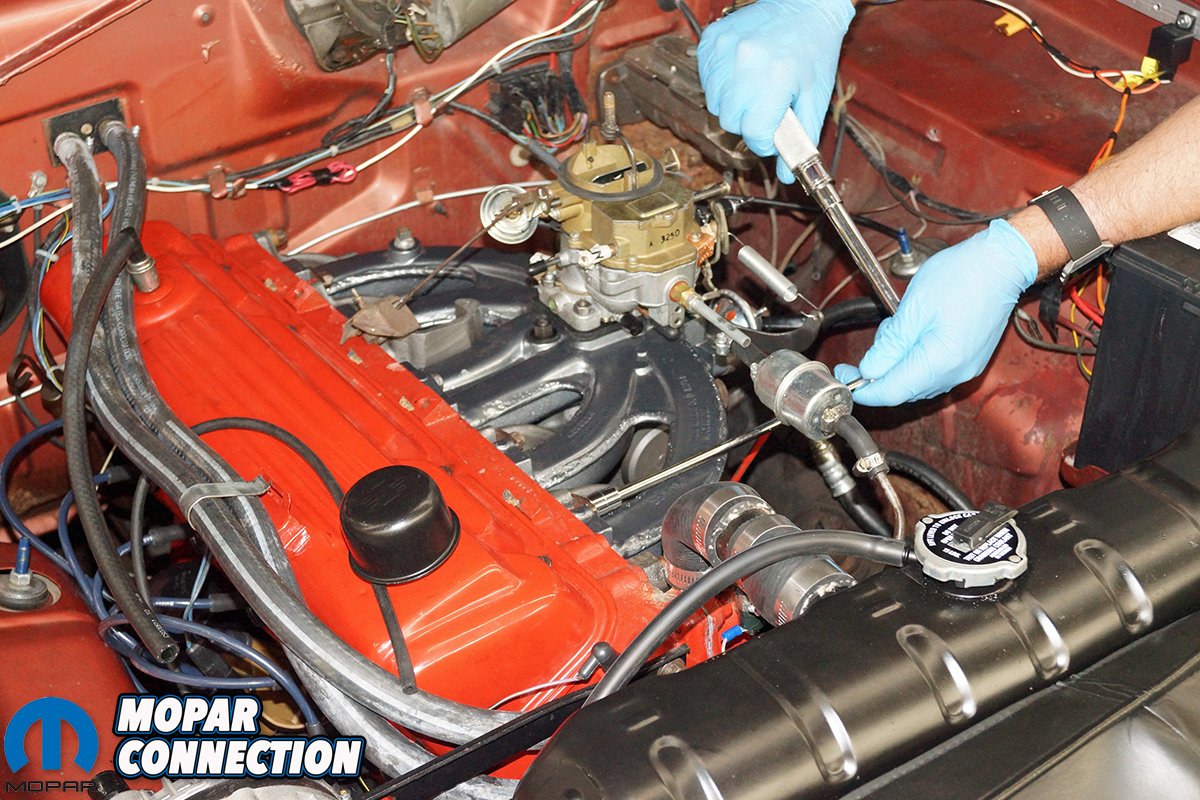
Top Left: With the manifold assembly installed, the fuel line, distributor vacuum hose, PCV hose, throttle cable, and the kick-down linkage lever were installed. Top Right: A new exhaust gasket was installed and the pair of bolts attached the Accurate Exhaust header pipe were torqued to Accurate Exhaust’s recommendation of 30 ft-lbs. Bottom Left: All of the carburetor ports that were not being used have been capped. The throttle cable has been adjusted, and the slant six was close to being ready to start. Bottom Right: The kick-down throttle rod was attached to the transmission shift lever in a slightly different manner when compared to the one-barrel throttle rod, but everything fit together perfectly. The throttle rod linkage was adjusted per factory service manual.
Each stud received a washer and then the nut was threaded into place. The torque on the manifold studs was set to 120 in-lbs. Care was taken to not exceed the value; the torque spec and warning are stamped into the intake manifold. Once the manifold assembly was torqued to spec, we reconnected the fuel line to the carburetor. The vacuum lines from the distributor and the PCV were reconnected to their respective ports on the carburetor. The throttle cable was reattached and adjusted for WOT, and the kick-down linkage was installed on the carburetor.
The other end of the kick-down linkage was connected to the transmission shift lever, and following the factory shop manual, the linkage was properly adjusted. Before the air cleaner was installed, we wired the electric choke with a switched 12-volt source. The air cleaner heated inlet air system port was connected to the air cleaner housing, and the air cleaner filter element and housing were secured in place by the lid and wing nut.

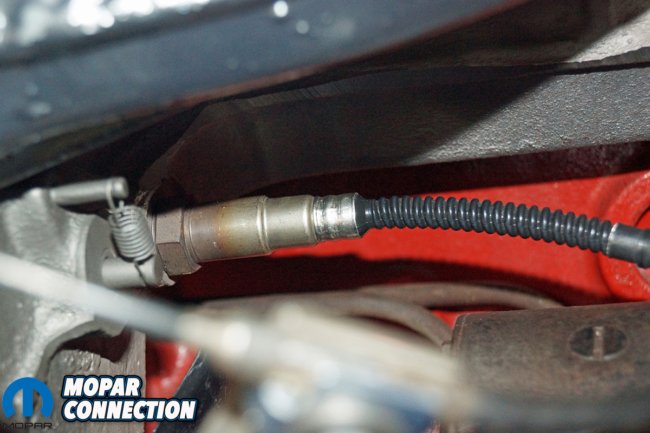

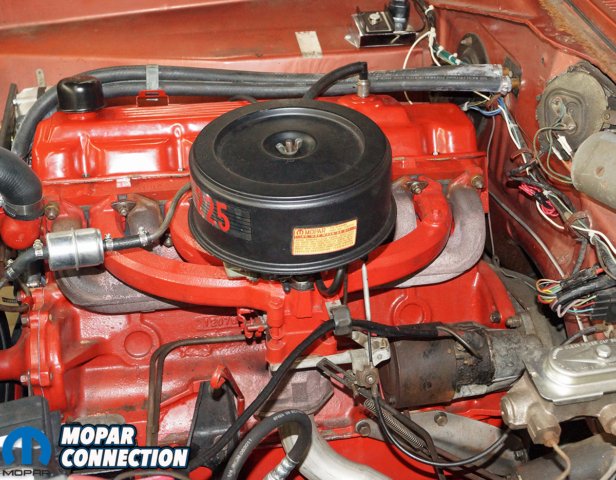
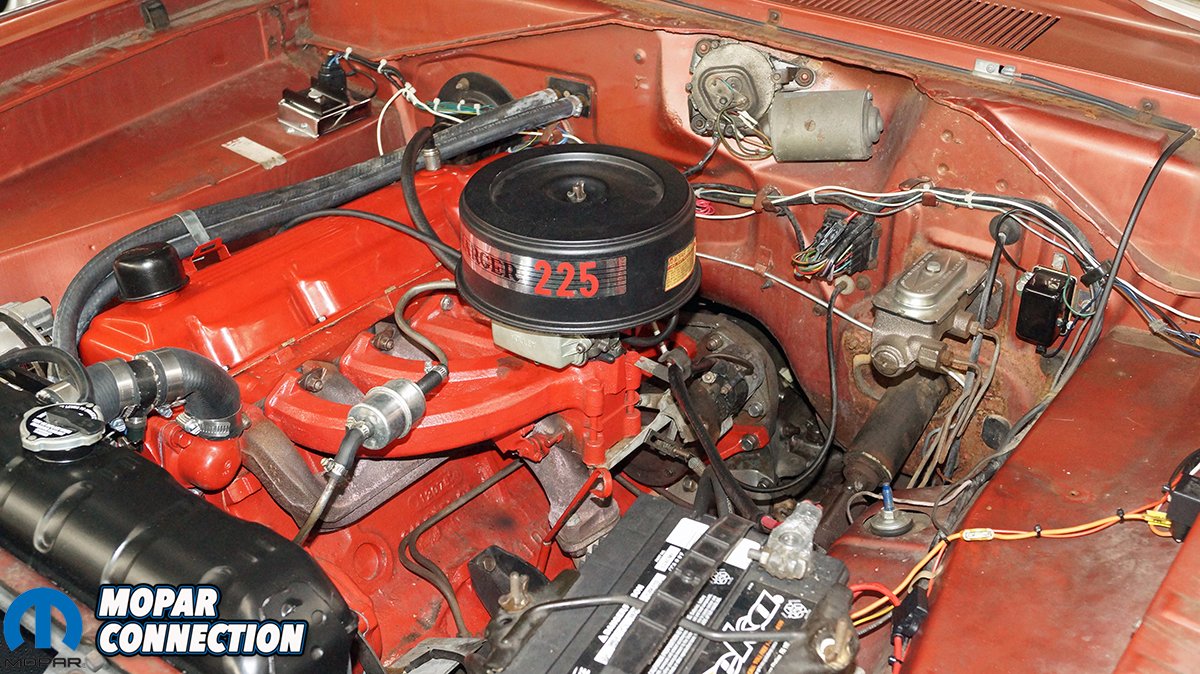
Top: We installed the much larger Super Six air cleaner housing onto the Carter two-barrel. Bottom Left: For our dyno testing, we utilized the O2 sensor bung on the Super Six exhaust manifold. Bottom Right: We tapped a 12-volt switched source and ran a wire to the choke heating element.
With the entire Super Six assembly installed, we reinstalled the negative battery cable. The ignition key was twisted and the engine roared to life. We quickly noticed the carburetor was leaking at the inlet to the float bowl. A damaged gasket at the inlet to the float bowl was the culprit. We replaced the gasket, and immediately, we were back in business. The engine idled nicely. The choke operated as it should. With a few turns of the idle speed adjustment screw, we had the 225 idling at 650 rpm while in gear. The Dart was taken for a quick road trip, and upon return, the idle speed was readjusted slightly to maintain the 650 in gear rpm.
Satisfied with the responsiveness and smoothness of the Carter on our test drive, we took the time to strap the Dart to the Mustang dyno for additional evaluation runs. The Slant 6 pulled hard, and the horsepower did not start to drop off until 4200 rpm. We made our three pulls from 2200 rpm to 4200 rpm, and after three successful runs within 1% of each other, the torque and horsepower were up.

Above: The additional torque provided a bit of a kick when the Dart was driven on the street. The two-barrel made the Dart more pleasurable to drive, but we were disappointed with the limited availability of metering rods and jets to fine tune the combination.
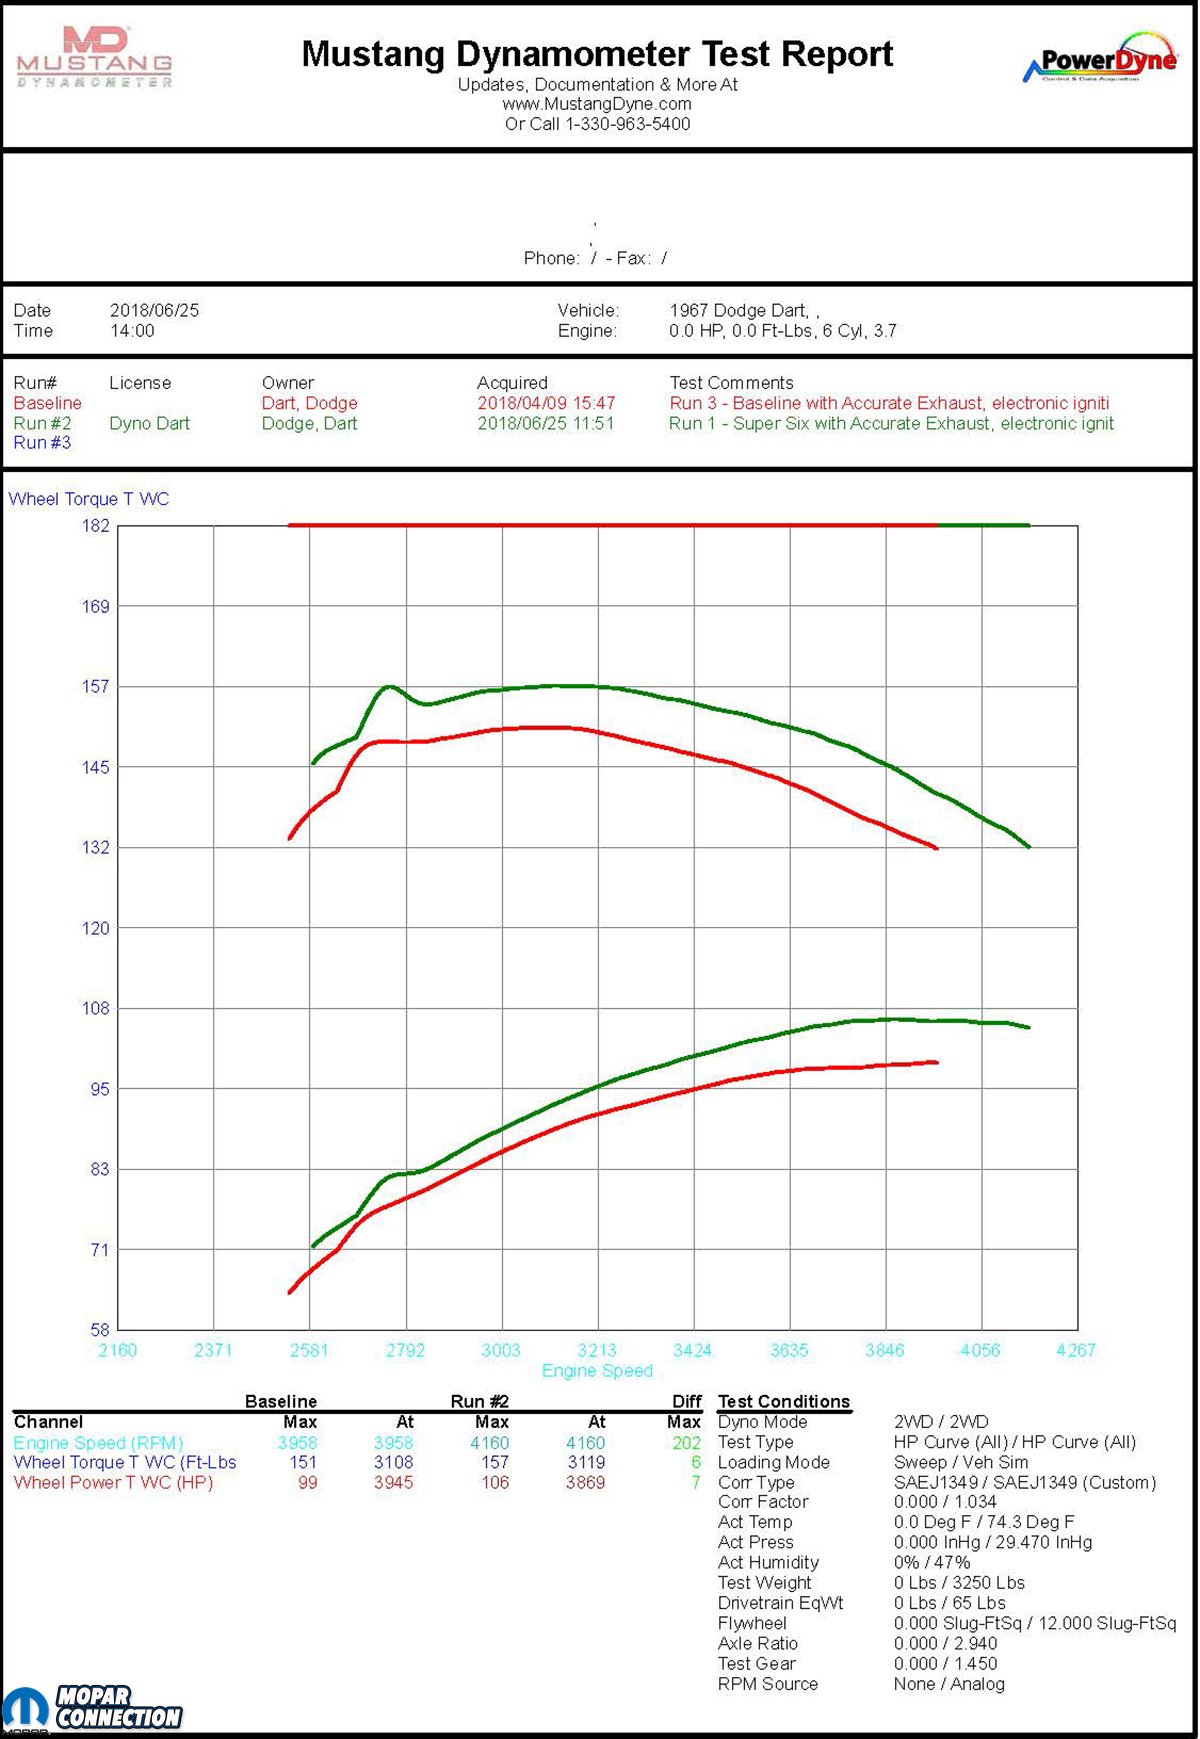
The peak torque was up 6 lb-ft to 157 lb-ft, and the horsepower increased to 106 horsepower, which was an increase of 7 horsepower. The average torque over the entire run was up 5 lb-ft to 149 lb-ft. The average horsepower rose to 97 horsepower, up 7 horsepower over the baseline runs. Between 3600 to 3800 rpm, the torque increase was 10 lb-ft over the baseline, and the horsepower eclipsed 100 hp from 3600 rpm to 4200 rpm (end of run).
Our biggest complaint about the Super Six setup was the fact that we could not find additional metering rods to fine tune the carburetor. Our jetting looked spot on, but the metering rods for cruising and part throttle were not to our liking. At WOT, the air-fuel (A/F) ratio was 11.9 – 12.0:1, which was not too bad. At idle, we were able to adjust the A/F ratio to 14.4:1. However, at part-throttle cruise, we had an A/F of 12.5:1, which was too rich, and a pair of more restrictive metering rods would have most likely helped lean out the cruise A/F ratio.

Above: The Super Six setup increased the output of the torque and the horsepower. The peak torque was 157 lb-ft, and the horsepower increased to 106 horsepower. The average torque over the entire run was 149 lb-ft. The average horsepower rose to 97 horsepower. Between 3600 to 3800 rpm, the torque increase was 10 lb-ft over the baseline, and the horsepower eclipsed 100 hp from 3600 rpm to 4200 rpm.
Did the Super Six measure up to the factory’s listed increase in performance? It was pretty close. We measured the increase at the rear wheels rather than at the flywheel as the manufacturer would have, and we had an increase of 10 lb-ft of torque and 7 horsepower. We do not know the loss of performance based upon the driveline, but quick estimates show the torque is inline or slightly better than what Chrysler had claimed, and the horsepower is very closely in line with the factory declarations. For less than $200, we picked up double digit increases in torque and just under a 7% horsepower increase. Not bad for a day’s work. We are still searching for metering and jet kit for the Carter BBD, so if you have a lead please send it our way.


Chris,
Specifically, which FSM did you use to adjust the kickdown linkage? I’ve installed the same setup on my slant and just wanted to verify the year of the FSM. Most of the years read very similarly so just verifying what I have to do.
Thanks,
Louis
Louis,
I used a 1977 Dodge Aspen FSM for the kickdown adjustment. Until 1977, the slant only came with a 1bbl carburetor (with exception to the early 60s 4bbl Hyper-Pak), so although close, the 1bbl kickdown linkage and adjustment may be off slightly off when used with a Super Six carburetor. Check out the 1977-80 Aspen or Volare for the proper adjustment of the 2bbl kickdown linkage. Thanks for your question…. Chris
Louis,
I used a 1977 Plymouth Volare FSM for the kickdown adjustment. Until 1977, the slant only came with a 1bbl carburetor (with exception to the early 60s 4bbl Hyper-Pak), so although close, the 1bbl kickdown linkage and adjustment may be off slightly off when used with a Super Six carburetor. Check out the 1977-80 Aspen or Volare for the proper adjustment of the 2bbl kickdown linkage. Thanks for your question…. Chris
Not speaking “carburetor” how do I adjust mine on a ’77 Aspen wagon? What screw/adjuster does what? The tail pipe stays black and I know it can be better. 225 Slant 6, Super Six. 2 bbl I bought from parts store. No A/C. Seems to be a lost art with all the new vehicles around.
Adding to my other question, I’m not even sure all the vacuum lines are in the right place. My Chiltons manual isn’t helping very much. Just a good dependable no nonsense beater, but would still like to get the best out of it.
These are a few suggestions for tuning and vacuum line routing. A factory shop manual for your year would be the best for the factory information, but the following links may help.
https://www.autozone.com/repairguides/Chrysler-Full-Size-Vans-1967-1988-Repair-Guide/Carbureted-Fuel-System/Carter-BBD/_/P-0900c1528007fd4d
https://www.slantsix.org/articles/choke-adjust/choke-adjust.htm
http://repairguide.autozone.com/znetrgs/repair_guide_content/en_us/images/0900c152/80/08/7a/b4/large/0900c15280087ab4.gif?source=pepperjam&affiliate_id=43737&click_id=3117117375&ppjmid=43737&cmpid=AFF:US:EN:AZ:NL:1000000:GEN:ppjmid43737-8-11065&clickId=3117117375
https://www.forfmjbodiesonly.com/classicmopar/threads/vacuum-diagram-for-1980-super-six-2bb.6208/