


Unless your springs are very low mileage, they should be disassembled, blasted, and have all the inner zinc liners, the plastic spacer wear pads, and the front bushing replaced. The front spring hangers should be blasted and painted with Seymour’s Stainless Steel paint. Next, inspect the area on the front of the spring assembly where it is protected by the spring hangers. You will see if your particular springs were natural or painted black even if you find black paint there or not. There will also be two swatches of color that the factory used to identify which spring went on what car and on which side. Take several pictures to document what you find so you reproduce what your car originally came with from the factory.
If you discover your springs are natural, you can use Rust Preventive Magic (RPM) and they will never have to be painted. If you do not use RPM, you can also paint them with Seymour’s. If they are black they can be painted before assembly. Some say they were dipped fully assembled but we have not found any evidence to back that up. Pictures of original cars do not show any paint on the exposed liners and we haven’t found any heavy areas of paint that would indicate they were dipped and hung. The paint is black flattened at about 20-percent. Some say they were brush painted black after assembly.

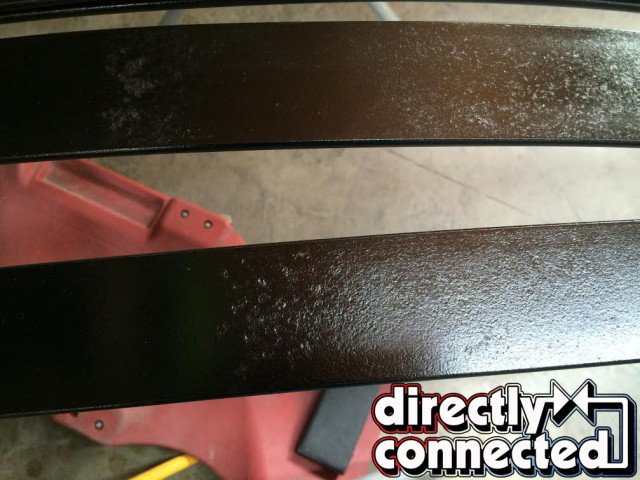
Above left: After disassembly and removal of the front bushing, blast all the springs and finish them with black paint, treat them with R.P.M., or paint them with Seymore’s Stainless Steel paint. Above right: If you have found remnants of black paint on your springs, paint them with 20% flattened black. There are several types of chassis paint that replicate this shine. These springs were blasted and then coated with Eastwood’s Epoxy primer, followed by 2 coats of Bill Hirsch Super Black Chassis Undercarriage paint. The finish is spot on.
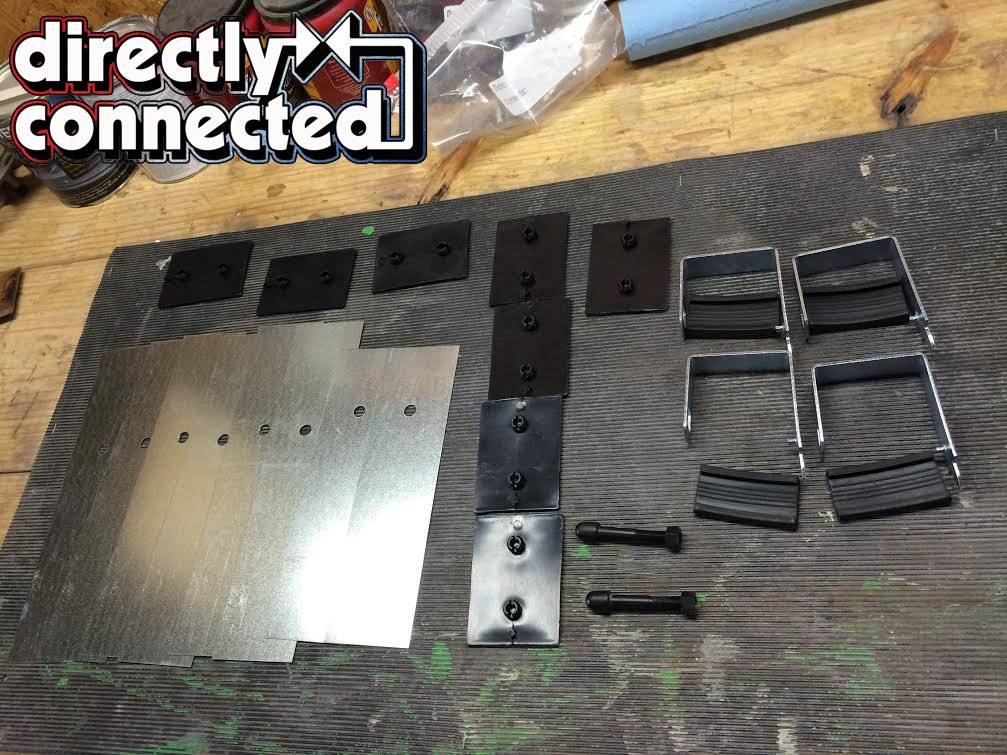
Above: The kit contains everything need to reassemble the springs. Liners, wear pads and clamps with rubber spacer.


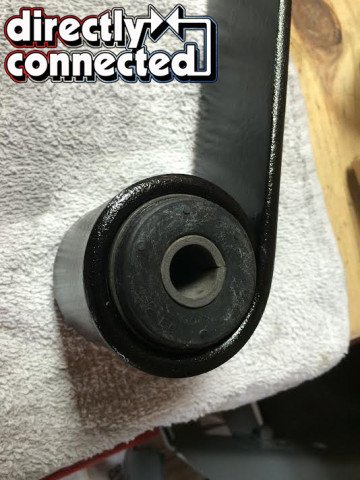
Above left: The original liners were made of zinc. Here is a replacement that is made of galvanized tin. They are thinner than the zinc ones. Above center: Here are the originals that were removed from the springs when they were disassembled. These are in amazing shape for a 40 + year old set of springs. Upon very close inspection there wasn’t any trace of black paint on the clamp even though there was black paint on the springs they came from. Above right: After drilling out several places of the rubber bushing it was pressed out. A new bushing was lubricated and pressed in. These bushings are available in rubber like the original and polyurethane. The polyurethane bushing gives a firmer ride but will squeak unless completely coated with the provided lubrication. YearOne is a great option for purchasing the replacement bushings.
After you disassemble the spring assemblies, blast all the leaves separately, remove the large front rubber bushing. You can drill out the rubber in several places and then press out the bushing. After refinishing or painting the springs, install a spring rebuild kit. There are several cheaper kits that have liners made out of galvanized tin and the clamps are not that thick. We recommend you purchase a kit from Frank Badalson. His kit has zinc liners and heavier clamps. You don’t want to do this twice so again. So do it once, and do it right. Lubricate the front eye bushing and press it in.
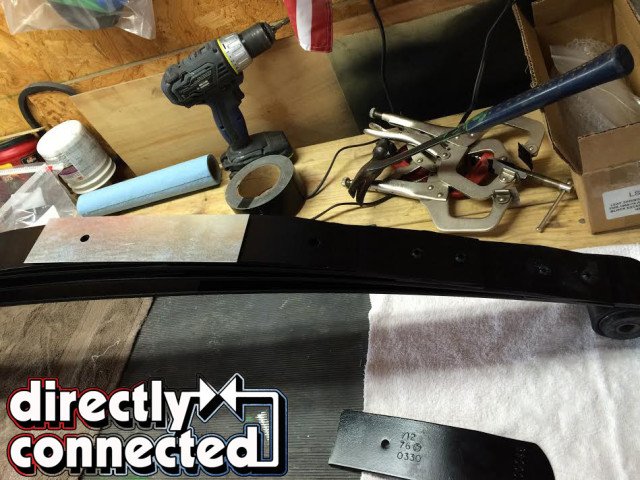
Lay out the springs in the proper order for reassembly. Get several C-clamps or welding clamps, and a long shaft that will fit the center bolt hole. Put duct tape of any surface that will touch the finished springs. You do not want to mar the newly finished surface. Lay out protective cloth where that springs touch your workbench. Press in the wear pads until they snap in place and then assemble the leaves and liners. Make sure the extra holes in the leaves have one in front and one in back. The clamps have a tang that goes into this hole.

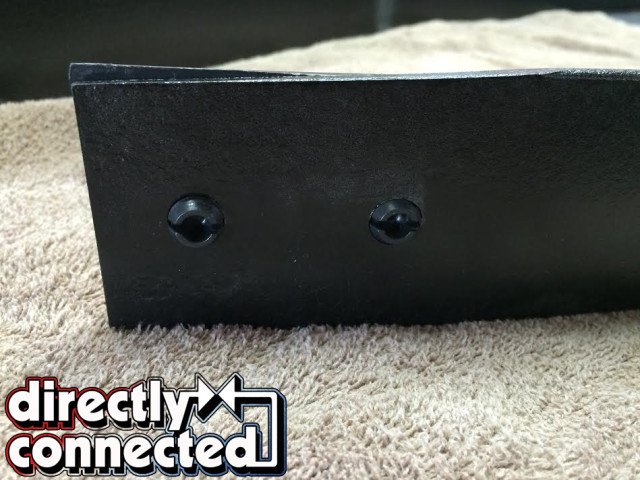
Above left: Pop in the wear pads. We do not lubricate them but you need to make sure they “pop” completely into place. Above right: You can double check to make sure the wear pads are securely and fully seated by looking at the backside of the pad after it comes through the spring.


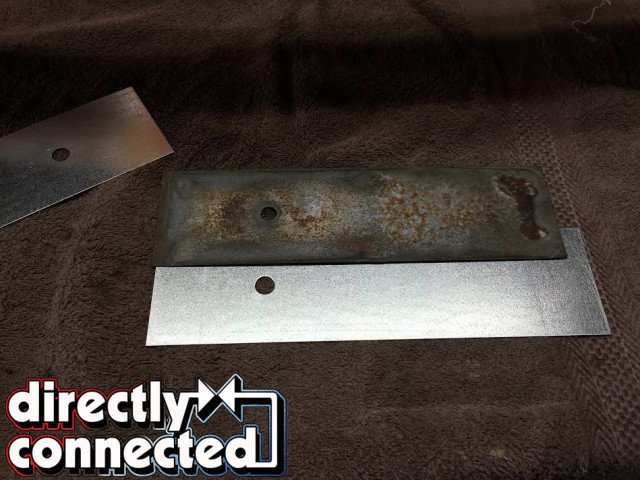
Above far left: Lay out the liners making sure the longer side goes toward the rear of the spring. If you have any question about the correct orientation you can see the wear on your springs from these liners from years and years of flexing and rubbing. Above center left: Depending on the number of leaves your springs came with the last spring leaf will face forward. If your car comes with a high performance axel package you will have 7 springs on the right side and 5 on the left. This car had 5 on both sides. Above center right: Notice the last short spring and liner has the longer side facing towards the front of the spring while the other liners longer sides go towards the rear. Take your time and make sure you have the leaves and liners all facing correctly. Above far right: In this spring kit, that did not use the correct Zink liners the tin liner was longer than the original. It was trimmed to fit before it was installed.
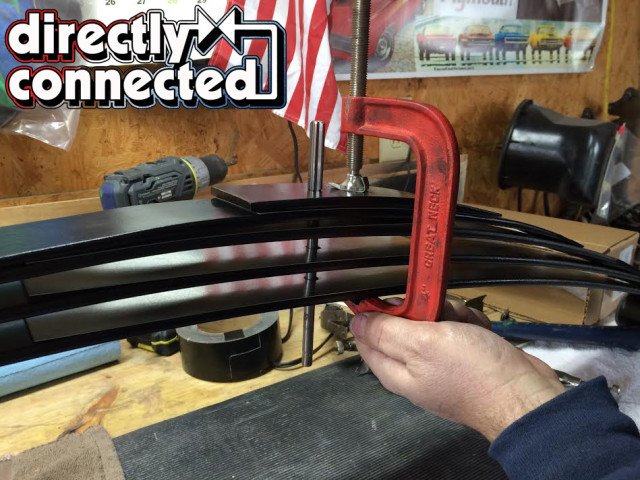
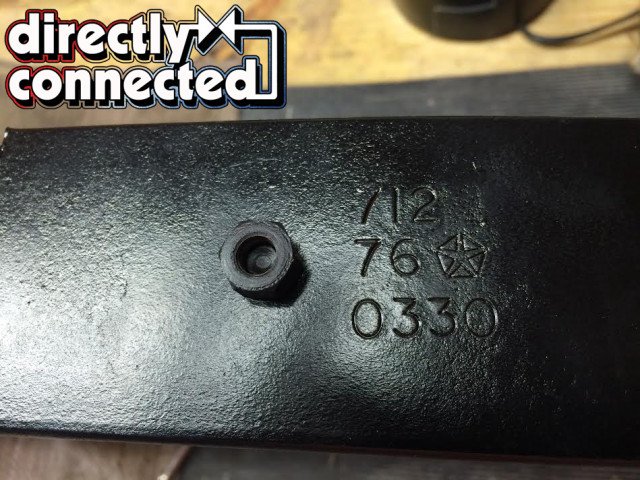
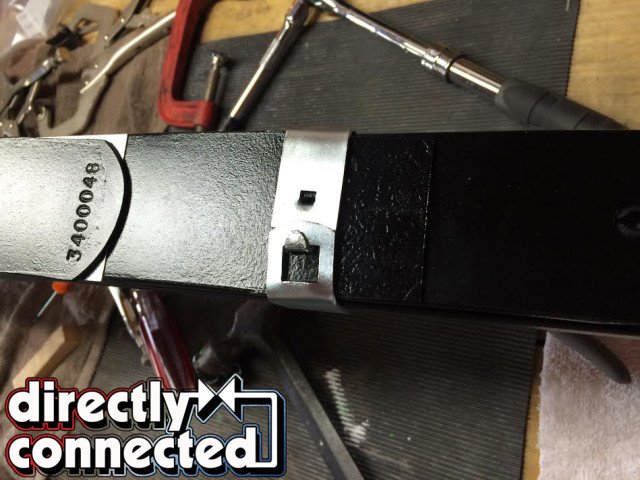
Above left: Using a long shaft or threads all line up the leaves and the liners and with a C-clamp that has duct tape on the surface that touches the springs, tighten it until they are fully compressed. Above right: Insert the black phosphate plated bolt with a rounded head into the springs and tighten the nut. Notice the logo and date code of these 1970 original springs.

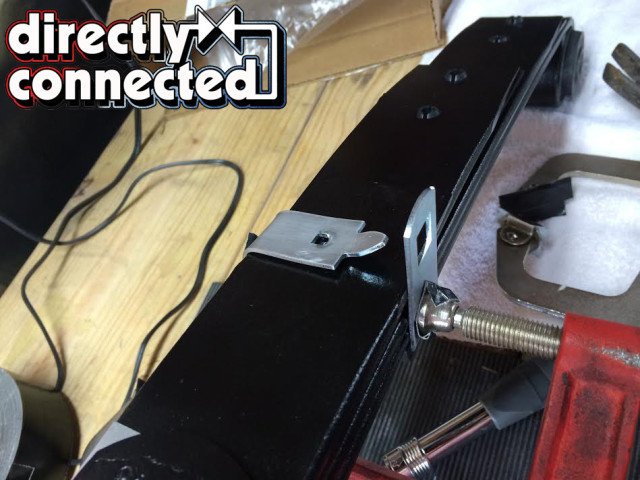

Above far left: Assemble the clamp and the rubber insulator and wrap it around the spring. Using a clamp tighten it from the bottom and top and secure it in the proper place. Then using another clamp secure it from each side. Begin to tap the side of the clamp with the tang down slowly. Use a hammer with duct tape on the face of the hammer. Once it starts to touch the “top to bottom clamp” remove the clamp. Above center left: With needle nose pliers bend the tang upwards. Do not go too far since the other side of the clamp must fit over the tang before it is completely bent over. Finish tapping the tang side of the clamp down making sure the bottom tang fits into the hole in the spring. Above center right: Reclamp the tang side on the edge of the spring clamp. Tap the overlap side of the clamp down flush. Using a flat nose punch and hammer tap the tang over until flush. Remove all clamps and tap any edge that is rounded and square the clamp up. Above far right: Repeat these steps and install the rear clamp. Again there are holes in the springs for the lower tang so it is impossible to install them in the wrong place.
Once everything is lain out with the wear pads in place and the zinc liners in place, put the shaft through everything so that all parts are lined up. Tighten the C-clamp and compress the entire assembly. Put in the original bolt/pin that should be black phosphate-finished with the nut towards the bottom. The pinhead goes in the spring/shock mount. Wrap the nut and bolt with tape and tighten so not to mar the finish.
Once both assemblies are completed to this point it is time to install the clamps. By using at least two C-clamps to hold the new spring clamps in place you can bend and secure the clamps with crisp corners and minimal dents in the surface of the clamps. Refer to the step-by-step illustrations for the easiest way to install these clamps.
Once you finished the assembly of these springs, if they are painted black, mask them off and paint them. You can do the same if they are painted stainless. Then you can set them aside until you are ready to bolt them on to the rear axle and then install everything as one unit in the car.
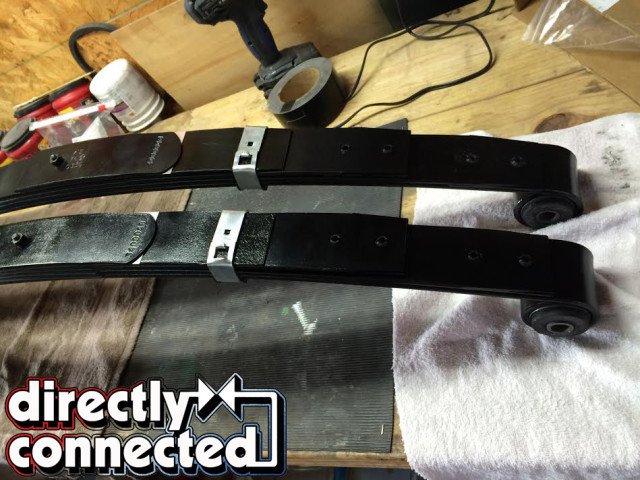
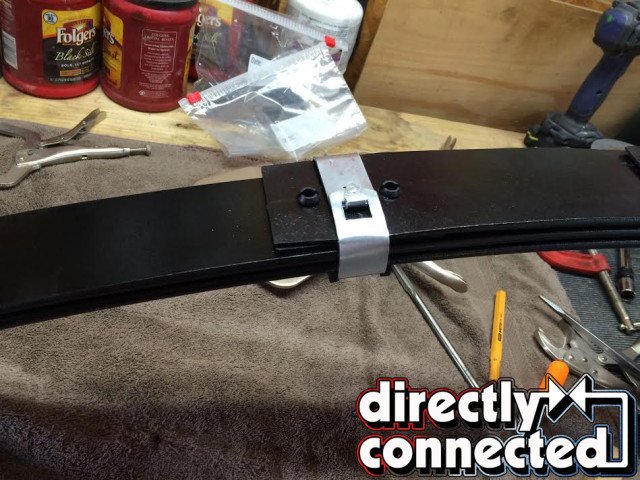
Above left: This clamp needs a little more tapping to make all the bends crisp. You can use a block of wood so you won’t mar the already perfect surface. Above right: Repeat the process on the other spring and you will have a perfect matched set on the front with the part numbers clear and clean. Also notice the correct amount of liner showing. Reducing photo count and this is a casualty.


Above left: If your springs are black, mask off the clamps and paint. If your springs are natural, even though the clamps are new, they must either have been treated with R.P.M. before assembly or painted with Stainless after installation. Even if you clear them they will rust over time. Above right: Finished and almost ready to install looking better than new but correct of any level of show or just preserved for the future when you are cruising down the street. Reducing photo count and this is a casualty.


Above left: Using the reference pictures you took on disassembly you can document the fact that these springs were indeed originally painted black. There are also the hand painted water based color markings that identify the springs. You now can apply these by taking the picture to the local hobby store and match the colors. Above right: Here are some great products that were used on these springs to accomplish amazing results.


 Mopar Connection Magazine – The ONLY Daily Mopar Magazine © 2022. All Rights Reserved. Mopar Connection Magazine is the ONLY daily Mopar Magazine bringing you the latest Mopar news, technology, breaking news, and Mopar related events and articles. Find out the latest information about Mopar, Mopar products and services, stay up to date on Mopar enthusiast news, dealership information and the latest Mopar social media buzz! Sign up for the Mopar Connection Magazine newsletter for the latest information about new products, services and industry chatter. Mopar Connection Magazine is the best and only source you need to be a Mopar industry insider!
 by
by