


Picking up a new project can be a lot like forensic science. Not only are you trying to assess the current status of the car itself, but you’re also having to evaluate decades’ worth of previous owner’s maintenance, modifications and and simple misuse. For our buddy Eric Stuebing, acquiring this 1972 Plymouth Valiant (and a ’66 Belvedere) for $1,500 made perfect sense; the four-door Valiant was in solid shape, ran – for the most part – and was rather complete. “It’s a good driver,” Stuebing defended. “But there’s definitely some issues.”
The biggest “issue” being the Valiant’s persistent overheating. Equipped from the factory with a Slant-6, the A-Body’s two-row, 19.25-inch wide radiator could barely keep the “leaning tower of power” from barfing its guts out wherever it went. “It doesn’t help that the thermostat doesn’t work,” Stuebing groaned. “I just try to keep extra water in the backseat wherever I go.” Because we needed Eric up at the Mopar Connection Shadetree Garage to help us cut and weld on ZomBEE regularly, that was definitely unacceptable.
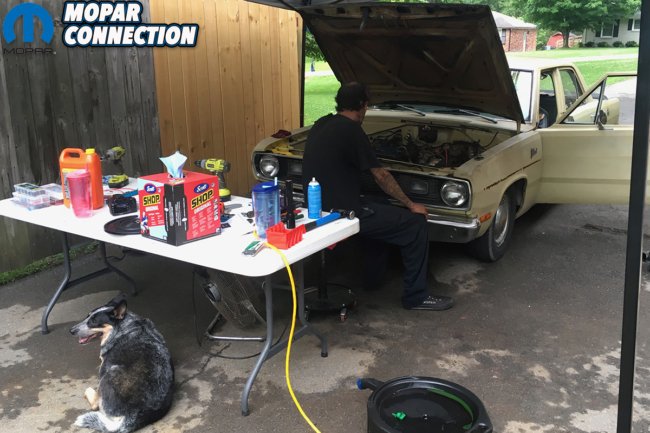
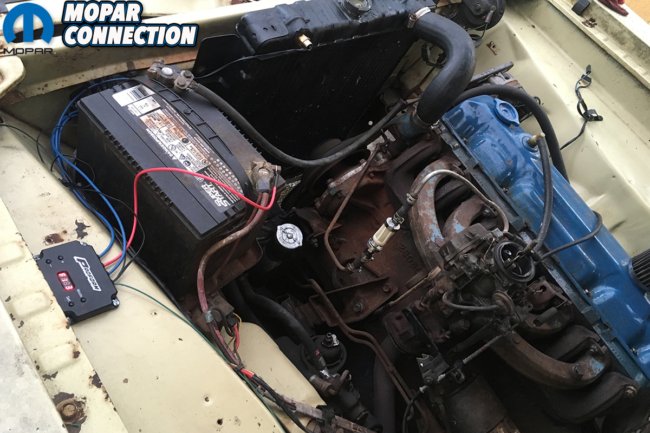
Above: This ’72 Plymouth Valiant is a pretty reliable driver except for chronic overheating issues stemming from poor airflow. We turned to Proform Parts to help solve our “hot” issue.
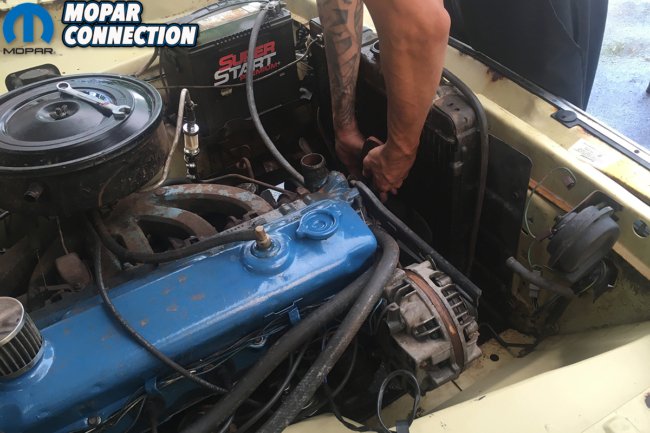

Above left: The space between the water pump pulley and the 2-row radiator was still too tight to fit our new 16-inch Proform fan, so we needed to remove the fan and the radiator to install the new electric fan in the “pusher” position. Above right: Although fresh coolant came pouring out of our radiator, we went ahead and flushed the radiator and engine block to free up and remove any clogging and rust scaling.
The radiator didn’t show any pinhole leaks, and we had changed out the worst of the two radiator hoses with a fresh one. A new thermostat was slipped in as well. The Slant-6 spun a clutchless mechanical fan and drew air as fast as the engine could spin. Clearly a flush for the radiator (and cooling system), fresh coolant and greater airflow was what was needed.
Our first thought was to Proform Parts, whose high performance electric fans had nearly sucked the papers out of our hands while standing near a display at the Performance Racing Industry (PRI) tradeshow last December. “Of course!” came the reply from Ryan Salata, Proform’s Marketing Manager. “How much room is there between the radiator and the front pulley to fit a puller fan?” The answer was not enough. Space was at a premium. “No problem. All of our fans can be flipped to be used as a pusher-style fan.” Well, we thought. That’s handy.

Above: With the radiator out were were able to give it a quick flush and light coat of paint.

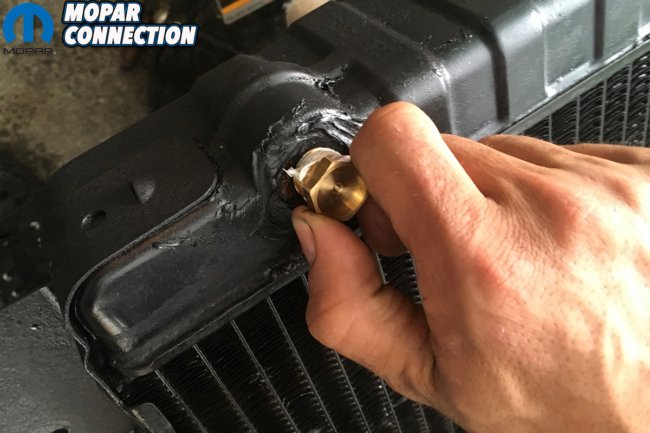
Above left: Proform highly recommended using its Digital Variable Speed Fan Controller for our Valiant, as it is one of the only aftermarket controllers to slowly increase and decrease fan speeds to regulate engine temperature without abrupt on/off surges to the electrical system. Above right: The fan controller communicates to a brass probe inserted into the radiator.
“But you’re definitely going to want our Digital Variable Speed Fan Controller. It’s totally programmable and will progressively bring the fan up to speed instead of going ‘full blast’ and hitting your electrical system out of the blue,” Salata insisted. He was right, and we had seen the Proform’s Digital Fan Controller at work in person. Many electrical fan systems that automatically engage when signaled by the thermostat-controlled relay will hit hard and fast. The sudden electrical draw on the antiquated factory electrical system can be enough to trip fuses or dim (or flicker) lights. And the electrical system was our biggest concern.
As noted, the constant on-again, off-again actuation of many electric fan controllers can lead to amperage spikes, injuring the terminals and wearing on the fuses – not to mention excessive fan wear and fan noise. Using Proform’s new Variable Speed Controller, the fan (or fans) run at whatever speed is needed to maintain a consistent temperature. According to Proform, “The controller receives a temperature signal from the radiator (…) probe. The fan controller processes this signal and runs the fan(s) at the correct speed needed to maintain the desired temperature.” The result is a fan spinning at gradients, only whirling at full speed when air flow is at its lowest.
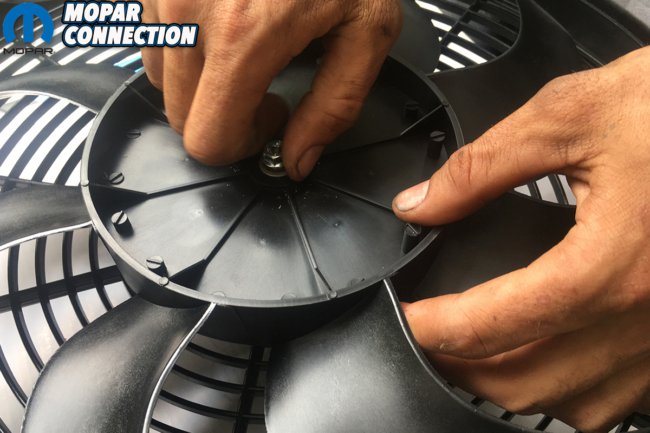

Above: Because we needed to mount the fan between the front of the radiator and the grille, the Proform fan’s S-blades can be unscrewed and flipped over to work as either a pusher or puller.

Above: With our fan ready to work as a “pusher” and our radiator freshened up, we set about installing it.
With the digital controller, we opted for Proform’s High Performance 16-inch S-Blade Electric Fan. Maintaining sufficient airflow with an electric fan not only prevents overheating, but frees the engine from parasitic loss by freeing the water pump pulley for more RPM, allowing for increased gas mileage and improved engine performance. Of course, since the fan we ordered was too thick for our cramped quarters (despite its thin design) and would be mounted in front of the radiator, we were going to run both the Proform fan and the mechanical simultaneously. Again, the easy reversibility of the fan blades made this a non-issue.
To do this, we drained the Valiant’s radiator and gave it a quick flush using some light solvents. We did the same for the Slant-6 as well. The 16-inch fan mounted easily to the front of the radiator using the locking nylon tie mounting kit provided. The lightweight fan is made from a reinforced glass-filled polypropylene blade and plastic housing, and fit snug between the radiator and the front grille-support strut. The fan came with a sleeved loom ending in a plastic terminal.
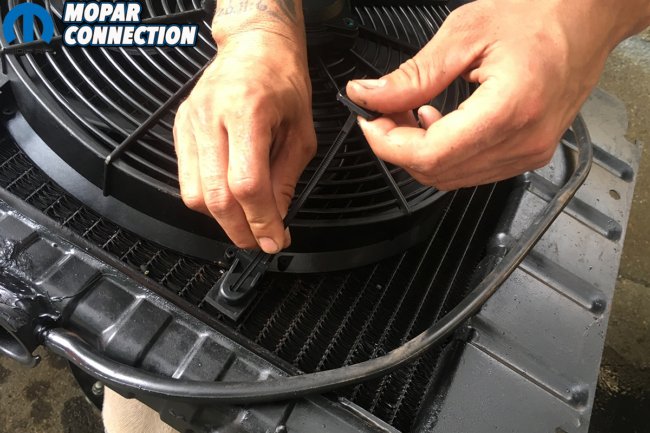

Above: Proform includes a locking nylon tie mounting kit that feeds through the molded-in mounts and through the blades of the radiator where you slide a pad over the nylon tie. With a pair of snips, you cut off the excess and you’re ready to roll.
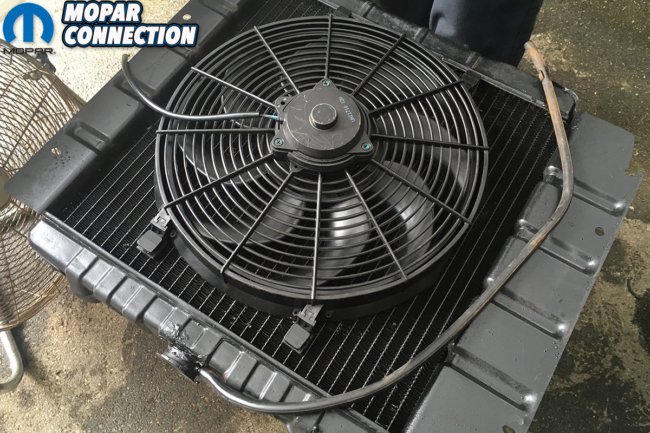
Above: Here’s a quick look at our finished fan installation.
Meanwhile, we drilled and mounted our digital variable speed controller to the Valiant’s flat inner fender wells with some self-tapping screws. Proform provides a very simple, easy-to-follow installation guide. We ran power directly to the battery and to the fan, a negative wire to the body, the wire to the radiator temperature probe, and a final wire to the 12-volt ignition, so that the fan could operate when the key was switched to “Accessories.” The fan’s loom also required its own negative (ground), which was mounted to the core support.
The controller box is a weather-resistant billet aluminum housing with thick rubber terminal boots ensuring that water and contaminants won’t penetrate. On the controller is a bright digital display with buttons designating Mode, Set, (+) and (-) to set the desired engine temperature. By simply pressing the Mode button, the digital display will show temperature in Fahrenheit. A push of a button allows for Celsius, as well as monitoring current engine temperature. We stayed with the pre-set 185-degrees.

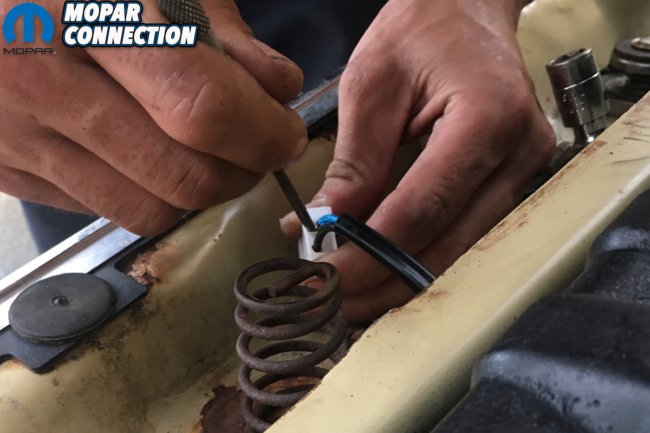
Above left: Next, we simply reinstalled the radiator back into its factory location and began reinstalling the upper and lower radiator hoses. Above right: The fan comes with a shrouded loom with a white plastic terminal for the positive and negative (ground) wires. Using a small dental tool, we freed the terminals from the plug, and grounded the fan to the radiator support.

Above: Meanwhile, as we were finishing up installing our new electric fan, we had another set of hands installing the Digital Variable Speed Fan Controller to the inner fender well of the Valiant. A set of self-tapping screws keep it tight.
We trimmed off all of the excess slack from the zip ties and re-tightened all of our connections before pouring in fresh coolant and letting the engine idle to purge any air from the system. Once properly topped off, we screwed down a new, pressure-reliving radiator cap and let the 6-banger idle up to temperature. At 165-degrees, the electric fan started to spin slowly, increasing in speed as it reached 180. By 185, the fan was spooling at full speed and we were immediately satisfied as we watched the temperature on the digital display drop back down to 182, where it hovered.
Since then, the Valiant has been a reliable cruiser, allowing Stuebing to run back-and-forth to work in Nashville traffic without incident. There are still a few other bugs to work out before we can call it a day, but that’s part of owning an old car. You work on it. You drive it. You work on it s’more.

Above left: Wiring the control box was rather straight forward; positive to the battery and fan, ground to the body, to the radiator temperature probe, and a final wire to the 12-volt ignition. Depending upon your application, this final wire will vary. You want the fans to be able to operate with the engine off but the keyed ignition set to “Accessories.” Above right: When wired properly, the box’s digital screen will light up. From Proform, the controller is set to 185-degrees Fahrenheit, but toggles allow for adjusting hotter or colder, or to Celsius.

Above: All that was left to do was fire it up, check for leaks and wait to verify that we had done our job right. (We had.) The fan spooled to life around 165-degrees and only spun harder the closer we got to 185. On the road, the fan didn’t have to work so hard as the passing air was doing a good job for it. Our big takeaway was the low amperage impact this set up has over say, the big daddy electric fan setup we have on Project Brazen. This is far more user friendly.


 Mopar Connection Magazine – The ONLY Daily Mopar Magazine © 2022. All Rights Reserved. Mopar Connection Magazine is the ONLY daily Mopar Magazine bringing you the latest Mopar news, technology, breaking news, and Mopar related events and articles. Find out the latest information about Mopar, Mopar products and services, stay up to date on Mopar enthusiast news, dealership information and the latest Mopar social media buzz! Sign up for the Mopar Connection Magazine newsletter for the latest information about new products, services and industry chatter. Mopar Connection Magazine is the best and only source you need to be a Mopar industry insider!
 by
by