


Many Mopar enthusiasts can tell you a story of how they stumbled across a car when they least expected it. For Barnabas Kriss of British Columbia, Canada, he just so happened to find his 1970 Dodge Challenger R/T SE in the spring of 1993 while looking for parts for a previous car he owned; a 1970 Plymouth Barracuda. “I purchased this car in August 1993 as a restoration project. When I found the car in the spring of that year while looking for parts for my Barracuda, the previous owner was undecided about selling the car. I kept the contact for the next several months and finally the car became available in August 1993 so I brought it home”, says Barnabas.
Not much is known about the early history of the car. It was sold new by Lucky Dodge in Longview, Texas and remained in Texas until 1986 when it was sold and brought up to Bellingham, Washington by the new owner. At this point, the car was already in non- running condition and needed restoration. It was then sold again to a new owner in 1989 and brought up to Canada.
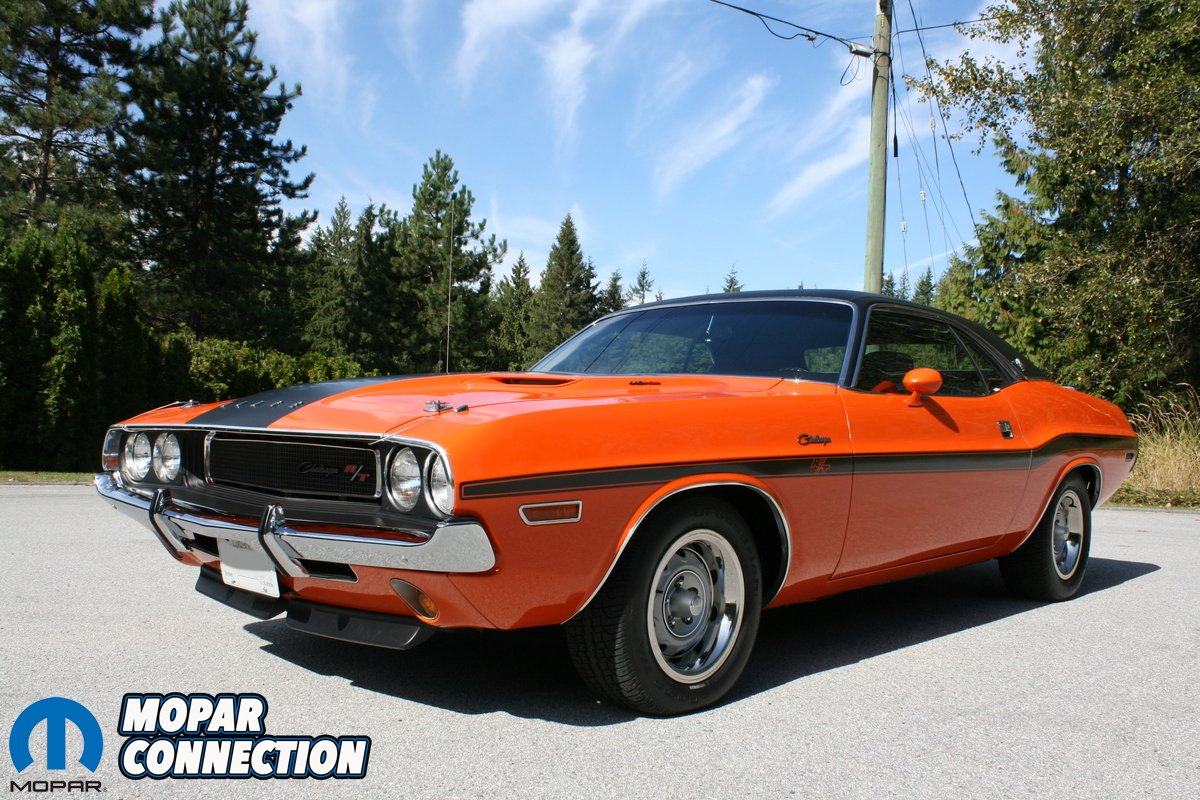
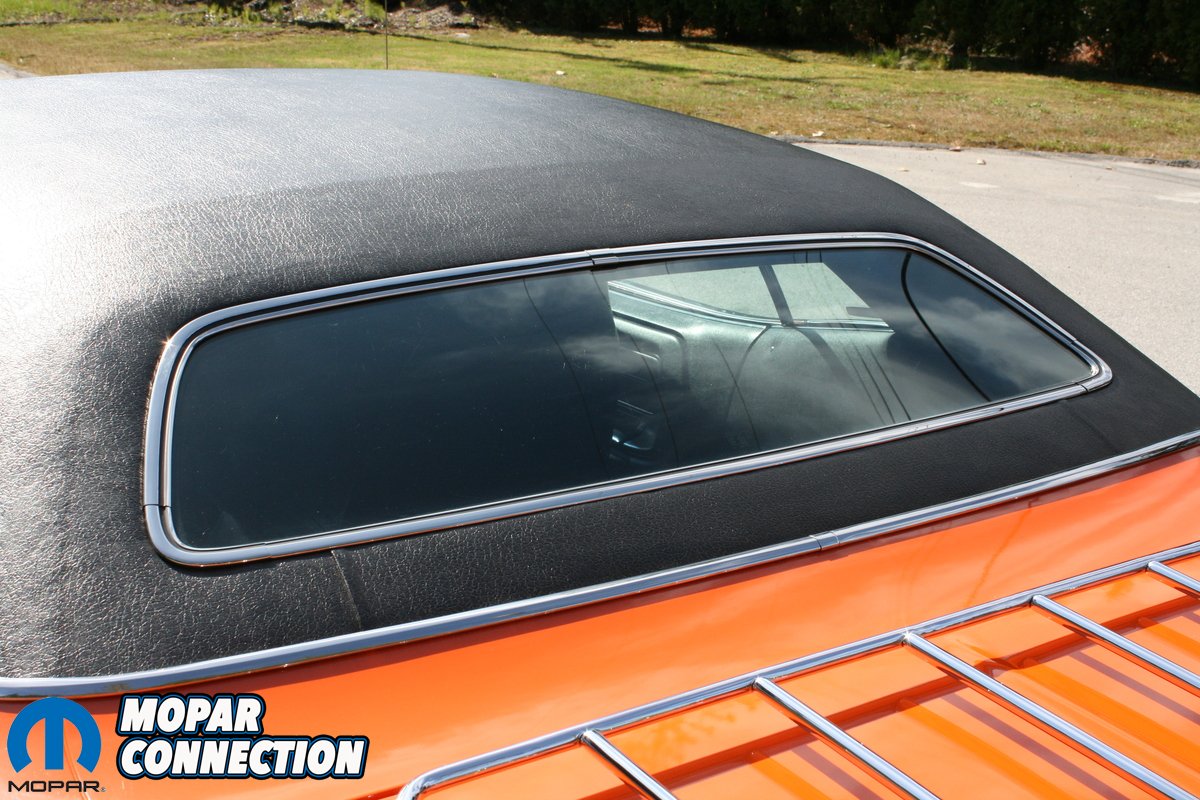
Once Barnabas got the car home, he didn’t waste much time getting to work on it. “During the restoration, we discovered evidence that the car probably had a very rough life. While the car was a partially disassembled basket case when I bought it, it was one of 733 R/T SE Challengers built with a 440 and automatic drive train. The car still had its numbers matching drive train, original paint, minimal rust, many rare options and a good color combination (EK2 Vitamin C Orange with V1X black vinyl top and HRX9 black leather interior) so I had to have it,” recalls Barnabas.


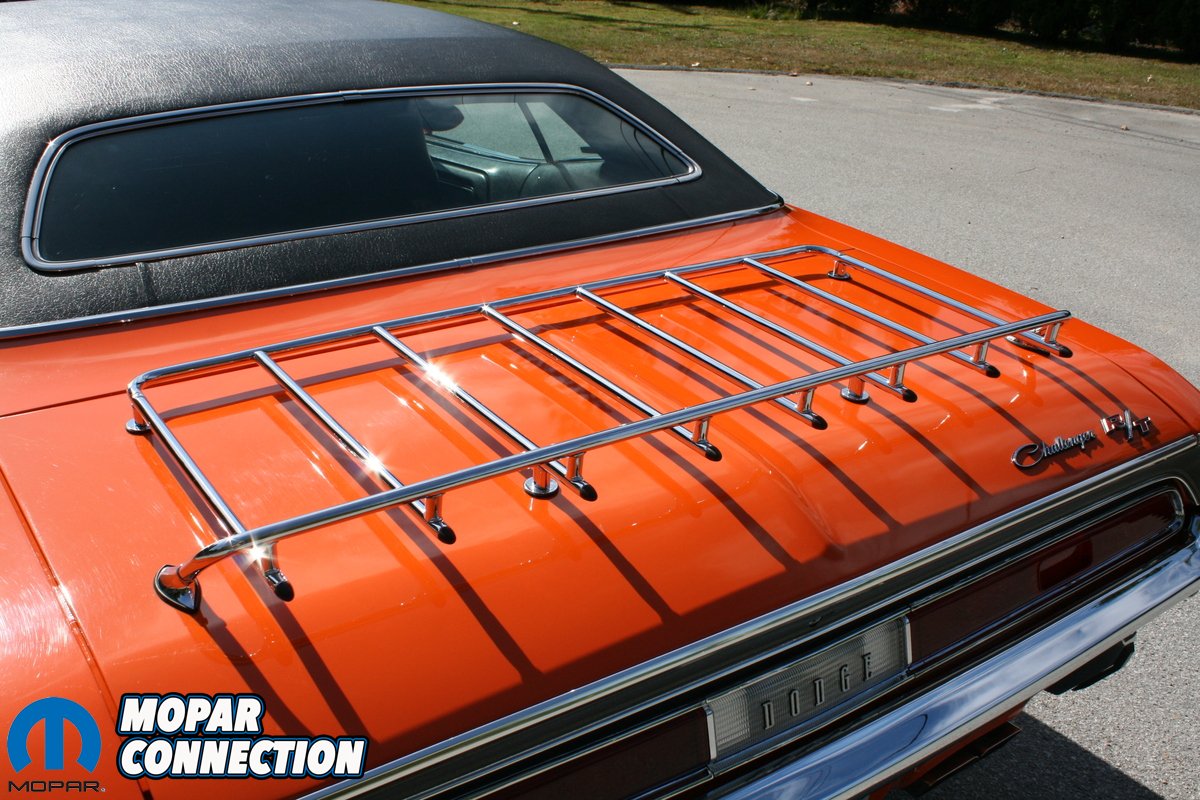
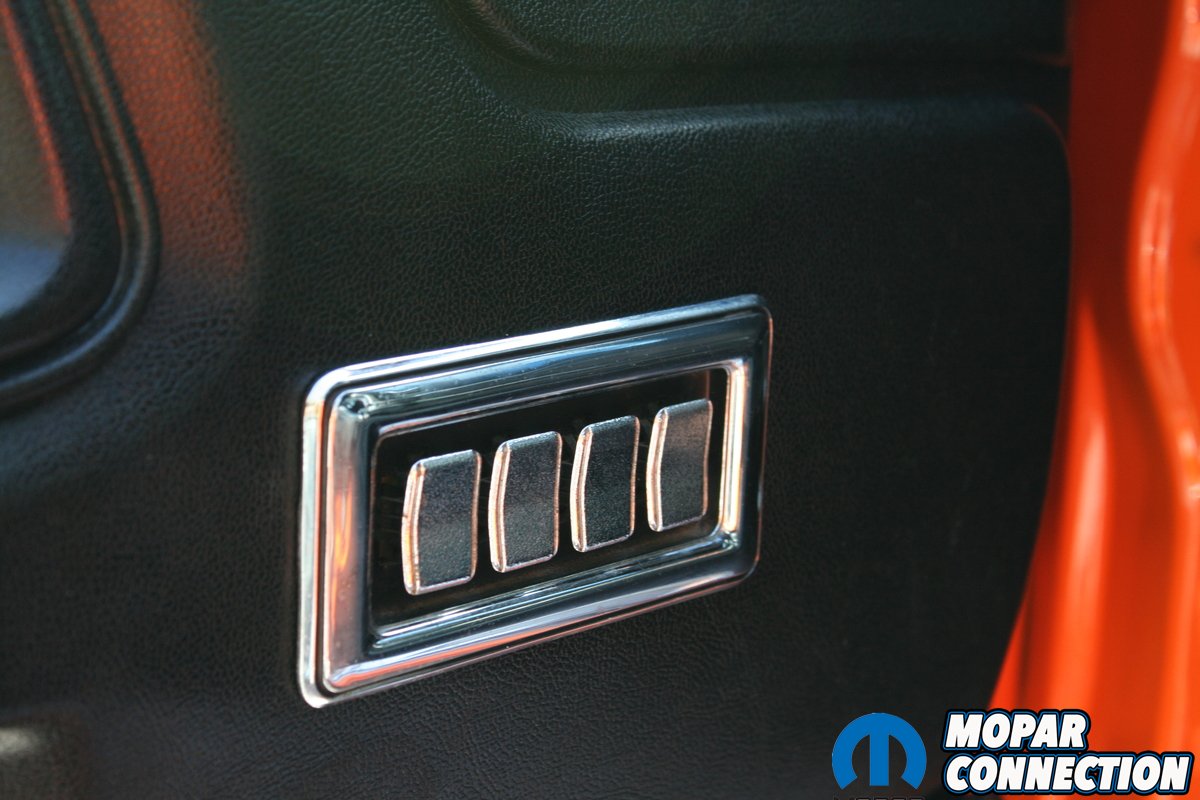
Among the R/T SE standard options, the Challenger is very heavily loaded with options including the A01 Light Group, B41 power disc brakes, C62 driver’s side 6-way seat, G33 left/right side mirrors, H51 air conditioning with tinted glass, J41 pedal dress-up, J45 hood pins, J46 flip top gas cap, J78 front spoiler, M05 door edge moldings, M83 front and rear bumper guards, M91 luggage rack, N42 exhaust tips, N88 cruise control, P31 power windows, R31 dual rear speakers, R35 AM/FM radio, S77 power steering, S83 Rim-Blow steering wheel, V21 performance hood blackout, V6X black side stripes, W21 Rallye wheels and W34 collapsible spare tire.
Thankfully for him, the car was missing very few parts which made the restoration a lot easier. During the first year of owning his Challenger, Barnabas spent quite a bit of time planning the restoration, documenting the small details on the car and researching what was correct and what was not. Barnabas says, “I also started collecting NOS and some used parts. Many smaller items were still available from Chrysler at that time such as emblems, door handles, a few moldings, front valance panel, battery cables, etc. Many more NOS parts were collected from about 50 different sources.


“While many reproduction parts were available, it was decided to use as many NOS, date coded or clean original parts as possible. This is due to the fact that many of the reproduction parts available at that time were incorrect, poor quality and did not fit as well as original pieces. There were a few NOS items that were extremely difficult to find. One was the front valance molding which was installed on SE models only. The other was the door edge guards which are an unusual option on a Challenger. I spent around three years looking for those.”
Once Barnabas had a significant part of the hard to find parts in hand, he completely disassembled the car down to a bare shell. Next, he started with the repair of the minor rust and dents. Unlike many E-body restorations, only the driver’s side inner fender and the trunk floor had to be replaced on Barnabas’ Challenger along with a few other small areas that had to be repaired. Barnabas was very meticulous with making sure all the metal work was done to factory specifications and style.


“On factory seams, the spot welds were carefully duplicated for a correct look. In areas where patch type repairs were necessary, the metal was butt-welded with no overlapping seams. The welds were then ground smooth on both sides, making the repair invisible. Rather than use body filler, the dents were removed as much as possible by hammering and then by shrinking the metal as necessary. This process was extremely time consuming but it eliminated the need for much body filler. The paint preparation took well over 300 hours”, says Barnabas.
With the metal work complete, the body and other parts were taken to Redi-Strip and chemically dipped followed by an electrolytic de-rusting process. Everything was then finished off with a zinc phosphate coating to prevent flash rust. With that all complete, the body was then mounted on a rotisserie and epoxy primered inside and out. To make sure the car would never rust again, Barnabas spent a lot of time rust proofing and coating the inside of the frame rails and other difficult to access areas. Primer was poured into areas like the trunk floor extensions until it began seep out of the factory seams and then new seam sealer was applied as specified in the factory service manual.


The next step was the rebuilding of the hood and door hinges before installing and aligning the body panels. The body was then sprayed with sealer and block sanded multiple times until everything was smooth and straight. The same process was used inside the trunk, engine compartment and under carriage. Finally everything was sprayed with RM Diamont basecoat-clear coat paint in the original EK2 Vitamin C Orange color. Once the paint was laid, everything was wet sanded and polished to perfection by A & S Autobody and Restoration in Maple Ridge, B.C.
While the body and paint process was being done, Barnabas was also hard at work correctly restoring all of the other components of the car. The small parts were zinc or cadmium plated as they were originally and the nuts and bolts were phosphate coated. All of the suspension parts and engine accessories were powder coated in original colors for a correct appearance and increased durability and the exhaust manifolds were metallic-ceramic coated to prevent surface rust. To make sure the Challenger had plenty of shine, all of the stainless steel moldings were polished and all plated parts were re-chromed by Modern Auto Plating in Vancouver, B.C.


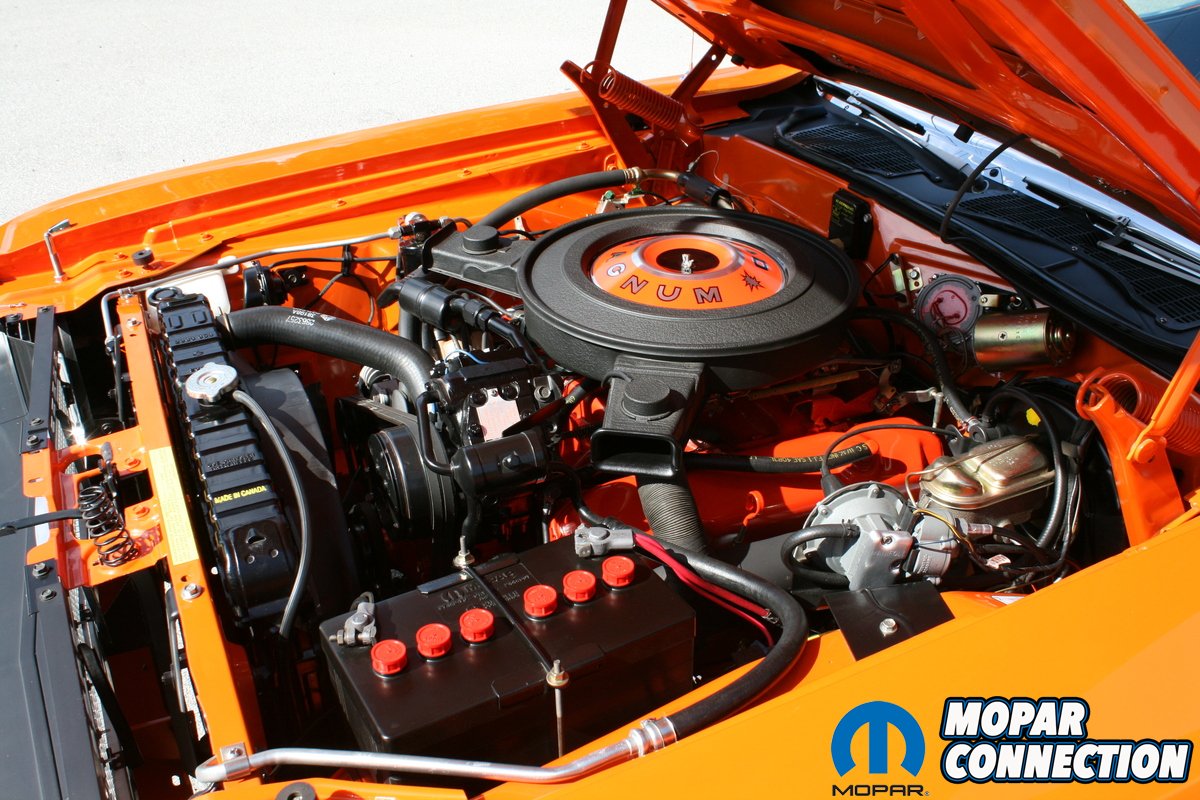
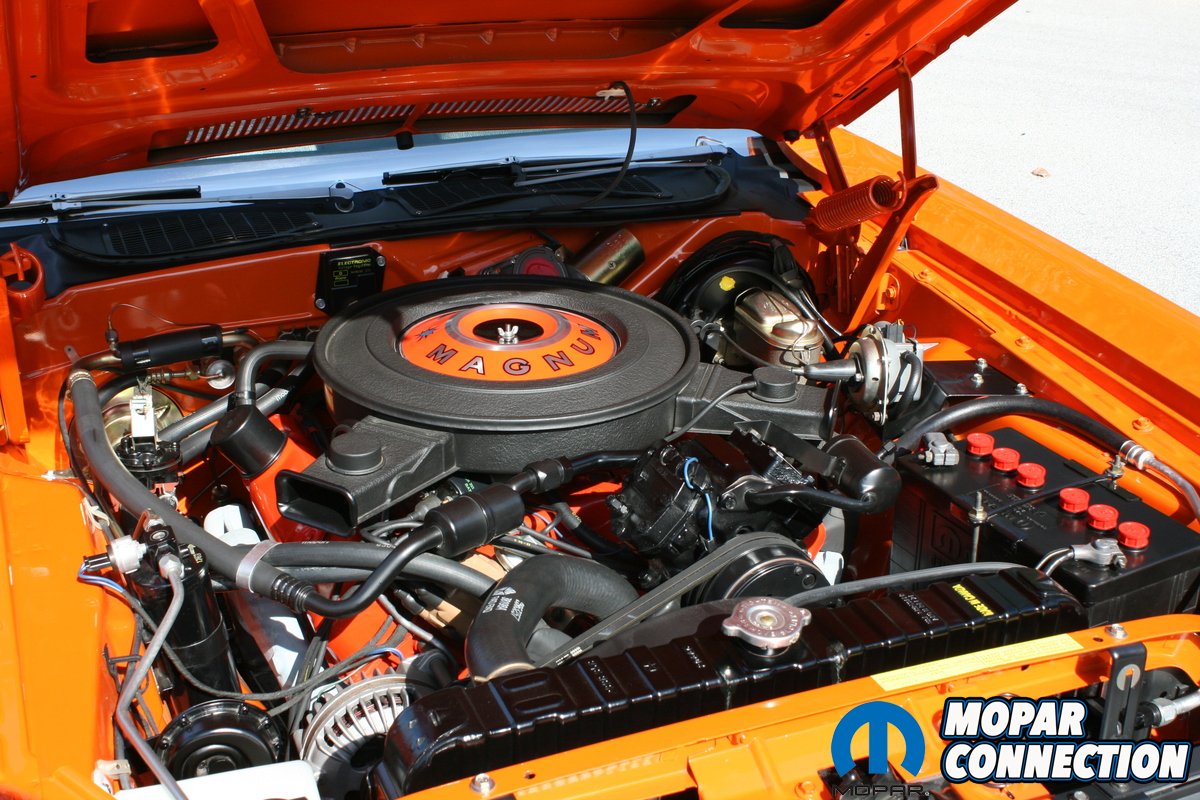
When the body was ready to re-assemble, the first step was the installation of the new vinyl roof. “The whole assembly process was done in almost the same sequence as it was done at the factory. All of the parts were rebuilt to look and function like new using original Chrysler parts where possible. Every part was rebuilt to factory specifications such as the windshield wiper motor, heater box, A/C compressor, alternator, power steering pump, steering box, steering column, etc. The original carburetor was sent to the Holley Custom Shop for restoration. Most of the small parts are not only correct but also have the correct date codes such as the alternator, voltage regulator, coil, spark plug wires, carburetor, intake manifold and exhaust manifolds” says Barnabas.
The next big step was rebuilding the original 440. The engine block and all of the parts were taken to Redi-Strip as well for cleaning and de-rusting. All of the internal parts were totally replaced except for the crank and rods. The engine machine work was done by Thunderbolt Engines in Langley, B.C as they specialize in high performance and racing engines. The heads were upgraded with hardened valve seats and stainless steel valves for unleaded use and the compression ratio was blueprinted to 9.5:1 suitable for 91 octane unleaded. The rotating assembly was balanced and all dimensions were blueprinted to factory specifications. For a nice exhaust note, Barnabas installed a Mopar Performance street Hemi grind camshaft. Besides the mentioned machine work, the entire engine assembly was done at home by Barnabas.
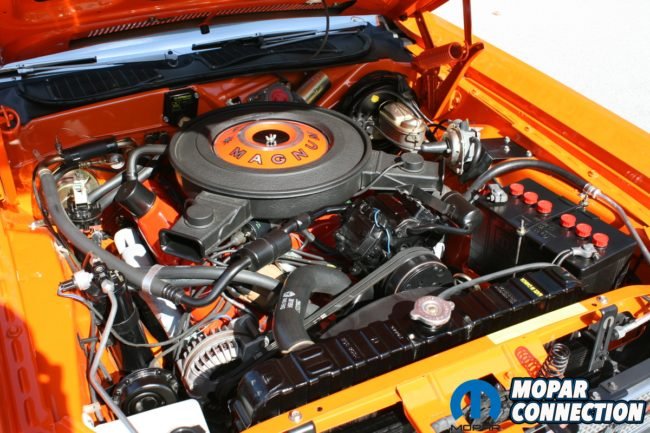


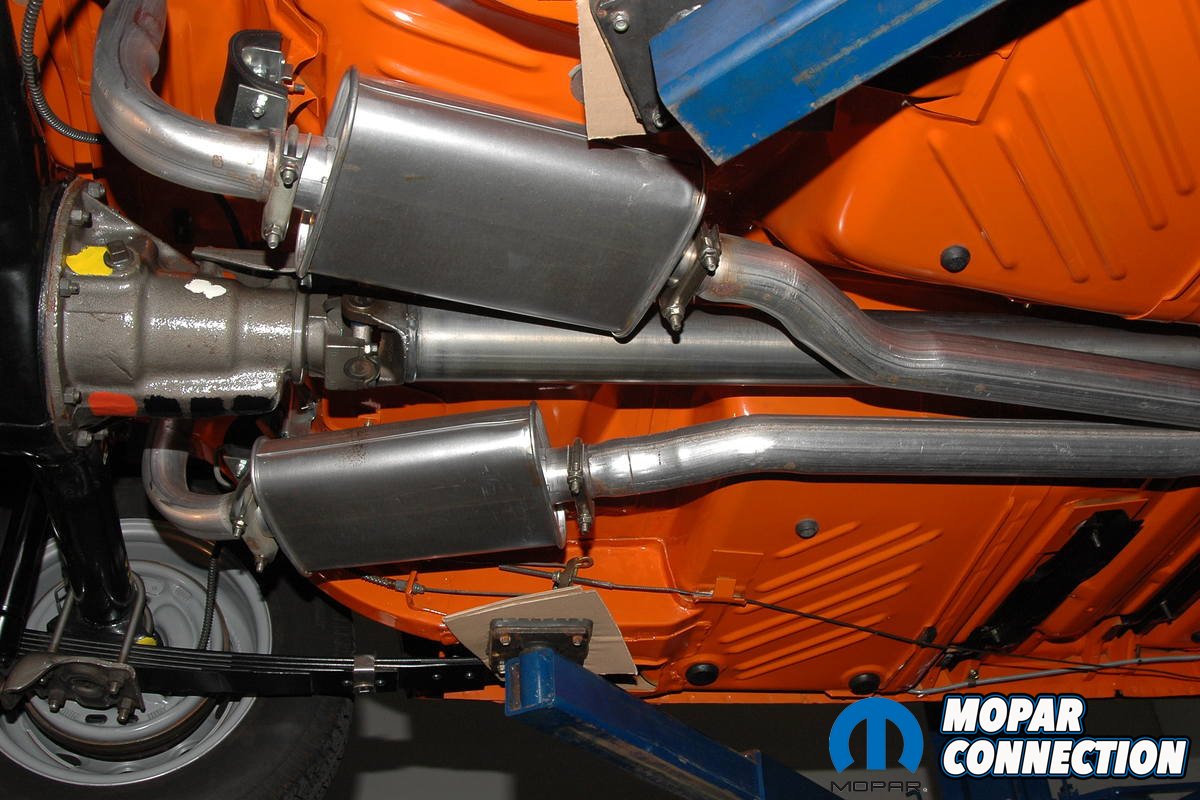
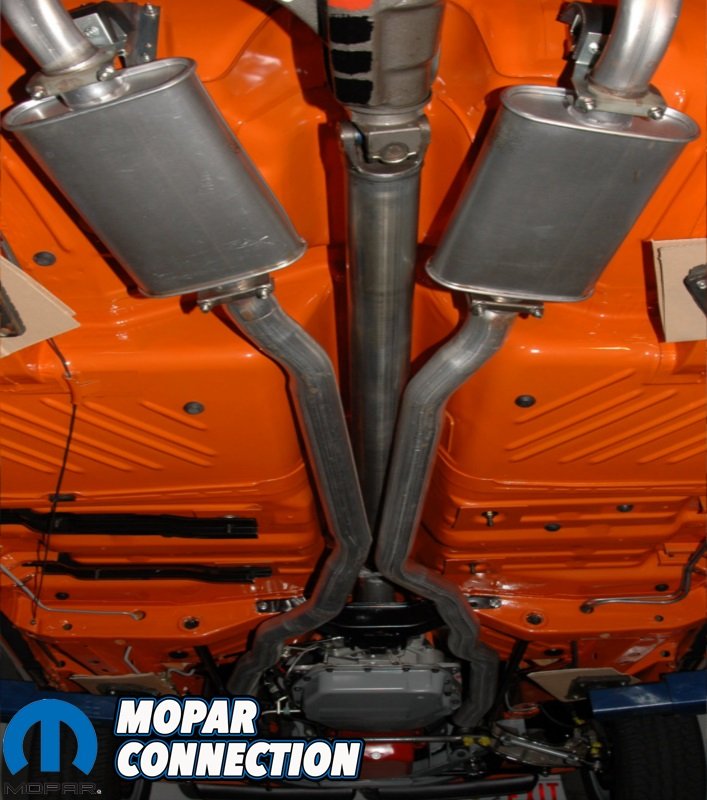
With the engine and transmission mated back together, Barnabas then installed the assembly from the bottom up just like at the factory. For better spark, a Chrysler electronic ignition system was installed but hidden from view. The correct part number radiator was re-cored and a reproduction exhaust system was installed. Under the car, the rear end and transmission were also completely rebuilt and detailed and Barnabas carefully re-applied all of the original inspection marks.
A new reproduction gas tank was installed along with new fuel and brake lines through-out the whole car. The suspension was rebuilt with new bushings, ball joints and tie rod ends and the brakes were rebuilt with mostly OEM Chrysler parts. The stock 11″ front rotors were upgraded to 11.75″ rotors that you would find on some 1976-1983 model year Chryslers. Barnabas tells us that this upgrade is nearly invisible once everything is assembled and the braking power is significantly improved. The car rides on brand new 15×7 Rallye wheels with NOS center caps and BFGoodrich Comp TA tires.


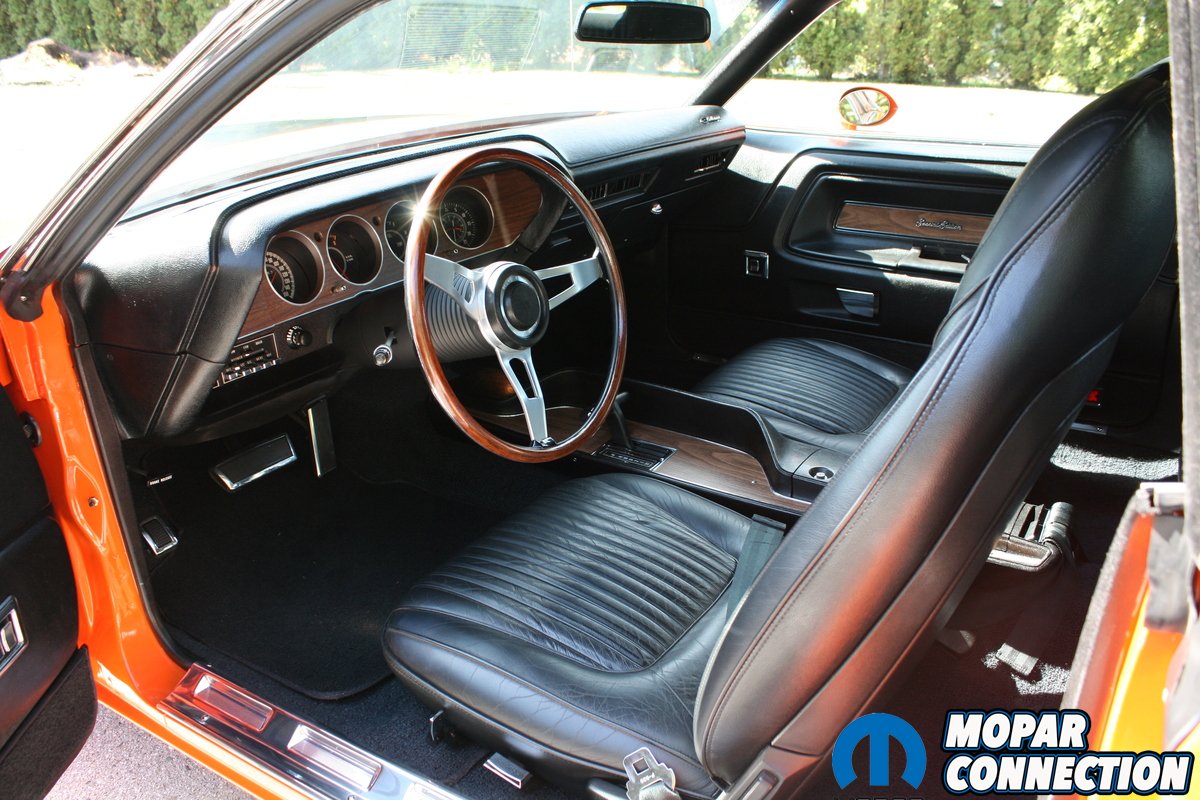
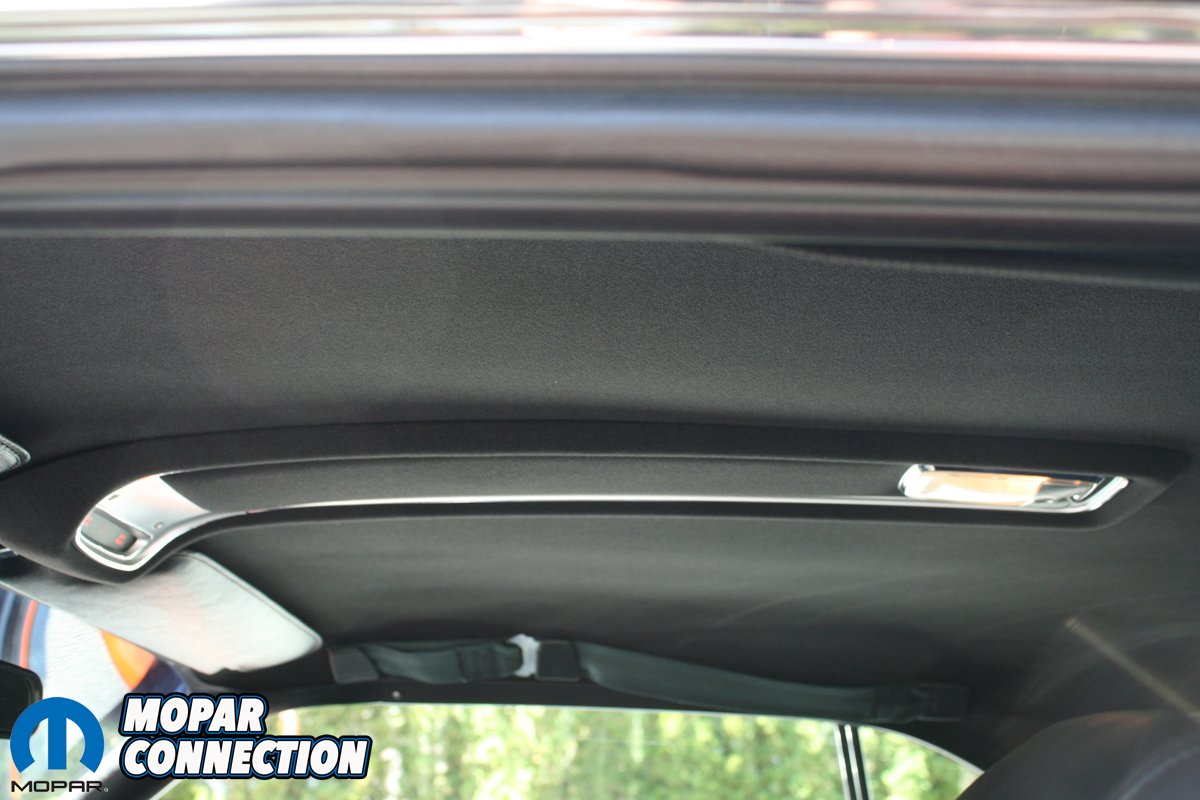
Once pretty much everything else was installed back into the car, Barnabas turned his attention to the final area needing to be put back together; the interior. The headliner and overhead console were recovered with the correct fabric. “Locating the correct fabric for that part of the interior restoration required some research as most of the reproduction parts vendors and upholstery shops only carry incorrect generic replacements” says Barnabas. The carpet was replaced with a new reproduction kit, the console was replaced with a nice condition used one and the original door panels were cleaned and detailed.
The seats showed years of heavy abuse and needed to be completely restored. Once the old foam and upholstery were removed, the seat frames were cleaned and repainted. The seat adjusters were completely rebuilt and then new molded foam and reproduction upholstery was then installed. Rather than use a reproduction dash pad, Barnabas opted for one that he calls “almost NOS”. He goes on to say, “The dash pad was a hard item to find since it is specific to 1970 models with A/C only. The one I installed came from a car that was totaled when it was new. The pad was removed from that car and stored away safe until I got it and installed it in my Challenger”.


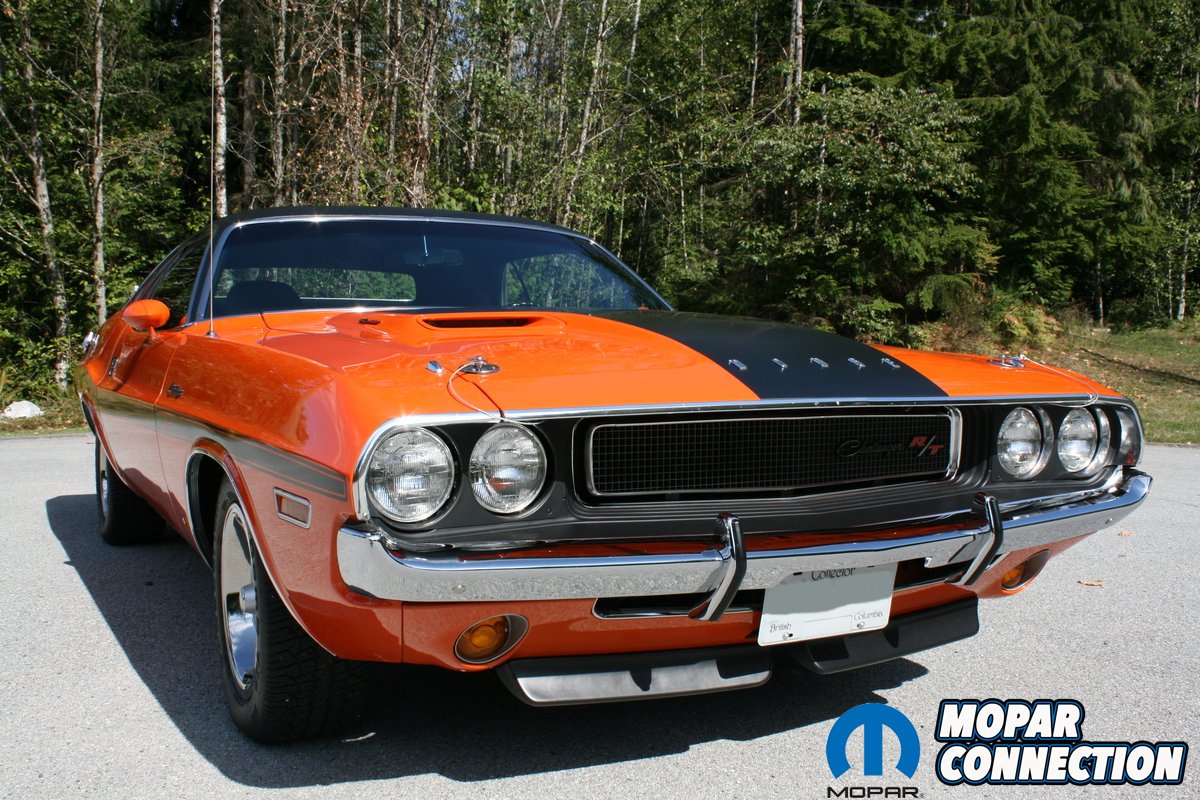
The last item to be restored and installed was the grille. Since Barnabas couldn’t find a NOS R/T grille and most NOS grilles he had seen were less than show quality with many small factory flaws, he chose to restore the original one. Once the grille was disassembled and the old anodizing was stripped, the aluminum was then polished and finally re-anodized using the OEM bright dip process. Since no one offered that service in Western Canada, the grille had to be sent to the United States. After that, all of the parts were then repainted and the grille was assembled using the correct rivets and NOS headlight bezels before being installed.
In July 1999, the Challenger was finally complete. Barnabas says he counted around 1,600 hours of work over the 5 years spent since the project started. The results are absolutely breath taking and we can proudly say Barnabas’ Challenger is truly one of the nicest we’ve ever seen. We’ve been trying to get his car into the magazine for over a year and are very excited to finally do so! His Challenger has been entered in many shows over the years and always does well; usually bringing home 1st place in its class. He has also received several awards for best engine, outstanding paint, outstanding muscle car, and Best of Show. Barnabas loves driving the car and has put on over 7,000 miles since the restoration was completed. It’s definitely not a trailer queen as he drives it to every show! He would like to thank the Coquitlam Chrysler parts department for their assistance in locating many hard to find parts.


