


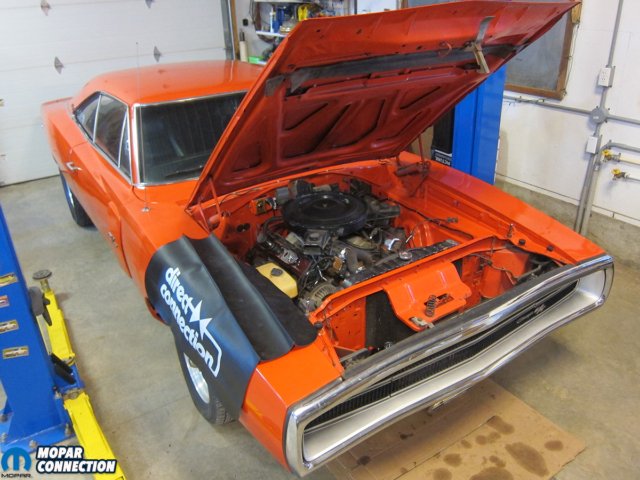
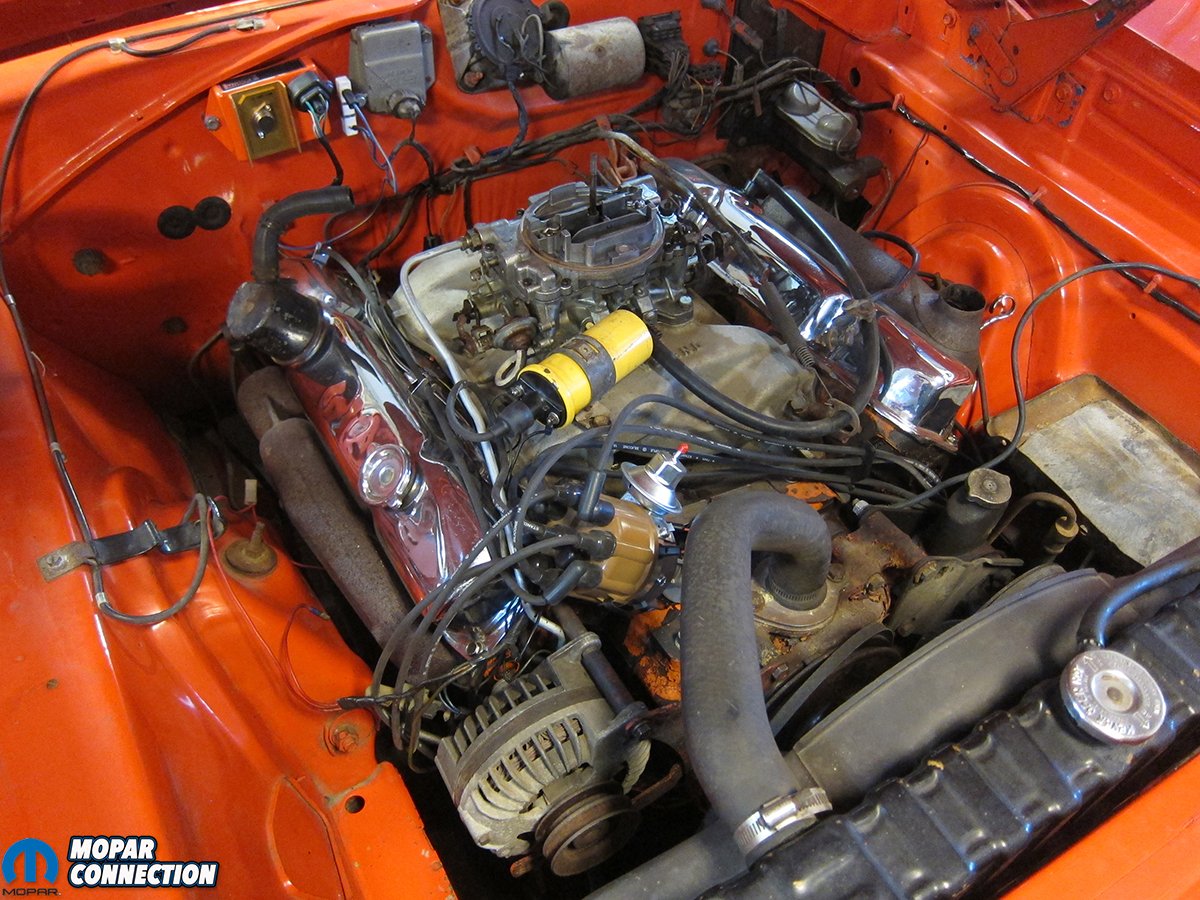
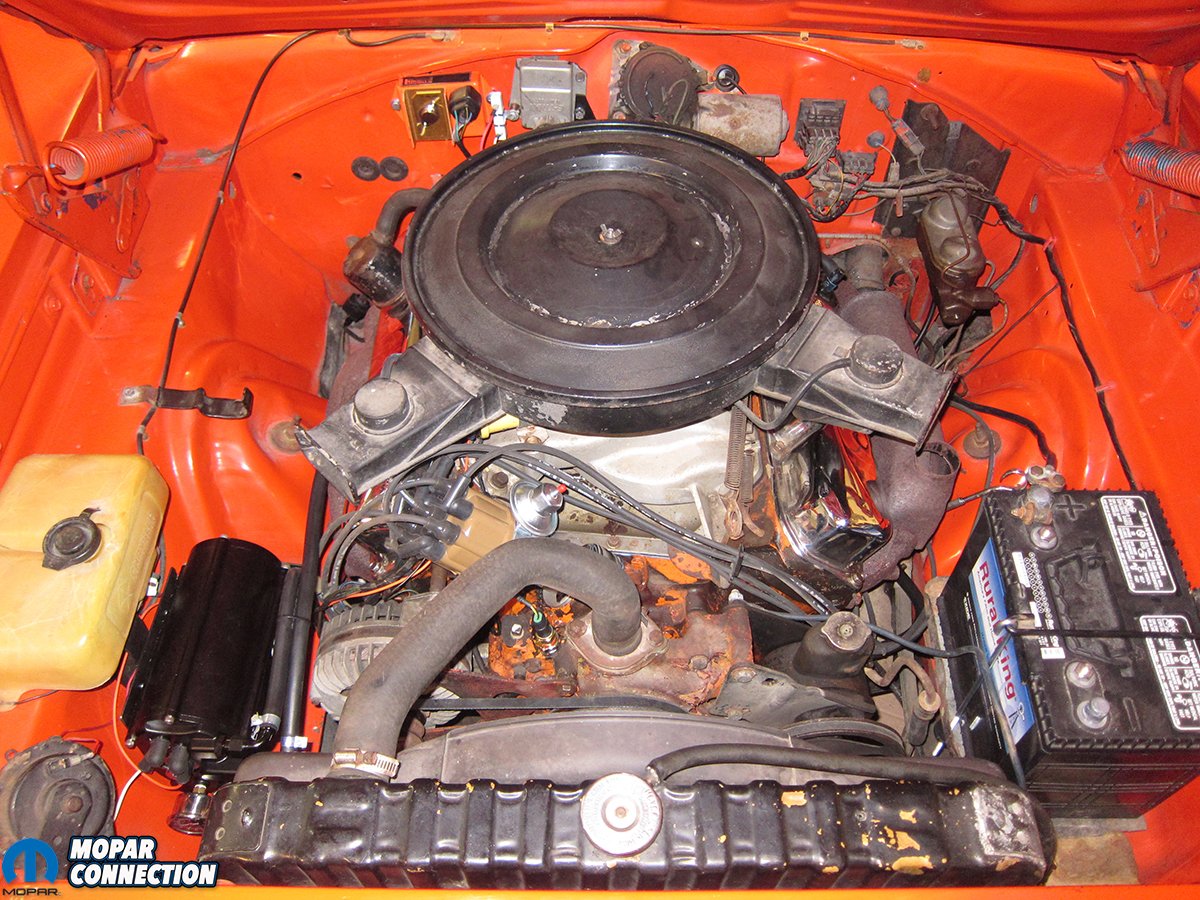
Driving home from a local car show last year, a vapor-locked Carter AVS left us in an all too familiar place: alongside the road. A spit, a sputter, and a cough brought our 1970 Charger’s 440 Magnum to a halt as we coasted to a stop. The warm summer’s day coupled with engine heat and ethanol-laced gasoline had the big four-barrel all choked up. As this started to become the norm, we popped the hood, pulled the dual-snorkel air cleaner, and let the big-block exude some heat before spinning it over again.
It started, albeit unwillingly, and we mashed the accelerator to hurry back home, all the while wondering if this was actually the height of muscle car performance. Electronic fuel injection (EFI) had always been in the back of our minds, but the idea of fiddling with an external electric fuel pump, extra wiring, and laptop tuning just wasn’t all that appealing.
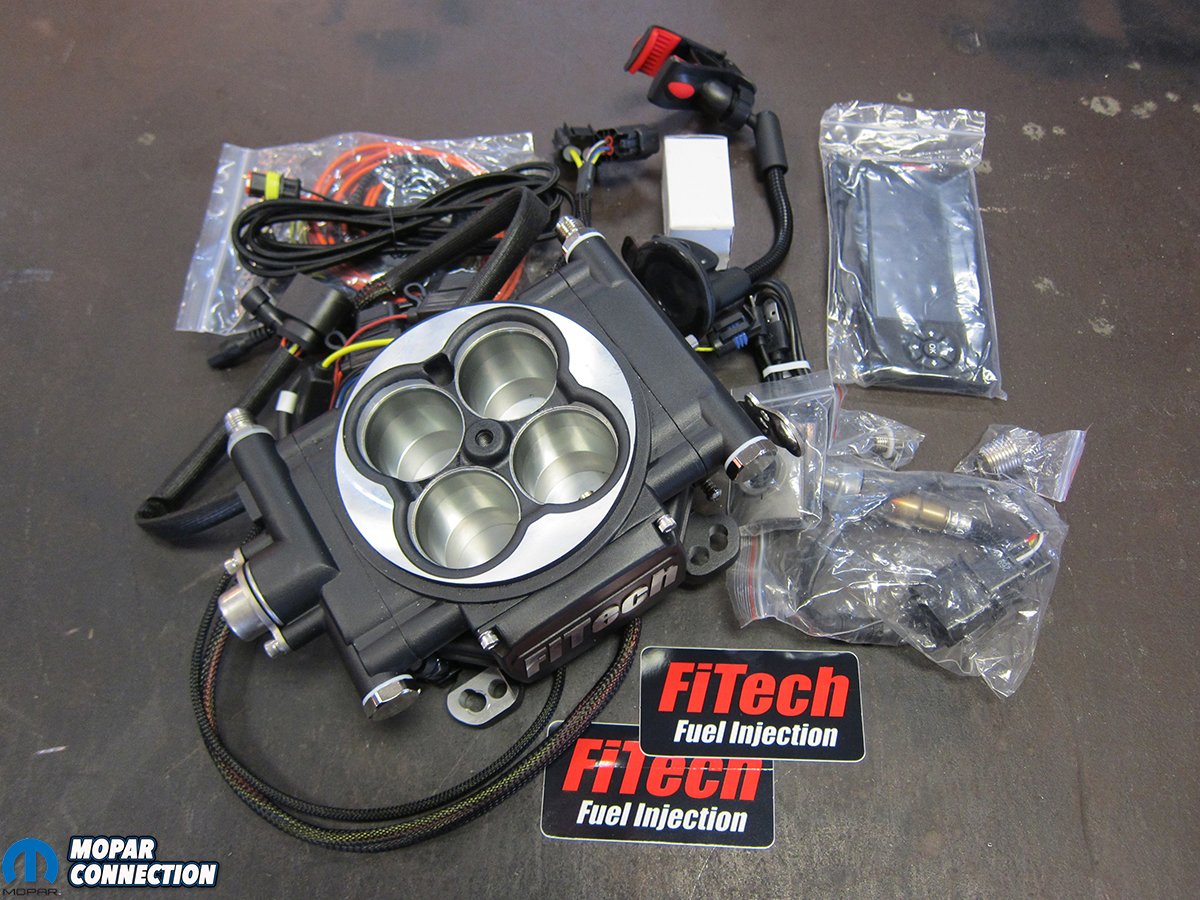
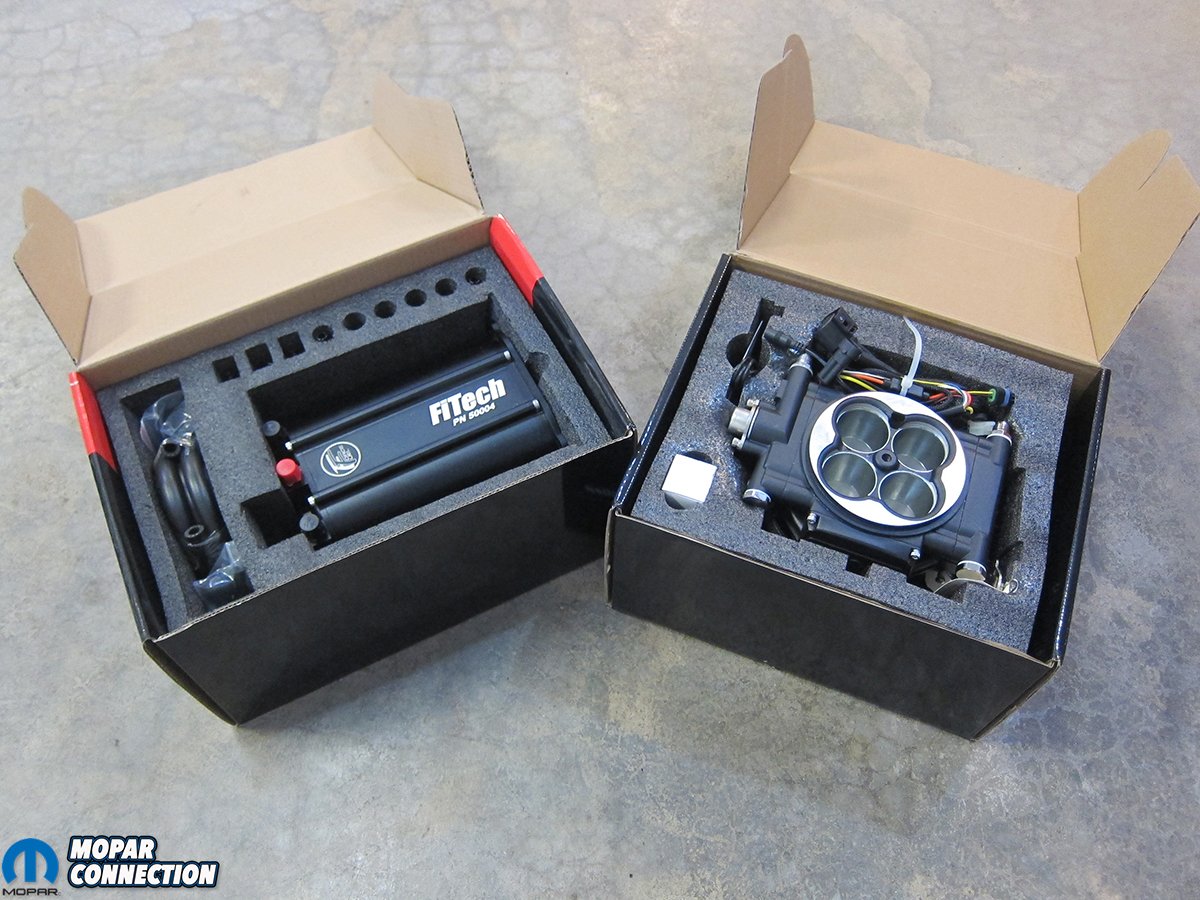
Luckily, EFI is becoming more turnkey every day with companies like FiTech Fuel Injection leading the technological charge. With a good feel for their customer base (guys and gals that are used to carburetors), FiTech has massaged their product design to be as quick and painless as possible. In fact, we were able to ditch the cranky carb in a single weekend with FiTech’s Go EFI 4 600HP kit (P/N 30002) and their new Force Fuel system (P/N 50004).


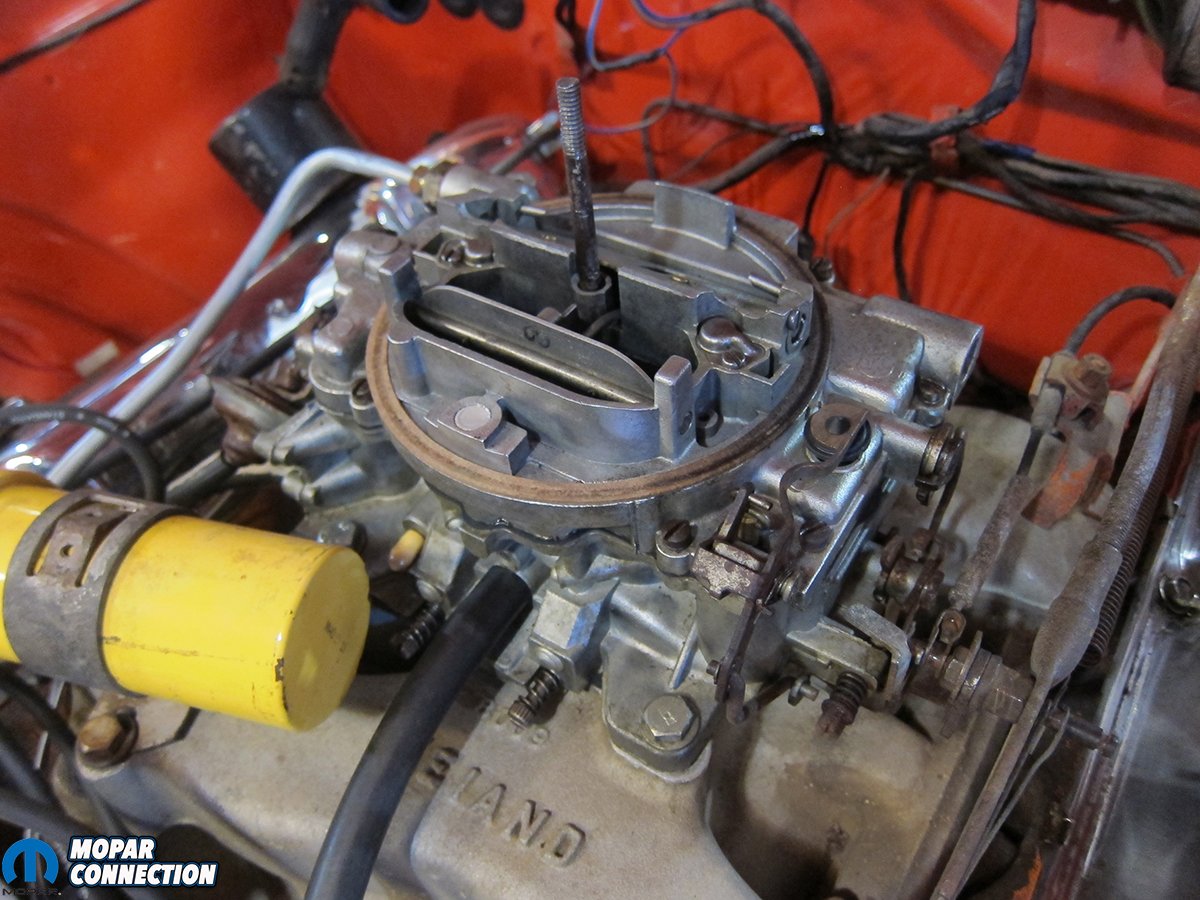
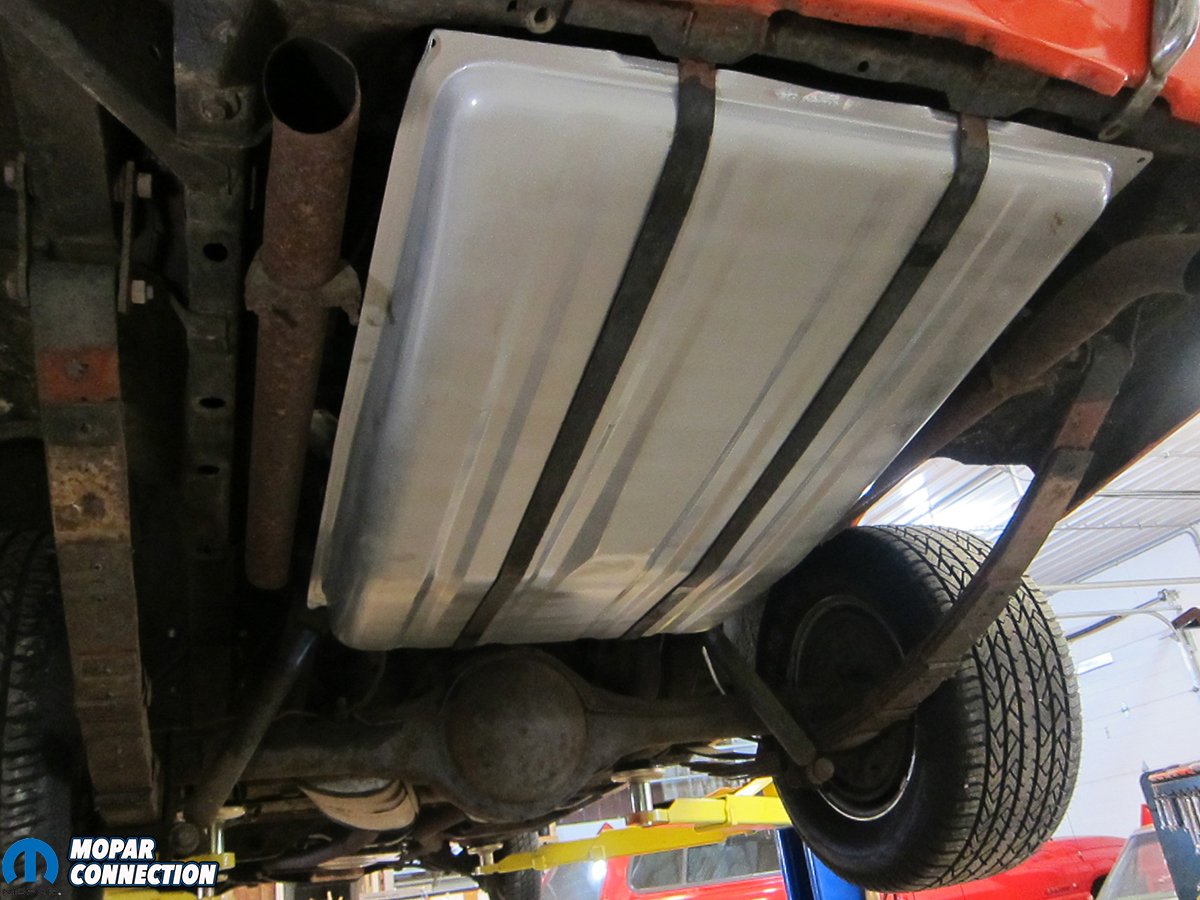
Top: The tired Carter AVS had served the 440 well over the past fifty years, but it was time for an upgrade. Bottom Left: One last look at our Carter AVS. Bottom Center: We did not want to take any chances of our stock tank causing issues and installed a new one. Bottom Right: Once again we did not have to change out the fuel line but did so anyway for extra insurance.
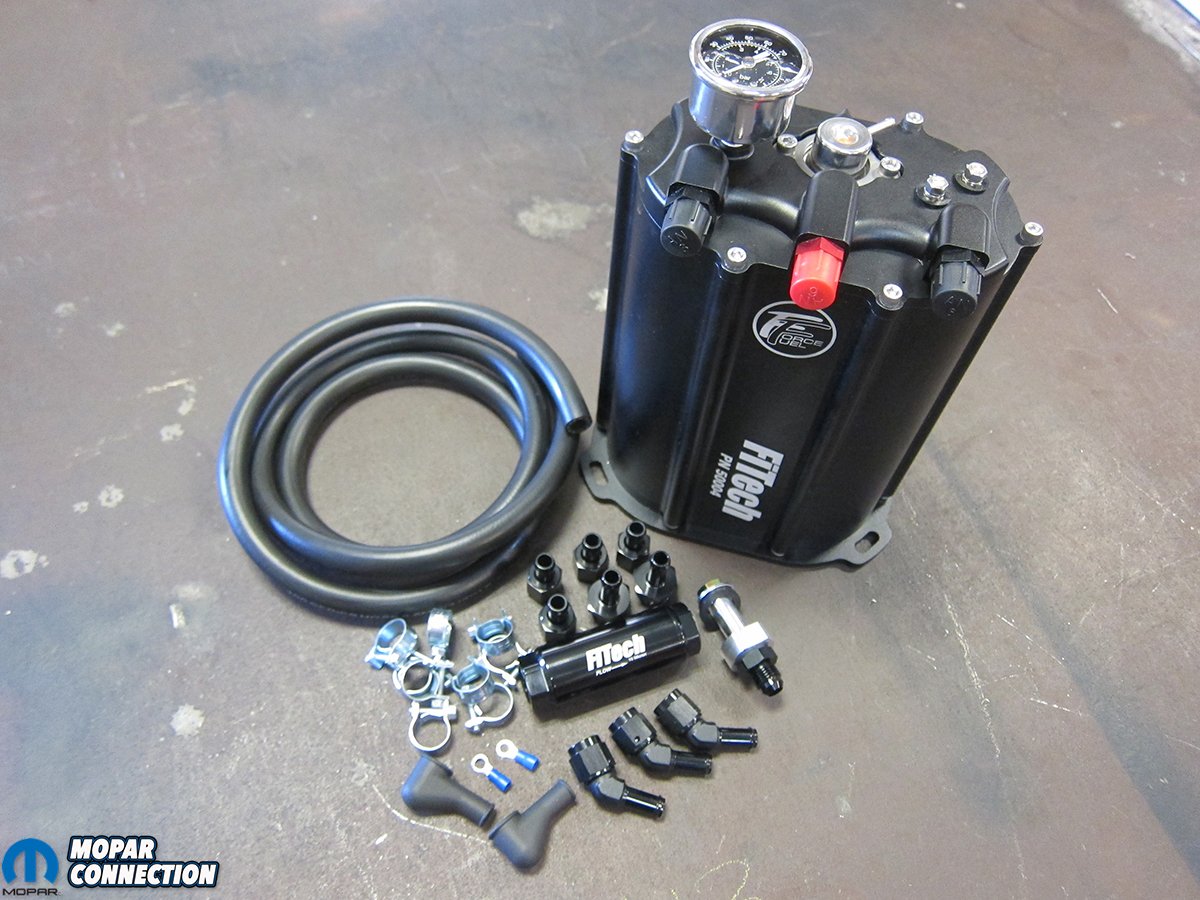
The Force Fuel system really eased our minds as it eliminated the need for an external pump, EFI-specific fuel tank, fuel pressure regulator, and a bunch of new fuel line. Fed by a stock mechanical pump, it’s able to supply 58 PSI fuel to the throttle body with an internal 340 liters-per-hour pump. Wrapped in a solid aluminum tank that holds a half-gallon of gasoline, the pump stays submerged to keep it cool and minimize the chance of starvation.
Included with the Force Fuel kit were a serviceable 10-micron fuel filter, AN fittings, wire terminals, five feet of high-pressure fuel line, and high-pressure clamps. Three ports on the Force Fuel made plumbing a breeze; one was the supply from the mechanical pump, one was the pressure feed to the throttle body, and one was the return back to the factory fuel tank.
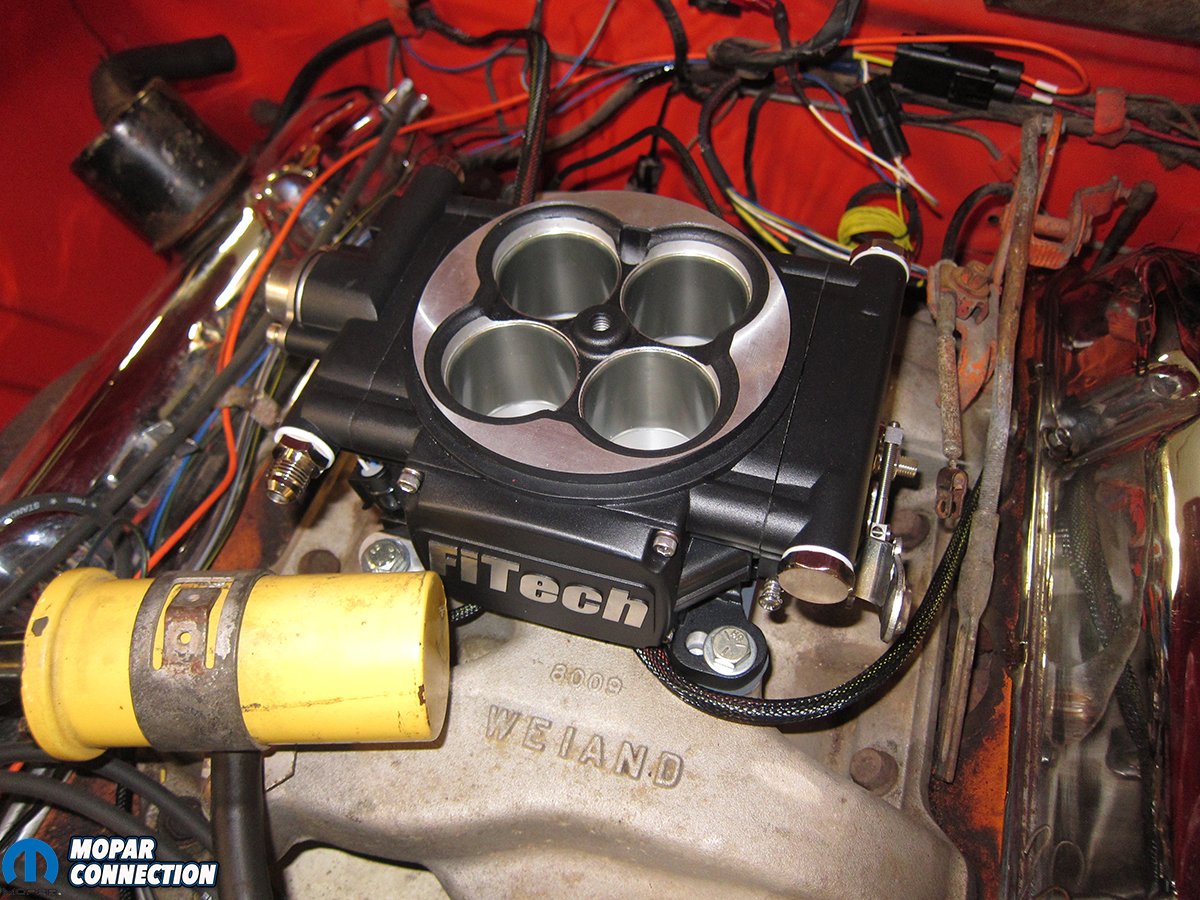
The real meat and potatoes of the system was the Go EFI 4 kit. A matte black throttle body with integrated ECU was the centerpiece, but FiTech also packed along installation essentials such as wiring harnesses, an O2 sensor, a coolant temperature sensor, the handheld tuner, and detailed instructions. Self-tuning and rated at a naturally-aspirated 650 horsepower, four internal injectors and FiTech’s wet flow annular discharge design are able to maximize both power output and fuel atomization. Timing control was available but, since we had a fresh Mopar officially licensed electronic ignition kit, we left that feature disabled for the time being.


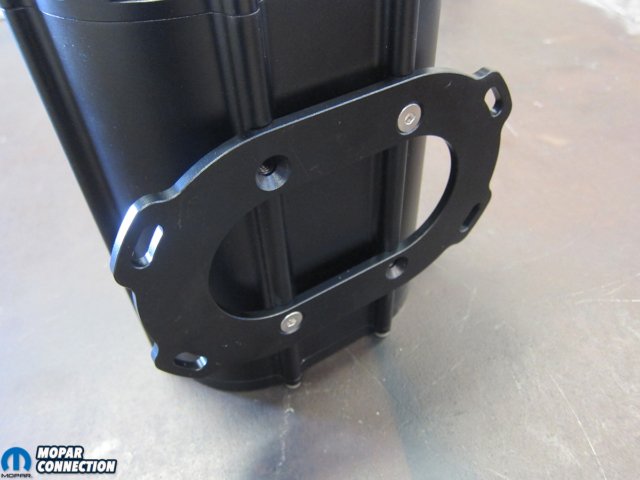
Top Left: Just two boxes and a weekend of time turned the cantankerous 440 around. Top Right: The FiTech Go EFI 4 came with everything we needed to run the unit and tune it. Bottom Left: The Force Fuel system came with hose, clamps, fittings, a filter, and a mounting bracket. Bottom Right: The bracket shown mounted to the Force Fuel tank.
Before the new goodies could go on, we started with a purge of the vintage components. A Carter AVS was standard fare for a 1970-model 440 and ours looked to be the original unit. It had been through a couple of rebuilds over the last fifty years. Common with today’s fuels, it still had a nasty vapor-lock problem and questionable tuning. Even though the 440 was never low on power with the Carter commanding air and fuel, we still felt like there was more driveability and power to be had. After noting any and all vacuum hose connections, we disconnected the fuel line, pulled the four carburetor mounting bolts, and packed the old gas guzzler up for long-term storage.
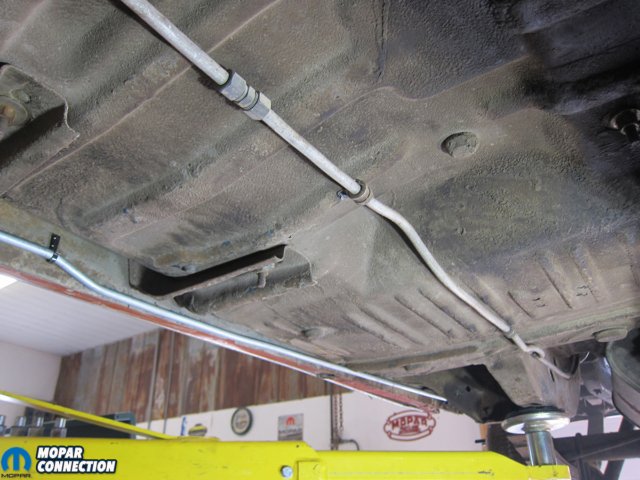
Underneath, it looked like the Charger was still sporting its original fuel tank. Not wanting to introduce any contamination into a finely-tuned EFI system, we decided to go ahead and replace both it and the sending unit. While it would have originally been equipped with a 5/16” fuel line and 1/4” return line, the car was, for whatever reason, missing both. Instead, self-bent 3/8” aluminum line had been routed underneath in the early-’80’s. It wasn’t leaking, so we left it alone. We did, however, need a return line to go from the Force Fuel back to the fuel tank for any excess fuel from the mechanical pump feed. For that, we bought a pre-bent 3/8” fuel line kit and installed it in the factory location.
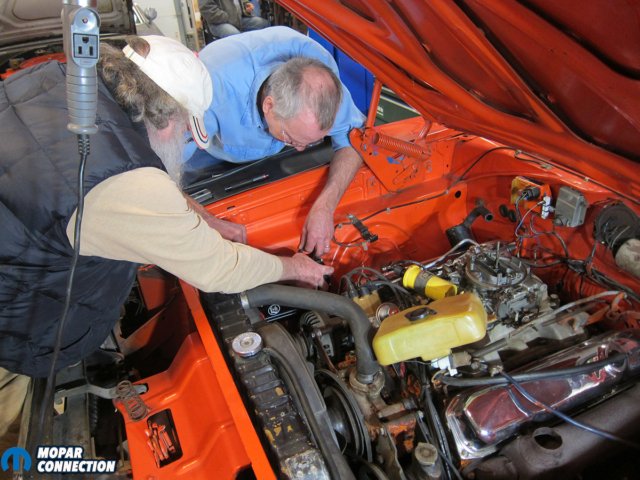
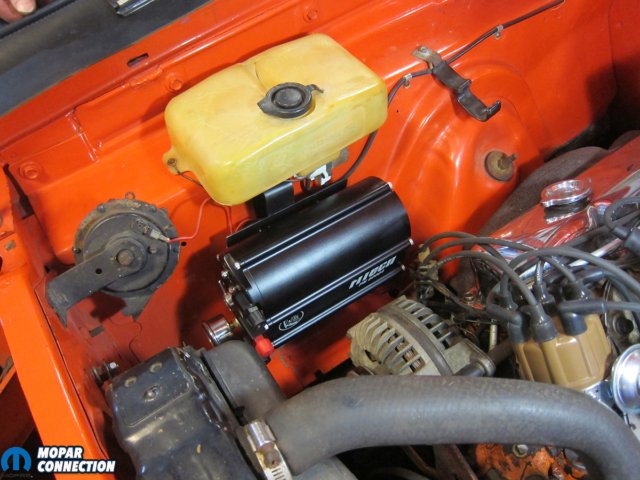

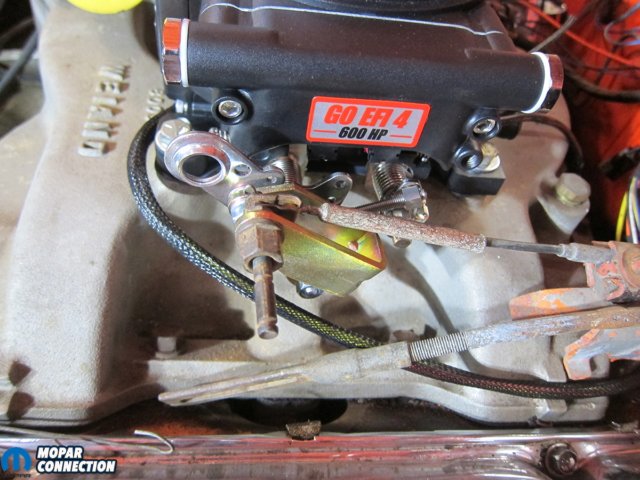
Top Left: Removing the washer bottle to give us some room to mount the Force Fuel tank. Top Right: The Force Fuel size allowed for almost a stealth look as it tucks perfectly underneath the washer bottle. Bottom Left: The Go EFI 4 unit bolted right on the intake without any issues. Bottom Right: The only extra piece we needed to help with the installation was a linkage bracket from Holley (P/N 20-7).
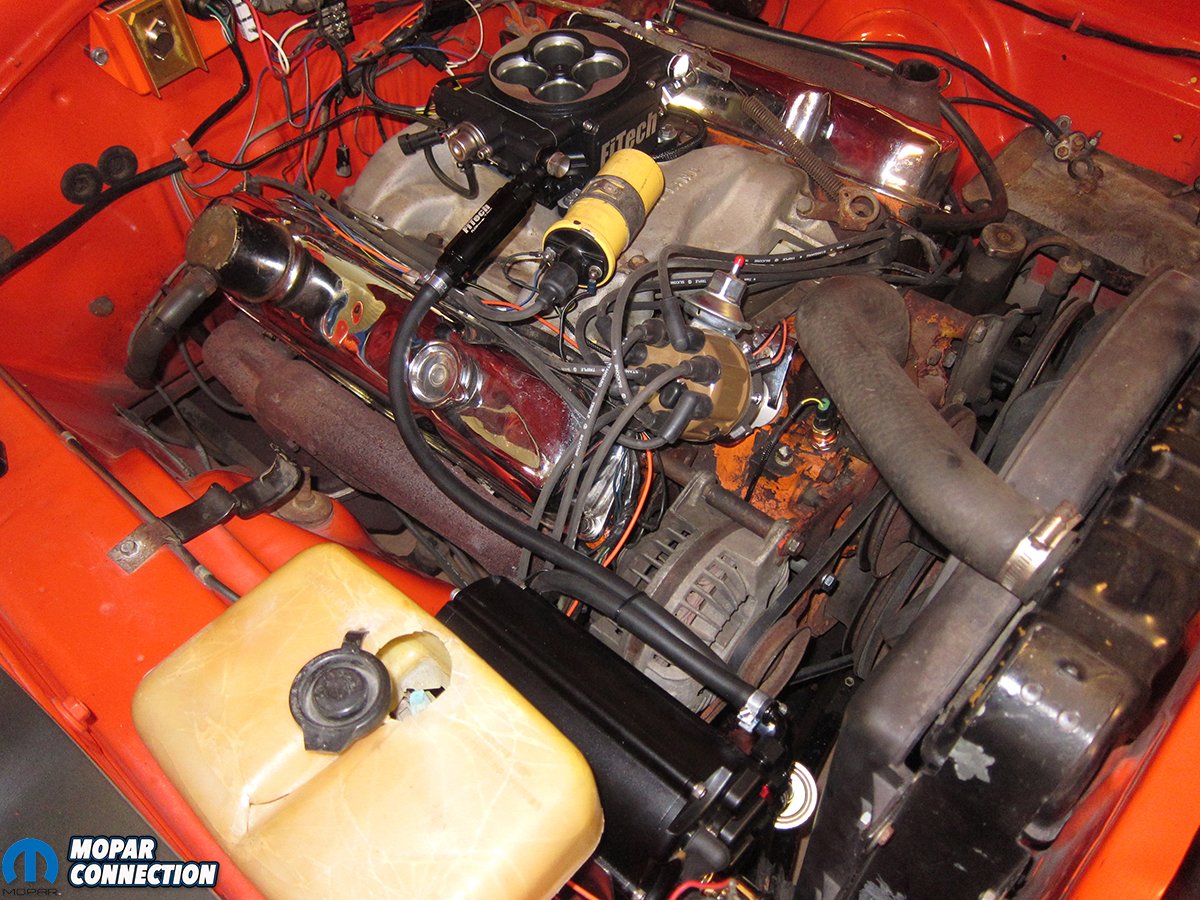
Mounting the Force Fuel unit was the next task. For a 1970 B-body, we’d say that the area underneath the washer bottle turned out to be nearly perfect for the application. The Force Fuel did come with a modular bracket for both vertical and horizontal mounting. However, we didn’t want to drill any extra holes, so we made a custom bracket to mount it via existing inner fender holes. Away from heat and tucked up against the inner fender, the auxiliary tank was safe and nearly unnoticeable with the washer bottle residing over top.
Plumbing was simple. The line from the stock mechanical pump that used to run to the carburetor was rerouted to the inlet of the Force Fuel through a standard canister filter. The return port was connected to our new 3/8” return line and the pressure port was destined for the throttle body. Since high-pressure hose and clamps were included in the kit, we didn’t even have to buy any expensive AN hose.
Throttle body mounting was just as simple as it nearly matched our original AVS in every dimension. Only a Holley carburetor throttle lever adapter (P/N 20-7) was necessary to hook up the stock throttle cable and kick-down linkage. Included in the Force Fuel kit was a 10-micron filter that needed to be plumbed into the pressure feed line.
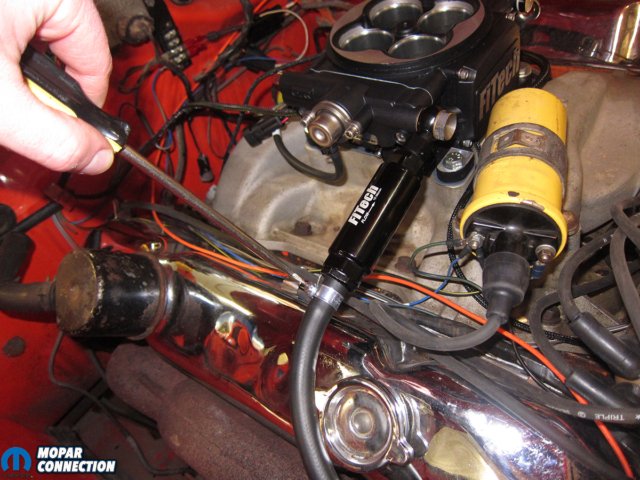


Top Left: The fuel filter was mounted inline at the throttle body inlet. Top Right: Can’t weld? No problem, FiTech includes hose clamps and clamp on bung mount for the O2 sensor and all you need to do is drill a hole. Bottom Left: We found a spot on the water pump to install the Go Efi 4 temp sensor. Bottom Right: All plumbed and wired, the installation was a lot cleaner than we assumed it was going to be.
A -6AN banjo fitting we had laying around allowed us to basically mount the filter right to the inlet port of the throttle body. Since it was so lightweight, the filter didn’t require any kind of fancy mounting and could have actually been supported by the supplied hose if necessary. The finished plumbing left us really impressed with the clean look of the Force Fuel and EFI systems that were clearly made to work well together.
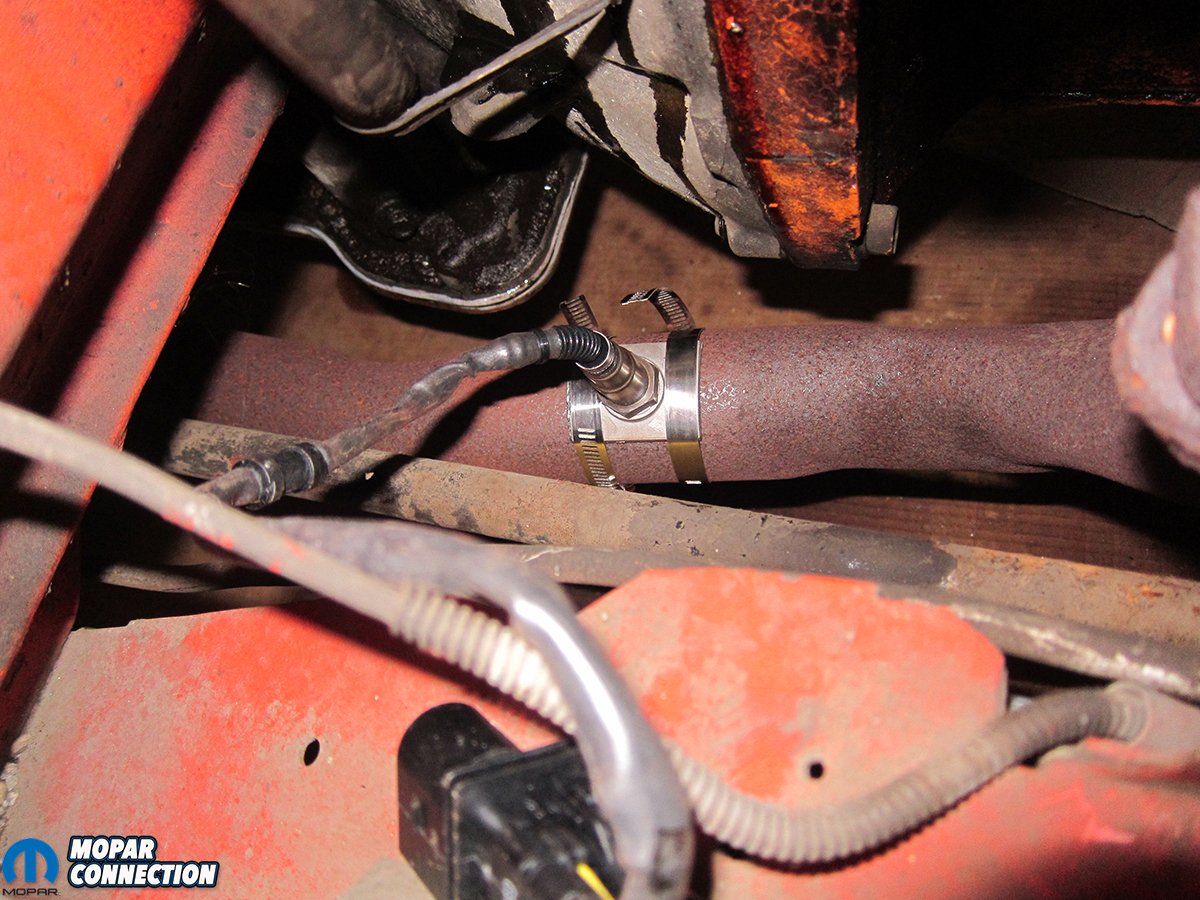
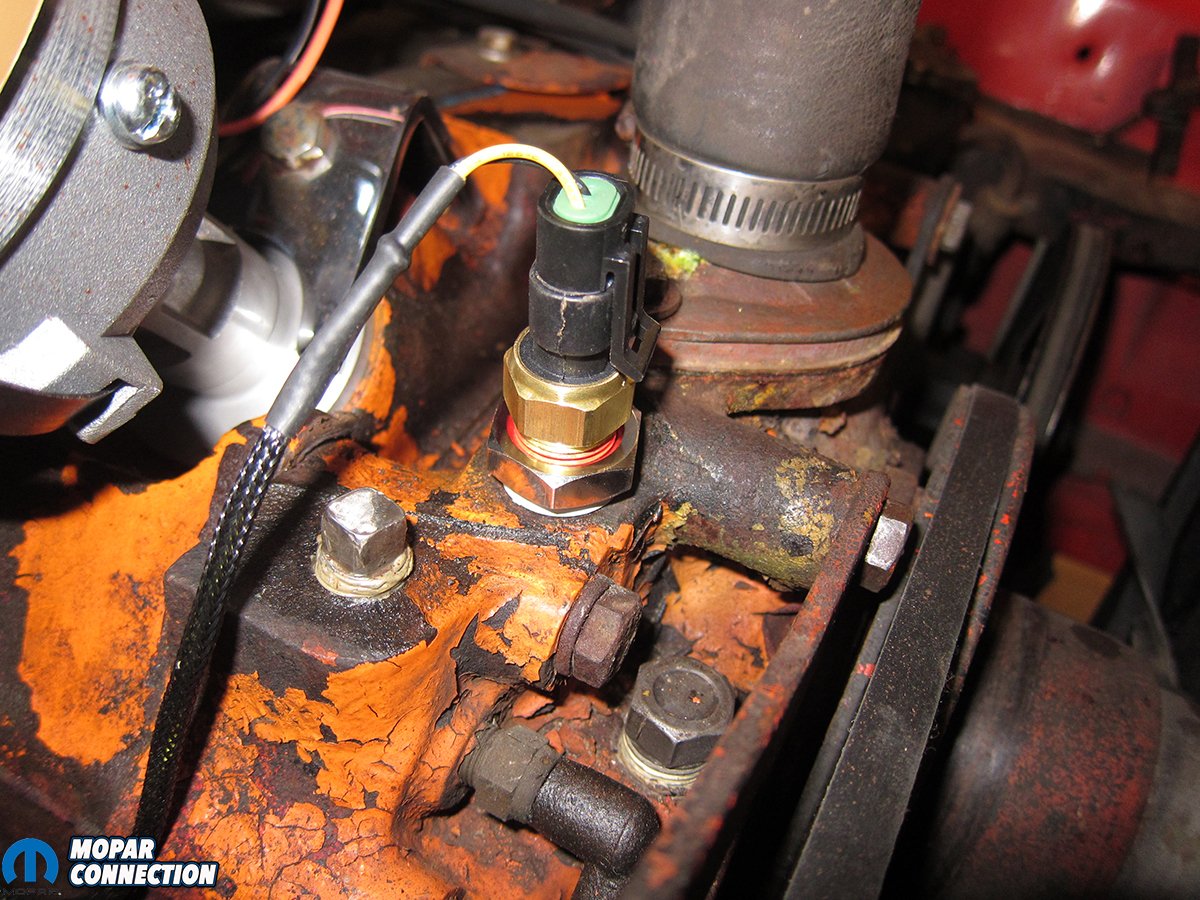
On the sensor side of things, just two needed to be added: a coolant temperature sensor (CTS) and an O2 sensor. Everything else, like the throttle position (TPS) and manifold absolute pressure (MAP) sensors, was already integrated into the throttle body itself. Since our big block was still sporting its high-performance exhaust manifolds, we punched a hole in the down pipe for the O2 sensor.
Rusty, thin-walled exhaust pipe would have never allowed for a welded O2 bung, so FiTech’s clamp-on unit was a real life-saver. We drilled the hole, installed the gasket, then clamped the adapter down tight with nary a leak. The CTS was similarly simple as it threaded into one of the existing threaded ports on the water pump housing. FiTech even included a threaded adapter for fit-up to multiple pipe thread sizes.


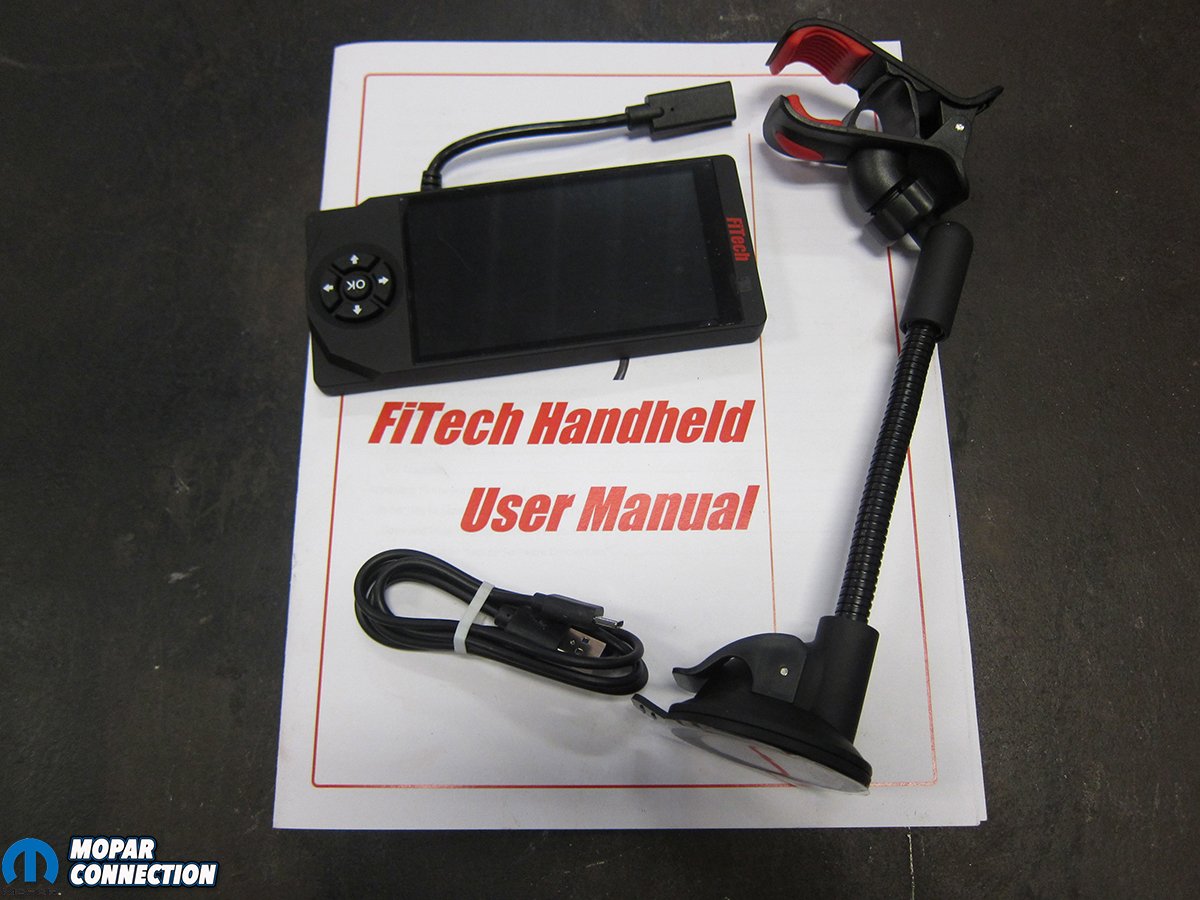
Above Left: FiTech’s handheld gave us easy tuning adjustments and more. Above Center: We had to run through a few prompts for initial startup. Above Right: We a turn of the key the motor came to life and we were watching all the vitals on the handheld.
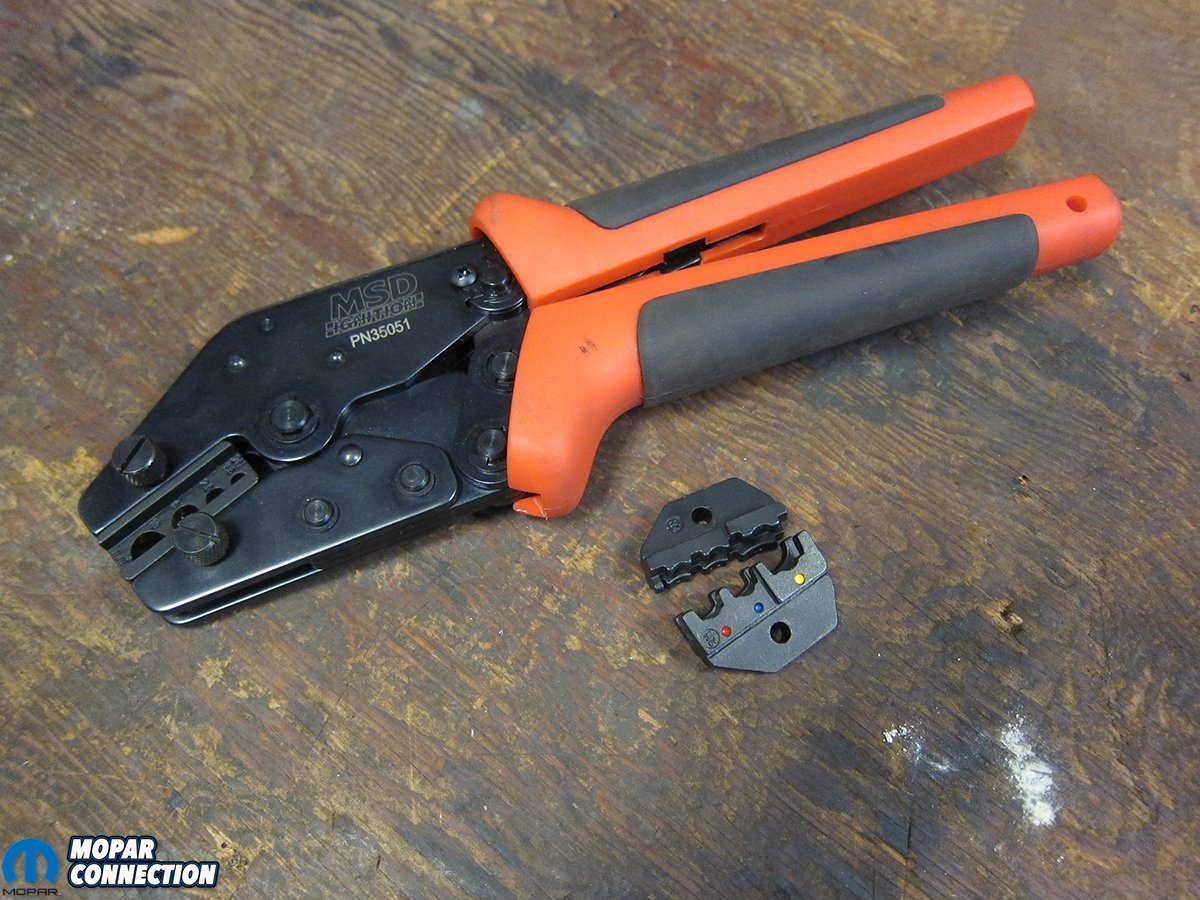
Wiring can be the scariest part of any modern component installation, but FiTech’s integrated ECU made the entire process as simple as possible. Only four wires needed terminated: battery power, switched power, tachometer input (coil negative), and fuel pump power. Each was extra long so there was plenty of lead to make the connection no matter how the harness was routed. MSD’s Pro-Crimp tool (P/N 35051) was an absolute must for terminal crimping.
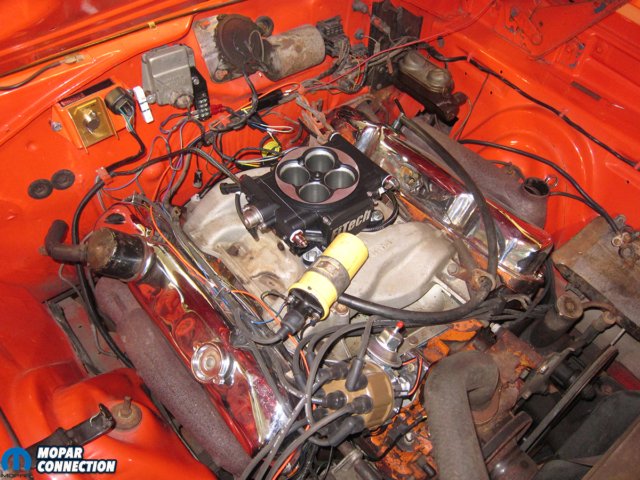
Its ratcheting action and quick-change dies made for rock-solid crimps every single time. Another benefit of FiTech’s integrated ECU was that the bulk of the harness came out the back of the throttle body. Once it was slipped into the factory firewall harness clips, the extra wiring was barely noticeable to the untrained eye. Once the original dual-snorkel regained its throne atop all, it was just about impossible to tell that anything had even changed. We weren’t going for total stealth, but it certainly was a byproduct of FiTech’s keep-it-simple engineering.
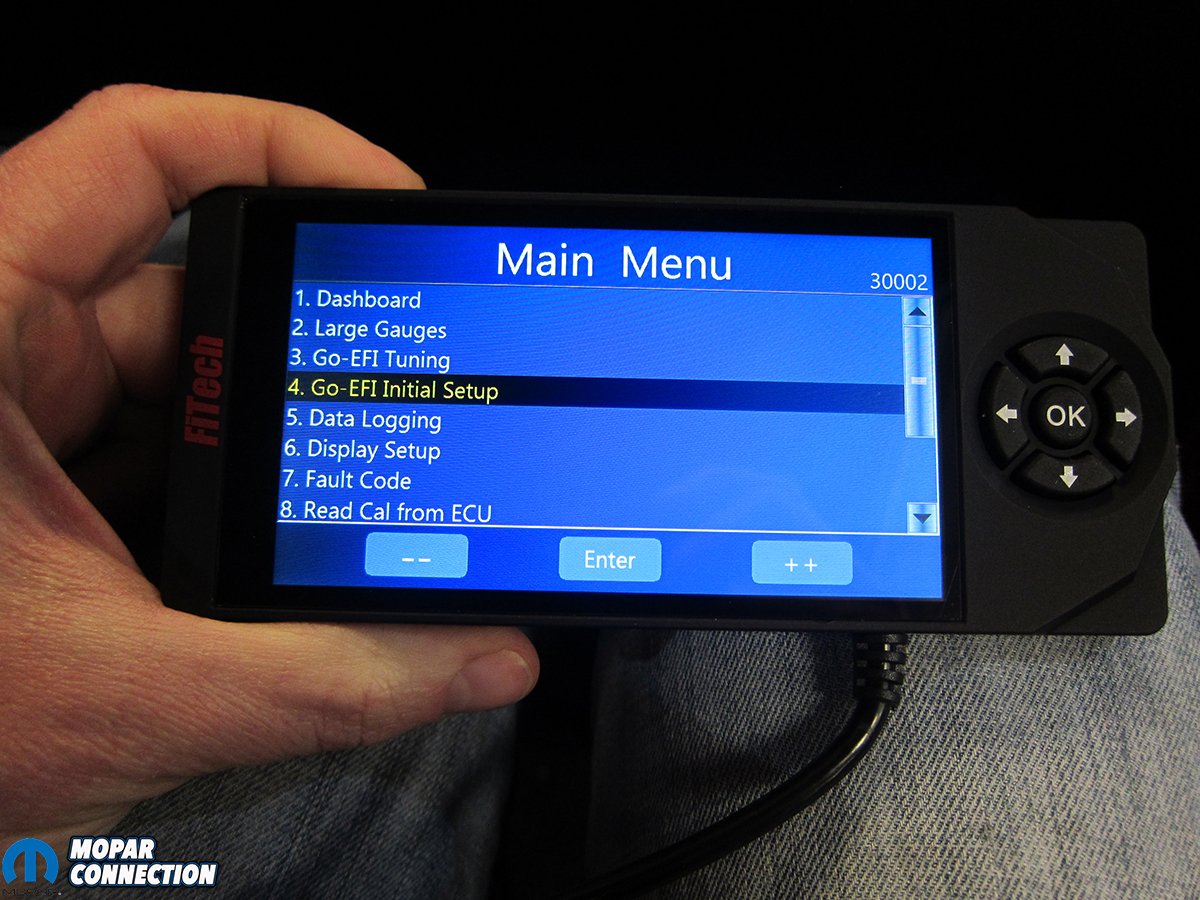
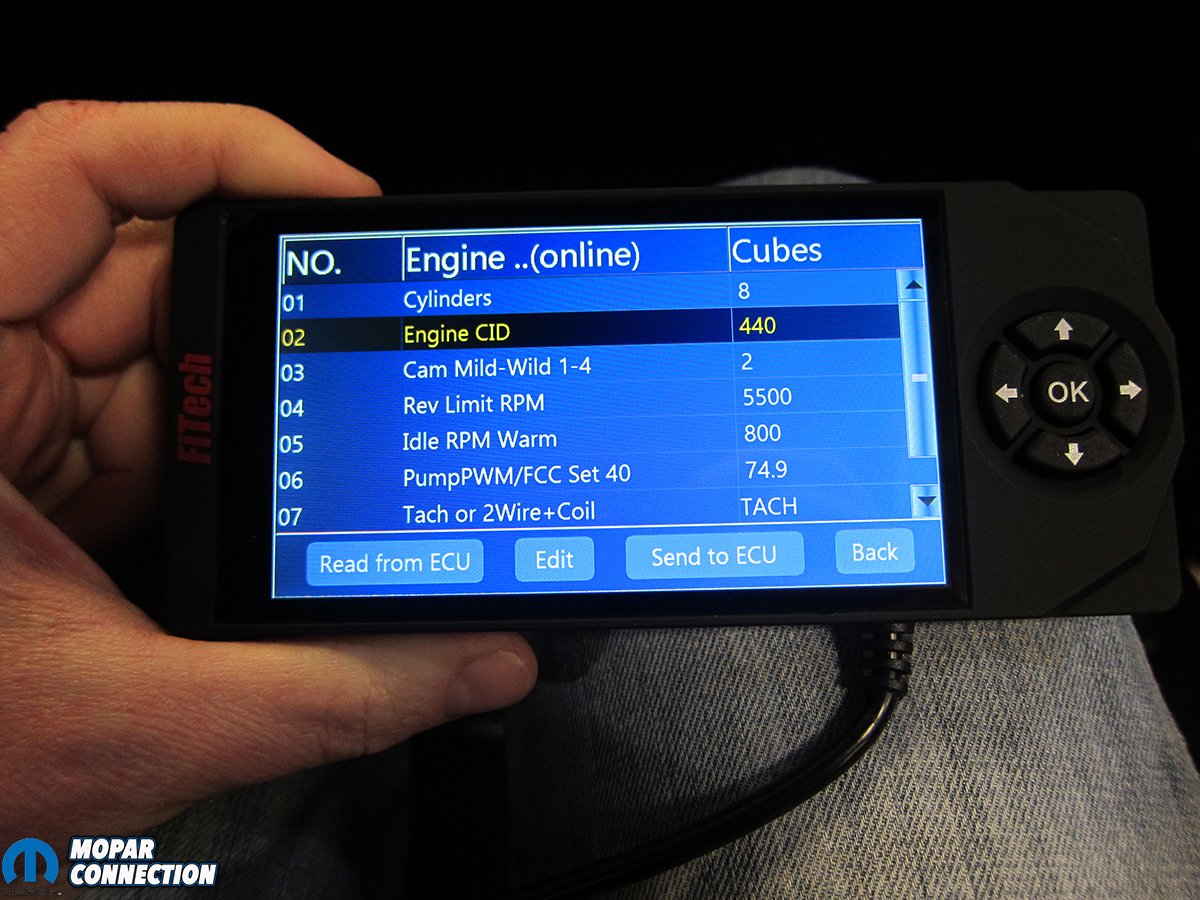
With final fuel and wiring connections made, it was time to prepare for the maiden voyage. First off, we left the fuel pump power wire unhooked and cranked the engine over for about forty seconds to make sure the mechanical pump primed the Force Fuel’s tank. After that, we connected the fuel pump wire and moved on to pre-start tuning. FiTech’s new 4.5” touchscreen handheld and intuitive programming made the initial setup quick and easy. Within the engine calibration screen, we adjusted cubic inches and warm idle RPM to the appropriate values.


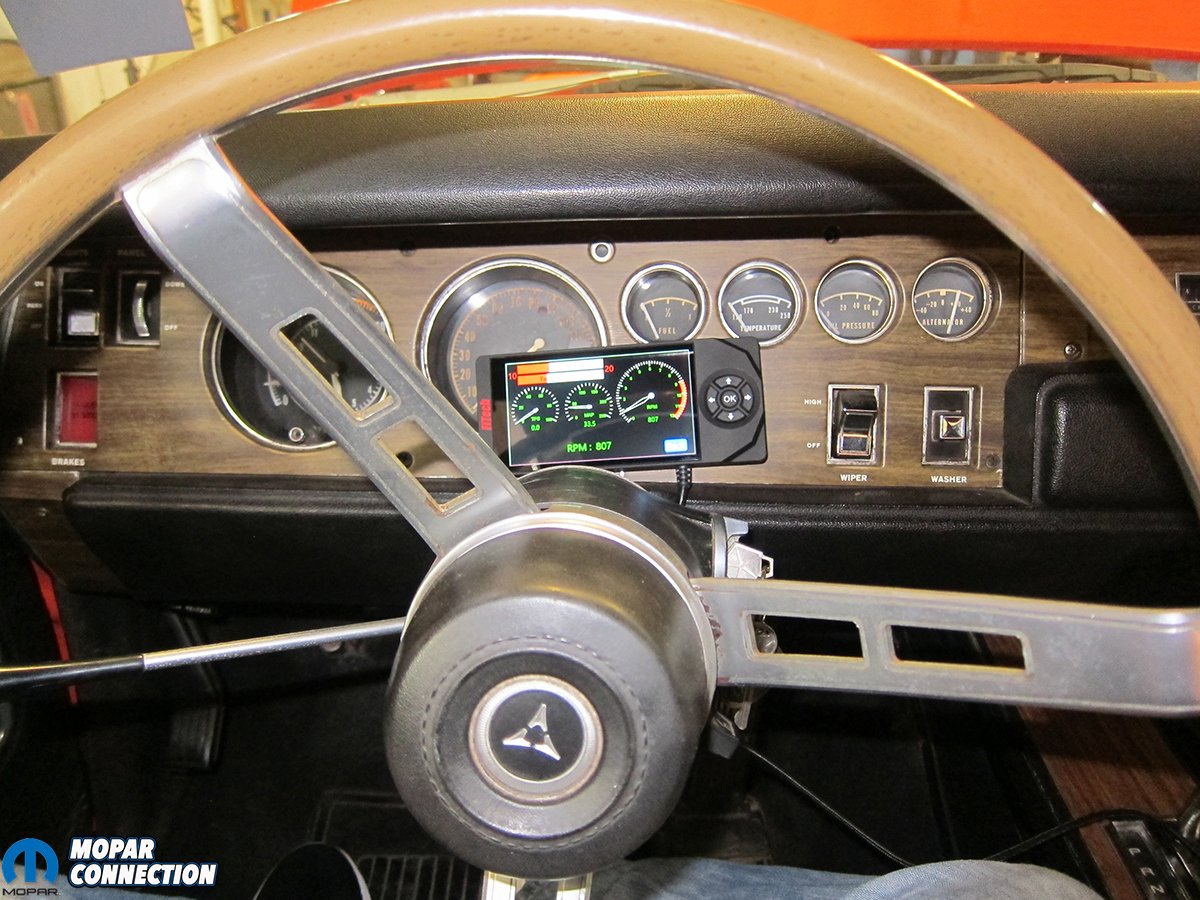
Top Left: From a short distance you can barely tell we changed anything. Top Center: We need to rub some dirt on the Force Fuel system and no one will be able to tell we have EFI. Top Right: We positioned FiTech’s digital dash for easy viewing while cruising the streets. Bottom: The multiple black marks should tell you how well the GO EFI 4 unit is working.
After that, believe it or not, we were ready to turn the key. Right away, the big-block roared to life and settled down to cold idle RPM. We didn’t have to pull on a choke cable or worry about idle mixture screws; the EFI had it all handled. Switching the handheld to the large gauge dashboard mode allowed us to keep an eye on vitals. Air-to-fuel ratio (AFR), TPS, MAP, and RPM were all spot-on, so we stepped out onto the highway.
The best part about a self-tuning EFI installation is that all you need to do is drive it. Mile after mile, the system learned how to best feed our big 440 Magnum. After a couple of trips around the countryside, we could tell that it was dialed-in and ready for a wringing out. Standing on the skinny pedal, the throttle body opened wide as the rear rubber went up in a plume of smoke that the AVS was never able to properly muster.
The proof was on the pavement. A couple of healthy Sure-Grip smokies from the 295/50R15 rear tires told the tale of FiTech’s capabilities. Now that we know the Go EFI 4 and Force Fuel installation is this simple and turnkey performance this easy, we’re thinking we might have several more retired carburetors laying around soon.


I think one big problem with converting to EFI is the cost. There are other ways of curing vapor lock or heat soak problems. You should probably put the price of these systems online with your article. I would bet most people reading this probably hire a mechanic to install it raising the price even more. Sorry I’m old school, and a mechanic of 40 years. I will keep my carburetor.
Certainly! But the conversion to EFI also radically improves the driveability and dependability. FiTech systems barely out-price a new Holley double pumper and fuel pump too.
Excellent article, it looks like EFI is the way to go, especially with all the ethanol fuels.
My cuda has a radical camshaft and the idle is quite rough. Cold engine startups require constant pumping of the throttle. Would this system adjust for this type of engine? Thanks
Certainly! But the FiTech system we installed is only rated for 500-550HP. Other systems will better suit higher horsepower applications.
Hi I was wondering where u came across that harness connection that’s attached to the firewall