


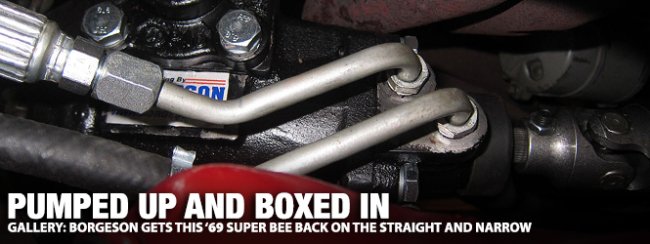
Few things are more important than control when your foot is on the floor of your favorite muscle car. All the horsepower in the world is no good at all if it can’t be pointed in the right direction. While the factory power steering setup performed well enough for millions of Mopars over the years, steering technology has come a long way since the 1960s. Borgeson has pretty much been around since the advent of automobiles with a history dating all the way back to 1914 so, when it came time to oust the old rudder in our 1969 Dodge Super Bee, it was obvious that they were the company to call.
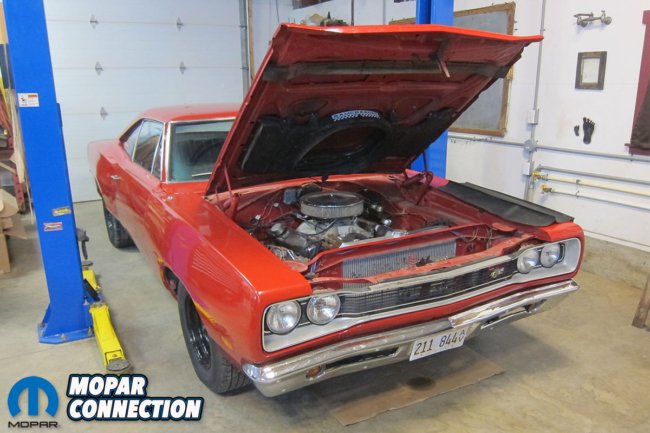
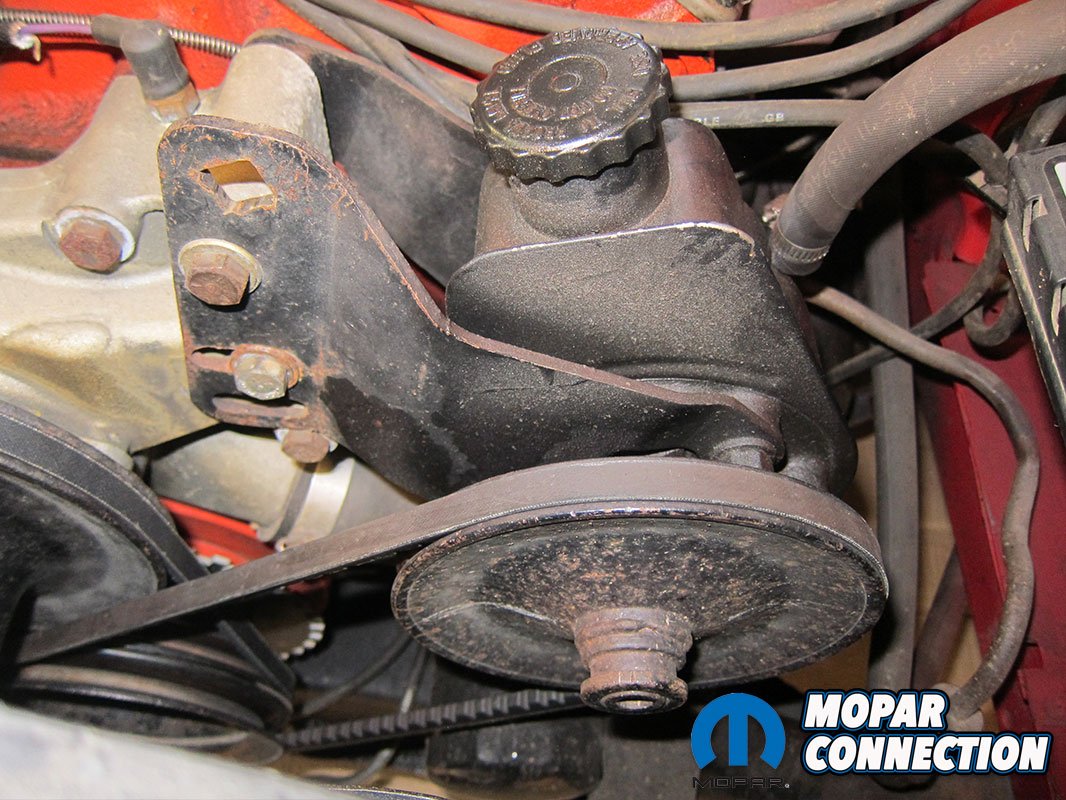
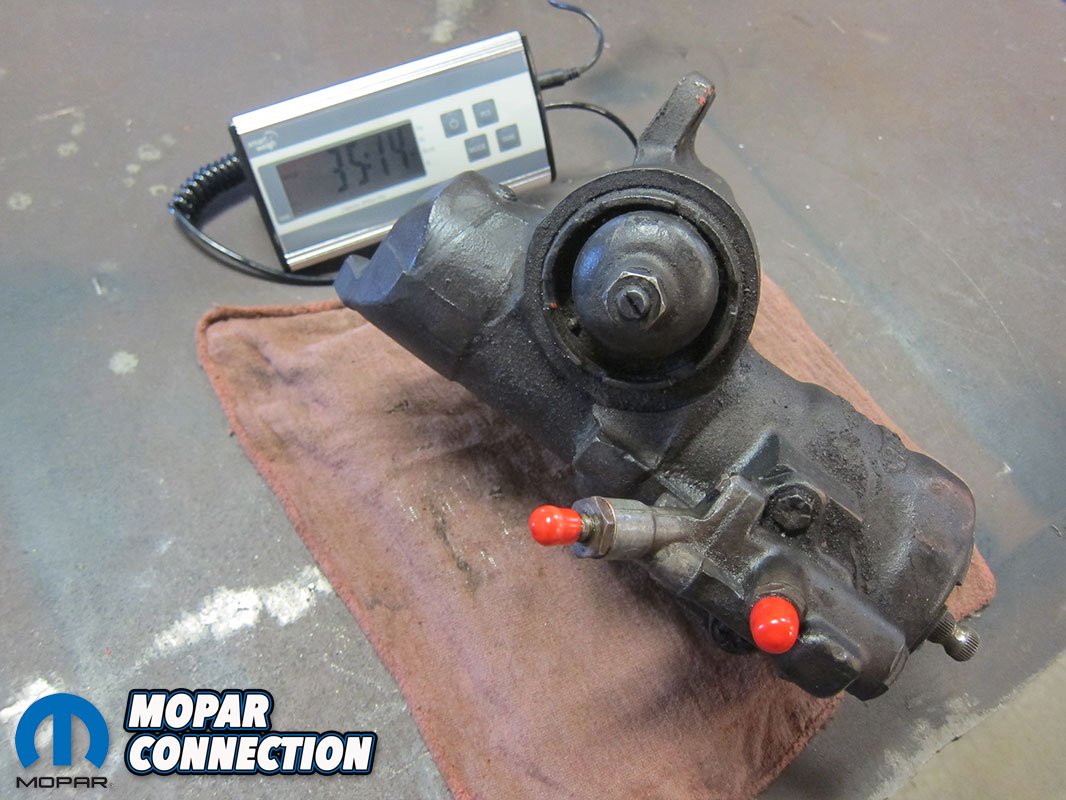
After fifty years of use and abuse, the Bee’s factory power steering often felt more like a suggestion box than a sure-fire steering gear. Wandering was plentiful, there was little to no road feel, and every single component was leaking some kind of territory-marking fluid. Unfortunately, when the car was restored, the only love the steering got was a fresh coat of paint. A K-frame drenched in power steering fluid was the last straw before going to Borgeson for help.


Above: Every single component of the Super Bee’s factory steering setup was both leaking and under-performing so it was time to fix that.
Their recommendation was not just a new box, but a complete new system to upgrade, upstage, and otherwise annihilate the shortcomings of the factory parts. A Mopar big block kit for 1-1/8” pitman shafts (P/N 999065) was the perfect fit for a multitude of reasons related to both function and fit. With spirited driving always a possibility, a complimentary heavy-duty power steering cooler kit (P/N 925126) was thrown in as well to keep the fluid cool under even the harshest of conditions.
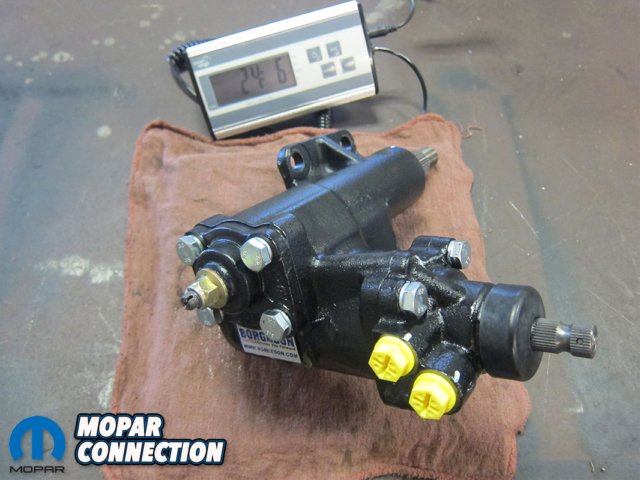
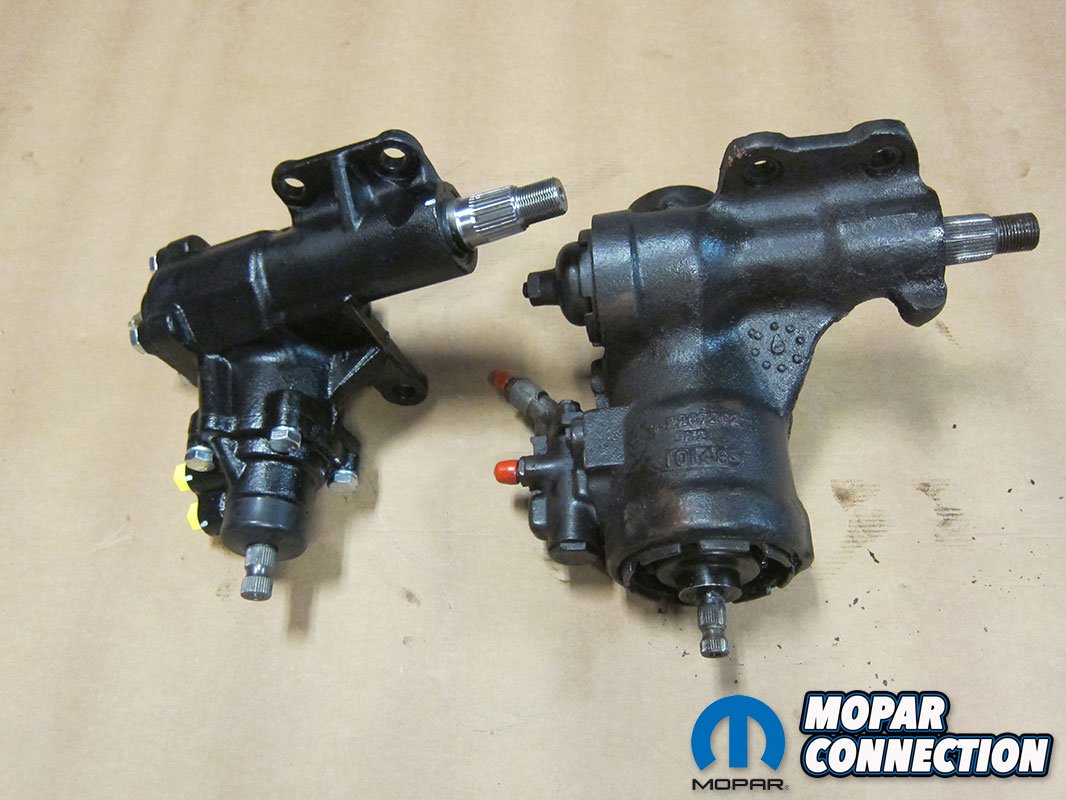
Of course, the headliner of the whole kit was a brand new 14:1 quick ratio steering box. Smaller than the factory steering gear in every dimension, the new Borgeson unit could solve more problems than just the steering. Header clearance can be hugely improved, it’s easier to install, and it’s incredibly lightweight. In fact, our scales showed that it weighed in at roughly 2/3 the weight of the Chrysler box, a substantial difference of 10 pounds.
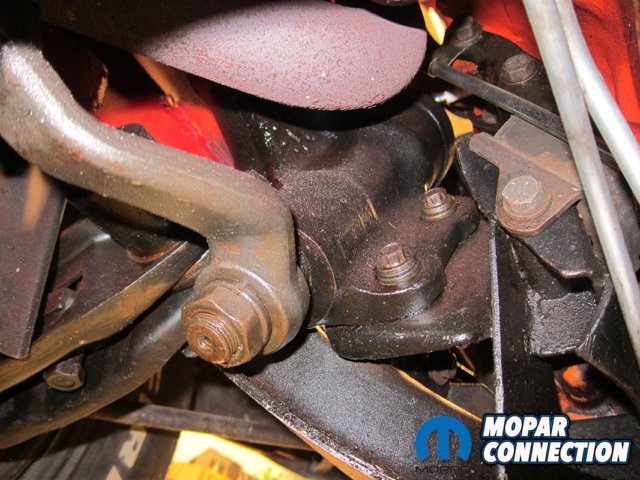
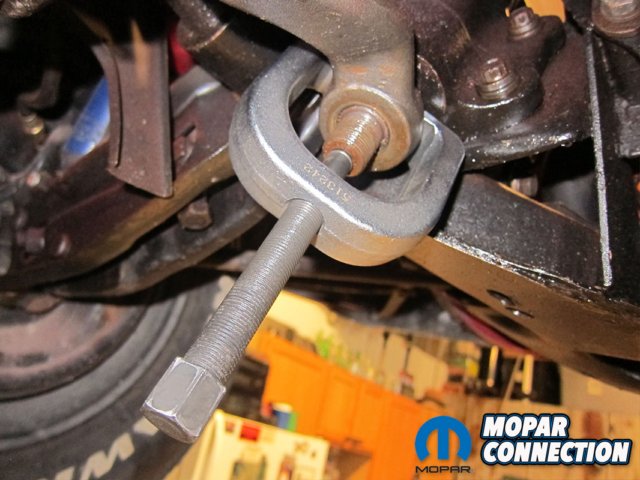
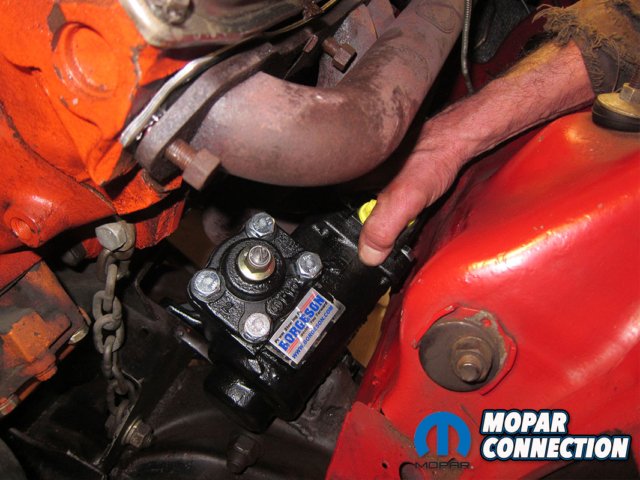
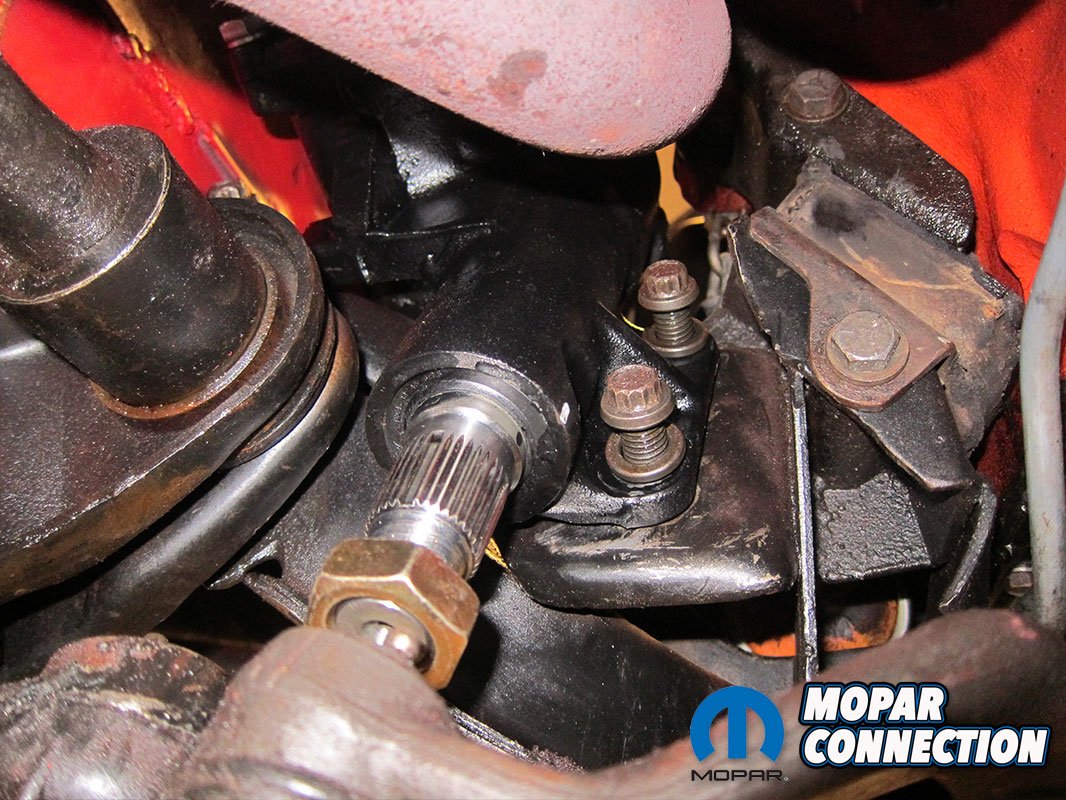
Above: The stock steering box was removed via three bolts and a pitman arm puller.
A new gear wouldn’t be any good without pressurized fluid to feed it, so a new Saginaw-style pump was included in the kit as well. In comparing it to two older Saginaw pumps, there were only a few inconsequential differences. The new unit was pretty much a dead-ringer for what is commonly known as the “later” Saginaw pump (pictured center). The more noticeable difference was between the new Borgeson pump and an “early” Saginaw piece from a big block 1969 B-body (pictured right). The earlier pump is easily identified by it’s tall, oval filler neck and spoked pulley. Rest assured that most casual onlookers wouldn’t even spot the difference.
Aesthetics aside, the new pump was designed to perform at or above the level of either original pump. Plus, it was specifically tailor for the Borgeson application for exactly the right pressure and flow. Aside from being brand new, the biggest advantage of the Borgeson pump was its heavy duty front bracket. Borgeson was able to simplify the bracketry by beefing up the front bracket and eliminating the rear one. The result was a really cleaned-up look on the engine with unquestioned sturdiness as well.

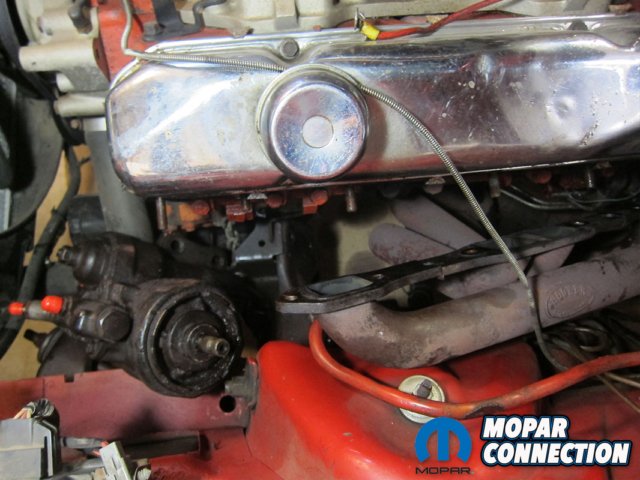
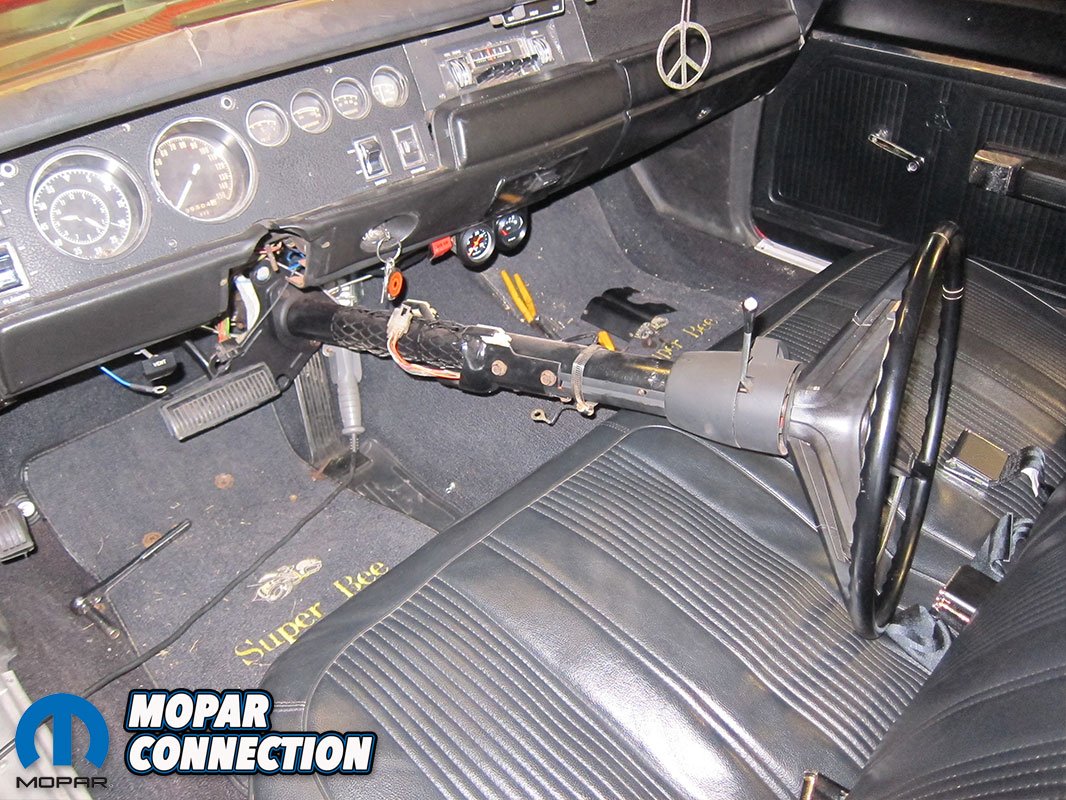
Above: With the column, headers, and starter out of the way, the steering box came out the front.
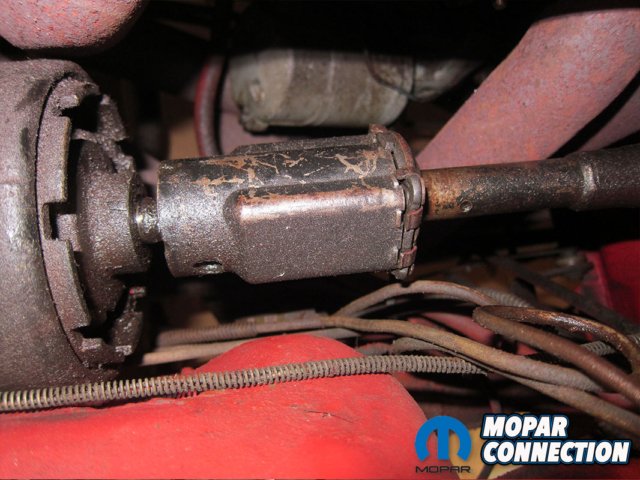
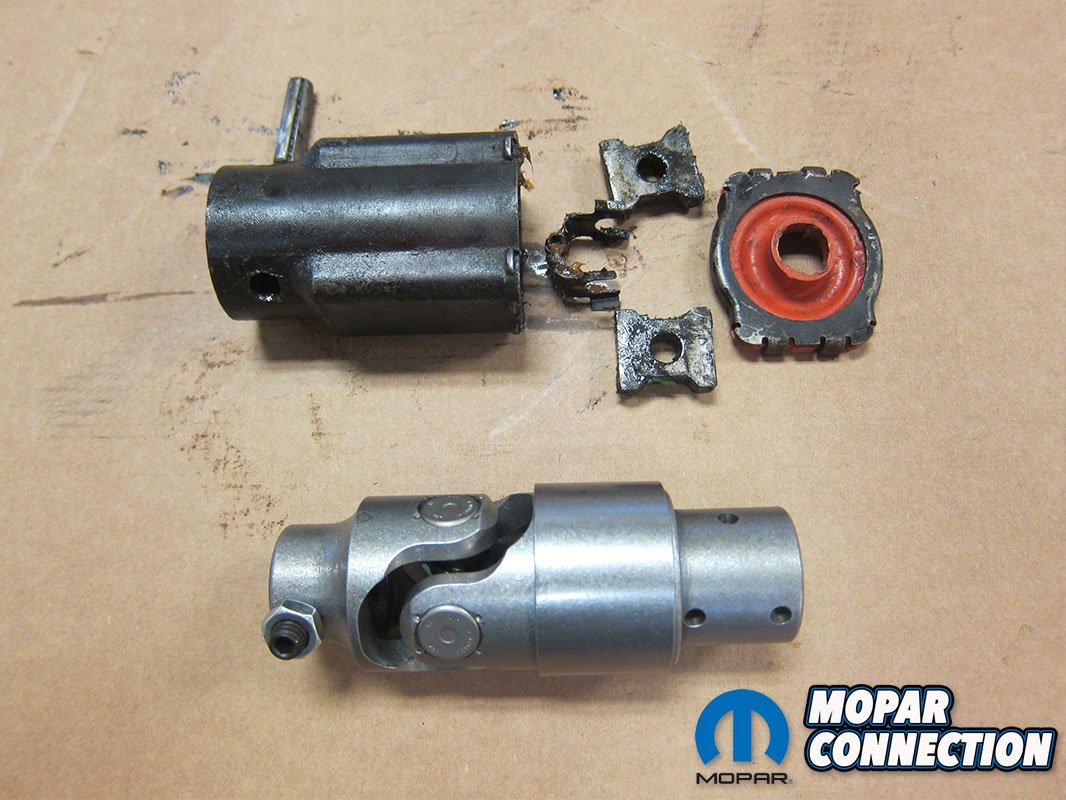
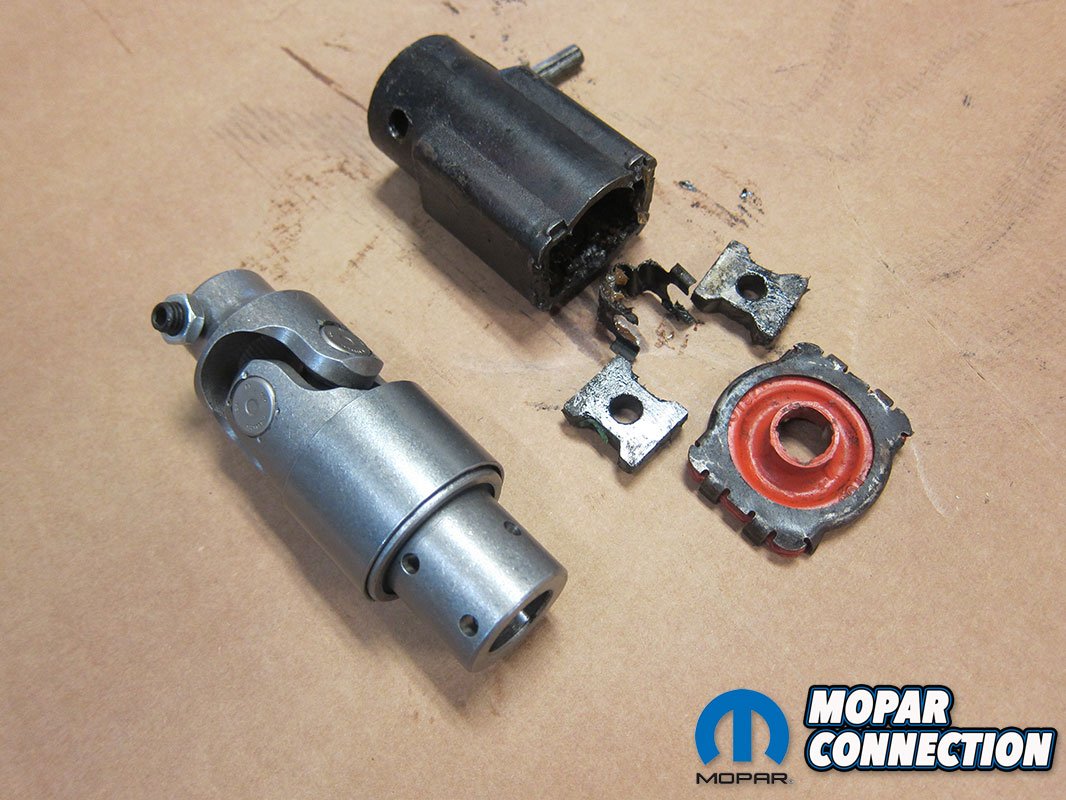
Tying the kit together was a modern-style Borgeson steering coupler. The factory coupler incorporated a slide-together assembly with a set of shoes pinned to the steering shaft. Packed full of grease and sealed with a cover cap, it was a serviceable piece for sure. However, inevitably, the seal would end up leaking and grease would start to creep out and cover surrounding components. Borgeson’s replacement is a sealed, U-joint-style union with integrated vibration dampening. Since it doesn’t require grease packing, it’ll be a much cleaner solution long term. Furthermore, the three-pin connection to the steering shaft is rock solid and should be maintenance-free.
Before we could get any of those new goodies installed, we were in for a fight to get the old box out. With the wheels set straight, the first component to go was the factory column-to-box coupler. A single roll pin held it to the box’s splines, so we drove it out with the appropriately-sized punch. From there, the column was pulled per the service manual instructions. Between the firewall attachment plate and the column support under the dash, there were seven bolts to remove before giving the column a gentle tug and disengaging it from the box splines.
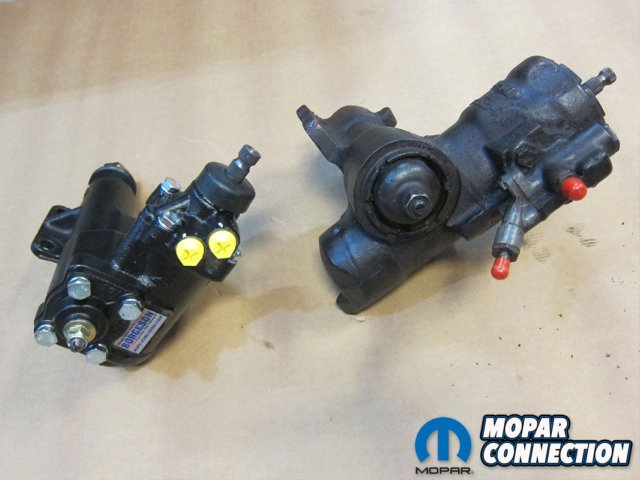


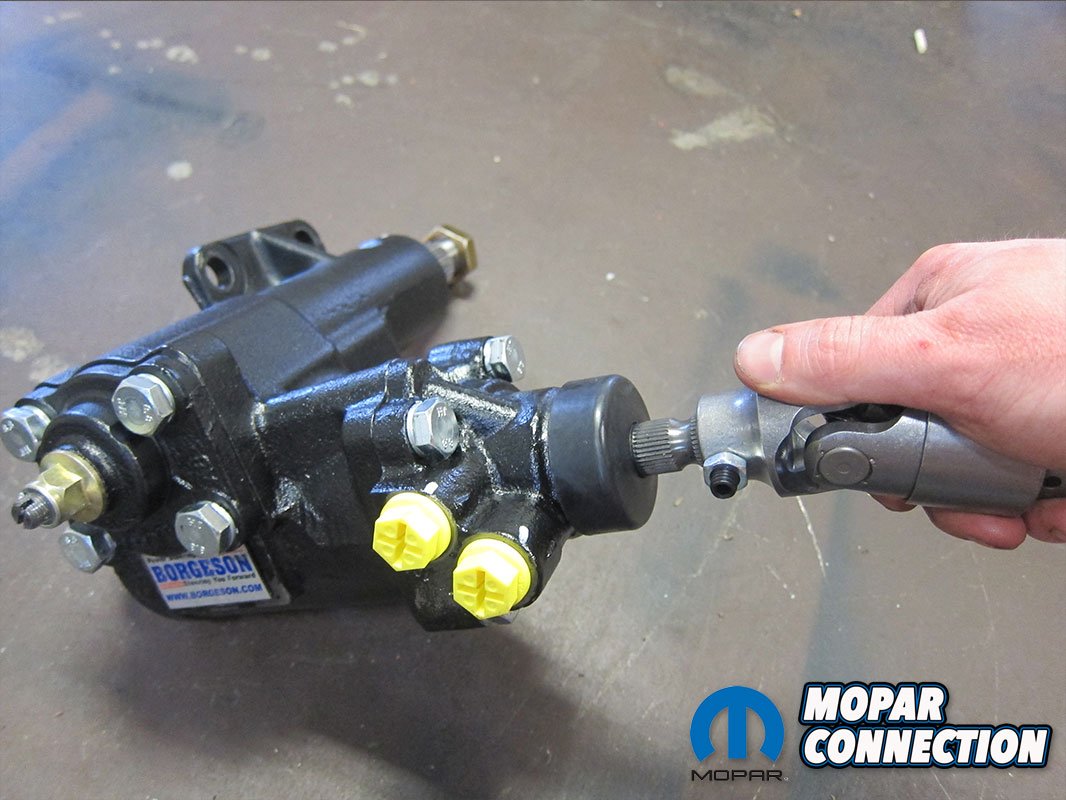
Above: The new Borgeson unit is a massive upgrade in performance, size, and weight compared to the original unit.
After we drug it out the passenger side, it was time to move back under-hood. Detaching the box was simple enough with a puller to remove the pitman arm and a ratcheting wrench to take care of the three K-frame attachment bolts. With the starter removed and the driver’s side header tilted backwards, the box easily slid out the front side. Miraculously, we didn’t even have to lift the engine or remove the torsion bar.
Prior to throwing the new parts on, there were a few pre-installation confirmations to make. To verify center on the new Borgeson box, we put the new coupler on, turned it fully to the right, then brought it back 1.75 turns to center. A mark was made on the housing and the shaft so we could make sure nothing moved. Sliding it in the same way the old box came out, we immediately noticed clearance aplenty around the big Hooker tubes.


Above: Comparing various Chrysler-applied pumps, the new Borgeson pump (left) fit right in. Below: The new coupler (bottom) was cleaner, sleeker, and simpler than the factory assembly.


The ease at which it dropped in to place was surprising after dealing with the outgoing anchor. The new box mounted in the exact same three holes as the original, so we reused the factory bolts and torqued them to specification. Since the Borgeson box incorporates a factory-style 1-1/8” pitman arm shaft (or 1-1/4” depending on application), we reused the original pitman arm and installed it with fresh hardware.
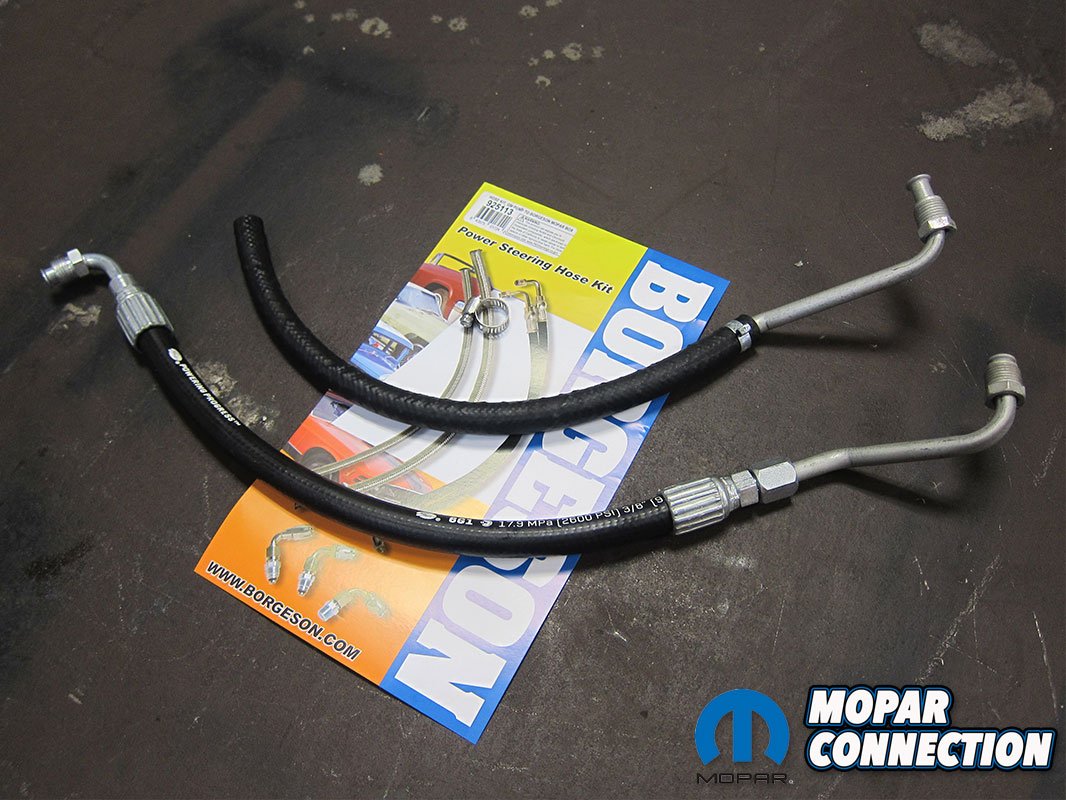
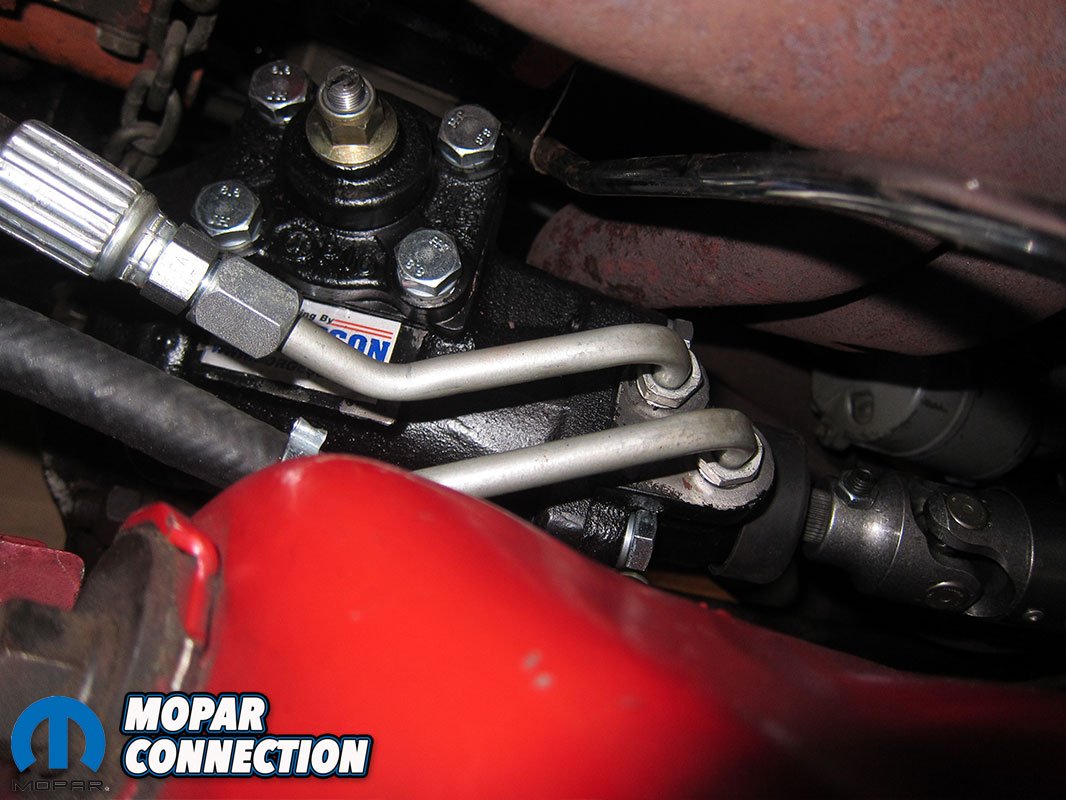
Pump mounting was similar to stock with the aforementioned beefy bracket hanging on two water pump bolts. Two new lines, one for pressure and one for return, were also included in the they-thought-of-everything kit. The pressure side was straightforward as one end connected to the pump and the other to the box. On the return side, plumbing was only slightly more involved to tie in the in-line fluid cooler. First, we had to find a place to mound said cooler. Since we already had a transmission cooler tacked on the front of the radiator, the obvious place was right below it. After mounting it with the supplied radiator zip strips, we routed the supplied hose, cut it to length, and strapped on the hose clamps.


Above: New lines were supplied along with a complete fluid cooler kit. Below: Verification of center was done and marked before installing.


Turning our attention back to the steering column, it was time to break out the tape measure. The Borgeson instructions were careful to explain the measurement verification process, so we followed along diligently. Luckily, it wasn’t all that complicated. With both the steering box and new shaft coupler locked in place, we measured from the firewall to the face of the coupler.
To our surprise, when we transferred that measurement to the steering column, we found that we didn’t even have to cut the shaft. That won’t be the case for every installation, but we were fortunate to be able to skip this step.


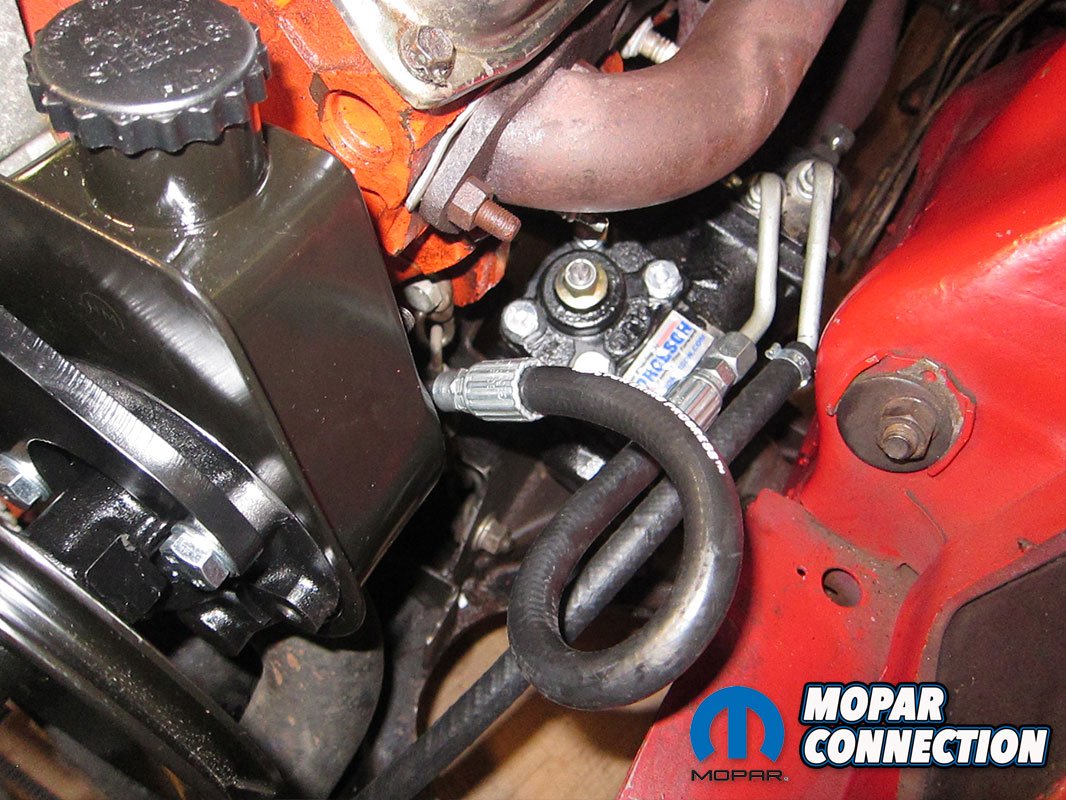
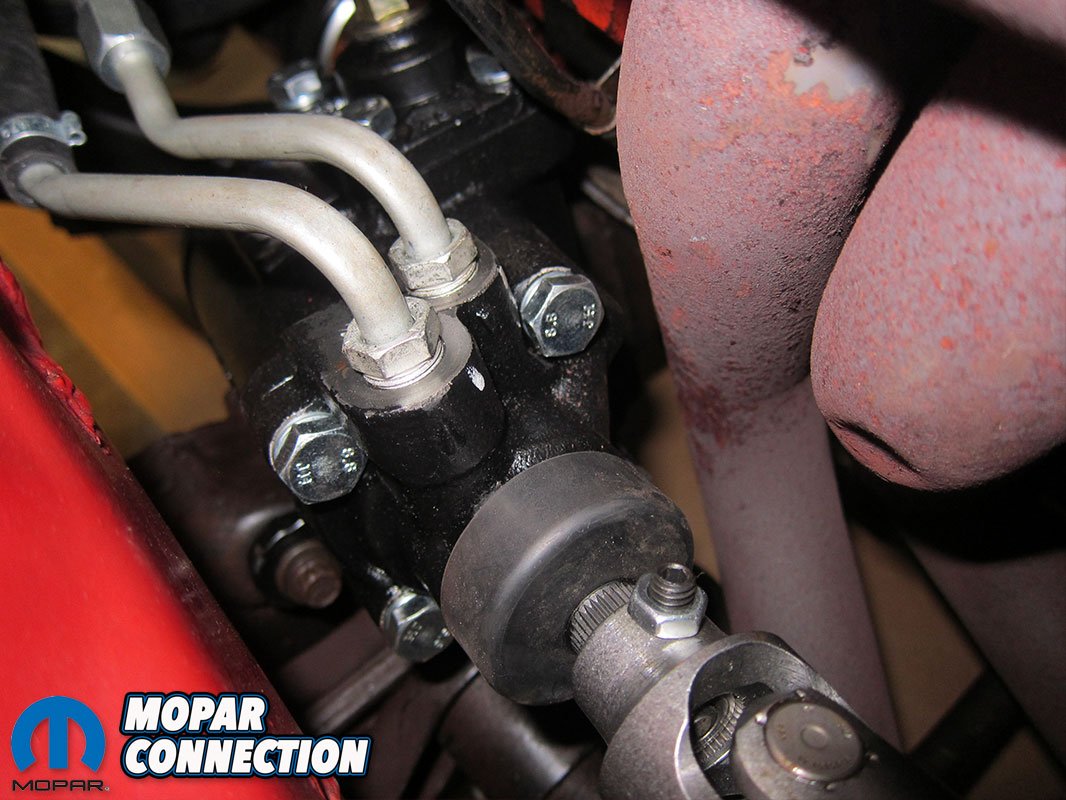
Above: The Borgeson box fell in place with ease along with the pump and lines.
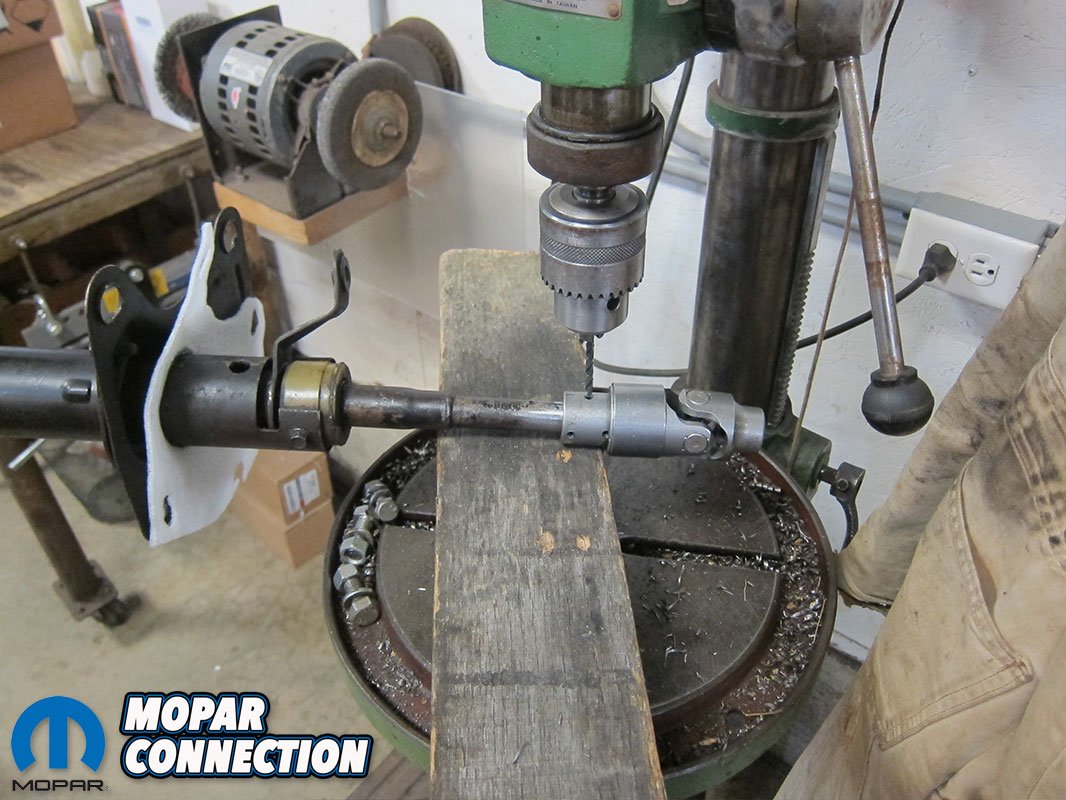
Since our column didn’t need shortened, we jumped right to pinning the Borgeson coupler to the column. Again, the instructions were clear and the process wasn’t difficult. With a shop mate holding one end, the coupler was slipped on, and the entire column was moved over to the drill press. Each hole was both drilled and pinned before moving to the next.
The moment of truth came when the column was reinstalled. To no surprise, our diligent conformance to the thorough instructions allowed everything to slip together with no issues. In fact, mating the column to the box was way easier than using the factory coupler with its shoes, grease, and cap. The Borgeson coupler just slid into place, then was locked down with a set screw, simple as that.


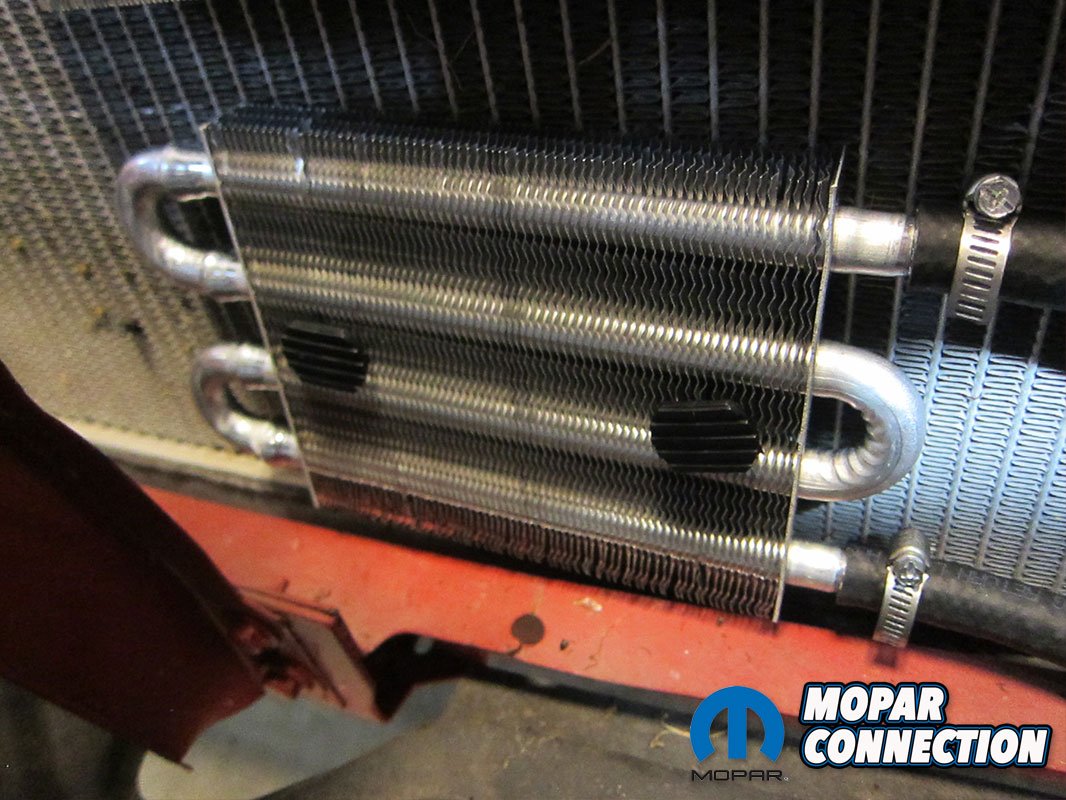
Above: The fluid cooler was mounted low on the radiator, then the return lines were cut to fit.
Before getting out on the road, the pump was filled with a quart of high-quality power steering fluid and left to sit for fifteen minutes to drain down. The system was designed to be self-bleeding, but we definitely wanted to get some fluid moving in a controlled environment prior to taking off down the road. We started by raising and supporting the front end of the Bee to get the load off the front wheels.
Turning the wheels back and forth several times with the engine off started the fluid circulating process. Once the fluid level wasn’t noticeably dropping anymore, fluid was topped off and the car was let back down to start it up. With the engine running, we turned the wheels back and forth slowly again to work more fluid into the system and check for leaks. When no more air bubbled up through the pump, it was time for a test drive.


Above: Drilling and pinning the shaft was done outside the car. After that, the assembly slid together as smooth as butter. Below: With everything buttoned up, we noticed a massive amount of breathing room around the new box. Even the big-tube Hooker headers were well clear of everything.


Even before turning out onto the road, it was clear that the steering was much improved. Slow speed maneuvering through the driveway was sure and stable with minimal effort. On the highway and up to speed, we were blown away by the Borgeson system’s perfect mix of responsiveness and road feel. While a point-and-shoot yank of the steering wheel would’ve put us in the ditch with the old box, the Borgeson unit followed direction like a well-trained Bloodhound.
Even down the straightaways, it was set it and forget it to track right down the middle of the lane. In the corners, any input to the steering wheel exactly matched output to the road and, for a moment, we forgot that we were driving a fifty-year-old automobile. In just two days, we’d gone from wandering wayfarer to a Borgeson-built beeline buzzer. No doubt, that weekend of wrenching will be well worth the trouble when it comes time for this summer’s weekend warrior duty.


This swap was done in Mopar Action a few years back using the same PS box as this but they got it from a 2000 ish Jeep 4.0l Cherokee and you can do the same for cheaper if that’s your thing
Unlike E-booger’s “junkyard crawl” way of offering tech, we actually pride ourselves on providing actually doable, replicatable tech using companies who stand by their product. Digging through a scrap yard leaves you with a lot of parts missing, a lot of unproven product, and far less-than-top quality condition parts. No way, Raymond. I don’t recommend using them at all.
The header photo doesn’t look like a Hemi orange Superbee to me. l might be mistaken but it Looks more like a green GTX .
What was the dollar figure at the bottom of the bill for this? Or was it product placement trade for publicity? Fine if it was, I simply think that publishing the cost, or the fact that it’s a trade, is a fact that should be included, as what it costs to do this as far as purchasing parts, is important for guys to get a ballpark idea so they’ll know if this is a any payday thing, or a income tax return item
lazy, go look it up , they gave you the exact part numbers.