


The classic Mopar B-body has some of the best lines of the muscle car era. Unfortunately, the B-body also has some of the worst potential damage areas too, some of which can remain hidden for many years, only to be found when the damage is too severe for simple repair. The front subframe is one such area.
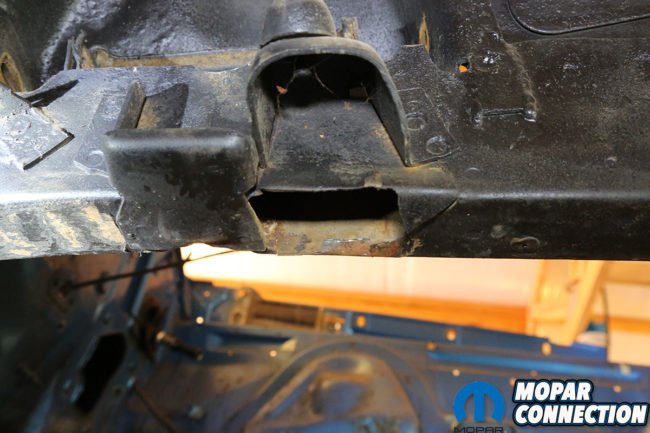
The top of the subframe is open along several places on the body, allowing dirt and water to collect inside the subframe. Eventually, the steel rusts through, leaving the uni-body structure in bad shape. Add to the potential rust issues, the K-member bolts to the subframe as well, and the hard lives these B-bodied cars have often been subjected to leads to cracks. All of these are potentially deadly situations, so it pays to be careful.
Repairing this type of damage depends on what and where the damage is. Replacement subframes are available, but they are expensive and the installation process requires massive surgery on your car. Often, you can get away with simply rebuilding the affected area with a home-made patch.
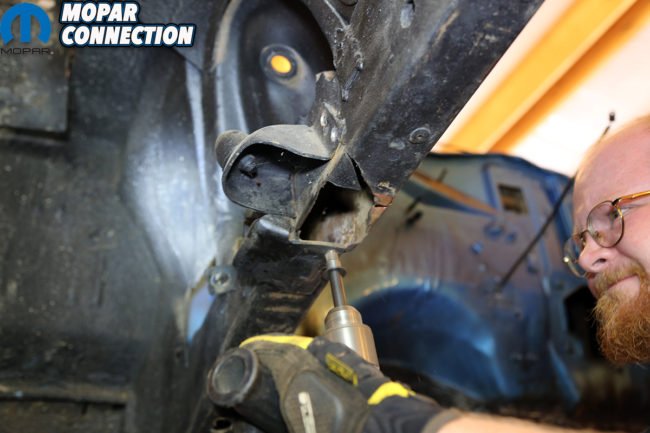
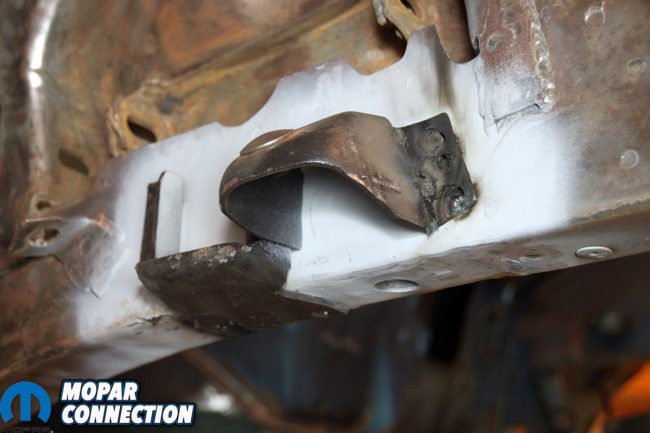
Above left: When the K-member was removed, the backing plate literally just fell out of the frame, this is not a good sign. Above right: We used a rota-broach spot weld cutter to remove the spot welds on the bumpstop bracket, which is in the way of the cracks.
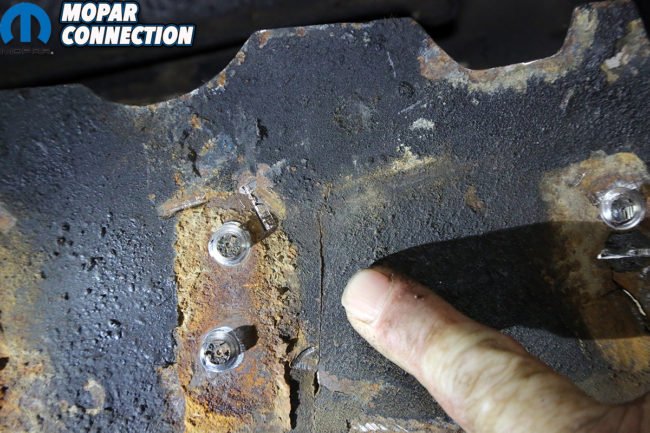
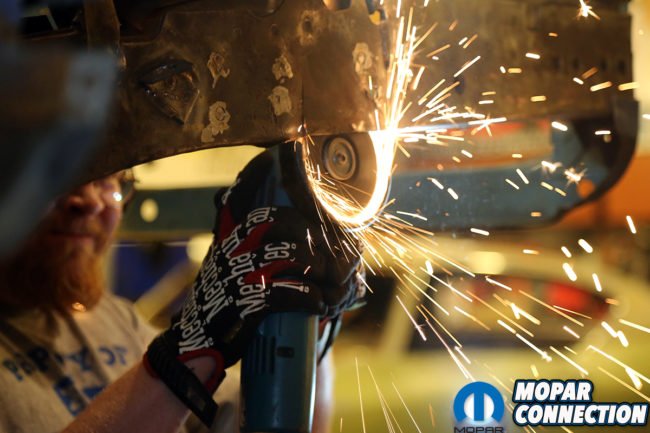
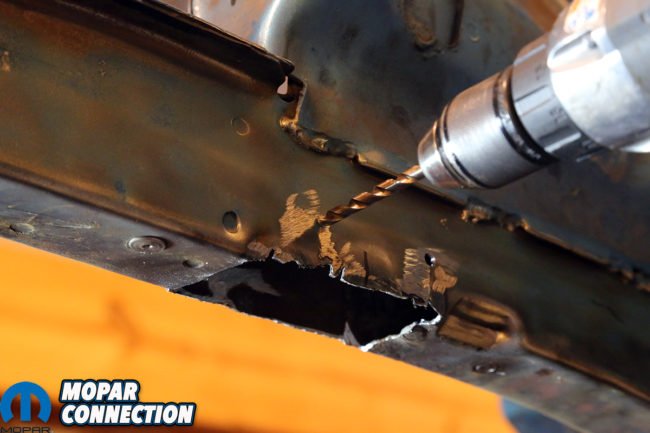
Above left: You can see how high the cracks go up on the subframe, this one is essentially to the top of the channel. Above right: We used a grinder to clean up the spot welds and jagged edges of the subframe opening.
This 1969 Road Runner had lead a hard life before it was chosen for a major rebuild. The subframe looked like it was in excellent shape until the K-member was removed. That was when the passenger side rear mount fell out of the subframe. The subframe had been stressed from hard driving to the point that the metal was so weak, the backup plate for the K-member bolt ripped free from the rest of the subframe. There were a total of 8 cracks in the side of the subframe channel. The rest of the subframe was in perfect shape, but this was an unsafe situation. Rather than cut out the entire subframe, the decision was made to repair it instead.
We reinforced the subframe using a piece of 3×4 box tubing. The original backing plate was reused to secure the K-member, as it was in good shape. By the time the repair was finished, the subframe was substantially stronger than it was when it left the factory. This is a serious repair that require quality welding and fabricating skills.
The process begins with removing anything in the way of the repair. For the K-member mount, this meant the bumpstop brackets that are spot welded to the frame. Using a drill bit or Rota-broach cutter, the spot welds are cut out and the bracket removed in one piece. This will be reused, so don’t trash it or grind it off. Using a grinder with a flap-wheel or a die-grinder with a Scotchbrite pad, clean off the frame and trim up any jagged edges on the damaged area. All of the undercoating and paint needs to be removed so you can find any and all of the cracks on the steel.
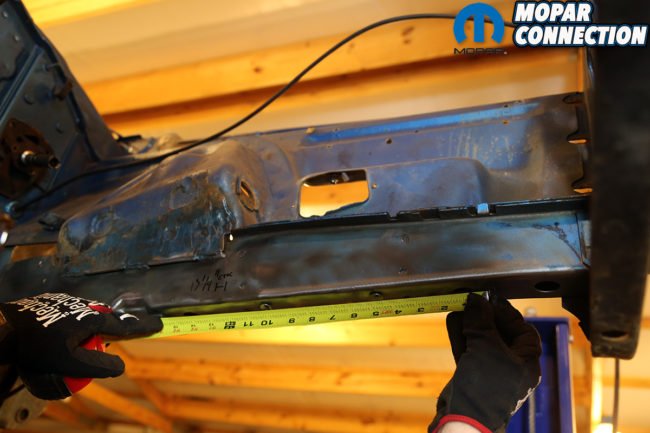
Above left: The repair channel was built from a piece of 3×4 tubing, with 1/8-inch plate added to the sides to make it wide enough. It was perimeter welded and plug welded in the center so that there is no chance of a future failure. Above right: We took lots of measurements on the frame to locate the bolt hole on the passenger side, fore, aft, and side to side. These were noted on the frame and translated to the passenger side.
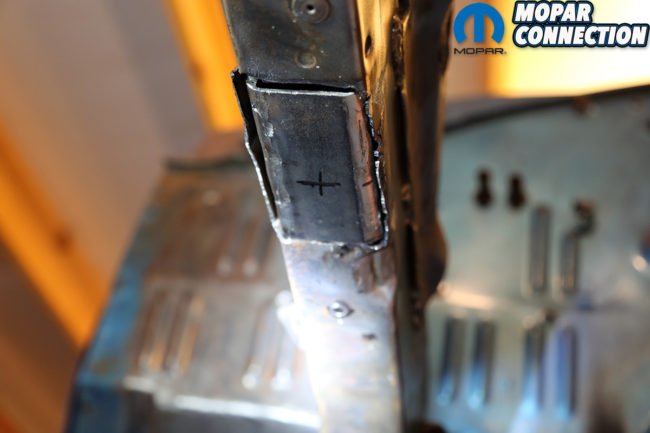
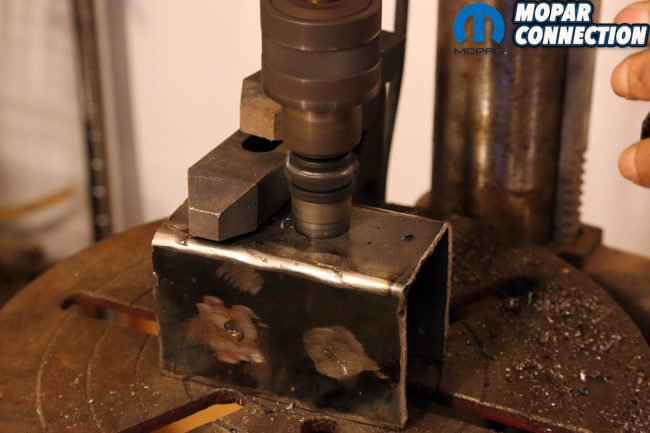
Above left: The repair channel slide up into the subframe and was marked for the bolt location. Above right: Using a large rota-broach cutter, the channel was cut for the bolt hole. This mimics the look of the factory subframe. We also drilled 2 holes for the spot welds, just like the factory.
Locate each crack, find where it stop and drill the end with a small drill bit. A 1/8-inch bit usually large enough to do the job. The goal here is to remove the stress factor so that the crack does not continue. Next, we cut a piece of 3×4 tubing to fit inside the subframe. We had to add a second piece of 1/8-inch steel to the sides of the tubing as the actual subframe is 3¼-inches wide on the inside. The plates were welded to the tubing along the edges and with 3 plug welds in the center of each plate. The tubing was cut along the 4-inch side to match the depth of the factory subframe.
We measured the location of the driver side mount using several locating points front and rear of the bolt hole, and then translated these measurements to the passenger side. The repair channel was inserted into the subframe and marked the location of the bolt hole and added some reference marks to ensure the channel goes back where it needs to be, as it will be test fit several times. With the location for the K-member bolt noted, the repair channel was removed and the bolt hole drilled, along with 2 holes for the spots welds which secure the backing plate and nut to the channel.
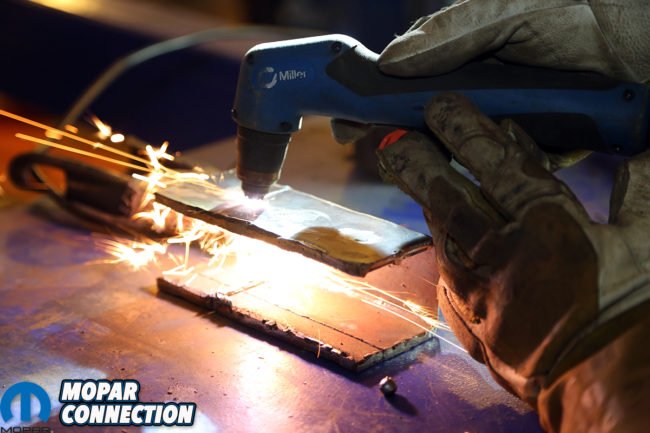
The backing plate had a small section of the original subframe welded to it. These spot welds were removed using the rota-broach cutter. The backing plate was centered in the repair channel, clamped in place and welded with the MIG welder.


Above left: The remaining section of factory subframe was cut away using the rota-broach spot weld cutter. A center-punch makes this task much easier, as the alignment pin needs a divot to ride in. Otherwise, the cutter will walk all over the place. Above right: The backing plate was then welded into the repair channel.

Above left: The cracks were drilled, along with several spot welds for the side of the repair channel. We want this repair to be solid with no chance of moving or cracking out again. Above right: After the channel was installed and aligned to the measurements, the frame was clamped tight to the channel and welded up. The factory subframe is only 14-gauge, so too much heat will warp the channel. We only welded an inch at a time.
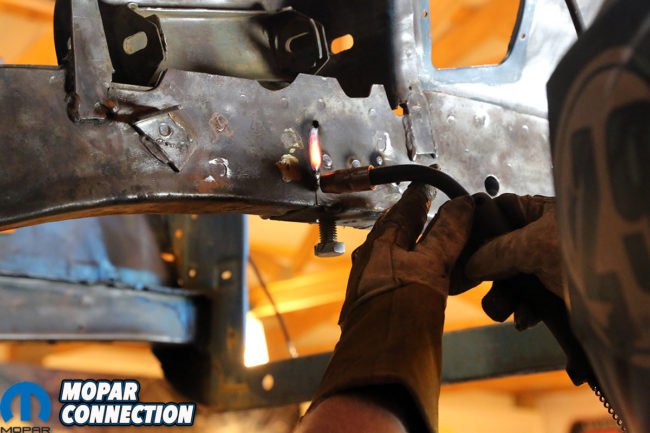
The sides of the subframe were marked and drilled for 3 spot welds. We installed the repair channel, measuring it carefully for placement. The frame was painted with some weld-through primer to protect the metal from rusting. Once it was determined to be in the exact spot, we used to welding clamps to lock it in place. A bolt was threaded into the K-member nut to ensure that no welding spatter gets into the threads. The channel was spot welded to the subframe along the 3 holes on each side. Using the clamps, the edges of the subframe were pulled tight to the repair channel and the repair was welded up using a series of inch-long stitch welds. This helps avoid warpage. The factory subframe is only 14-gauge, so warpage is a real concern.
Once the repair was welded in place, the cracks were welded up. Keeping the welds down to 1-inch increments is a good idea. Not only does this help reduce warping, but also reduces the potential for burn-through on the relatively thin sheet metal.
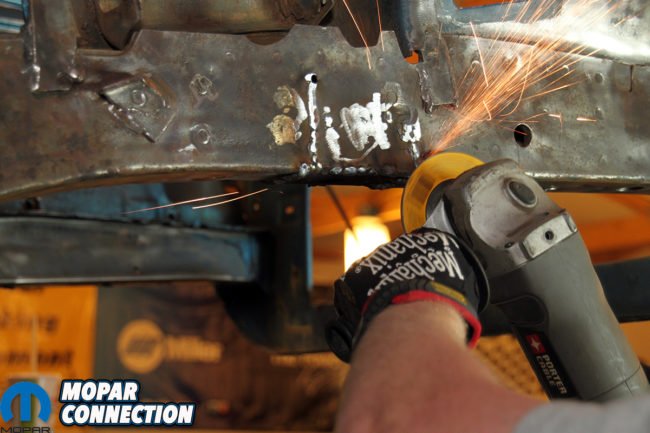
Next, the welds were dressed with the right-angle grinder using a flap-wheel. Unlike a standard grinding disc, the flap wheel makes quick work of the excess weld without leaving large scars on the metal. Flap-wheels also don’t put as much heat into the metal. Once the welds are smooth, we sprayed the frame with some weld-through primer and reinstalled the bumpstop bracket in the original location.
Above left: With the clamps removed, the cracks were welded up. Above right: The flap-wheel was used to smooth out the welds, leaving a clean surface, ready for the finish work.
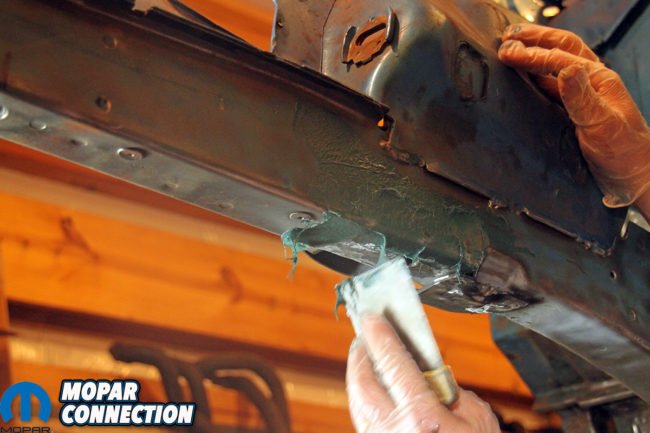

Above left: A high-zinc weld-through primer was applied and the original bumpstop bracket welded back into position. Above center and right: The last step was a coat of fiberglass-reinforced body filler (Duraglass). This filler is water resistant, fill pinholes and is more durable than standard
To finish off the repair, we wiped some fiberglass-reinforced body filler onto the subframe and sanded it smooth. The result is a clean repair that looks like nothing was ever done. The K-member lined up perfectly, and the repaired section is much stronger that it was from the factory. This project took about 2 days to complete from start to finish.


Great repair work! Thanks for the info.