


In our constant quest to lose our 2006 Police Package Charger’s patrol car appearance, we added a pair of American Muscle Spec-D Tuning headlamps and factory fog lights late last year. The Spec-D headlamps with the dual halo projectors and LEDs, along with the fog lights, provided the aggressive front end look we desired, and the nighttime driving illumination was much improved.
Wanting to add to the robust exterior, we contacted the American Muscle reps about a front-end spoiler for the Charger. The suggestion was their front chin spoiler (part no. CR1182) for the 2006-2010 Charger.
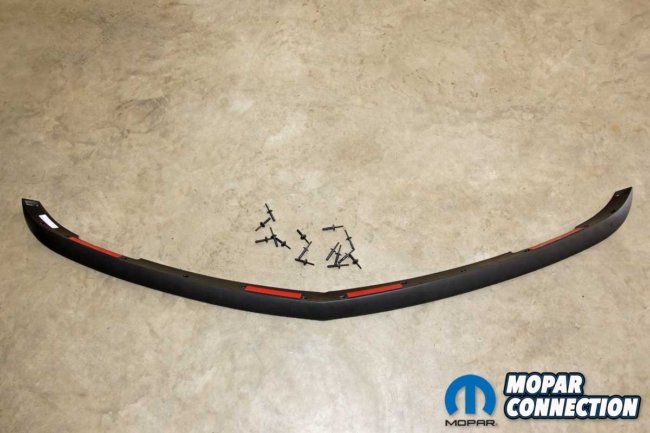


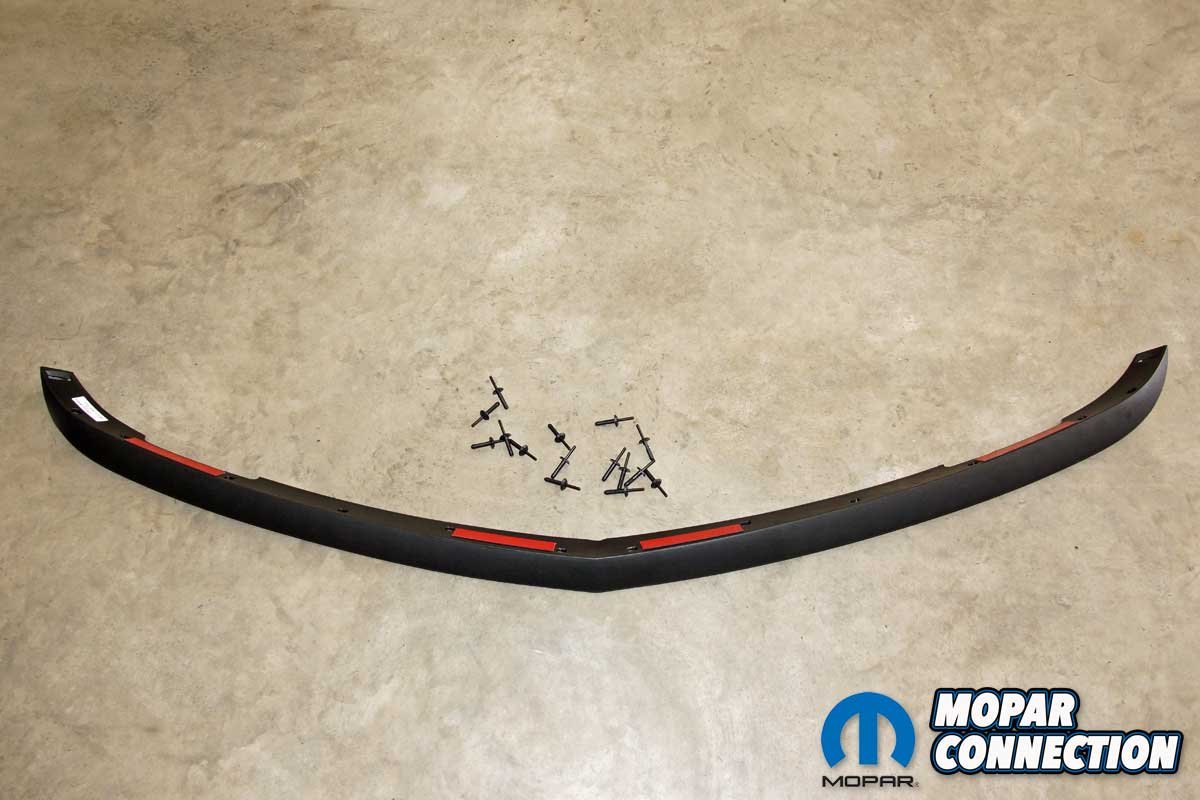
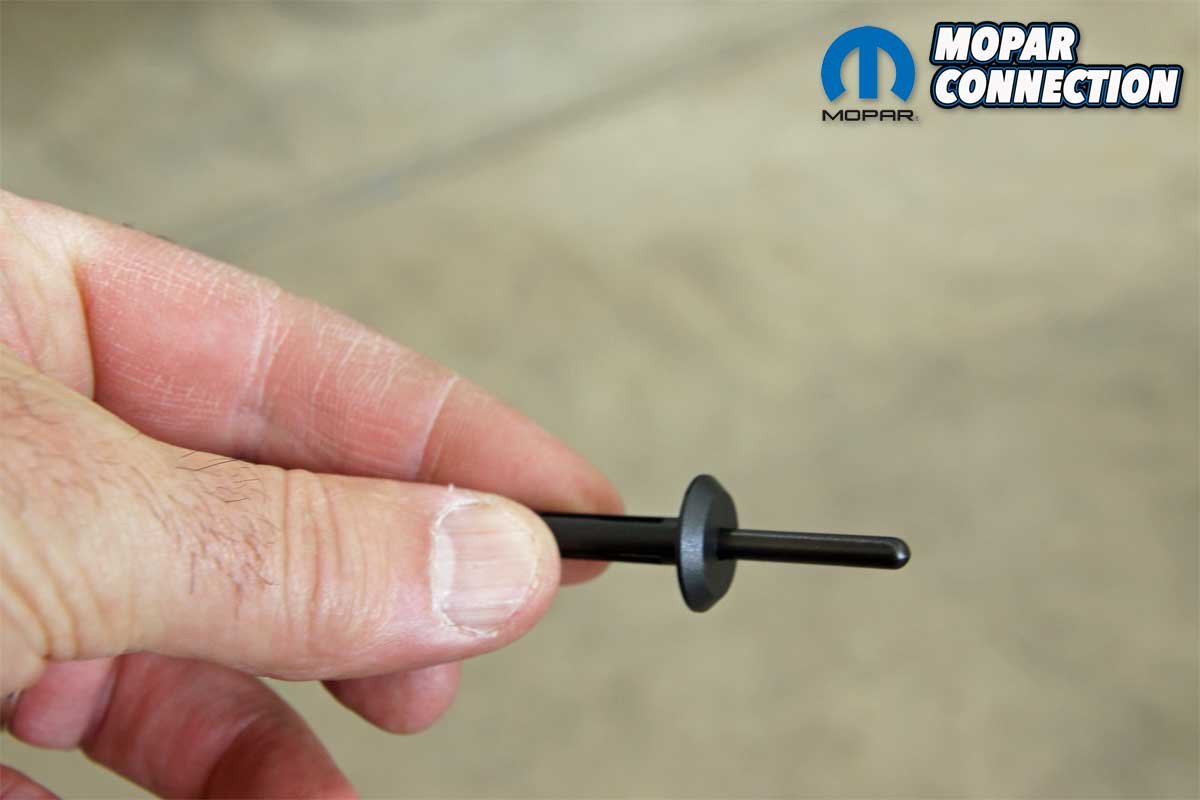
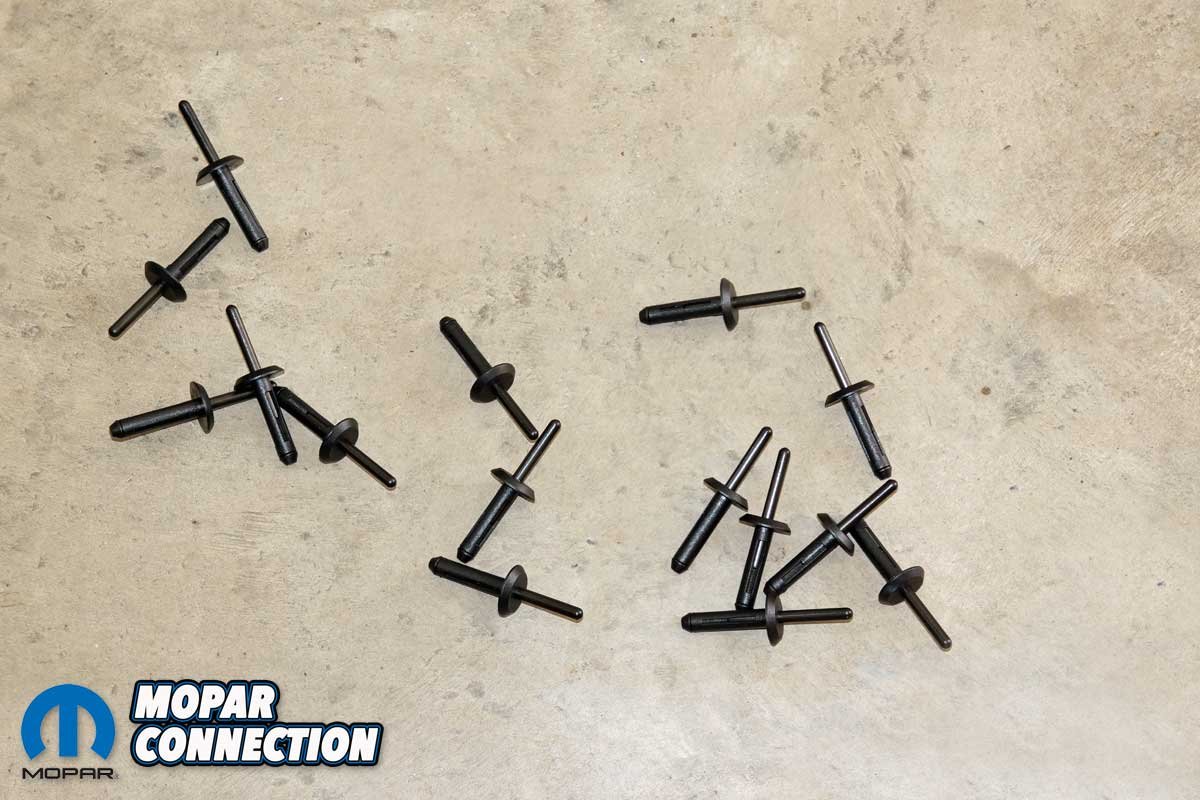
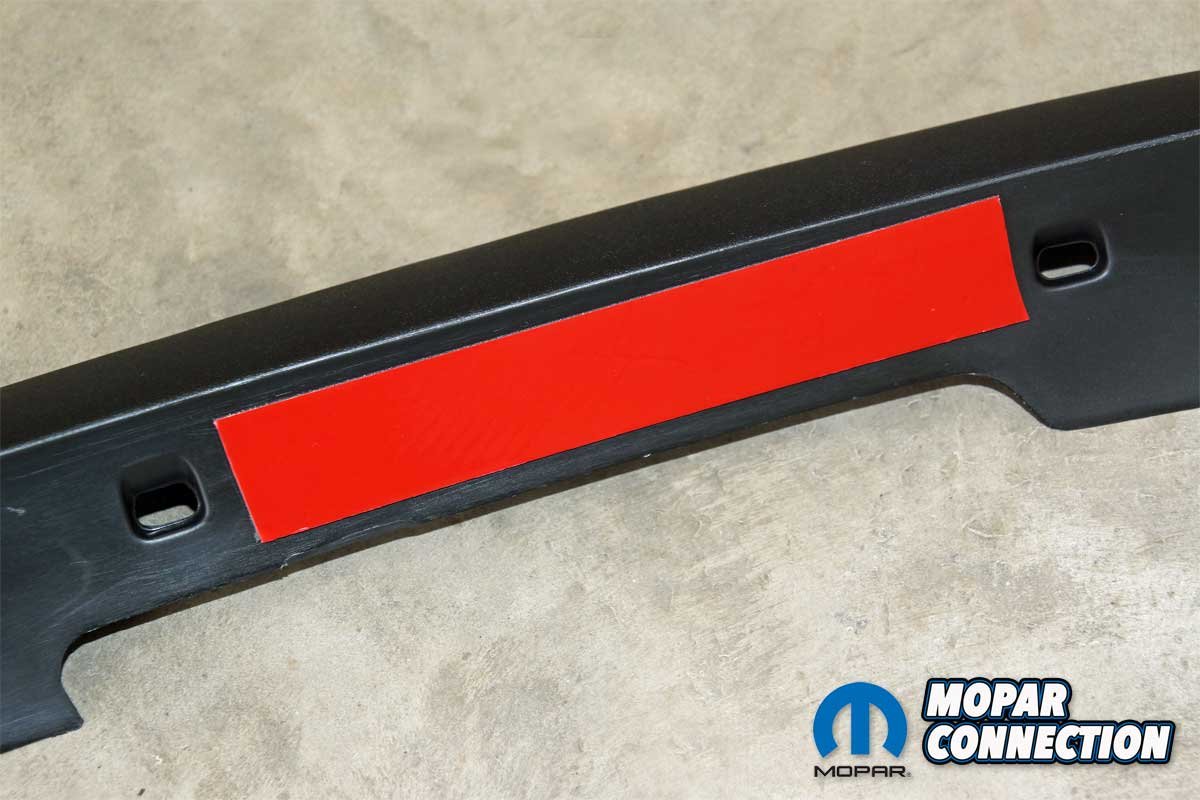
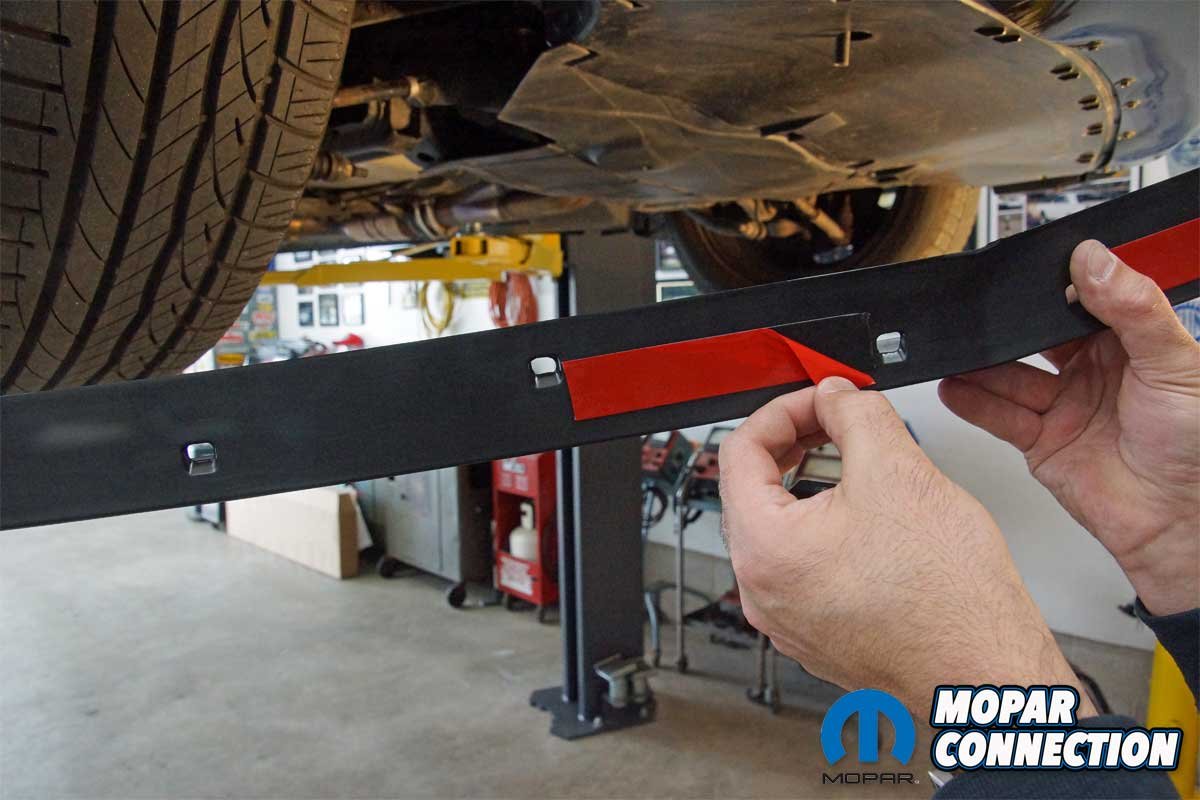
Top Left: The American Muscle chin spoiler is constructed from rugged ABS plastic to withstand minor shocks and abrasions. The spoiler is molded in black and ready-to-install, but it can be painted to match any color. Top Right: The spoiler requires special rivets to secure it to the bumper cover. The rivet’s body is pushed through a drilled hole, and then the pin is pulled. The pin movement causes the body to collapse, which provides the retention. Bottom Left: The chin spoiler kit requires twelve rivets, but American Muscle delivers a few extra fasteners. The extra rivets should not be necessary, but if a mistake is made and one is damaged during installation, you will have a replacement or two. Bottom Right: The spoiler had four adhesive strips attached to the support bracket. Two strips were at the center of the spoiler, and two were closer to the spoiler’s ends.
The chin spoiler is designed from a rugged yet lightweight ABS plastic to withstand minor shocks and abrasions. The spoiler comes in a ready-to-install black molded color, but it can be painted with the correct flex-agent paint to match your Charger’s hue. The spoiler is CNC designed to mimic the bumper cover’s contours and provide an aggressive race car styling.
The chin spoiler kit includes four two-sided adhesive tape strips, one side already affixed to the spoiler, and requires twelve small holes to be drilled into the bumper cover to fasten plastic rivets.
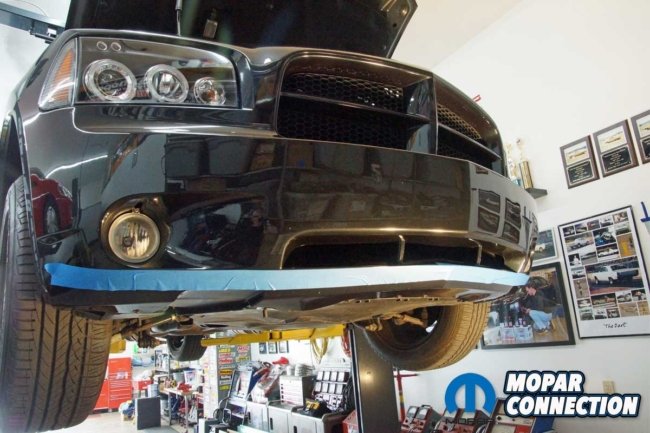
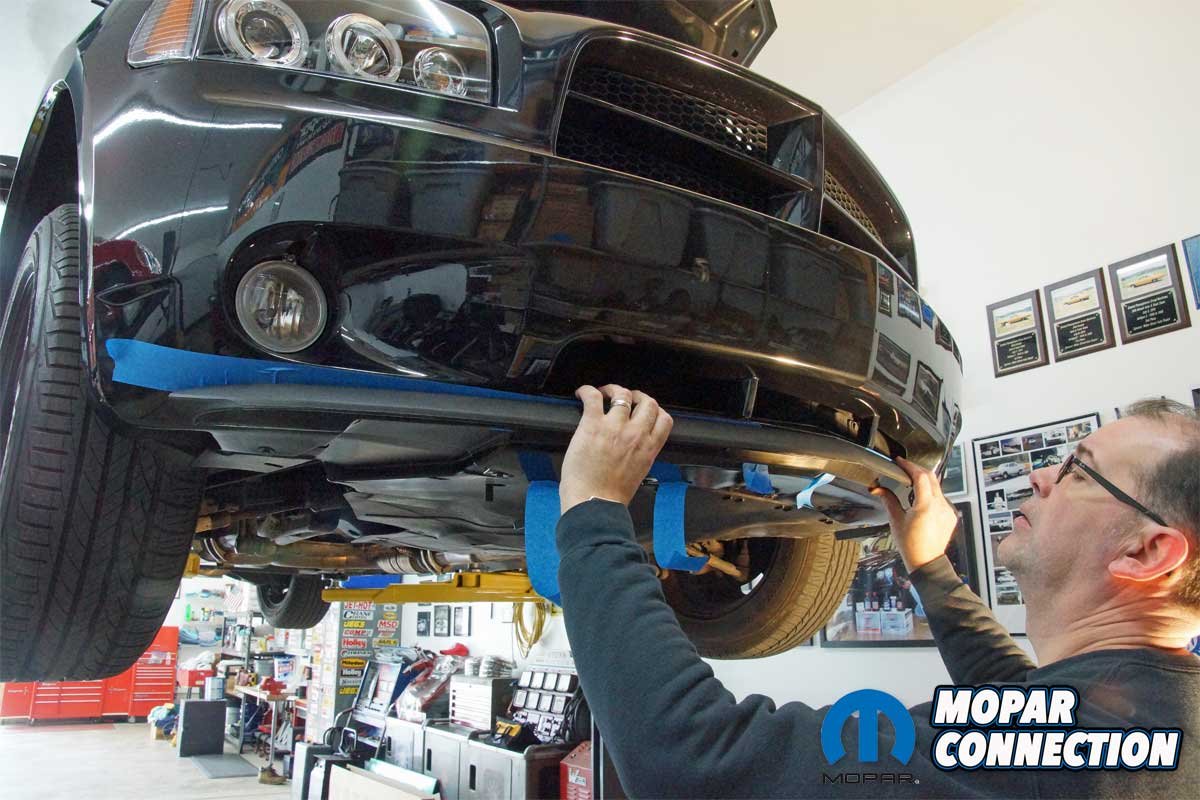
Top Left: Before we attempted to install the chin spoiler, we taped the bumper cover with 2-inch masking tape. The tape provided some protection to the paint as we adjusted the spoiler into position. Top Right: The spoiler is CNC designed to follow the bumper cover’s contours. We found the center point of the bumper cover and matched it to the spoiler’s center point. Once properly located, we taped the spoiler to the bumper cover. Bottom Left: We peeled back the centermost adhesive strip covers to hold the spoiler in place before drilling holes and riveting it to the bumper cover. Bottom Right: The adhesive strips are very sticky, so we made sure the spoiler was properly located before applying pressure to the spoiler’s attaching bracket.
To install the chin spoiler, we placed several layers of 2-inch masking tape over the bumper cover area where the spoiler would be placed. We found the center of the spoiler and matched it with the peak of the lower bumper cover.
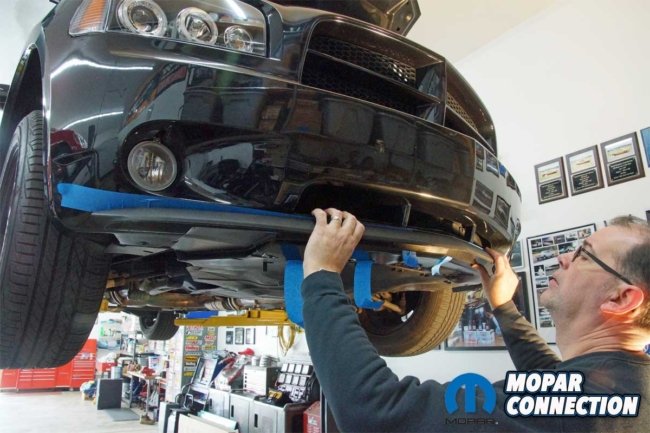
We used masking tape to hold the spoiler in place and adjusted it to maintain an even distance from the lower grille opening and the top of the spoiler. Additionally, we matched each air duct opening (one per side) with the recessed area of the spoiler’s mounting tab.

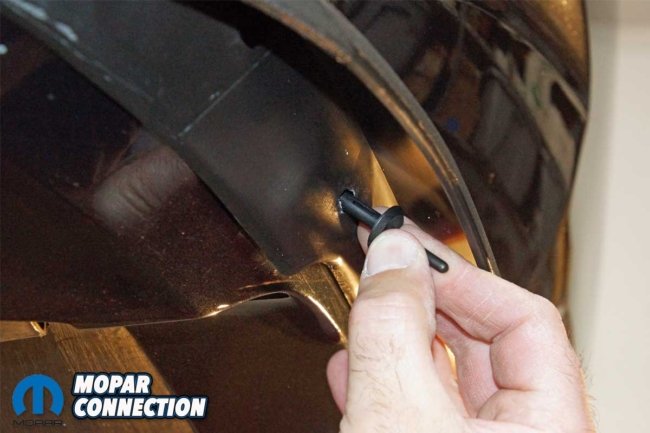


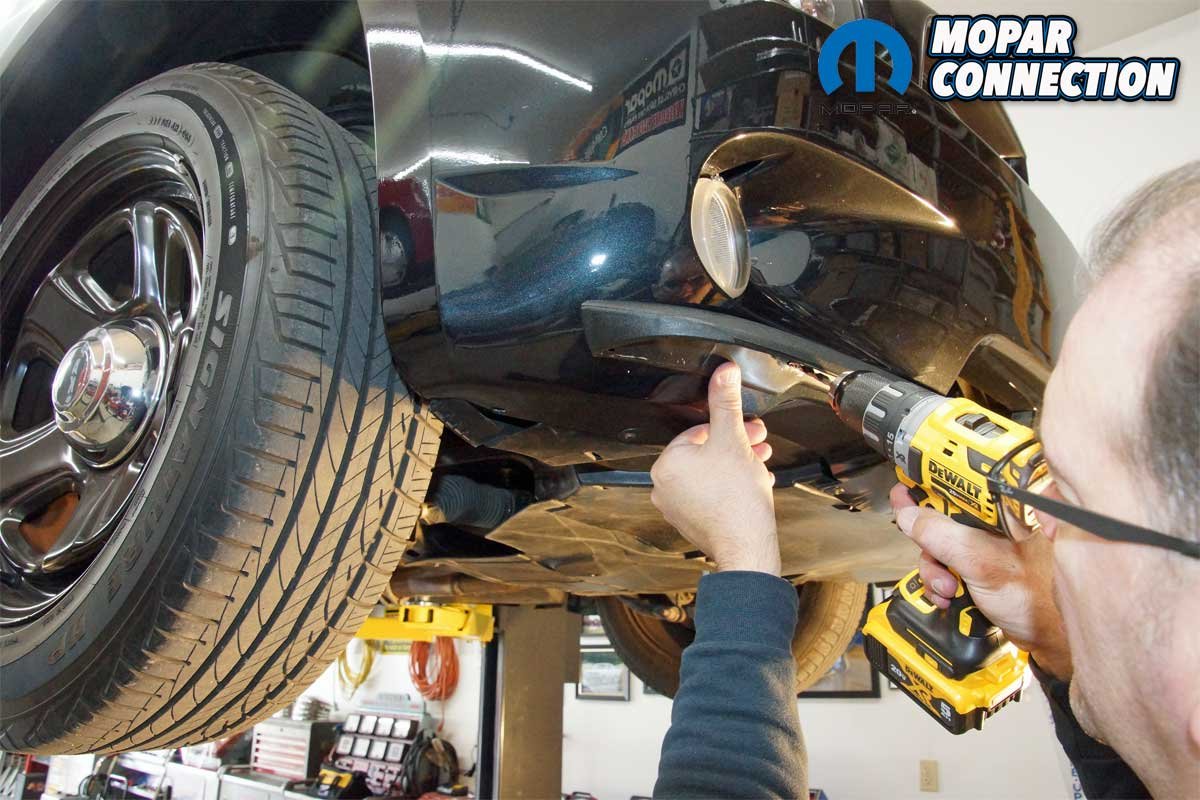
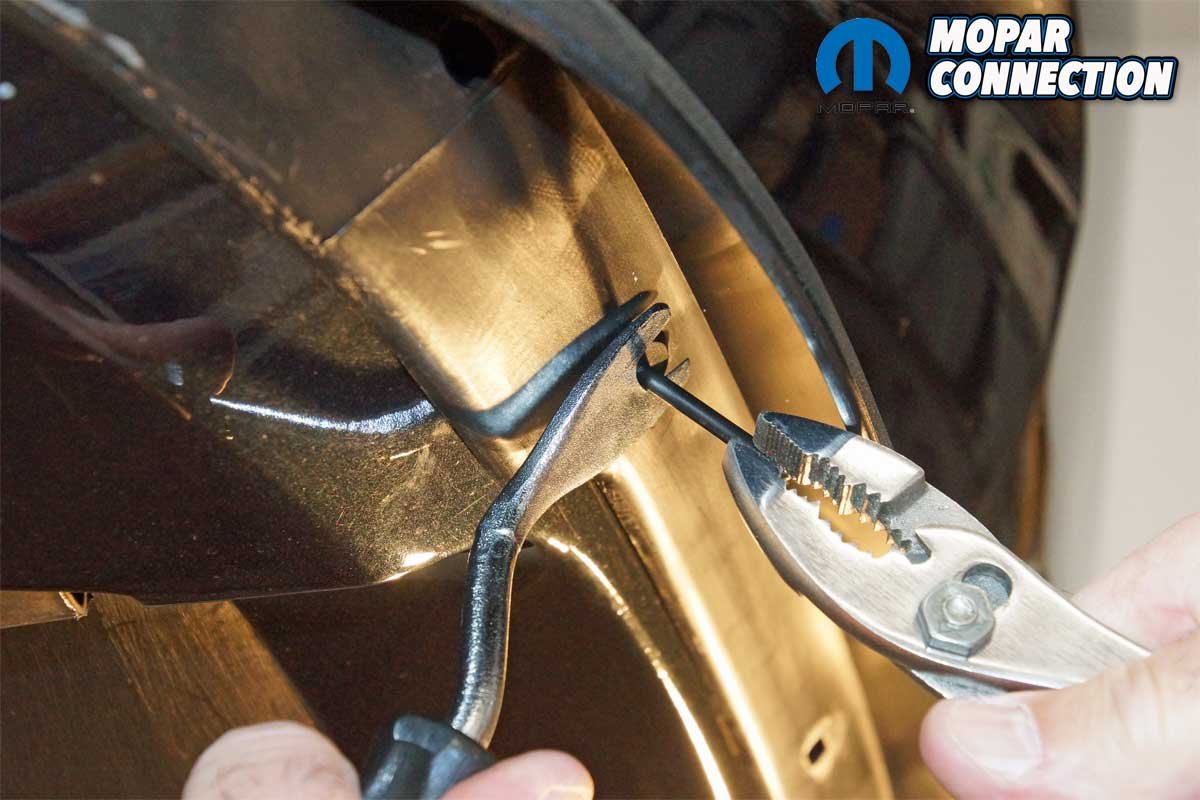
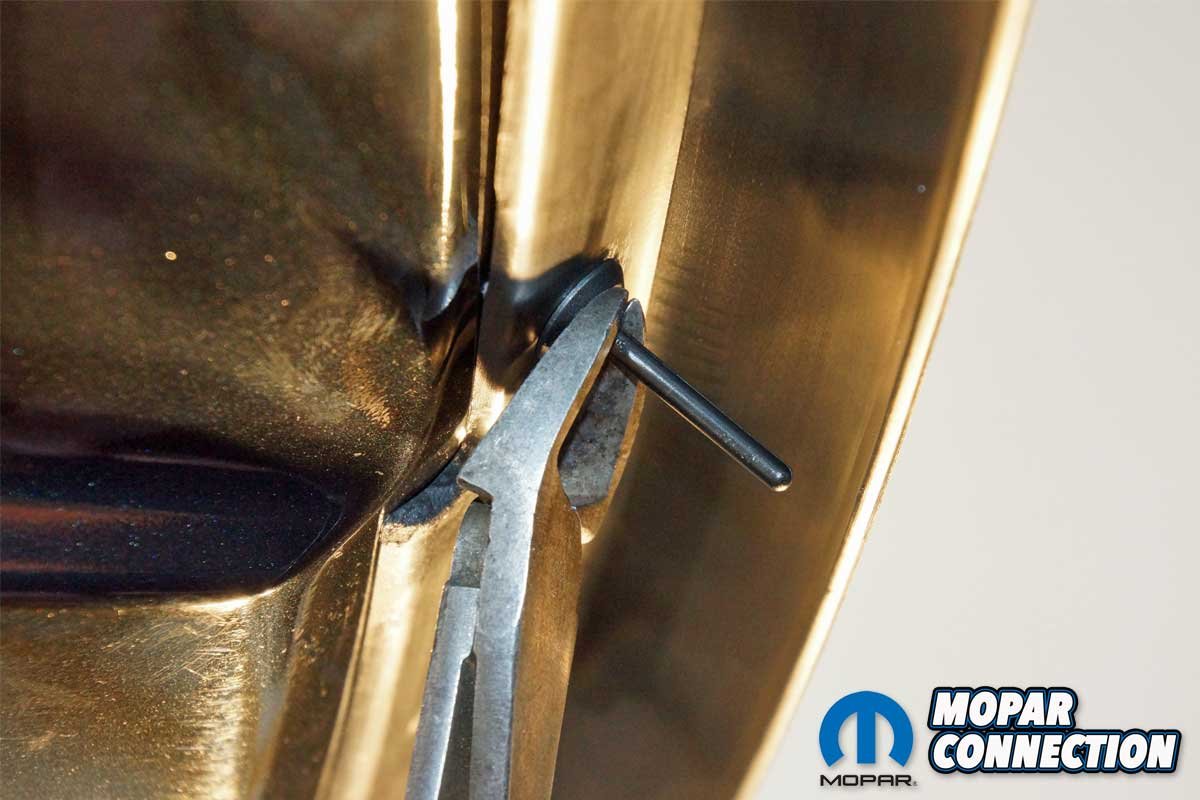
Top Left: The adhesive strips were secured at each end of the spoiler. We used a ¼-inch drill bit to place twelve holes in the bumper cover. Top Right: With the holes drilled, we added rivets in matching pairs working from the center of the spoiler outward. Each rivet fit snuggly into its ¼-inch hole. We pushed the entire body of the rivet through the spoiler support bracket and into the bumper cover. Bottom Left: To secure the spoiler to the bumper cover, we used a door trim tool to support the rivet head while pulling the pin until it would not extend any further. A “click-click-click” sound could be heard at the end of the pin’s extension. Bottom Right: We left the pin extended from the rivet’s body until we finished installing the rest of the fasteners.
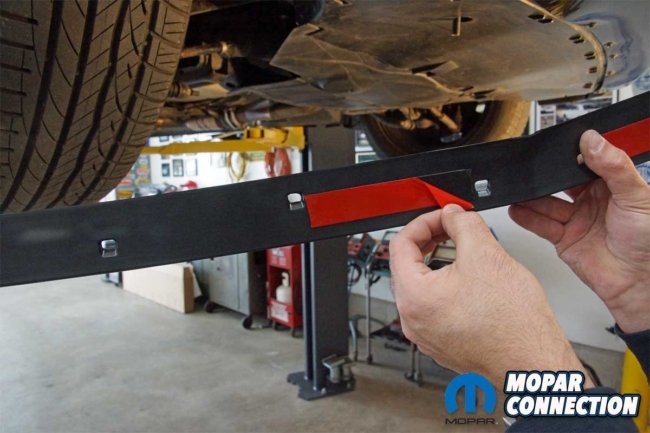
Satisfied with the location and the fit of the spoiler, we removed the masking tape and peeled back the two adhesive strips closest to the center of the spoiler. We realigned the spoiler and pressed the strips firmly against the bumper cover. Using a ¼-inch drill bit, we drilled through the center-most mounting holes. A plastic rivet was pushed through each hole.
Using a door trim tool to support the rivet head, we pulled the center pin with a pair of pliers. The pulling action caused the rivet to collapse, which provided a secure connection between the spoiler and the bumper cover. The second rivet was supported and pulled tightly in the same fashion as the first.
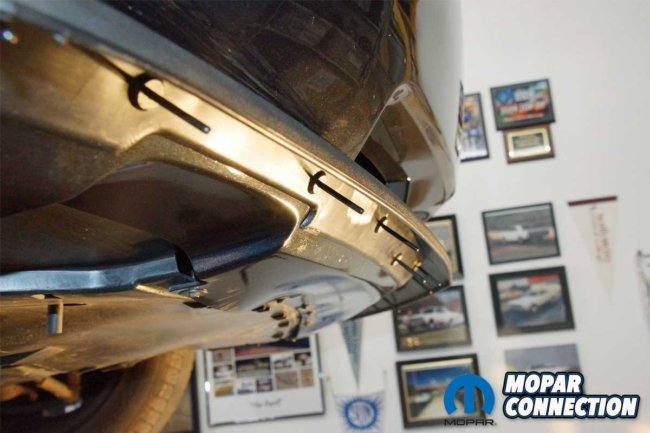

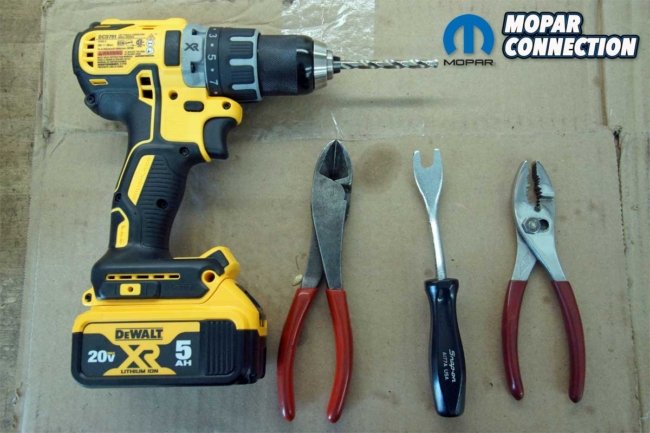
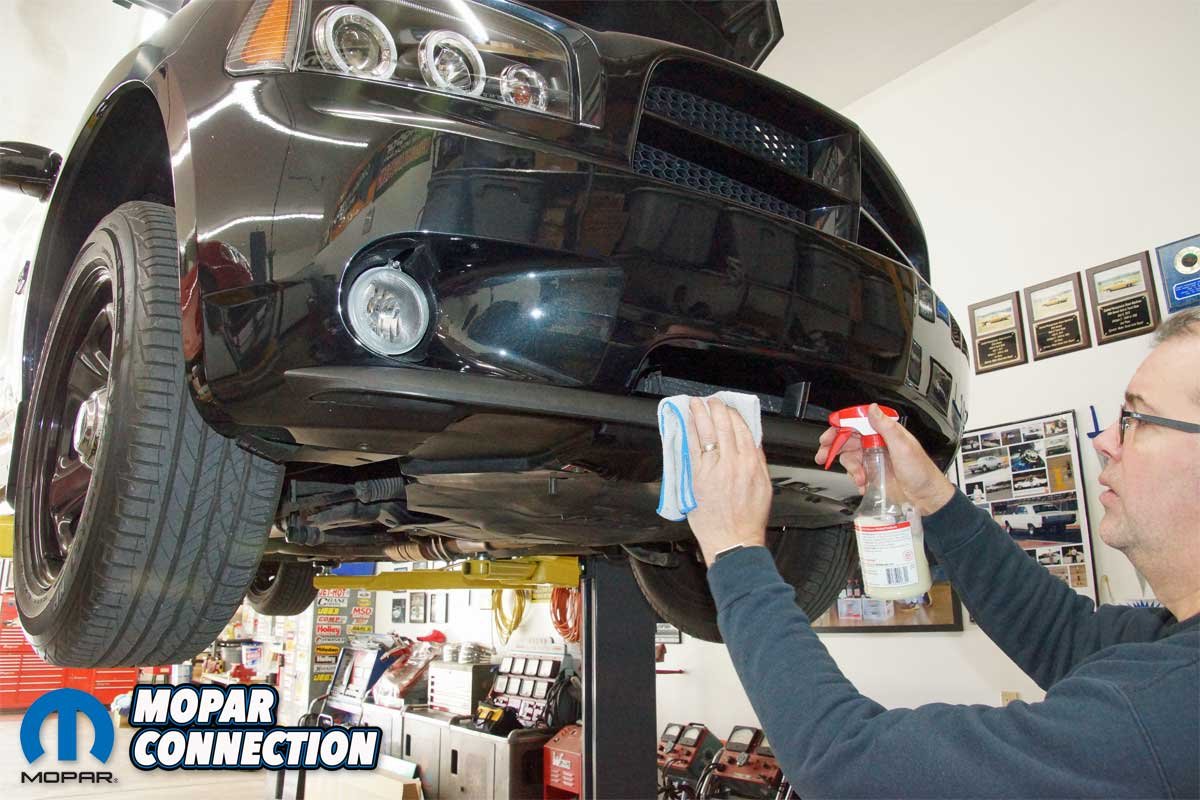
Top Left: We worked from the center rivets outward to the ends of the spoiler. Each fastener was rechecked for its tightness before we proceeded. Top Right: Each rivet pin was cut off with a pair of side cutters. All the pins were discarded. Bottom Left: The installation took about an hour. We applied a little spray wax to the spoiler to remove any fingerprints and protect the surface. Bottom Right: The tools necessary for the installation were a drill, ¼-inch drill bit, side cutters, a door panel removal tool, and a pair of pliers.
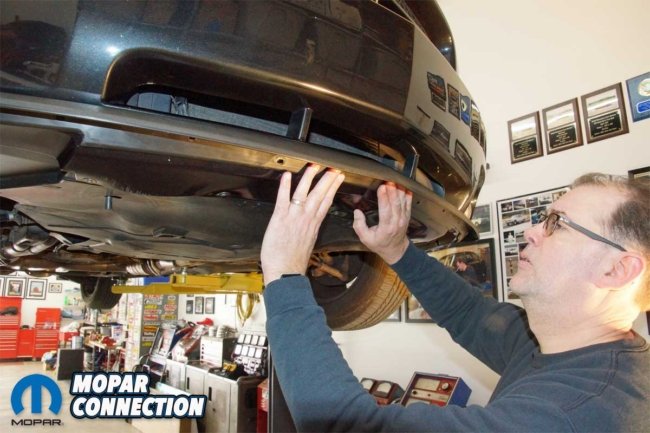
With the spoiler locked in place at the center, we moved to the driver’s side of the spoiler to secure it to the Charger. We unpeeled the third adhesive strip and aligned the spoiler with the grill opening and the scallop for the fog light opening before securing the spoiler. The exact process was followed for the passenger side.
With the spoiler in place, we drilled ten additional holes and installed rivets into each hole. We worked back and forth from side to side securing one rivet at a time until all the rivets were collapsed. All twelve center pins were cut off with a pair of side cutters. With the chin spoiler installed, we wiped down the spoiler with a liquid spray wax to enhance its luster.
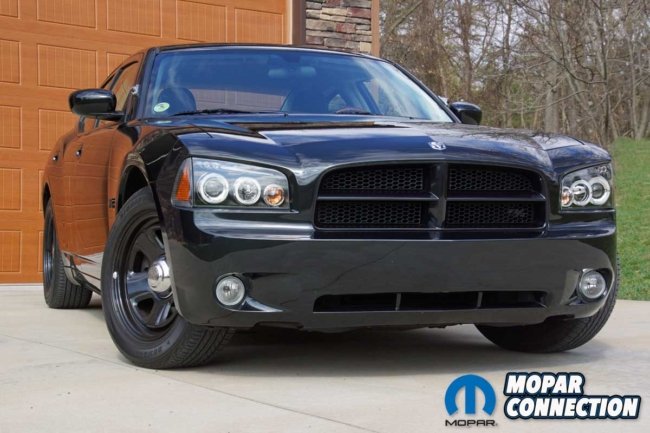
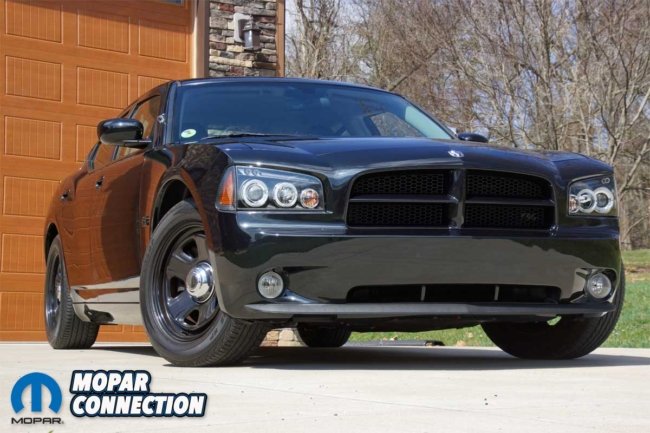
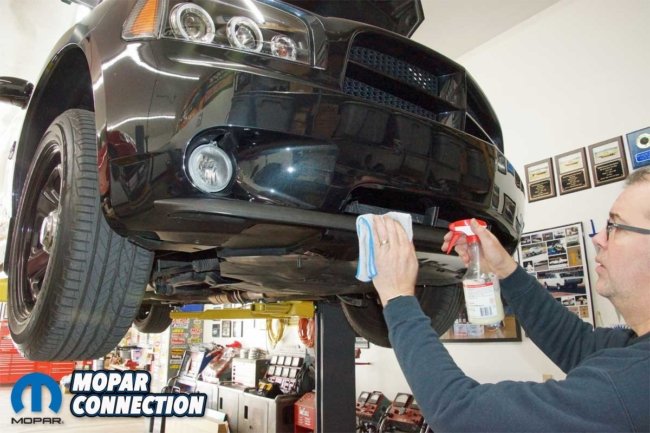
Left: The previously installed American Muscle Spec-D headlamps were a nice improvement to the front end of the Charger. The nighttime illumination was substantially increased, and the headlamps added a unique flair to the Charger. However, the front end still needed something more to improve the aggressive look. Right: The American Muscle chin spoiler followed the contours of the Charger’s front end perfectly. We lined the spoiler with the grille opening and the openings for the fog lights. While subtle, the spoiler certainly augments the Charger’s appearance and completes our desired aggressive look.
The subtle chin spoiler met our wishes by completing the aggressive look to the front end. The installation took less than an hour and was achieved with a drill, bit, and hand tools. If you are looking for a low-dollar project and you want to add a little extra style to the front end of your Charger, look no further than a chin spoiler from American Muscle.


