


For the past few months, we’ve been documenting how Musclecar Restorations rebuilt owner John Balow’s 1970 Plymouth ‘Cuda. If you haven’t caught the previous segments, we encourage to see how this project began, following each meticulous step MCR took to tear down this E-body and rebuild it to John’s exact specifications.
With the complete repainting of the ‘Cuda completed back to as-factory condition, it’s now up to MCR to begin reassembling the car. In this segment, we’re going to walk through each step taken to bring the interior back from the brink – not just replacing each and every part with suitable replacements (although that had to be done too).


Above left: The seats in John’s ‘Cuda were pretty rough but in most cases it doesn’t really matter as seats are redone from the frame up with either reproduction parts or in some cases full custom upholstery. Above right: Seats are stripped down to their bare frames and springs, repaired as needed, blasted and then powder coated.
The interior assembly is actually a bit more involved than just bolting parts in place. The seats for instance are a mini restoration unto themselves. The seats in John’s ‘Cuda looked like they were total trash but that’s OK because all of the soft parts will be discarded anyway.
Usually, only the frames are reused after they have been repaired, if needed, and then blasted and powder coated. New vinyl, or in this case leather, covers are stretched over new cushions so they look and sit like factory new. The new car smell even comes back.

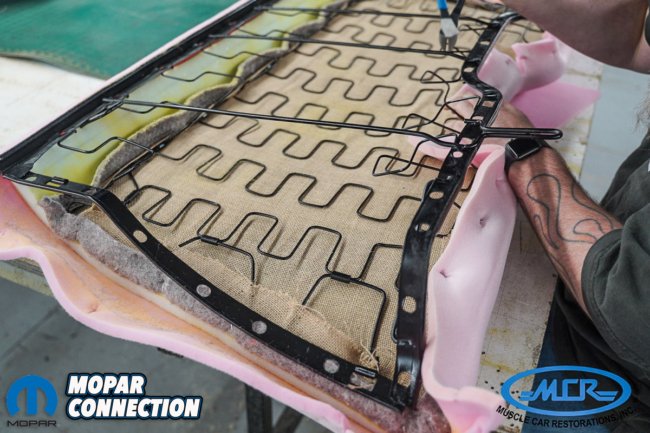
Above left: New foam cushions are slipped over the frame and then the new seat covers (in this case John wanted the leather option) are stretched over the foam. Above right: Back seats are a bit different as the foam isn’t molded and there’s a layer of batting that goes on first.
Occasionally, it might be asked if the back seat, headliner and door panels could be reused but unless there is a significant reason to do so, it is usually recommended that they all be replaced with new parts. Sure the seat might look good on its own but not so much when seen next to the rest of the new interior. Usually, the cost of cleaning and reusing old vinyl and cushions exceeds that of installing new anyway.
Some parts are reused though. The plastic panels that may not be available new are cleaned and restored using paint products specifically designed for them. Door panels can go either way but they often are subject to a lot of abuse so new is usually best.
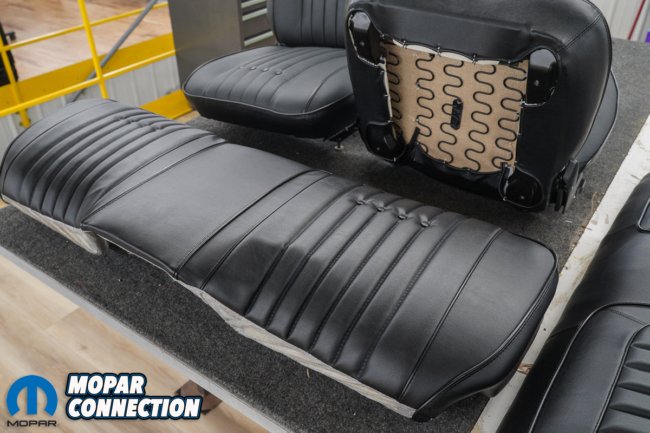
Above: The seats not only look good, they’re comfortable and smell like new too.
Since this car is being restored to factory new condition, the dash, heater box and gauge cluster will all be returned to their original condition.
Generally, interior assembly is the reverse of how it came apart with the headliner, heater box, dash, steering column and pedals going in first followed by carpet and rear seat and rear arm rests. Front seats are last really only because everything else is easier if they are not in the way.

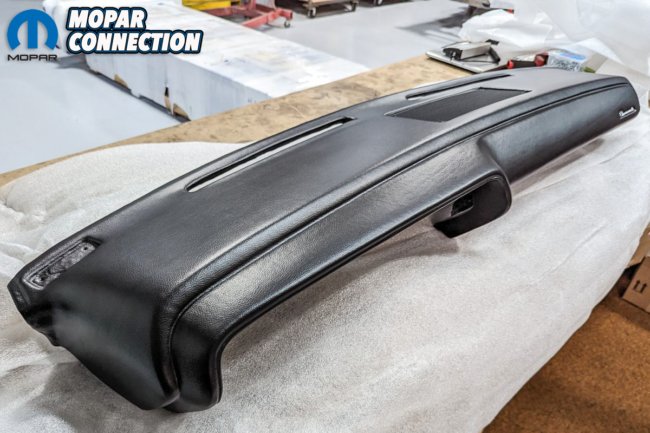
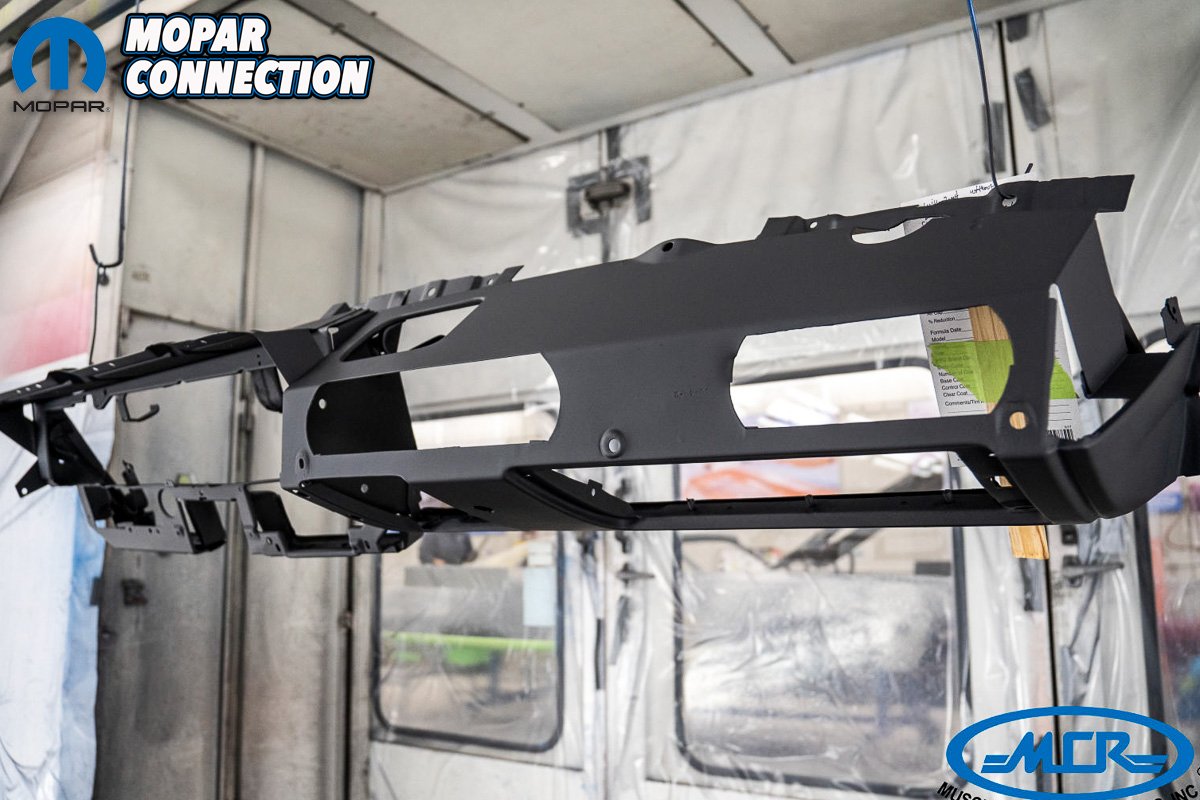
Above left: Dash restoration starts with its frame being repainted in the booth. Above right: Dash pads are also commonly in tough shape but MCR has sources to obtain new ones or have the originals restored if necessary.

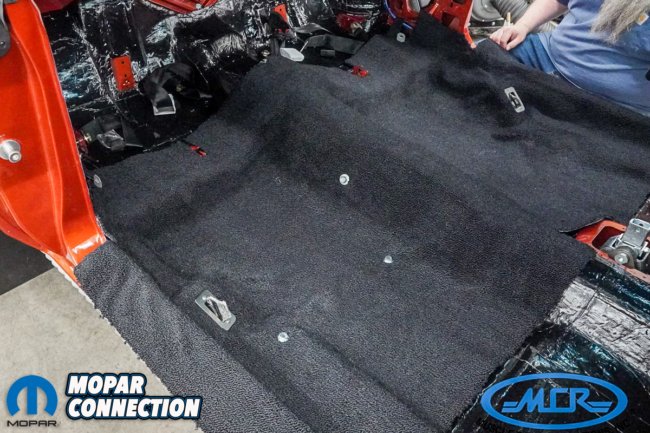
Above left: There’s a lot more going on in the interior than most imagine. Note the restored heater box goes in early. Also note that modern sound deadening materials are applied throughout the interior to provide that factory new quiet ride. Above left: Carpets come molded to fit the floor but often a heat gun is used to refine the final shape so the fit is perfect and then they still must be trimmed and fitted for seat belts etc.

Above: Much like the seat covers, the headliner is stretched, massaged and even steamed to get a perfect fit.
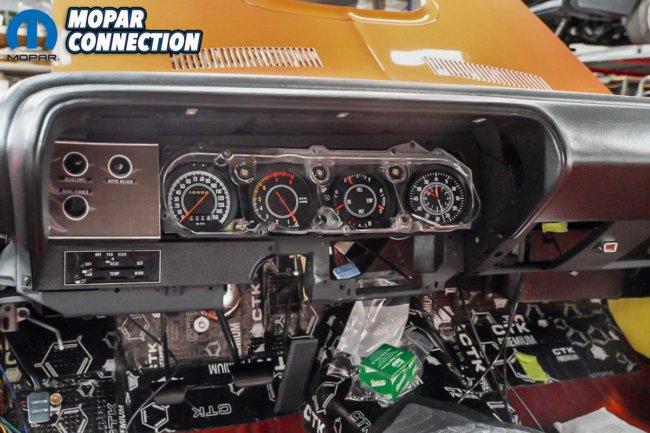
Above: Gauge clusters are typically sent out to experts to be refaced and checked to insure that all the gauges function perfectly.

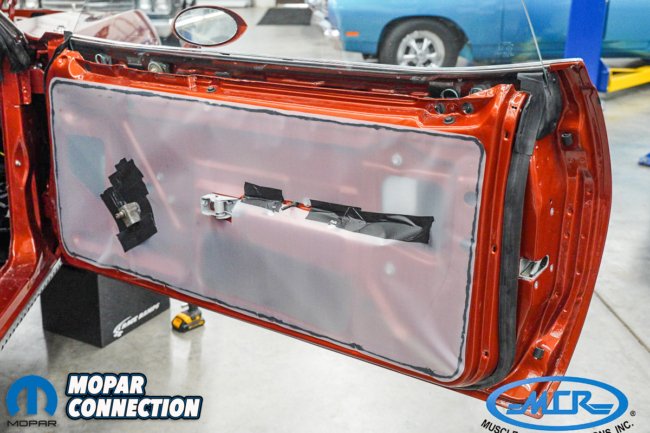
Above left: Even though interior plastic panels can sometimes be restored, it’s usually best to use new parts when possible. Above right: Just like the factory installation, doors receive plastic sheeting before the new door panels are installed.


Above left: New back seat and side panels look awesome. While the seats are often the first interior parts to be restored, they are the last to be installed. Above right: The finished interior not only looks new, it also sits new and even smells new.


