


Take a peek under a plethora of Mopar’s burly brawlers and you’re likely to find the venerable 8¾ rear end with its coverless circular housing lurking below. Churning the wheels on everything from 340 Darts to 440-equipped Chargers, it was second to only the Dana 60 in strength, but far exceeded the Dana in muscle car production volume. Heck, you could even get a Hemi car with an 8¾ as long as it was equipped with an automatic transmission.
Furthermore, the 8¾ quickly became known not only for its robustness, but its removable carrier which allowed for bench preparation rather than in-car setup. Swapping gears is as simple as pulling the axles, dropping the center unit, and bolting in another carrier, also known as a “hog’s head” for its familiar shape. We’ve even heard of guys running a 2.76 gear to the strip with a pre-set 4.88 center chunk in the trunk. Upon arrival, they’d quickly swap in the 4.88 carrier for racing, then pull it back out and run the 2.76 unit on the drive home.


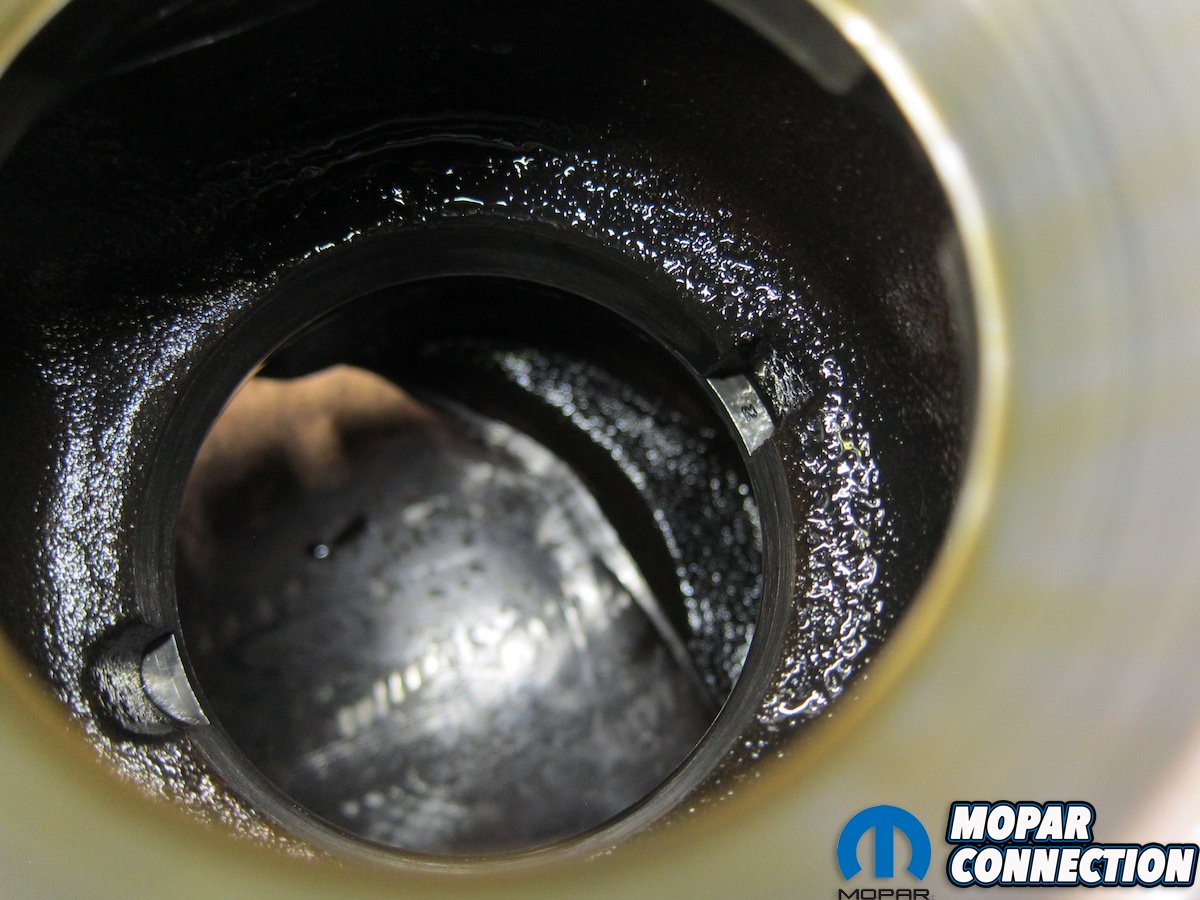
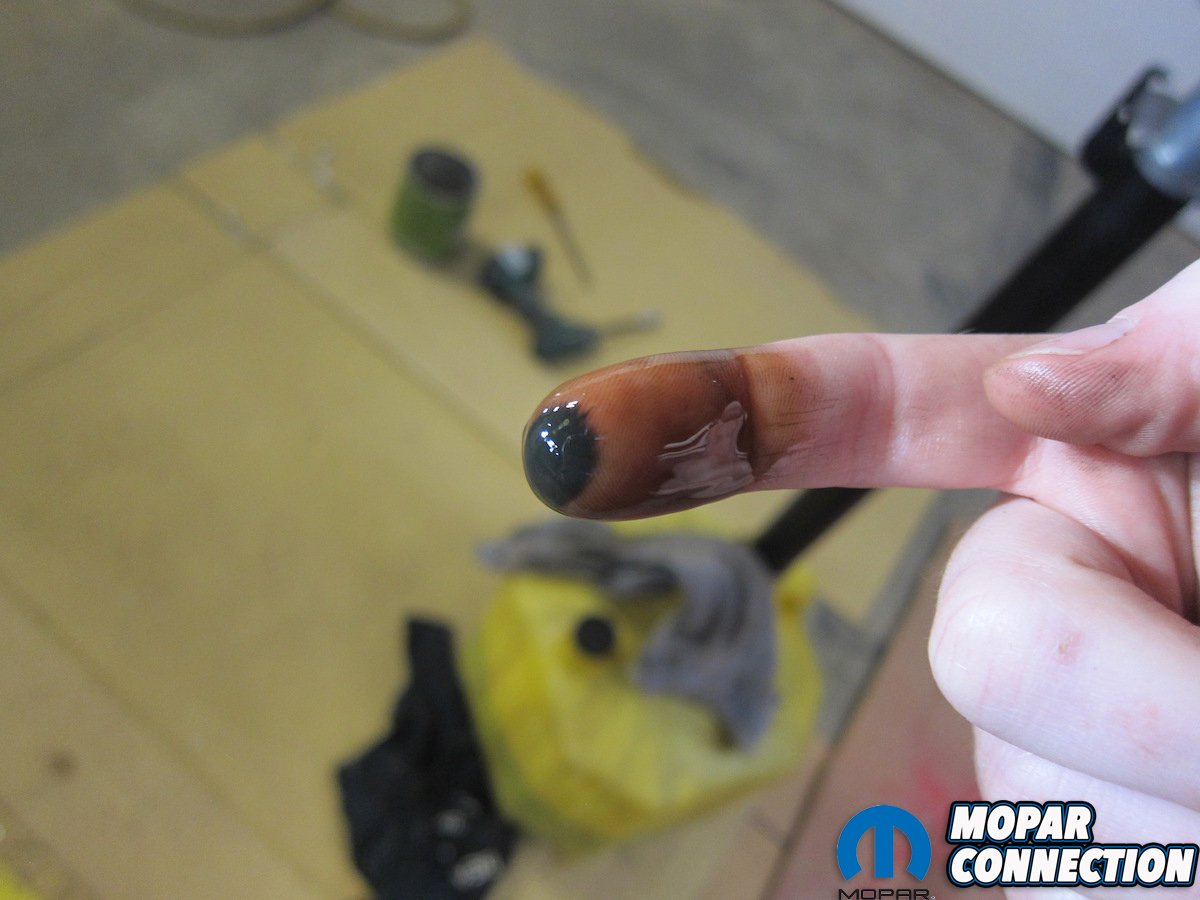
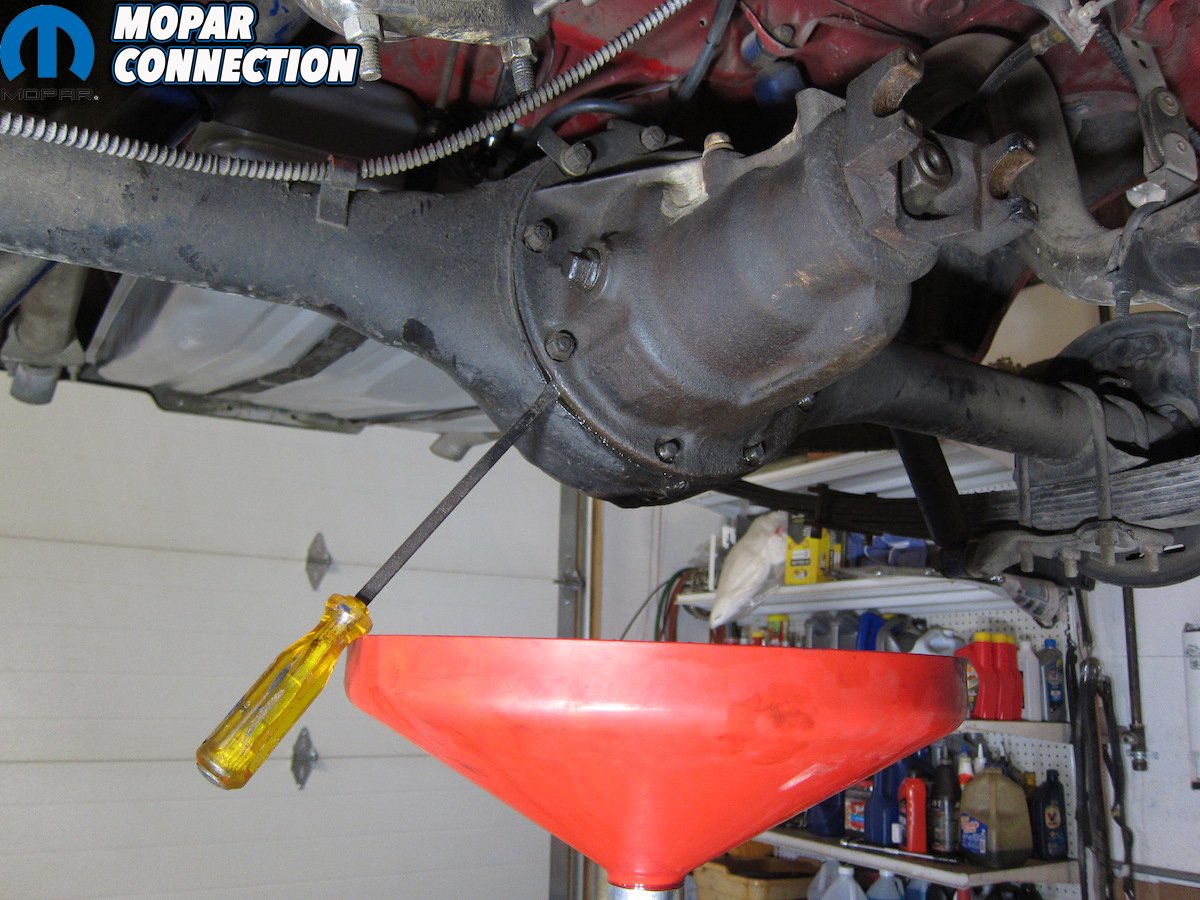
Above: Pulling the center section revealed a slurry of oil and metal that signaled impending doom.


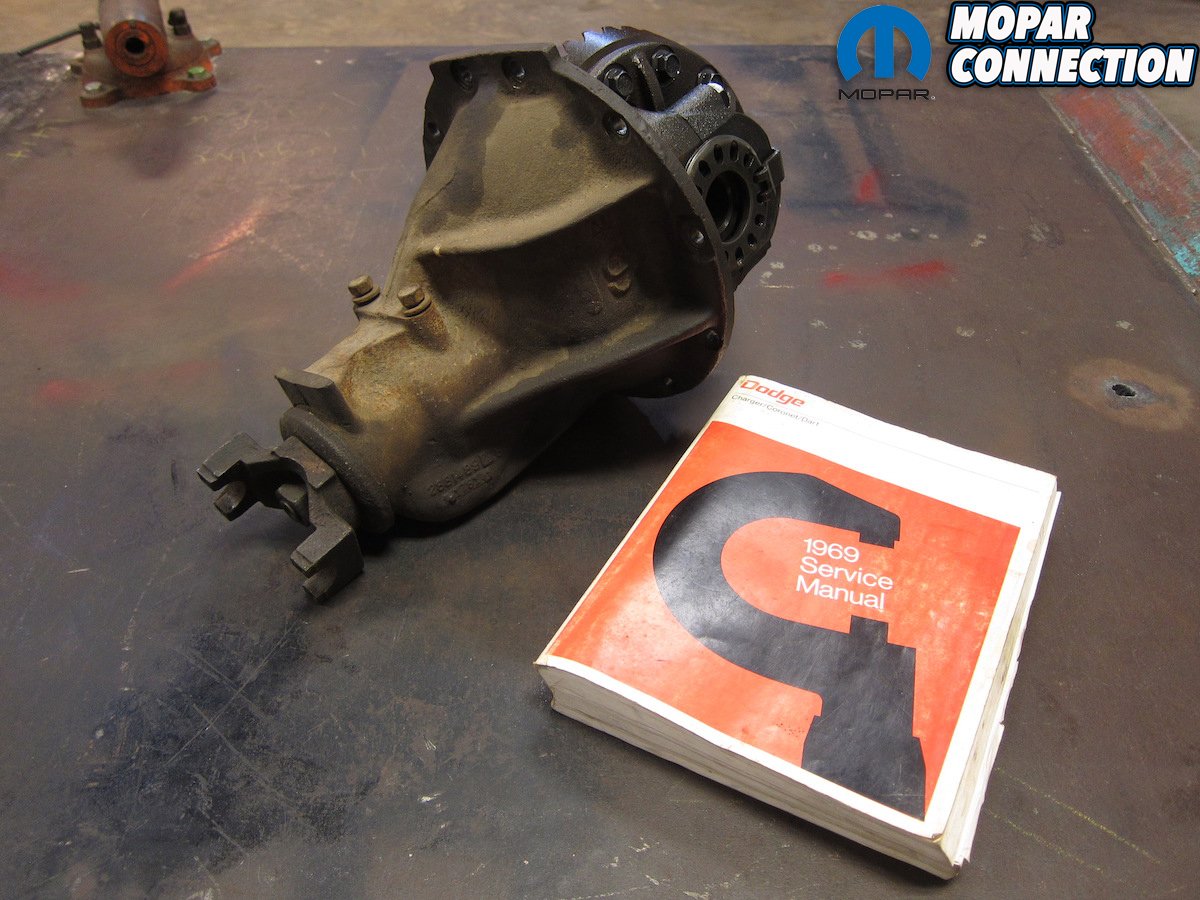
Above: All that was needed for the rebuild was a 489 hog’s head, service manual, and one call to YearOne.
Throughout the years, three main cast iron housings were used, all with slight internal differences. Identification comes via the last three digits of the casting number on the front lower driver’s side. 741, 742, and 489 are the most common, although 657 and 985 were also seen in the early ‘60s. Over the years, the 489 case has gathered a reputation of being the “strongest” due to its 1-7/8” tapered pinion, but we wouldn’t hesitate to run a 741 or 742 on the street any day of the week.
Regardless, the 489 casting 8¾ rear in our 1969 Dodge Super Bee recently started to holler and howl, so we thought it best to slip it out for inspection. Unsurprisingly, we were met with the shoddy work of a prior rebuild as an improper mesh between the ring and pinion had led to a pile of ultra-fine metal sludge in the bottom of the housing.


Above: Disassembly followed the service manual’s procedure.


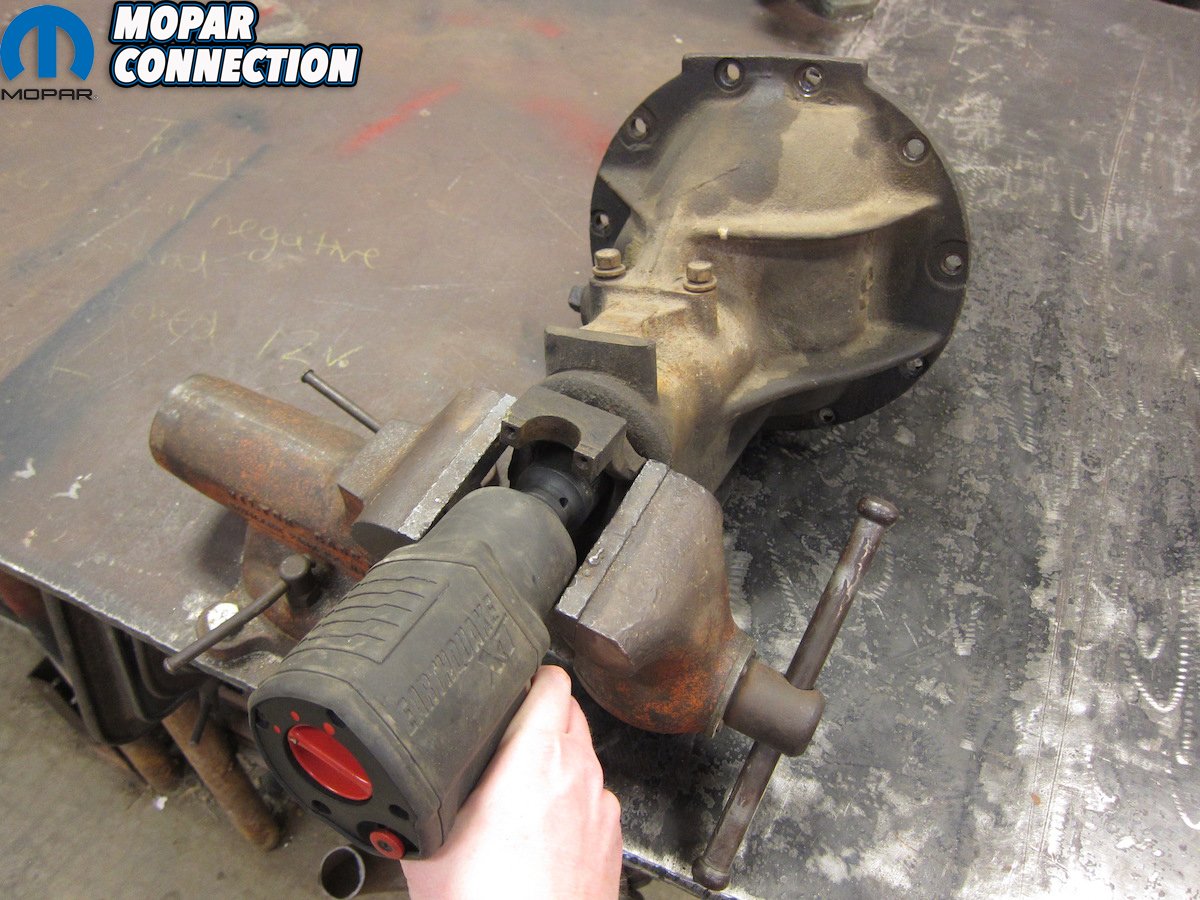
Above: The pinion nut required some air-powered muscle while the bearing races just need a punch.
With the gears obviously compromised, the bearings contaminated with a metal slurry, and a cone-type Sure Grip that was probably about to be a peg-leg, the Bee was absolutely in need of an upgrade. However, we were not at all looking forward to the arduous process of properly selecting manufacturers and part numbers for the cluster of components that make up a differential assembly.
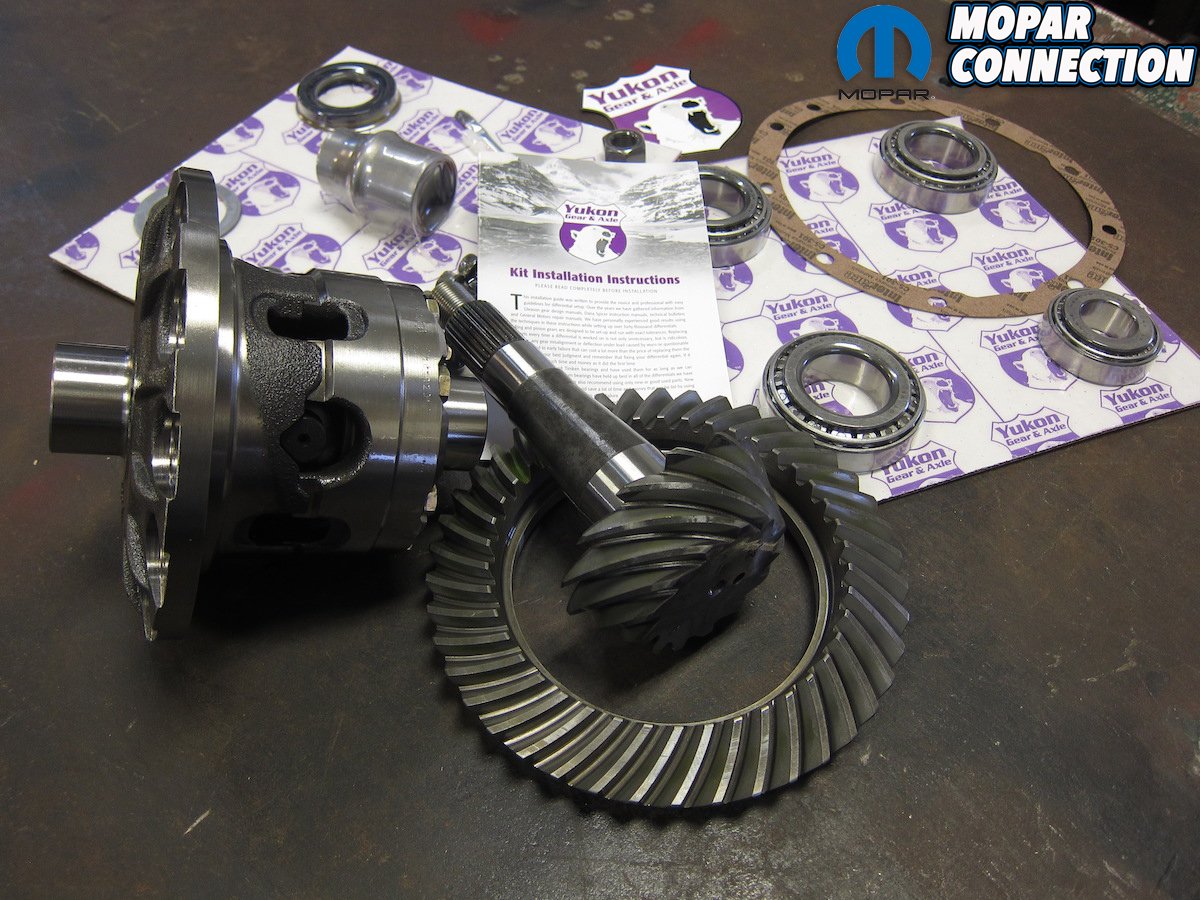
Fortunately, YearOne and Yukon Gear & Axle have taken all of the guesswork out of rear end rebuilding with their new Trac Pack differential kits. Instantly, our trepidation of flipping through a multitude of catalogs was eased when we saw that the Trac Pack kits incorporate everything needed for a hog’s head overhaul. A new clutch-style Sure-Grip differential, housing gasket, yoke seal, crush sleeve, pinion nut, shims, ring gear bolts, Timken bearings, instructions, and a matched ring and pinion set are all neatly packaged in a single part number for fool-proof parts procurement. With maximum driveability in mind, we opted for the 3.23-geared kit (P/N YO1007), even though 3.55 and 3.73 are offered as well.
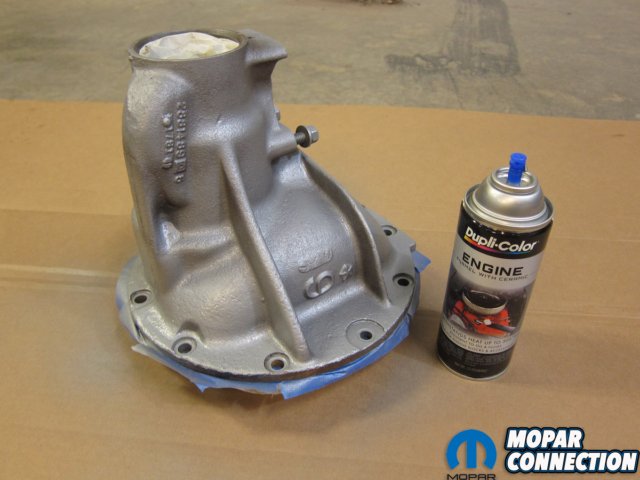
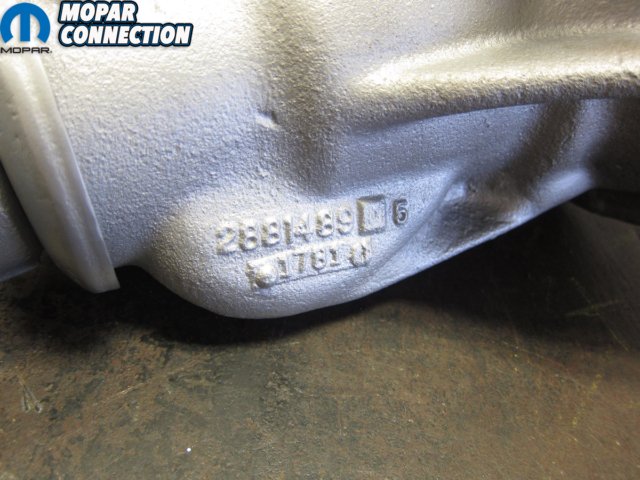
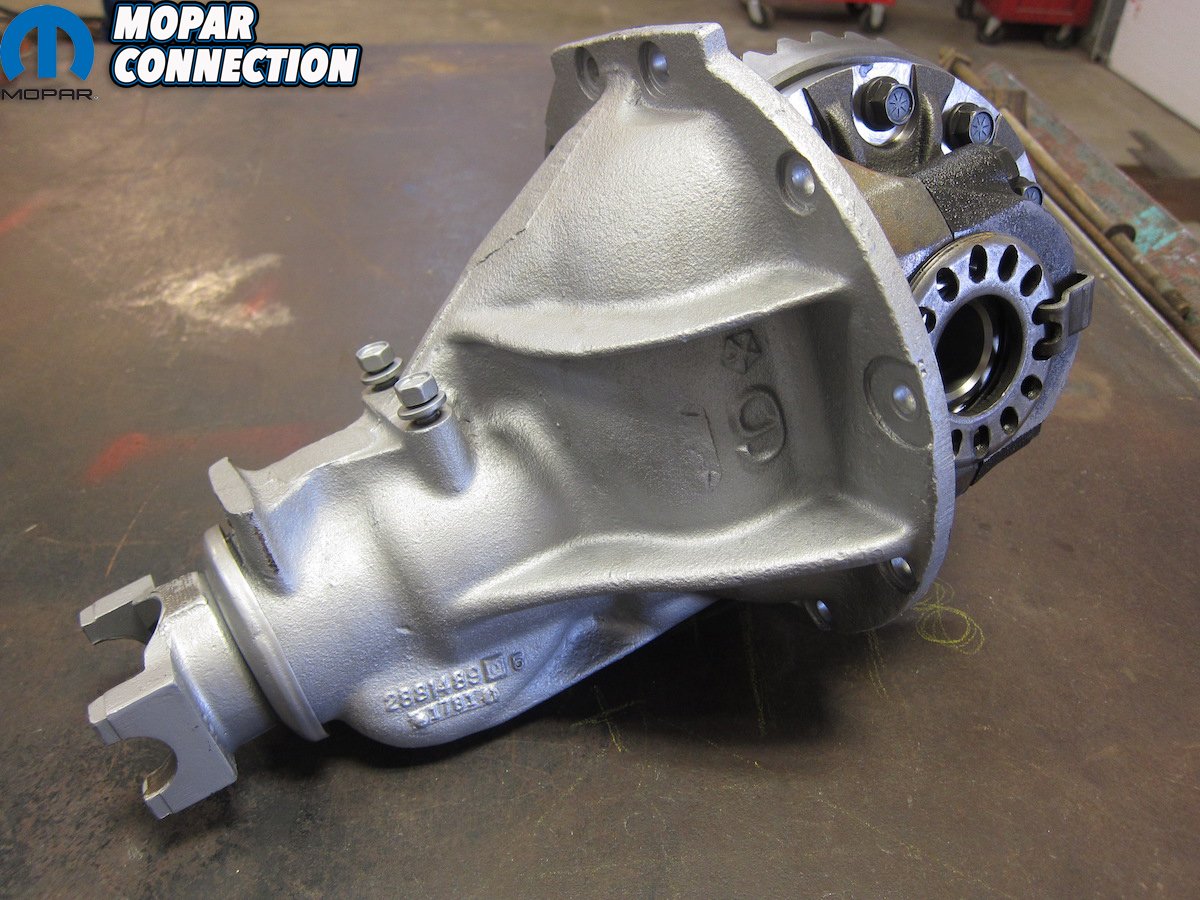
Above: The case was cleaned and painted to a non-show quality standard. Note the last three digits of the casting number that identify the case.
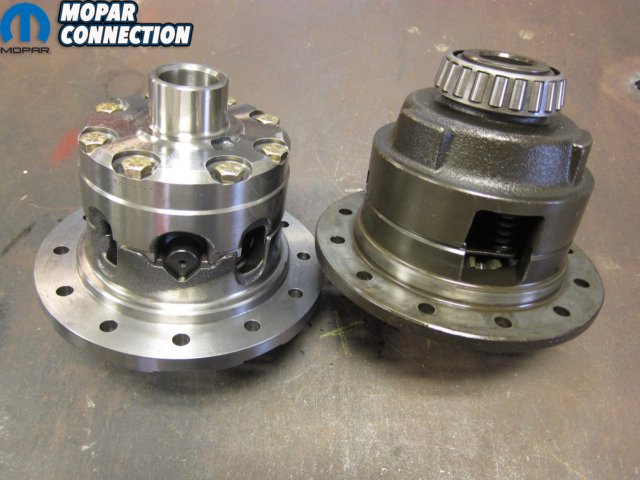
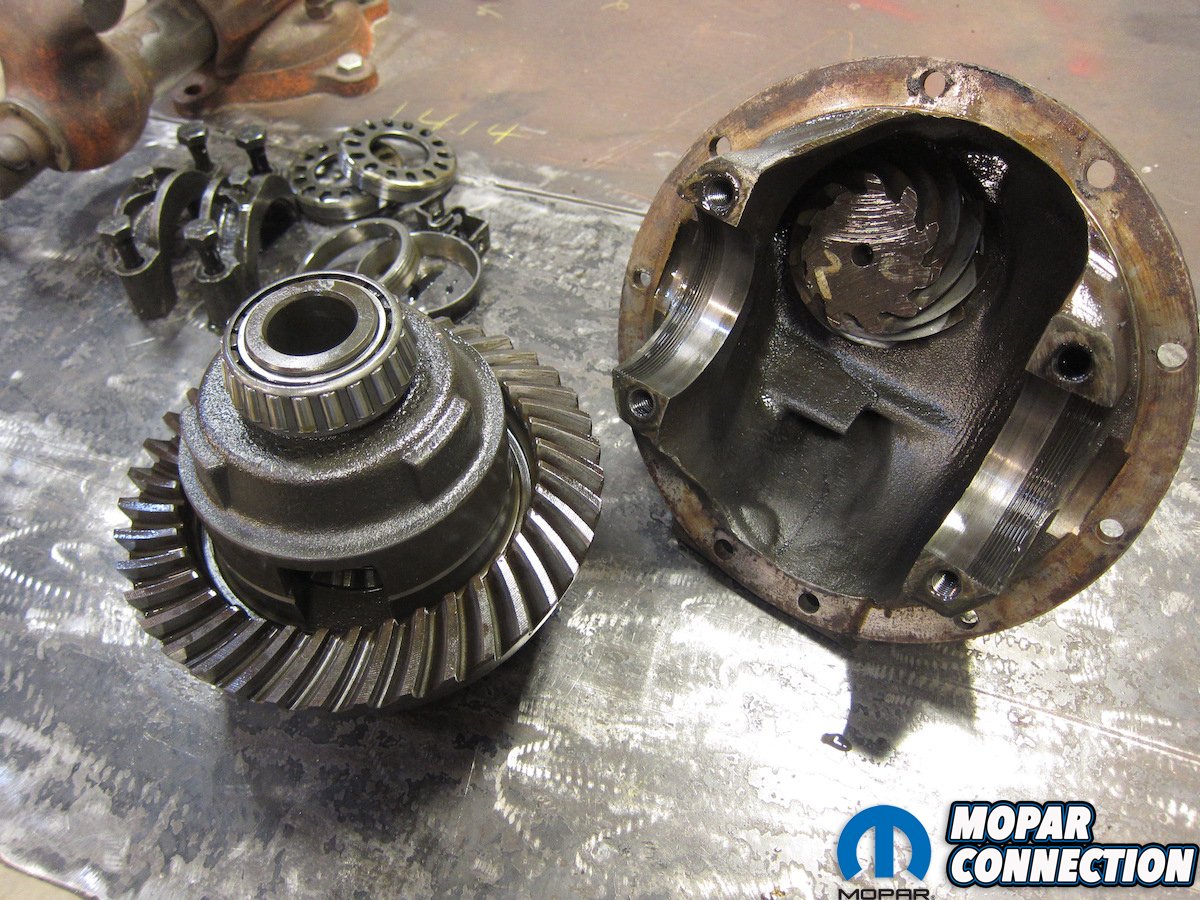
Above: The new Yukon differential (left) is the much-preferred clutch-type and is noticeably different from the original cone-type (right).
Since our defunct diff was already out and on the workbench, we grabbed the 1969 Dodge manual (P/N RSM69D0D) and began disassembly. The service manual is incredibly thorough in its detailing of the rebuild procedure and should always be referenced religiously with a setup-intensive process such as this.
Marking the carrier caps with a set of punch marks was the first order of business so we could make sure they were placed back on their original sides later on. Adjuster locks, bearing adjusters, and caps were removed in that order so the differential could be lifted out. Around front, the pneumatic impact was called upon to relieve the pinion nut of its duties. A few taps with a brass hammer dislodged the pinion from the yoke and front bearing so it could be removed. The only consumable parts left in the casting were the pinion bearing races which were driven out with a punch.

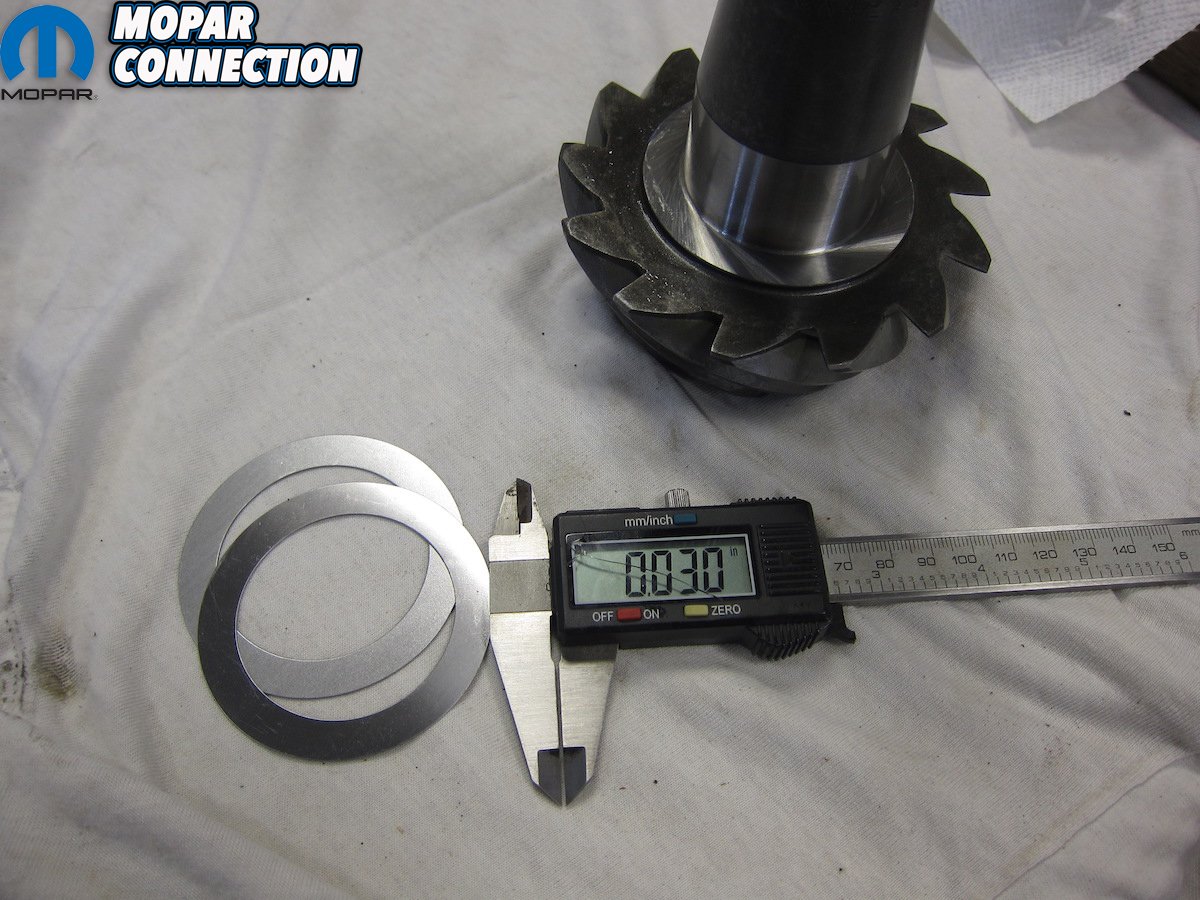
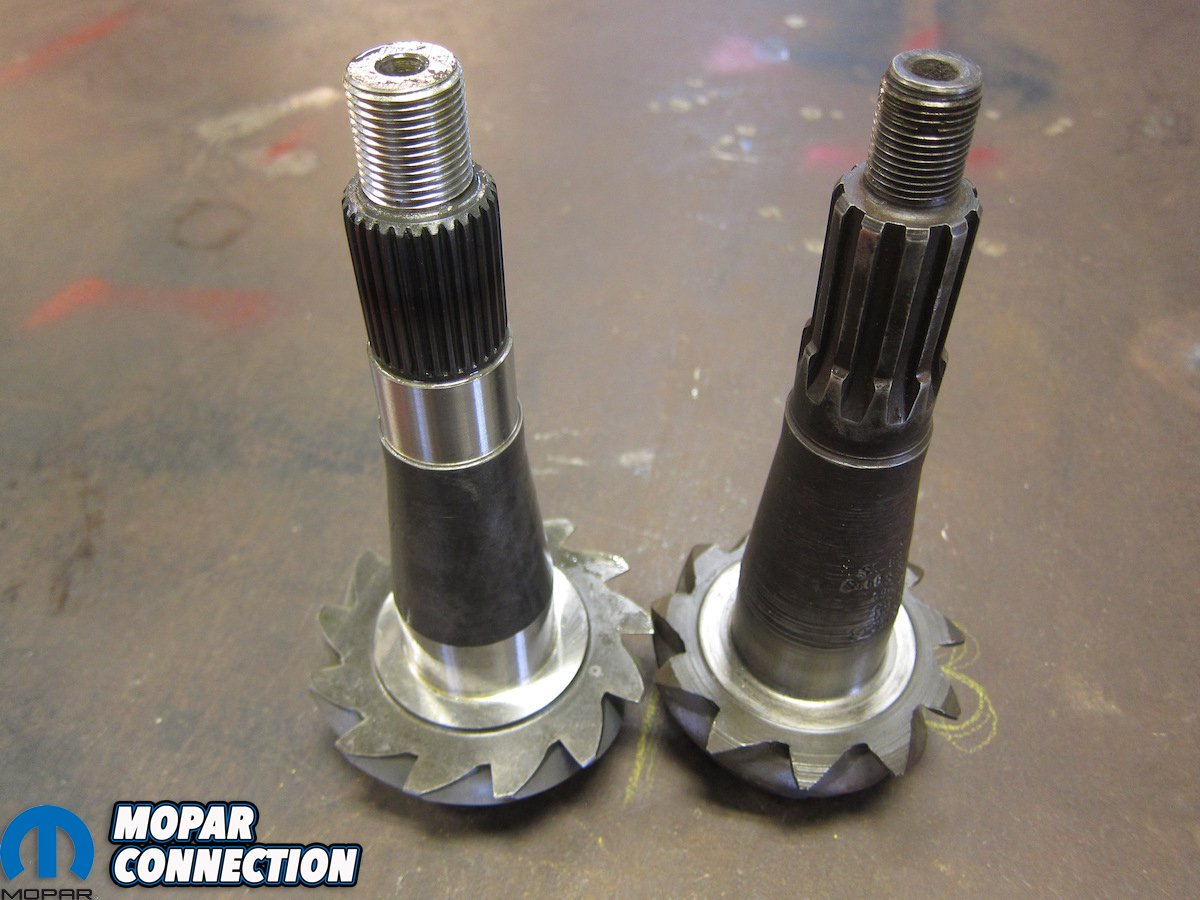
Above: The new Yukon pinion (left) featured a stronger 29 splines compared to the outgoing pinion’s 10 (right).


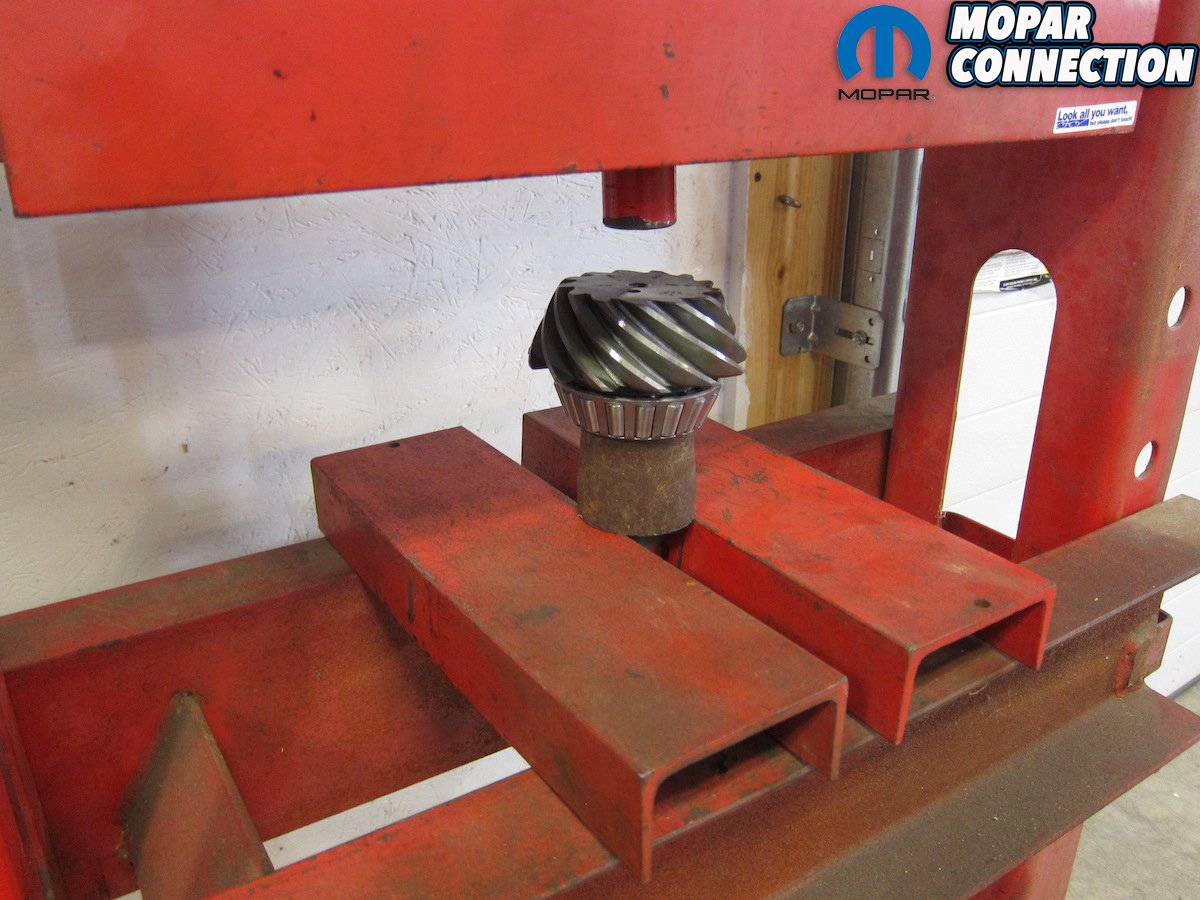
Above: New bearings were pressed on the differential and pinion with the recommended and supplied shims.
The bare case received its first cleaning in fifty years, then was sprayed with a coat of engine enamel paint for rust prevention. From the factory, this cast iron hunk would’ve been left with a natural finish and a smattering of various paint swabs for identification, but the gold standard judges won’t be underneath our Bee any time soon.
Prepping the new parts came next. High-quality Timken bearings from the kit were seated on the new differential with a hydraulic shop press. Same goes for the big pinion bearing, although we were careful to remember 0.030” worth of the provided shims before forcing it on. Since this was a new gearset, unfamiliar to this housing, a 0.030” pinion shim was Yukon’s starting recommendation. Contact pattern analyzation later on would confirm that this shim level was adequate.


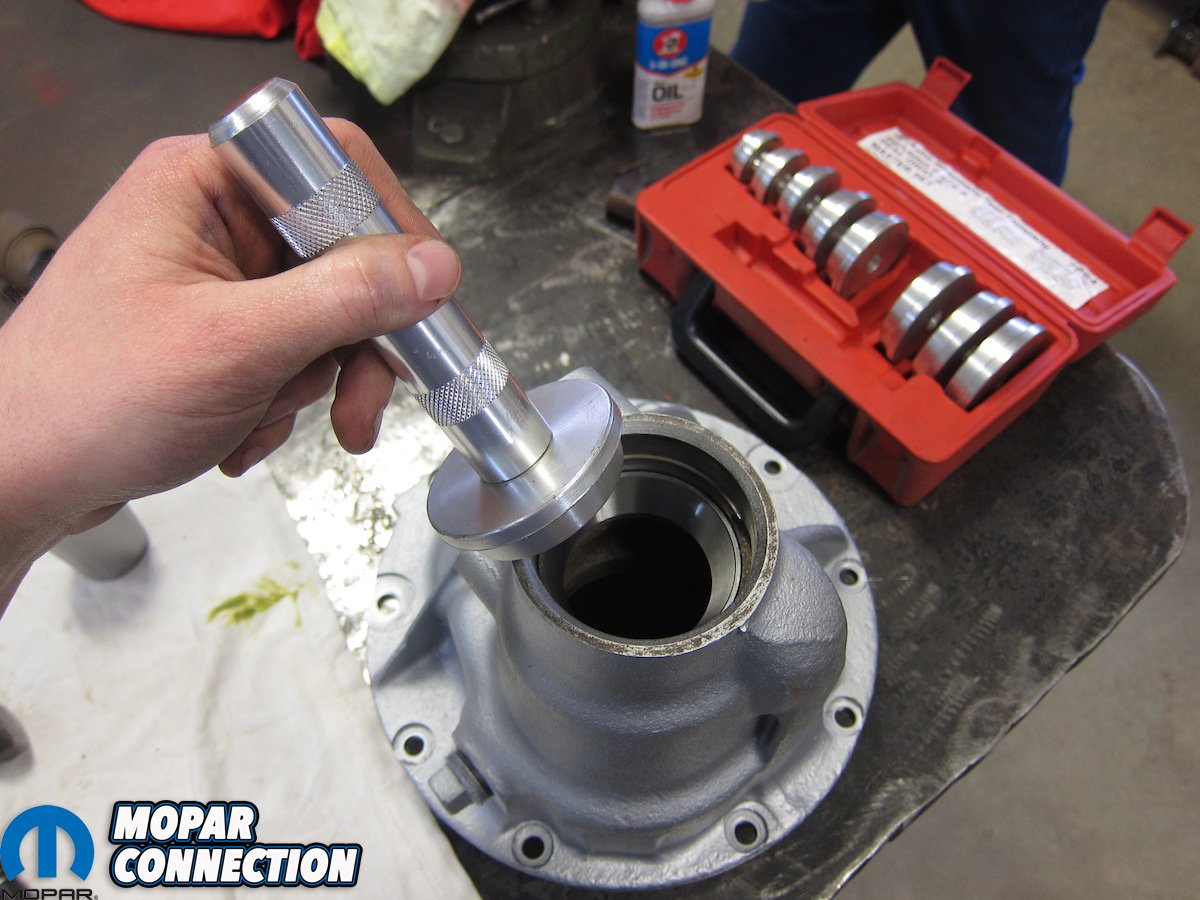
Above: New ring gear bolts mated it to the differential while new bearing races were driven into the case.
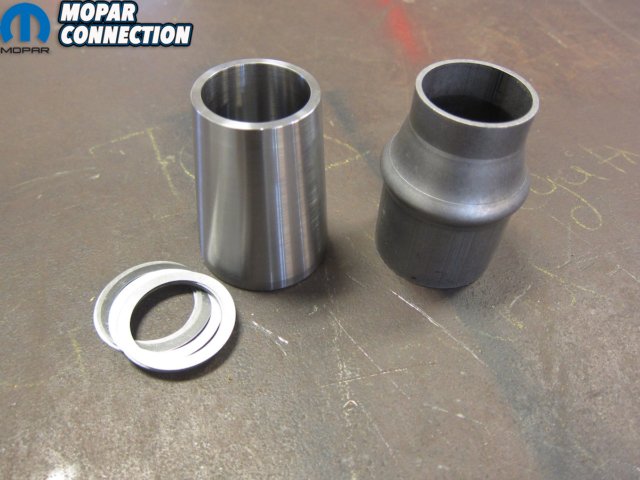
Above: All 489 cases were originally equipped with a crush sleeve (right), but aftermarket solid spacers (left) are available too.
Another note to make on the Yukon pinion is that it’s a 29-spline version as opposed to a 10-spline. Both 29 and 10-spline were offered from the factory in 7260 and 7290 U-joint arrangements. The aftermarket has furthered options to include 1350 joints as well. There is no shortage of choices here with billet, forged, and cast-iron varieties populating the YearOne catalog. We had one of the 7260 variety on the shelf, so it was cleaned and painted.
After a brief de-bur with an Arkansas stone, the new ring gear was carefully tapped onto the shiny new differential. Twelve fresh left-hand thread ring gear bolts with a torque specification of 55 foot-pounds married the two. Replacement pinion bearing races found their home in the housing by way of appropriately-sized race drivers.


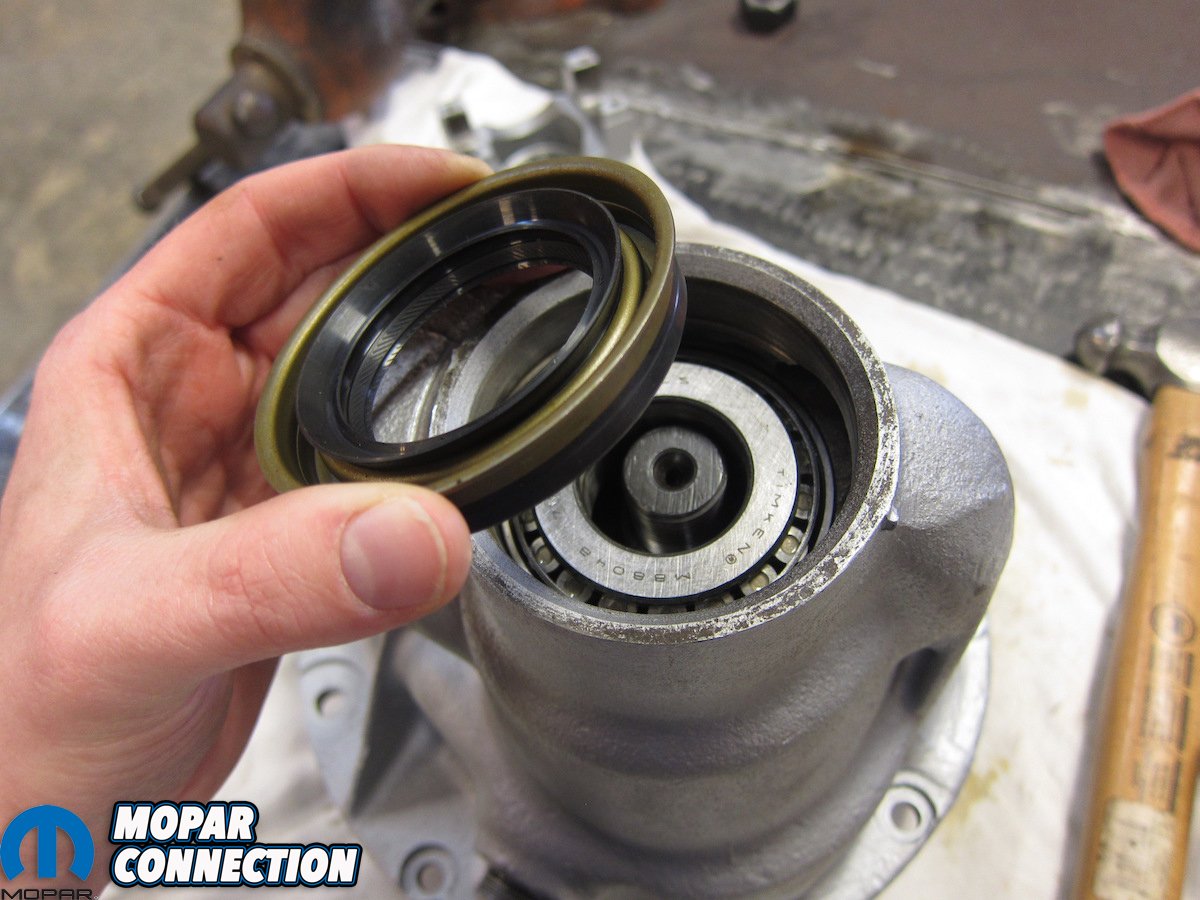
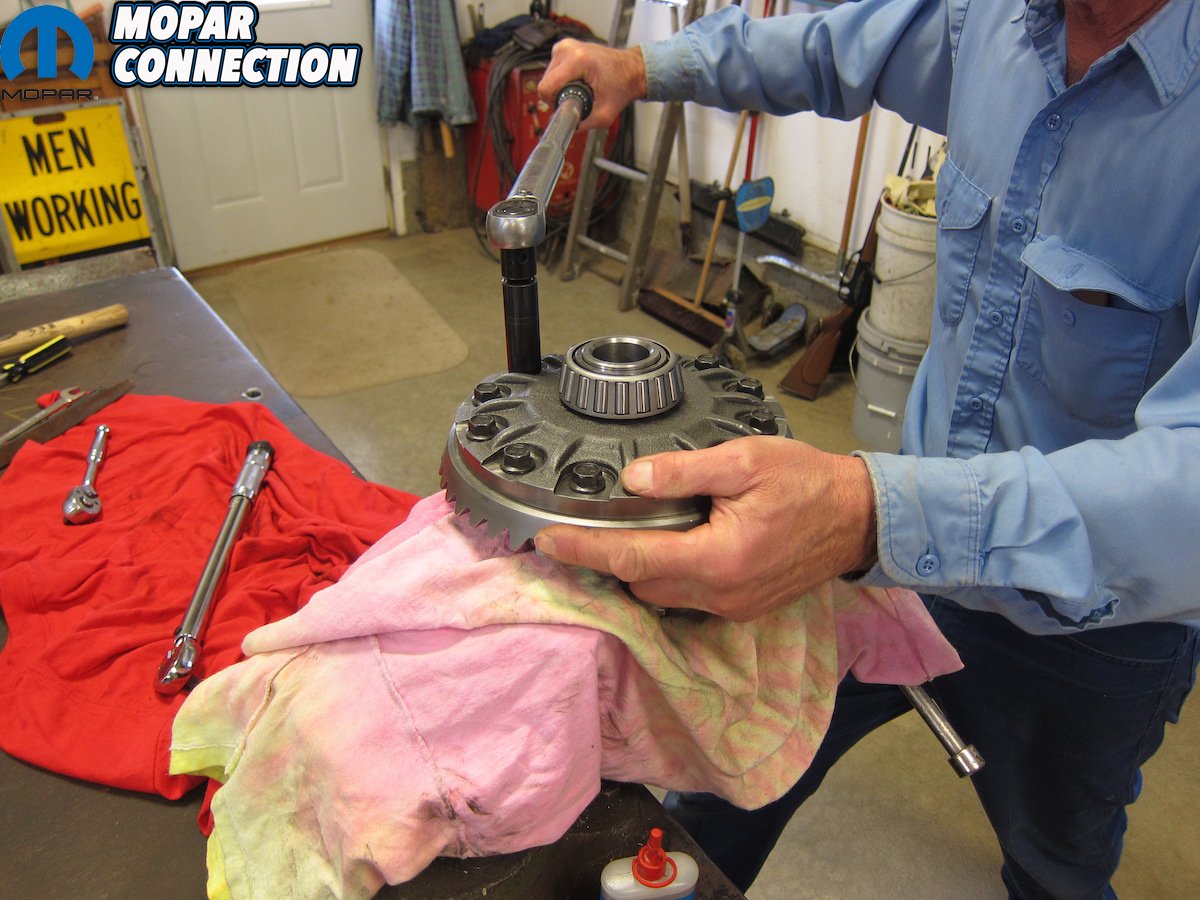
Above: With pinion bearing preload confirmed, the oil seal could be installed.


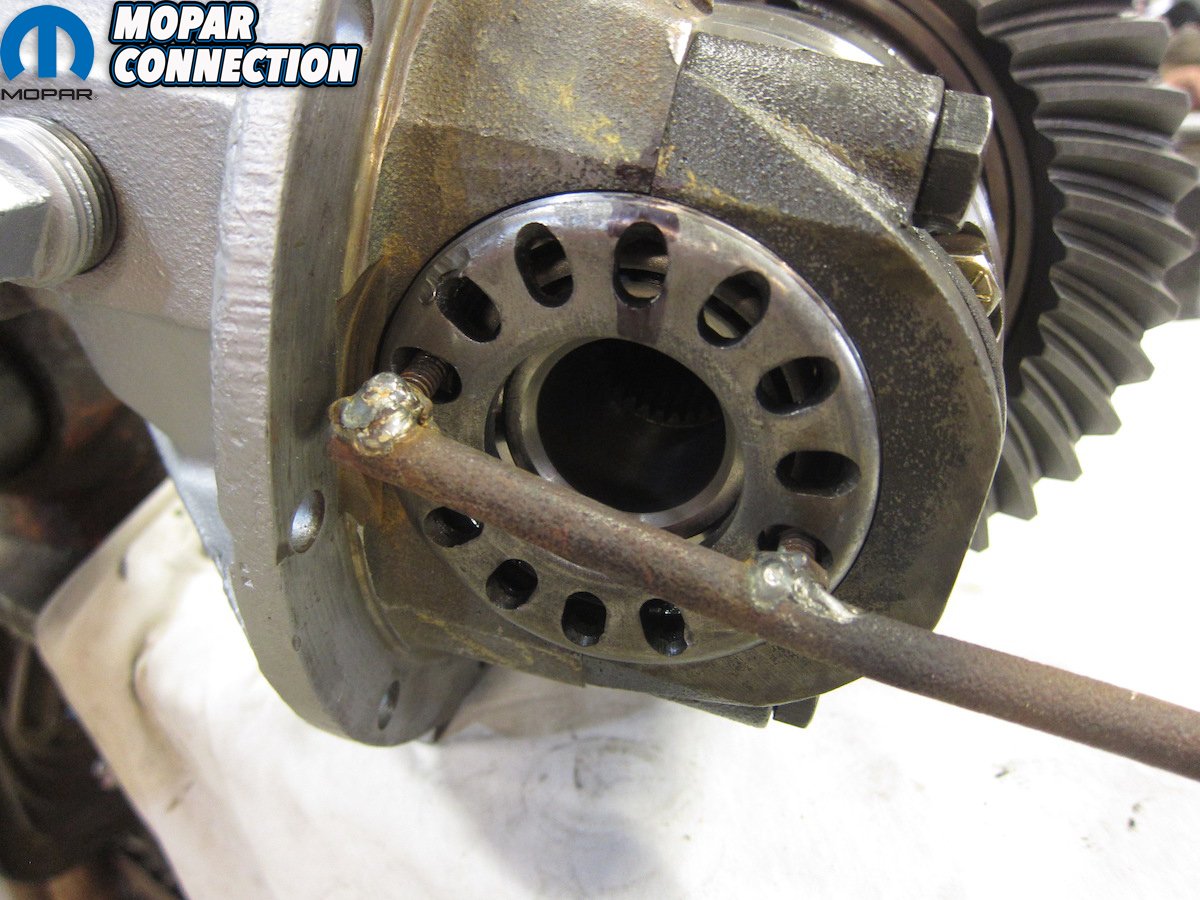
Above: Differential assembly was straightforward with a home-made spanner tool for the adjusters.
One thing that makes the 489 unique is its use of a crush sleeve to set pinion bearing preload as opposed to the 741 and 742 cases’ solid spacers and shims. The crush sleeve can be daunting to some since the installer really only gets one chance to get it right, but the design has proved trustworthy when properly set through service manual procedures. Yukon does offer a crush sleeve eliminator kit (P/N SK CSC8.75) for those who prefer it. Either way, the end result needs to be a pinion with a preload torque of 20 to 30 inch-pounds on brand-new bearings. We verified ours with a drive beam torque wrench, then moved on to the differential install.
At this point, the pinion portion of the rebuild was complete barring any contact pattern concerns that could only be checked with the entire assembly fitted together. With races on, the differential was dropped into the housing and the main caps were installed in their original positions per punch marks from earlier. Hand-tight cap bolts were followed by the screw-in adjusters. A set of home-made spanners snugged them up, but it would’ve been a whole lot slicker to have used a pair from Yukon (P/N YT A05).


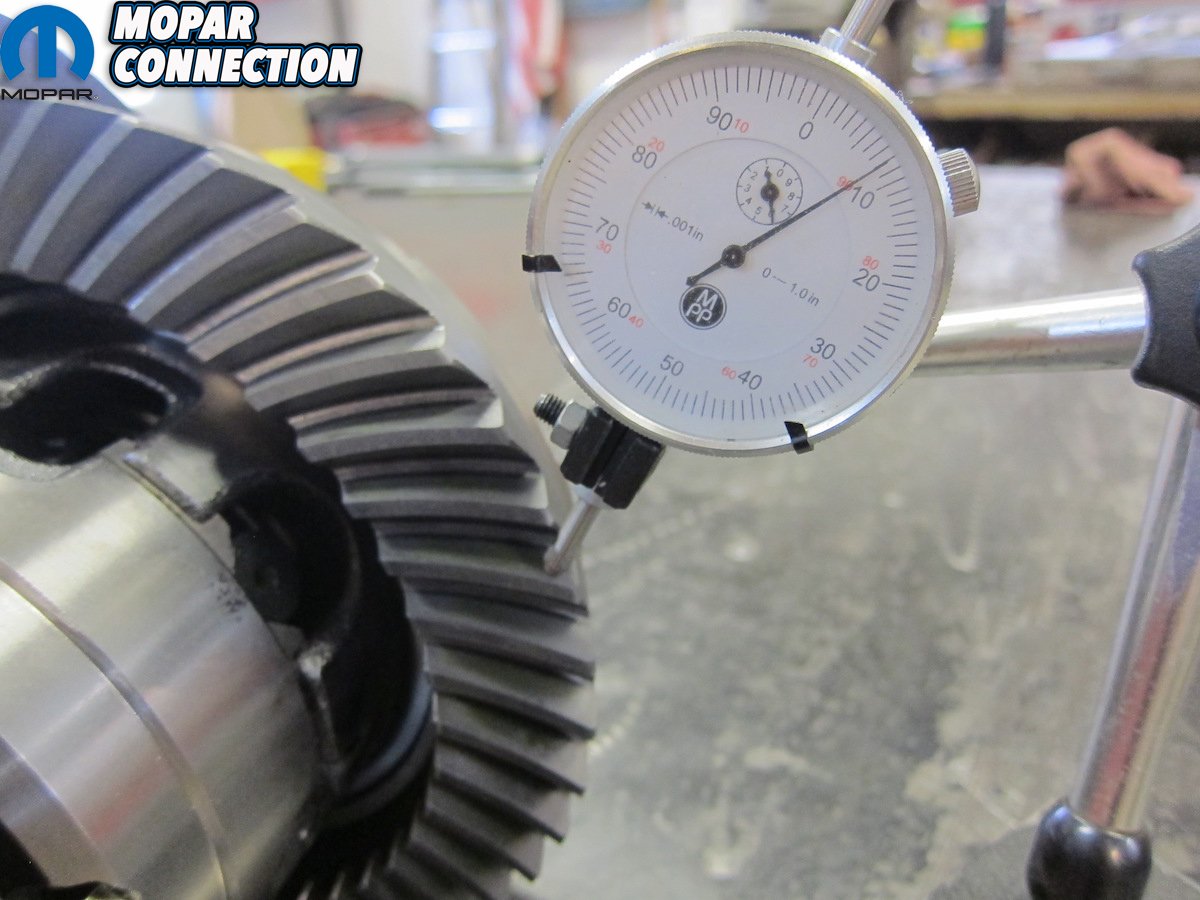
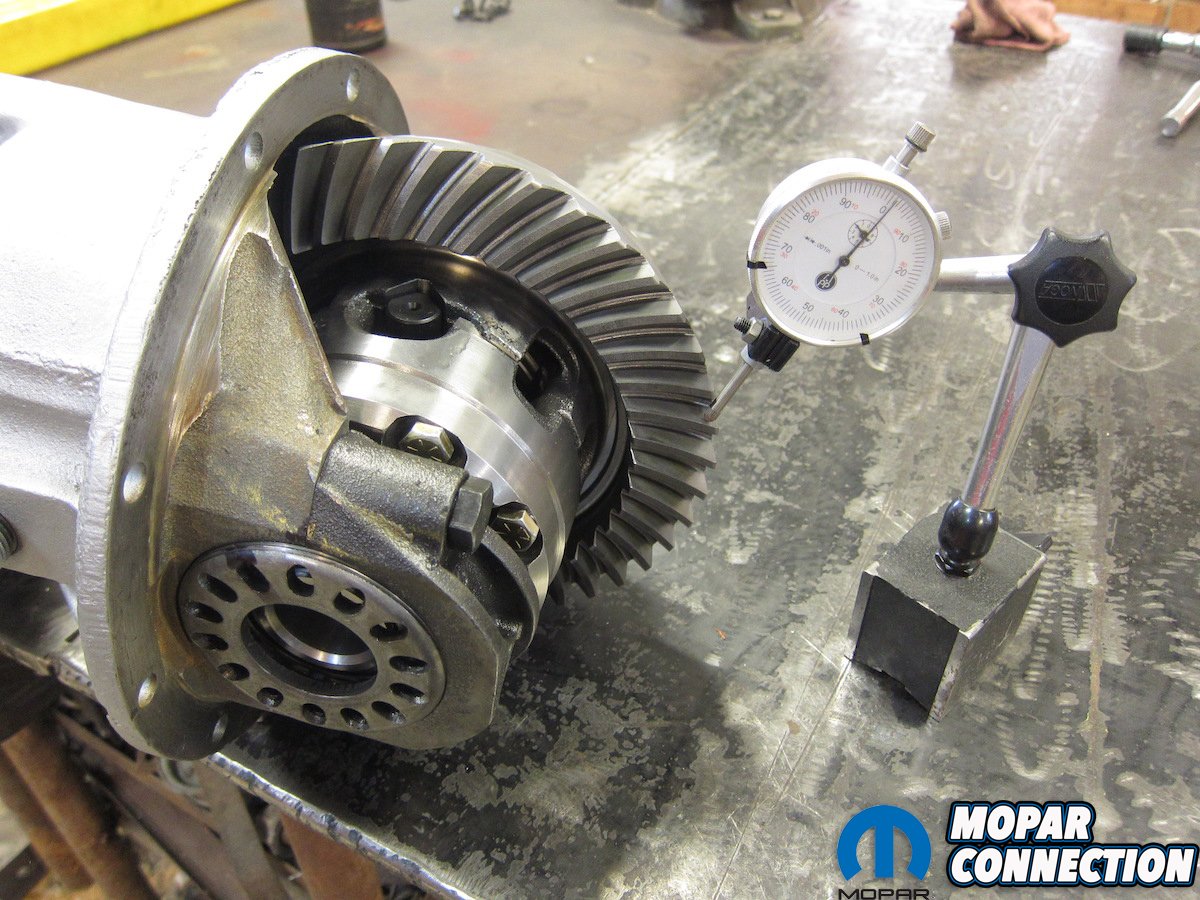
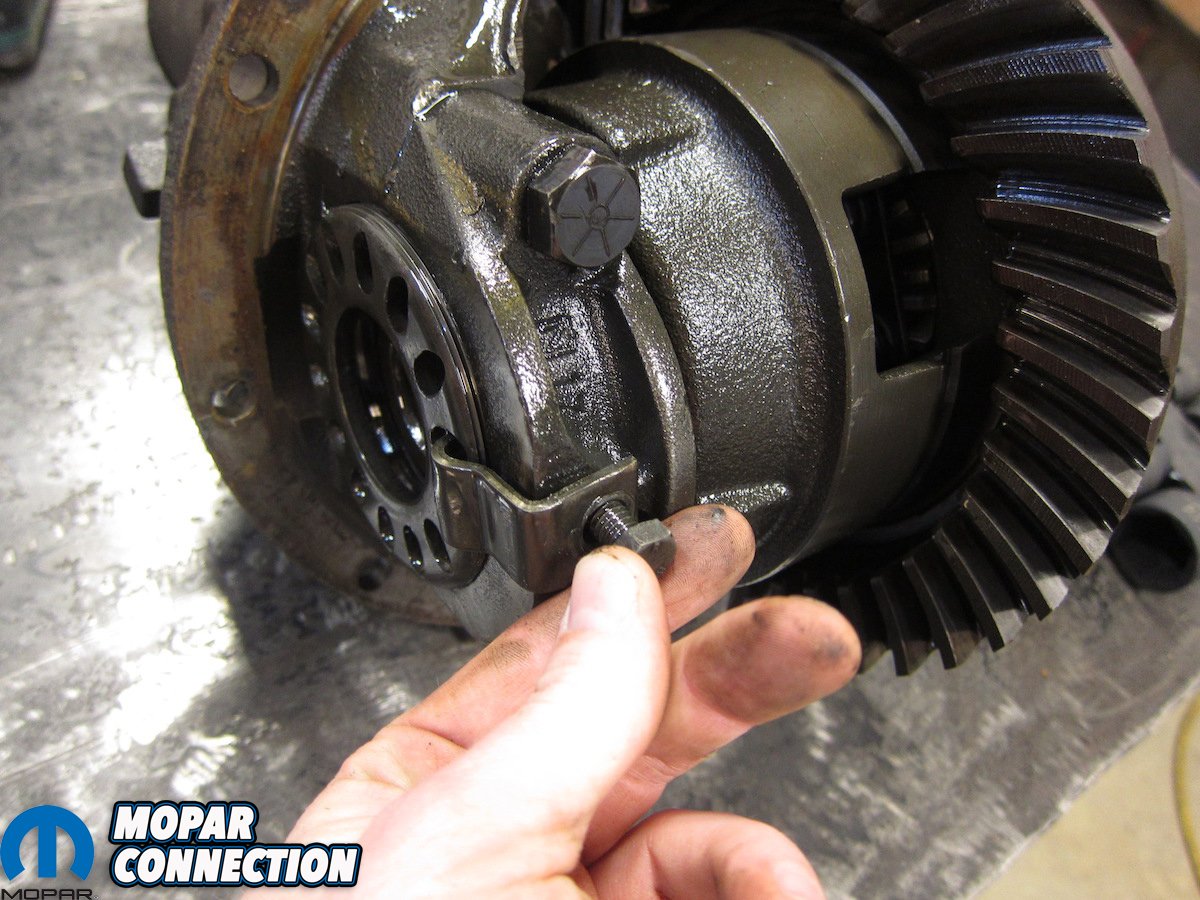
Above: Backlash was dialed in and adjuster locks installed per the manual procedure.
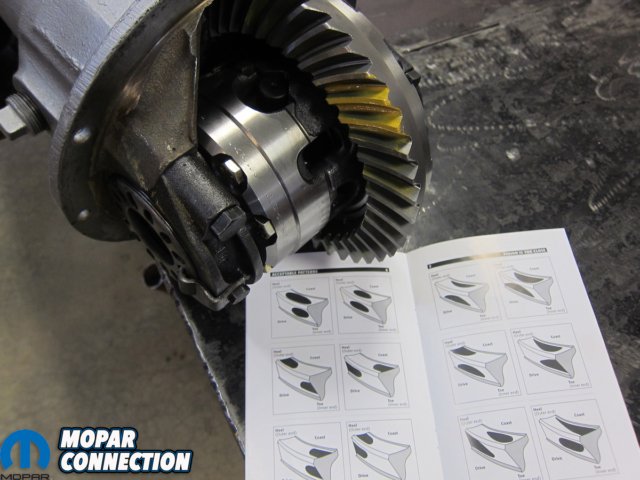
Above: Gear contact paste confirmed correct setup per Yukon’s chart.
Adjustment from there was made exactly per the service manual. One bearing cap bolt on each side was torqued to specification before backlash was set to 0.001” as measured with a dial indicator on a magnetic base. Once there, we installed the adjuster lock on the back-face side of the pinion to keep it from moving. The opposite adjuster was turned in one notch at a time until backlash was in the 0.006” to 0.008” range. Using this method not only set the backlash, but also differential bearing preload. The only way to do this correctly is to follow the service manual word-for-word throughout the process.
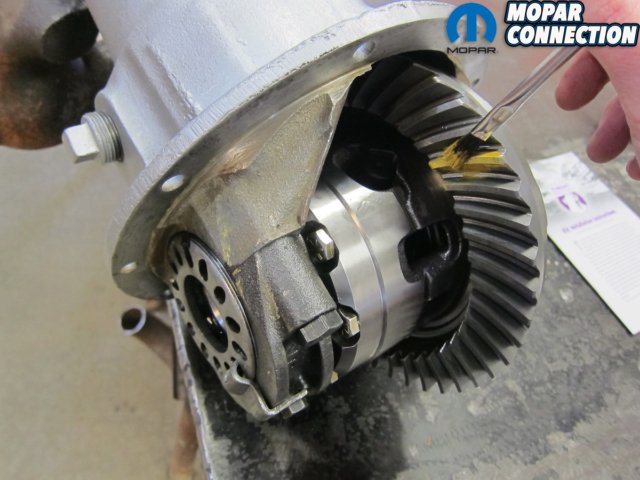
Gear tooth contact pattern was the final certification for road duty and, again, all of the necessary supplies were included. The yellow contact paste was liberally applied with its corresponding brush to several areas of the ring gear. Rotating the pinion one complete revolution in each direction provided distinct drive and coast markings. Upon comparison with Yukon’s acceptable pattern chart, we found that we were in the clear. Had something been off, a total disassembly would have been required to adjust pinion bearing shimming. Thanks to Yukon’s shims and starting thickness recommendation, that extra effort wasn’t required.


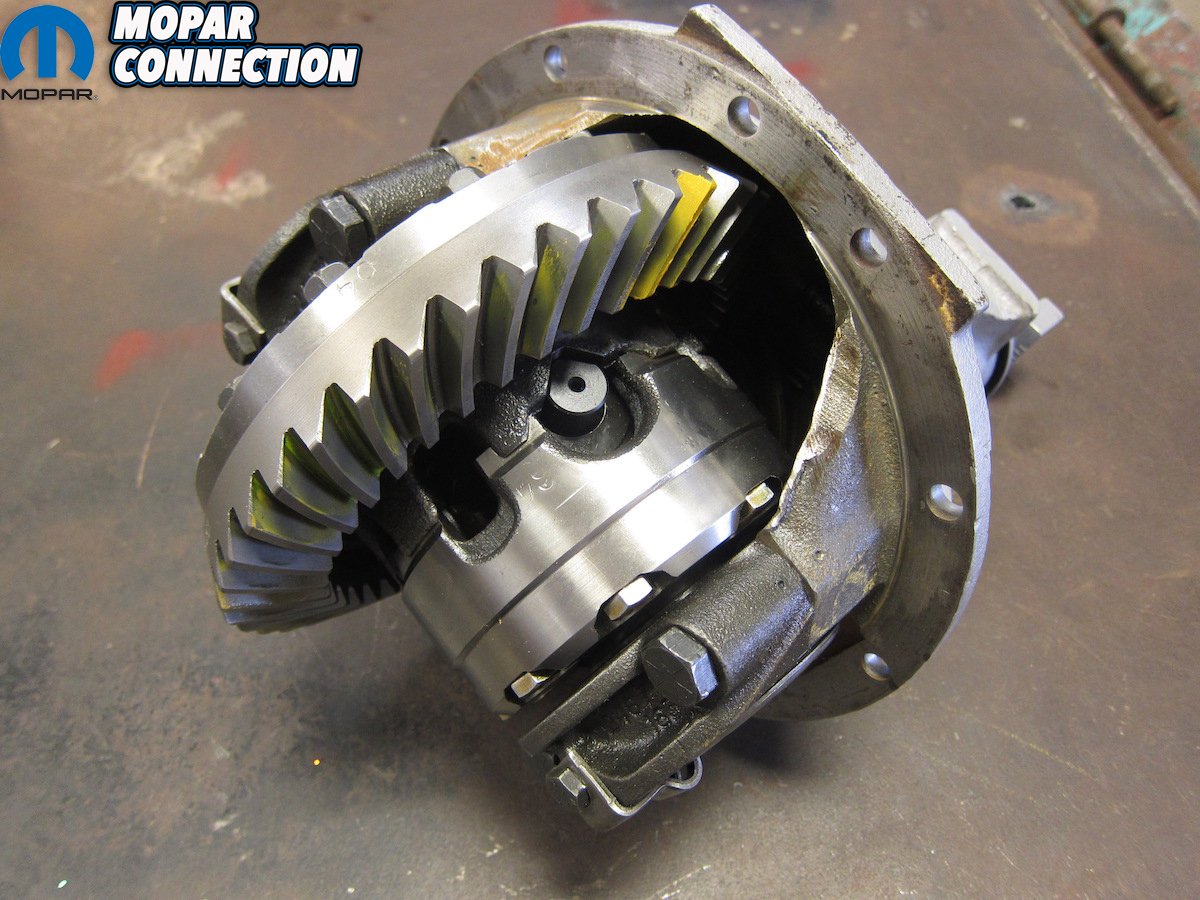
Above: The finished unit was dressed to impress and ready to roll.
Lucky for us, the hard part was over as the remainder of the renovation involved reinstalling the center section, axles, wheels, and appropriate fluid, then going for a spin. Without question, YearOne’s Yukon-stocked kit saved days of digging through parts books and waiting on a mountain of boxes. One part number, one click, and one tracking number resulted in one complete package that put us in the best possible position for success.
Rebuilding a rear end isn’t something you want to have to do twice and the completeness of the kit really allowed us to focus on correctly executing the rebuild process rather than just the parts purchasing. The end result was quiet cruising bliss, aside from the few times we were obligated to verify differential function with a firm right stomp and a pair of scalding witness marks on the pavement. YearOne and Yukon ended up making the math pretty simple: one box of parts plus one afternoon of work equals two tires of fun.


