


You might remember seeing this ’13 Dodge Daytona in our article, “Getting Low On A 2013 Charger Daytona With Hurst Performance Products.” Installing a set of Hurst lowering springs gave the car a better look and increased the handling without sacrificing daily drivability. The car looks great but doesn’t sound or perform quite as well as we would like; unfortunately, the car continues to be daily driven and can’t be down for more than a couple of days. To help us out, we turned to the pros at Holley for their help adding a few ponies and giving our Daytona that desired muscle car sound.
After making a few calls we drove the Daytona up to see the guys at Big 3 Racing in Hinckley, Ohio. While we were there, we were able to get a baseline run for the Daytona. Once the car was strapped down on the dyno, the guys ran a few warm up passes and then two final pulls. The Daytona peaked at 341 rear-wheel horsepower and 353 ft-lbs of torque. With our baseline set, it was off to find an exhaust.
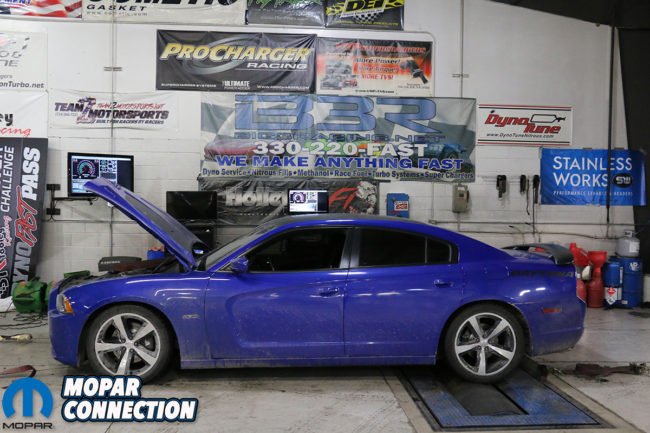
Above: Our 2013 Dodge Charger Daytona on the dyno at Big 3 Racing.


Above Left: The Daytona made 341 horsepower and 353 ft-lbs. of torque stock. Above Right: As we made our few pulls the guys at Big 3 Racing kept an eye on the cars vitals.
Choosing an exhaust is not so easy these days. There are a lot of choices, each one sounds different and you can’t always hear what they all sound like. We wanted an exhaust system that would outflow our current setup, give us more power, that was easy to install and present us with an aggressive sound when we hit the gas. What we didn’t want was a horrible drone during cruising speeds or something that required a lot of modification or welding.
We were very intrigued with Hooker’s Blackheart Speed Exhaust products. They state, “From the cylinder head flange to the tailpipe, the Blackheart line is engineered to provide maximum exhaust velocity, ground clearance, style, performance, and quality.” With Hooker’s long history of exhaust products, we trusted that the Blackheart line wouldn’t disappoint and decided to go with it. With multiple options for header style and sizes we turned to Holley’s Doug Marino to learn more.


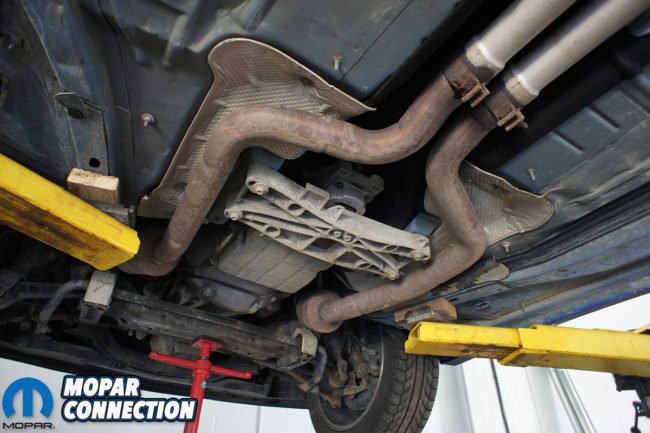

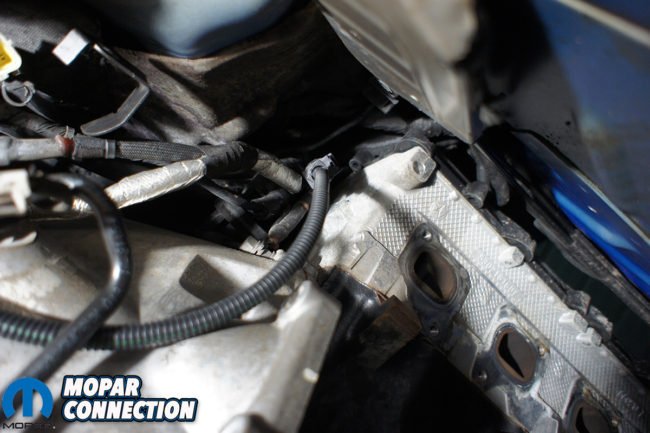
Top Left: Before we lifted the car in the air we looped the seat belt through the steering wheel per Hooker’s instructions to prevent damage to the clock spring when we disconnected the steering shaft later on. Top Right: It’s always a wise choice to place jacks under the front and rear of the car when your working on a two post lift. Bottom Left: You can see our our stock mid pipes and catalytic converters. Bottom Right: The previous owner threw on some cheap mufflers and 2″ exhaust pipe that was restricting exhaust flow and didn’t sound very good.
Hooker’s Blackheart line offered both long tube and shorty headers for our Daytona. We were searching for a simple install and we assumed the shorty header would probably be easier to install without sacrificing much performance. Doug explained otherwise, “A (well-designed) long tube header will almost always outperform even the best shorty header in all areas from idle to redline. Shorty’s are handicapped by the nature of the application. They are usually required to be very compact and that causes the design to be compromised in almost all areas.” Doug followed up with a list of the pros and cons of both style headers:
Shorty Pros
- Better power than a manifold in most cases
- Significant weight savings over a cast iron manifolds
- Less expensive than long tubes
- Connects to factory exhaust
- Emissions friendly option (If CARB exempt)
Shorty Cons
- Less overall power potential than a long tube
- Can be difficult to install
- Applications are limited for some vehicles
Long Tube Pros
- Better power and torque potential compared to a shorty
- Balanced cyl to cyl scavenging – better power , fuel distribution
- Lower cost to HP potential than a shorty
- Easier to install in most cases
Long Tube Cons
- Higher initial cost
- No emissions compliance
- Ground clearance issues in some cases
- Can create service issues (starters, etc.)
- Requires compatible exhaust
After looking through Doug’s pros and cons for both shorty and long tube headers, we quickly decided on the long tube headers. They would offer the most performance and wouldn’t be any more difficult to install than the shortys. Doug also noted, “Our long tube headers feature a more traditional merge style collector (although not a true fabricated merge collector). Not only do they have a spike but they also taper to a smaller convergent choke point than the outlet of the collector. The taper has several functions, it reduces the interior open area or dead space inside the collector, focuses the low pressure signal from each primary to the next cylinder beginning its exhaust event and promotes inertial scavenging and stronger more focused wave signals. It also creates a venturi effect speeding the exhaust gas exiting the collector and into the exhaust system for better overall power.”
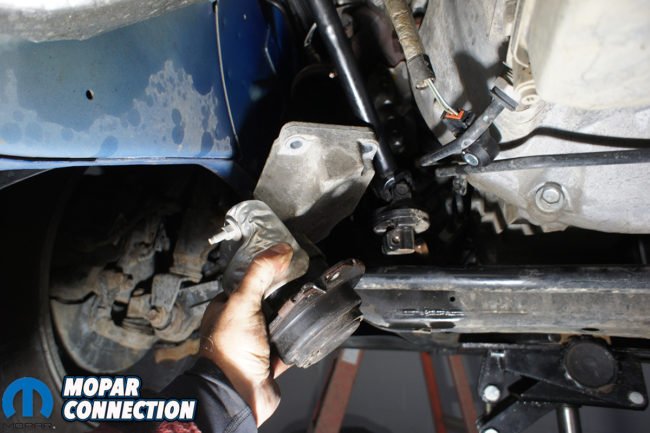
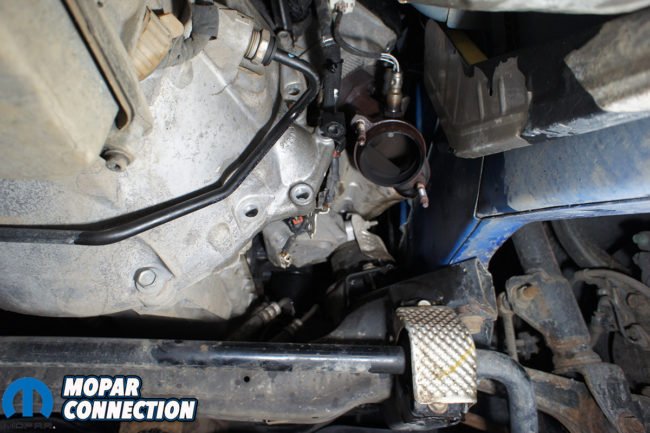
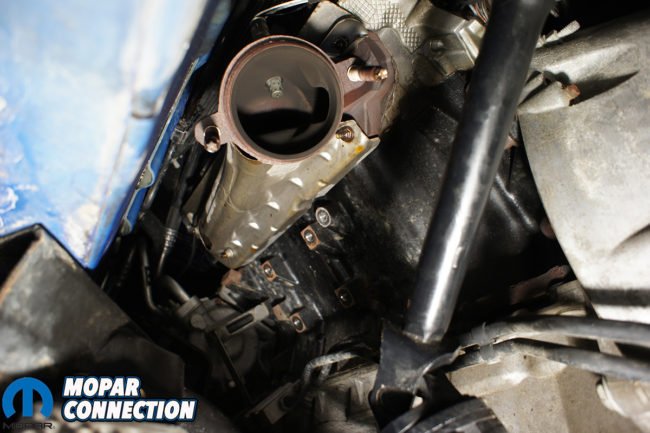

Top Left: Removing the motor mounts and disconnecting the steering shaft are a necessary for installing the Blackheart long tube headers but also make it easier to remove the stock manifolds. Top Right: Removing the starter is a must and best to remove early on. Bottom: With motor mounts removed you can access the manifold bolts a lot easier.
Our next choice was what size primaries we wanted the long tube headers to be. The Blackheart long tube and shorties both come in two sizes, 1 3/4” and 1 7/8”. We thought the bigger diameter headers would be better, but Doug explained otherwise. “The 1 3/4” header will produce a much broader torque curve and within a few HP of 1 7/8” header. The 1 7/8” header would be a better choice for supercharged applications that can take advantage of the additional primary volume or heavily modified engines running at higher engine speeds most of the time where low speed torque production is not a primary concern,” stated Doug.
We really had to sit down and think about what our end goals for our Daytona were. It is daily driven, not raced and on the weekend it’ll be driven to shows. Although it would be awesome to supercharge the Daytona, we do not have any plans for that. At most we might throw a cam in the 5.7 HEMI, which the 1 3/4” primaries would be sufficient. This had us leaning towards the the Blackheart 1 3/4” long tube header (70102305-RHKR).
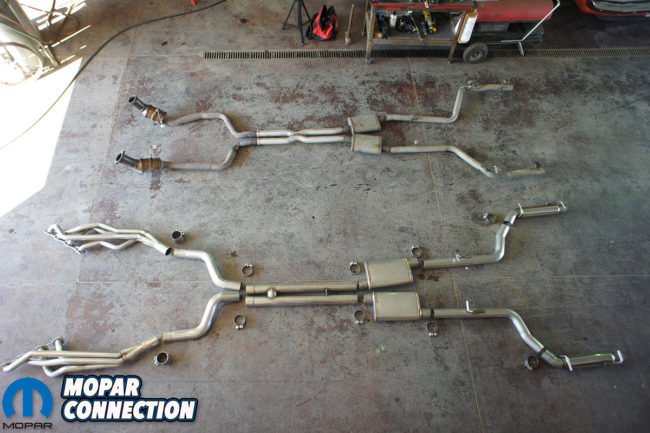

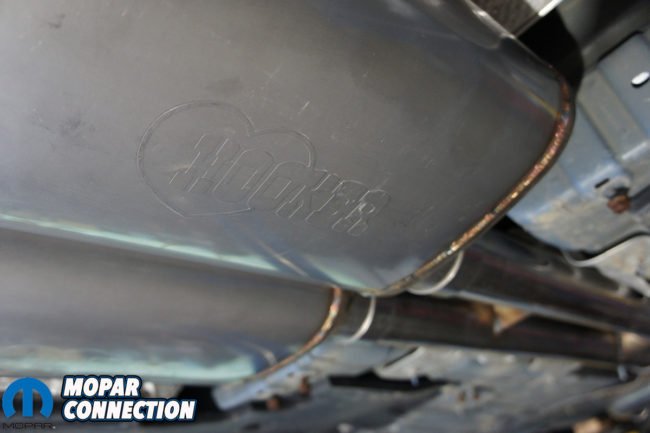
Above Left: The Hooker’s Blackheart header-back exhaust is superior to the factory exhaust in every way. Above Right: It’s a shame that exhaust is installed under the car where no one car see it. From the welds to the stainless steel construction, the exhaust is a piece of artwork.
To help further our decision, Doug explained how to calculate torque peak rpm for both headers. This would give us actual data instead of just opinions of what would work. The formula (Tube ID x Tube ID x (3.14 / 4)) x 88200 / Area of 1 cylinder = peak torque rpm. Finding the exact ID of tubing can vary depending on exact material and supplier, but any steel tubing chart found on the web will be close enough for our purpose.
- 1 7/8 Primary = 1.780 x 1.780 x.7854 = 2.474 x 88200 /43.125 = 5089 rpm
- 1 3/4 Primary = 1.655 x 1.650 x.7854 = 2.151 x 88200 /43.125 = 4399 rpm
The chart we found listed 18 gauge stainless 304 tube ID for a 1 7/8” pipe was 1.780” and 1 3/4” was 1.655”. Doug uses 3.14/4 = .7854 as it is another way to find volume of a cylinder, he is normally looking for volume of a cylinder per inch of length. 88200 is a mathematical constant and the displacement of 1 cylinder of a 5.7 HEMI is 43.125. To calculate displacement of cylinder just divide the amount of cylinders by the total number of cubic inches, 345/8 = 43.125. If you have a 6.1 its 46.25 and a 6.4 would be 49.


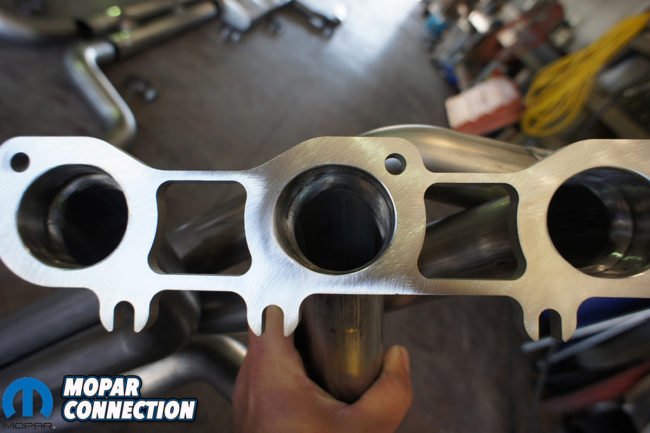
Top Left: The Blackheart line of headers all come with 3/8″ CNC water jet cut flange for added strength and sealing ability. Top Right: Another view of the hand welded long tube header. Bottom Left: O2 bungs are welded in each header at the collector. Bottom Right: Each header flange is ground flat and each port is ground smooth for maximum sealing and exhaust flow.
Since the 1 3/4” header would peak torque around 4400 rpm, we chose to go with it over the bigger 1 7/8”. If we had plans of racing, forced induction or stroker build then we would sacrifice the few hundred rpms now and choose the 1 7/8” primary. Remember this is only a close estimate of torque peak rpm. To calculate the exact number of a specific header would take further math and need to take into consideration bore, stroke, cam, heads, compression, intake design, runner length header length, and more. These will all effect the torque peak rpm. For majority of enthusiasts this formula is all you need to make a decision between multiple primary sizes.
The math reinforced our decision to go with the Blackheart 1 3/4″ long tube headers. With our header chosen, we needed to complete the rest of our exhaust with a header-back system. Since we were driving this on the street and didn’t want the exhaust tone to be too aggressive we chose the header-back kit 70502321-RHKR which came with mufflers and resonators. Yes, you read that right we choose mufflers because the other option deleted the mufflers and with only resonators it would attract some unwanted attention driving around town. For a race application the muffler delete would be great option.
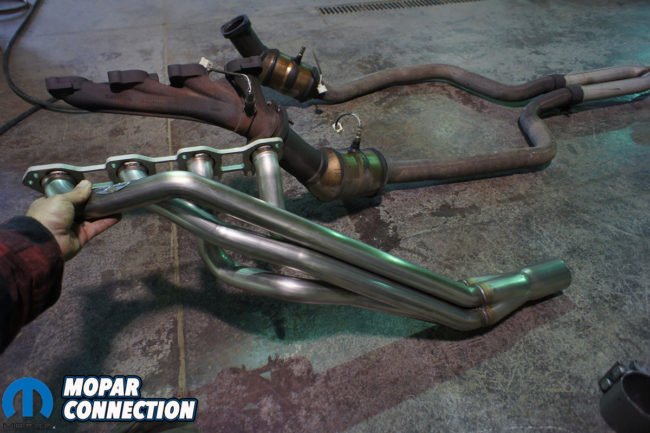
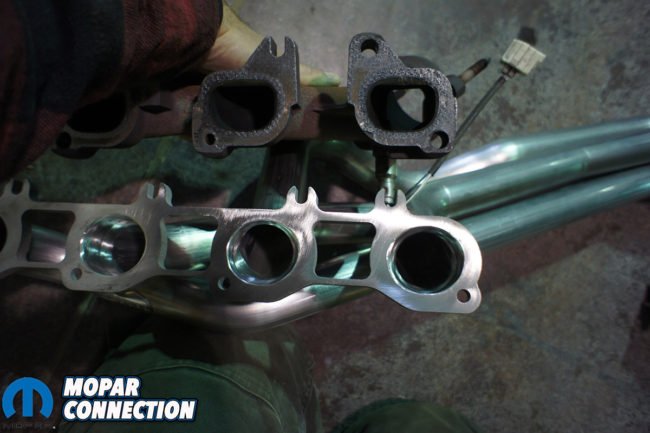


Top Left: It’s pretty obvious when comparing the factory manifold and long tube header how poor the factory manifold flows. Top Right: The headers ports are slightly bigger and circular compared to the factory D shaped. This won’t inhabit any horsepower but will help flow more if you change or port your heads. Bottom Left: Looking up the header collector you can see the spike and O2 sensor bung. Bottom Right: We think this is a good look, who really needs exhaust anyway?
The Blackheart header-back system utilizes 3” 304 stainless steel construction, uses OEM hardware, 28% weight savings over OE exhaust and designed for maximum ground clearance. The exhaust is designed to fit right where your factory exhaust was and use all the original exhaust hangers. It would also allow us to retain our factory bumper mounted exhaust tips. Best of all it comes with Hooker’s limited lifetime warranty.
Along with the the 3” stainless tubing Hooker choose straight through absorption mufflers, high flow resonators and an H-pipe for maximum flow. Whether you have a mild or wild modern Mopar, the 3” tubing will allow you to squeeze every bit of power from your car. The straight through absorption mufflers and H-pipe offer the best flow dynamic while giving the exhaust a classic deep muscle car tone.


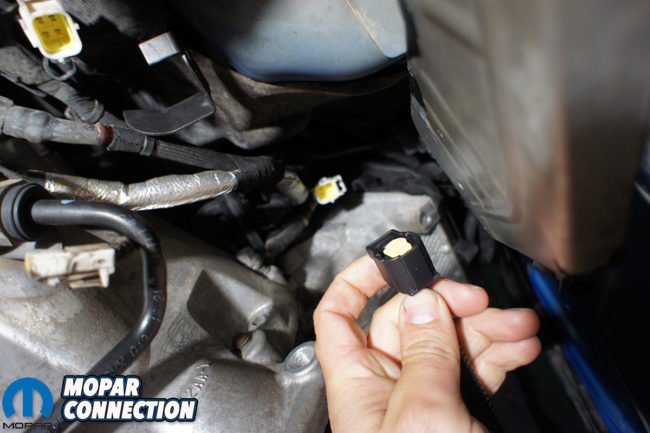
Top Left: Before installing the new manifold gasket and headers we used a die grinder and medium grit Scotch-Brite pad to remove the old gasket from the head. Top Right: When installing any steel bolts into aluminum (especially a head) be sure to use anti-sieze to prevent the bolts from micro welding themselves together. Bottom Left: Hooker sends O2 extension harnesses with the long tube headers for the upstream O2 sensor. Bottom Right: Be sure to plug the extension harness into the correct O2 plug as it will fit both upstream and downstream sensors.
We thought the resonators were a little unnecessary but Doug told us, “The resonators are really more of a muffler than a true resonator and they are added to take the edge off the tone and clean up the idle and low speed exhaust note. The Dodge HEMI has a tendency to flutter at idol and deceleration, they also employ a timing strategy on up shifts that amplifies that same sound and the resonators help clean that up.”
We received everything in the mail and couldn’t wait for the weekend to get everything installed. Hooker sends all the hardware you need to install the headers and exhaust. The headers come with new bolts and extension harnesses for your O2 sensors. The exhaust comes with all the clamps you need to secure the piping and the hangers are pre-welded and ready to slide into the factory mounts. You will need to purchase a set of header or manifold gaskets for the new headers.
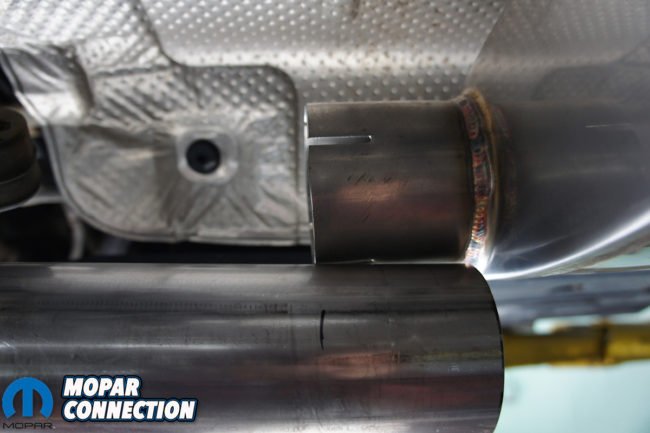

Top Left: We marked the exhaust pipes before inserting them so we could gauge how far the pipe was being inserted. Top Right: You can see on the header clamp marking the pipe allowed us to make sure both pieces of exhaust were being clamped evenly. Bottom Left: When tightening the clamps for the exhaust be sure to rotate them to the sides to prevent any scraping. Bottom Right: The straight through Blackheart mufflers sound as good as they looked.
Hooker’s instructions are very detailed and to prevent any issues be sure to follow them in order. For example, if you try to install the driver’s side header first, you won’t be able to reinstall the motor mount on the passenger side. The headers take the most time to install. Our Daytona only has 50K miles and everything came apart fairly easy. If you have a high mileage car you might plan on a little longer for those stubborn rusty bolts.
Once the Blackheart headers and exhaust were installed, we instantly could hear the difference in exhaust tone as we started it up. As we were cruising through town there was no drone but when you stepped on it, everyone around knew it. Don’t be alarmed when you start your car after the installation and the check engine lights on. The Blackheart exhaust deletes the downstream O2 sensor and will kick on the check engine light. After we take the car to Big 3 Racing for a tune with HP Tuners, the check engine light will be turned off.

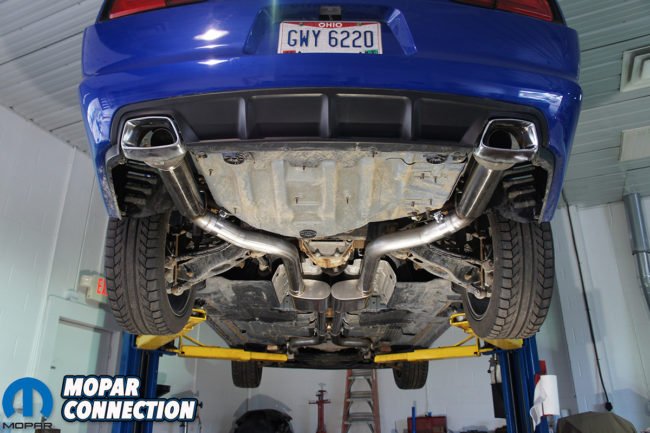
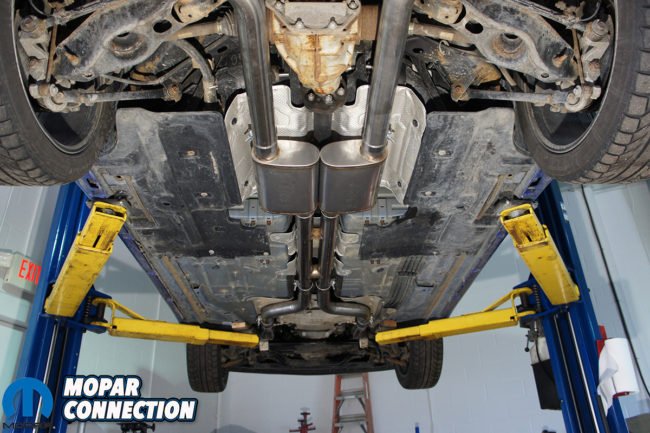
Above Left: Although not completely factory, the exhaust was a hack job with poorly bent tubing, no resonators and crappy mufflers. Above Right: Hooker’s Blackheart exhaust looks better, fits tights, no hard bends and with the addition of resonators will help drone and take the edge off the exhaust note.
Overall, Hooker’s Blackheart Speed Exhaust fulfilled everything that we needed. Everything fit like it was supposed to, simple installation, multiple options for any enthusiast, all stainless construction for durability and best of all the Daytona has that muscle car growl that it deserves. We can’t wait to feel the difference after Big 3 Racing dials everything in perfectly with HP Tuners. Check back soon when we find out how much power we gained and a few other benefits from installing Hooker’s Blackheart long tube headers and full exhaust system.


 Mopar Connection Magazine – The ONLY Daily Mopar Magazine © 2022. All Rights Reserved. Mopar Connection Magazine is the ONLY daily Mopar Magazine bringing you the latest Mopar news, technology, breaking news, and Mopar related events and articles. Find out the latest information about Mopar, Mopar products and services, stay up to date on Mopar enthusiast news, dealership information and the latest Mopar social media buzz! Sign up for the Mopar Connection Magazine newsletter for the latest information about new products, services and industry chatter. Mopar Connection Magazine is the best and only source you need to be a Mopar industry insider!
 by
by