


 Assembling the long block is the part of an engine build where everything is finally coming around turn four with the checkered flag in sight. There are still gears to grind, but once you crest that short block hill, the mind‑numbing monotony of bore sizing and bearing clearances is finally in the rearview mirror.
Now the fun stuff — the part where it stops being a pile of parts and starts looking like something that wants to bark to life and jump under the hood of your hot rod. For our 5.7L Hemi rotating assembly, next on the hit list was a valvetrain chock full of COMP Cam’s latest G3 goodness. An HRT Stage 1 kit (P/N MK201-300-17) with a stump-pulling camshaft profile got the nod to get our big B-body moving down the road like it’s got something to prove.
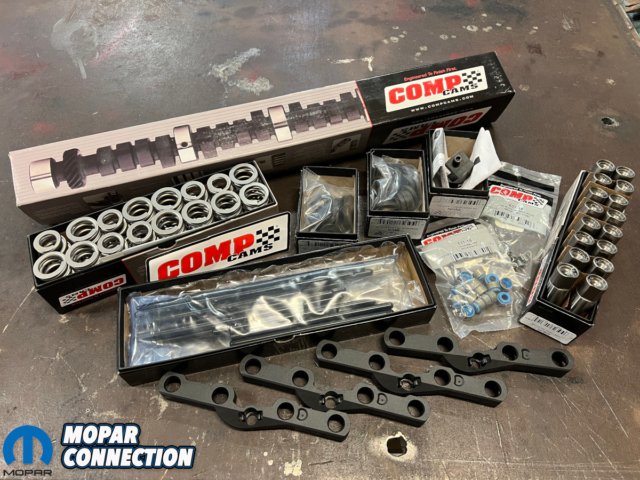
Above: COMP’s master kit included all of the valvetrain essentials.
And, man, did that kit come loaded; new non-MDS lifters, yokes, springs, spring seats, retainers, locks, valve stem seals, pushrods, phaser limiter, and limiter tool were all matched to a mellow bumpstick coming in at 216 and 222 degrees of duration at 0.050” of intake and exhaust lift.
Total lifts of 0.520” and 0.515”, respectively, complemented the mild durations geared toward fat torque and crisp throttle response. All told, COMP’s data says it should be good for a square 450 horsepower and 450 lbs-ft of torque with big gains north of 4,000 RPM compared to a stock 5.7L. Yeah, it ought to grunt with a hard stomp on the go pedal.
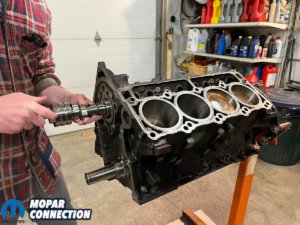
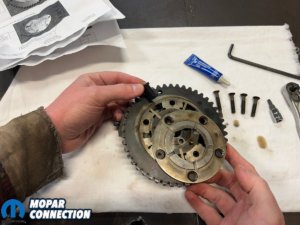

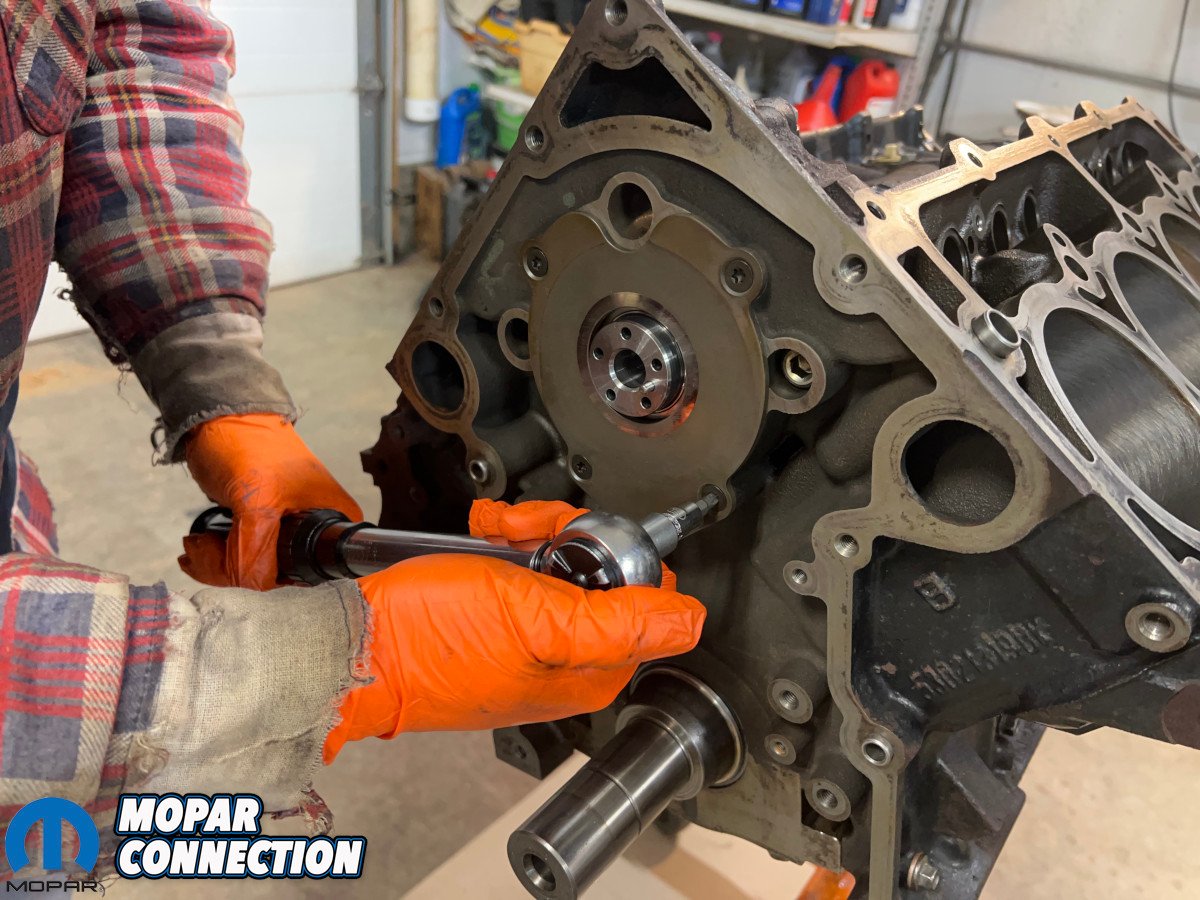
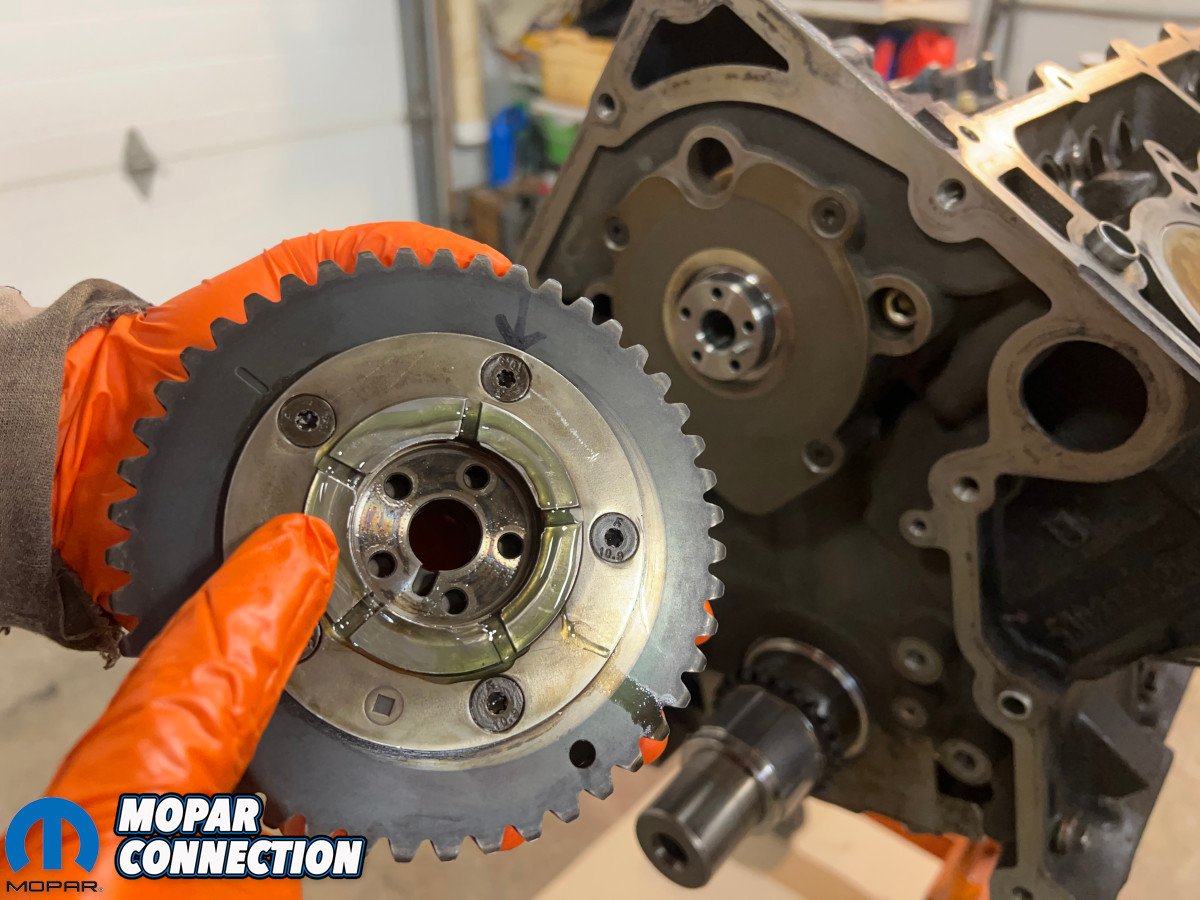
Above left: A well-lubed cam slid straight in the new bearings. Above center: Phaser rotation was limited for valve-to-piston clearance. Above right: Timing a modern Hemi is as simple as lining up the marks.
After a healthy coating of the green honey that is Lucas assembly lube (P/N 10153-1), the cam easily slid into its new bearings. A replacement rear core hole plug from Melling (P/N MEP334) was assigned to keep oil in on the backside.
Camshaft position and thrust on G3 Hemis is dictated by the bolted-on thrust plate up front which ends up sandwiched between the phaser and the front cam journal. It’s usually rare for the plate to sustain much significant wear, even in high mileage engines. End play measured in at 0.007”, well within the service manual’s range of 0.003” to 0.011”, so the four bolts were torqued to 106 in-lbs.
Before the phaser could go on, it needed COMP’s limiter (P/N 5761CPG from the kit) installed to stave off any potential valve-to-piston kisses. Once the limiting wedge was fitted, assembly lube was applied to the thrust face and the phaser was put on with its single bolt just finger tight.

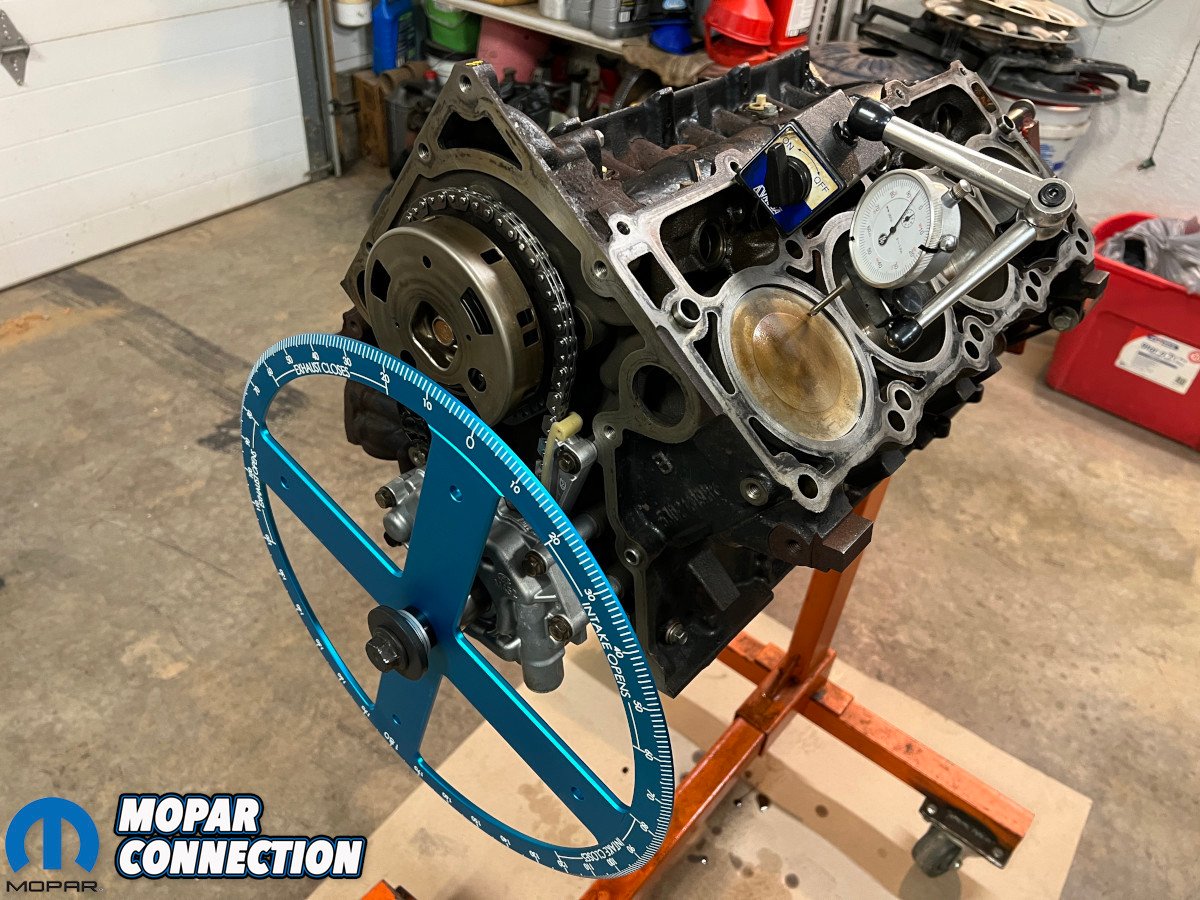
Above: Proform’s billet degree wheel (P/N 67490) came in handy to confirm timing.
Timing involved simply lining up two marks on the chain which straddled a single mark on the phaser, then matching a single mark to a single line on the crankshaft sprocket while cylinder number one’s piston was at top dead center (TDC). With the cam phaser’s mark also at TDC, the crank sprocket’s line ended up between five and six o’clock.
The phaser bolt’s final torque came in at 90 ft-lbs and, after verifying timing marks again, it was ready for an oil pump. Unlike old wedges, the G3 Hemi’s pump is driven directly off of the crank sprocket and there’s much online discussion about which variant is best.
Basically, there are four options for 2009+ engines: 5.7L/6.4L stock replacement (P/N M452), Hellcat stock replacement (P/N M452HV), high pressure/stock volume (P/N 10452), and high pressure/high volume (P/N 10452HV). Web warriors might argue for higher volume, but we’ve not seen any definitive data that says any level of reliability is to be gained in a near-stock rebuild. For that reason, the standard M452 fit this bill just fine.
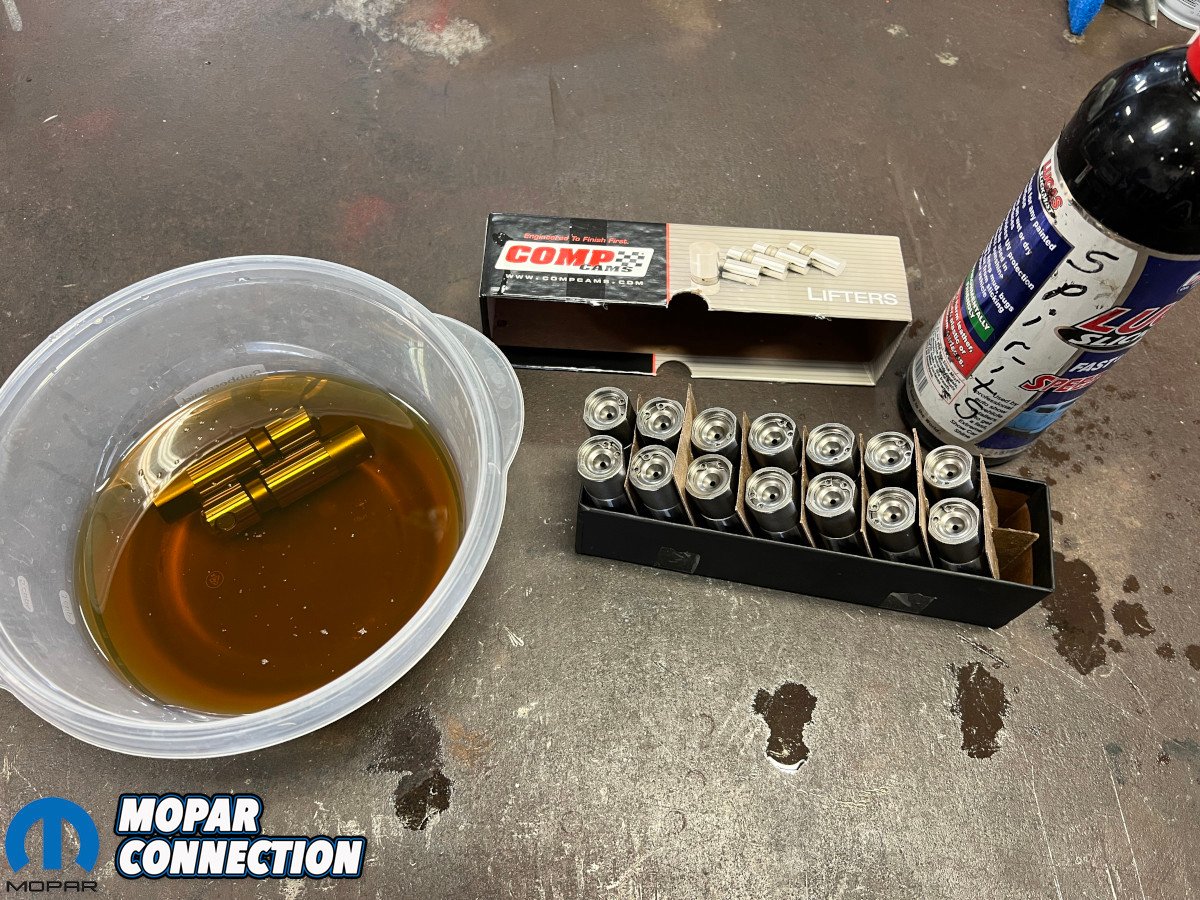
Above: New non-MDS lifter sets are a must for any performance G3 Hemi build.
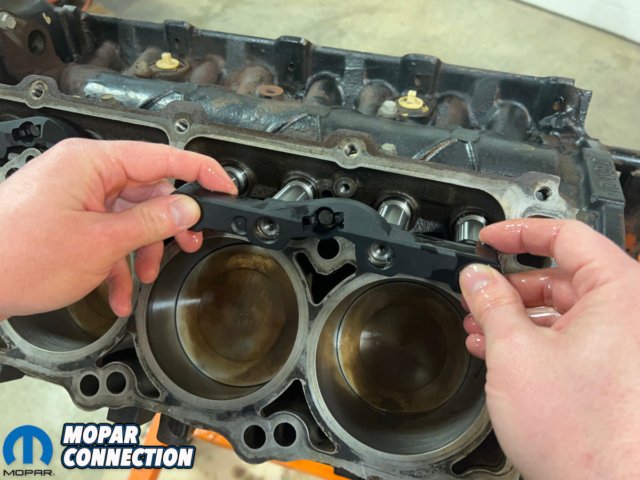
Next out of the COMP kit were the non-MDS lifters (P/N 856Y-16), all of which were wiped down with mineral spirits before getting a 24-hour dunk in 5W-30 motor oil. Sets of four slipped into their respective plastic yokes, then into the block’s bores, all awash in oil. A single bolt in each yoke, torqued to 106 in-lbs, was deemed sufficient per the trusty service manual.
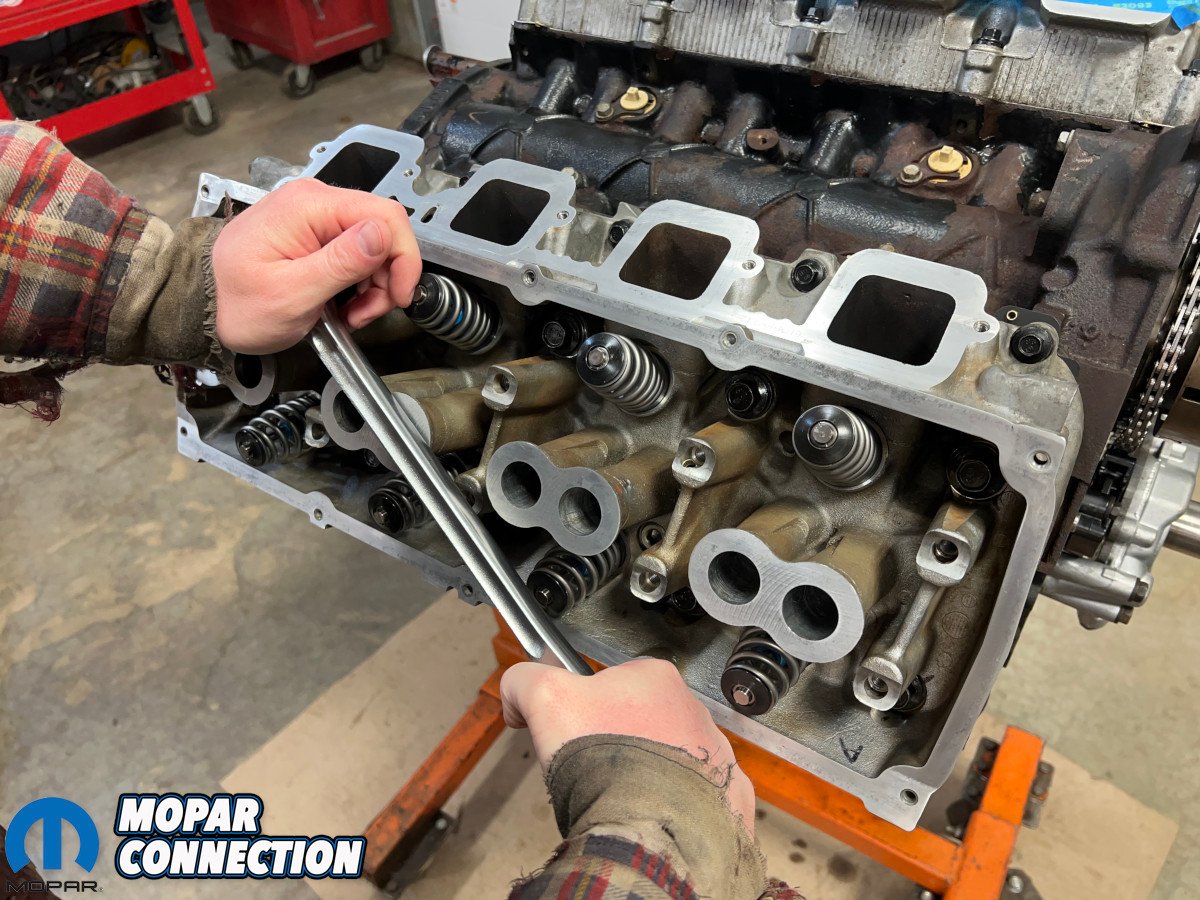
Those lifter assemblies were a necessary step in moving on to the cylinder heads since, contrary to old big and small blocks, G3 Hemi lifters are held captive by the heads. There is no lifter valley in a modern Hemi block; rather, there are four cavities for the four yokes of lifters under the upper portion of the cylinder heads. That negates the need for a traditional valley pan, but also makes cam swaps a little more intensive since the heads have to be removed.
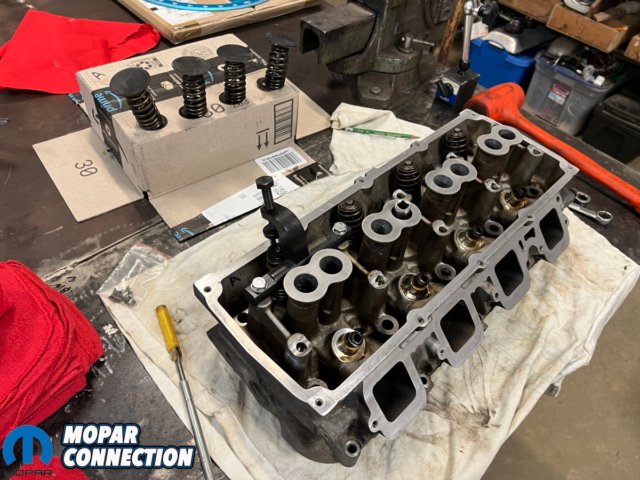

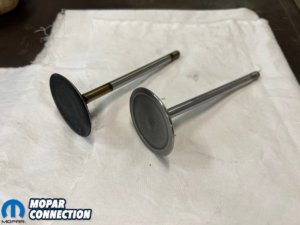

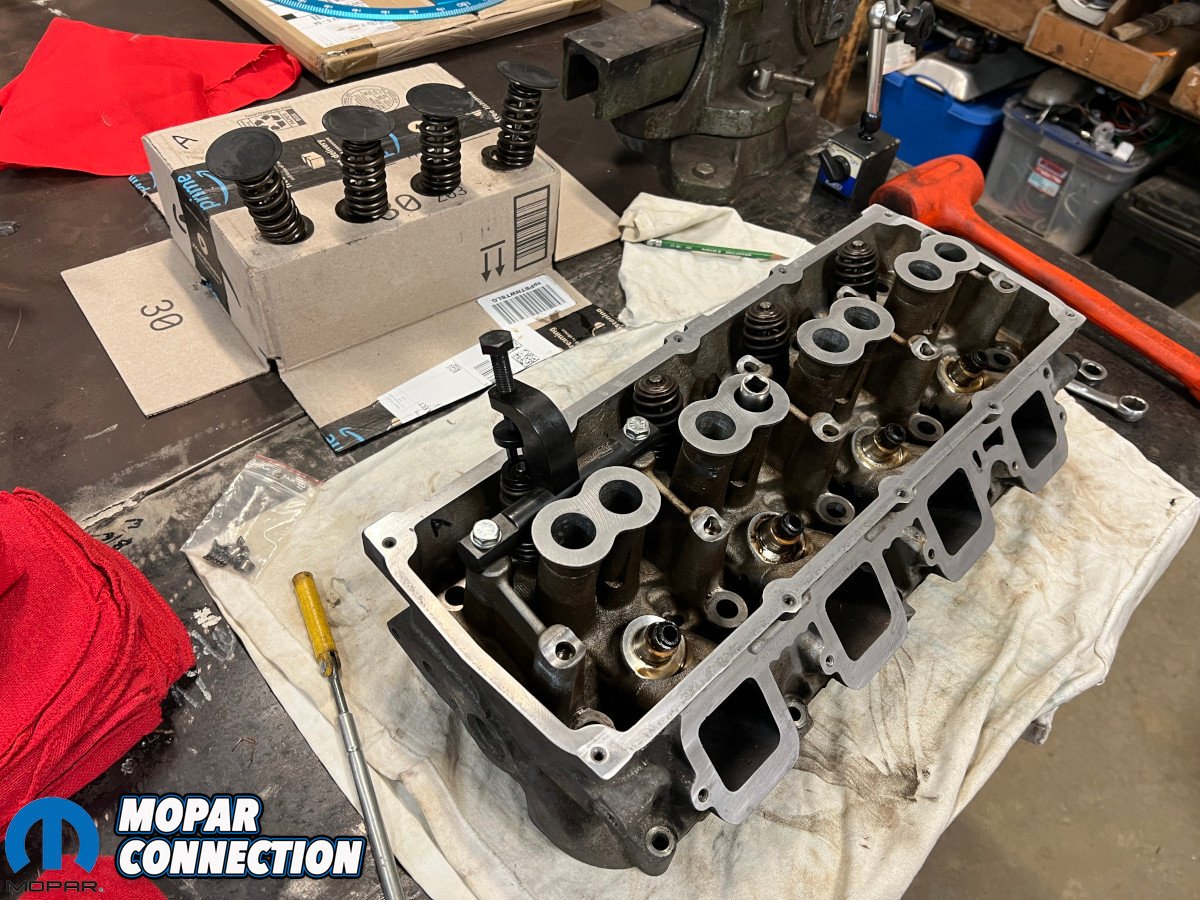
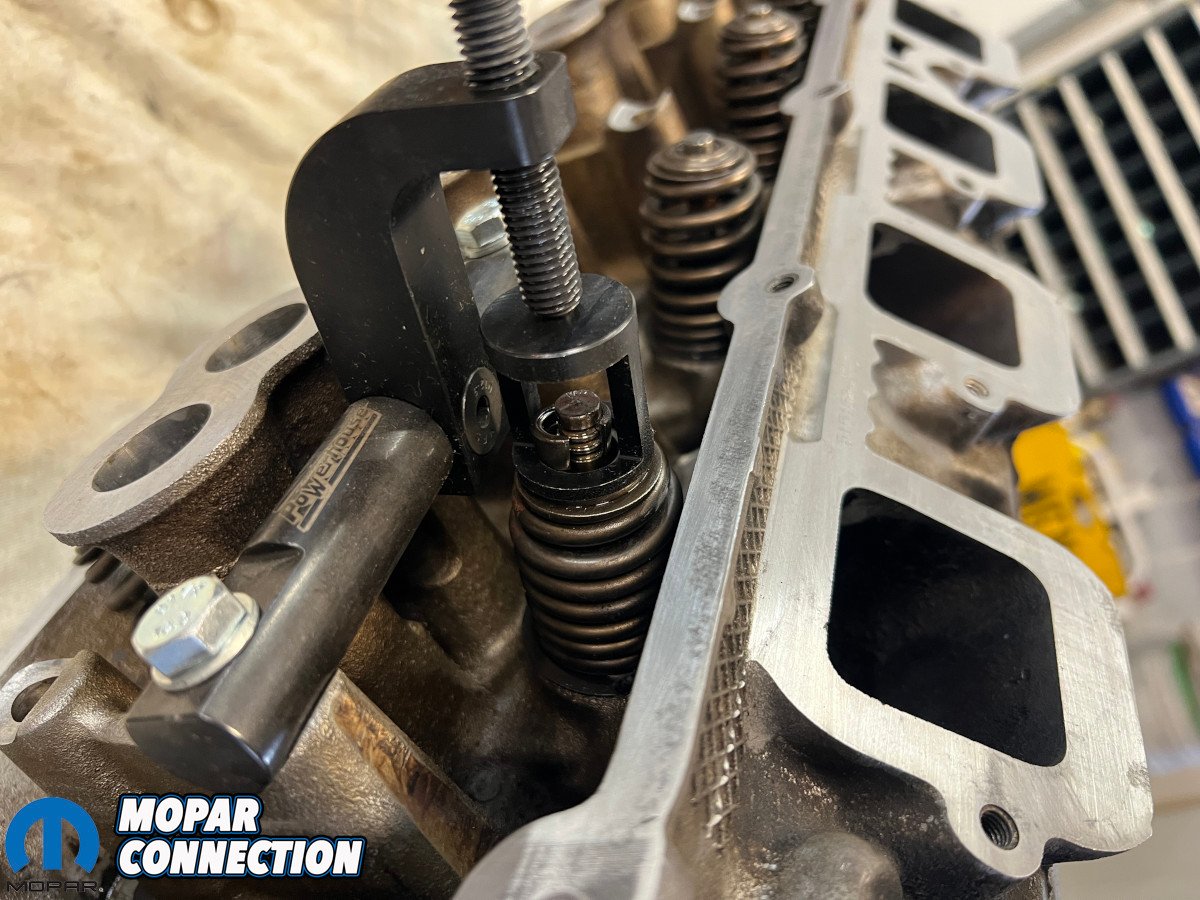
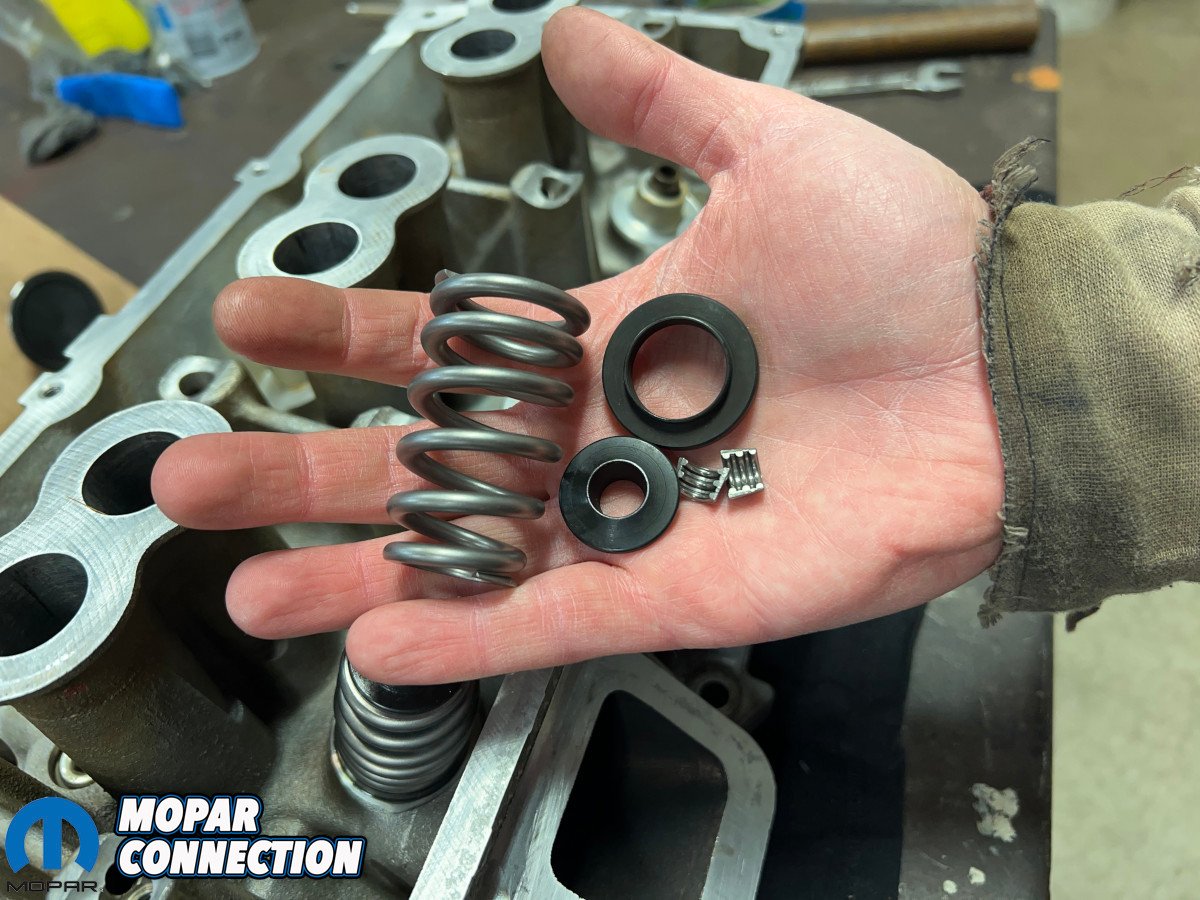
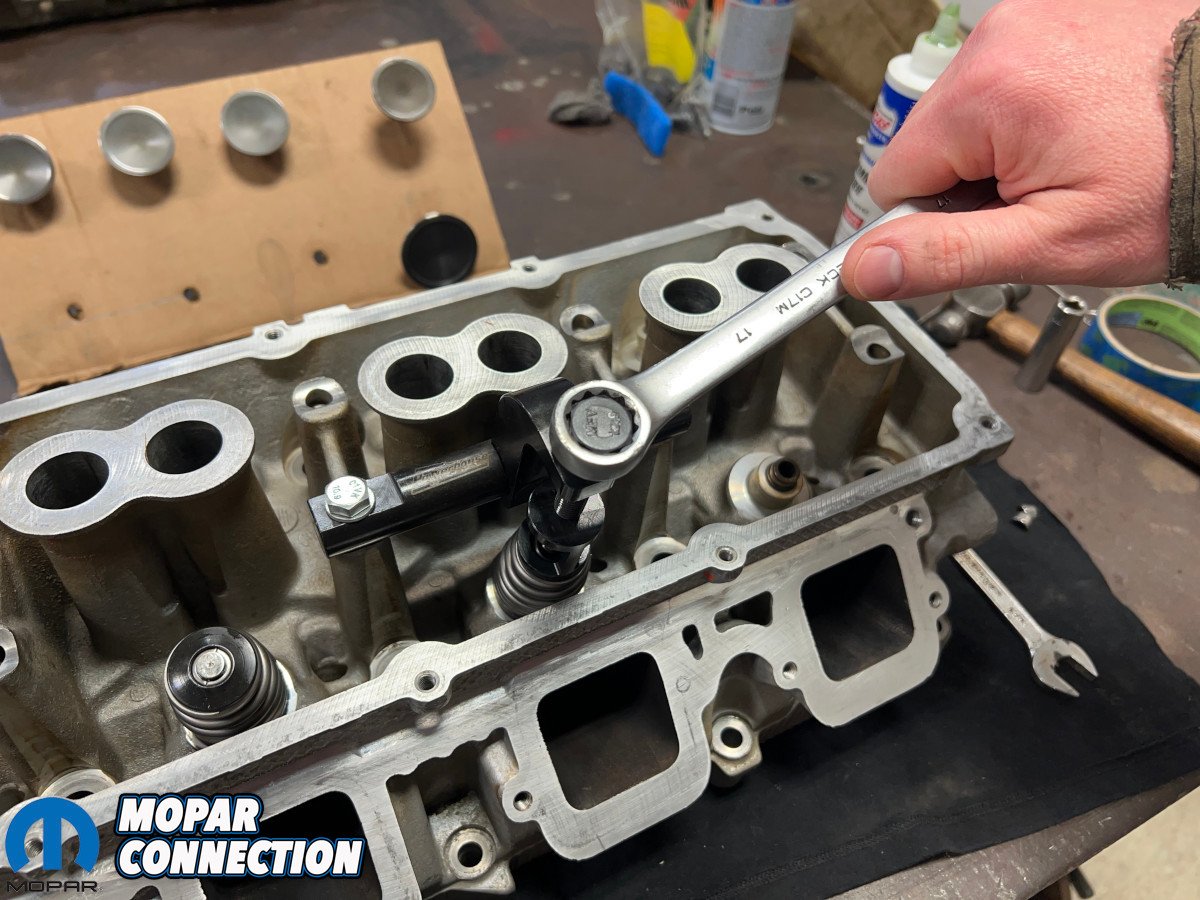
Top: Cylinder heads were disassembled separately so valves could stay in their original positions. Above left: COMP’s G3 Hemi valve spring compressor was quick and efficient. Above center: Valves were well-used, but good enough after cleaning. Above right: COMP’s complete spring set left us no guesswork whatsoever.
Speaking of cylinder heads, ours were in need of a little love. Disassembly came courtesy of another COMP-sourced apparatus, their G3 Hemi valve spring compressor (P/N POW352003). This wasn’t part of the master valvetrain kit, but a necessary piece nonetheless as it made short work of valve removal.
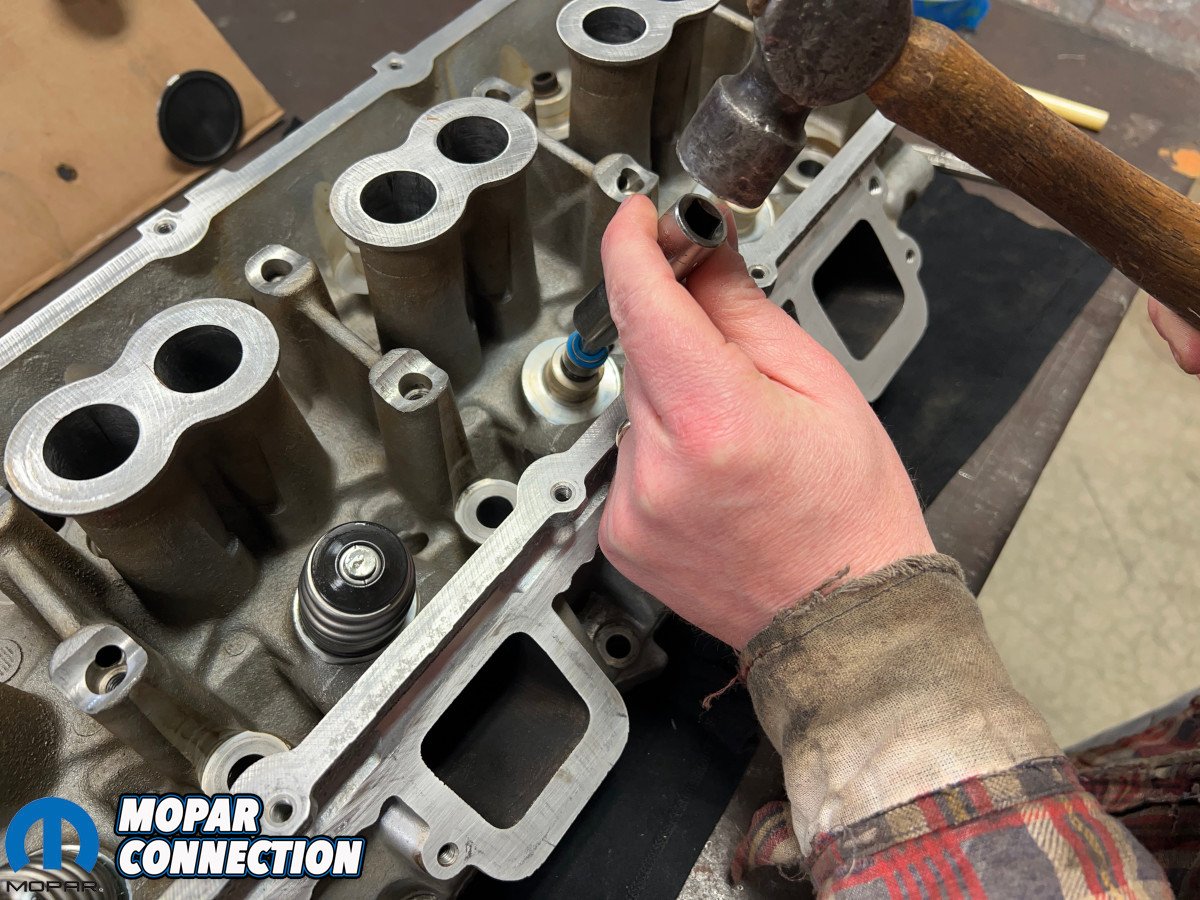
Old retainers, springs, seats, and seals were all tossed to make way for the COMP kit’s parts. The used valves were labeled, soaked, cleaned, and slipped back into their original guides. A 1/2” socket popped the valve seals in, then came the seats, beehive springs, spring retainers, and locks. Here again, COMP’s compressor shrunk the springs enough to slip new retainers in.
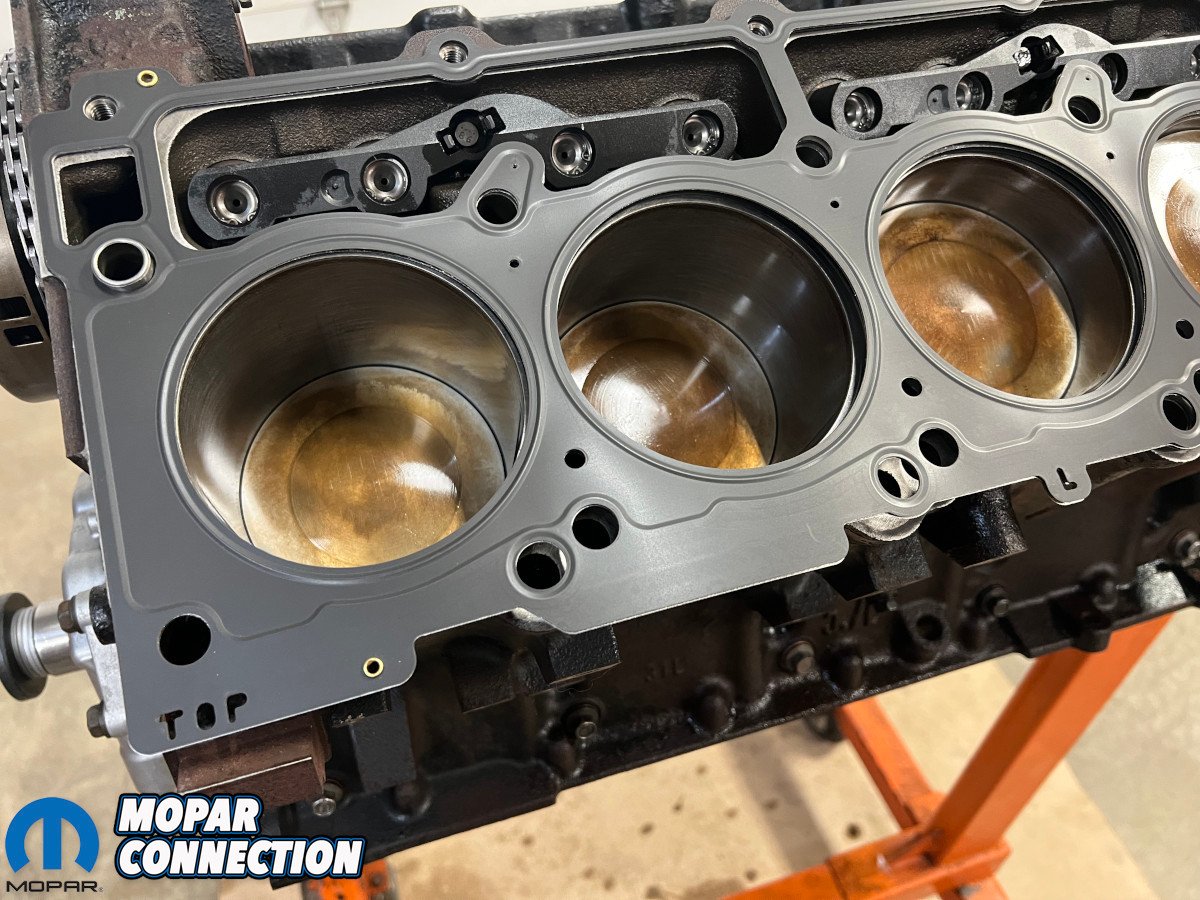
Reassembled and ready to go, the cylinder heads took their place atop 0.027” Cometic MLS gaskets (P/Ns C5467-027 and C5468-027). Much like the main and rod bolts, head fasteners got a torque sequence followed by extra degrees of rotation.

Above: After the heads were torqued, the robust OEM rocker sets were put back into service.
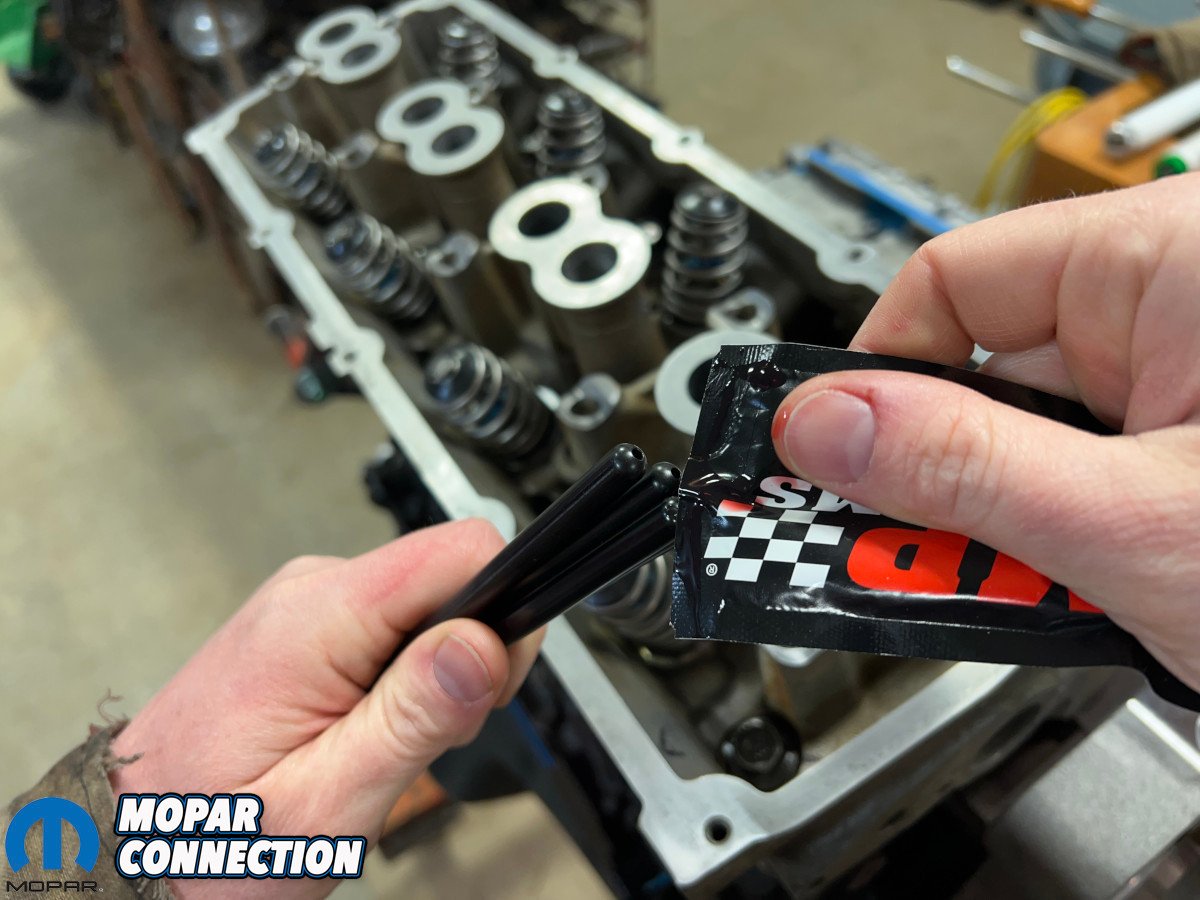
Heavy duty pushrods were the last items left in the COMP kit. Generous lubrication glazed both ends before they slipped below deck and were topped with stout OEM rocker assemblies. These simple shaft-mounted rockers with standard hardware have been proven good up to about 7,000 RPM, well north of this 5.7L’s expected redline.
With the last of the hard mechanical parts finished up, it was on to the pretty stuff. Blackbird Performance supplied a cast aluminum front cover (P/N BP-004-A), but everything else was pretty much bone stock.
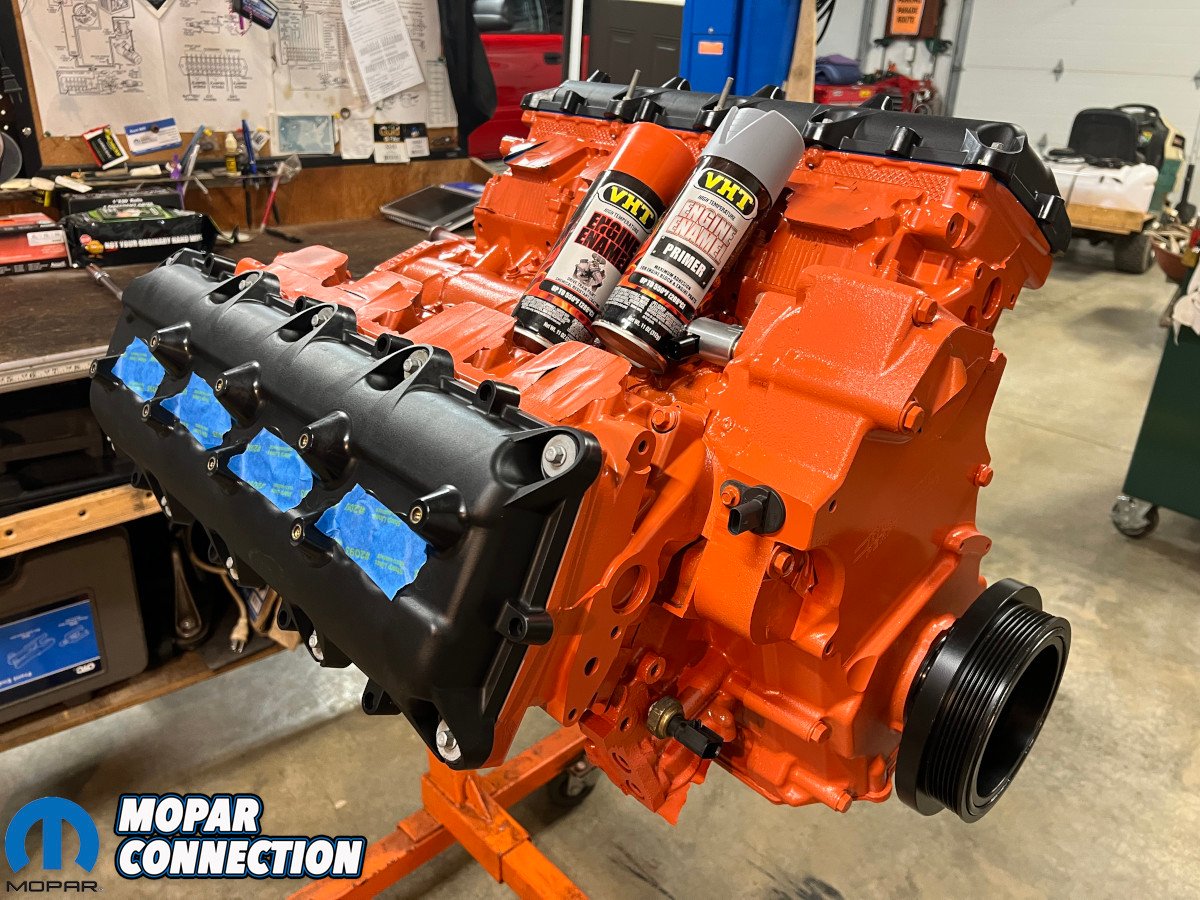
Valve covers, sensors, coil packs, injectors, exhaust manifolds, the intake manifold, and the throttle body were all factory Ram truck pieces that got cleaned and reused, but not before the most important part: fresh Hemi orange paint.


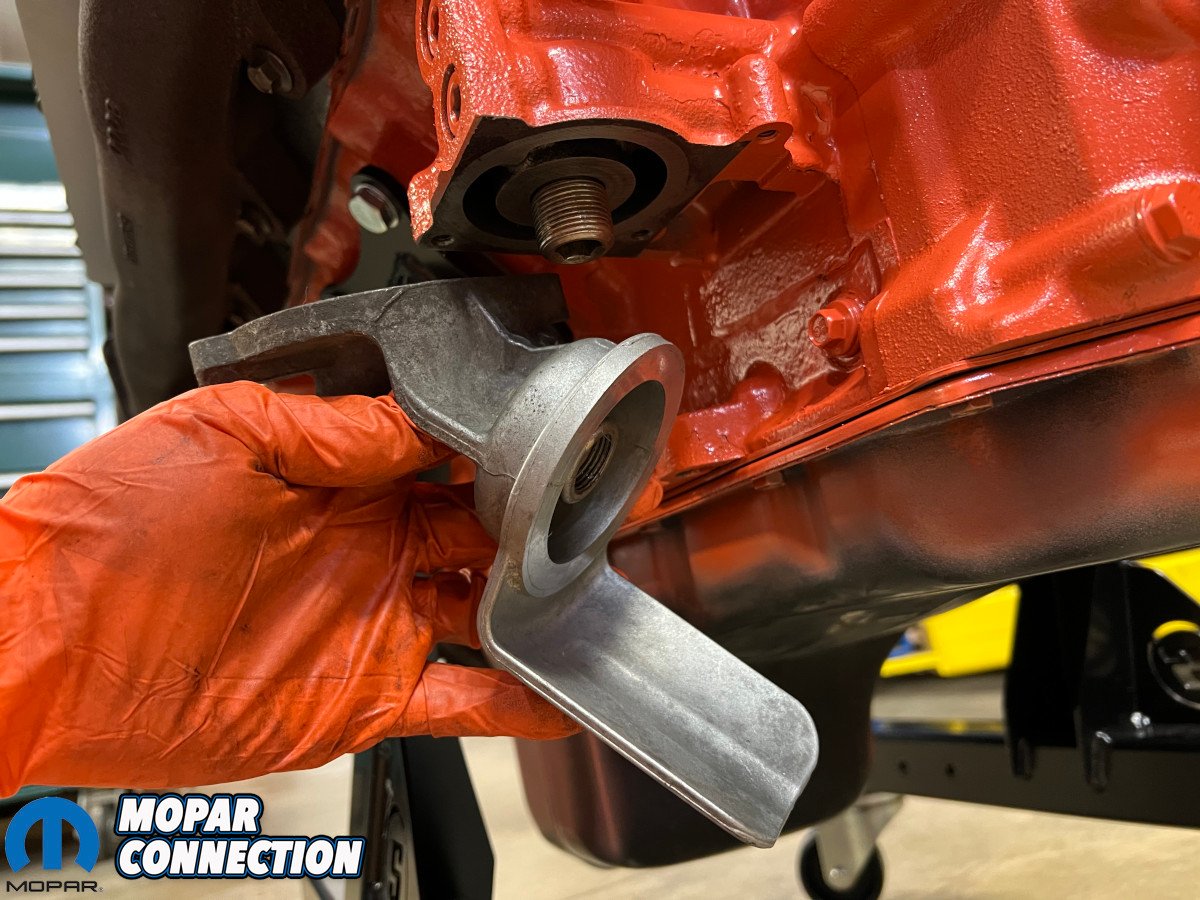
Above: To run on an engine stand, a 45-degree oil filter adapter wasn’t needed. Its stud was removed and threaded into the block for direct mounting of the filter.
A thorough degreasing prepped the block for VHT’s high-temp primer (P/N SP148), followed by a couple coats of their Hemi hue (P/N SP120) which is a very close match to the original ‘60s engine color. Many would have left the aluminum cylinder heads and front cover as bare cast. We did not in a nod to big brother 426 which was orange from head to toe other than the valve covers.
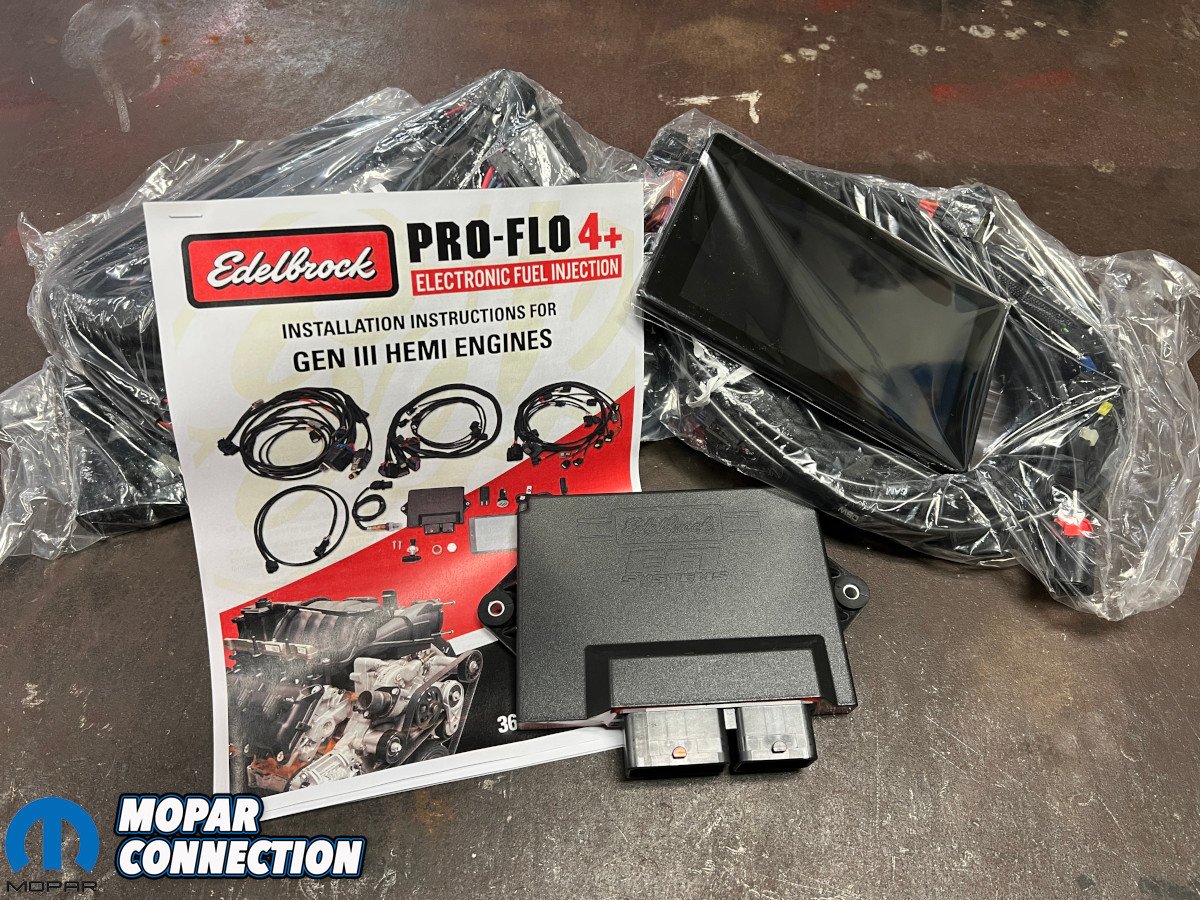
By then, the only heavy lifting left was hooking up the Edelbrock Pro-Flo 4+ EFI (P/N 36140) which could be summed up in four words: it just plugs in. Seriously, there was no wiring wizardry here. We didn’t even look at the supplied diagrams. Every connector was pre-labeled and the harnesses took minutes to install.

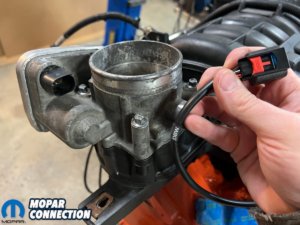

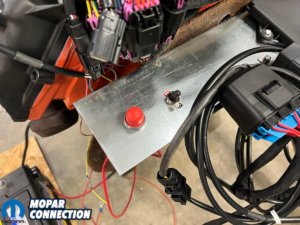
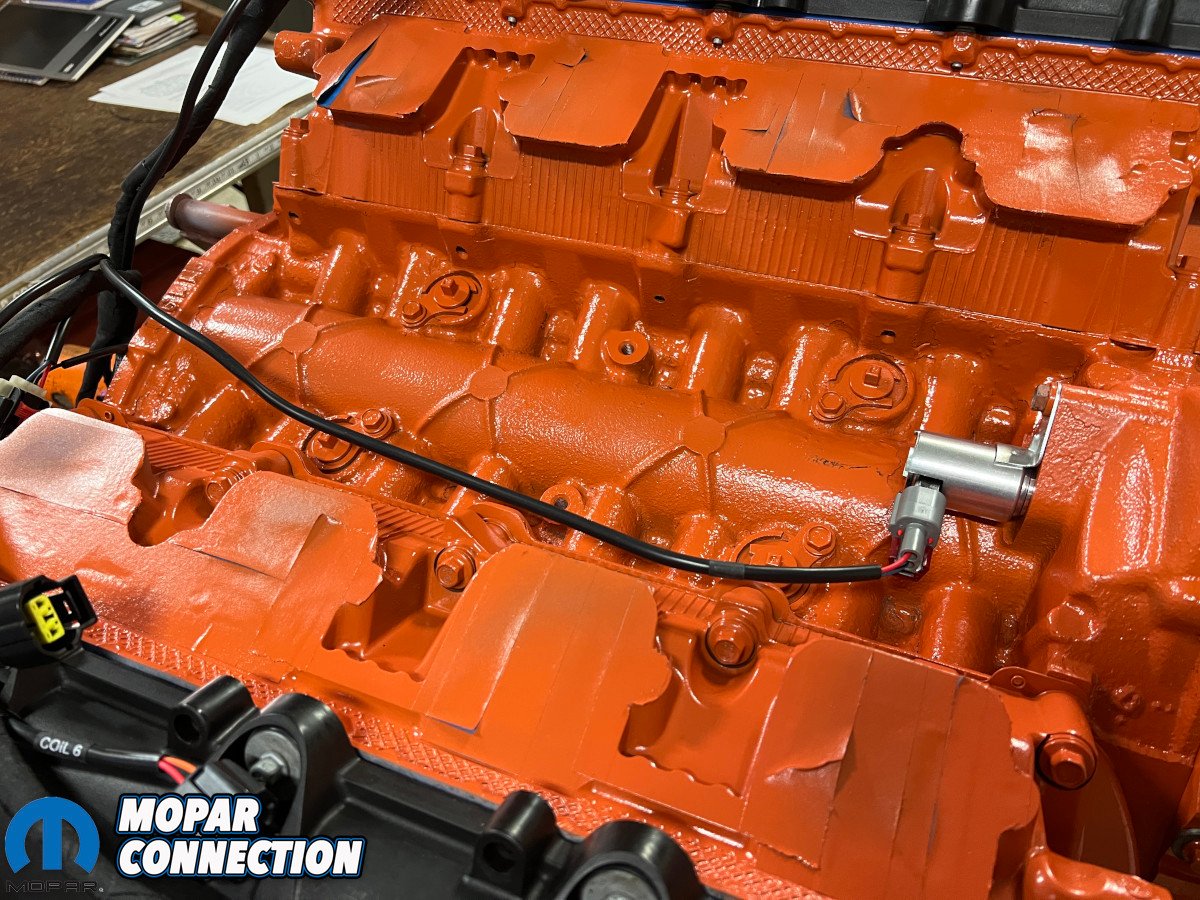
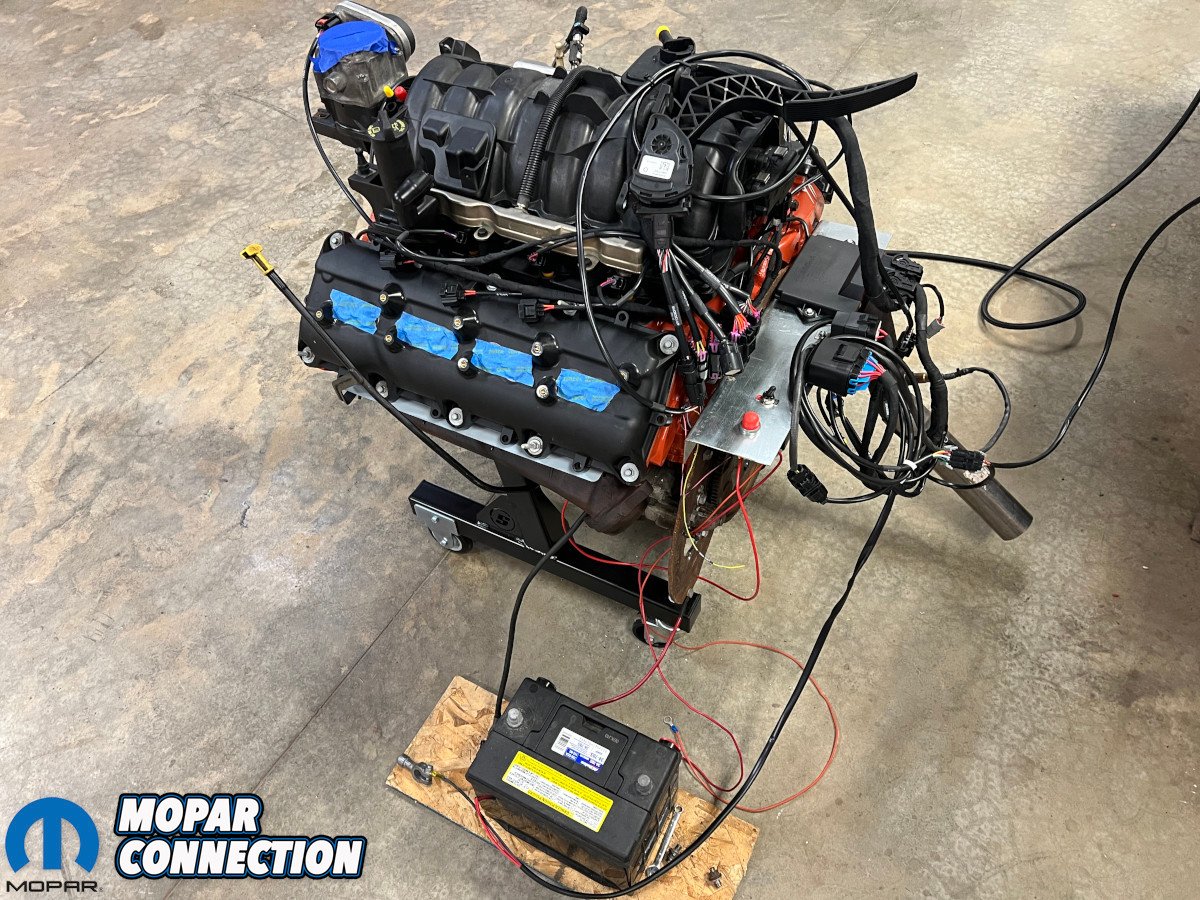
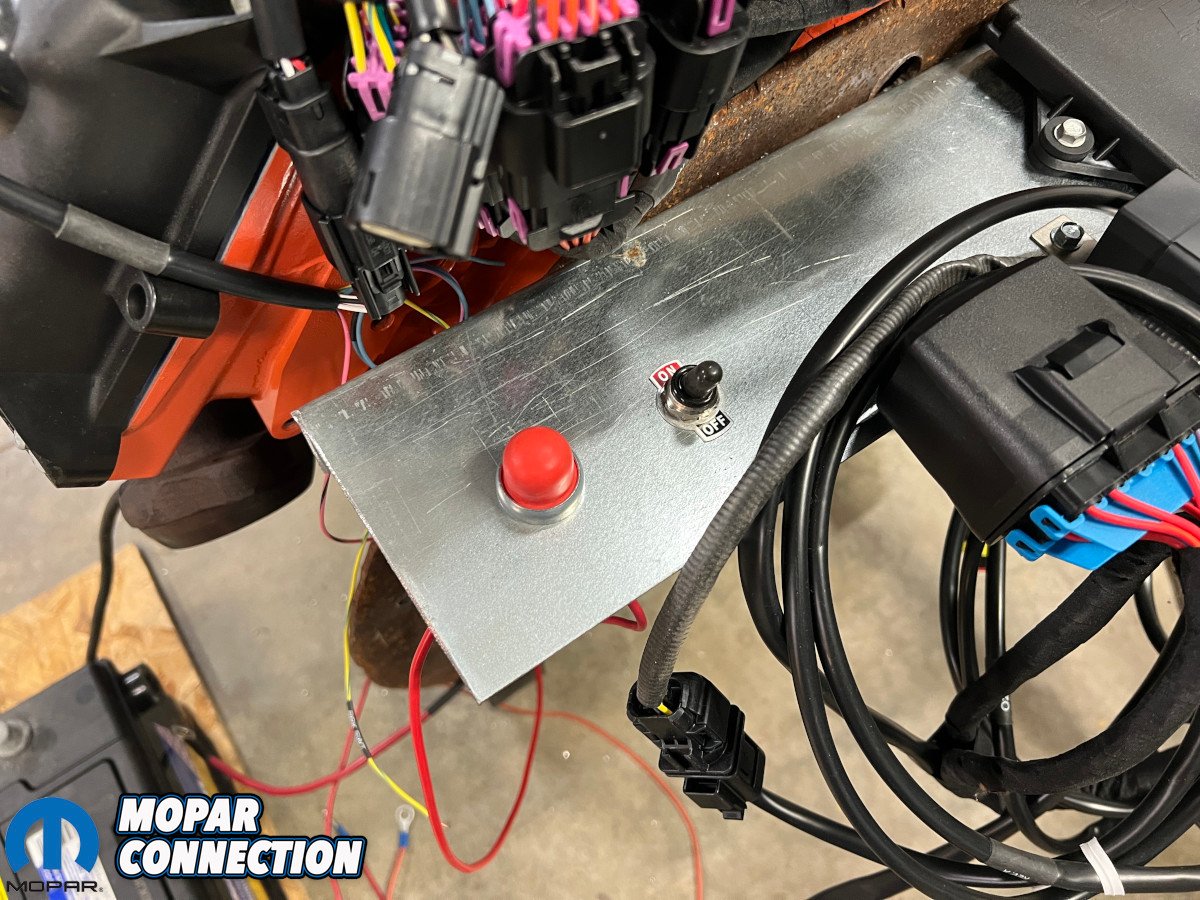
Top: Edelbrock’s Pro-Flo 4+ EFI came complete with wiring, an ECU, and a Bluetooth tablet. Above left: Every wire connection was marked for quick connections. Above center: Wiring was all draped on the intake manifold for test firing. Above right: Two additional electrical components were the only “extra” pieces needed: a pushbutton for the starter and toggle switch for ignition power.
The control unit (ECU), main relay, and fuse box were all bolted to a plate on the back side of the engine and paired with a few items not included in the Pro-Flo kit. One was a drive-by-wire (DBW) accelerator pedal. Mopar part number 04861714AF was called out in the documentation and found online (used) for $30.
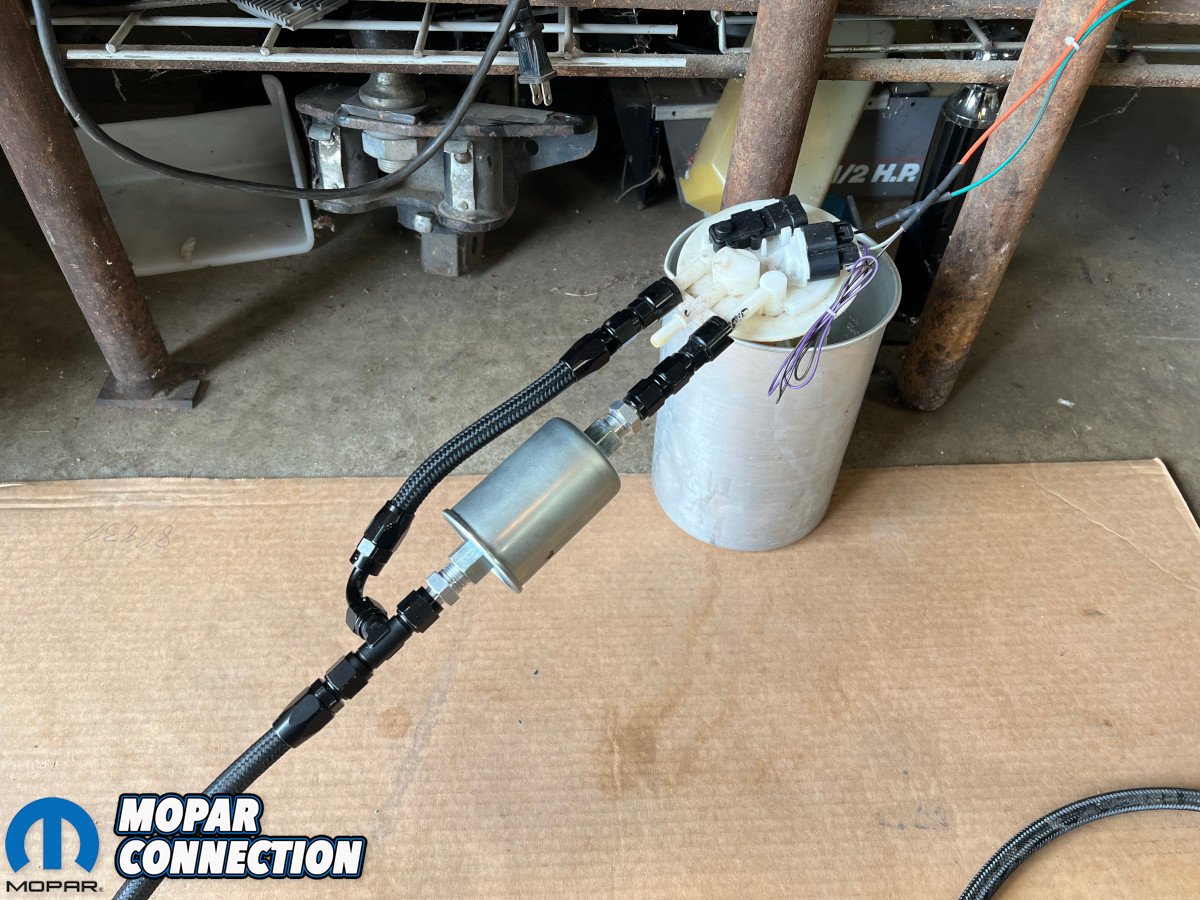
A pushbutton for the starter and toggle switch for ignition power provided start and run signals. Fuel supply was sourced from a 1999-2002 GM F-body because those pump modules include a built-in 58 psi regulator. It was wired in to the Pro-Flo harness’ existing Weather Pack pump connector.
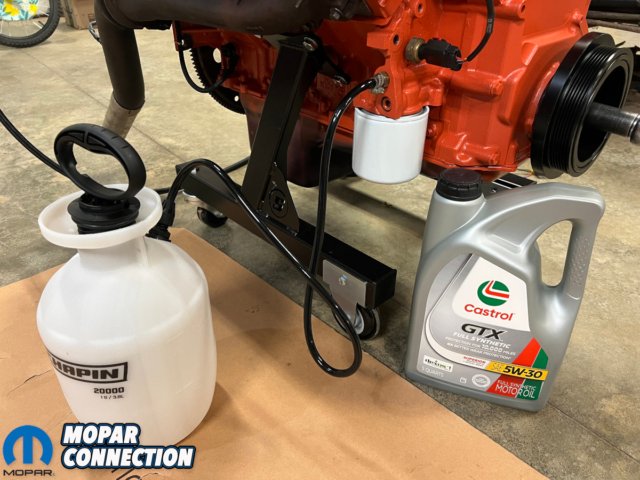
Above: An inexpensive box store sprayer did the invaluable job of priming the oil system.
Prepping the oil system is typical prior to any new build’s first firing, although the G3 Hemi’s priming procedure is very different than what most Mopar guys are used to with a drill on the oil pump drive shaft.
Since the G3 Hemi’s oil pump is driven directly off of the crank snout, it can’t be rotated without spinning the entire assembly. Therefore, the first few glorious gulps of lubrication are best provided by a basic pump sprayer.
We filled our one-gallon unit full of 5W-30 and screwed a barbed fitting into one of the 3/8 NPT ports above the filter. While turning the engine over by hand, oil was ushered in until it could be heard dripping back down into the pan.
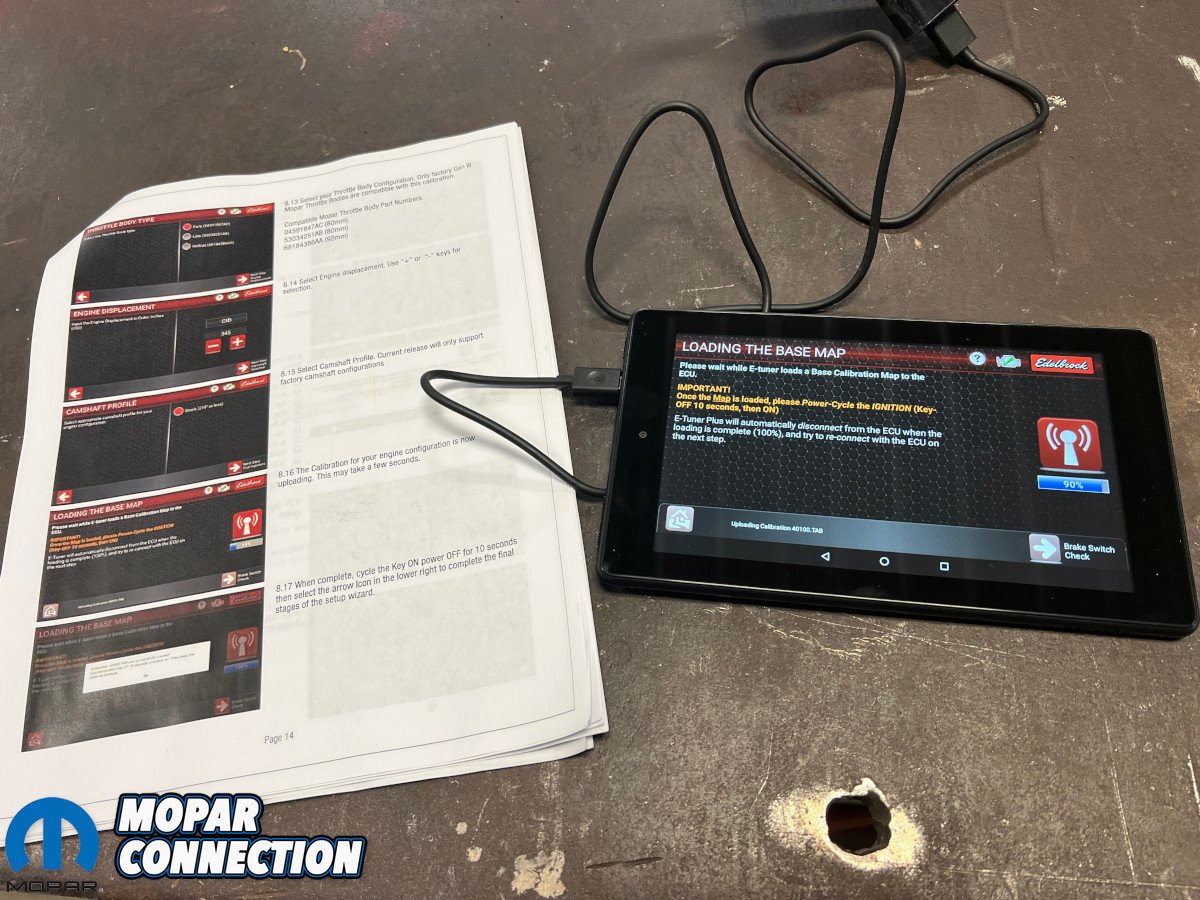
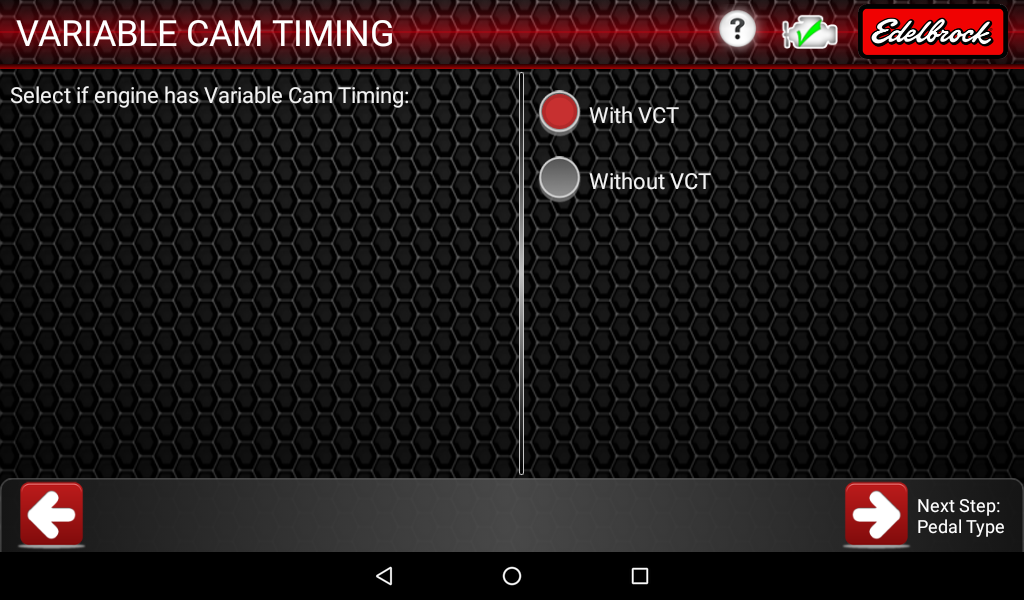
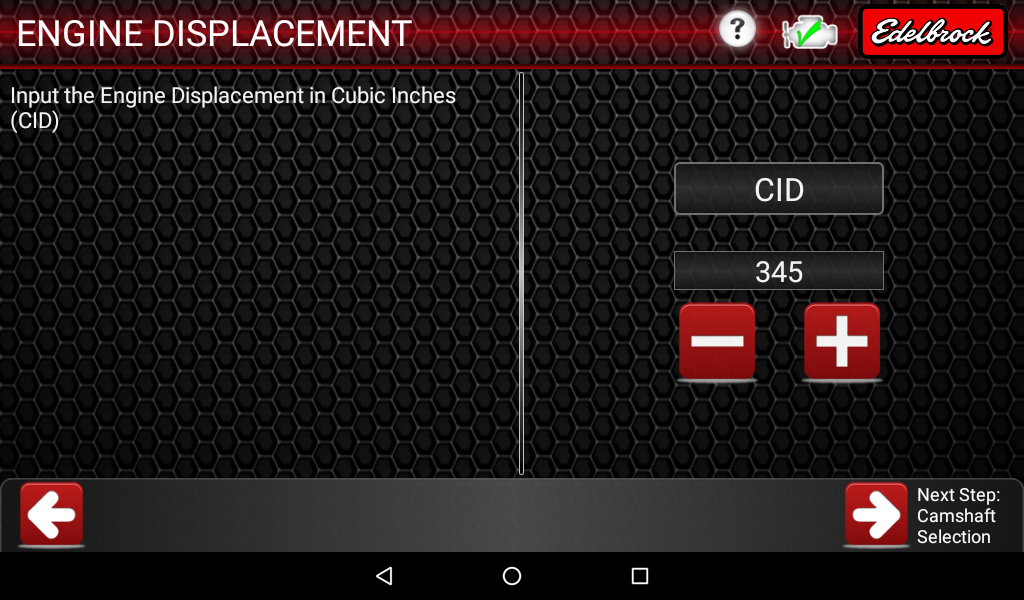
Battery connected and toggle switch on, the Pro-Flo’s Bluetooth tablet immediately connected and steered us to the setup wizard. About fifteen clicks and a power cycle later, this Hemi was ready to hammer.

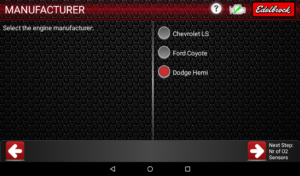
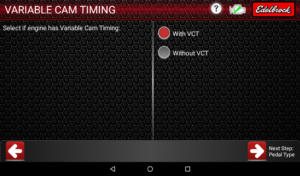

Above: The wireless tablet, preloaded with Edelbrock’s app, walked us through setup. Each screen was easy to understand and concise.
Unsurprisingly, it lit the sixteen candles on the first try and settled into a cold idle of about 1,100 RPM with 60 psi of oil pressure. Without any water in it, we only let it growl for a few minutes, but that was plenty enough for proof of life.
At this checkpoint in our G3 Hemi adventure, a few things are carved in stone. For one, this is still a straightforward pushrod V8 that’s well-suited for power and reliability. Modern technology aside, the hard parts really aren’t that far off from those of the iron legends that came before it.
Secondly, getting a modern Hemi to run standalone for swap applications is ridiculously simple with turnkey EFI like Edelbrock’s Pro-Flo 4+. No tuning. No programming. No laptop gymnastics. Just plug in the pre-made harnesses and let it lope.
Stack that with the fact that COMP and Edelbrock are basically serving up every G3 Hemi goodie under the sun, and it all comes down to just one thing you need to do: Saddle up some horsepower and Hemi up.


