


An object decreases its temperature by releasing energy, in the form of heat, to its surroundings. And an object increases its temperature by gaining energy in the form of heat from its surroundings. That’s simple enough, right? Although this is textbook definition of heat, it directly relates back to our cars. As you know, heat, the majority of the time, is an enemy to our cars. Whether you are talking about keeping the engine cool, wires away from hot exhaust, transmission fluid cool, etc. we are always looking for ways to cool different parts and keep heat shielded from certain areas.
When petroleum-based liquids reach temperatures above 220-degrees Fahrenheit they start to break down. Once your oil or other lubricants break down, they quickly lose their lubricity and cooling properties, which they are responsible for. We learned the hard way in Project Orange Crush by throwing many power steering belts and fighting high oil temps at the track from overworking the car without the proper cooling. While B&M Racing is known for their performance transmissions, torque converters, SFI approved flexplates, legendary automatic shifters, precision manual shifters and many other transmission products; they also offer universal fluid coolers in the form of B&M Racing’s Supercoolers or Hi Tek cooler. Depending on the amount of cooling, fluid type and mounting space, they have a cooler that will work for you.
B&M came to the rescue with their Supercoolers for the engine oil (PT# 70274) and power steering (PT# 70264). When they arrived we were impressed at the weight of the package. We found very rigid, thick finned coolers. The rigidness comes from the way they strategically stack aluminum plates and their oven-brazed construction that makes the coolers nearly impervious to rocks and other road debris. The mounting flanges on the sides of the coolers were also a great touch and give you multiple mounting options. The Supercooler we choose for the engine oil had a BTU rating of 29,200 and our power steering cooler was 14,400 BTU. With the coolers in hand it was time to get to work.
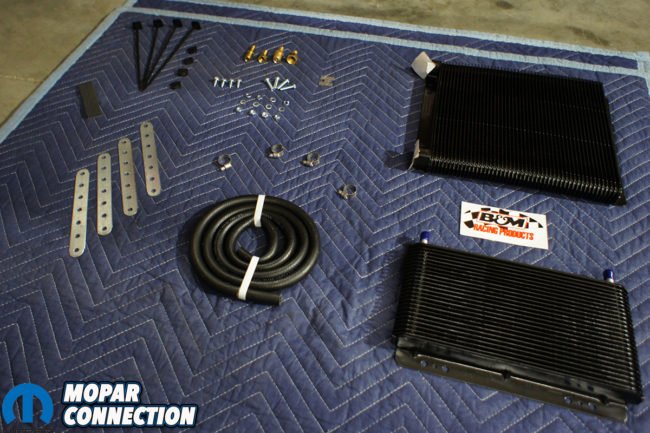
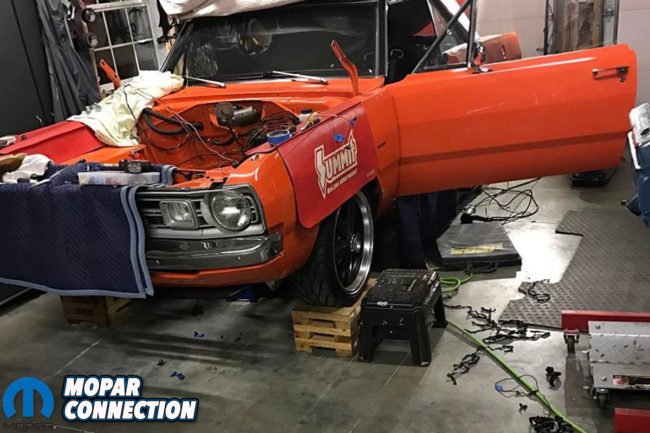
Above left: B&M Racing’s Supercoolers came with everything we needed to properly re-plumb our Orange Crush’s engine oil and power steering systems. Above right: We had the engine out of ‘Crush already, making installation and rerouting a little easier, but it’s not necessary.
Now understand that when installing an engine oil cooler you will need to relocate your engine oil filter. You have to tap into the oil system and this is the best and easiest way to do so. For the power steering cooler you only need to splice into the low-pressure hose on the pump, which is pretty easy to do. We had limited places to relocate our oil filter under the hood. This was mainly due to saving space in certain areas for future parts that will need to be mounted also.
We choose to mount the filter behind the passenger side headlight, inside the fender. We really like this spot for its convenience for oil changes without the annoyance of oil covering our headers every time. It also looked great by helping keep the engine bay cleaner. The only downfall is if a big rock or piece of debris were to kick up and knock a hole in the filter. (To combat that issue we plan to build a cover in case of such an event.)
For the coolers to work properly there needs to be airflow. The best place for airflow is in the front of the car around the radiator. Although many enthusiasts will mount the coolers directly to the radiator, we weren’t hip to bending up the fins of our radiator with those thick zip tie mounting kits. Knowing that we wanted to mount the cooler separate from the radiator, the issue arose that we had limited space in front of the radiator with not much to mount it to.

Above: We chose to reroute and mount our oil filter behind the headlight making access easier and solving our spillage issues.
We had some 1-inch square stock aluminum and decided it would work well. There are many different ways you could mount the coolers but the aluminum bars was the lightest option and would be easily reversible if we ever needed to remove the cooler for any reason. The oil and power steering coolers is they share the same dimensions on their mounting flanges, even though the power steering cooler is half the size. This allowed us to easily mount both coolers to the same two pieces of aluminum bar. This made the mounting procedure more simplistic and keeps a cleaner appearance.
Once we had our bars cut to the correct length, the next step was to figure out exactly where we were going to drill the bars for the coolers and mounting location on the car. To get the bars to lay flat against the core support we had to notch out the small factory lip that sticks up about 1/8th-inch. This allowed the bars to sit flat and secure against the radiator core support. Using a level we made sure that both bars stayed level and clamped them into place while we drilled holes through the core support and bars.
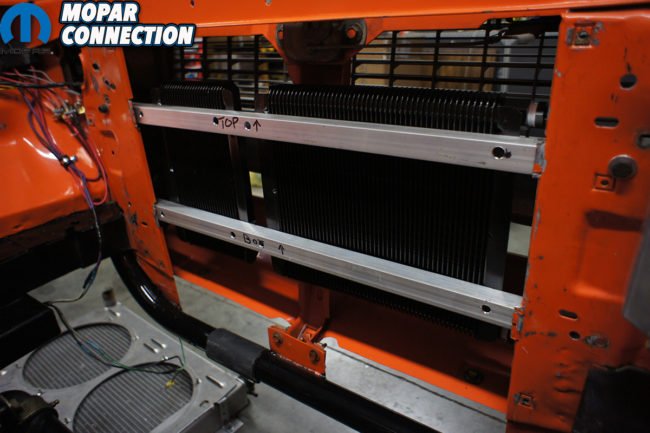
We drilled the top bar first so we could mount the coolers and make sure the bottom bar was in the correct place. Once the top bar was bolted in, we held up our coolers to the bar and adjusted the bottom bar to make sure that we would be close to the center of the bar when we drilled the next set of holes. Once the bottom bar was drilled, we bolted them into place. With the bars in place, we clamped the coolers down to make sure that everything would clear the grille, radiator and core support.


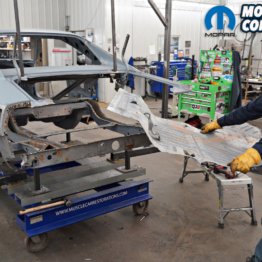
Above left: With our radiator out, we were able to take copious measurements prior to any drilling. Above right: With some spare aluminum tubing on hand, we decided this would be our best (and lightest) option.
We removed the bars and coolers so we could assemble the coolers, fittings and lines at once. Note that we installed both coolers with the fittings pointing to the right and left fenders. This is not necessary because both the oil and power steering coolers will be under pressure, which will allow you to mount the coolers in any orientation that you need. Mounting them sideways gave us easy access to the fittings on the coolers to install our lines. We needed to splice into both of the oil filter relocation lines for the oil cooler. The cooler had places for two different ½-inch NPT fittings, while the power steering coolers came with 3/8-inch nipple fittings built in.
Instead of using clamps and rubber hoses for the oil cooler, we opted to pick up some NPT-to-AN conversion fittings and more braided stainless line. When you’re choosing engine oil line and fittings you have to make sure you don’t go any smaller than -8 and that all of you’re an fittings are high flow. Some cheaper AN fittings will neck down from -8 on the inside of the fittings which will restrict the oil flow and increase your oil pressure. Some high capacity and high-pressure systems require up to a -12 hose and line. Rubber power steering hose and clamps for the power steering cooler will suffice for us.
Once we had the AN conversion fittings for our oil cooler, we coated the treads with sealant and installed them. There are many different thread sealants available, be sure to read the label and make sure it is oil resistant. There is nothing worse than installing fittings and then have a leak because you used the wrong sealant. With the fittings in we needed to mount the coolers in the car again. This time we were going to be measuring for the correct length hose. Once the coolers were mounted we were able to get measurements for correct hose lengths and made new lines.
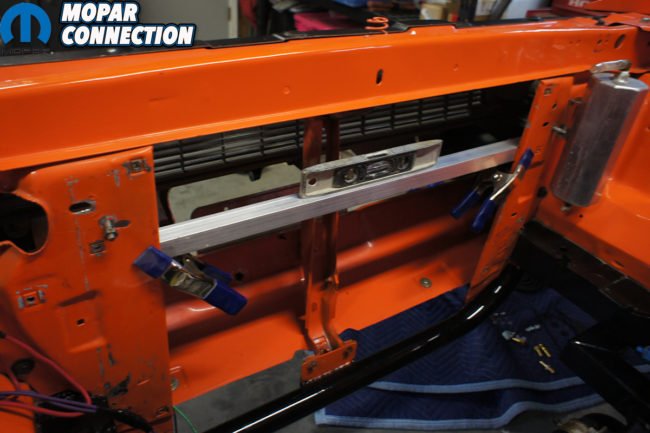
Above left: With some clamps, we mocked up our top bar’s placement prior to making final drilling marks. Above right: Satisfied with our “measuring twice,” we were ready to “cut once” and drill our holes into the core support.
One VERY important piece of information when installing the oil lines is to make sure you get the flow in the right direction. Whatever oil relocation kit you use, make sure you note what side the oil is flowing in and out on the motor and on the filter mount. When you splice in the oil cooler you want to connect the “out” line from the filter to your cooler and then the other side of the cooler would connect to the “in “ side of the mount on the motor. If you get these lines mixed up you could have no oil pressure and cause major damage to your engine.
The cooler itself doesn’t care what side is used for “in” or “out.” Also we suggest that the oil coming from the motor run through the filter first and then ran through the cooler and back into the motor. The oil will be hot and thin which will flow easily through your filter and clean the oil before it runs through your cooler. If you run it through the cooler first, you could potentially clog up the cooler with deposits from the dirty oil and once it cools down will be thicker and tougher to push through your filter.
The power steering pump and cooler is a little easier to install correctly. Simply cut the low-pressure hose and extend both cut ends of the hose to each side of the cooler and there, you’re done. Do not splice into the high-pressure hose. You could potentially ruin your pump and/or steering box but you’ll most likely just have one big mess to clean up. If you are not sure which side is low pressure and high you can normally tell by the hoses.


Above left: We mounted our Supercoolers to our new cross braces. Above right: The newly-mounted coolers and braces mounted cleanly in place in front of our radiator.
The high-pressure side will have screw on fittings at both ends of the hose connecting the pump to the steering box. The low-pressure hose might have a screw on fitting on one side but the other end will be connected to the reservoir of the pump with a hose clamp. The low-pressure hose is returning the used fluid that is running through the steering box back to the reservoir, where it will sit until the pump needs it again. The key is to return cool fluid to the reservoir, which will keep the pump from over heating.
Once the lines are cut and new fittings installed, we permanently mounted the coolers and hooked up the lines. We reinstalled our radiator and before we started the engine, had to prime the oil system. You have to remember that there is empty space in the oil cooler and extra hose. We later found out that we increased our total oil capacity by almost two full quarts. If that oil was not added back into the motor you could starve your engine of oil.
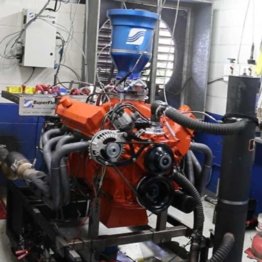
Also when your priming the engine’s oil system, its common that it’ll take more than a few minutes to build any oil pressure. We removed the distributor and oil pump gear to prime the motor with an electric drill. Once we had some oil pressure, we continued to run the pump for a few minutes to make sure everything was good and oiled before we started the motor back up. Once we had the motor good and primed, we rechecked the dipstick and added oil accordingly. With the power steering pump there isn’t much we could do except make sure the reservoir is full before we started the motor. Once the motor is running you can bleed the power steering system.


Above: Although the B&M Racing Supercoolers come with all the rubber hoses and fittings necessary to complete the installation, we opted to step up our game with some steel braided line and AN fittings. Here you can see how we routed our oil cooling lines to the filter (mounted behind the passenger headlights) and cooler.
With the oil primed, full and power steering reservoir topped off, we were ready to start up the car. With the car blocked in neutral, we let the car idle and kept a close eye on our oil pressure. If for any reason oil pressure drops or is way low, turn the engine off and make sure you have no leaks and the hoses are routed correctly. While continually checking the oil pressure gauge, we checked for oil and power steering leaks. Everything looked good with no leaks and we were ready to bleed the power steering pump.
After a few turns of the steering wheel, we burped the power steering pump and added a little more fluid. Once all the air was out of the cooler we were ready for the road. On our first drive we took it easy, just a quick jog around the block and then back into the shop. We made one final check for leaks and everything was still holding up. We recommend that for your first few drives to take it easy and keep an eye on your oil pressure, oil level and power steering level. There is always a possibility that a leak could arise at a later time because a fitting or hose worked its way loose.
We can proudly say with the addition of the Supercoolers from B&M we feel confident that our issues of overheating our power steering and engine oil will be nonexistent. We will now be able to push the Orange Crush to the limits without worry of our oil breaking down or throwing a power steering belt in the middle of the course. Remember, if you’re looking to keep cool on the road or the track, let B&M help you. Choose your cooler wisely and if you have any questions about what one suits you best, give B&M Racing a call and their knowledgeable staff will match you up with the correct products.


Above left: We simply interrupted our power steering’s feed to run it through our newly mounted cooler. Above right: When finally complete, you can see how much room we have between the coolers and our radiator, as well as a glimpse at our plumbing.


 Mopar Connection Magazine – The ONLY Daily Mopar Magazine © 2022. All Rights Reserved. Mopar Connection Magazine is the ONLY daily Mopar Magazine bringing you the latest Mopar news, technology, breaking news, and Mopar related events and articles. Find out the latest information about Mopar, Mopar products and services, stay up to date on Mopar enthusiast news, dealership information and the latest Mopar social media buzz! Sign up for the Mopar Connection Magazine newsletter for the latest information about new products, services and industry chatter. Mopar Connection Magazine is the best and only source you need to be a Mopar industry insider!
 by
by