


Needless to say, 2020 has not gone according to plan for pretty much everything and everyone. What we had planned for Mopar Connection’s first project car – “Brazen” – our ’69 Dodge Charger [FYI, it’s not a real R/T, but loosely cloned – Ed.] this year pretty much fell apart the minute COVID-19 hit. Of course, the same happened to many of you; so hey, at least we’re in good company, right?
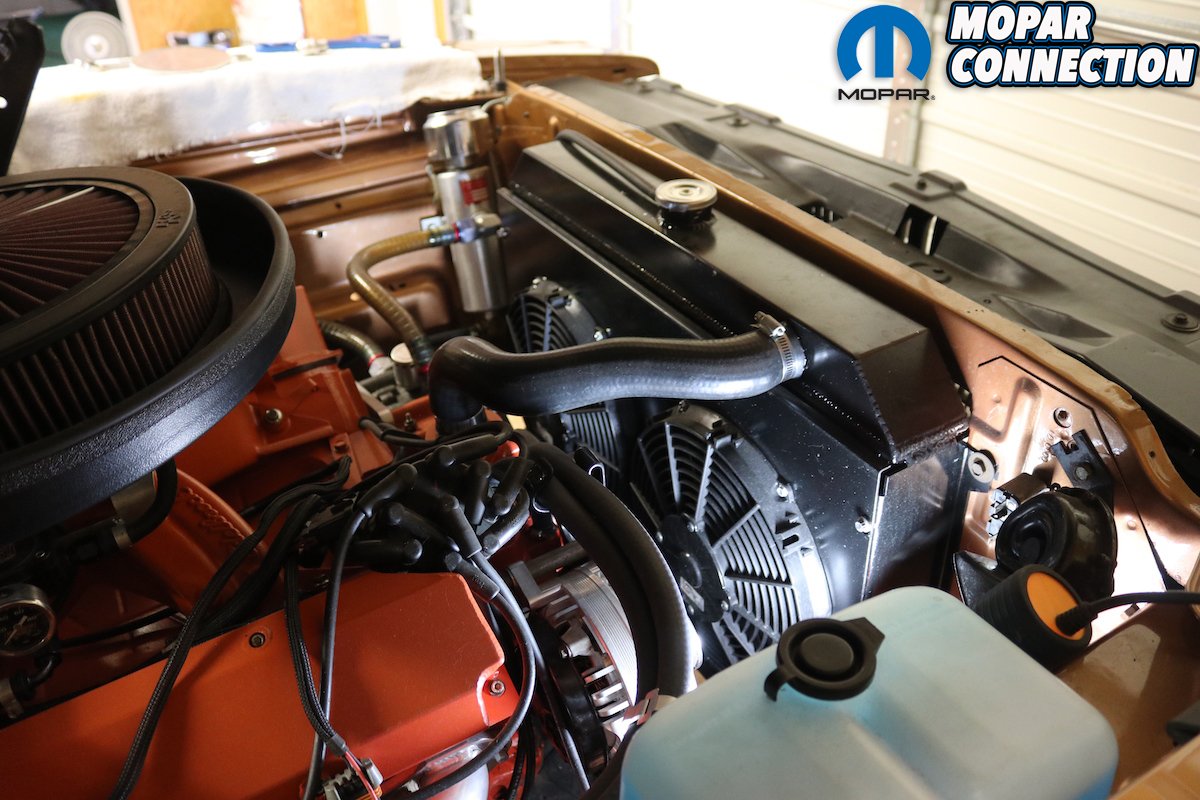
Back in April, we published the last bit of wrenching we did on Brazen – a complete cooling system upgrade using Holley’s new line of high performance Frostbite aluminum radiators, a flawless blend of OE-style steel the four-piece remote cooler line kit and transmission cooler from YearOne, and Earl’s Steel Zinc Hardline Tubing Kit.
All of that is well and good, but we still couldn’t actually drive the car. See, it has been 3 years since Brazen devoured its otherwise awesome Silver Sport Transmission A41 4-speed overdrive transmission. Although repairable (it’s happening now at Bowler Performance), the A41 ultimately needed to find a more street-friendly home as plans for a far more gnarly powerplant for Brazen lay in wait.

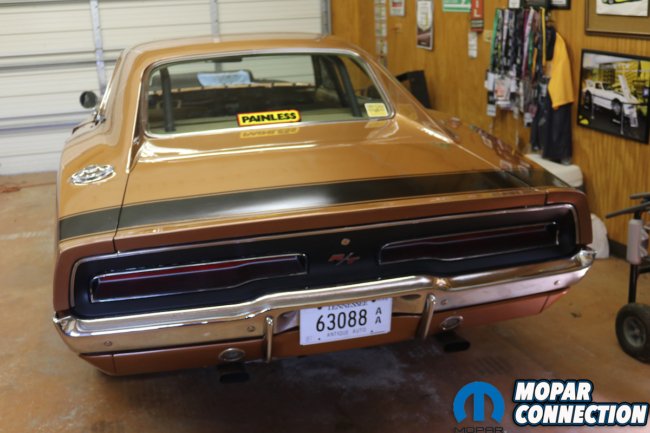
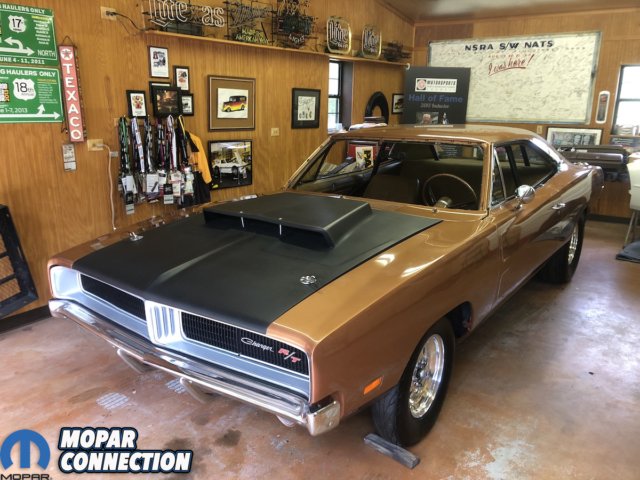
Above: Our ’69 Dodge Charger has been waiting patiently for this stupid COVID-19 crap to blow over so it can be rewired. Thankfully, Painless Performance Products’ Dennis Overholser has been kind enough to house “Brazen” in his home garage.

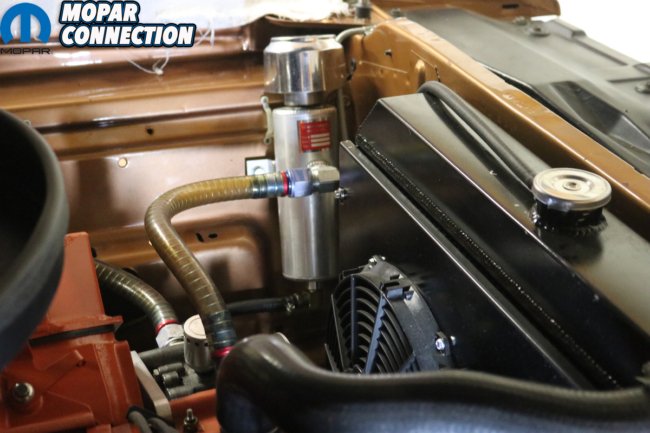
Above: In addition to some serious paint repair, wrapping our transmission cooling lines in Design Engineering Inc’s heat shielding, touching up the dashboard and installing a new TCI Diablo shifter, we also needed to relocate the vacuum canister for our GZ Motorsports vacuum pump, which we installed a few years back.
Due to that, we opted for a TCI Auto Super Street Fighter 727 TorqueFlite backed with a grenade-proof Gear Vendors overdrive to handle the planned 800-plus-horsepower Hemi. (That’s the same TorqueFlite that we plumbed back in April.) So now where are we? Well, you’d think we’d be ready to tear up some asphalt, but not so – because 90-percent of the wiring harness is gone.
Wait, what? You’re thinking. Unfortunately, a 52-year-old wiring harness that was already limited from the factory when new simply wasn’t up to the challenge of keeping Brazen’s 535cui stroker wedge happy, especially when its running a FAST EZ-EFI 2.0 fuel system and full digital ignition, Holley Sniper in-tank high-volume fuel pump, dual SPAL electric fans and remote A41 transmission controller.
Even upgrading to a 90amp alternator wasn’t enough to keep the Charger from draining the battery an amp at a time at every stop light. A far beefier alternator was needed and to properly do that required upgrading the harness itself. Now replacement harnesses are found from various manufacturers and we considered several options – but Painless Performance Products had a different idea.

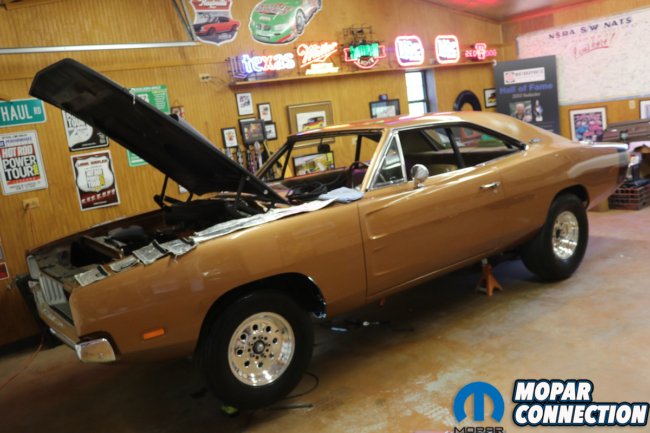
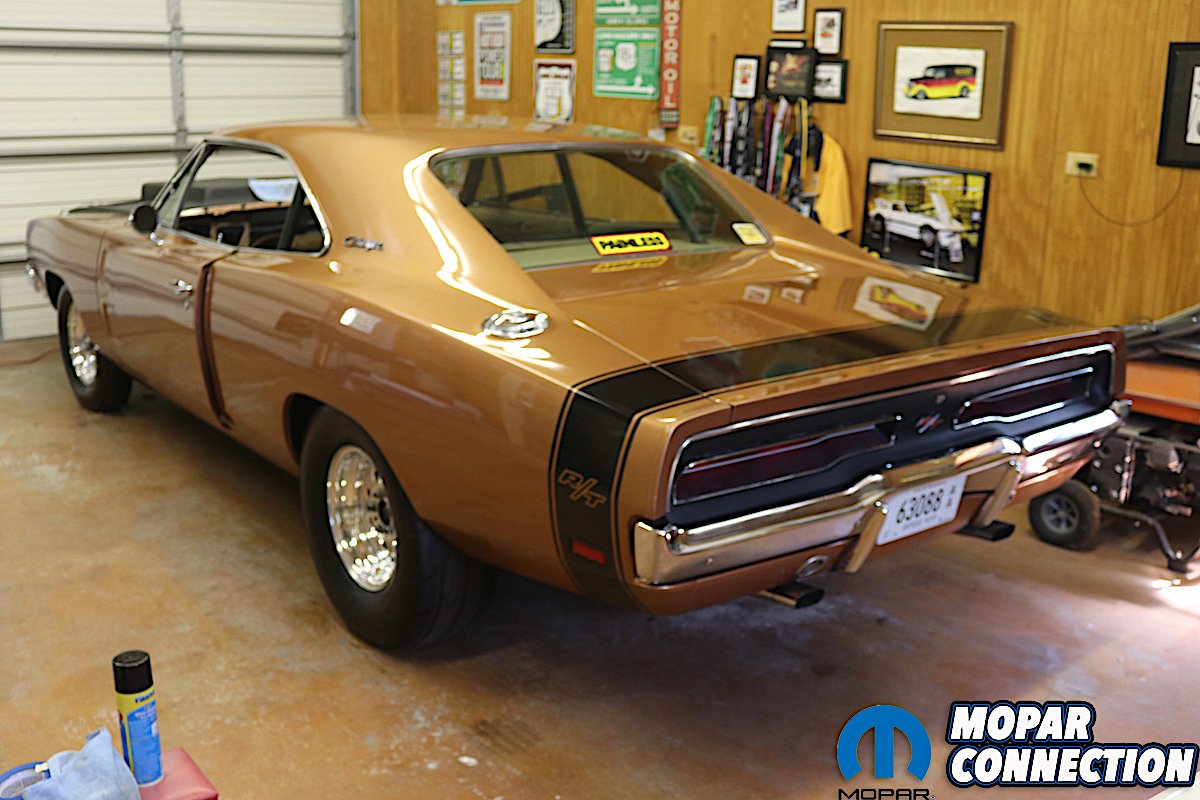
Above: We didn’t waste anytime cleaning up our ’69 Dodge Charger after sitting for 4 months in Painless Performance Products’ Dennis Overholser’s home garage. Towing it from Nashville to Fort Worth wasn’t kind on our Mopar and needed some TLC to return back to its former luster.
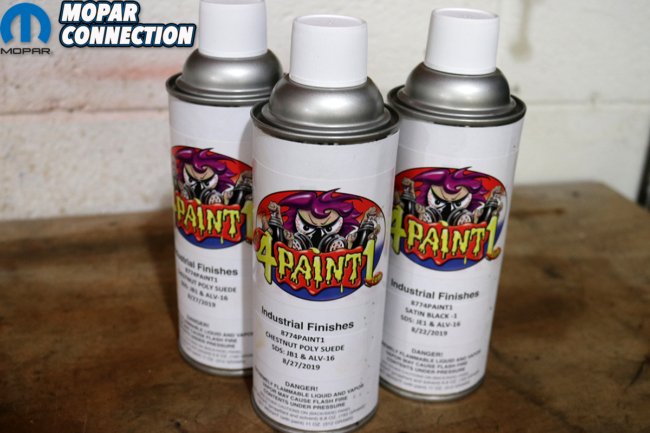

Above left: Earlier in the year, Mopar Connection partnered up with Charles Dallas of 877-4Paint1 to help us restore our dashboard. (An in-depth technical tutorial is soon-coming). Dallas masters in recreating factory-correct colors and textures for a variety of Mopar’s more complicated painted surfaces. We brought along some extra Chestnut brown to touch up our newly-restored dashboard. Above right: Meguiar’s sent us one of their super-cool MT300 polishers to try out. We’ll have a specific review on this tool in coming weeks.
Wanting to develop a truly universal performance wiring harness for the 1966-1970 Chrysler B-body platform that could be quickly adapted for modern upgrades like what we’ve done, Mopar Connection was asked if Brazen could be “borrowed” to serve as their guinea pig. Happy to help in the development of further aftermarket support, we agreed and brought the car out to Dennis Overholser’s home outside Fort Worth, Texas earlier this year. …Then corona hit Texas hard, and pushed everything back.
Dragging Brazen over 700-miles from Nashville to Fort Worth though, was a little problematic. First, the dashboard had been removed months earlier so we could completely restore it as well as install our Vintage Air heater/defroster kit (a full technical article on this process is soon coming – we’re seriously going out of sequence here). This meant that the windshield was removed as well. Since it was cracked years beforehand, plans to replace it were on the docket already.
Unfortunately, despite our best efforts to seal up the windshield frame with cardboard, plastic tarps and nearly a whole roll of paint-friendly blue painter’s tape, torrential rains through northern Arkansas drenched and wind-whipped our poor car to death. Upon arrival in Texas, our roof was pitted and chipped from the flapping tarp, the interior (and freshly restore dashboard) were soaked and filthy, and the whole car greyed with road grime and debris.
Above: Admittedly, the tarp we used to cover up the hole left by an absent windshield really did a number on our 15-footer paint job. We resorted to using some heavier compounds to knock down the deeper scratches before smoothing them down with a more gentle polish. This is along the half-way point.


Above left: Meguiar’s also sent along a bottle of 3-in-1 Cleaner, Polish and Wax; as well as the complete detail kit. Above right: After spending several hours clay barring, buffing, polishing and finally hand-waxing the Charger, we were ready to actually start working on the car itself, not just gussy it up.
We rolled Brazen from the trailer into Dennis’ garage, opened up the doors and turned on the fans with hope that the warm Texas air would dry out the Charger quickly. Time constraints required us to leave the car as-is and speed back home, which hurt even more. Months passed under the quarantine without being able to work on the car, that is, until in late June when we raced back out to Dennis’ for two days of touch-ups and last minute honey-dos.
With us we carried a can of 887-4PAINT-1 OE-correct textured dashboard paint, who also was so instrumental in the entire dash restoration (again, the article will be out later this month), Meguiar’s Smooth Surface Clay Kit, Meguiar’s MT300 Professional DA Polisher and Meguiar’s 3-in-1 Cleaner, Polish and Wax to help us clean up and protect our weathered paint.
Without delay, we dived into our work. The clay bar worked wonders to pull out the road grime that had impregnated into our 13-year-old paint job. The roof and fenders where the tarp had freed itself and whipped violently for half a day’s drive required the most attention, requiring us to use some grittier compounds to really help smooth out the scratches.
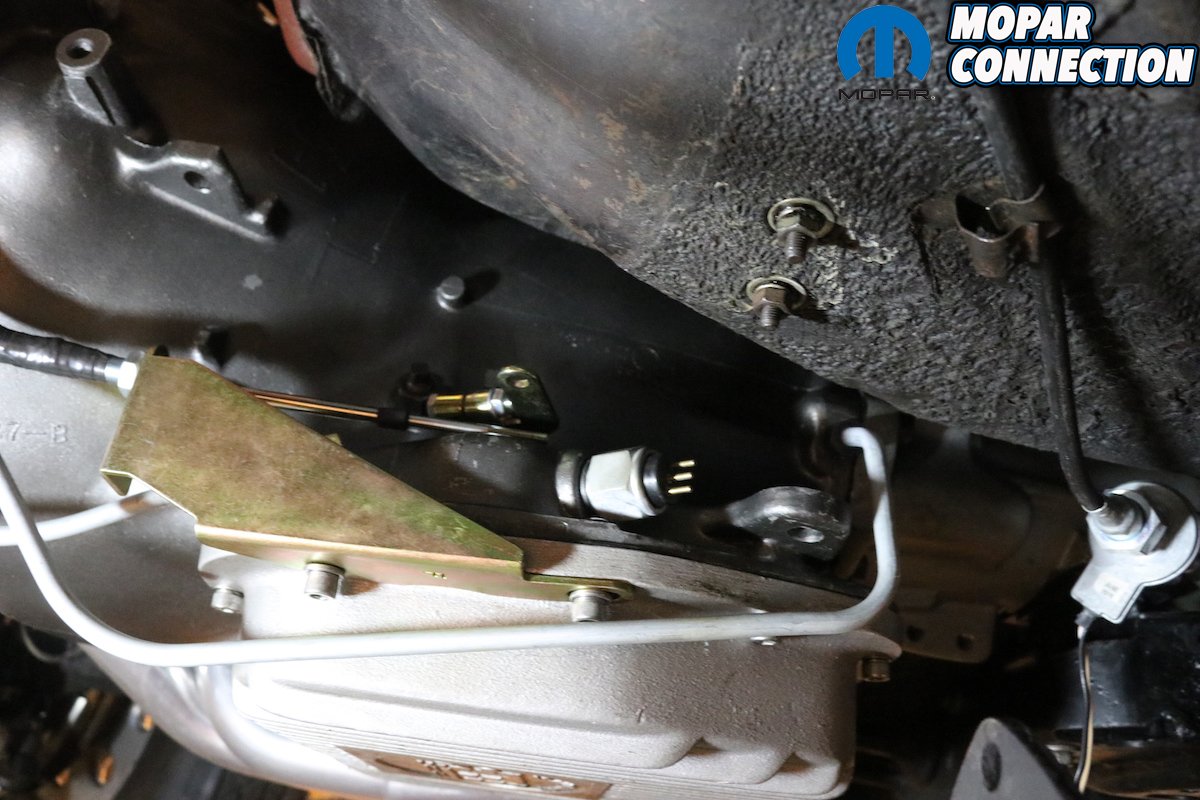
Above: With the Charger in the air, we could prepare for wrapping the freshly bent-and-installed transmission cooler lines. To make our efforts easier, we backed out the driver’s side torsion bar and dropped the big 3-inch Doug’s Header. Although it made for extra work, access to the lines and the shifter linkage was demonstrably easier.


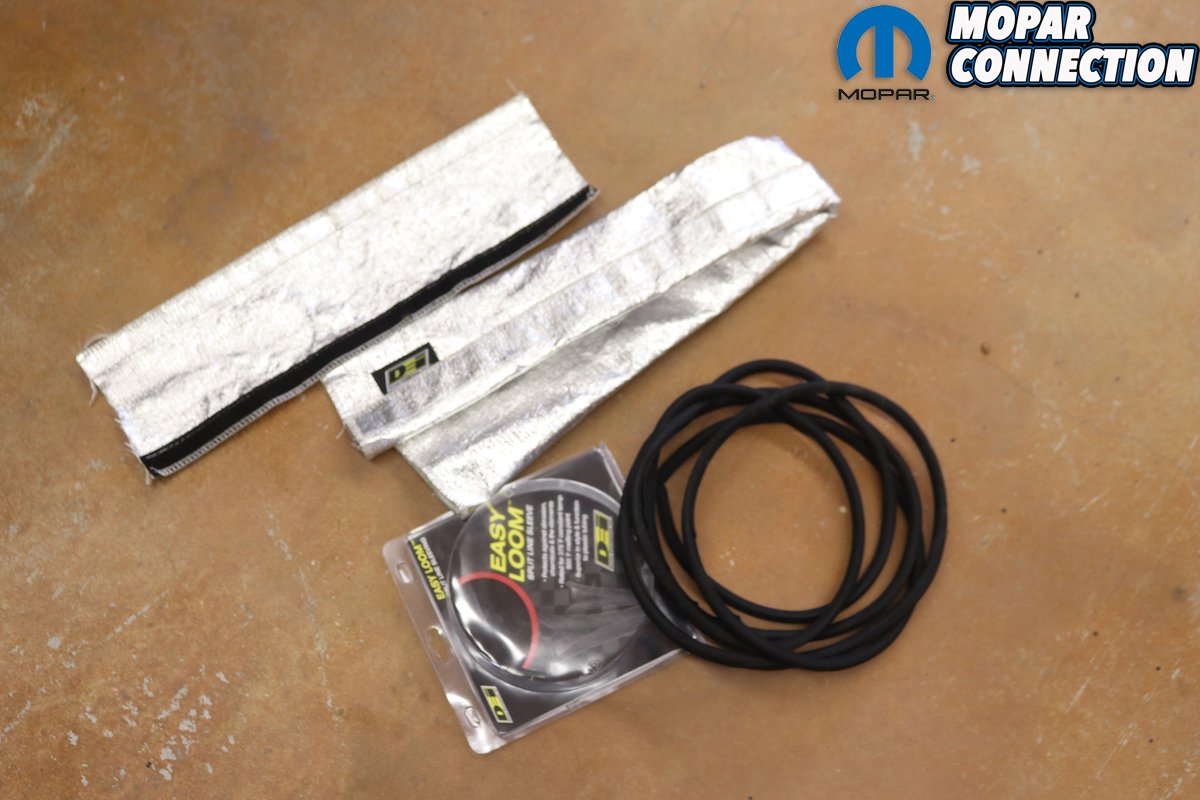
Above left: Heat mitigation is the name of the game when you’ve already cooked a transmission or two. We picked up an extra 20-feet of DEI’s Easy Loom Split Wire Sleeve to go with our aluminized Heat Shield Sleeve that we had buried in the home garage. Above right: We wish our plumbing was a little more per factory spec, but our aftermarket shifter linkage needed more room, so a few extra bends we made to clear everything.
After several hours and what must’ve been a gallon of sweat, Brazen’s shine had returned. Although a tremendous “15-footer,” Brazen’s paint was applied by professional automotive painter and friend, John Dempsey over 13-years ago and for little more than the cost of materials. Even on a “tap water budget” he managed a good job, but the paint itself is rice paper-thin, so burning through the paint with the buffer was a real concern.
Nevertheless, we were happy to see our Charger looking more like itself, so we went about touching up the dashboard where necessary. As paint dried, we raised Brazen up on jackstands to access the transmission cooler lines and shifter linkage. Confident that our remote transmission cooler would do the trick for our high-stall TorqueFlite, we didn’t want to leave anything to chance, and opted to wrap the lines as best as we could.
We had picked up 20-feet of Design Engineering Inc.’s (DEI) Easy Loom Split Wire Sleeve from our local speed shop, Tennessee Speed Sport before heading west. The Easy Loom is a quick way to protect exposed wires, cables and hoses from abrasion, chemicals and natural elements, as well as carrying a radiant heat resistance of 347°F. Plus, the stuff is really affordable, which is nice for us cheapskates.

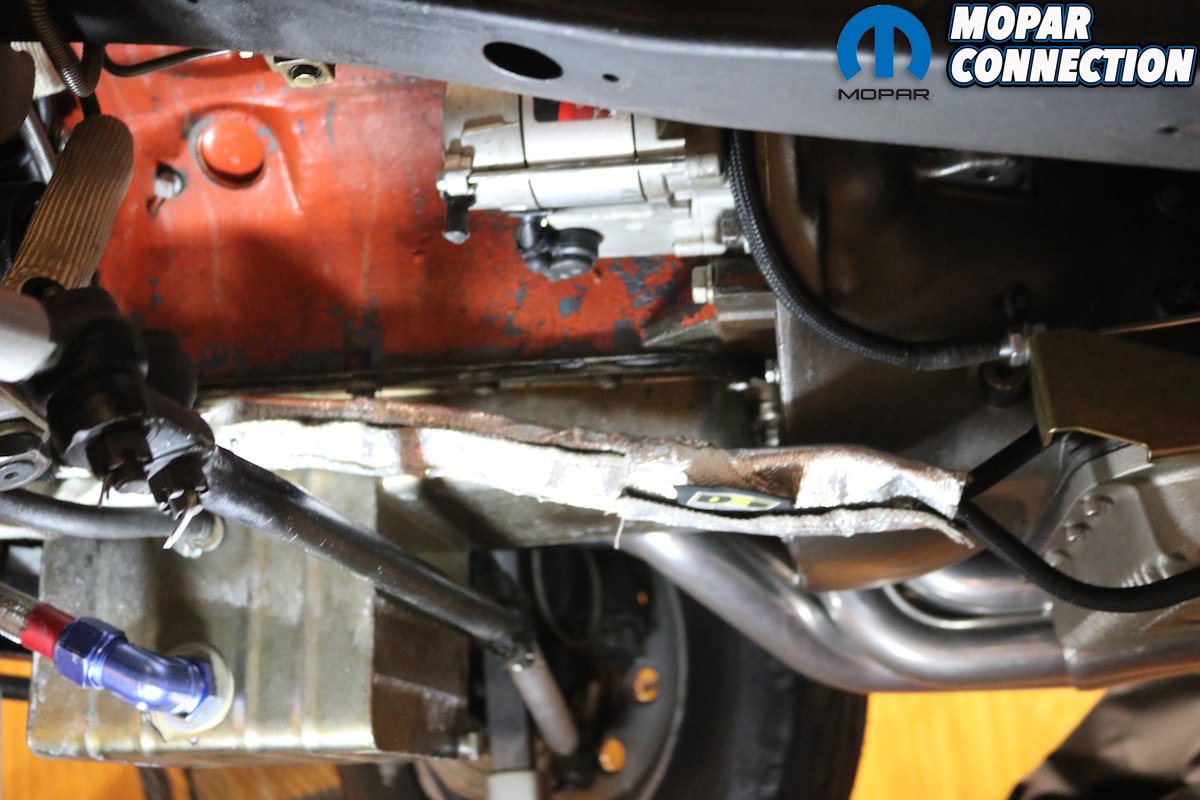
Above left: We had plenty of heat wrap to go around, covering up the positive and return lines from their bases all of the way to the leading edge of the K-member (see Above right). We also smartly wrapped up the new shift cable as we’ve burned through one or two of those before as well.

Above left: Another angle of our wrap job illustrates how nicely the DEI sleeve holds the 5/16″ line. Above right: Because being thorough was the name of the game this day, we went ahead and double-wrapped our transmission cooler lines in a second layer of shielding. Since this portion runs between the oil pan and our big ceramic-coated headers, we felt it best to add a second layer. No more boiling ATF!
The kit comes with a polymer wrap that deceptively looks a lot like electrical tape, but is surprisingly reusable; so if you don’t like how you wrapped the ends, you can peel the edge back and try at it again. We ran our sleeves from the inlets into the transmission all the way to the front of the K-member – letting the visible portions running to the radiator and the cooler remain exposed.
Since our lines ran between our big 7-quart Milodon oil pan and our massive Doug’s 3-inch headers, we opted for a second layer of protection; using what DEI’s Heat Sheath Aluminized Sleeving that we had laying around in the garage. The double-layers should be all that’s needed to keep our transmission lines protected from any outside sources of unwanted heat.
One final bit of protection was given to the new shifter cable, as its proximity to our ceramic coated headers was also a little precarious – and since we’ve burned through one or two shifter cables in the past before too. The new shifter cable belonged to a brand-new TCI Auto Diablo Shifter, which in all honesty, we’ve been salivating over since it was first introduced a couple of years ago.

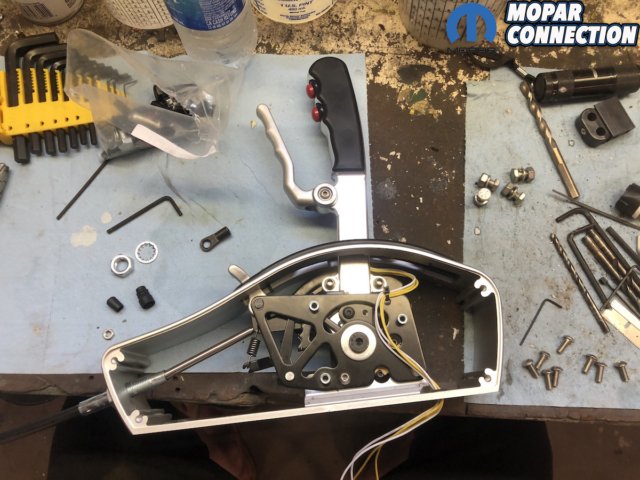
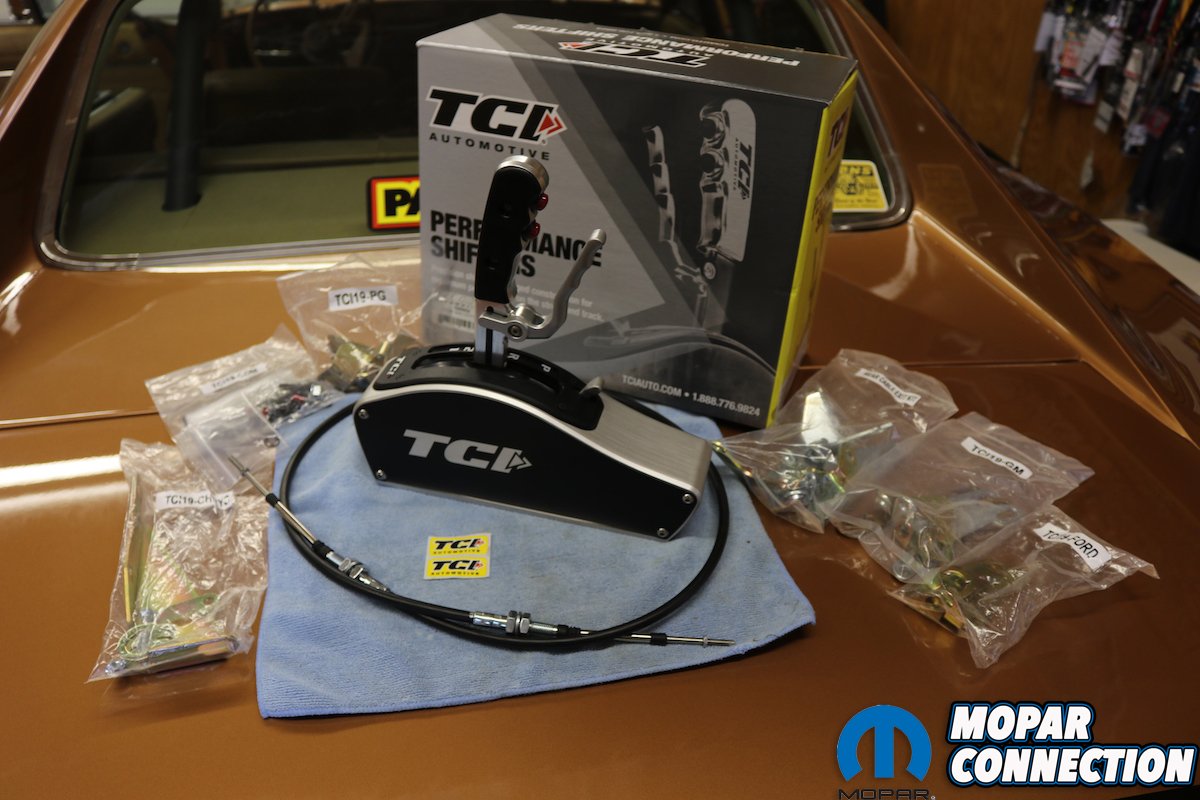
Above: Admittedly, we’ve been jones’in for one of these Diablo Shifters since first seeing the prototype back in 2015. TCI Auto really hit it out of the park with this pistol grip-style shifter, and we’re excited to finally get to row the gears using one.
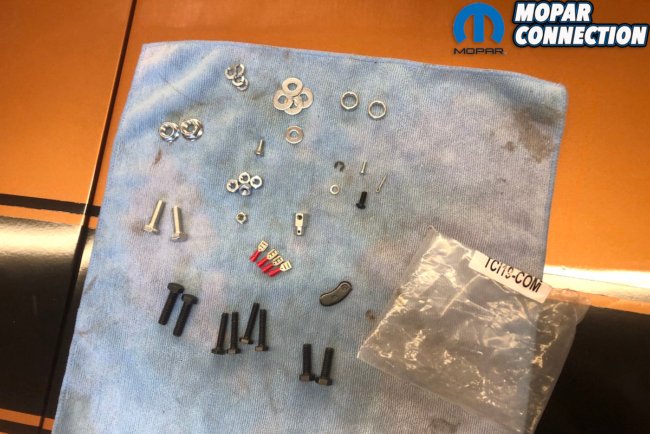
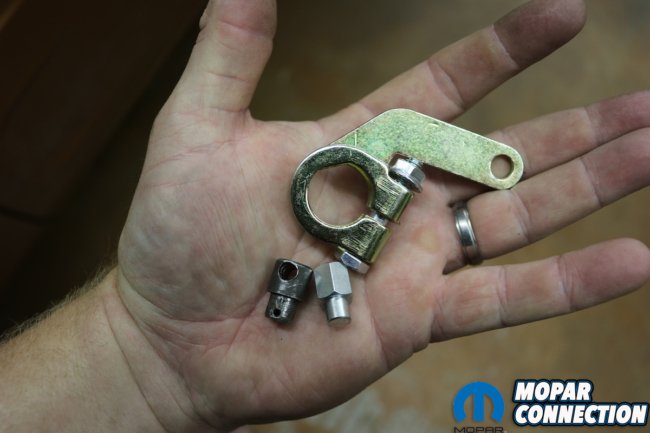
Above: As to be expected, TCI Auto includes all of the necessary hardware to not only install the Diablo shifter to your TorqueFlite, including the linkage arm, pinch bolt, pan bracket, 3-foot cable, and all of the required hardware to switch the pattern and gear-count of the shifter. It’s truly a “universal kit.”
The Diablo Shifter is truly an impressive piece as it’s been designed from the beginning to fit nearly any GM, Ford or Chrysler set up, and that’s also for either a front or rear-cable exit. Oh wait, there’s more: it can also be configured for 2, 3, 4 or 6-speed transmissions in both forward and reverse shift patterns – all without having to order extra parts! Additionally, the Diablo can be ordered with a two-button pistol grip for nitrous, a transbrake or swapping shift points. It’s a virtual transformer.
Made using an aluminum extrusion for light weight, ours came in the natural brushed aluminum finish, while a Blackout version is available too. Oh yeah, and you can also order it without a cover if you want to mount the shifter stealthily in your factory center console. Pretty tricky. Although we weren’t planning on running either a transbrake or squeeze, the thought has crossed our minds, so we opted for the two-button package. Best to plan ahead, we say.
Thankfully, installing the Diablo shifter wasn’t any trouble since we had a TCI Outlaw on a two-piece pedestal mounted to the transmission tunnel. The outgoing Outlaw looked sharp, but is far more clunky than its smooth-shifting progeny. Equally, the Outlaw’s cover is stamped steel with sharpish edges that have snagged both clothes and skin before; plus as it rides on two pull-pins, it’s rattles like the dickens. So hasta la vista, baby.
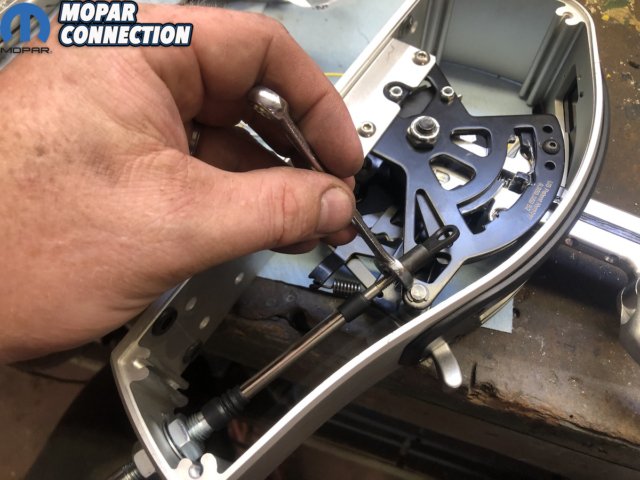
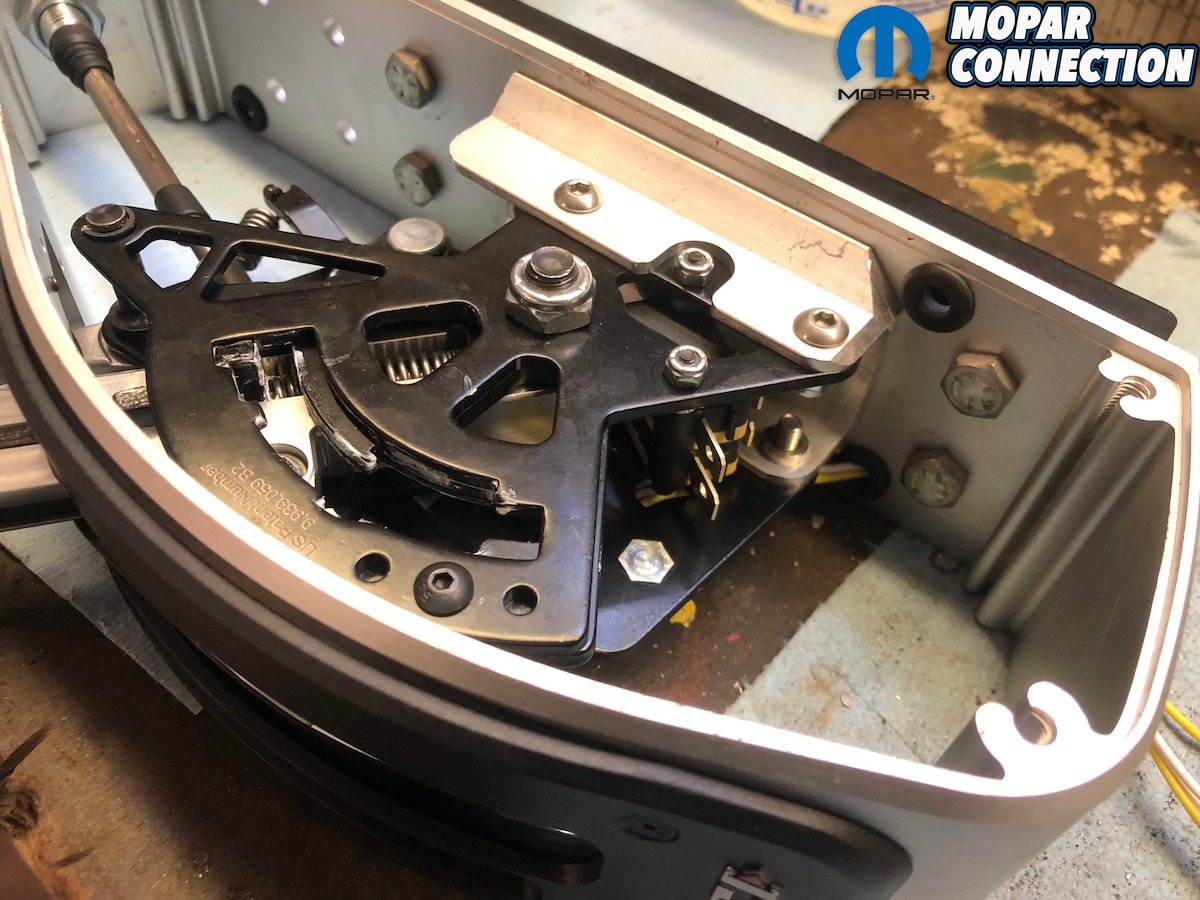
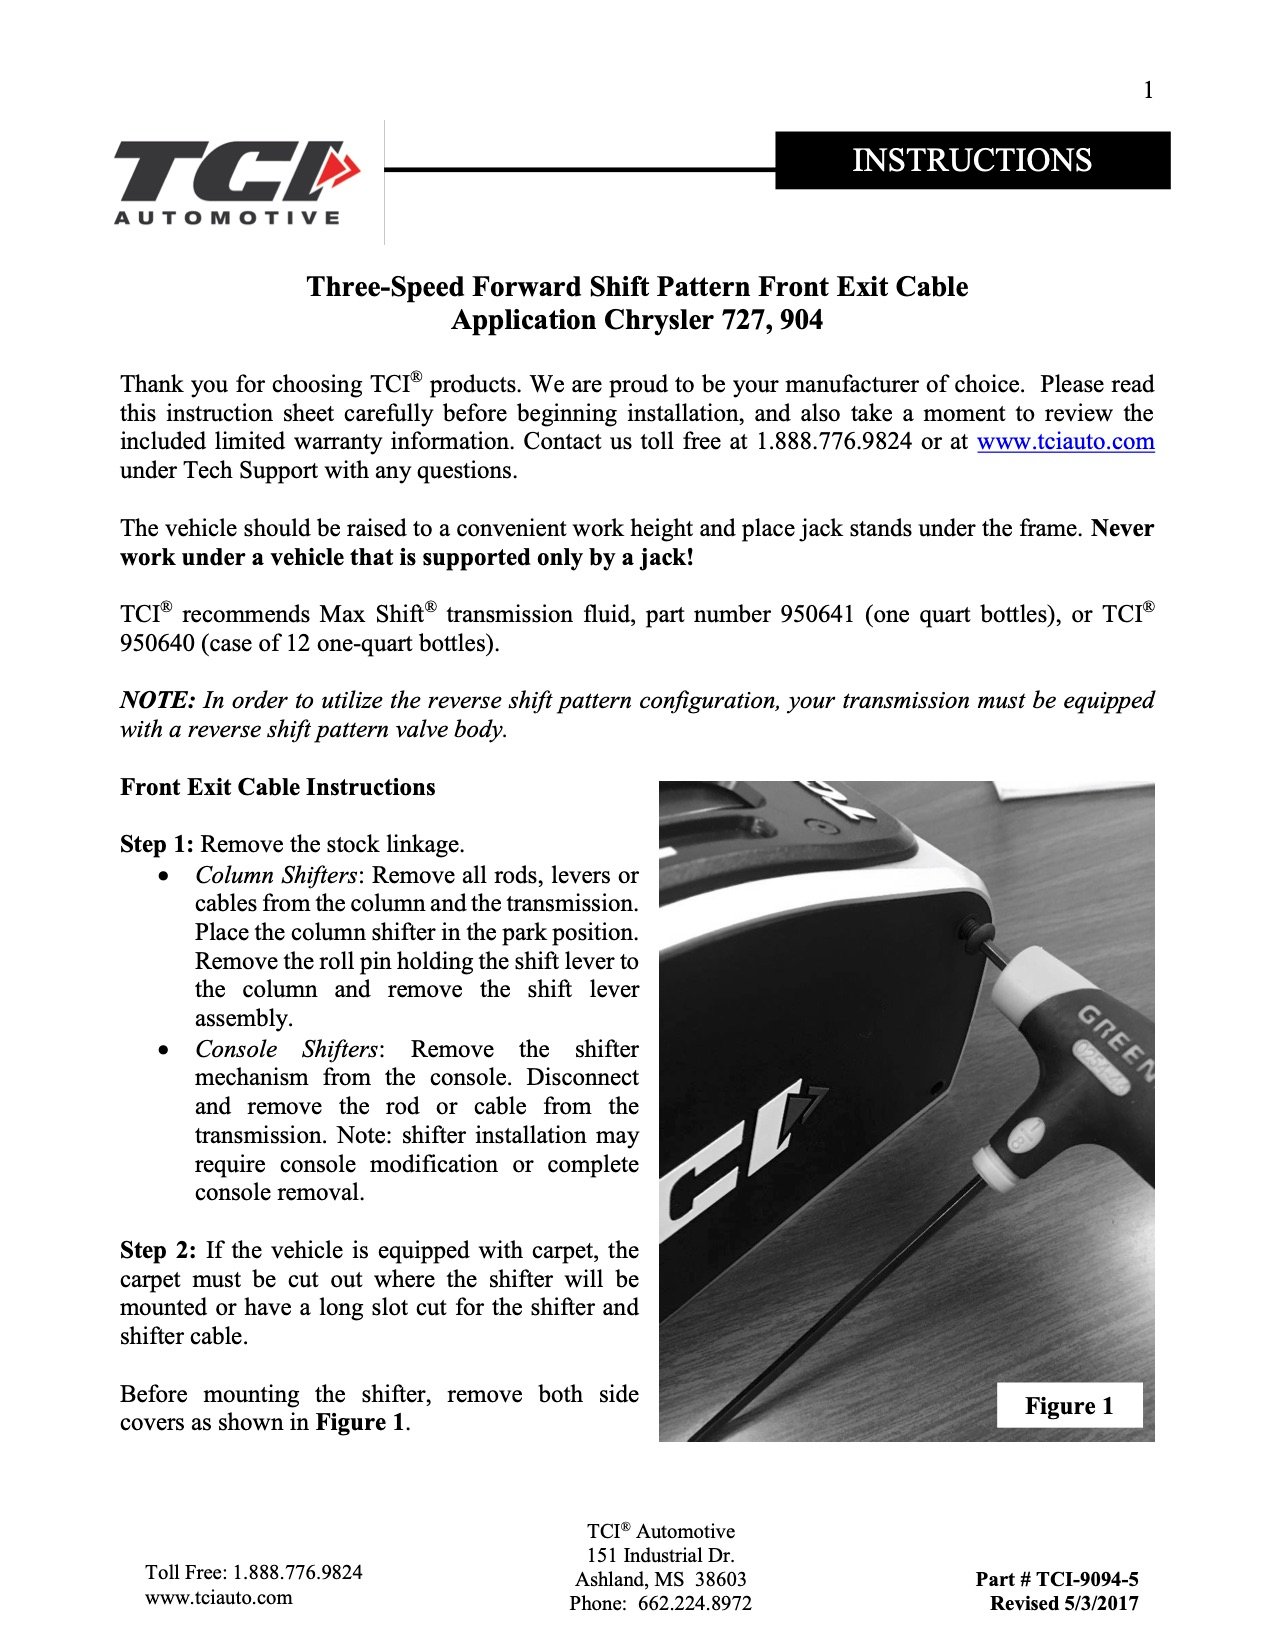
Above left: With the side plates off, you can see a little bit of the inner workings of the Diablo shifter. Optioned with its extruded aluminum housing, other shifters can actually fit smoothly inside of a factory center console if so desired. Per TCI, “rubber grommets are installed in the shifter housing to accommodate wire routing.” Above right: Attaching the end of the supplied shifter cable is a necessary first step. First, remove the dust sleeves and feed the cable through the hole in the housing. Then reinstall the dust sleeves before hooking the end into the joint using an E-clip. Adjust the jamb nuts so that there’s no slack in the cable.


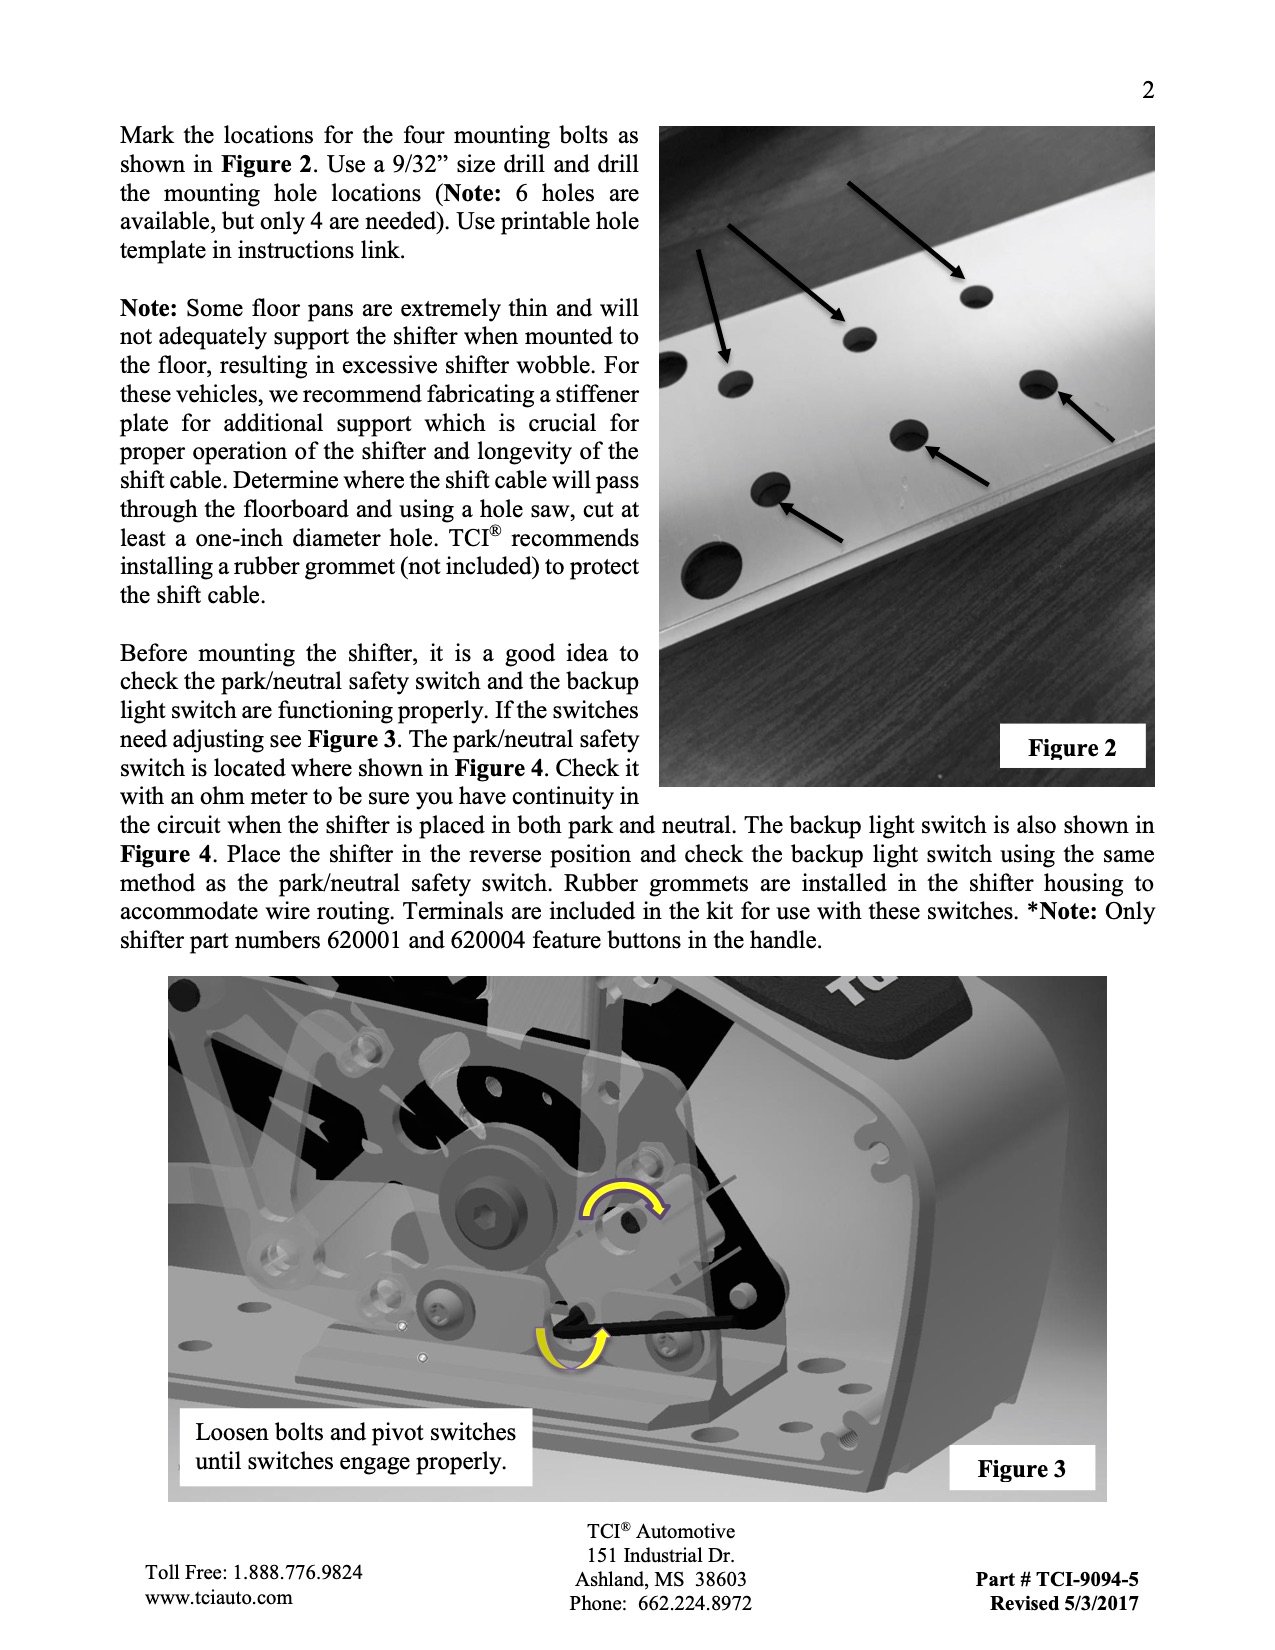
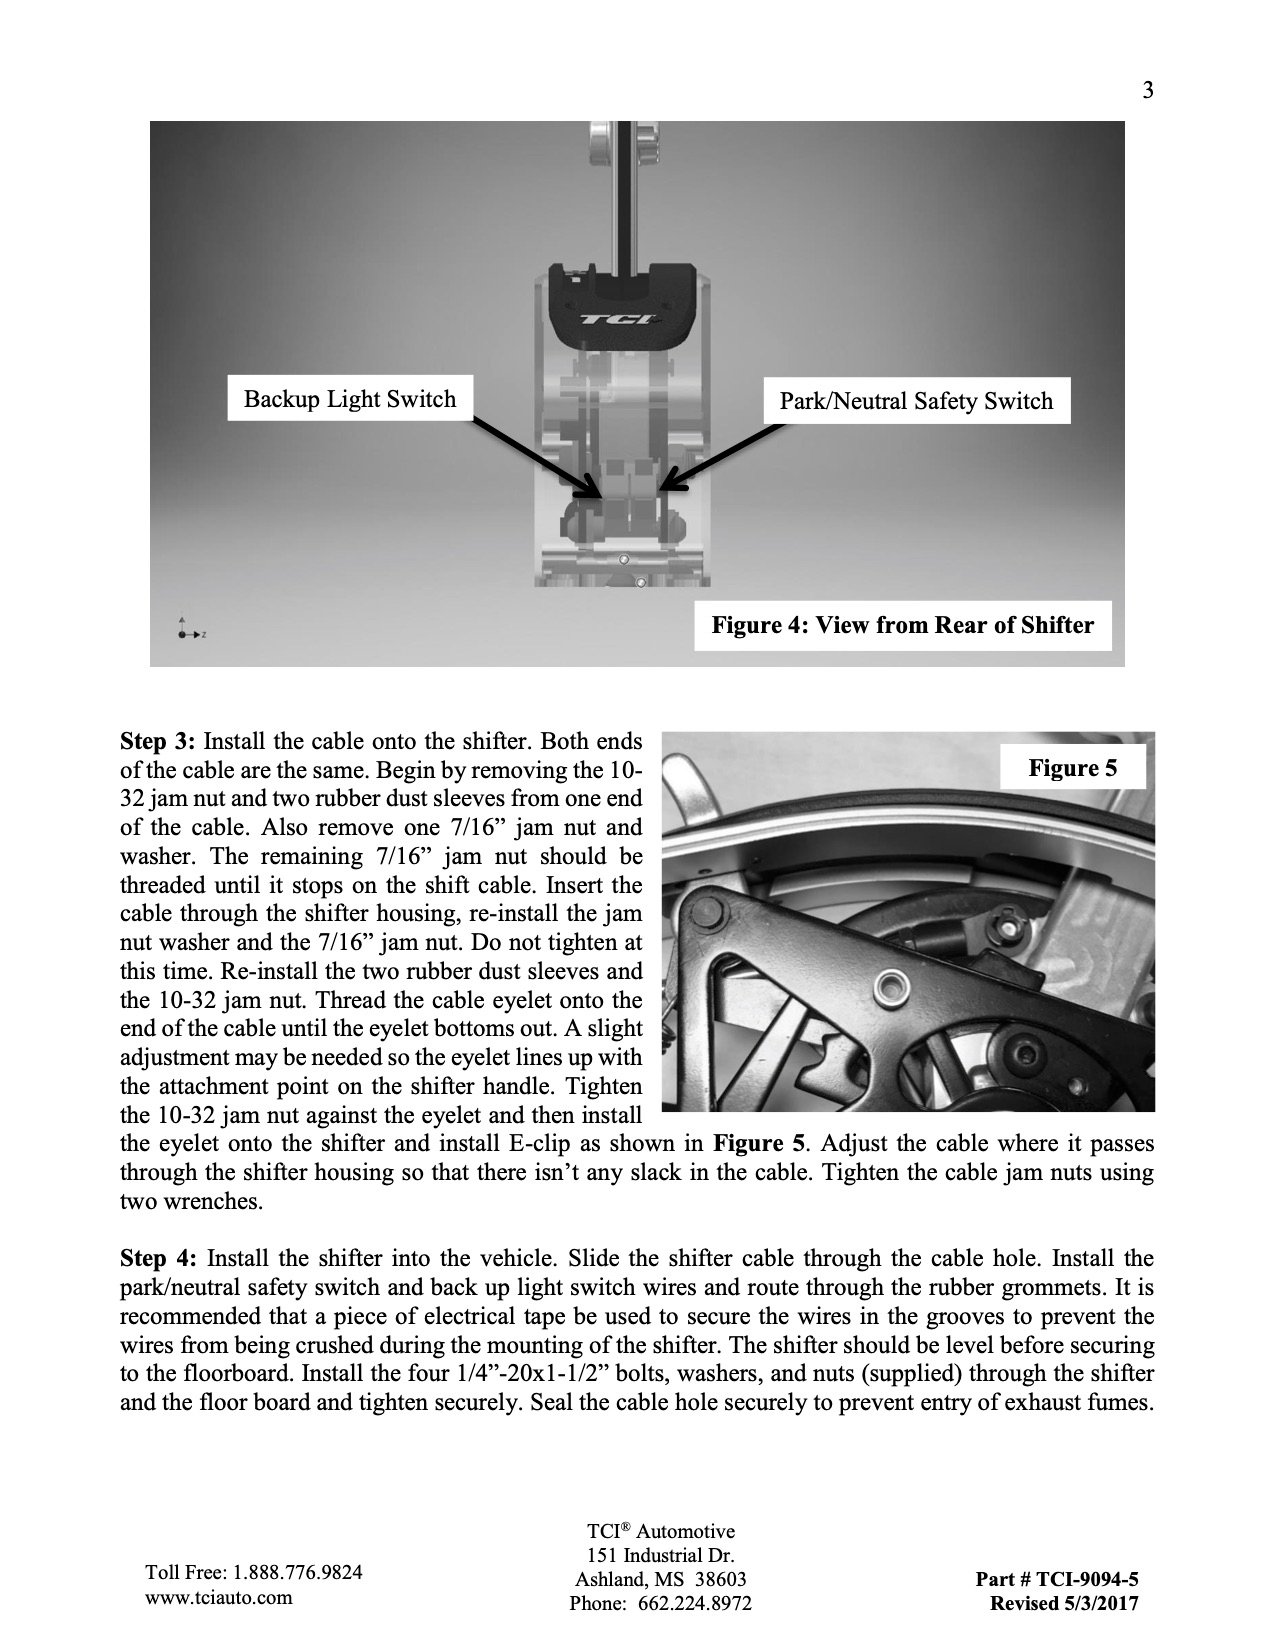
Above left: With the cable end attached to the shifter arm, can the small 7/16″ jamb nut and washer be tightened and the cable tightened down to the housing. Above right: Here’s a better look at the adjustable shift pattern plates, allowing the Diablo to change from a 2-gear to a 6-gear, and forward or reverse pattern shifter. Also note the location of the backup light switch and park/neutral safety switch. Terminals are included int he kit for use with these switches.
Our only complaint regarding the Diablo is not directly towards the shifter at all, but TCI Auto. In order to save money on printing, the instructions are downloadable through your phone using a QR code. Unfortunately, the process was buggy and our WiFi signal faint, so we had find a decent signal in order to download a proper PDF just to ensure we had the adjustable shift gate set properly for our reverse-manual TorqueFlite.
[Just trying to find the instructions online is impossibly difficult. That’s why we’ve included JPGs of the instructions in the gallery below. But seriously, whoever thought of this should be whipped with a rubber hose. –Ed.]
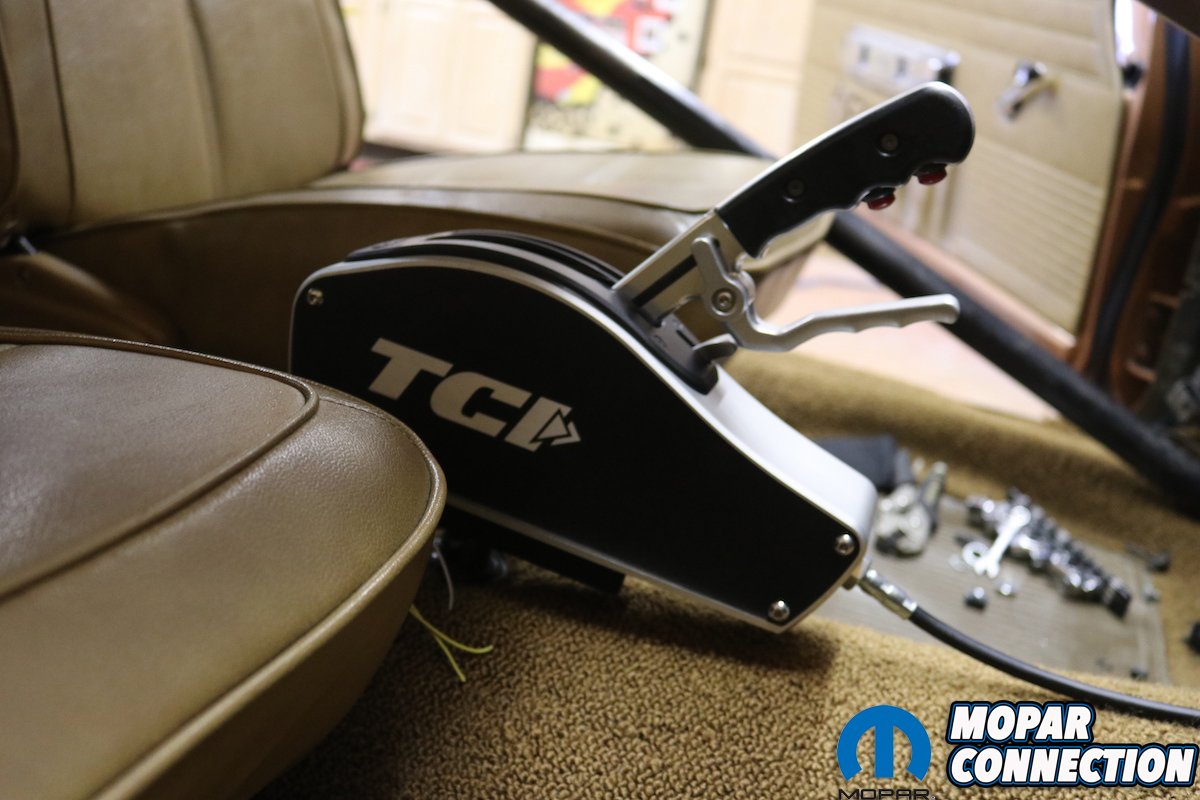
The last feature to love is the smooth-edged billet reverse lock-out lever. The Outlaw uses a small billet tang that is attached by a jeweler’s screw that tends to back out. The Diablo does away with that, and has a ergonomically-shaped switch that clicks effortlessly in and out when indexing the gears.


Above: In addition to being one of the founders of Painless Performance Products, Dennis Overholser is also a certified diesel mechanic, rancher and amateur historian, having recreated a vintage Texaco filling and service station in his backyard, replete with original uniforms, road maps and souvenirs.
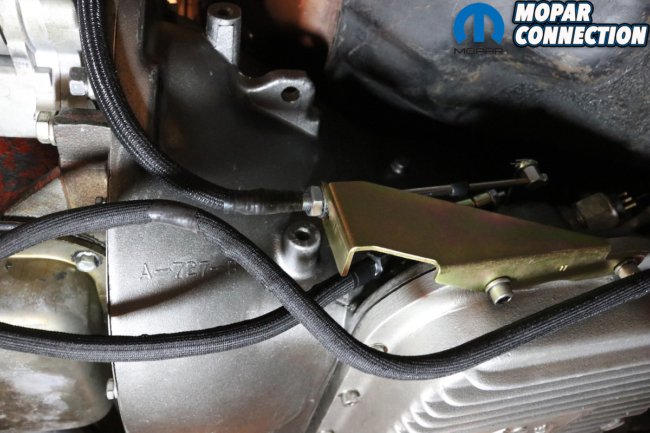
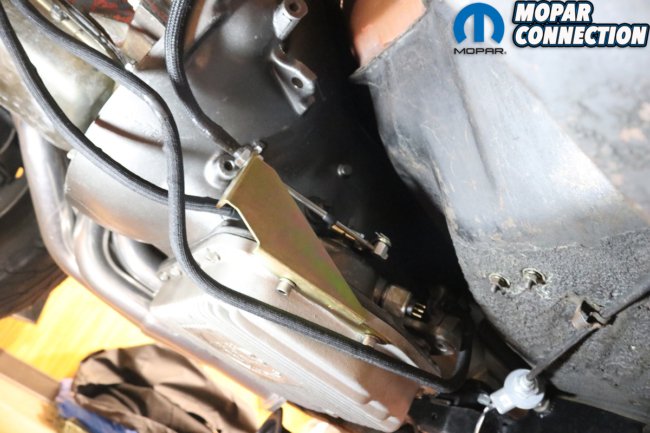
With the shifter mounted, we fed the new 3-foot cable through the hole in the floorboard, tight alongside the bellhousing and to the new gold-anodized shifter linkage bracket included in the kit. In setting up shift linkage, we’ve found it easier to start at the bottom of the shifter’s throw; in the case of our reverse-manual TorqueFlite, that would be 3rd gear. A new linkage arm was installed and tightened to the gear selector.
The threaded end of the cable is fitted with a threaded stud, measured to fit in the end of the linkage arm without binding as you row through the gears. This is the most tedious part of the process and will take several tries to get right, so be ready to take your time. Again, you’re dealing with aftermarket parts so it’s gonna take some finesse to get it dialed in.


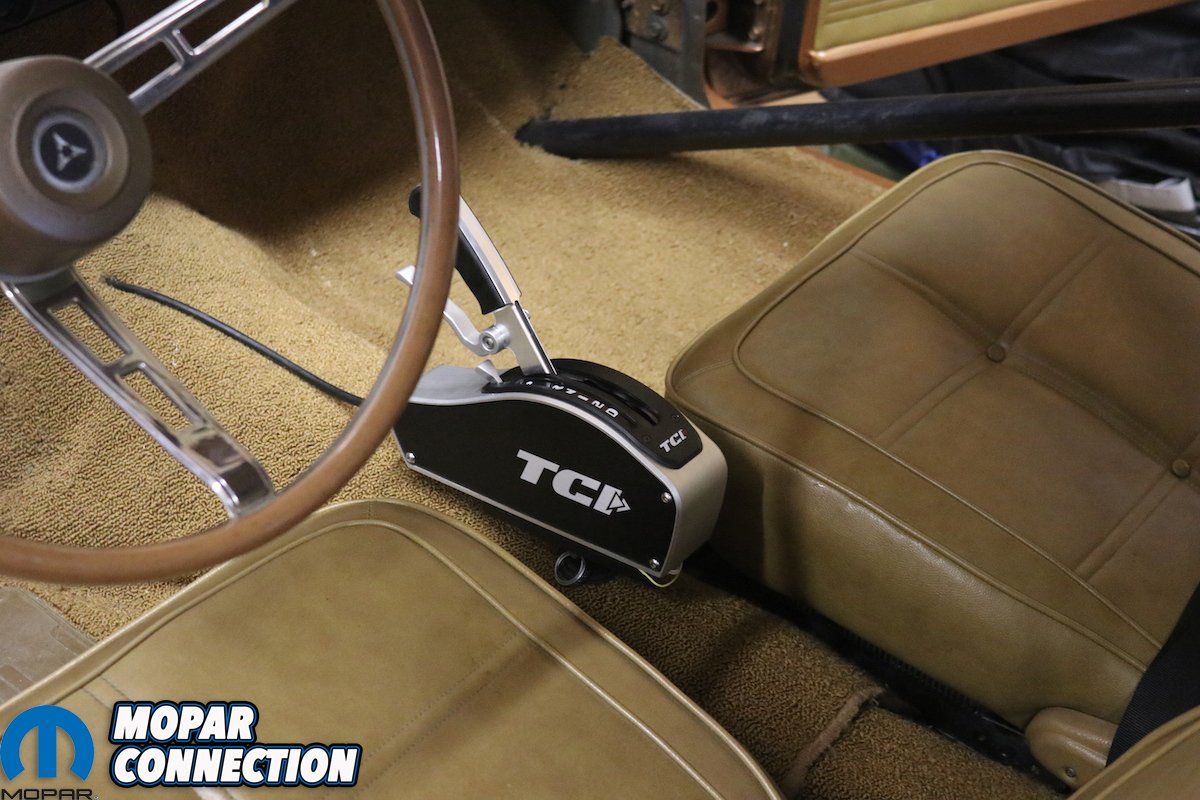
Above left: Our previous TCI Outlaw shifter was configured for a Silver Sport Transmission A41 overdrive, which is a heavily reworked 4-speed GM 4L60E overdrive. Since we returned a 727 TorqueFlite under the tunnel, we also went back to the familiar reverse manual 3-speed pattern. Above right: The plan is to wire one of the TCI Inc. Diablo shifter’s two buttons to operate the Gear Vendor under/overdrive’s On/Off switch. The Diablo’s base is pre-drilled to fit mounting plates or to mount directly to the floorboards. Also make sure to seal up the hole for the cable to prevent exhaust fumes from entering the cabin.
Above: Before dropping the Charger back on the ground, we made sure to row the shifter through all the gears and recheck all the jamb nuts to make sure we were engaging each gear properly. (Do NOT force the shifter into gear, as doing so can bend or break the cable ends or linkage. If it’s tight, you need to readjust!) And with that our 2-day thrash complete, we had to speed back home to Tennessee. Brazen is still waiting until the COVID-19 quarantine lifts in Texas so Painless Performance Products’ team can roll it in and start the laborious process of building a wiring harness that will not only work for our Frankenstein project, but every other ’66-’70 B-body.
Happy with our progress, we tidied up our mess, reinstalled the header, torsion bar and C-clip. [Did we mention having to drop both to better access our cooling lines and linkage? No? Well, we did. It made life demonstrably easier. – Ed.] Tightening up the lower control arm tensioner preloads the torsion bar, keeping the Charger from slamming down on the ground as if it had no spring in there at all – it also makes adjusting the ride height far easier than a coil-over spring.
Alas, our shifter’s installation couldn’t be fully completed as we couldn’t wire it to our Gear Vendors under/overdrive until Painless Performance Products was done developing its new B-body Mopar wiring harness. Once completed though, we’ll publish a fully-detailed review of the new harness, how it can be used as a factory-replacement, or easily modified for a relocated battery, larger 1-wire alternator, electronic ignition and much, much more.


Beautiful car..I had an Cali car same color 440. Now I have a Black 69 572 Hemi and I had similar issues. I broke the trans, overheating..replaced electric water pump 4 times due to failure (CVR). Then I put a Meziere water pump on. Trans cooler I already new I had to use an external cooler. I used quik silver ratchet shifter and made it look like a 4-speed in my console. Keep posting, I like see what other people do. Also.. you should have went with a Dakata dash .. they’re great!
We had Redline Gauge Works in SoCal go through our cluster and convert the ammeter to volts.