


It took a while for us to discover that our 535 cubic inch stroker motor (see both installments of “Wicked Wedge of The South” HERE and HERE) was spitting out some serious crankcase pressure. With the engine first in our long-term project Brazen ’69 Charger, the big wedge pushed nearly a quart of brand new oil past the cork valve cover gaskets up, and all over the intake manifold.
Because the first sign of abnormally high crankcase pressure is oil being pushed out anywhere it can, our first move was to follow Ma Mopar’s steps, and install a traditional PCV (positive crankcase ventilation) valve in one of the valve covers. Chrysler discovered early on that even the basic 440 4-barrel engines produced excessive crankcase pressure, requiring the PCV valve to allow the engine to operate below atmospheric pressure.

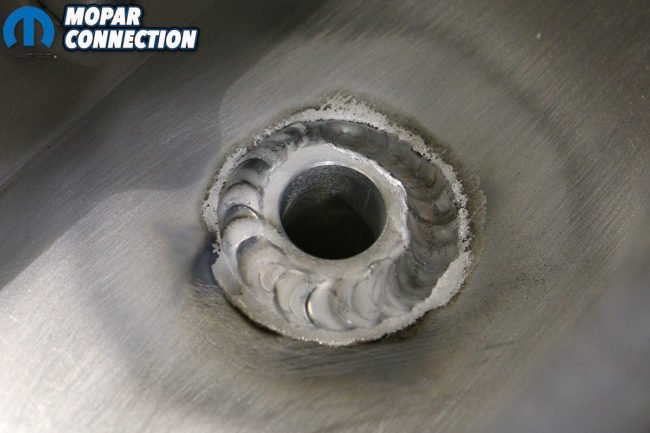
Above: This diagram illustrates the simple-yet-effective Moroso Crankcase Evacuation System. Excessive crankcase pressure (or “Blow-by”) is siphoned from the crankcase from breathers installed into both valve covers, which are plumbed into one-way check valves welded into the header collectors.


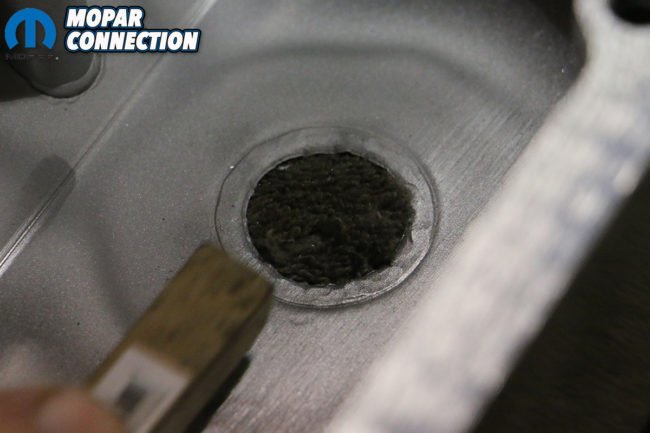
Above left and middle: With our stamped valve covers removed we could see where oil was being pushed through our Fel-Pro gaskets and out of our engine. Above right: Even ARP valve cover studs and knurled shoulder nuts couldn’t keep back our oil leaks caused by blow-by.
This excessive crankcase pressure being created is called “blow-by.” Consisting of compressed air-and-fuel mixture from the compression stroke, combustion leakage past the rings, and by-products from the power stroke (including fuel, exhaust gasses, carbon and other contaminants), blow-by can cause severe damage if left unresolved.
Not only does excessive crankcase pressure rob power by disturbing the ring seal and creates drag and windage on the reciprocating assembly, but it also introduces harmful contaminants to the engine’s lubrication, and even taints the incoming air-and-fuel mixture to the combustion chamber. With the engine sealed, it struggled to find release, eventually pushing oil past the piston rings, causing our engine to start blowing white smoke out of the exhaust.
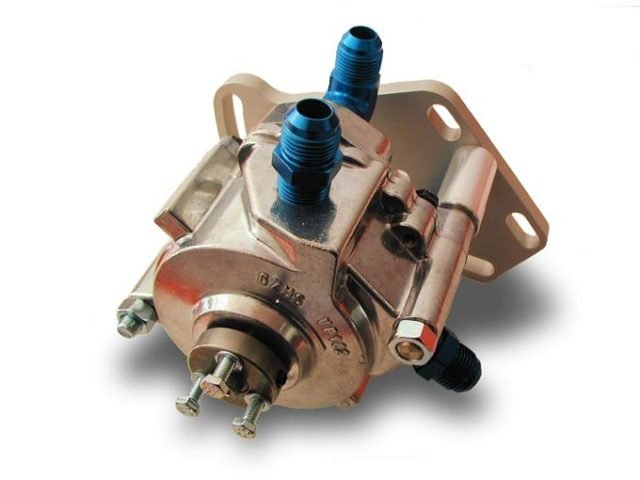
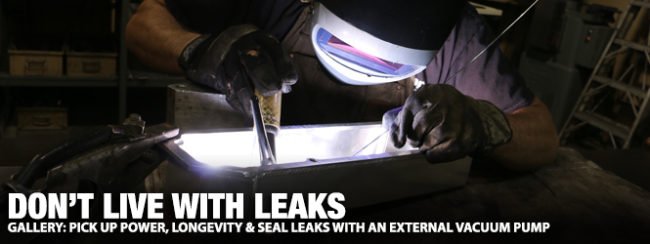
Above: GZ Motorsports offers different sized external (belt-driven) vacuum pumps to best suit your application’s needs. Left is a VP 102 with a VP 104 on the right. Because too much vaccum can have adverse effects on your engine’s oil pressure, while not enough vacuum will fail to resolve your blow-by issue, GZ Motorsports recommends properly tuning your pump by maintaining an eye on your oil pressure, as even the recommended 12-to-15 inches of vacuum can yield a 8-to-12 psi drop in oil pressure.

Above: Because our Project Brazen was seeing mainly street use, GZ Motorsports suggested their Sportsman Complete Racing Vacuum Pump Kit. True to its name, the kit complete with all of the hardware, -12 AN fittings, hose and belt necessary to install your external vacuum system relatively effortlessly.
We quickly added a pair of traditional chrome breather caps to help alleviate the pressure, but all it did was provide our big stroker a new release to push oil through (despite the valve cover’s internal baffling). Our attempts to “Band-Aid” the situation only prolonged our choice to install a passive crankcase evacuation system (or a so-called Pan-Evac system). Developed by Hedman Hedders’ Bill Million, the original crankcase evacuation systems were first used “in the field” by Traco Engineering on the Penske Trans Am Camaros.
The system itself is ingeniously uncomplicated: a pair of one-way check valves, mounted to an angled tube, are welded into each respective-side’s header collector. The valves are then attached to vent tubes that are fed by breathers attached to the valve covers. The idea is that the passing exhaust gases will draw a vacuum on the tubes, pulling excess crankcase pressure out of the sump and up and out through the collector.

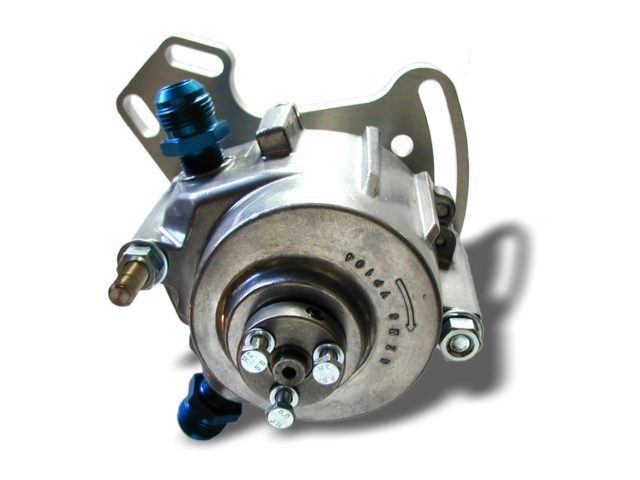
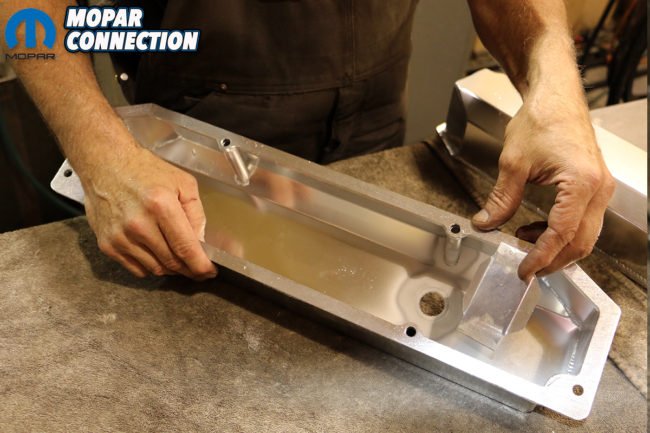
Above left: Getting a vacuum system to properly work requires a sealed crankcase, making our cheapo stamped valve covers and parts store breathers a “no go,” so we turned to Hamburger’s Performance who supplied these absolutely gorgeous brushed aluminum fabricated valve covers. Above right: Each side featured a beveled and baffled inlet for a oil filler cap and PVC valve. Why fabricated covers are so much more desirable than stamped is the laser-cut base that gives the valve covers a nearly perfect seal to the cylinder head’s machined surface.
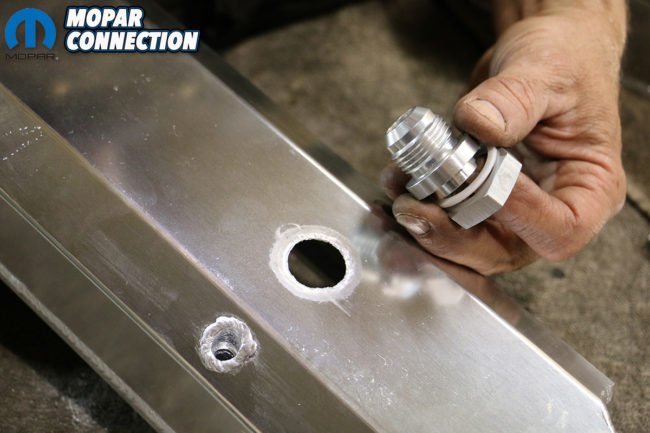

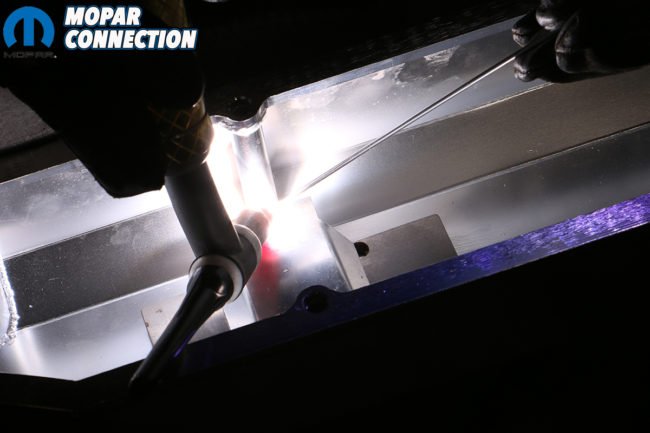
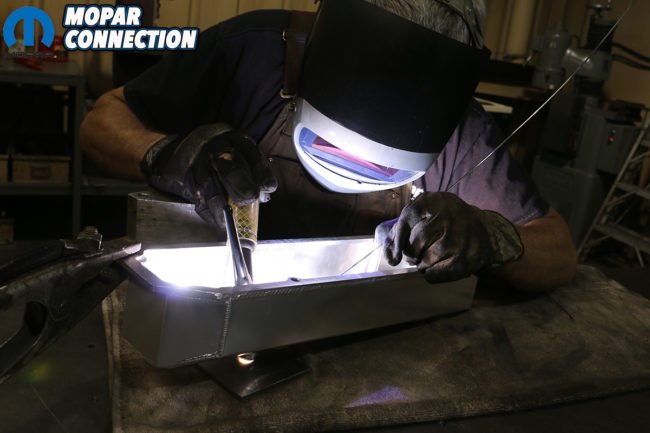
Far left: Because we needed to plumb our GZ Motorsports vacuum system to our valve cover, we felt it best to weld our -12 AN fitting to the cover rather than try to wrench it down. This required snipping out the baffle cover first. Center left: We next flattened down the beveled edge and cleaned it up as best as we could careful not to injure the soft aluminum surface. Center right: Prior to installation, we made sure that our AN fitting sat nicely in our new hole. Far right: We mocked up our soon-to-be-permanently-installed AN fitting to our Hamburger cover.
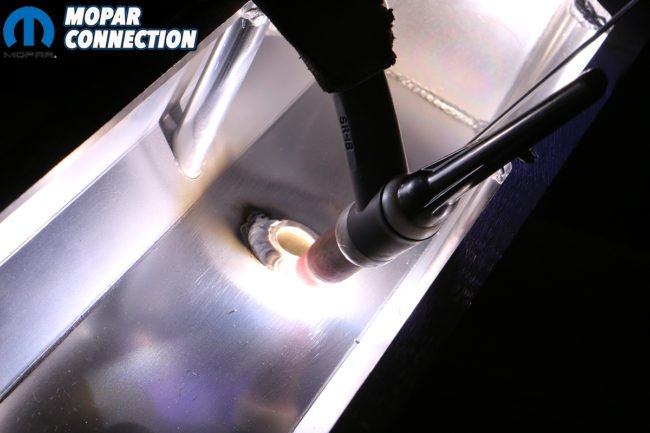
Above: Mopar Connection Magazine Technical Advisor Tray Batey is pretty handy with a TIG welder and handily fused our AN fitting to our new valve covers careful not to burn the coating off of the brushed aluminum covers.
We installed our Moroso Evacuation System in a manner of hours and were met with immediate success. Gone was the smoke billowing out of our exhaust tips, and our driveability immediately improved, allowing us to rack up some much overdue mileage. Unfortunately, because of the passive nature of the system, we encountered several drawbacks; as noted by Moroso, the Evacuation System is ideally suited for open-header dragsters and racecars, as the back pressure created by mufflers, sound-muting resonators and full-length exhaust systems will counter the vacuum effect created by passing exhaust gases.
Because of our large diameter (3-inch) system and open “chambered” mufflers, the Moroso system fared well, but only under throttle. At idle or when letting off of the throttle – particularly after accelerating hard – the building back pressure blocked the Evacuation System, and produce a tell-tale plume of burnt oil. Moreover, we still found our valve cover breathers collected too much oil, and our gaskets leaking despite our best efforts.
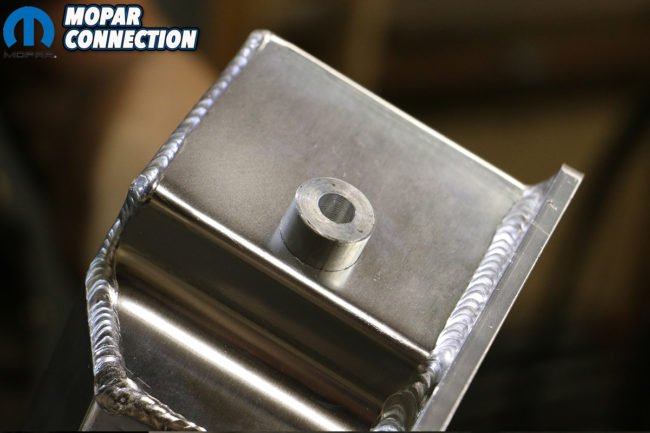
Above: With our AN fitting now a permanent fixture to our driver’s side valve cover, we could reinstall the baffle.
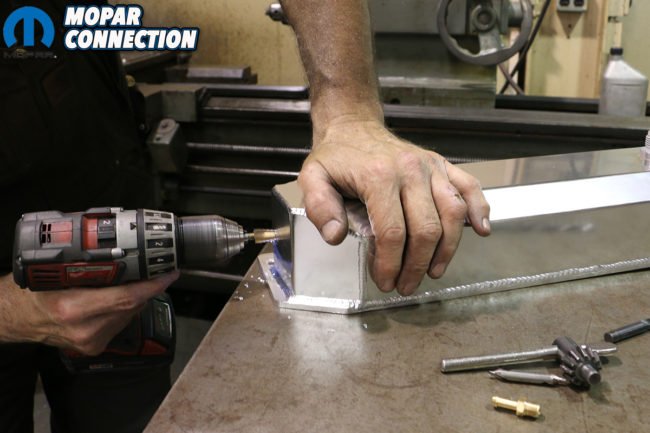

Far left: The final alteration we made to our driver-side valve cover was the addition of a vacuum gauge port. Center left: After we machined a small plug, Batey welded in to the back of the cover. Center right: We ran a tap through it allowing us to thread in a small brass fitting. Far right: Voila! It almost looks like it came from Hamburger’s with it already installed.
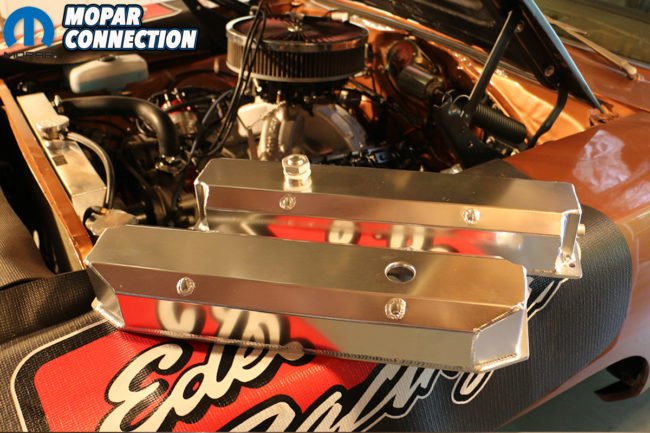
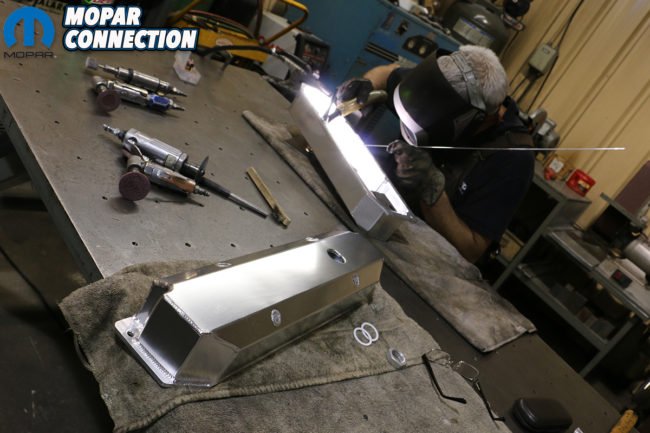
Above: With our newly modified Hamburger’s Performance valve covers complete, we were ready to begin the installation of the GZ Motorsports Sportsman Complete Racing Vacuum Pump Kit.
If we were going to continue racking up the miles on our “Wicked Wedge” stroker motor, it was time to pull out the big guns. We turned to Bill Huntington of GZ Motorsports, who explained to Mopar Connection Magazine, that one of their external crankcase vacuum pumps would not only provide significant power gains for both racing and high-performance street engines by promoting superior ring sealing and reducing windage.
An external, crank-driven vacuum pump evacuates positive crankcase pressure continually, and in fact, are particularly effective on larger displacement engines (or those with power adders) that generate higher cylinder pressure and thereby, more blow-by, making its application to our 535 cubic-inch motor ideal. In the case of our engine, the bigger the stroke, the more wind produced by the rapidly descending pistons, churning the crankcase into a torrent of super=heated air and oil, resulting in windage and parasitic drag.

Above: GZ Motorsports includes a billet aluminum bracket (as well as all of the hardware) necessary to installing your vacuum pump to your engine.
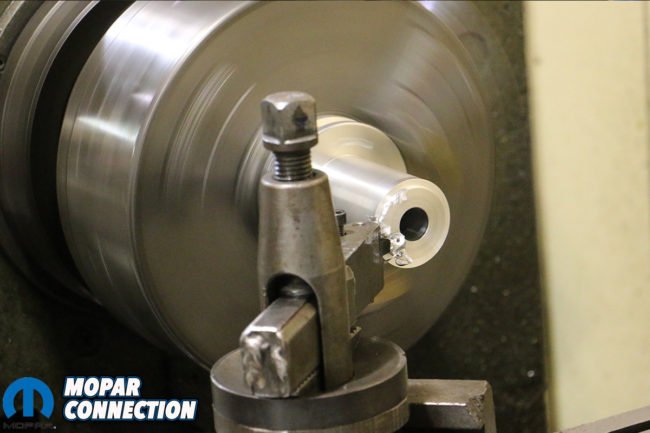

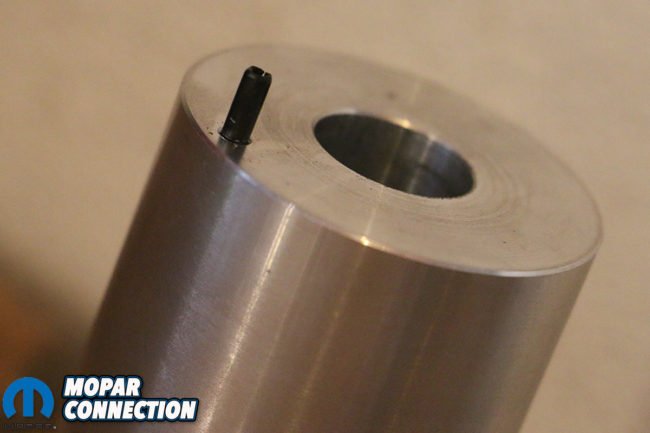
Far left: Because the drive-belt alignment is so precise, GZ Motorsports’ asks for your measurements prior to sending out the billet underdrive pulley. And even if your measurements are off, the mandrel can be easily modified to achieve an ideal alignment between the pulleys. Center left: Batey chucked up the pulley on a lathe and shaved off a few thousandths and even re-drilled the pin hole for the dowel that indexes into the factory accessory pulley. (Center left and Far left)

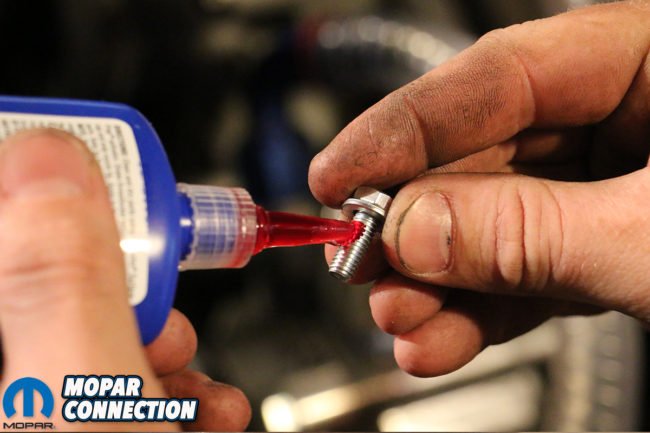
Above: With our measurements on point, our pulleys lined up and belt alignment spot on, we added some thread locker to our crank bolt and three bolts that hold down the pump pulley.
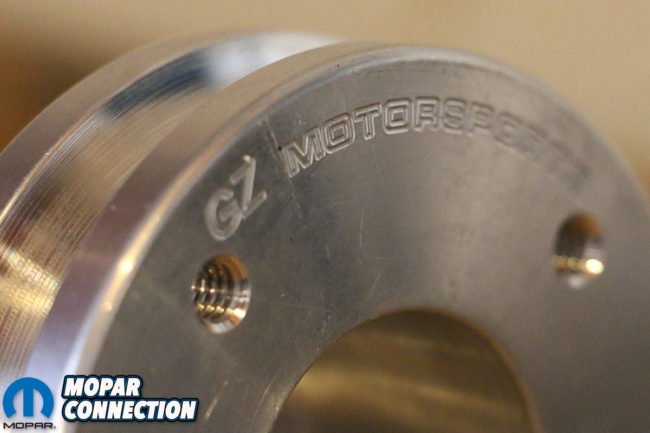
Because our engine was seeing primarily street use, Huntington recommended GZ Motorsports’ Sportsman Complete Racing Vacuum Pump Kit. True to its name, the kit includes everything necessary to install on most Mopar applications (VP 102 pump, pulleys, billet universal mounting bracket, billet crank mandrel, Gilmer belt, braided hose, breather tank and vacuum-control valve), if only requiring a little ingenuity. GZ does caution that those looking to mount the VP 102 pump to the driver’s side cylinder head (Mopar big and small block) should call ahead for suggested mounting options – depending on the type of heads being used.
Being belt-driven, an underdrive pulley mounts to your crank, spinning the vacuum pump continuously. The pump is plumbed to either one or both of the valve covers, pulling vacuum and discharging to an external oil separator and breather. For most Sportsman applications, the VP 102 pump doesn’t require an oiling source, as it self-lubricates as the oily discharge is pulled through the pump’s carbon fiber vanes and Rulon wipers. Because GZ Motorsports recommends limiting pump speed to no more than 6,000 rpm to optimize durability, GZ’s underdrive pulley has the pump spinning at 55-to-75 percent of the crankshaft speed.
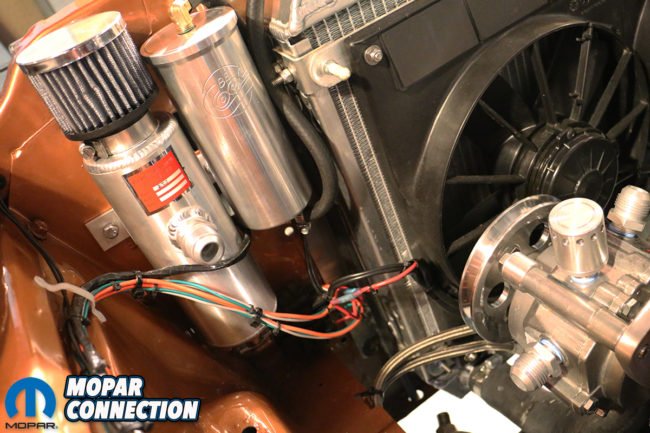

Above left: We installed the remotely-mounted breather tank next to our other breather tank. GZ provides plenty of hose to route the pressure and oil mist evacuated from the crankcase to the external breather tank. Inside, the tank vents the pressure through a filter and collects the excess oil for periodic draining. Above right: GZ Motorsports also supplied all of the anodized -12 AN fittings necessary to plumb the system.

Above: GZ Motorsports’ Bill Huntington recommended that the exhaust fitting is positioned between the 5 o’clock and 8 o’clock position to keep excess oil from building up at the bottom of the pump (potentially causing the vanes to stick in the rotor slots). With it properly installed, adjusted and operating at full capacity, the GZ Motorsports Sportsman Complete Racing Vacuum Pump kit renders performance gains between 10-to-35 horsepower. [We have scheduled a dyno session to prove this claim within the month. -Ed.]
Huntington cautioned that a maximum of 12-to-15 inches of vacuum is ideal as it yields solid, measurable power gains and doesn’t interfere with the engine’s overall oil pressure. Too much vacuum can draw oil out from between the bearings and journals, thereby scavenging flow and plummeting the oil pressure. Even running the suggested inches of vacuum can result in anywhere between 8-to-12 psi drop in oil pressure, so its best to keep a close eye when calibrating the vacuum pump.
If more vacuum is required, GZ suggests changing your engine to a more advanced dry-sump oiling system that can better maintain oil pressure throughout the system; equally, a larger vacuum pump that is lubricated through a feed line is also recommended, but these applications are almost exclusively for committed race car applications, while self-lubricated external vacuum pumps such as what we installed on Brazen are often the ideal choice for hot, enclosed street or bracket racing engines, as well as other performance applications.


