


Full size Chryslers, Dodges and Plymouths from the 1960’s are among the most durable, longest lasting vehicles ever built. But it’s important to remember that while all of the parts Chrysler engineered were of high quality, they still have a finite life expectancy. Take the multi leafs that were used on rear of all 1965-1968 Chrysler C-Bodies. They have been supporting the vehicle weight, along with that of the occupants and any cargo for nearly fifty years. This is far in excess of what the engineers could have possibly anticipated when they originally designed these vehicles.
Consider 100,000 or more miles of real world driving, including crossing rail road tracks, hitting pot holes and the abusive harmonics caused by undulated road surfaces during a period of nearly five decades and you’ve got all of the ingredients necessary for metal fatigue, sagging and even ultimate failure. Adding insult to injury, the rubber bushings in the spring eyes and shackles wear, distort, dry out and crack from mileage and, dare we say it, old age.


Above left: Measure vehicle ride height before beginning to establish baseline for comparison between old and new springs. Above Right: Chalk both front wheels
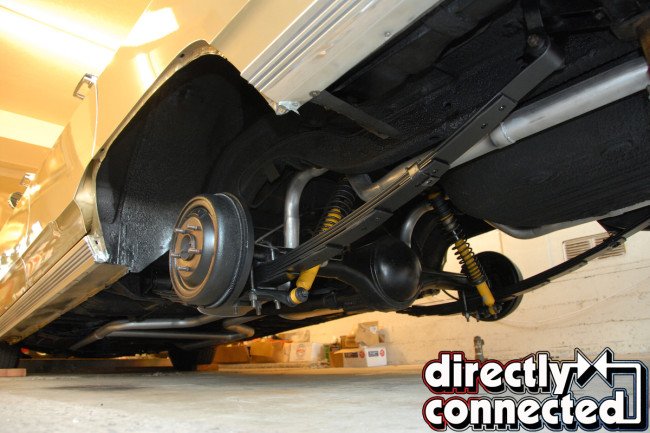
The 1967 Chrysler that is the subject of this story is a true survivor with just 55,000 miles on the odometer. The rear suspension was all OE, other than the shock absorbers that had been replaced with coil assisted heavy duty Monroe units. While finding a mint, unmolested 1967 Chrysler Town and Country wagon is the proverbial needle in the haystack, and the thought of owning a survivor sounds so romantic, the truth remains that this vehicle is 47 years old. The rear suspension was sagging on the left side, possibly because the fuel tank is mounted vertically behind the left rear wheel. When you factor in the years, along with the location of the fuel tank, it becomes painfully obvious that all of the parts were well past their normal life expectancy.
Tired springs combined with worn bushings will compromise the ride and handling of your vehicle. Rather than wait for the inevitable to happen, we decided to replace the original leafs on the 1967 Chrysler Town and Country nine passenger wagon. Working with Eaton Detroit Spring, we sourced a pair of new replacement multi leafs. Included with the leaf set were new shackles, spring eye bolts, rubber bushings and U-bolts.
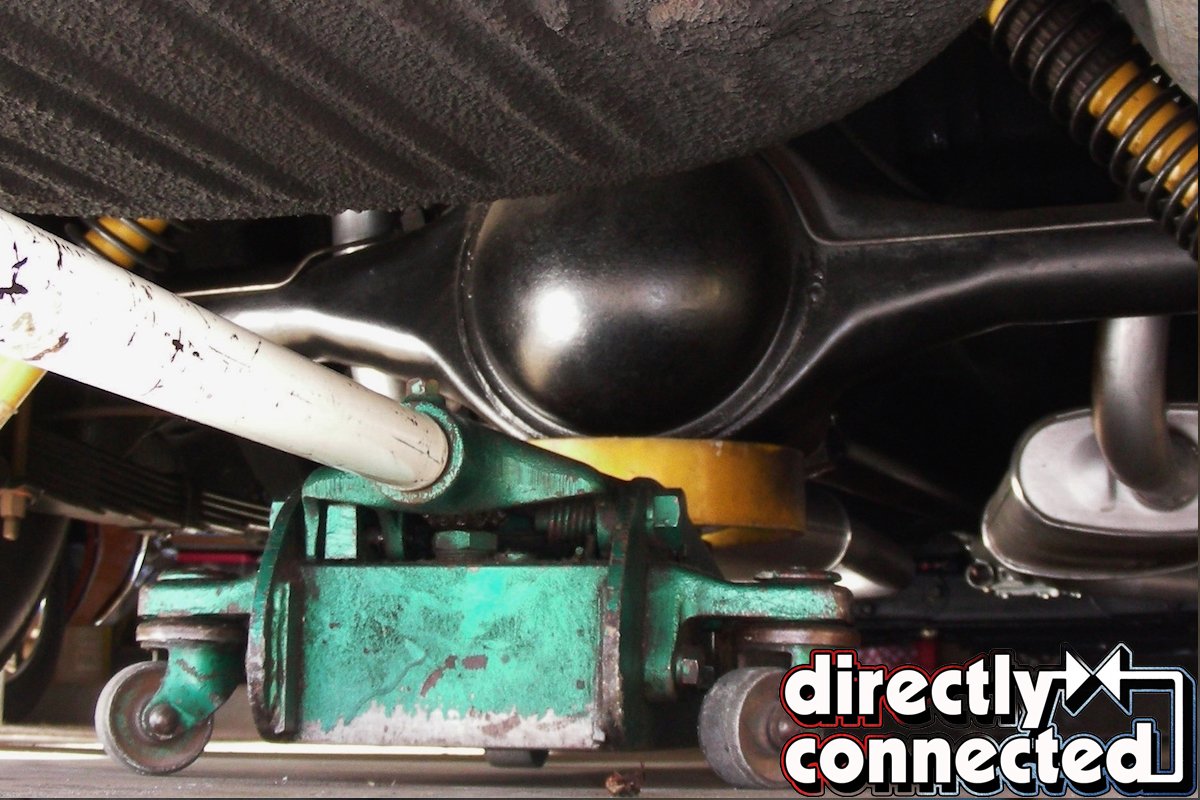


Above left: Use jack stands under rear frame on each side to safely support vehicle. Above right: Detail photo illustrating placement of jack stand on rear frame.
Located in Detroit, Michigan since 1937, Eaton Detroit Spring is one of the largest manufacturers of replacement leaf and coil springs in the world. According to Gary Gassman at Eaton Detroit, they offer springs for over 166,000 applications, all of which are made here in the United States. Their web site, www.eatonsprings.com has detailed information on all of the different springs they offer. By providing the year, make and model of your vehicle, and your preference for stock or lowered ride height, Eaton Detroit can provide the correct springs for your vehicle.
Follow along with us as we replace the tired leafs on the Chrysler. Note that changing the leaf springs on A, B and E bodies is very similar to those on the C Body. The photos and captions will give you a very good idea of what is involved should you decide the change out the leaf springs on one of these other Mopars. It’s easy, and you can do it at home using simple hand tools. We suggest two sturdy jack stands and a floor jack for safety. The whole job only takes a few hours, while the satisfaction you’ll get from performing this upgrade will bring a smile to your face every time you drive your car.


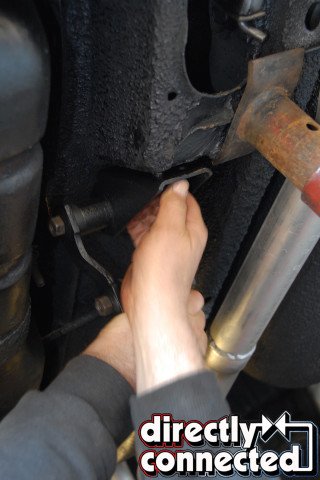
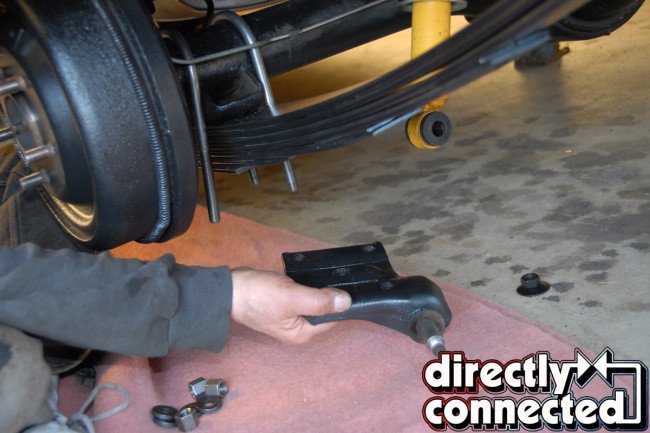
Above left: Remove lower shock nut and slip shock absorber off the mounting stud on the bracket. Next, remove nuts and lock washers from the U-Bolts that attach to the spring perch and bracket beneath the leaf spring. Remove the bracket. Above right: Remove the fasteners from the front and rear leaf spring hangars and remove leaf spring from vehicle.

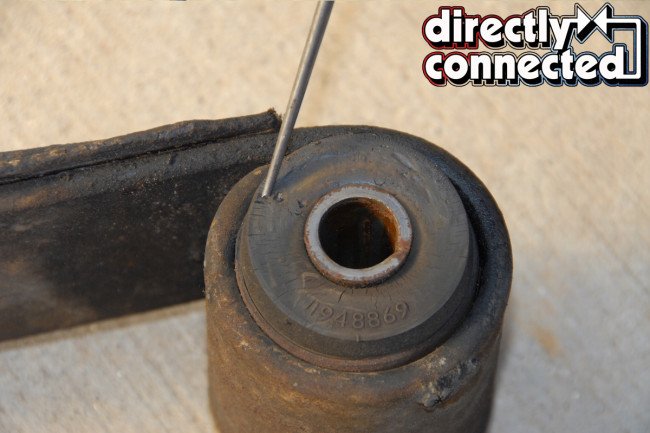
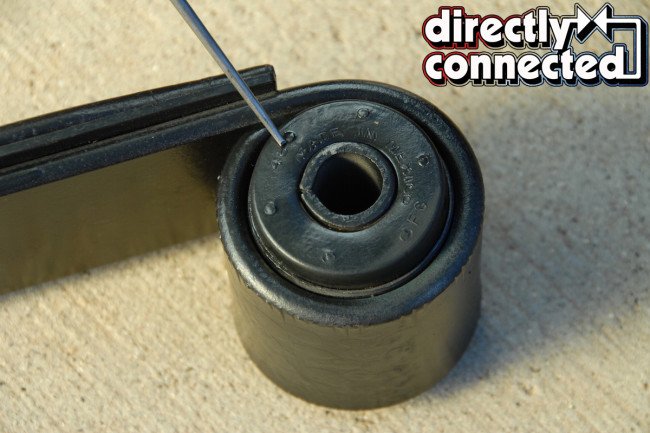
Above left: The original front spring eye rubber bushing is cracked and dried out. Above right: The new bushing illustrates the difference between old and new.


Above left: The bushings between the leaves in the original leaf spring are dried out and disintegrating. Above right: Compare to the bushings on the new spring.


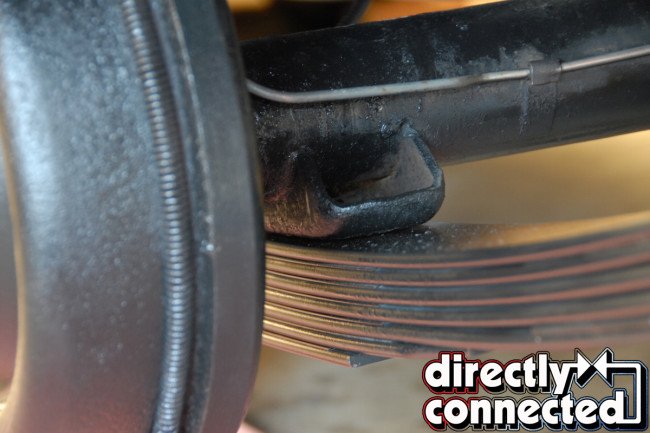
Above left: This shows front spring eye hangar. Note that the mounting studs that install on the frame are spaced differently on the top compared to the bottom and are offset left and right. Be careful to reinstall the hangar on the correct side of the vehicle. Above right: This shows the spring installed in the hangar. Note: The permanently installed bushing identifies the end of the leaf that installs in this hangar.


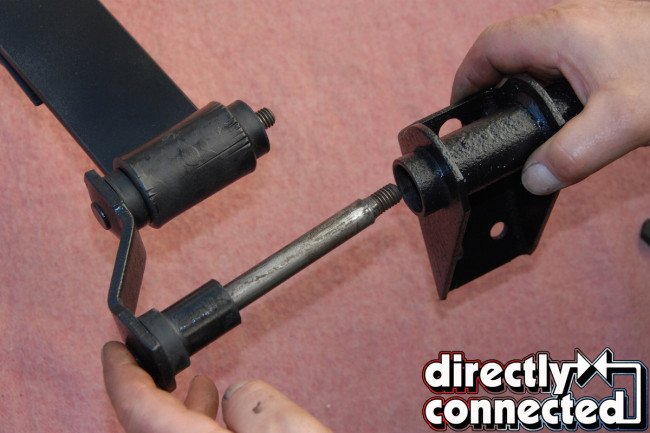
Above left: Install shackle and bushings onto leaf spring. Note that the shorter stud is inserted into the leaf eye. Above right: Install frame hangar onto longer shackle stud.


Above left: Install rear leaf spring frame hangar to vehicle. Tighten to 30 ft. lbs. Above right: Secure to frame with retaining nuts. Note: Torque shackle nuts to 35 ft. lbs. when vehicle weight is on springs.

Above left: Align hole in perch with stud in leaf spring. Above right: Lower differential onto spring.


Above left: Install new U-Bolts over differential housing. Above center: Install lower spring bracket under leaf and push U-Bolts through the holes, install lock washers and nuts. Above right: Tighten nuts to 45 ft. lbs. Reinstall shock absorber to lower spring bracket and tighten nut to 50 ft. lbs. Repeat steps on other side and tighten all bolts as necessary.
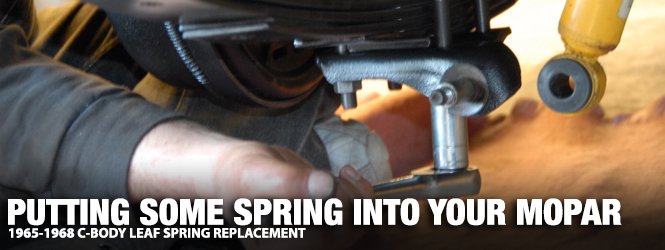
“1965–1968 C-Body Leaf Spring Replacement: Putting Some Spring into the Stride of Your Mopar” was originally written by Larry Weiner with photos by Steve Temple, and published in Pentastar Power Magazine.


