


One of our favorite things about Project Orange Crush is rowing through all the gears. Rolling down the freeway with 3:91 posi and only taching 1500rpm is incredible. The tight quick shifting of the T56 Magnum from American Powertrain puts the old sloppy 4 speed to shame. With 6-speeds to choose from, it allows for perfect selection of gears whenever you need them giving you the perfect combo for racing and cruising. This setup has been in the car for a few years now and has worked great until recently.
The transmission is holding up great, even considering the abuse we have put it through, but the factory pedals seem to be on their last leg. With more gears we obviously shift a few more times than normal and our factory pedals don’t like it. We were talking with our friends at American Powertrain and learned that they reproduce bolt in, factory-style A-Body pedals! They were kind enough to send us a set to fix out issues we were having with our worn out factory pedals.


Above left: The first clip we removed was the E-clip located at the end of the clutch pedal rod on the right side of the pedal assembly. This clip holds the clutch pedal in place so it doesn’t slide out of the king pin. It’s difficult to see from under the dash but you can feel it with your hand. We found it was easy to pop off with a short flathead screwdriver. Once the E-clip is removed be sure to grab the washer that is found behind the E-clip on the shaft. Above right: The next clip you will remove is the king pin hold down. Again it is hard to see the hold down and will have to feel for it. It is bolted to the left side of the pedal assembly. The clip is held in place by 7/16 bolt and nut. Once the hold down clip is removed it is time to slide out the king pin. We found it easiest to slide it out towards the drivers side of the car. Be careful when you slide the king pin out because your brake pedal will drop to the ground too.


Above left: We disconnected the hydraulic linkage from our clutch pedal. Next we disconnected the brake pedal linkage. With all the linkage disconnected we only had couple clips to remove. Above right: With the E-clip removed from the clutch pedal you can begin to slide the pedal out. This can become tricky to completely remove because of your parking brake handle and linkage. We had to maneuver around some of it and push some of the parking brake cable out of the way to get the pedal out. Although completely removing the pedal is not necessary at this time, we highly recommend because the next clip that needs removed is tough to get to and with the clutch pedal removed its easier to access.
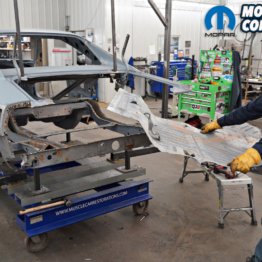
Project Orange Crush started life out as a Slant 6 automatic car. Over the years the car has undergone many transformations, which included a 4-speed conversion at one point. When we decided to go with the 6-speed setup we simply reused the factory pedals that were in the car from the 4-speed install. We have no idea how many miles and hard shifts these pedals have seen over the years, not to mention that we haven’t taken it easy on them either. The easiest way to actuate the clutch in an A-body and a T-56 is through a hydraulic setup. We chose American Powertrain’s Hydramax system that nearly bolted in with just a couple simple modifications.
When we switched from the mechanical 4-speed linkage to the hydraulic, we didn’t need the over-center spring any more. Actually it’s highly recommended to remove it because it can cause issues with the hydraulic setup. The pedals were already in the car so we tried to remove the spring without removing any of the pedals. If you have never done this, it’s not easy and the spring is very very strong. While trying to pop the spring off the rear stud, the whole bracket snapped right off the pedal. This bracket or bar was the same piece that our hydraulic clutch linkage was attached to. This was not good and had to remove the pedal. Further inspection presented that the factory only spot welds the over-center spring bar onto the pedal and through the grapevine heard this wasn’t a first.


Above: With the pedals removed, we were able to compare our factory pedals against the new American Powertrain replacement ones. We assumed that we would see some bending in the clutch pedal but to our surprise the brake pedal was also bent. Pedals bending never crossed our mind but this is proof that is does happen. Examining a little closer you can see the different in the welds. The factory pedals for the most part are spot welded together. The pedal pads, cross bar and even the clutch pedal shaft that goes in the king pin wasn’t welded very well. The bore of the factory brake pedal and the king pin were both wore out too.


Above: The new pedals were a completely different story, everything has nice solid welds. The over-center spring bar is fully welded on the top and bottom, the pedal pads have welds that run the width of the arm and the clutch pedal shaft was welded on more precisely than the factory one. Seeing the difference in welds gave us piece of mind knowing that in the middle of a race or cruising down the highway we would be confident that our pedals would break apart causing a disaster. Our factory pedals were in worst shape than we initially thought and were even more thankful for American Powertrain’s new set.
We decided to weld a flat piece of metal back in its place temporarily until we got new pedals. The welded bar has worked OK but recently we have noticed another problem, that our clutch pedal has been bending! Yes, that’s right, the clutch pedal has been bending sideways towards the brake pedal and almost touching. We have bent it back a couple of times but are not sure exact location of the bend. Along with the bending the factory plastic bushings are worn pretty good and have a lot of play in them. We have been concerned that the clutch pedal might break or interfere with he brake pedal which could be an issue driving around town or worse on the track!
We called up our friends at American Powertrain to ask them about their replacement pedals for 1967-76 A-bodies. We talked with Matt Graves about the issues we were having with our factory pedals, he ensured us that all of our issues would be fixed with a new set of their pedals. “Unlike the other guys, our pedals are made in house and new, not refurbished old pedals. We designed a pedal set that replicates the fitment and look of factory pedals to keep the same classic look while providing a hassle free installation. When designing the pedals we also created our own brass bushings in house to replace the cheap plastic ones that never seem to last.” stated Matt.


Above left: The new pedals came powder coated black for durability and a factory look. This saved us time from sanding and painting that would need to be done with old pedals. Since we had hydraulic linkage we needed to drill a hole close to the factory clutch rod pin. We chose a spot just below the factory pin. This spot would give us very similar pedal pedal ratio to factory. You can choose a different spot but this give the best pedal feel and least amount of binding. Above center: With a punch we marked the center of our potential hole. Above right: We used a 5/16-inch drill bit to drill our hole. It is critical that when you have hydraulic linkage or any type of linkage that is bolting to your pedals that you drill the hole to the same size as the mounting hardware. If you drill it too large, even one size, it will have slop in the hole and eventually oblong the hole causing unnecessary play or potentially break.


Above left: With the hole drilled we had one more small modification that needed to be done. There isn’t enough room on the bar where we drilled the hole for the head of our bolt to seat against the pedal. We hate cutting up perfectly good parts, but some times there is no way around it. Above right: With a cut off wheel we cut the pin off flush with the spring bar. Our bolt will now seat nicely and flat and will be able to connect the rest of the linkage.
We asked Matt why they only offered just the pedals and not the whole assembly: ”During our R&D we found out that it’s not necessary to replace the whole assembly. Most of our customers have a pedal assembly in their car already. Whether its automatic or manual, you can spend a couple of hours and swap in our pedals, bushings and new king pin while leaving your dash, steering column, etc intact. No need for extra work or more money for an assembly when the customer doesn’t need it!” exclaimed Matt.
After all the talking we did with Matt, we were eager to check out their pedals first hand. The day finally arrived and our pedals were delivered to our front door. We immediately opened the packed and starting going through the parts and pieces. The package contained a new brake and clutch pedal, new pedal pads, new king pin and 4 brass bushings for the king pin. We didn’t have our old pedals out of the car yet, but just holding them we knew they were quality pieces. We were confident that these pedals would fix our issues and hold up for many years to come. After a couple days of the new pedals sitting on the workbench taunting us, we planned a Saturday morning to switch out the pedals. We started by removing our factory manual pedals.


Above left: Another modification we wanted to do while pedals were out was skateboard tape. We wanted more of a race car feel and instead of using the rubber pedal pads. The rubber pads American Powertrain sent us were great and would look more factory, but as you know Project Orange Crush is far from factory. The car is not a show car and function trumps looks. The skateboard tape won’t allow our feet to slip off the pedals during a race and will give us a little advantage over rubber pedal pads that can be slippery, especially when its wet. The skateboard tape has an adhesive backing so all you have to do is cut the tape to the size of the pedal. Above center: We stuck our pedal in our vise with our rubber jaws, this would hold it in place while we stuck the tape on. We cut a square roughly the size of the pedal from the roll of tape we had. The rough cut doesn’t matter, just make sure that the whole pedal is covered. Above right: Next, we peeled the skateboard tape off and stuck it to the pad. With a razor blade we followed the outside edge of the pedal pad trimming off the excess. Now there is no extra that can peel up or stick to your shoe.


Above left: With all the modifications completed on the clutch pedal, we were ready to grease up the pedals and bushings for assembly. We grabbed our jar of anti-seize and a few rags. We found that its easier to apply grease now rather then under the dash when you are assembling the pedals. Either way it’s a messy job. Above right: The two large brass bushings can be inserted into the brake pedal bore. You want the flat side of the bushing on the outside of the bore. The collar of the bushing will be inserted into the pedal bore. The king pin will be slide though both of these bushings when the pedal is in the car.
Once 3-out-of-4 bushings in place, its time to install the king pin and brake pedal first. Lining up the brake pedal and the king pin shouldn’t be too difficult. When doing so make sure the brass bushings don’t fall out of the brake pedal. Make sure when inserting the king pin that the side with the groove is on the left side of the pedal assembly. Once you get the king pin in, make sure it slides all the way through the pedal assembly. The brake pedal should have no side play if the bushings and king pin are in the right places.
If you still have an unusual amount of side play double check that the king pin is all the way through the pedal assembly. If it is then take the brake pedal back out and double check your bushings. If they are installed correctly you’ll want to check the hole that the king pin rides in on your pedal assembly. Its possible that hole could be oblong from years of abuse and bad bushings. If that’s the case we recommend that you replace the whole assembly.


Above left and center: We applied a light coat of anti-seize to the brass bushings, king pin, inside the bore of the brake pedal and the clutch pedal shaft. It doesn’t require a whole lot because of the tight tolerances of the bushings and king pin, much of the excess will be scraped off when you assembly everything together. We do suggest greasing the pedals prior to installation. It’s tight enough under the dash trying to work without adding in the hassle of greasing too. Now we have the American Powertrain’s pedals ready to be installed back into the car. There isn’t much assembly required before hand besides the bushings. Above right: One of the small brass bushings will need to be slid onto the clutch pedal shaft with the flat side against the pedal. This will eventually ride inside the king pin but we don’t recommend installing in the king pin because the angles you encounter while trying to insert the clutch pedal shaft in the king pin can be extreme and won’t allow it to go in.


Above: Now that the brake pedal is in place, linkage installed and king pin is secure you are ready to install the clutch pedal. Make sure the brass bushing is still in place on the clutch pedal shaft. While maneuvering around the parking brake and cable, insert the clutch pedal shaft through the king pin. Push the pedal all the way through the king pin until it stops. The other small brass bushing will need to be inserted over the end of the clutch pedal shaft and into the king pin. The flat side of the brass bushing will be on the outside of the king pin and the collar of the bushing will be inserted in the king pin.
With the brake pedal in place and king pin slid through, its time to install the king pin hold down clip. We forgot to do this ourselves and had to remove the clutch pedal to give us enough room to tighten the bolt down. Slide the hold down clip until it rests in the groove in the king pin. You may have to move the king pin around to get the clip to seat. Once it is you’ll need to rotate the clip around until the bolt hole lines up with the hole on the assembly. This is the most difficult part of the whole install.
You cant see the hole to line them up so you have to feel your way through it. Once you get the bolt slid through the clip and the hole, go ahead and get the nut started by hand. Double check the king pin doesn’t move side to side, if it doesn’t go ahead and tighten the nut the rest of the way. If it does slide back and forth something is not right and you should loosen the nut back up and try again. When the king pin hold down is tight, go ahead and reinstall the brake linkage from the master cylinder.


Above: The clutch pedal is installed and you can reinstall the clutch linkage. Due to where we installed American Powertrain’s Hydramax bracket we had to move the linkage to the inside of the clutch spring bar, opposite of our welded piece. With the linkage installed, depress the pedal and make sure nothing is on a bind or anything is rubbing. Ours was fine and was time for test drive.

Above: We got the pedals installed just in time for the autocross at Goodguys PPG Nationals in Columbus Ohio. Our pedals worked flawlessly all weekend. They had great grip with our skateboard tape and didn’t have any unwanted movement in the pedals. We feel more confident that our pedals wont break apart on us at an inconvenient time. American Powertrain’s brass bushings felt great and know they will last for seasons to come.
It took some force to get our bushing on due to its tight fit. If the bushing is installed all the way and the clutch pedal shaft is all the way through the king pin you should be able to feel the groove where the E clip goes on the end of the shaft. If you cannot feel that groove you need to push the pedal through the king pin further or make sure both brass bushings are seated inside the king pin all the way. If you can feel it go ahead and slide the washer on the shaft and then pop the E clip into the groove.
We never thought that a new set of pedals would make such a big difference, we are very pleased with American Powertrain’s replacement pedals. It was a quick install and not only compatible with aftermarket clutch linkage but also with factory style rods and clutch setup. So whether you have a 1967-1976 A-Body or 1966-1970 B-Body and either in the process of converting to a manual or factory pedals are worn out like ours, give American Powertrain a call to get yourself a set!


 Mopar Connection Magazine – The ONLY Daily Mopar Magazine © 2022. All Rights Reserved. Mopar Connection Magazine is the ONLY daily Mopar Magazine bringing you the latest Mopar news, technology, breaking news, and Mopar related events and articles. Find out the latest information about Mopar, Mopar products and services, stay up to date on Mopar enthusiast news, dealership information and the latest Mopar social media buzz! Sign up for the Mopar Connection Magazine newsletter for the latest information about new products, services and industry chatter. Mopar Connection Magazine is the best and only source you need to be a Mopar industry insider!
 by
by