


If you’re building a classic Mopar muscle car, chances are if your machine came from the factory with anything bigger than an 318, you’ve got a Chrysler 8¾ rear end sitting beneath its belly. The only Banjo-style axle produced by Chrysler, the 8¾ was first introduced 1957, and ran its course by 1974. Although the Dana 60s were notoriously “beefier,” the 8¾ is “the” rear end to run on the street, particularly as there are so many aftermarket parts available (making its rebuild significantly more affordable).
Of course, of all of available cases to come in the 8¾, the 2881489 or “489” case is the most desirable, as it is the strongest of the 8¾ units. According to Mopar1.us, “As with the 742 there are tons of replacement parts available as well as gear ratios. Gear ratios available beyond 3.23 are: 3.55, 3.91, 4.10, 4.30, 4.57, 4.86, 5.13 and 5.38. Almost all original Sure Grips, except 1969, found in this housing are the non-rebuildable and less desirable cone type.”

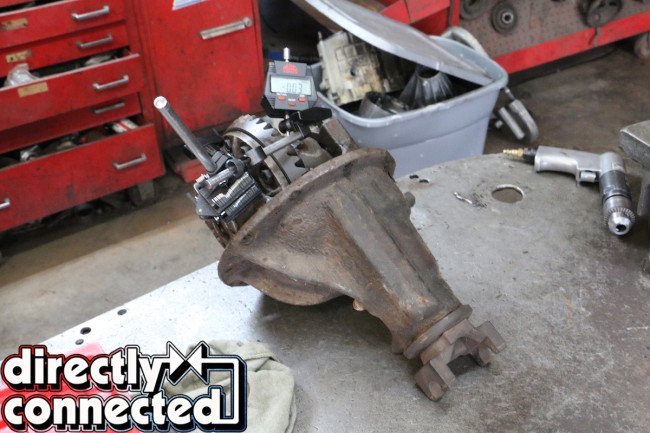
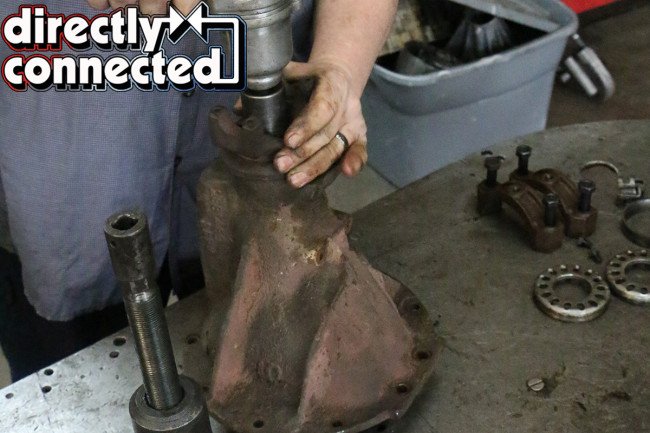
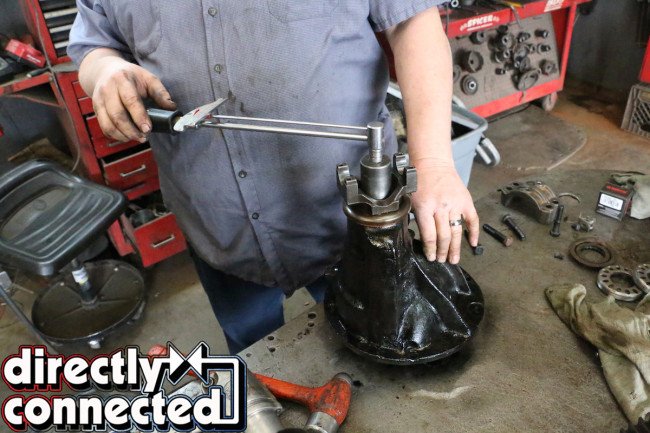
Above left: This 8 ¾ center section with 3:23 gears from a 1969 Road Runner needs to be rebuilt and possibly needs the ring and pinion gears replaced. The rebuild begins with a thorough inspection of the 489 case, the gears, the equalizer bar, and yoke. Upon initial inspection except for a few minor rust pits in the ring gear the chunk passes the visual surface inspection. Above right: The next step in deciding whether the gears need to be replaced or just a basic rebuild is possible, is to establish the actual base line measurements. Using a dial indicator the gear back lash is checked. For this 8 ¾ a back lash between .006 and .010 is desired. Buy rocking the gear back and forth the dial indicator shows that this unit has a back lash of .007. This again confirms these gears may be re used and not replaced.


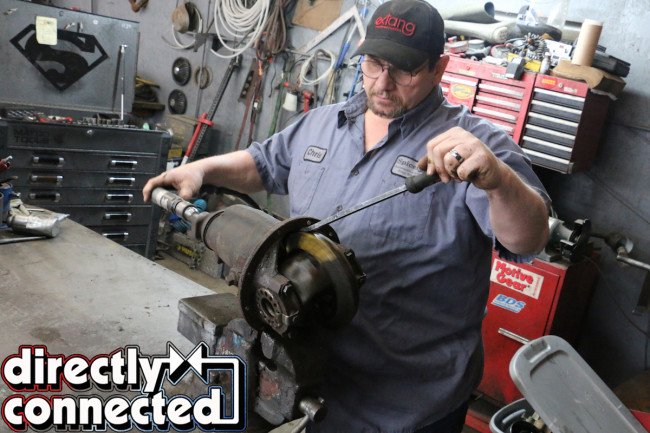
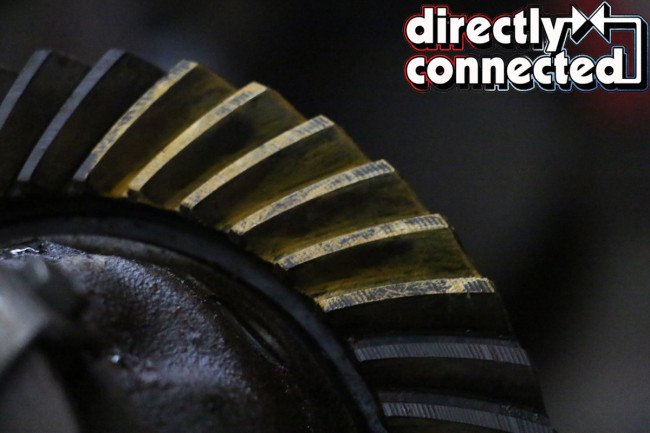
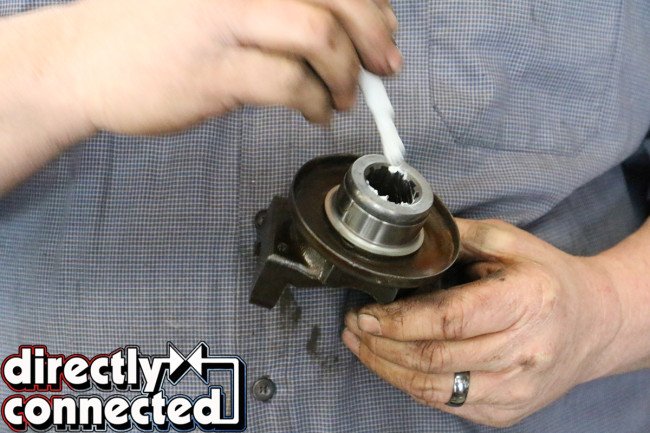
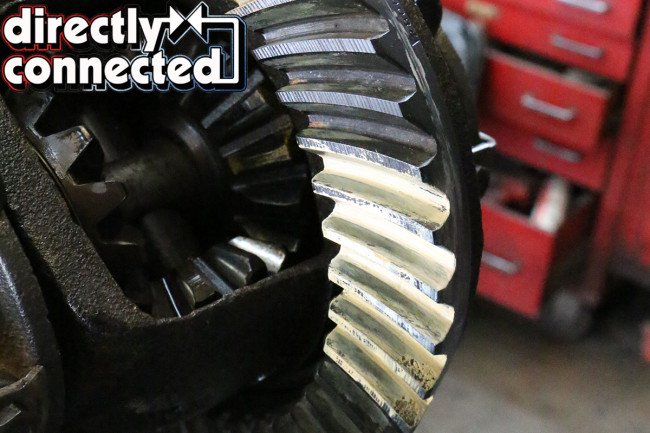
Far left: The next step is to check the gear wear pattern. By using a lead based yellow marking compound, cover the front and rear of 5-8 teeth on the ring gear. This compound is the only way to see the pattern that these particular gears have made over the years. This also will be used later after the re- build so that this pattern can be replicated. If you re- use these gears and change this pattern, not only will the rear end “whine”, but the gears will eventually have a catastrophic failure. If you are changing the gears out for new ones with a different ratio you can skip this step. Center left: After applying the marking compound completely secure the unit in a heavy duty vise. “Secure” is the important word to remember. Center right: To get a true pattern and to duplicate the gears under load in actual operation, use a large screw driver and pry down on the gears while turning the gears with an air ratchet. Be sure and go forward and in reverse so you can mark both sides of the gear teeth. Far right: Examine the pattern on the teeth. You are looking for a uniform square pattern that is not too deep and not too shallow. It should also be centered on the gear teeth. This unit’s pattern was acceptable so the decision to re-use the ring and pinion gears was made. If during any of these steps the gears do not pass the inspection they need to be replaced.


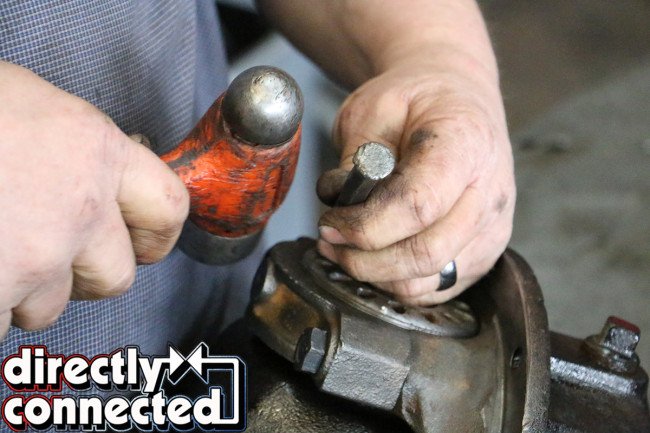
Above left: The carrier bearing adjuster caps and bearing main caps are unique to each side and orientation, and therefore should be re-installed exactly as they were disassembled. The best way to guarantee this is to take a punch and mark each side so there will be no mistake as to where they were set up originally. Above right: Remove the 2 adjuster keepers, unscrew the adjusters, and remove the bearing retainer caps. The carrier can now be removed. If everything is still in good shape clean everything that has been removed at this point in the parts washer. Using a puller especially designed for this purpose remove both carrier bearings. Again examine the condition of the carrier after the bearings are removed.
Although all cases, pinions, bearings, gears are not interchangeable between the three units, the Sure Grip units are, the two types being the Dana Power Lok (ran from 1962-though-1969, which are rebuildable), and the Borg-Warner Spin Resistant (ran between late 1969-through-1974, which are not rebuildable cone types). As suggested by Mopar1.us, the easiest way to find an original Sure Grip “is to find a clutch unit in an orphan 741 case and remove it with the bearings (pressed on) and races and swap it into your better carrier (742 or 489). Most people don’t think they are swappable so whine to the seller that it is a 741 SG and negotiate hard.”
While we didn’t have to “negotiate hard” to fish our 489 case out from beneath the shop, we did take our worn out rear center section to Spicer Automotive & 4-Wheel Drive in Rock Spring, Georgia. The group at Spicer are true Mopar lovers (as indicated by a front parking lot and backyard full of classic Mopar iron, as well as a showroom cram-packed full of Mopar engines on stands, including a pretty wild selection of induction systems.
Here we’ve outlined all the steps necessary to convert a worn out 8¾ center section into a street-ready roller within a couple of hours. And if you’re looking for a set of professional hands to do the work for you, we couldn’t be happier with the service we got from Spicer Automotive. Check ’em out!

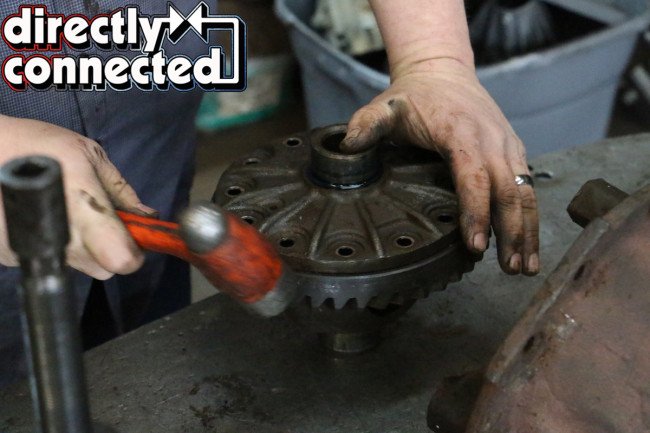
Above left: Remove the ring gear bolts with an air ratchet. These may be somewhat difficult to remove after years of heat and use. Above right: Tap the ring gear off of the carrier working from side to side to insure the gear comes off evenly. Set the carrier aside.
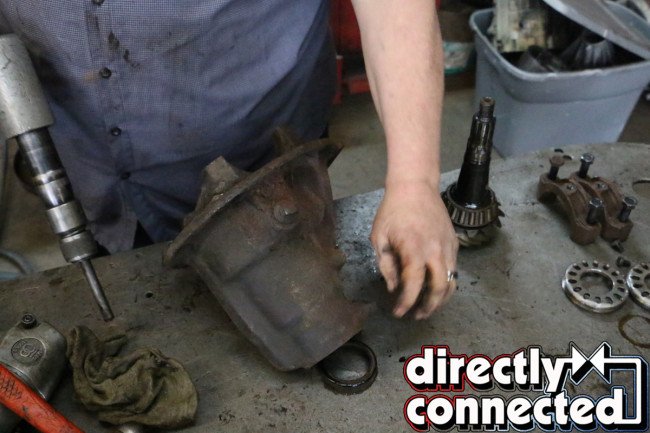

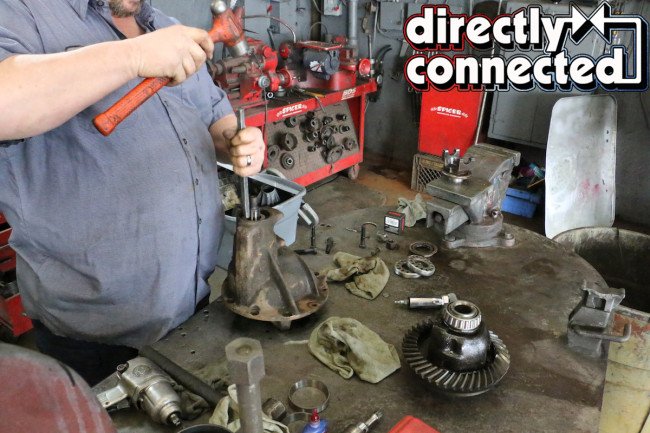
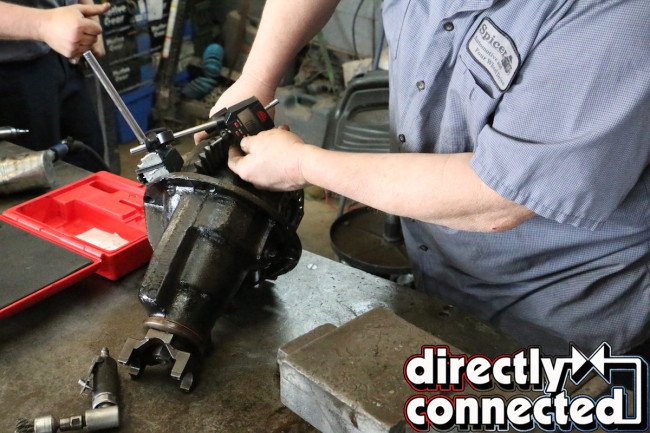
Above left: Now get the case and stand it upright so you can remove the yoke and pinion gear. Remove the yoke and then using an air chisel gun and a blunt rounded rod drive out the pinion gear from the case. Above center: After the pinion gear is removed examine it and make sure it is in good enough condition to re-use. Remove the crush sleeve and set it all aside. Above right: Remove the front seal from the case by tapping one the thin lip of the seal. It should come put easily.


Above left: There is a front pinion bearing that will come out with the front seal and will be replaced along with all of the other bearings that are provided in the rebuild kit. Purchase quality American made parts so that you are assured they will withstand years of trouble free of operation. Above right: There are two races that are mounted in the case that need to be removed. These are where the roller bearings ride and are unbelievably hard. These should be saved for future projects, not to use as races but anytime you need to use them when creativity is needed to accomplish a specific task.
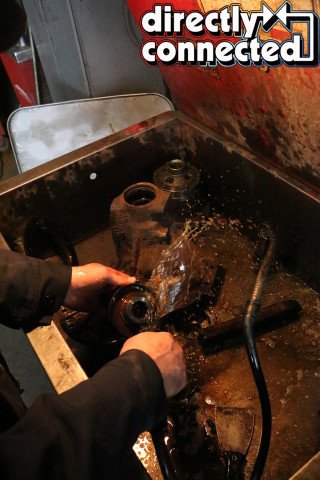
Above left: Everything can now be cleaned in the parts washer. Jeremiah had no idea all those years of washing dishes for his Mom would ever come in handy later in life! Above right: Using the puller remove the pinion bearing. This bearing will have a shim behind it. This shim needs to be saved since the number and thickness of these shims determine the wear pattern depth on the ring gear.


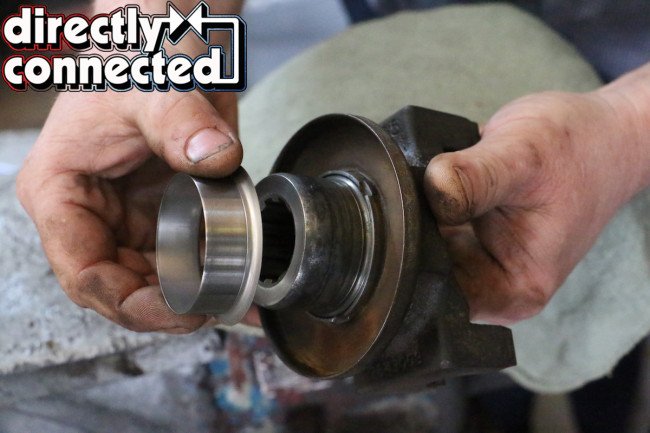
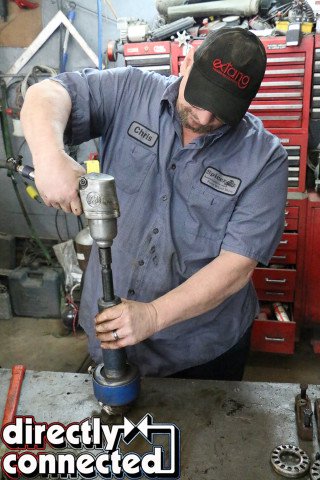
Far left: Each bearing and race that are needed will have to be pressed into place. Do not forget to put the shim on the pinion before the pinion seal is pressed into place. Center left: A hydraulic press that has enough power to install these bearings is needed. This is another expensive piece of equipment that must be used in this rebuild. Center right: Inspect the pinion yoke. Since this original has the large splines and matched the large spline pinion gear it needs to be saved. Upon inspection it has a worn surface from the original seal. This worn surface will leak even with the new seal. Far right: By using a “Redi-Sleeve” made by Federal Mogul this original can be saved. The part even comes with the install tool in the box. After cleaning off any rust and applying a thin coat of red Loc-Tite, tap the “Redi-Sleeve” onto the yoke. Once it is fully installed wipe off the excess Loc-Tite. It is now ready to be re-installed and a good seal is assured.

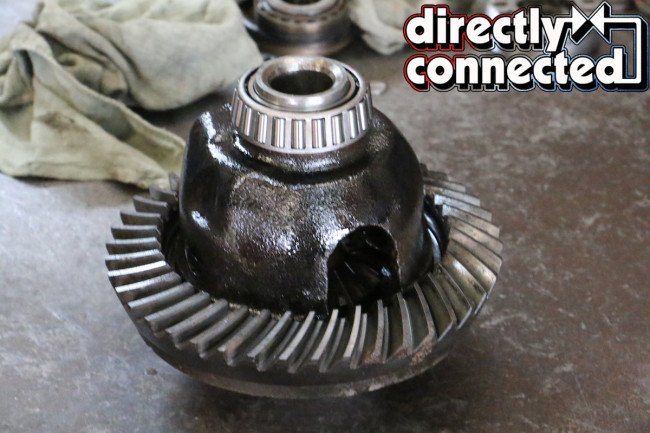
Above left: After pressing the carrier bearings in place using red Loc-Tite install the ring gear onto the clean carrier unit. Tighten the bolts using a crisscross pattern so the ring will go into place evenly. If you do not use this method you can warp the gear and it will have to be replaced. Above right: The carrier unit is now completely finished and the guys at Spicer take pride in their work by painting the carrier, even when it will never be seen in daylight again.

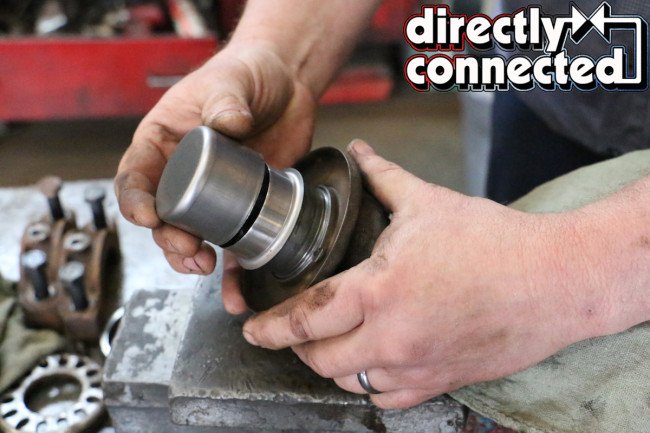
Above left: Install the inner and outer pinion bearing race with a “race punch” in the cleaned and prepped case. This punch is important to use so the race will not be damaged during installation. Take the new crush sleeve from the kit and slide it on the pinion gear before reinstalling it in the case. Above right: Install the pinion gear in the case and using the punch seat the front bearing against the race and install the front seal.


Above left: Use a Permatex thread sealer to seal the splines or they will leak. This sealer sets up with heat not air so it is well suited for this application. Above center: Tap the yoke onto the pinion gear until there is just a small amount of play between the case and the yoke. Check the pinion gear as you tap it in for proper spacing. Above right: Tighten the yoke nut slowly until there is a zero lash. As you are tightening this nut you are also compressing the crush sleeve. This step is very important and is critical to get it correct for the operation of the unit.


Top left: Continually measure the rotational torque achieved by the tightening of the yoke nut and the compressing of the crush sleeve. For this unit the manufacturer recommends 8-10 inch pounds of rotational torque. Top center: Reinstall the carrier, the adjusters, and the bearing caps paying close attention to your positional marks you applied during disassembly. Continually rock the gears as you tighten the adjusters. You are working toward achieving the original back lash of this unit. Top right: Tap the adjusters from one side to other until you can feel that the approximate lash that you had originally is achieved. Bottom left: Using the dial indicator measure the back lash and tap adjusters until the original .007 lash is achieved. Bottom center: Using a white marking compound repeat the process of marking the teeth on a different, but close the original yellow marking compound, so you can compare the gear patterns after the rebuild with the original pattern. Bottom right: Examine the two patterns and compare their positions. If there is any change you must take it all back apart and apply or remove shims to achieve the original settings of the gears mesh. You will have to replace the crush sleeve when it is reassembled and follow all the steps to make sure the unit will function correctly and give you years of worry free operation.


i have 157 on my new pinion dose it mean add 157 thou shim to back of pinion
I have a 1965 Polara with a rear casting number of 2070742. This casting number refers to a 1-3/4″ Pinion, however my rear end appears to a have a 1-3/8″ Pinion with the spacer between the pinion bearings. The pinion bearings look great but were loose and the pinion nut was very tight when I disassembled the unit. I see much literature talks about a crush ring, however the 1965 Shop manual does not show a crush ring? It would appear the long spacer between the bearings should be shorter to tighten the bearings onto their races, but this does not seem to be an option? Finally I don’t see any rebuild kits for the 1-3/8″ Pinion. Any advice??